Here’s the thing about bathrooms: they’re used more than any other room in your home, and yet they’re almost always the last room to get any love. Kitchens get full renovations. Living rooms get gallery walls and new sofas. But the bathroom just keeps getting the same tired grout and the builder-grade mirror from 2009. I get it — bathrooms feel expensive to update. The best bathroom ideas on a budget, though, don’t require a contractor or a big check. They require knowing where to start. These 15 updates range from a free afternoon and $20 to a committed weekend and a few hundred dollars. Every single one makes a real, visible difference. Start wherever the pain point is biggest and work from there.
1. Peel-and-Stick Wallpaper: A Bathroom Ideas on a Budget Favourite
If you haven’t tried peel-and-stick wallpaper in a bathroom, you’re missing one of the easiest wins in budget decorating. The technology has improved dramatically. Today’s vinyl and PVC-backed versions are moisture-resistant, repositionable during application, and remove cleanly without damaging painted walls. That last point matters for renters, who can pull it down when they move out and leave nothing behind.

The key is choosing the right material. Look for “vinyl” or “PVC” on the label — these naturally repel water and resist mould. Water-resistant and waterproof are not the same. For walls directly in the splash zone near the sink, waterproof vinyl is the safer choice. Tempaper and Naphite are reliable brands. The Home Depot and Wayfair both carry moisture-resistant options, typically $1-3 per square foot.
Getting the Surface Ready
Application comes down entirely to prep. Clean the wall with rubbing alcohol first. Any dust, grease, or residue will cause the adhesive to fail early. Work panel by panel from a plumb vertical line, pressing each panel from the centre outward with a squeegee to push air to the edges.
The Smartest Placement
The best strategy in a small bathroom is one accent wall — behind the vanity, above the toilet, or the far wall you see when you open the door. That one surface delivers maximum impact with minimum material. Smaller still: paper just the back of a linen niche or open shelf cavity, turning a plain recess into something designed. A single accent wall typically costs $30-90 depending on panel size.
2. Swap Your Vanity Hardware for an Instant Upgrade Under $30
This is the most underrated update in bathroom decorating, and I will never stop recommending it. The pulls and knobs on your vanity cabinet are among the first things the eye lands on when scanning the room. Swap dated polished brass or flat chrome for matte black or brushed nickel, and the whole vanity looks intentional — like someone made a design decision.
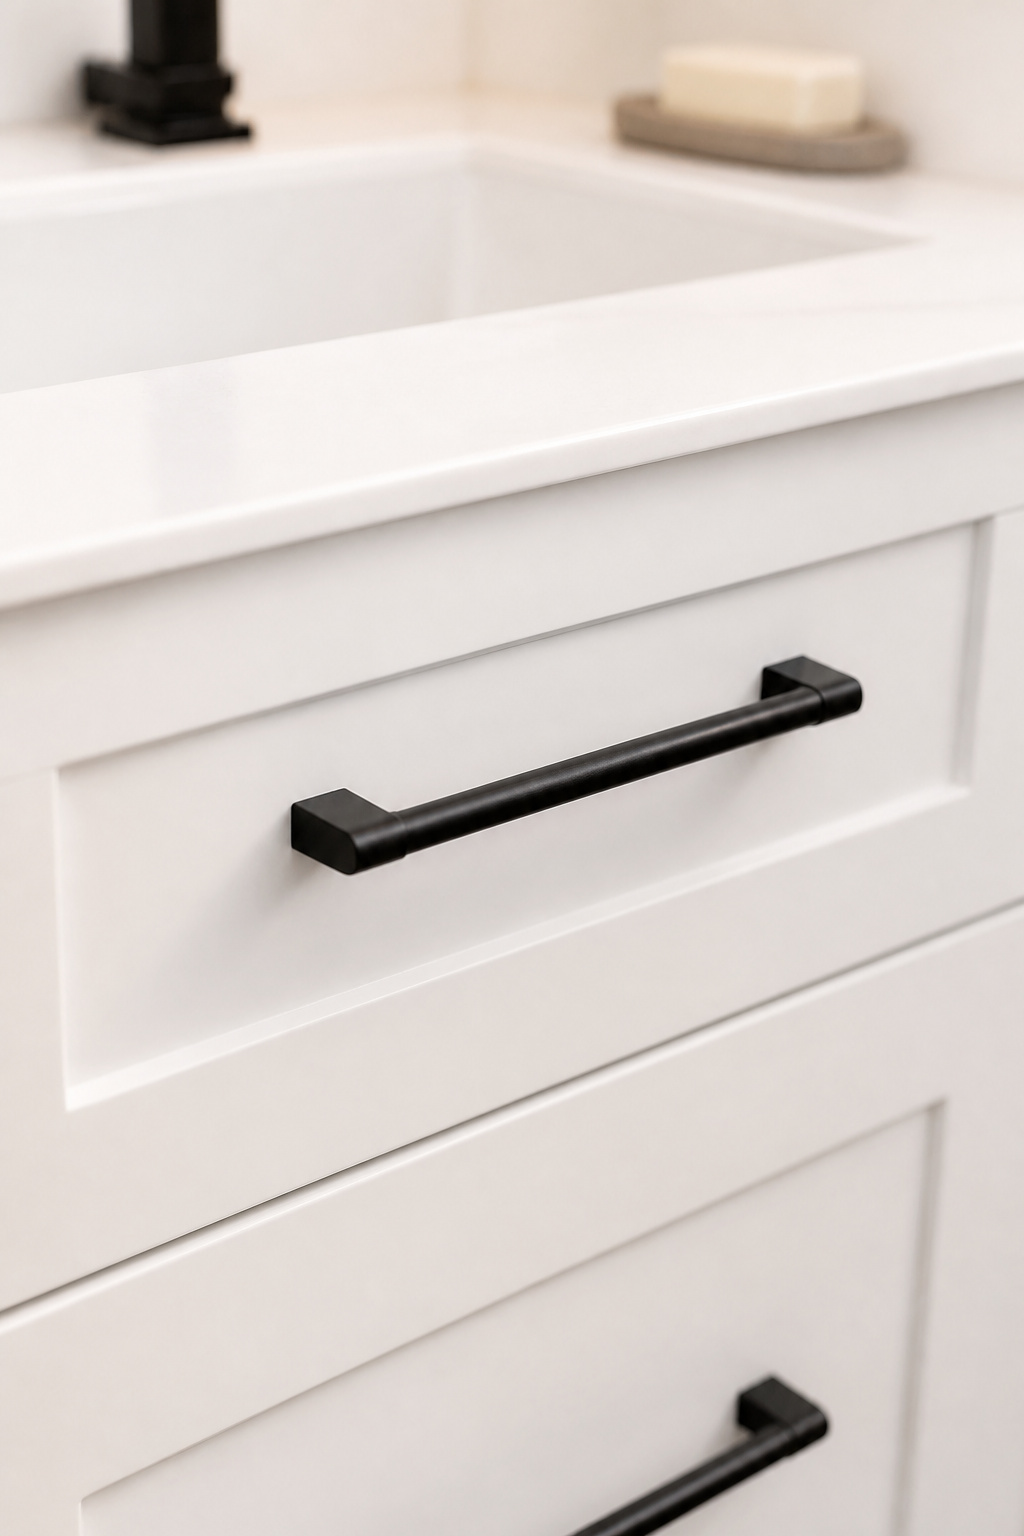
The math works. A full set of pulls for a 36-inch vanity — typically 4-6 pieces — runs $15-30 from Amazon, IKEA, or the Home Depot hardware section. Compare that to a new vanity, which starts at several hundred dollars, and the return on that $25 is hard to beat. Match those new pulls with a coordinating towel bar, toilet paper holder, and robe hook, and the cohesion reads like a renovation — even though you haven’t changed a single fixture.
Measuring Before You Order
Before ordering anything, measure the existing hole spacing on your drawer pulls. Standard centre-to-centre spacing is 3 inches (76mm), 3.75 inches (96mm), or 5 inches (128mm). Get that number right and the swap is simply unscrewing the old and screwing in the new. If you’re switching from a knob to a pull and need an extra hole, a 3/16″ drill bit handles it in minutes.
Which Finish Lasts
For durability: matte black powder coat is the most forgiving in humid environments. It doesn’t show water spots or tarnish. Brushed nickel is a close second. Budget brass plating chips in consistent moisture — avoid it. For a warm brass aesthetic, look for lacquered solid brass instead. For more on what a thoughtfully updated vanity can look like, these bathroom vanity ideas that feel luxurious prove the right details go a long way.
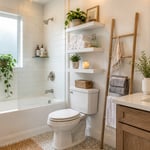
3. Float a Shelf or Two for Affordable Bathroom Storage and Style
A bare wall in a bathroom is a missed opportunity. A well-placed floating shelf does two things at once. It adds storage you almost certainly need, and it gives you a surface to style — which transforms a bathroom from functional to finished.
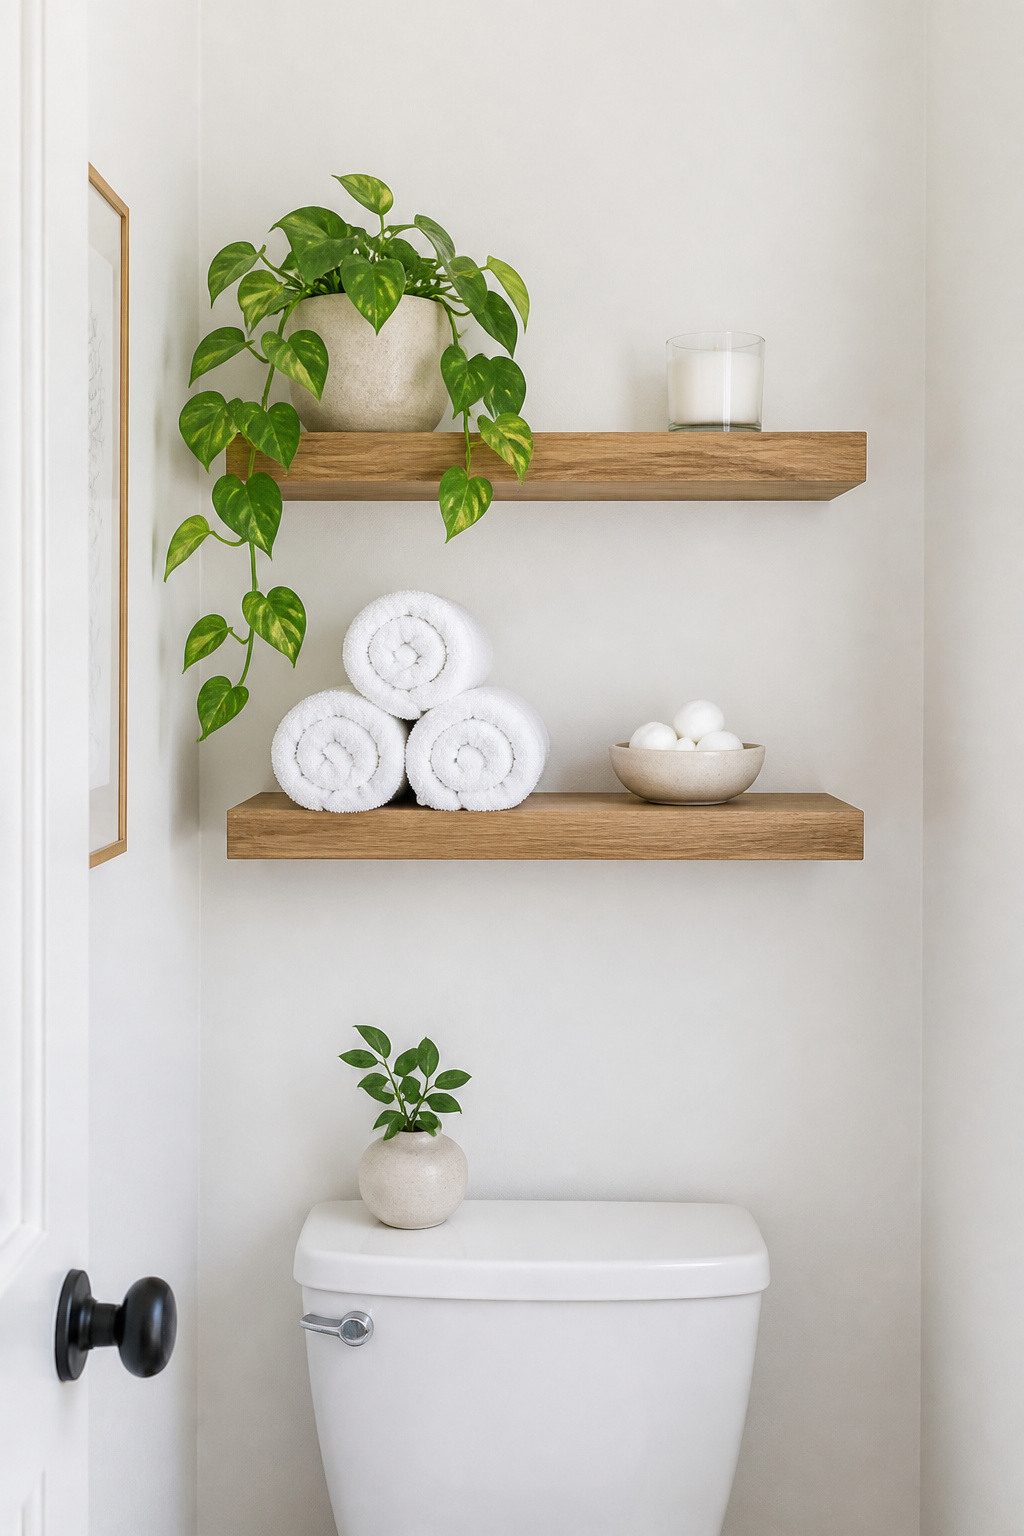
The best placement in most bathrooms is above the toilet, where wall space is almost always wasted. Leave at least 20 inches of clearance between the shelf bottom and the toilet tank top. Two shelves at different heights — one lower for everyday items, one higher for decor — creates visual layering that looks deliberate.
Installing on Tile Walls
Installing in a tile wall is not as scary as it sounds. You need a diamond-tipped drill bit — a regular bit will crack ceramic. Drill slowly and dip the bit in water every 10-15 seconds to keep it cool. Find your wall studs first; anchors into studs hold 50+ pounds compared to 15-20 pounds in drywall alone. Renting and not willing to drill? Heavy-duty Command strips rated to 16 pounds handle lighter decorative shelves without leaving a mark.
How to Style Them
Use the rule of three: one functional item (rolled towels or spare soap), one plant, one small decorative object. Keep the front half of the shelf clear — items pushed to the back look hidden rather than displayed. Use moisture-resistant materials: metal, sealed wood, or ceramic. Raw unfinished wood in a steamy bathroom warps quickly.
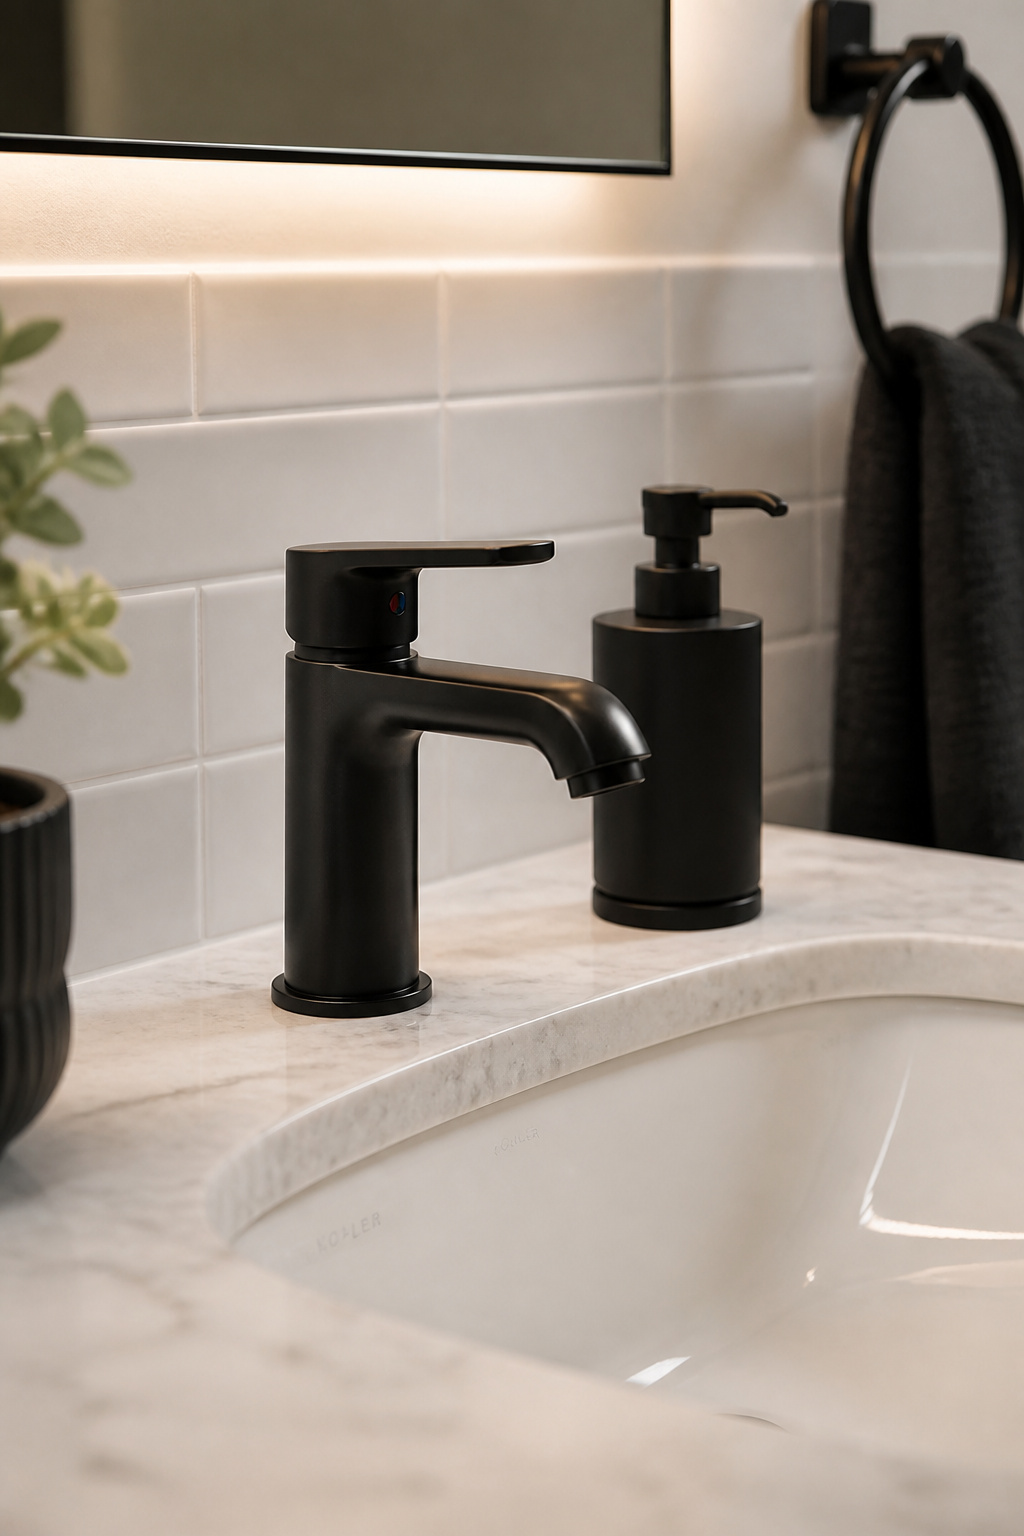
4. Budget Bathroom Ideas: Replace Your Faucet Without Calling a Plumber
A faucet swap surprises people. There’s plumbing involved, which sounds complicated — but replacing a standard bathroom sink faucet is rated 2-3 out of 5 for difficulty. It’s more about patience than skill, and most homeowners finish in 1-4 hours. The payoff is real: a corroded or dated faucet makes an otherwise fine vanity look neglected, while a fresh one in a coordinating finish ties the whole room together.
Step-by-Step: Shut Off, Disconnect, Install
Start by turning off both shut-off valves under the sink — hot and cold. Open the faucet to drain the remaining water from the lines. Then disconnect the supply lines (hand-tight plus a quarter turn) and unscrew the lift rod from the drain assembly. Remove the mounting nuts under the sink. A basin wrench ($20-50) is essential here — it’s designed specifically for reaching those nuts in tight spaces under deep basins. Installing the new faucet is the reverse: thread it through the mounting holes, tighten the mounting nuts, reconnect the supply lines with a few wraps of plumber’s tape, and turn the water on slowly. Check every connection for drips.
Budget Faucet Picks That Perform
Moen’s Adler series and Delta’s Foundations line both start under $70 at major retailers and carry manufacturer warranties. Matte black single-handle options from WEWE and Friho on Amazon run $40-60 and photograph well. Avoid no-name options under $25 — cartridge failures within the first year are common at that price.
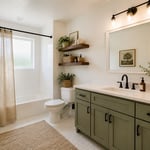
5. A New Mirror Can Make Your Bathroom Look Twice as Big
The builder-grade frameless mirror glued above your vanity is doing the bathroom no favours. It has no visual weight, no design intention. And over time those edges oxidize and turn black — moisture working behind the glass, a process called desilvering. Replacing it is one of the most satisfying single-afternoon bathroom projects you can tackle.
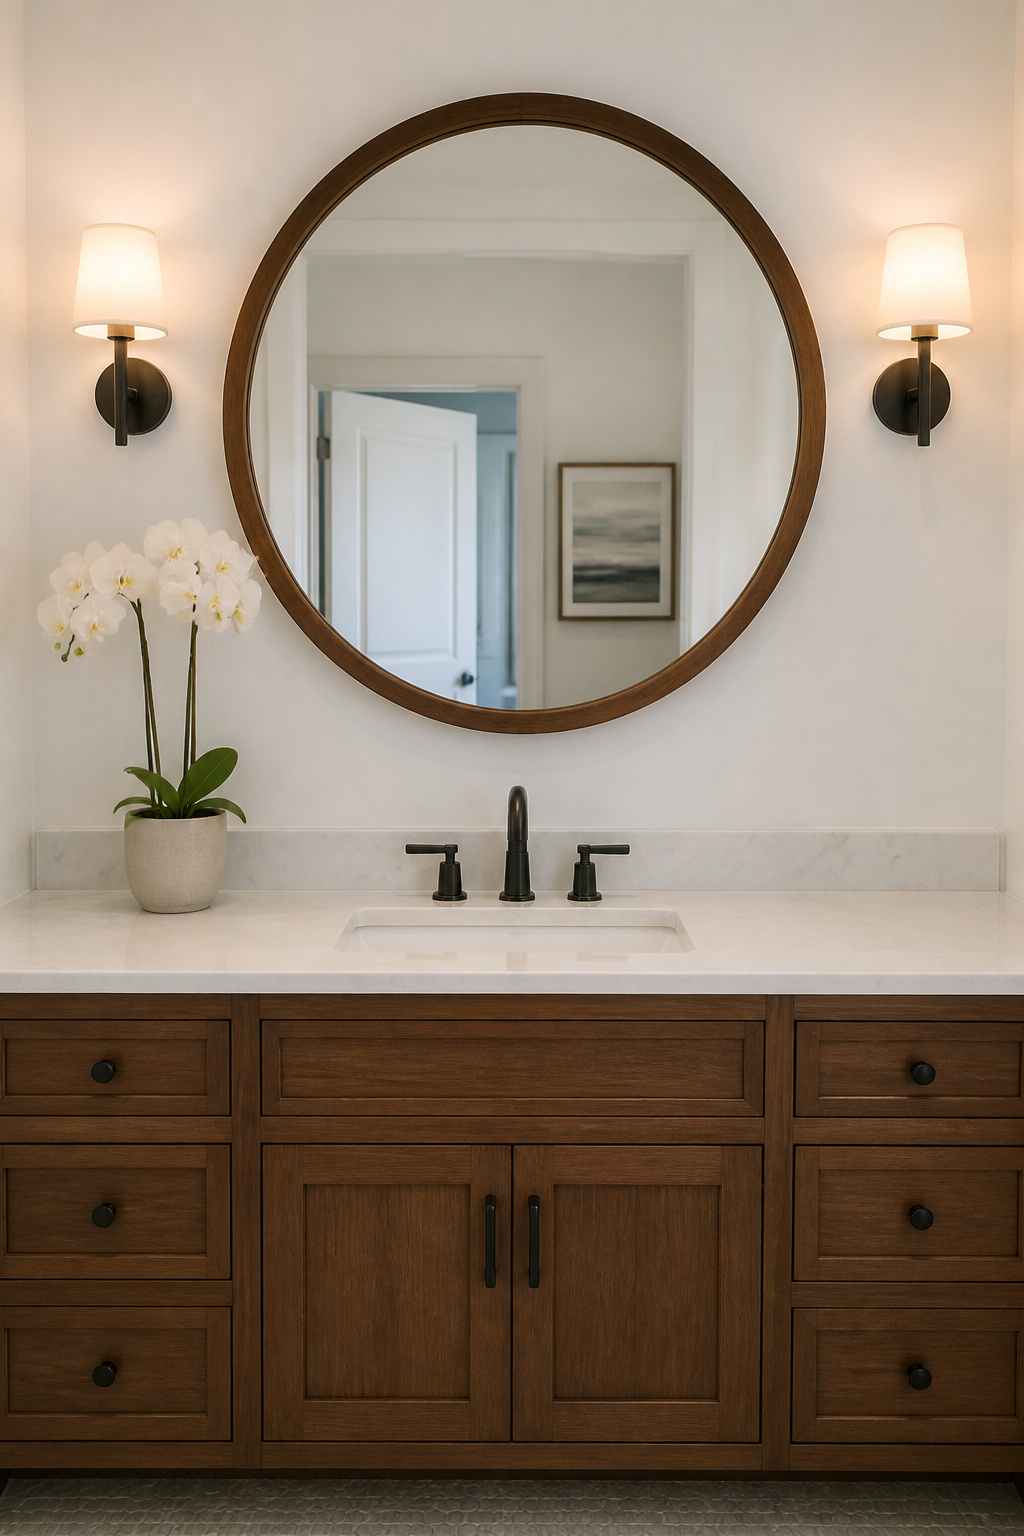
Frameless mirrors cost $10-100 for a plain piece; framed mirrors run $50-200. For the smallest bathrooms, a frameless beveled mirror is often the smartest bathroom idea on a budget — the clean edges read as minimal and modern. A framed mirror adds more personality and establishes a clear design direction: white or natural wood frames work across styles, while thin brushed metal frames skew modern.
LED Mirror as a Two-in-One Upgrade
There’s also a third option worth considering. LED integrated mirrors combine a mirror and vanity lighting in one unit. IKEA’s STORJORM and similar options run $60-150 and replace both the mirror and the light fixture simultaneously. That’s a great choice if your current lighting is also due for an update.
Sizing for Balance
Mirror width should be 1-2 inches narrower on each side than the vanity top. A 36-inch vanity calls for a 32-34 inch mirror. Position the bottom edge 5-10 inches above the faucet. For a double vanity, two separate mirrors look far more intentional than one long horizontal strip — and they’re often cheaper. For a deeper look at what a mirror update can do, these innovative bathroom mirror designs show how much the right choice transforms a space.
Removing the glued original: use a hair dryer or heat gun to soften the adhesive, then slide thin wire behind the glass panel to cut through it. Wear safety glasses — this step warrants the extra care.
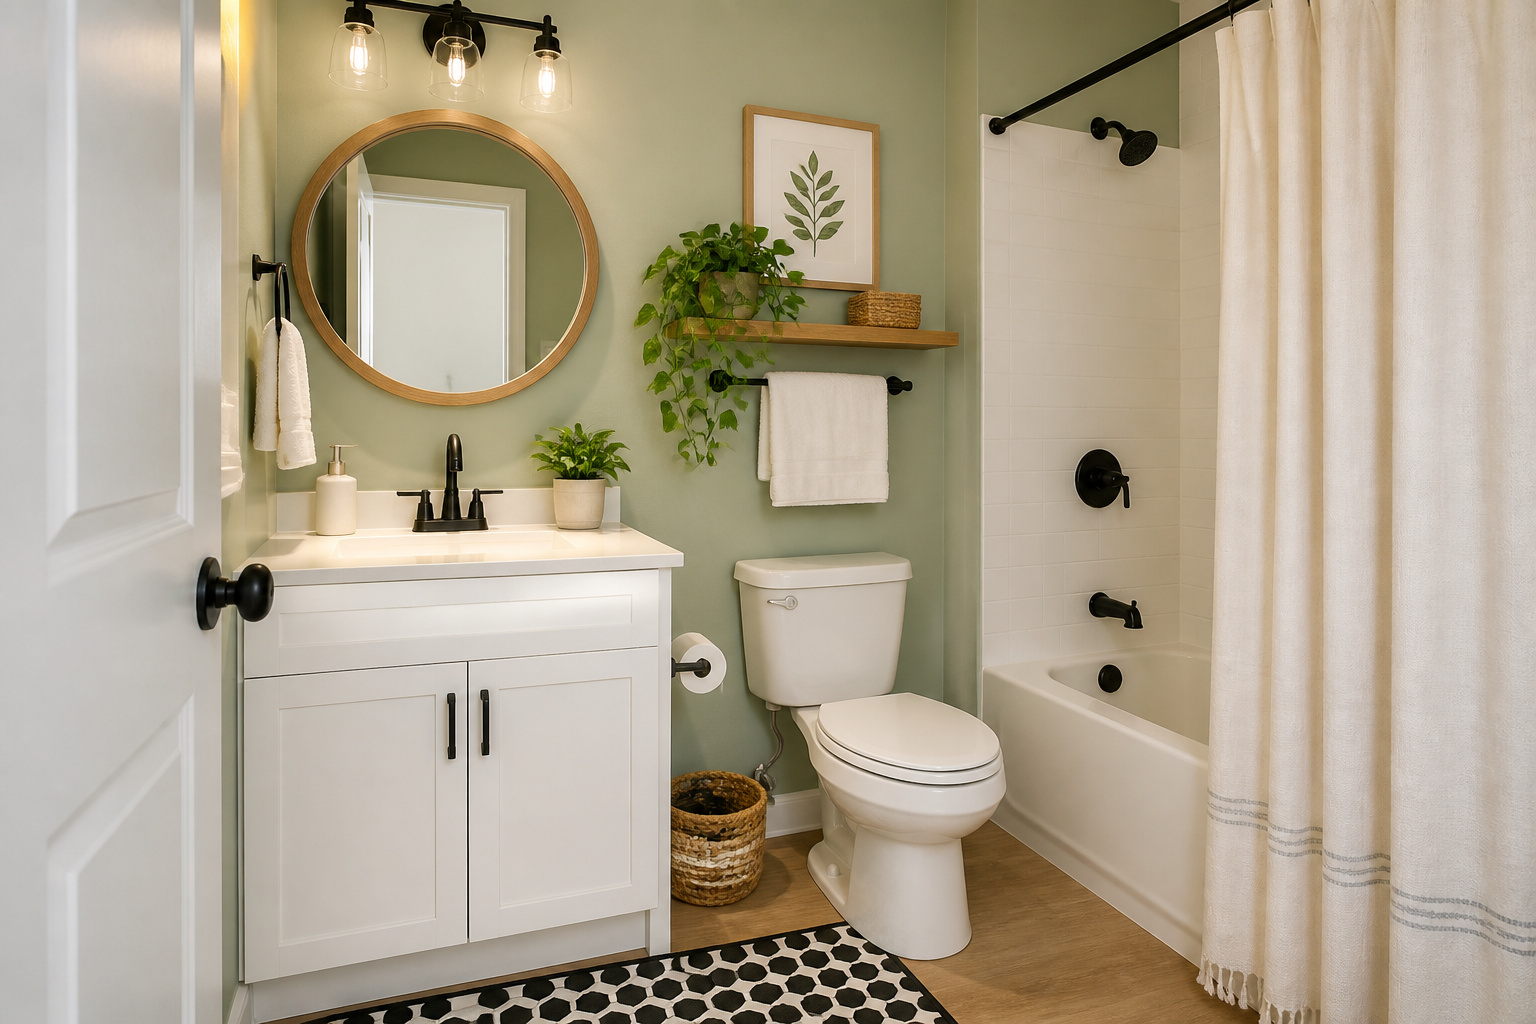
6. Repaint the Bathroom This Weekend — a Coat of Paint Changes Everything
Paint is the oldest trick in the budget renovation playbook, and it still wins. A fresh coat in the right colour transforms the perceived size, cleanliness, and mood of a bathroom in a single weekend. For most bathrooms, you’ll use less than a full quart. Cost: $30-85 depending on brand.
The non-negotiable: use paint formulated for high-humidity spaces. Regular interior latex mildews within months in a poorly ventilated bathroom. Benjamin Moore Aura Bath & Spa is the benchmark — matte finish, mildew-resistant formula, and Color Lock technology for one-coat coverage at $75-85 per gallon. Sherwin-Williams Emerald Interior in satin is an excellent alternative with antimicrobial properties and frequent 40% off sale pricing during SW promotional weeks.
Colour Choices That Work
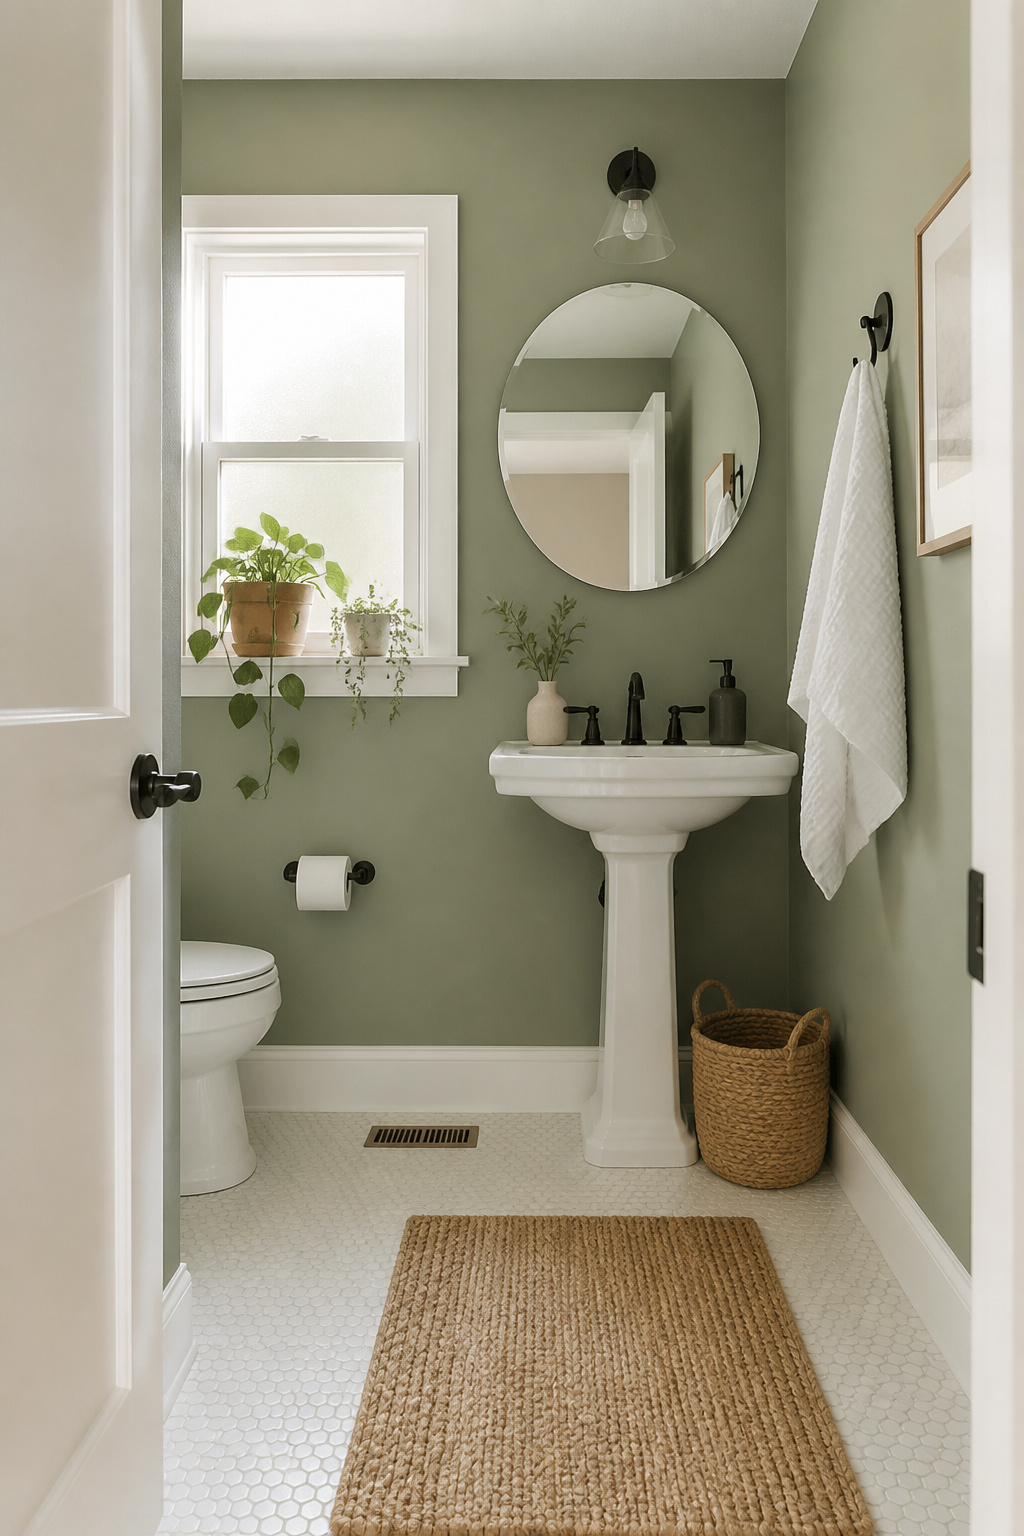
For colour: soft neutrals photograph well and feel universally calming. Sage green — Sherwin-Williams Pewter Green SW-6208 or Benjamin Moore Saybrook Sage HC-114 — works with white fixtures, warm wood, and chrome or black hardware equally well. Dusty blue (SW Watery SW-6478) creates an airy feel. Warm whites like Benjamin Moore White Dove OC-17 or SW Alabaster SW-7008 are the safest choice for dark or windowless bathrooms where you need every bit of reflected light.
Prep and Curing Time
Prep is where most weekend paint jobs go wrong. Clean walls with TSP substitute, fill cracks, and apply a mildew-resistant primer (Zinsser Bulls Eye 1-2-3) over stains or bare drywall. Allow 24-48 hours between coats and seven full days before steam exposure. The curing time is not optional in a bathroom.
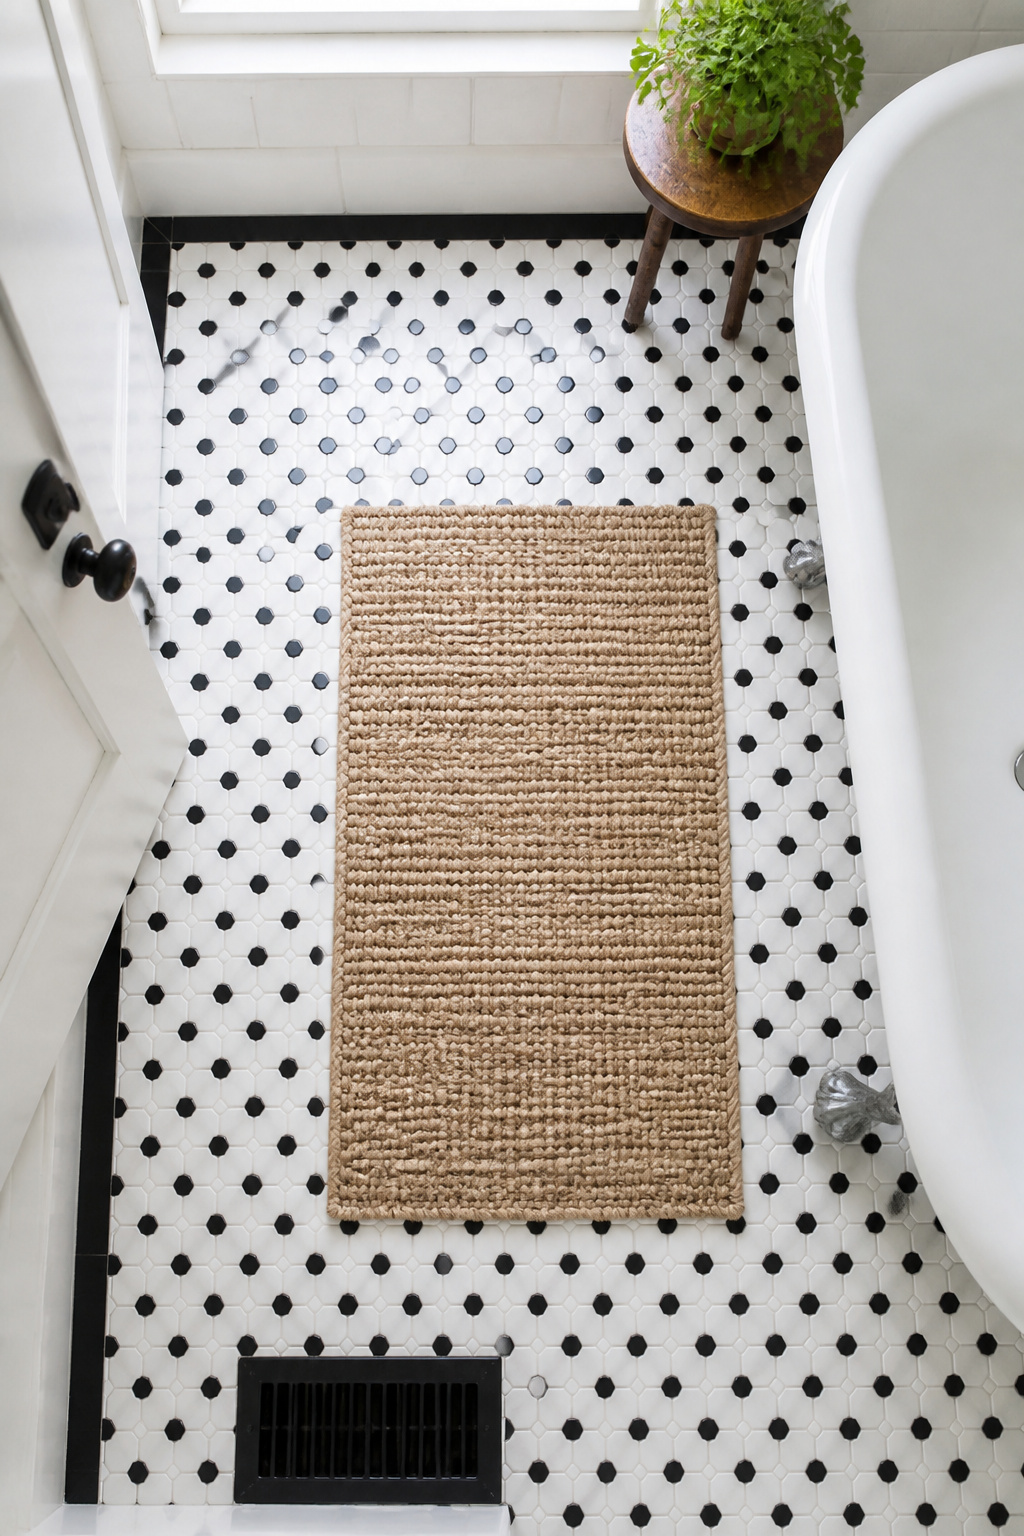
7. Peel-and-Stick Floor Tiles: Budget-Friendly Bathroom Ideas for Floors
Yes, the floor. You can update it without ripping anything out, and it costs a fraction of a tile job. Peel-and-stick vinyl tiles have earned a real reputation in the past few years — not as a permanent solution, but as a durable, good-looking option. Homeowners report 5-10 years of solid performance with proper installation.
The phrase “proper installation” is doing a lot of work there, because subfloor prep is genuinely everything with peel-and-stick. The tiles are flexible, which means they conform to whatever surface is beneath them — including every bump and grout line. Install over textured ceramic tile without any prep, and those lines show through the vinyl within months. Over a smooth, clean, level subfloor? The results hold up well.
Subfloor Prep and Edge Sealing
If your existing floor has noticeable texture, a bag of self-leveling compound ($15-25) can smooth minor irregularities first. Clean the subfloor thoroughly with a degreaser — dust or wax defeats the adhesive. Once tiles are down, apply a thin caulk bead along the wall edge and around the toilet base to seal out moisture. That step is the difference between tiles that stay down and tiles that lift within a year.
Pattern Options
For patterns: black and white checkerboard is the classic choice that reads intentional in any bathroom size. Hexagon tiles in grey or terracotta are widely available in peel-and-stick format. Marble-look vinyl creates a luxurious visual effect for $0.50-2.50 per square foot. A standard 50-square-foot bathroom costs $25-125 in materials — a significant saving over ceramic installation, which typically runs $500-1,500+ with labor.
8. Thrift Store Accessories That Give Your Bathroom Real Character
This is where your bathroom goes from updated to characterful. The difference between a bathroom that looks decorated and one that looks collected comes down to a few well-chosen pieces. You almost never have to pay full retail for them. Designers thrift for bathroom accessories even for high-end clients — because the objects that give a bathroom personality aren’t the ones fresh off a Target shelf.
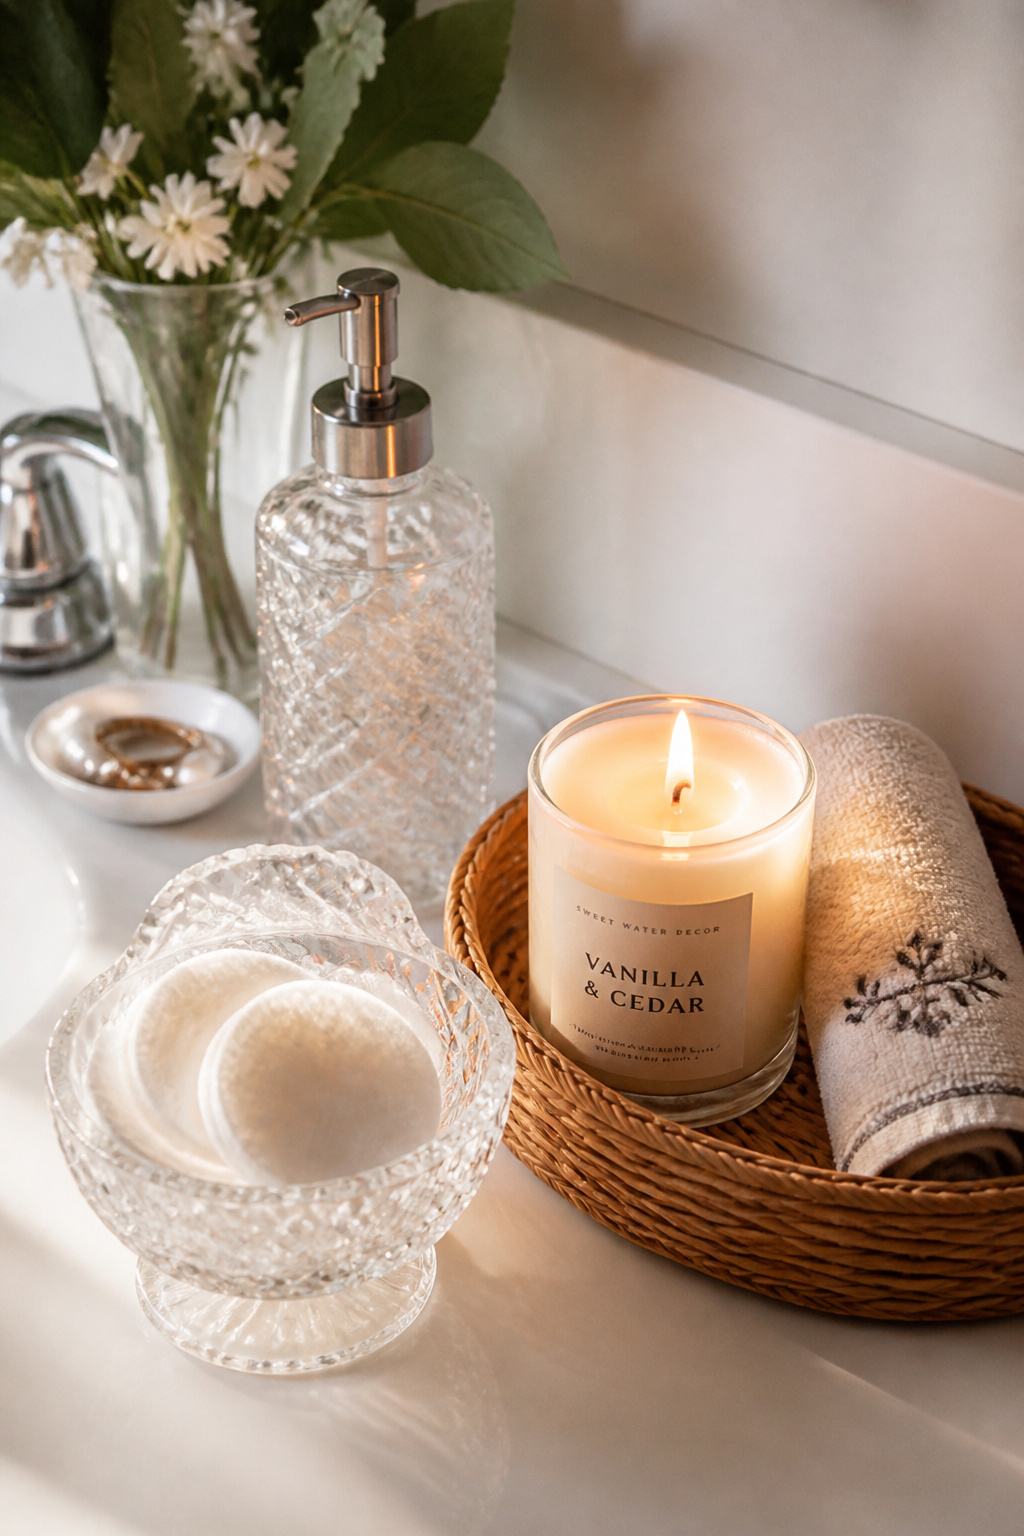
Here’s what to look for: glass decanters and carafes (repurposed for liquid soap, bath oil, or cotton balls), cut crystal candy dishes or covered bowls (ideal for Q-tips or hair ties), rattan and wicker baskets (for spare toilet paper or rolled towels), and ceramic trays in marble or neutral tones that organise without overwhelming. Vintage frames from the art section — even without art — can be spray-painted and used as wall decor. This kind of bathroom idea on a budget costs essentially nothing if you shop at well-stocked thrift stores. If you’re drawn to the farmhouse style especially, these budget-friendly farmhouse bathroom decor ideas cover a similar approach with a distinct rustic aesthetic.
Sanitizing What You Bring Home
Hygiene is the question everyone has, and the answer is simpler than most people expect. Glass and ceramic sanitize completely — a dishwasher on high heat or a hand-wash with diluted white vinegar does the job. Wicker and rattan can be scrubbed with diluted dish soap, dried in sunlight, and sealed inside with Mod Podge Outdoor to protect from humidity. Skip fabric items, wooden pieces with unknown finishes, and anything plastic that smells or feels tacky.
Mixing Old and New
Use the 80/20 rule: 80% thrifted pieces, 20% new. A fresh soap dispenser or new white hand towels make thrifted objects look chosen rather than accumulated. Unify disparate finds with one consistent thread — all clear glass, all natural rattan, all white ceramic. Limit yourself to three items per surface. Understanding core bathroom decoration principles worth knowing helps you edit with confidence rather than just collecting.
9. New Towels and a Coordinated Colour Scheme Tie Everything Together
Towels are the most visible textile in a bathroom and almost always the most ignored. Mismatched, faded, or pile-of-different-colours towels undo the work every other update on this list achieves. Fresh, coordinated towels in two complementary tones cost $25-50 for a full set. The before-and-after is immediate.
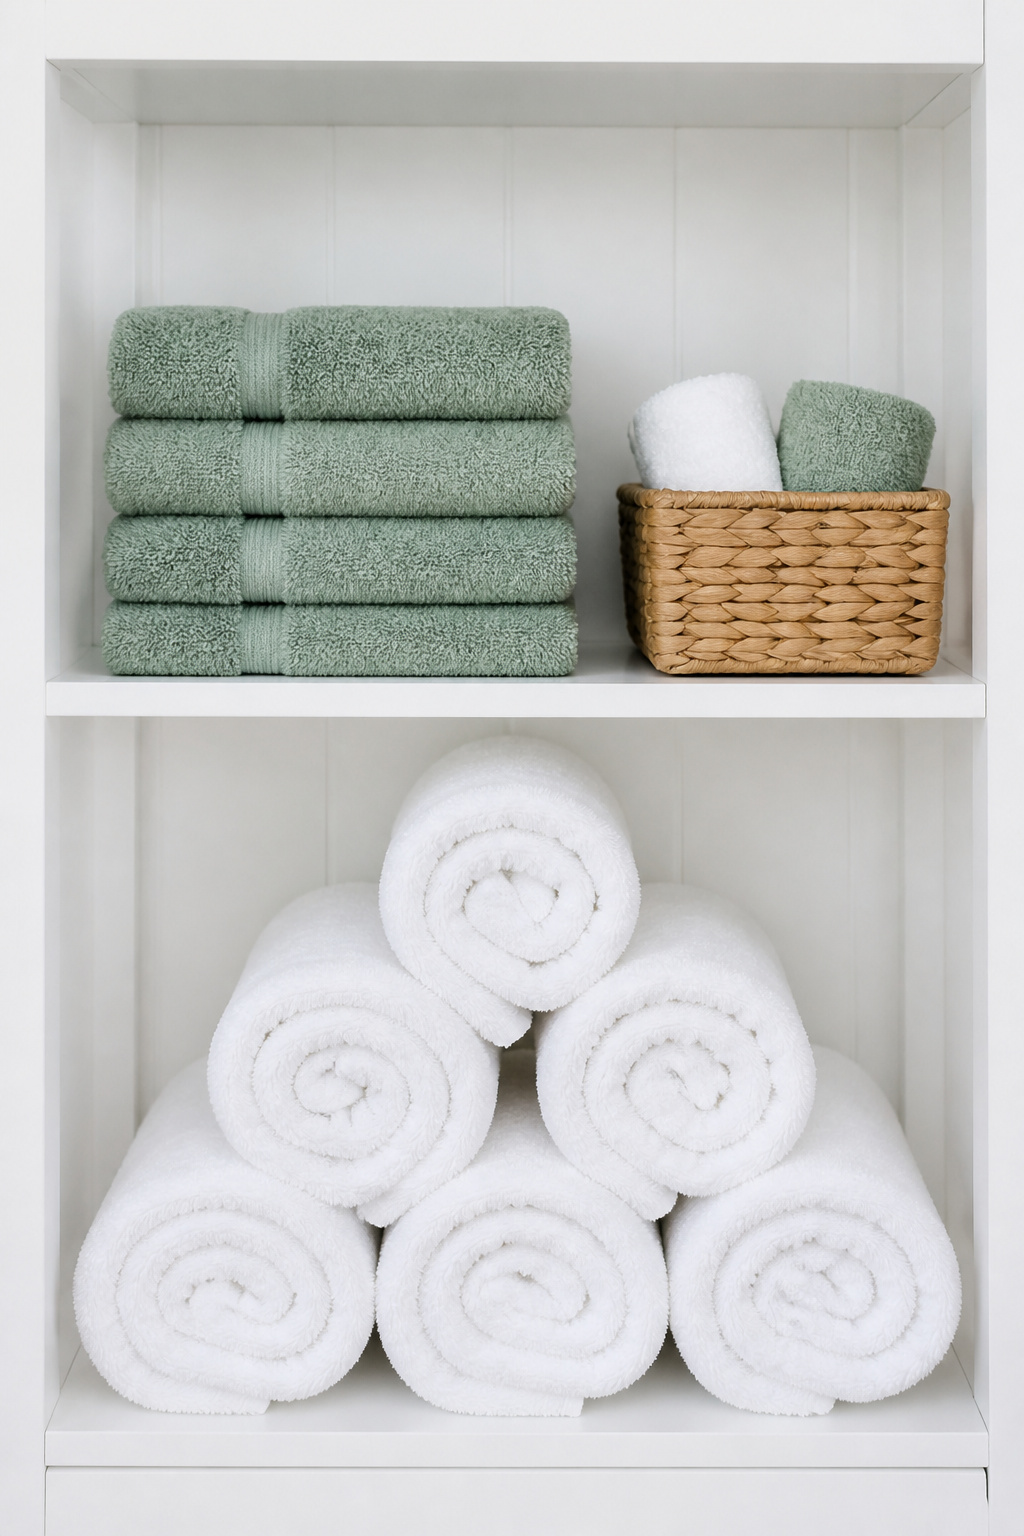
Towel quality is measured in GSM — grams per square metre. The 400-600 GSM range is the sweet spot for everyday bathroom use: absorbent without being so heavy they stay damp between uses. Under 400 GSM and towels feel thin. Over 700 GSM and they take too long to dry in a humid bathroom. IKEA’s FLODALEN at 600 GSM scores well in independent tests and costs $14-20 per towel. Costco’s Charisma Hygrocotton sets use hollow-core cotton yarn for a soft feel and fast drying time. Amazon Basics 600 GSM Egyptian cotton sets run under $35 for six pieces. Always wash new towels before their first use — manufacturing residue blocks absorbency until that first wash.
The Three-Colour Rule
For colour, use the rule of three. One anchor — the dominant neutral (white, ivory, linen grey) as the main towel body colour. One accent — a single hue pulled from another element in the room, like sage tile or matte black hardware. One neutral connector like a jute bath mat or white ceramic soap dish. Keep to two towel colours on display. More than that reads as mismatched rather than collected.
Display That Looks Intentional
Fold bath towels in thirds lengthwise, then in thirds widthwise, and face the folded edge outward on the shelf for a hotel-style row. Rolled towels displayed in a basket look styled and take up less visual space in tight quarters. The fold method matters more than the towel brand.
10. Bathroom Ideas on a Budget: DIY Pipe-and-Wood Open Shelving
Open shelving in bathrooms is everywhere right now. The version everyone loves — black iron pipe with a stained wood board — looks like it came from a high-end store. It didn’t. You can build a single shelf for around $50-80 in materials. Retail versions of the same look cost $200-400.
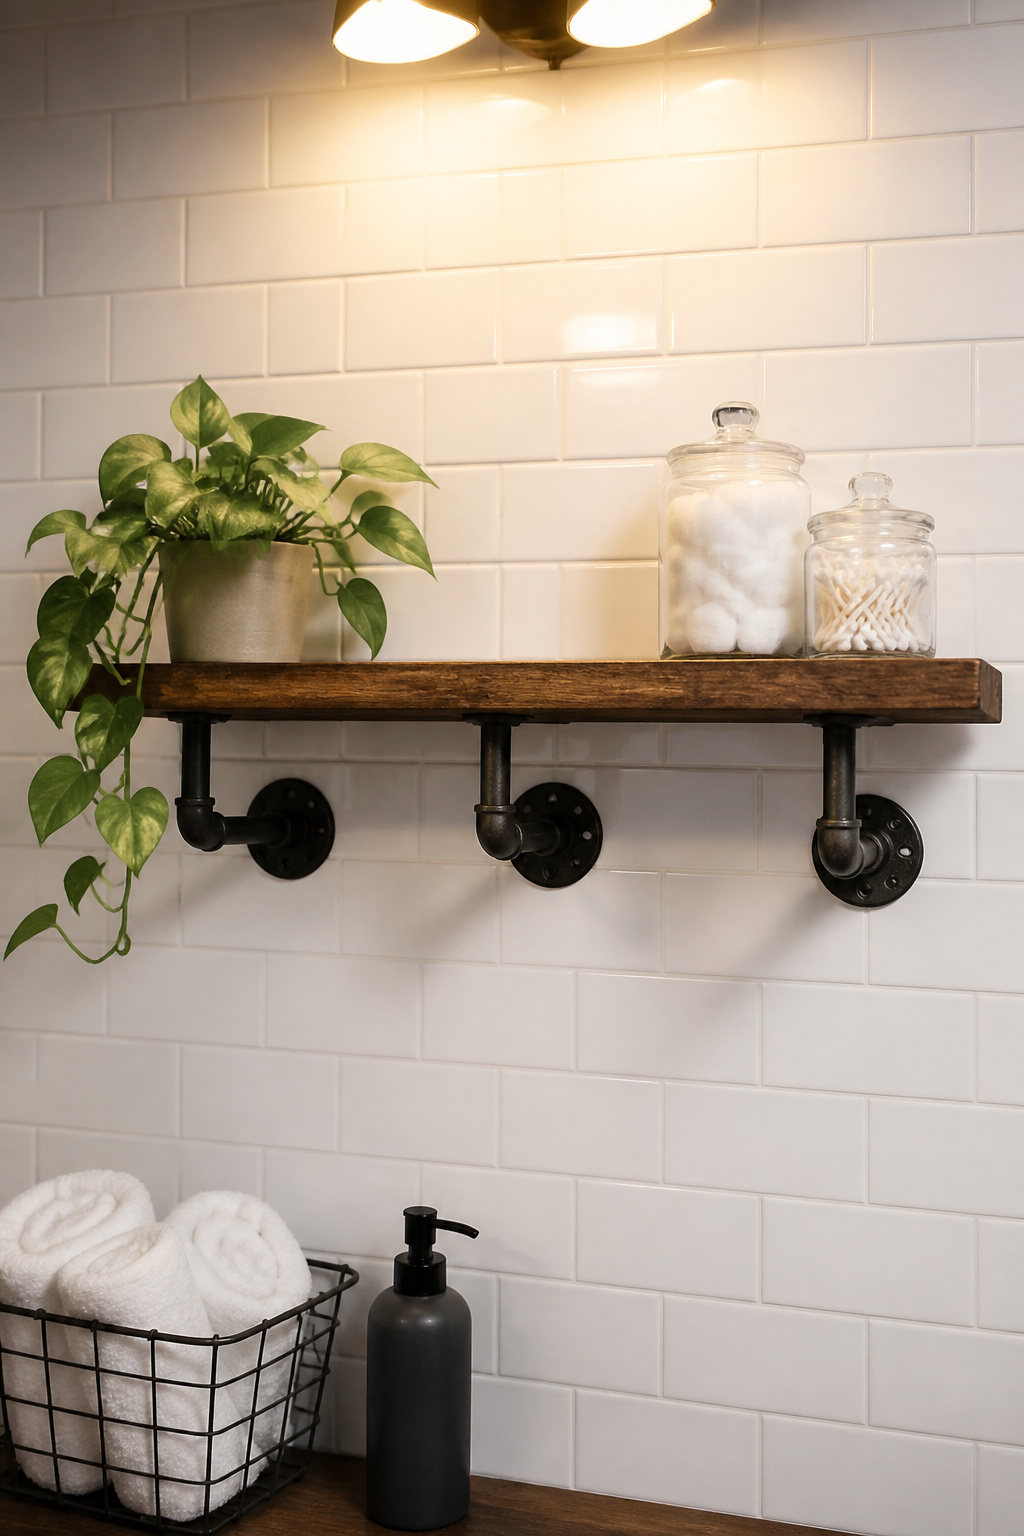
The visual appeal is in the contrast: warm stained wood against matte black iron reads as designed in both modern and rustic bathroom contexts. It works especially well against white subway tile or shiplap, where the dark hardware pops. Because the pipes are structural rather than just decorative, these shelves are genuinely strong — far more so than most bracket-and-board systems.
Building the Shelf Step by Step
Materials: 3/4-inch black iron floor flanges (2 per shelf, $4-6 each in the plumbing section), pipe nipples cut to desired depth (4-6 inches is standard), end caps, a stained wood board, and pipe straps. Total parts: $50-80 per shelf. Degrease all pipe pieces with dish soap before starting — they come factory-coated in grease that prevents any finish from bonding. Spray with polyurethane to protect against rust. Mount flanges directly into wall studs, not drywall alone. Connect pipes, lay the board across, and secure with pipe straps underneath. Those straps are critical — without them, the board shifts every time you reach for something.
Styling Open Shelves
Group items in odd numbers. Use matching containers for consumables — cotton balls, Q-tips, and bath salts in identical clear jars unify the look instantly. Leave at least 40% of shelf space empty. That breathing room is the difference between curated and cluttered.
11. Re-Grout and Re-Caulk for a Transformation That Costs Almost Nothing
This is the most underestimated bathroom idea on a budget on this entire list. Dirty, discoloured, or cracked grout makes even good tile look shabby. And cracked caulk at the tub-to-tile joint isn’t just cosmetic — it’s the leading cause of water working its way behind walls, turning a $30 fix into a $3,000 repair.
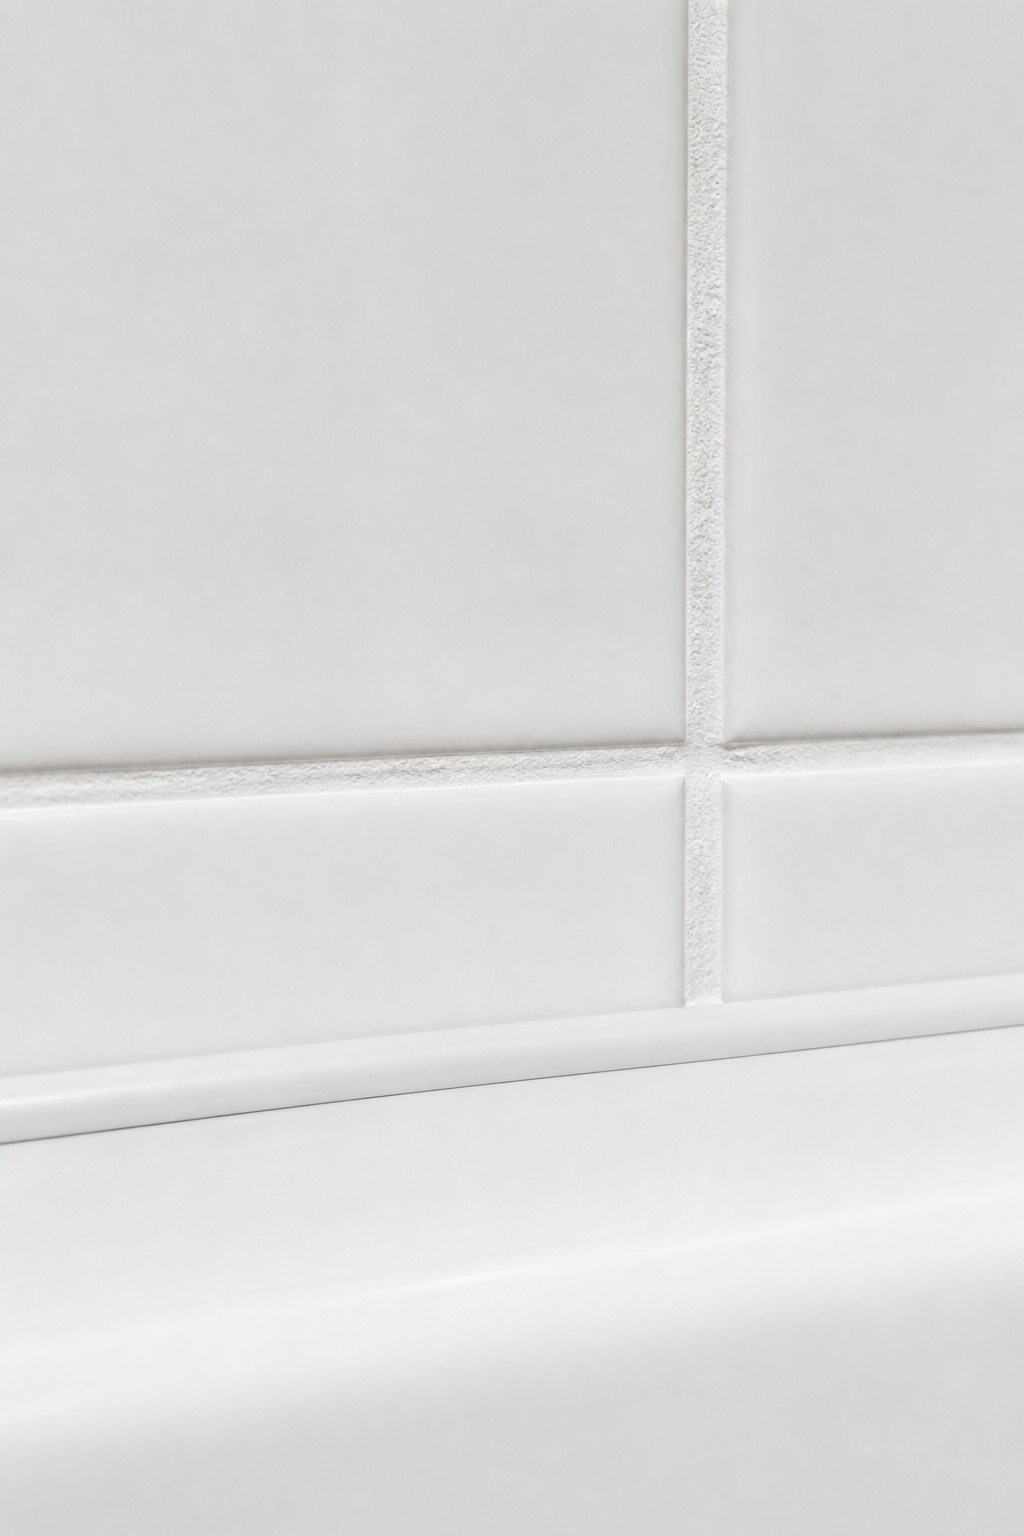
Fresh grout makes tiles that are 20 years old look new. That’s not an exaggeration — the tile didn’t age; the grout did. And the DIY cost for a full regrout is under $100 in materials, compared to $600-2,500 for a professional service.
Tools and Materials for a DIY Job
Remove the old grout to two-thirds of its depth using an oscillating tool with a grout removal blade (tool rental: $30-60 per day) or a manual grout saw ($8-15). Mix new grout to a peanut butter consistency, then apply with a grout float held at 45 degrees, pressing firmly and moving in diagonal strokes. Wipe off the haze with a damp sponge after 20-30 minutes. Allow 24-48 hours to cure, then apply a grout sealer ($10-20 per bottle) to protect the surface. For caulk: use silicone-based waterproof caulk at all corners and plane-change joints. Apply painter’s tape on both sides first. Run a smooth bead in one pass, tool it with a wet finger, then pull the tape at 45 degrees while the caulk is still wet.
One Critical Rule
Grout goes between tiles. Caulk goes at corners and at all joints where two planes meet — wall to floor, wall to tub. Never use grout in a corner. It will crack within months because corners experience slight movement that rigid grout cannot handle.
12. A Shower Curtain Upgrade Transforms Your Entire Tub Area
The shower curtain is the largest single piece of textile in a bathroom. In most homes it’s also one of the cheapest items in the room. That combination means it has outsized influence on the overall feel — for better or worse.
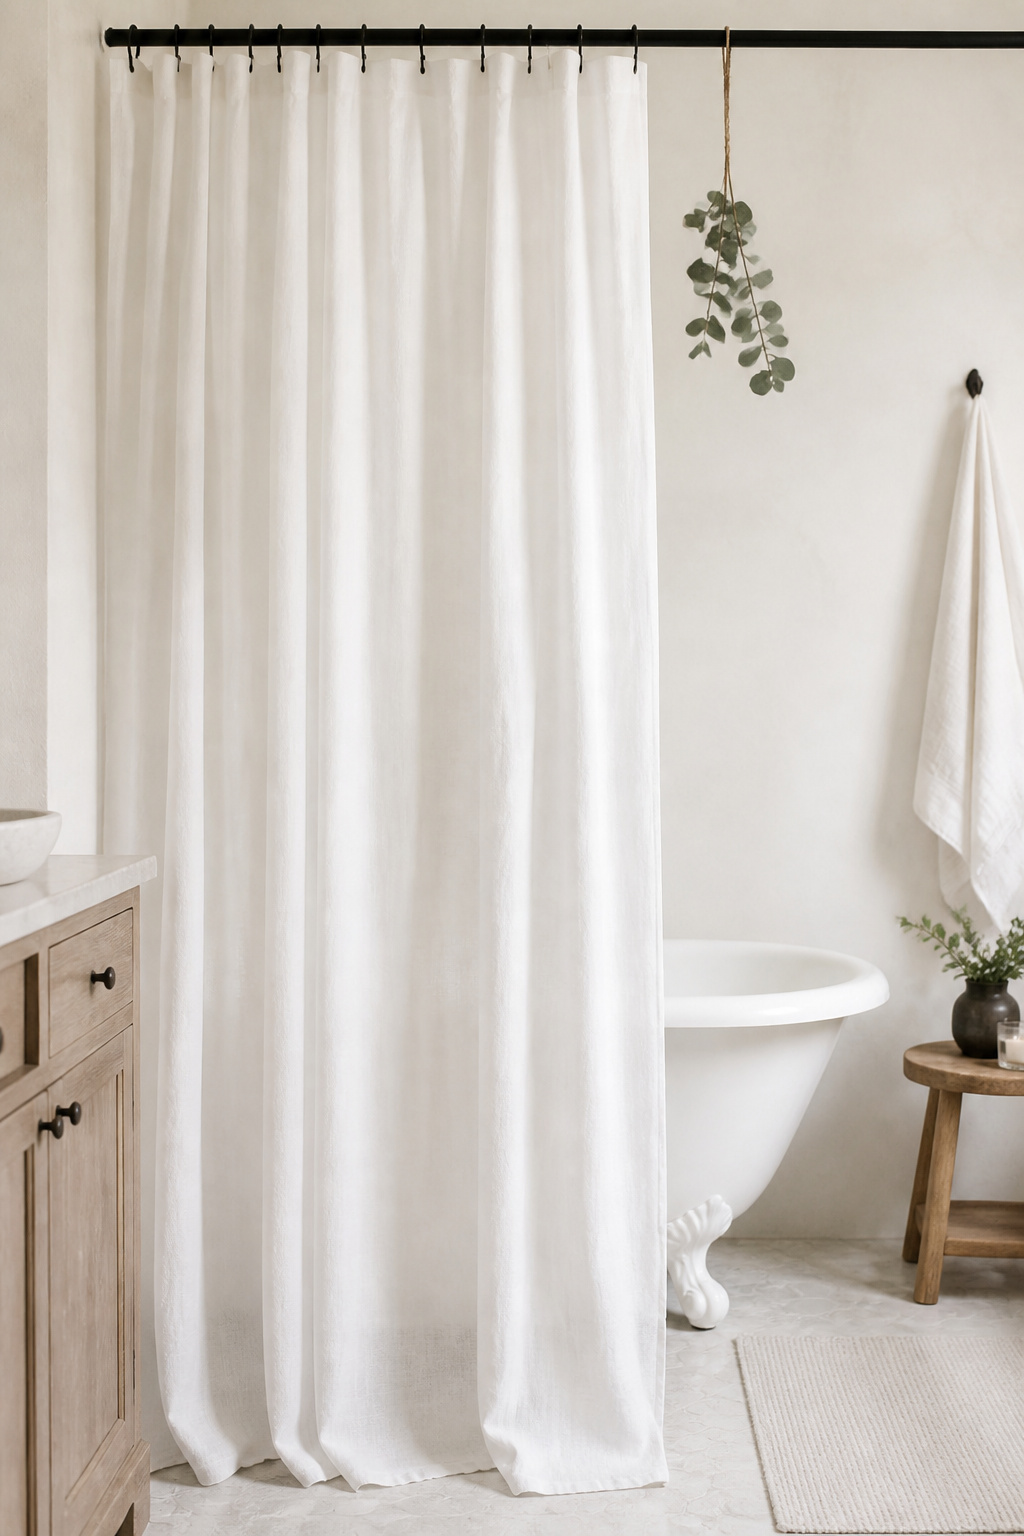
Height is the first decision. Standard curtains are 72 inches, which works fine in an 8-foot ceiling bathroom. But hang an 84-96 inch curtain from a rod positioned near the ceiling — even if your shower is shorter — and the room reads as significantly taller. It’s a designer trick that costs just a few dollars more than a standard curtain.
Curtain Weight and Pattern
For small bathrooms, solid curtains in light neutrals — white, linen, pale grey — make the space feel less closed off. Bold prints are better in larger bathrooms with good natural light. Small-scale patterns like thin stripes work well in tight spaces. Match the rod finish — chrome, oil-rubbed bronze, or matte black — to the other metal finishes in the bathroom.
Choosing the Right Liner
Don’t skip the liner, and avoid PVC. PEVA (polyethylene vinyl acetate) is the safer choice — waterproof, machine washable, and without the chemical off-gassing of PVC. Look for weighted hem magnets at the bottom and rust-proof stainless steel grommets. Machine-wash liners monthly with a cup of white vinegar to prevent mildew. A curtain and PEVA liner together from Amazon or Wayfair typically runs $15-40.
13. Affordable Bathroom Ideas: Swap the Light Fixture for Instant Drama
Builder-grade bathroom lighting is almost universally poor. The standard Hollywood strip with bare globe bulbs casts light from directly above, creating unflattering shadows under the eyes and chin. Swapping the fixture for a modern vanity bar is one of the highest-impact changes you can make, and it’s a straightforward swap for anyone comfortable turning off a breaker and connecting three wires.
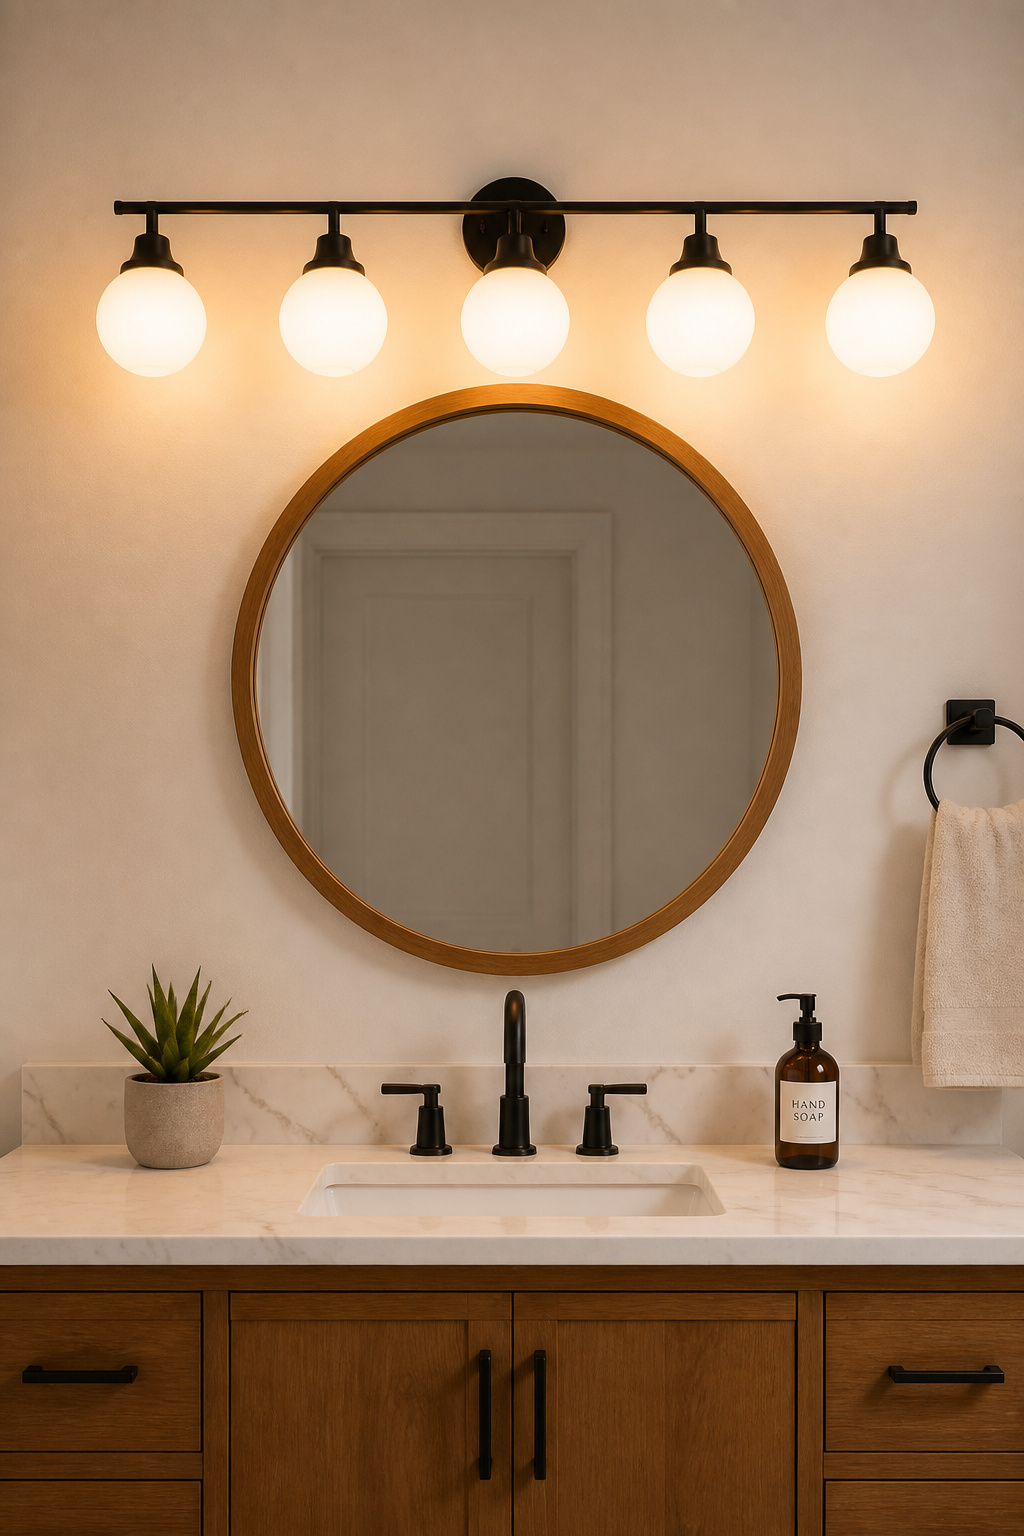
Safety first: turn off the bathroom circuit at the breaker, then confirm with a non-contact voltage tester before touching anything. Most vanity light swaps involve connecting three wires — black to black (live), white to white (neutral), and bare copper to ground. New fixtures include detailed instructions and all hardware. The process takes 30-60 minutes.
Colour Temperature and LED Efficiency
For colour temperature: 2700-3000K warm white is the standard for bathrooms. It’s flattering for skin tones and creates a relaxed atmosphere. 4000K and above reads as cool and clinical. LED fixtures use 90% less energy than incandescent and last 25,000-50,000 hours — most pay back their cost in energy savings within two years.
Budget Picks Under $100
Three-to-five globe vanity bars in matte black or brushed nickel run $40-80 at Amazon. Linear LED bars with a frosted diffuser fall in the $45-75 range at Home Depot and Wayfair. Fixture width should be 75-80% of the mirror width — a 36-inch mirror pairs with a 28-30 inch bar. Match the finish to your hardware and faucet. That consistent metal thread through the bathroom is what makes affordable updates look considered.
14. Upcycle a Dresser or Console Into a One-of-a-Kind Vanity
This one takes more effort than anything else on this list, but the result is also the most impressive. A converted antique dresser used as a bathroom vanity looks like custom furniture — because it essentially is. Custom furniture vanities retail for $800-3,000 and up. A thrifted dresser conversion costs $50-300 all-in.
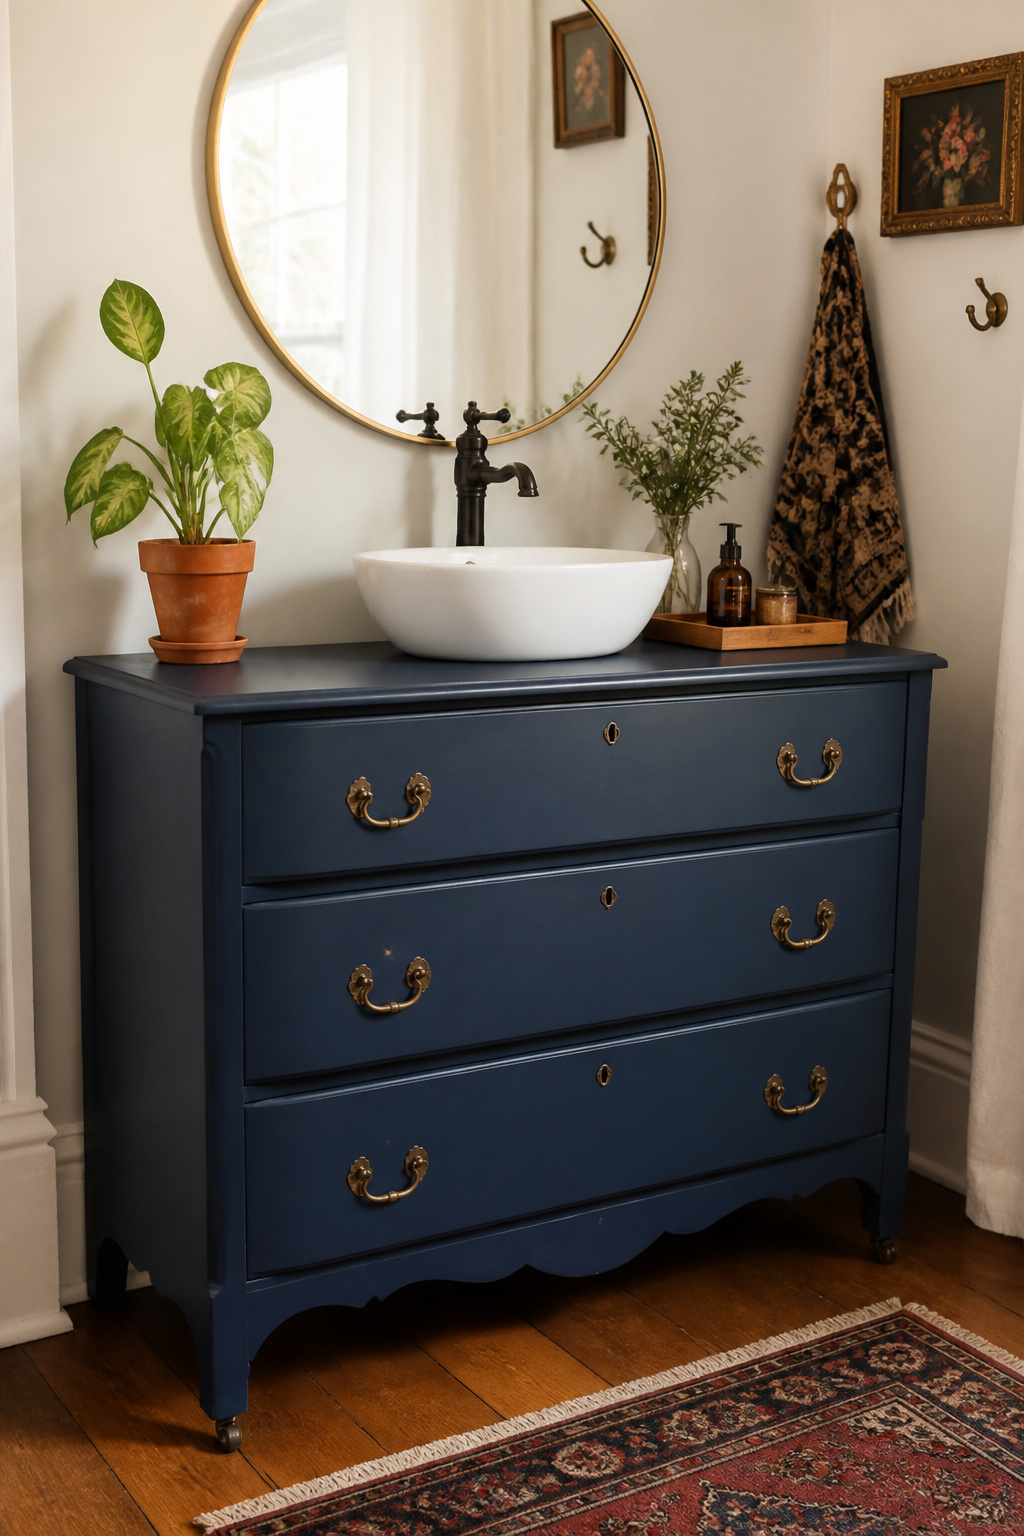
Before you buy anything at the thrift store, check your plumbing rough-in. Measure where the water supply lines and drain emerge from the wall or floor. That location determines what size and depth dresser will actually work. This is the single most common reason dresser vanity projects stall — someone falls in love with a piece before confirming the plumbing will line up.
Waterproofing and Height
Standard vanity height is 32-36 inches. Most vintage dressers sit 28-32 inches tall. Adding hairpin or angled legs raises them to the right height. Waterproofing the top surface is essential: apply three or more coats of marine-grade polyurethane (Minwax Spar Urethane) or a two-part epoxy like Masters Armor. Both resist standing water and cleaning products without breaking down.
Wood and Finish Choices
Dense species like oak, maple, and teak are the best choices — naturally moisture-resistant. Avoid pine and MDF — both swell in steam. For finish: oil-based primer followed by enamel holds up better than latex in bathroom conditions. Chalk paint works beautifully but needs at least two coats of protective wax or polyurethane to survive daily bathroom use. A vessel or drop-in undermount sink works best with a dresser conversion — both require simpler countertop openings.
15. Bathroom Plants on a Budget That Actually Survive the Humidity
Plants in a bathroom aren’t just a styling trend — they make biological sense. Bathrooms with regular shower use maintain 50-70% relative humidity, significantly higher than the 30-45% typical elsewhere in your home. For tropical plants, which evolved in warm, humid forest environments, a bathroom is the ideal microclimate. The plants that thrive there are also, almost without exception, the easiest and cheapest to find.
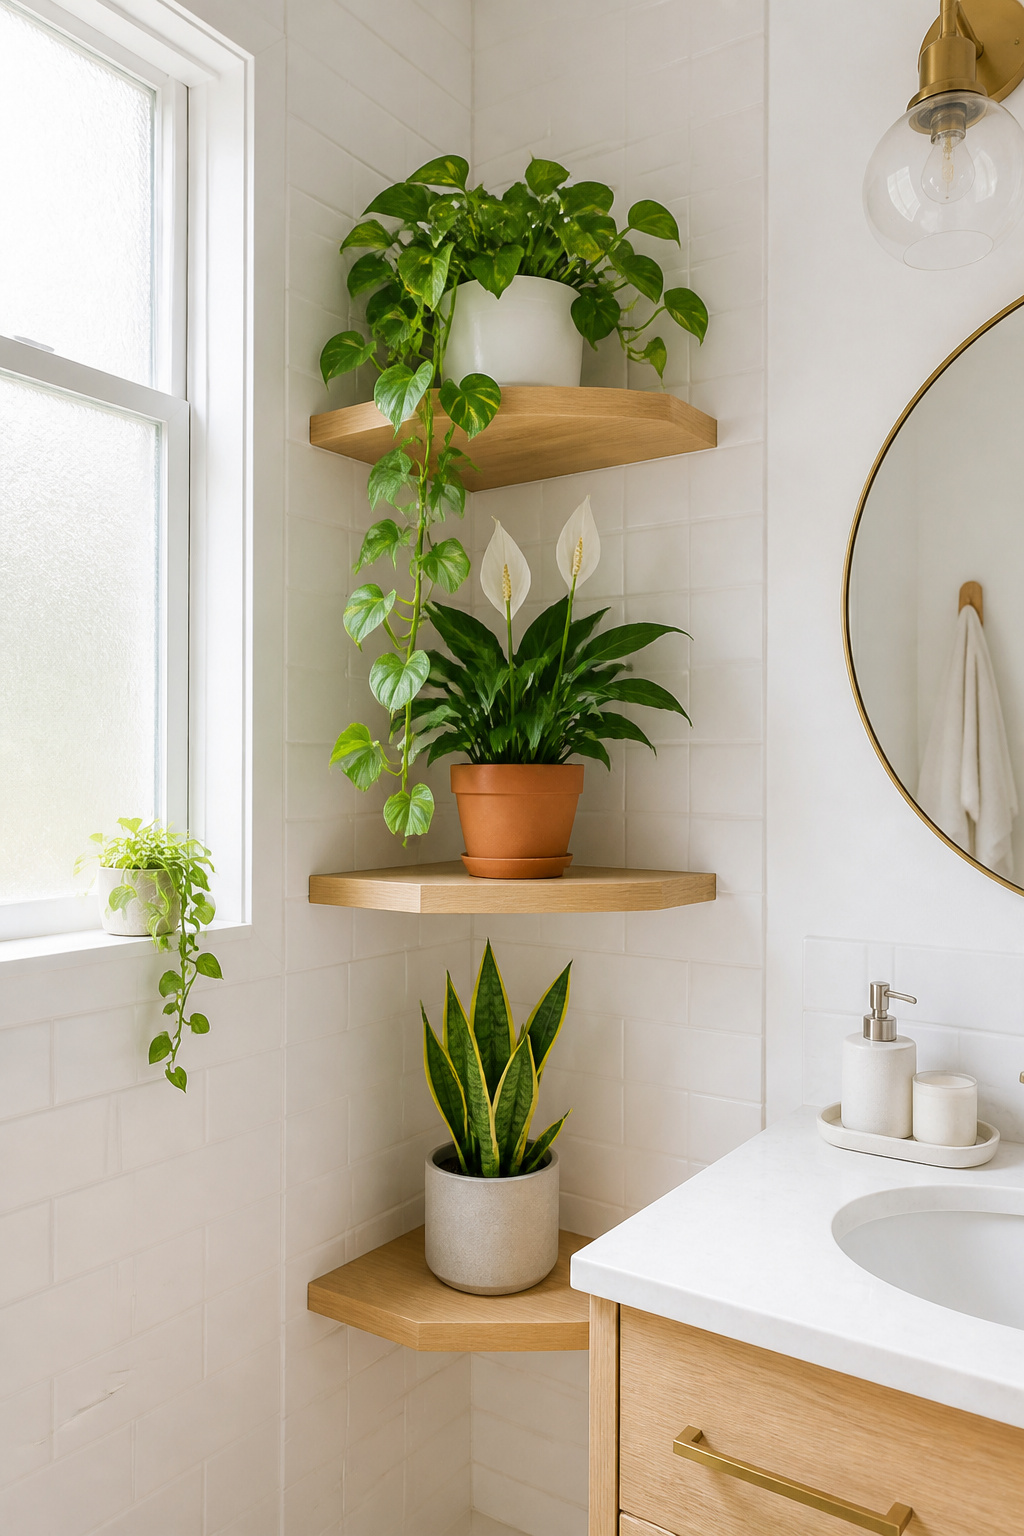
Pothos is the starting point for most people, and for good reason. It costs $3-8 at a garden centre or grocery store. Also, it tolerates low light gracefully and needs watering only when the top inch of soil dries out — which in a humid bathroom is far less often than in a dry living room. It trails beautifully from a shelf or hanging planter, softening any hard surface nearby.
The Best Species to Try
Spider plants are similarly forgiving and produce baby offshoots called spiderettes that can be clipped, rooted in water, and grown into full new plants for free. Peace lilies tolerate low light well and prefer moist soil, which pairs naturally with bathroom humidity. NASA’s research identified them as highly efficient at removing indoor air pollutants — formaldehyde, benzene, and airborne mould spores — a genuine bonus in an enclosed room. Snake plants (Sansevieria) are the best choice for bathrooms with minimal natural light. Their vertical form works well in tight corner spaces, and they need watering only every 2-4 weeks.
Budget Display Ideas
Macramé hanging planters ($5-12) are perfect for trailing pothos above the toilet. Repurposed glass jars with a drainage layer of pebbles make free planters that look intentional. Group three plants of different heights on a corner shelf for a layered effect under $30 total. The one category to avoid in bathrooms: succulents and cacti, which evolved in arid conditions and rot in high humidity.
How to Choose the Right Bathroom Ideas on a Budget for Your Space
The most useful thing I can tell you is this: start with what you see first. Stand in the doorway and look at your bathroom. Whatever draws the eye immediately — the dated mirror, the mismatched towels, the discoloured grout — that’s your starting point. The first update makes everything around it look better by comparison, and that momentum carries you to the next.
Matching Budget Tier to Impact
If budget is the primary constraint, the $0-50 tier gives you real impact: paint, hardware, towels, plants, and a thrift-store accessory refresh all fall here. The $50-200 tier is where the mirror, faucet, light fixture, and shower curtain live — each a significant visual upgrade that takes a few hours. The $200-500 range covers the bigger DIY projects: pipe-and-wood shelving, peel-and-stick floors, a full regrout, or the dresser vanity conversion.
The Right Order to Work In
Sequence matters, too. Do the messy work first — painting and regrouting before installing new hardware and hanging fresh towels. That order protects your new purchases from dust and overspray. Tackle the highest-visibility item in your $0-50 tier, finish it completely, then move to the next. Partial projects left mid-room are demoralising and often stay that way for months.
For a complete picture of what a budget bathroom refresh involves at each scale, these bathroom renovation tips to avoid costly mistakes cover the planning side in depth. Start with one project, finish it properly, and the next one becomes obvious.