There’s a moment every small bathroom owner knows. You’re standing in your 5×8-foot bathroom on a Monday morning, trying to figure out why it feels like a storage closet with plumbing, and thinking: *there has to be a better way*. There is. After years of helping readers transform cramped, uninspiring bathrooms on shoestring budgets, I can tell you that small bathroom interior upgrades don’t require demolition crews or five-figure renovation budgets. They require smart choices — some structural, some purely cosmetic — applied in the right order.
What follows is a collection of 15 ideas that actually move the needle. A few are weekend projects any renter can tackle with a screwdriver and a trip to the hardware store. Others are bigger commitments that pay off handsomely in how the room feels every day. All of them are worth knowing about before you spend a penny.
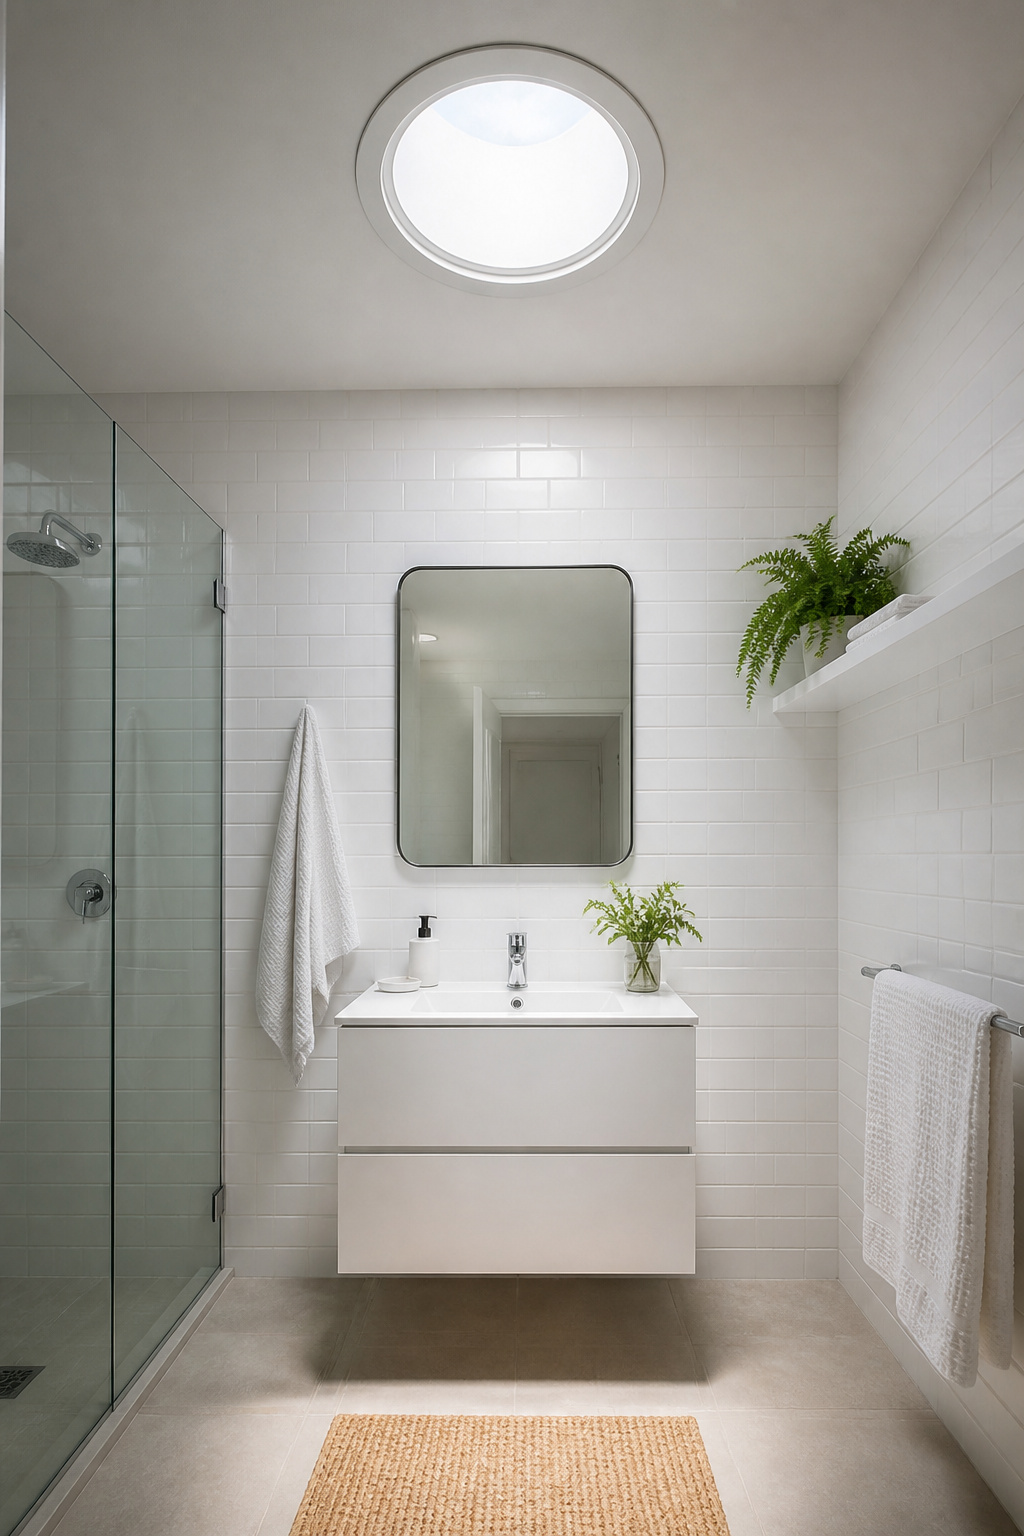
1. Floating Vanity With a Slim Profile to Open Up Floor Space
The single most impactful thing a floating vanity does in a small bathroom interior is expose the floor. That sounds simple, but the psychology is real: when your eyes can travel across the full width of the floor without interruption, the brain registers the room as larger than the dimensions actually are. A floor-standing vanity with a solid base creates a visual wall at ground level. A floating vanity removes it.
For small bathrooms, mount your floating vanity at 10–12 inches off the floor — just high enough to see the full floor plane beneath it. This sweet spot keeps the counter at a comfortable 34–36 inches while maintaining the space-expanding effect. Standard vanity depth runs 18–21 inches; if your bathroom is under 5 feet wide, look for 15-inch-depth slim models that sacrifice a little counter space to give you meaningful clearance. Width-wise, the vanity should occupy 60–80% of its wall — not crammed to the edges, but not so small it looks lost.
If a new vanity isn’t in the budget, there’s a cheaper workaround. Wall-mount bracket kits ($40–$80) can lift some existing floor-standing vanities, provided the unit is structurally sound. The wall behind it will need blocking or a ledger board between studs to safely carry the load. For those who want an even quicker fix, painting the floor and toe-kick the same colour creates a near-floating visual effect without touching the plumbing. For more ideas on making the most of your vanity space, our guide to bathroom vanity ideas that work in tight spaces is worth a read.
2. Walk-In Shower as a Smart Small Bathroom Interior Upgrade
The tub-shower combo is space-efficient on paper and awkward in reality. Those high acrylic walls chopping through the middle of your bathroom aren’t just using floor space — they’re dividing the room visually, making it feel like two cramped zones instead of one. Converting to a walk-in shower removes the divider, and if you choose frameless glass, the sightlines open up completely.
Statistically, fewer than 10% of homeowners use a bathtub daily. If you have a second bathroom with a tub, the case for conversion is even stronger. A standard alcove tub occupies approximately 60×32 inches; a walk-in shower of the same footprint, open at the front with a glass panel, reads as significantly less obstructive because the eye can see through it.
Budget varies considerably. A basic tub-removal conversion using a prefab shower base, simple tile, and a framed glass door typically runs $1,500–$4,000. Custom tile with a semi-frameless glass enclosure lands in the $4,000–$8,000 range. Tub removal and disposal adds $150–$300, and wall repair after the tub comes out costs another $300–$800. Don’t skip the permit ($200–$2,000 depending on your area) — it protects you when you sell. The minimum comfortable shower size is 36×36 inches; aim for 36×48 if you can, especially for resale. For inspiration on shower configurations that suit tight footprints, check out these shower ideas that work in compact bathrooms.
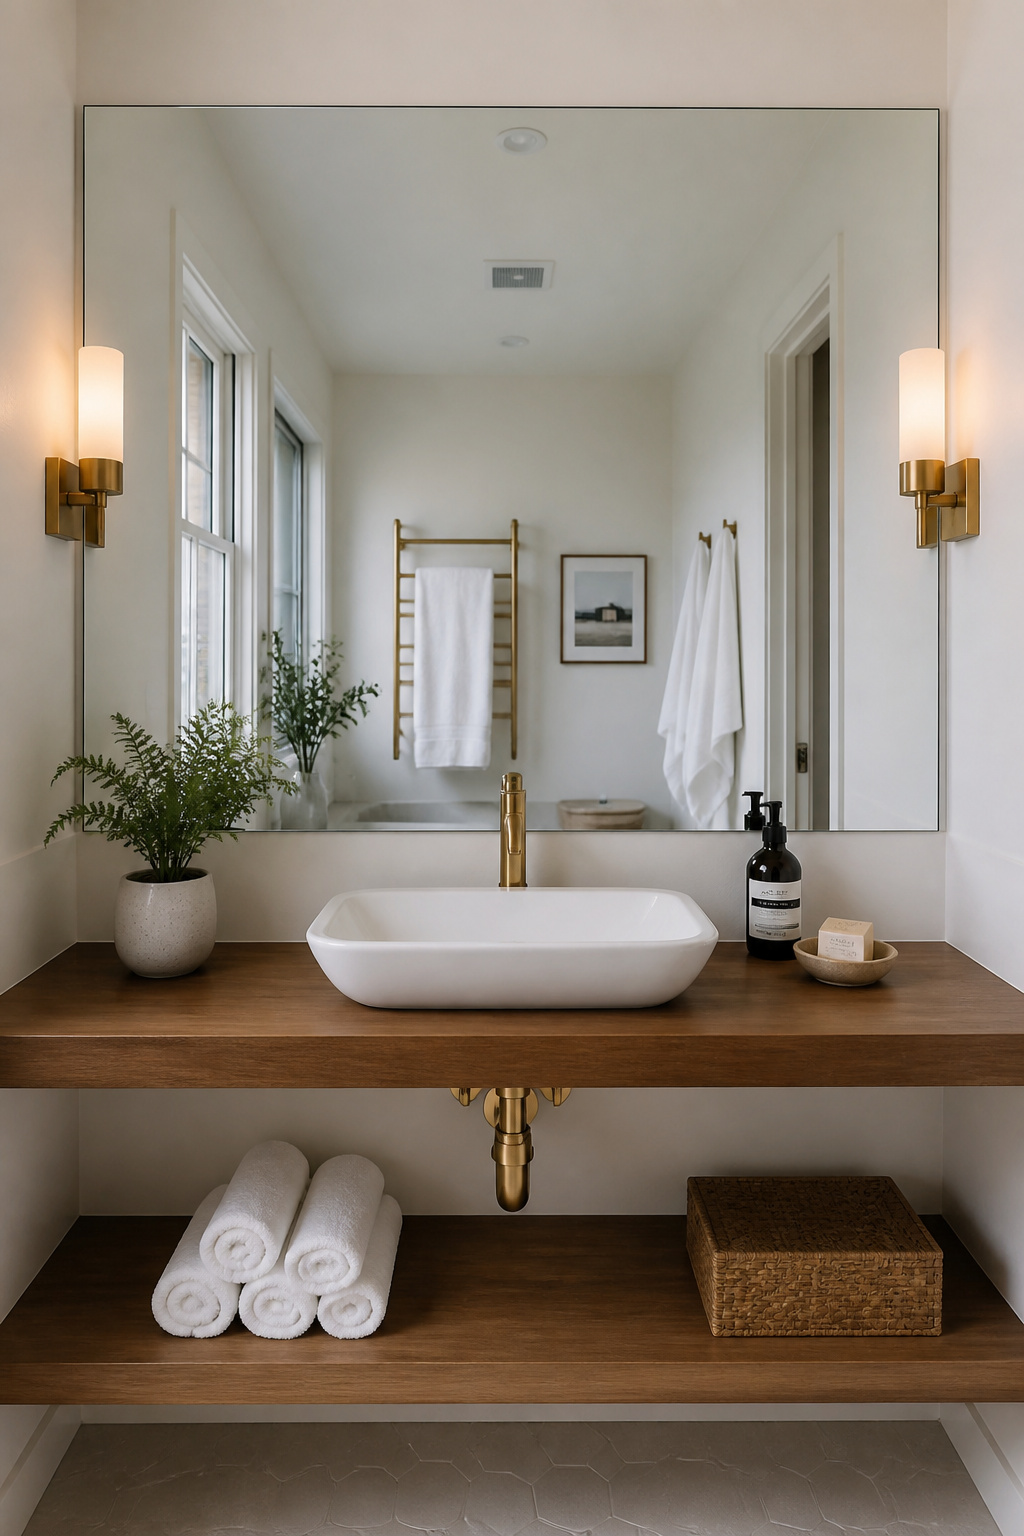
3. Light-Bouncing Mirror Wall That Doubles the Visual Depth
Here’s a rule that almost never fails in small bathrooms: go bigger with the mirror than feels comfortable. The instinct is usually to choose a mirror that’s a polite size relative to the vanity — tasteful, proportional. The result is a mirror that performs a purely functional job and does nothing for the room. A mirror that stretches the full width of the vanity, or wider, does something else entirely: it doubles the visual depth of the room by reflecting it back at you.
Full-width frameless mirrors are the maximalist version of this idea — and they’re not actually that expensive. IKEA’s HOVET (78×24 inches, around $150) is a frequent choice, and Wayfair offers multiple 36×48+ options under $100. The frameless version is better for small spaces because there’s no frame boundary interrupting the reflection. If you prefer a framed mirror for character, keep the frame to 1–2 inches wide and choose a simple profile that won’t eat visual space.
For installation, mirror clips (J-clips) are the most secure method for large frameless mirrors — liquid adhesive alone isn’t reliable for a piece this size in a humid environment. A DIY framing upgrade (1×2 pine lumber, glued to the edges of a basic frameless mirror) adds a custom look for under $30 in materials. Explore more bathroom mirror designs that open up a room if you’re looking for frame style inspiration across different aesthetics.
4. Subway Tiles in a Vertical Stack to Draw the Eye Upward
The direction you lay a tile changes the direction the eye travels. In any small bathroom interior, tile orientation is one of the cheapest ways to manipulate perceived proportions. Horizontal subway tile — the standard orientation — makes the walls read as wider. Vertical stacking makes them read as taller. In a small bathroom where the ceiling already feels low, vertical orientation is almost always the better choice.
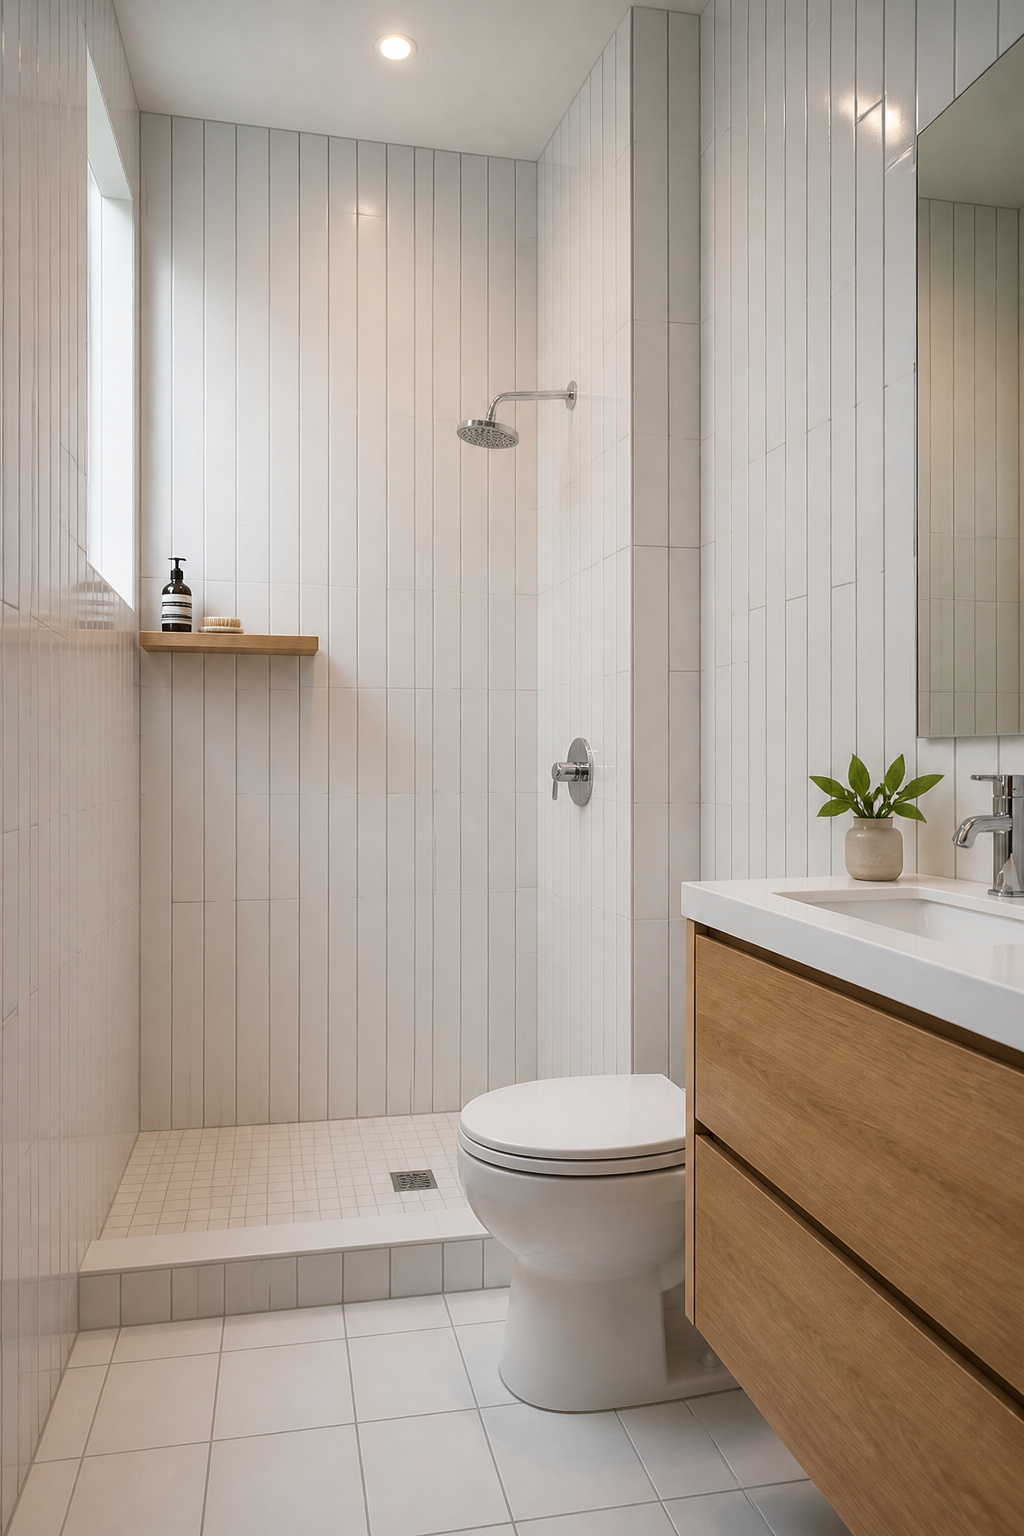
The effect is more dramatic with elongated tiles. Standard subway is 3×6 inches; elongated versions run 3×12 or 4×16 inches. Fewer grout lines per square foot, and those longer vertical lines create a rhythm that genuinely reads as height. White subway tiles laid vertically in a standard 8-foot bathroom make the ceiling appear appreciably higher — a perception shift with zero structural change.
Grout colour is the detail most people overlook. Matching grout (same colour as the tile) minimises the grid and lets the surface read as a single continuous plane — the right choice when your goal is to maximise perceived space. Contrasting grout emphasises every tile joint, which is a perfectly valid design choice but not a space-expanding one. Light grey is the best compromise if you want something more forgiving than white grout (which shows every stain) without the bold contrast of dark grey or black.
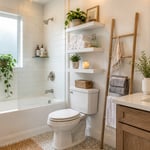
5. Open Shelving in Place of Bulky Cabinets to Breathe Life In
Open shelving in a bathroom is one of those ideas that looks beautiful in photos and goes wrong in real life more often than people expect. The difference between a styled bathroom shelf and a cluttered surface is about six weeks. Before committing to open shelving, be honest with yourself: are the things you store in your bathroom things you’d be happy to display?
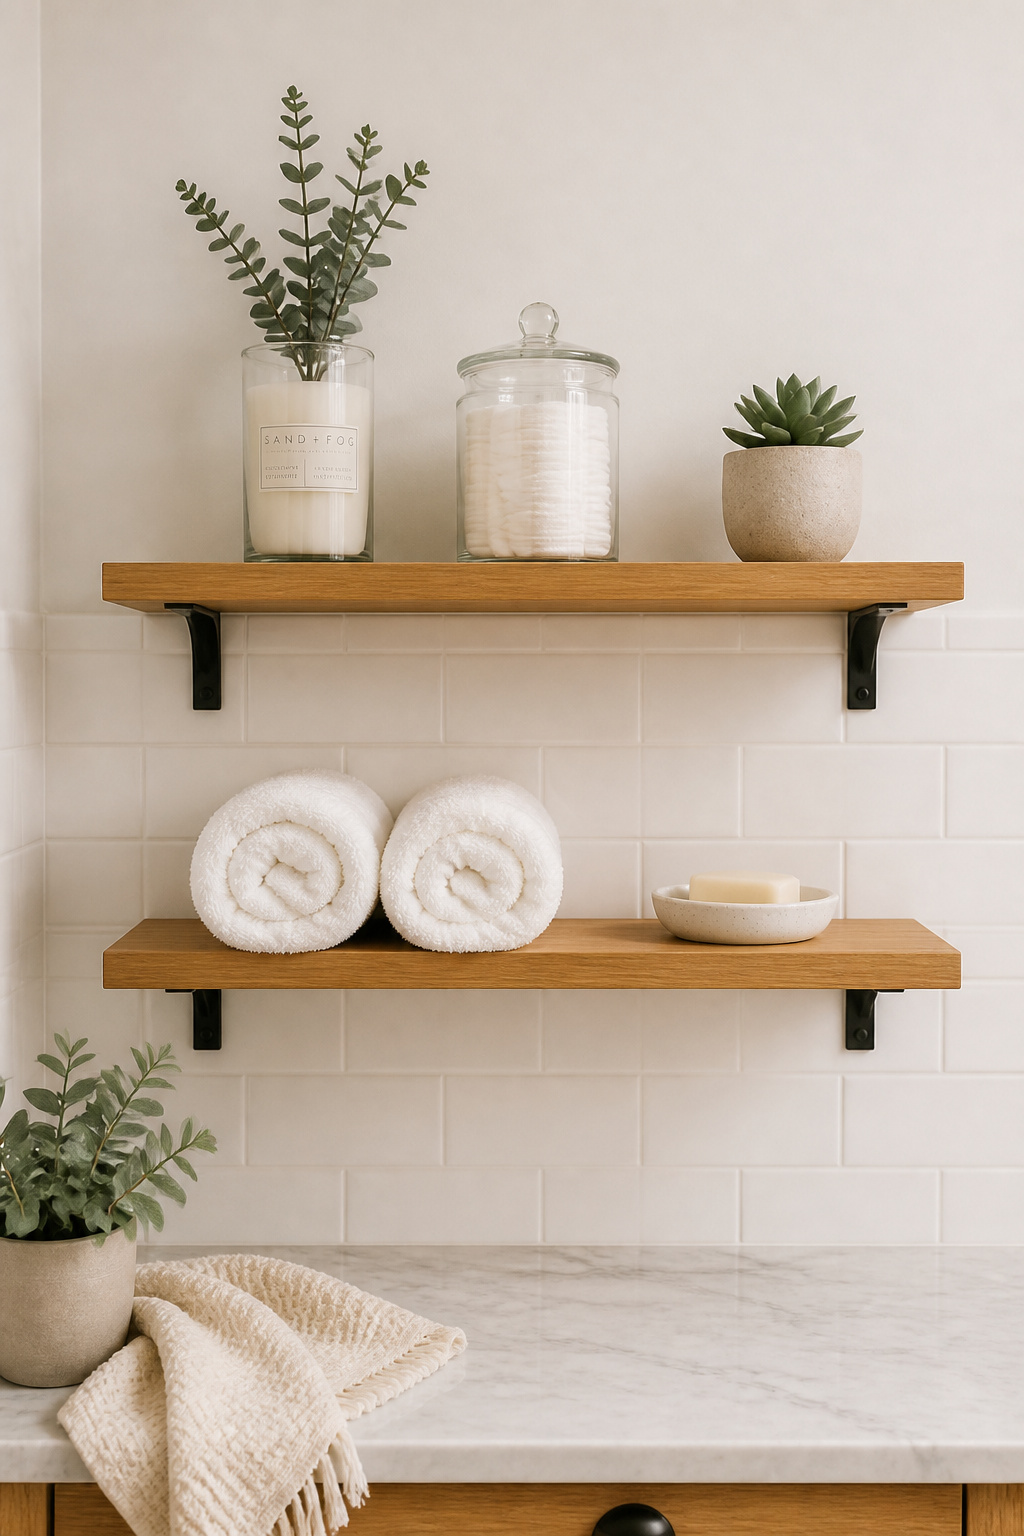
If yes, open shelving genuinely works. Closed cabinet doors feel heavier and more solid; open shelves let the eye travel past the storage zone and feel lighter. The best shelf depth for a bathroom is 8 inches — deep enough for most items, shallow enough to avoid looking like a service ledge. Materials that hold up well: sealed oak or pine, powder-coated steel, or glass. Keep brackets simple and sized to the shelf length — shelves over 36 inches need three brackets minimum, and heavy-duty 2-inch steel brackets (rated to 100 lbs each) look architectural rather than makeshift.
Styling is where the whole thing succeeds or fails. The rule of three applied to bathroom shelves: group items in odd numbers at varying heights — a tall candle, a mid-height glass jar, a low plant. Leave 20–30% of the shelf empty, because negative space reads as deliberate styling rather than room to fill. Use a small tray to corral daily-use items so they count as one visual object rather than five separate bottles. For a full breakdown of what actually works when bathroom storage is tight, the guide to clever bathroom storage ideas for small spaces covers a lot of ground.
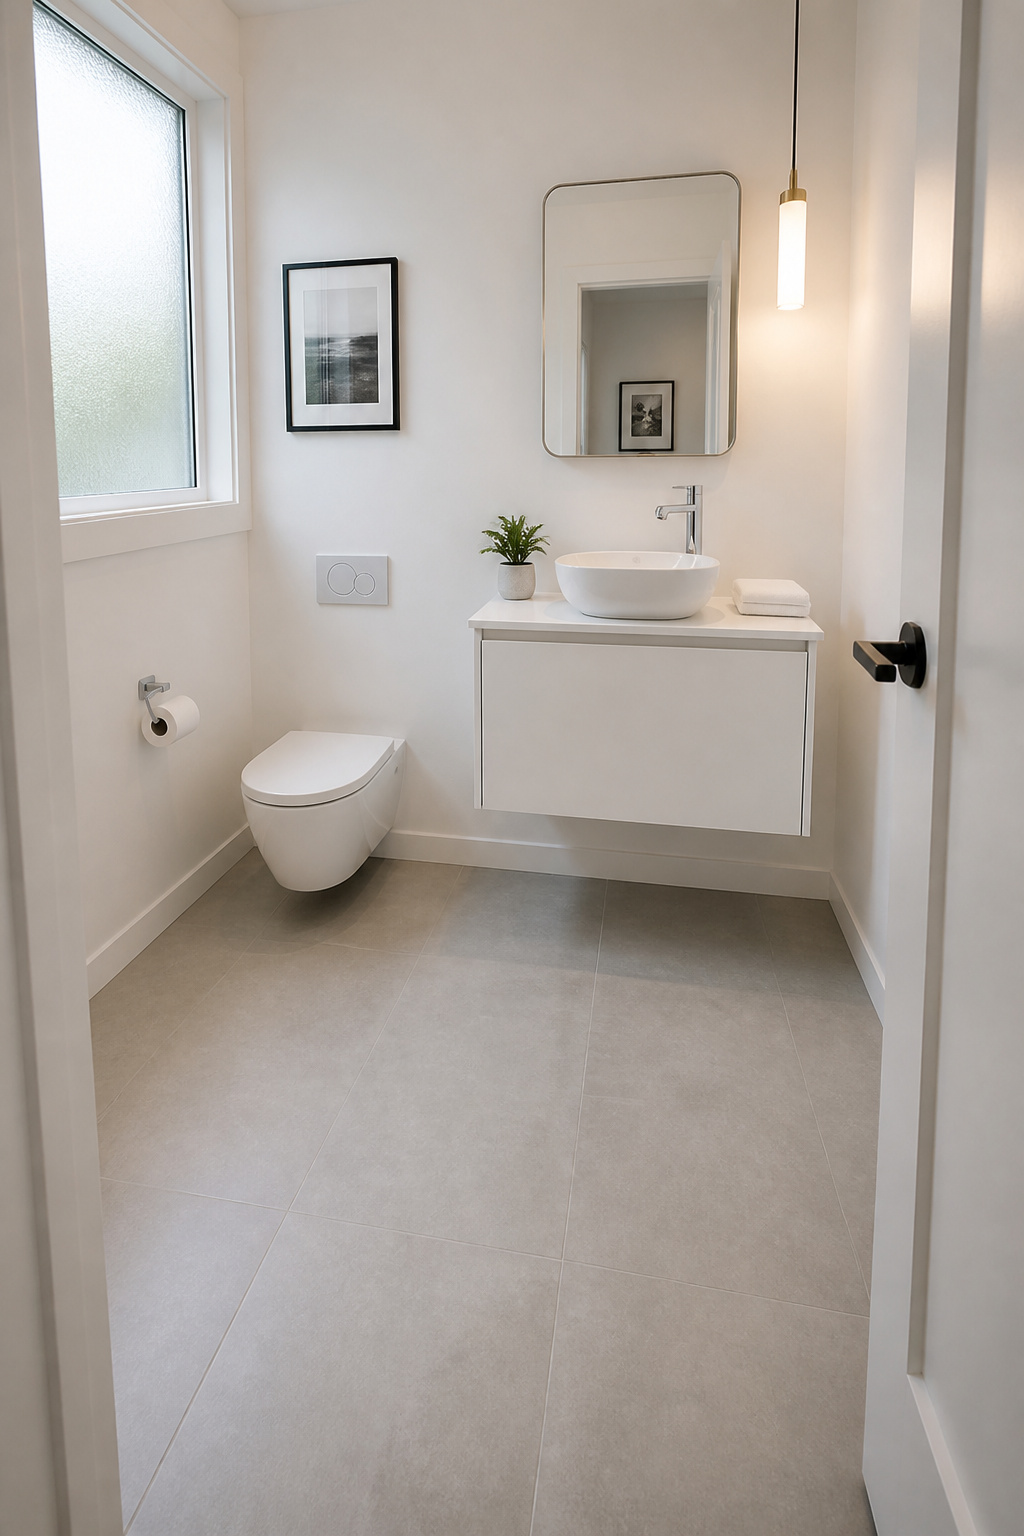
6. Wet Room Design: A Seamless Small Bathroom Interior Solution
A wet room is the ultimate version of the walk-in shower concept: no shower tray, no door, no enclosure — just a fully waterproofed room where the shower area sits flush with the main floor. The entire floor becomes usable as either shower space or standing space, and because there are no physical barriers, the bathroom reads as a single continuous zone.
In a 40–50 square foot bathroom, converting to a wet room format can feel like gaining 15–20% more usable space without moving a single wall. Wet rooms are also significantly easier to clean: no door tracks, no caulk lines to re-do every few years, no shower tray to scrub.
The technical requirements are non-negotiable. The floor must be tanked (fully waterproofed) using a proper tanking system — not just waterproof paint — with the membrane extending at least 300mm up the walls in dry zones and to ceiling height in the shower zone. The floor must slope at a 1.5–2% gradient toward the drain; this is built into the floor screed before tiling, not faked with cut tiles. A linear drain along one wall is the simplest option for a small room, requiring only a single-direction gradient. For tiles, large-format 24×24-inch or bigger tiles with minimal grout lines read as seamless and are much easier to maintain in the wet zone. Consider modern bathroom tiles that work in wet rooms for tile options suited to this format.
7. Pocket Door or Barn Door to Reclaim Precious Floor Space
A standard 30-inch bathroom door sweeping inward clears approximately 6.25 square feet of floor space when open. In a 40 square foot bathroom, that’s more than 15% of the total floor area claimed by nothing but door swing. Every time you walk in, the brain registers that the floor is partially obstructed — and the small bathroom interior feels smaller than it actually is.
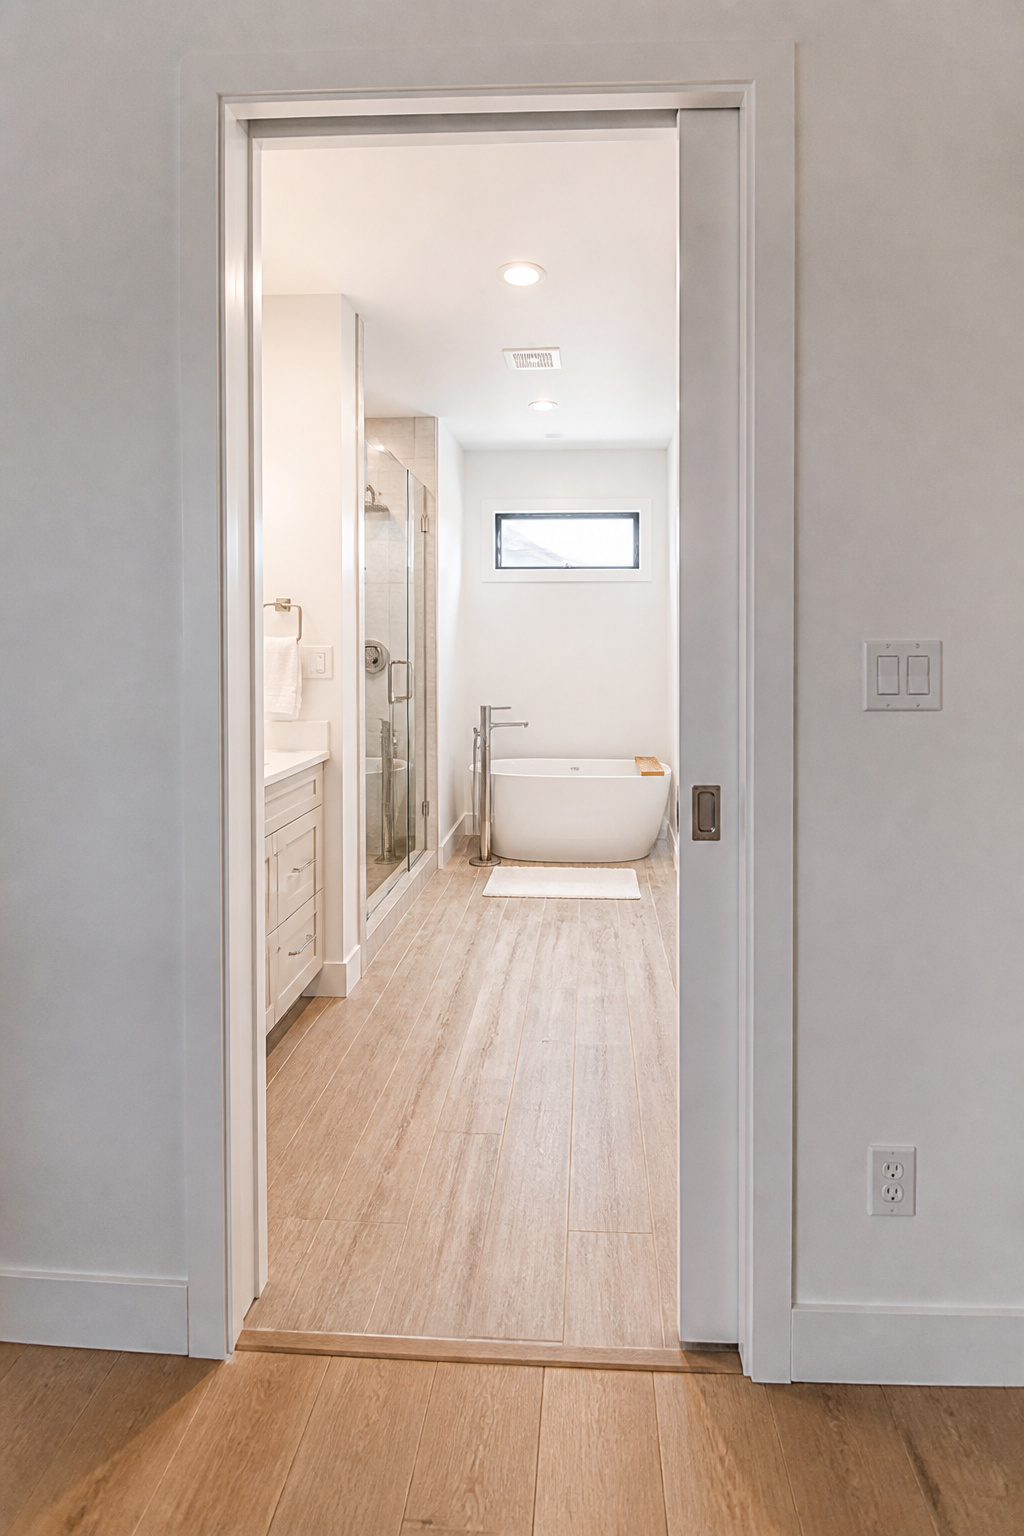
The cleanest solution is a pocket door — it slides entirely into the wall cavity, leaving the full floor plan free. Pocket doors cost $60–$1,000 for the door itself, but installation in an existing wall runs $1,000–$2,500 because the wall must be opened, reframed, and finished. For bathrooms where the wall is being worked on anyway (a renovation or remodel), this is usually worth including in the scope. For bathrooms with no planned wall work, the cost is harder to justify.
Barn doors are much easier to install ($100–$300 in labour for an existing door frame, plus $250–$2,500 for hardware depending on style) but have two real drawbacks in a bathroom: they don’t provide a tight seal (typically a half-inch gap at the frame), and they require wall space equal to the door width on one side of the opening for the door to slide into. For renters or anyone who wants a no-wall-damage option, a surface-mount sliding door kit (from around $150 for hardware) screws to the existing door frame and can be removed completely. It’s not as clean as a pocket door, but it eliminates the swing and saves the deposit.
8. Built-In Niche Shelf Inside the Shower for Clutter-Free Walls
A hanging shower caddy holding six bottles adds 4–6 inches of visual depth to an already tight shower enclosure. It swings when you brush it, rusts at the base, and wobbles off the showerhead every few months. A recessed shower niche holds the same items flush with the wall — nothing protruding, nothing swinging, nothing to clean around. It’s not a luxury feature; it’s just a smarter use of the wall cavity that’s already there.
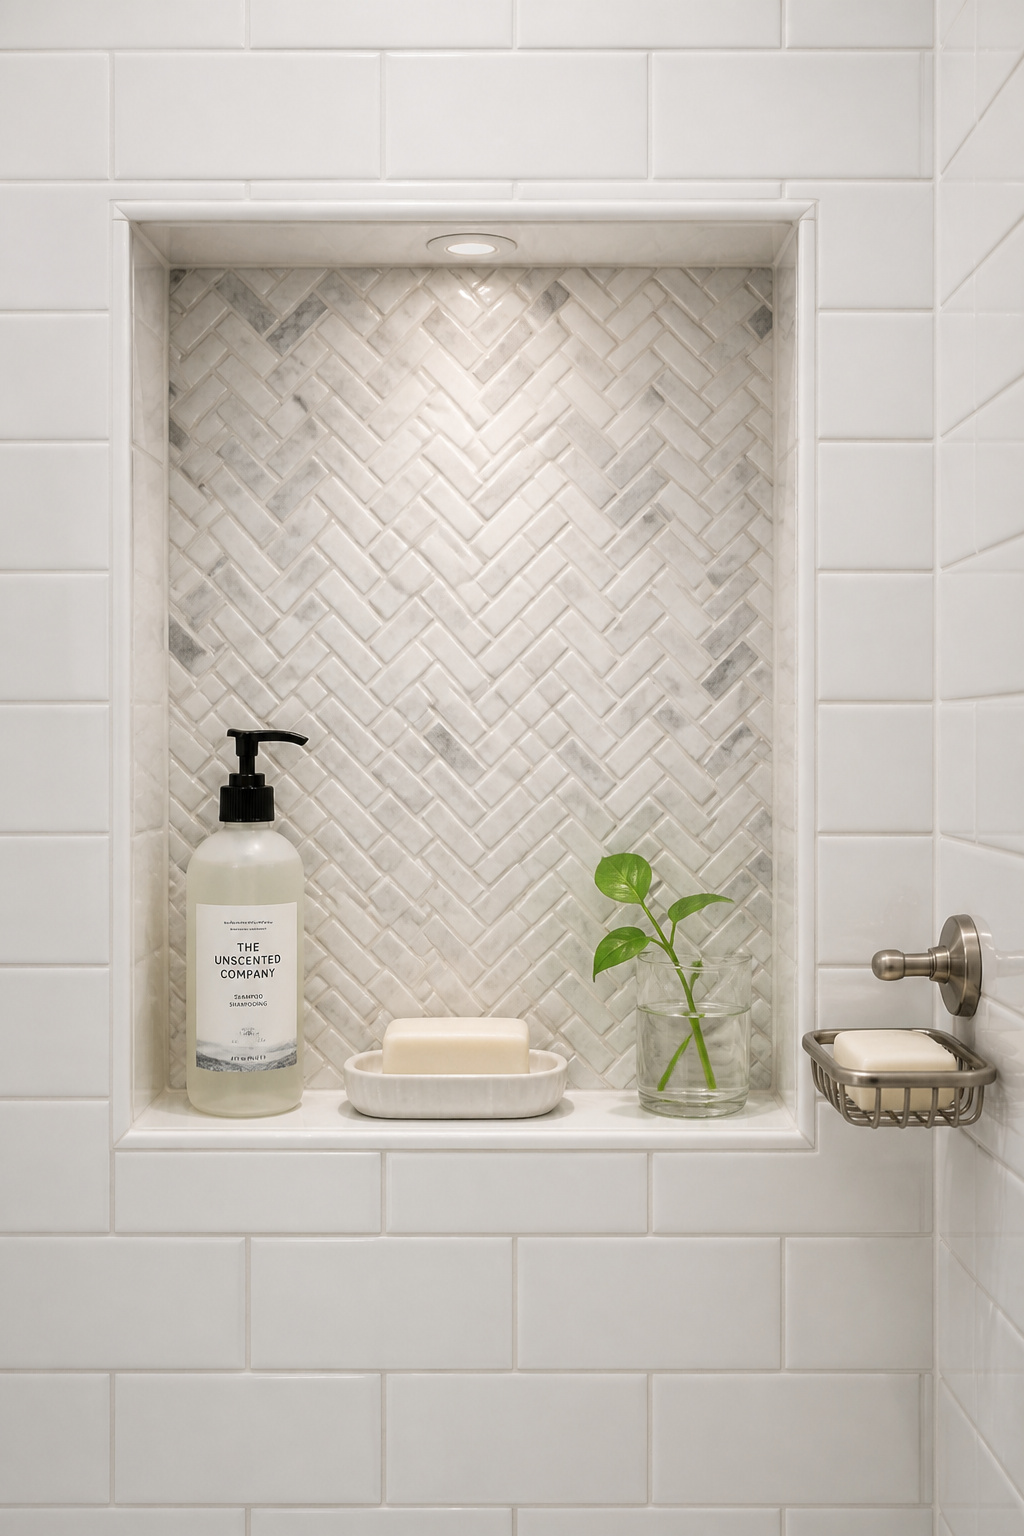
Standard stud spacing of 16 inches on centre accommodates most prefab niches, which are typically 12 inches wide (fitting between studs) and 3.5 inches deep (matching the standard stud depth). The Schluter KERDI-BOARD-SN comes pre-waterproofed and ready to tile in sizes from 12×6 to 12×28 inches — this is the DIY-friendly option because it eliminates the waterproofing step. Position your niche at 48 inches from the floor: eye level, easy reach, and above the main splash zone.
Before cutting into any wall, locate plumbing and electrical runs — never install a niche in an exterior wall, which contains insulation and vapour barriers. The design opportunity here is often overlooked: line the inside of the niche with a contrasting tile (herringbone mosaic, a different colour, natural stone) to signal that it’s a deliberate feature rather than just a hole in the wall. Add an LED strip light at the top of a deep niche for around $15–$30 and the result looks like something out of a hotel bathroom. Smart bathroom storage solutions don’t have to be complicated — sometimes it’s just knowing where to cut.
9. Wall-Hung Toilet That Frees Six Inches of Visual Floor Space
A wall-hung toilet projects 24–26 inches from the wall. A standard floor-mounted close-coupled toilet projects 28–32 inches. That 4–8 inch difference doesn’t sound significant until you’re in a bathroom where 4 inches is the gap between comfortable and cramped. And the visual effect goes further than the physical saving: the exposed floor beneath a wall-hung toilet continues the unbroken floor plane, making the room read as more open.
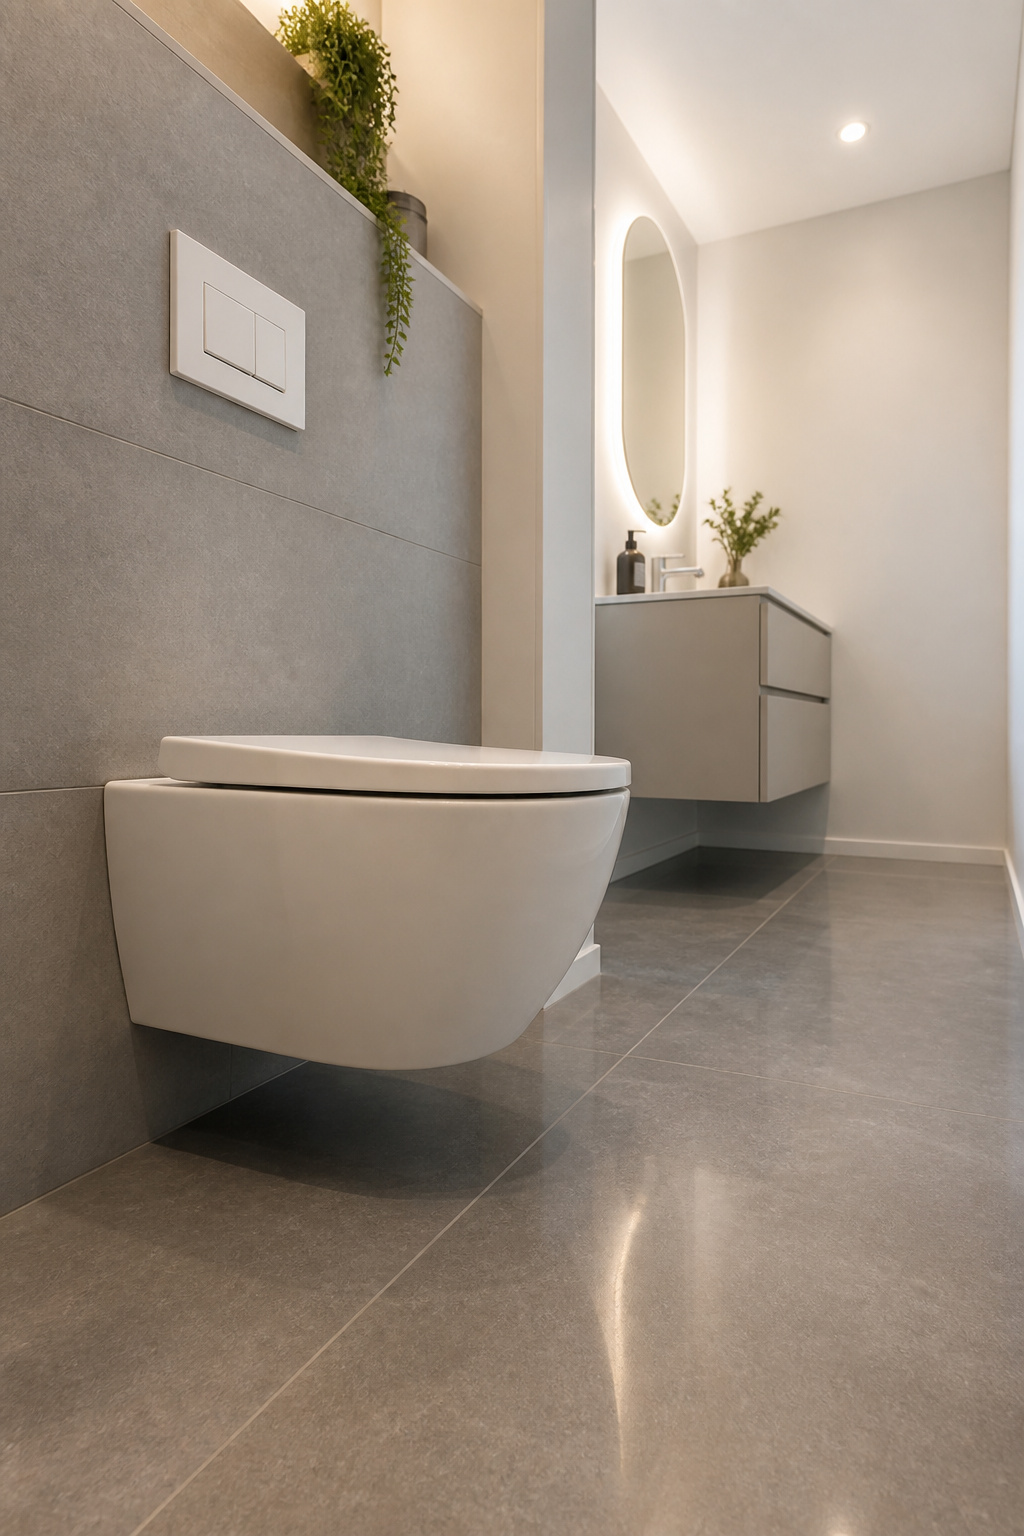
The cistern lives inside the wall in a steel carrier frame (Geberit, TOTO, and Kohler all manufacture them), and the wall must be at least 10 inches thick to accommodate it. In most retrofits this means building a 2×4 false wall in front of the existing wall — a plumber-required job for the rough-in even if you finish the wall yourself. Budget realistically: the toilet unit runs $700 on average ($216–$5,175 depending on specification), installation adds $500–$1,200, and wall construction can add another $1,000–$4,000. It’s a real investment, and it’s primarily worth it in a bathroom that’s getting a full renovation rather than a cosmetic refresh.
On the practical side: the exposed floor under the unit is genuinely easier to mop around; the pan height is set during installation so you can specify comfort height; and the cistern itself is sealed inside the wall with only the flush plate exposed, meaning nothing to yellow or deteriorate on the surface.
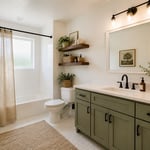
10. Monochromatic Palette for a Cohesive Small Bathroom Interior
The reason a monochromatic small bathroom works is the same reason a single uninterrupted floor plane makes a room feel bigger: the eye doesn’t stop at boundaries. When walls, floor tiles, and fixtures all share a colour family, the surfaces blend into each other and the room reads as one continuous space rather than several small competing zones. That boundary-erasing effect is a genuine size multiplier.
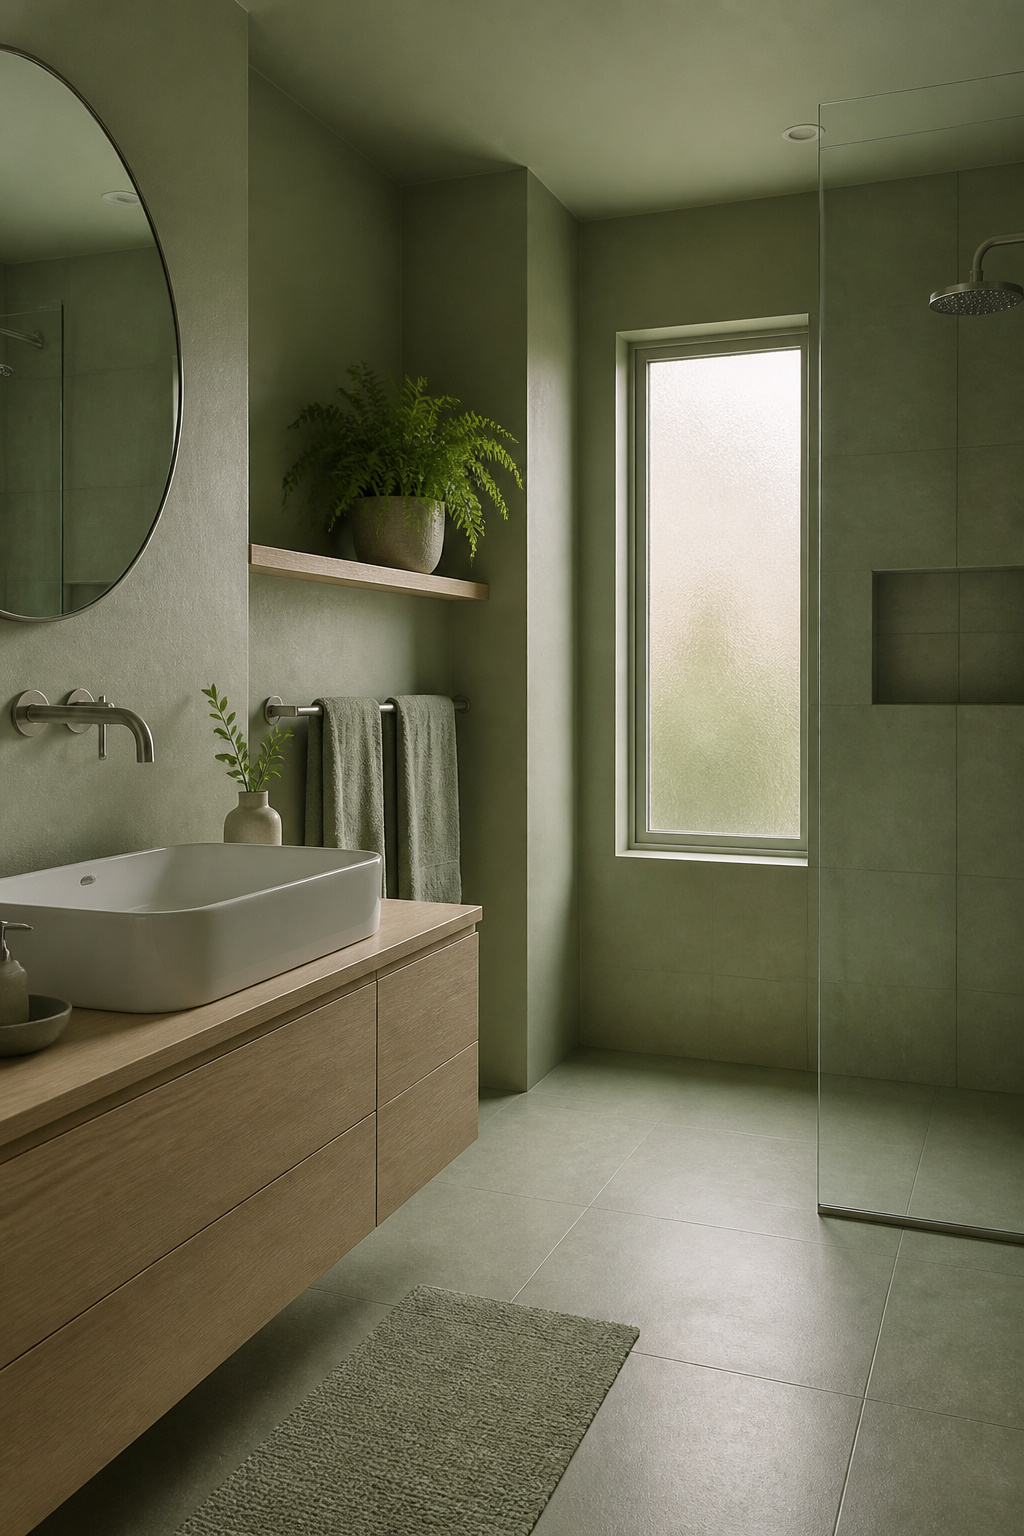
Light Reflectance Value (LRV) is the metric worth knowing here. It measures how much light a colour reflects, on a scale of 0 (absorbs all light) to 100 (reflects all light). For a small bathroom interior, colours with LRV above 60 are the space expanders — they bounce enough light to visually push the walls outward. Check the LRV when selecting paint or tile, not just the colour swatch.
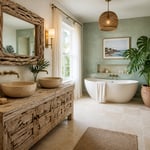
The range of palettes that work is wider than most people expect. White and off-white (LRV 80–95) are the obvious choices: clean, bright, suit any style. Warm greige or taupe (LRV 55–70) adds warmth without closing the space down — particularly good with natural wood accents. And here’s the counterintuitive option: a fully monochromatic deep tone — all navy, all forest green, all charcoal — can feel like a considered, atmospheric choice rather than a small dark room, provided you commit completely with no high-contrast breaks. Texture is what saves a monochromatic scheme from flatness: mix matte wall paint with a gloss tile in the same colour family, add a jute bath mat, use a textured 3D tile as an accent — the surfaces catch light differently and create depth without introducing a second colour.
11. Bold Geometric Floor Tile That Anchors the Whole Space
A plain floor in a small bathroom can look unfinished — as if the design ran out of ideas before it reached the ground. A bold geometric floor does the opposite: it signals that the space was deliberately considered, and that confidence shift actually changes how visitors (and you) perceive the room. For a small bathroom interior on a budget, this is one of the highest-impact cosmetic changes available.
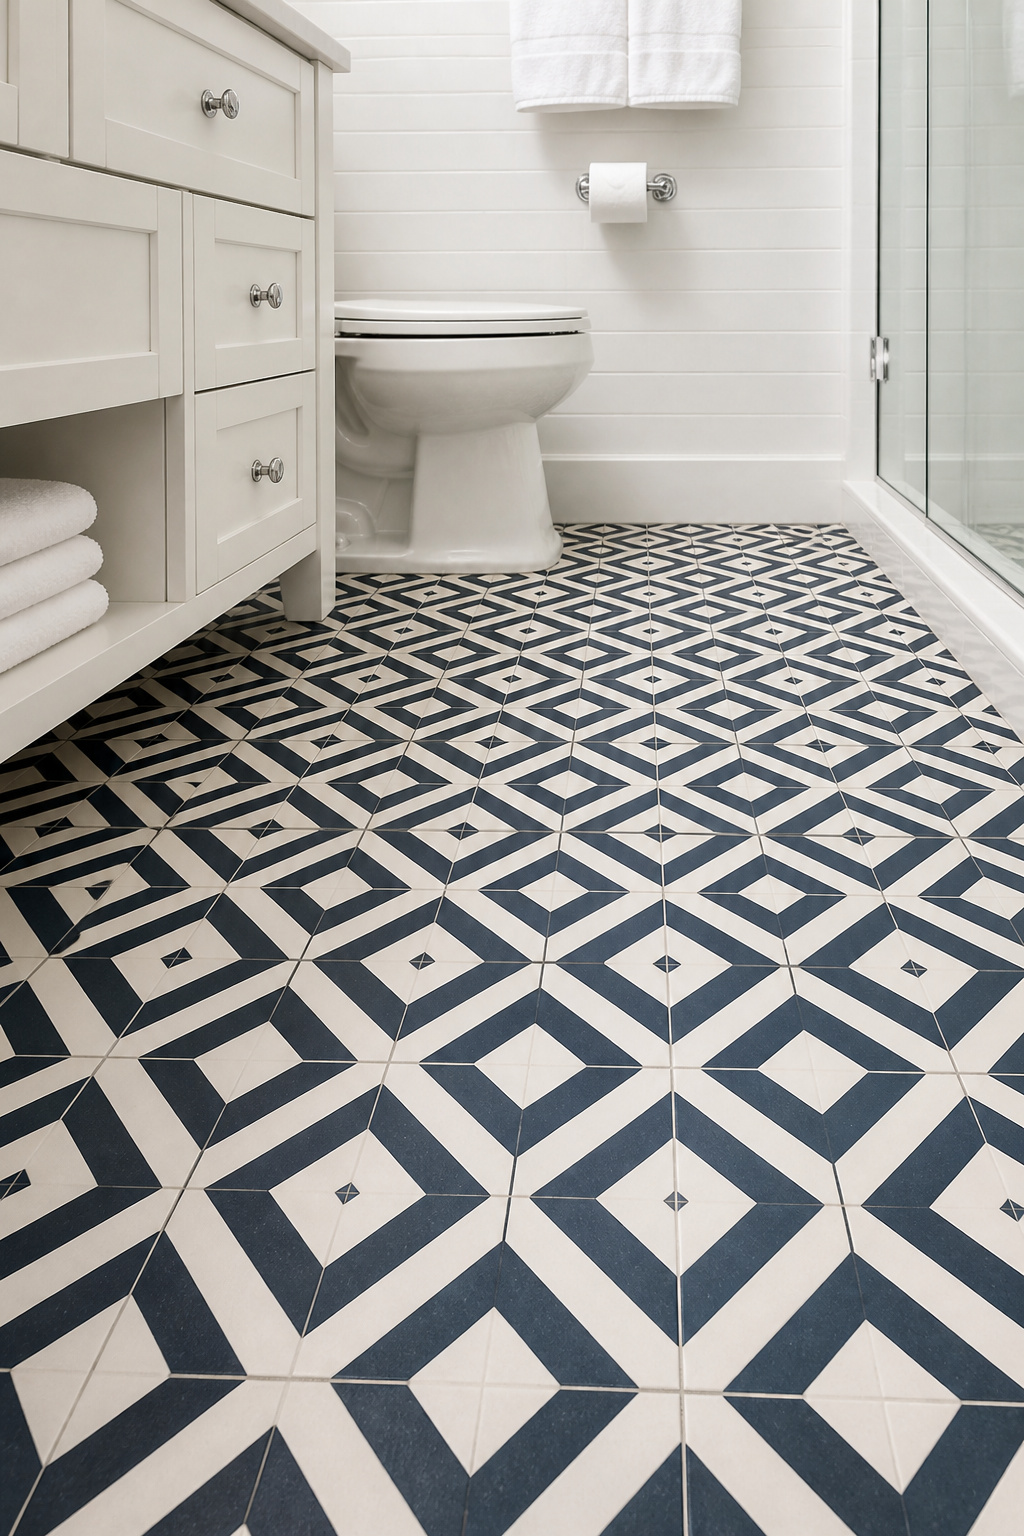
The key for small bathrooms is scale. Tile patterns with a repeat larger than 8 inches can look unresolved in a 40 square foot room — you see less than one full repeat, which reads as a fragment rather than a pattern. The safe range for a small bathroom floor is 2×2 to 8×8 inch tiles. Hexagonal tile works particularly well here: 2-inch or 4-inch hex has no strong directional pull, suits any room shape, and reads as classic rather than trendy. A diagonal setting (square tiles at 45 degrees) is another reliable choice that subtly widens the perceived floor area by directing the eye to the corners rather than the walls.
Budget-wise, encaustic cement tile is beautiful but demanding: $8–$25 per square foot, requires sealing before and after grouting, and will stain if you’re not diligent. Porcelain encaustic-look tiles from Floor & Decor or similar retailers deliver the same muted geometric patterns at $3–$12 per square foot with none of the maintenance overhead — virtually impervious to moisture and requiring no sealing at all. For a broader look at what’s possible with tile, these bathroom tile designs cover the full spectrum.
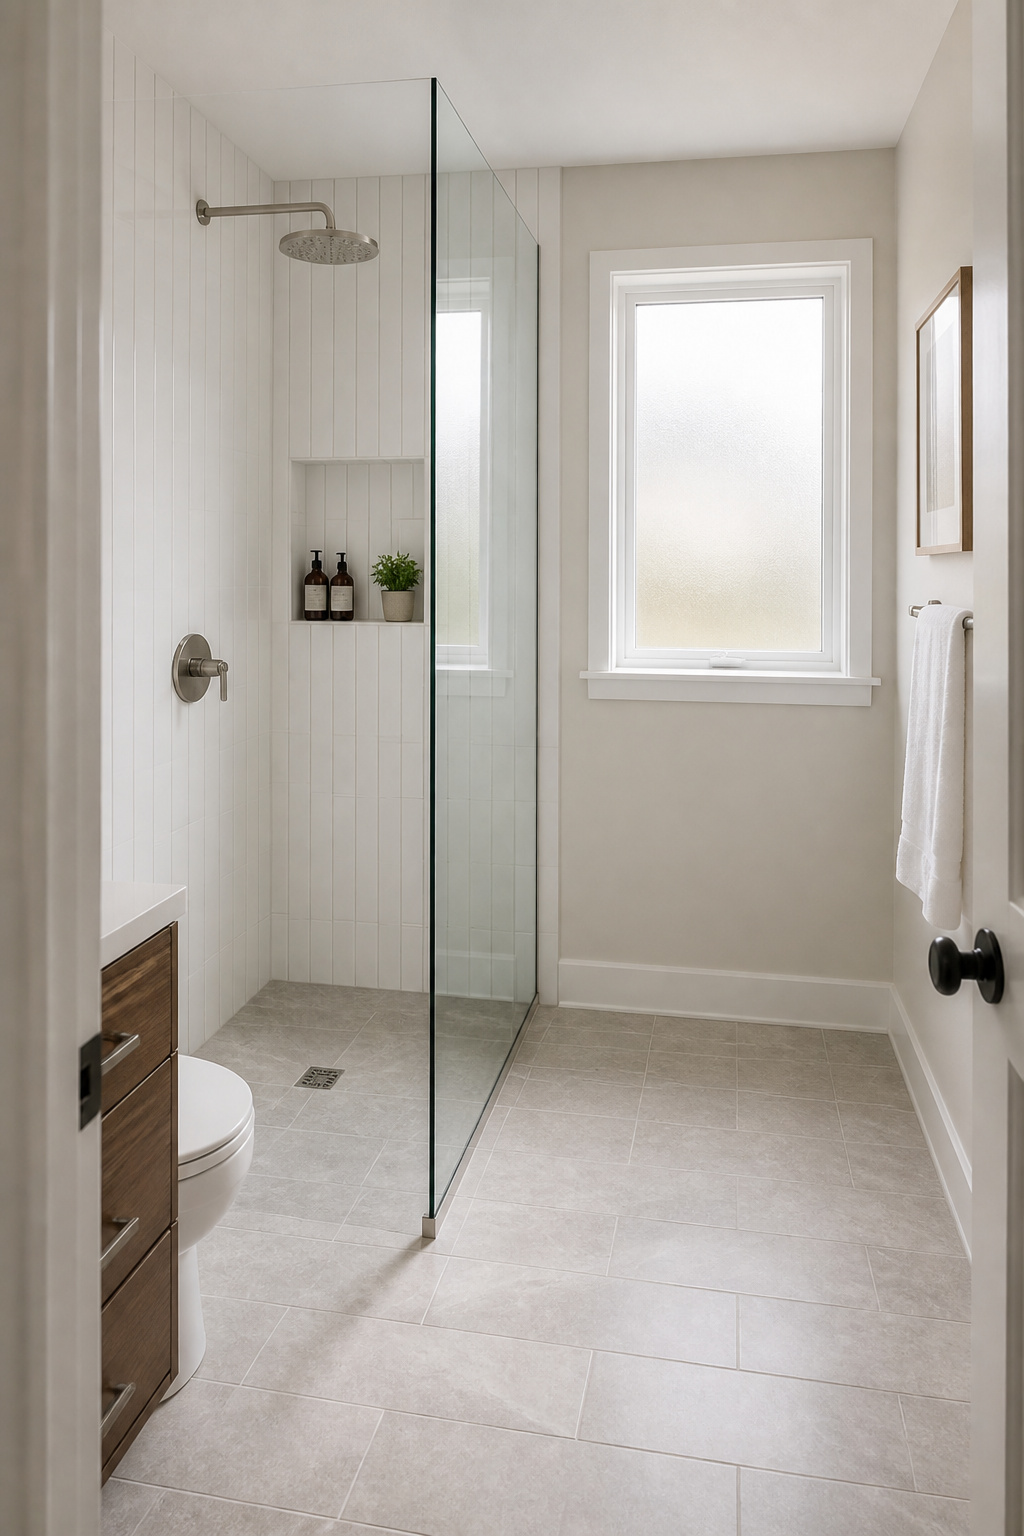
12. Pedestal Sink Styling That Defines Small Bathroom Interior Character
A pedestal sink is a study in trade-offs. On one side: a lighter, more open floor plan — the pedestal footprint is typically 18–20 inches of depth versus 21–22 for a vanity cabinet, and the space beneath stays visually open. On the other: you lose the vanity cabinet entirely, and everything that was living in those drawers needs to find a new home. The pedestal sink wins in a small bathroom interior only if you’ve sorted out the storage equation beforehand.
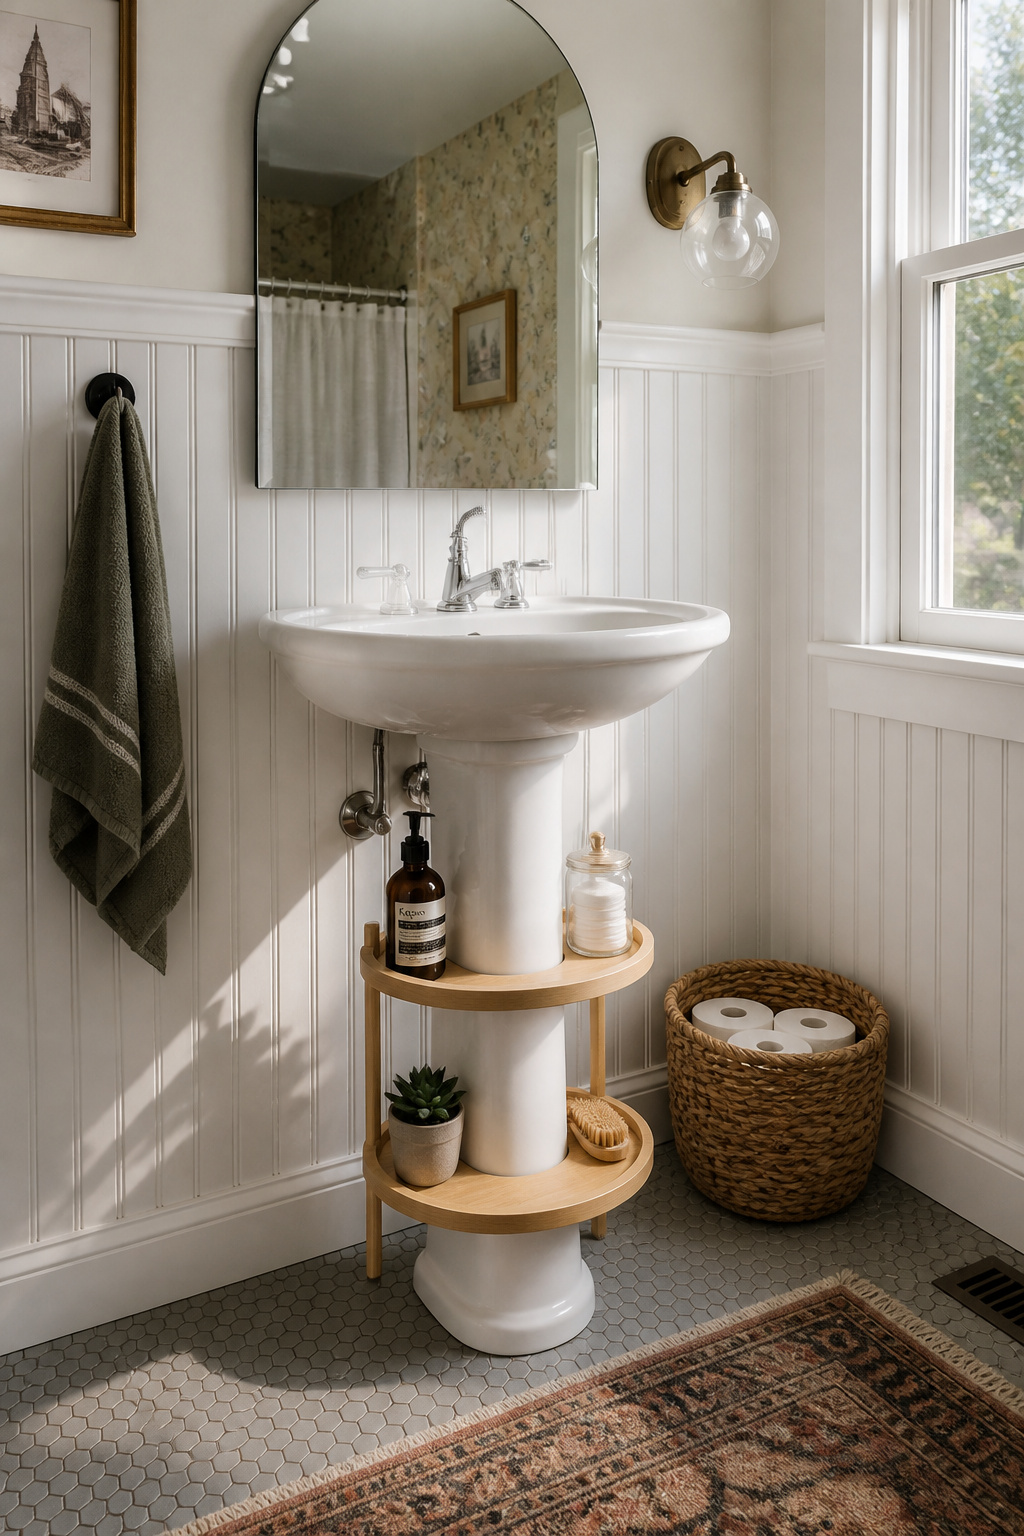
Style options have expanded considerably. The classic full-column pedestal (24–32 inches wide) suits period homes and traditional bathrooms — the column conceals all plumbing and creates a furniture-like presence. Modern slim pedestals (18–22 inches wide, small bracket concealing only the trap) suit contemporary minimalist spaces and are particularly suited to powder rooms under 30 square feet. The semi-pedestal wall-hung style — mounted to the wall with a decorative bracket — is the cleanest option of all and the easiest to keep clean underneath. For more styling directions, there are some genuinely good easy bathroom vanity ideas for a quick upgrade that complement the pedestal format.
Under-pedestal storage doesn’t have to look like an afterthought. IKEA’s RAGRUND sink shelf ($25, white bamboo) is specifically designed to wrap around a pedestal column and provides daily-use item storage at waist height. Slim stackable drawers (8–10 inches wide) tuck alongside the column without looking out of place. A fabric skirt on a tension rod around the base is the oldest trick in the book, and in the right setting — a vintage bathroom with a classic column pedestal — it looks genuinely charming.
13. Frosted Glass Window or Skylight to Flood the Room With Light
Of all the things that can transform a small bathroom interior, natural light does it most dramatically and for the least money. Artificial lighting is static and limited in spectrum. Natural light shifts through the day, fills the room differently in morning versus afternoon, and makes every other design element — the tile colour, the paint, the towels — look as it was intended rather than under the yellowish cast of an incandescent bulb.
The cheapest intervention is frosted window film. For $20–$30 per standard bathroom window (approximately 18×24 inches), you get complete privacy while preserving full light transmission. Self-adhesive versions are permanent-ish and re-applicable; static cling versions are completely removable and take the film with you when you leave. For renters, this is a genuine upgrade that costs less than a dinner out and takes 20 minutes with a squeegee. One refinement worth knowing: frosting only the lower half of the window (the part that matters for privacy) and leaving the upper half clear maximises light entry while blocking the relevant sightline from outside.
For bathrooms with no exterior window at all, tubular skylights (solar tubes) are worth serious consideration. Velux and Solatube make 10- and 14-inch-diameter reflective tubes that channel daylight from a roof dome through the ceiling — no structural framing changes required, unlike a traditional skylight. Total installed cost runs $750–$1,500, which includes the unit ($200–$500) and installation. It’s not cheap, but in a dark windowless bathroom the effect is remarkable. That quality of natural light cannot be replicated artificially.
14. Statement Mirror That Transforms Your Small Bathroom Interior
A statement mirror does something a piece of artwork in the same position cannot: it reflects the room back at you, doubling the light and creating a second visual plane that makes the bathroom feel deeper. The best statement mirrors in a small bathroom combine size (big enough to be a visual anchor) with shape (interesting enough to replace the need for additional wall decor). Arched, circular, and sunburst mirrors all work here because their shapes contrast with the angular geometry of tiles and fixtures — the eye notices the difference and the room immediately feels more considered.
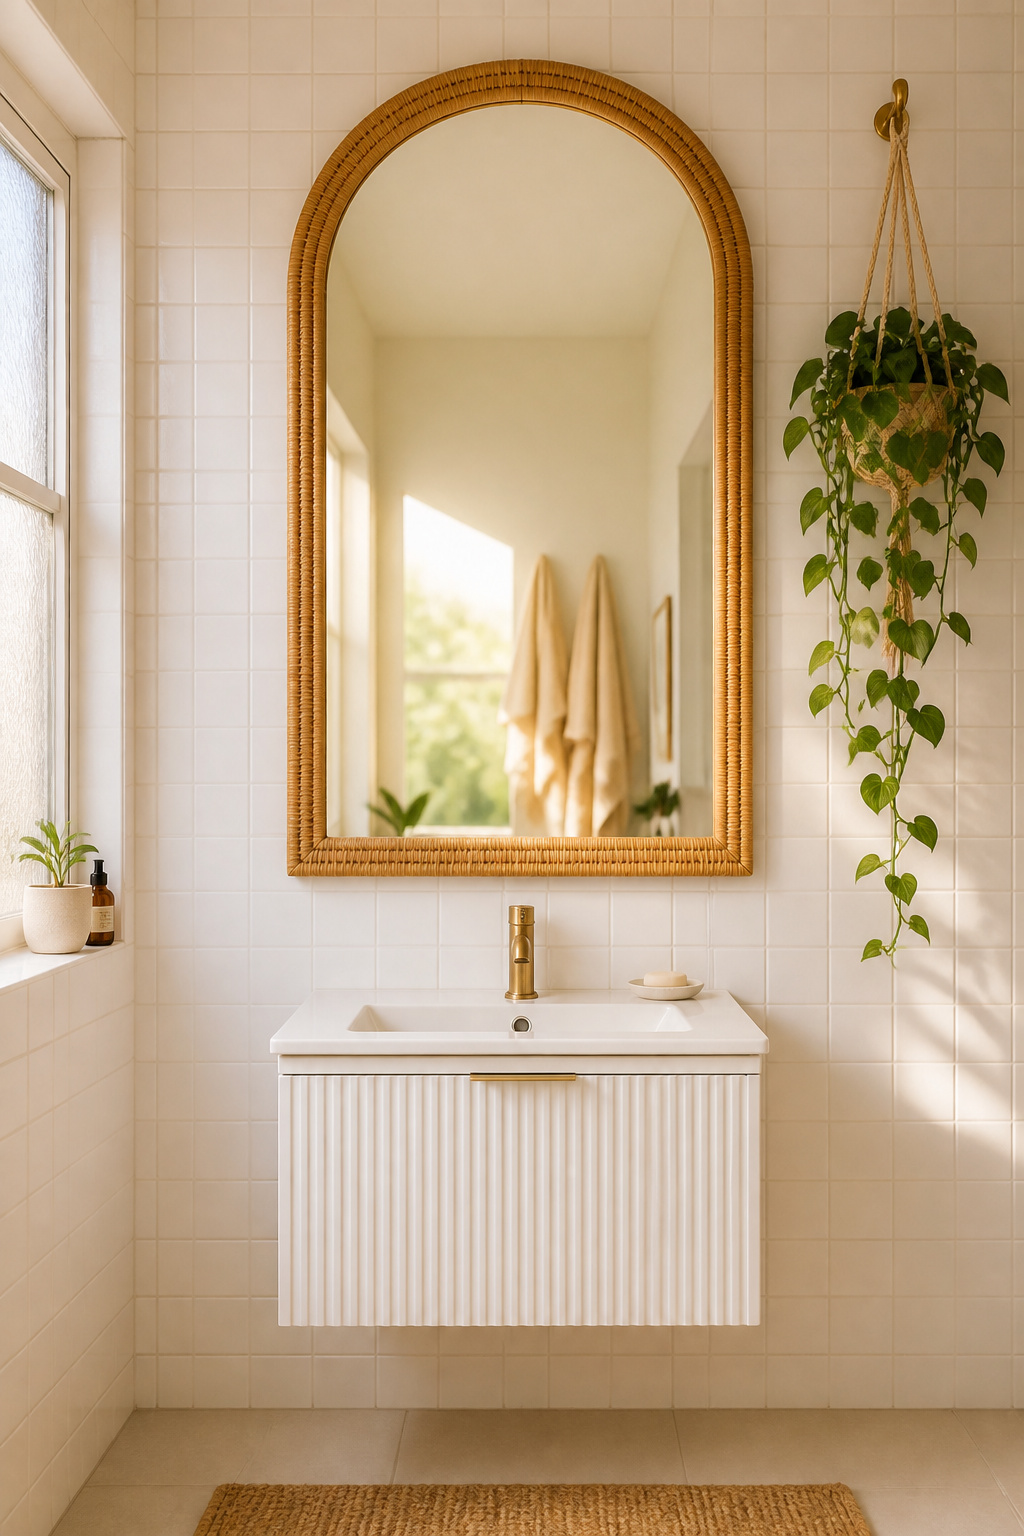
Arched mirrors are particularly forgiving: the curved top softens the room’s corners and suits everything from modern-minimal to vintage-rustic. An oversized arched mirror above a pedestal sink or floating vanity creates a focal point that draws the eye across the full length of the room, making it feel larger and more intentional. Sunburst and starburst styles are more of a statement — better in a powder room or as the sole decorative element in a bathroom that doesn’t want anything else on the walls.
The good news is this doesn’t need to be expensive. Thrift stores and estate sales regularly sell large ornate mirrors for $20–$80 — a can of spray paint ($8) in black, gold, or antique white updates any frame immediately. Facebook Marketplace is worth checking before buying new. And for a DIY upgrade, a basic frameless mirror from IKEA ($149 for the HOVET at 78×24 inches) with a simple wood batten frame made from 1×2 pine lumber (under $30 in materials) produces a custom-looking result for a fraction of retail. Once the mirror is in place, the bathroom lighting over mirror becomes the natural next consideration — the right light makes the whole combination sing.
15. Ceiling-Height Slim Storage Tower for the Unused Corner
Most small bathrooms are using about 60% of their vertical storage potential. The surfaces at eye level and below get the attention; the wall space between the top of the medicine cabinet and the ceiling is almost always empty. A slim freestanding tower — 7–10 inches deep, 12–16 inches wide, and 60–72 inches tall — occupies a footprint smaller than a book while adding more storage than most people expect.
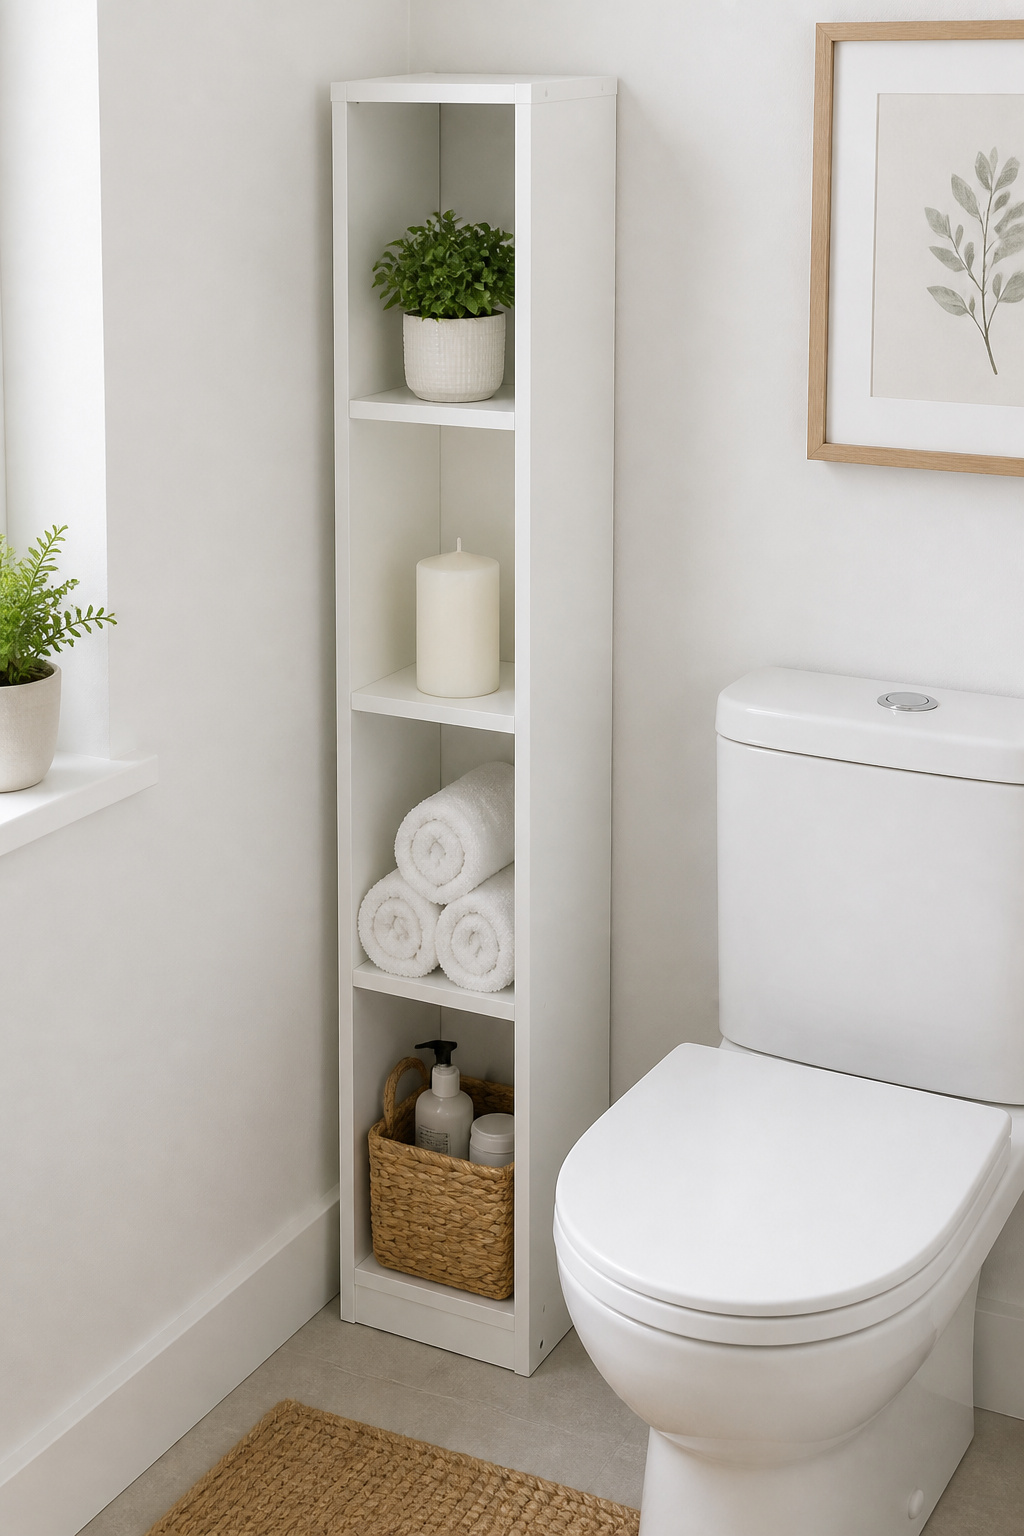
Corners are the best location for these units because corner floor space is typically wasted anyway. Freestanding towers are renter-friendly (no installation required), and quality options exist across a wide price range: $50–$350 depending on material and height. A slim 39×8×8-inch unit fits alongside a toilet or in a corner with a footprint small enough to feel like it was always there. Also, the vertical form draws the eye upward — the same principle that makes tall bookcases make rooms feel bigger. The bathroom storage ideas for small spaces guide has more options if a tower doesn’t suit your floor plan.
The styling principle that makes these work: use the lower shelves (below eye level) for storage — toilet paper, hand towels, toiletries in baskets — and the upper shelves (above eye level) for display. A plant, a candle, a small print. The rule is simple: if you wouldn’t let someone photograph it on the shelf, it goes in a basket or behind a door. Wall-anchor any tower under 10 inches wide, especially in a bathroom — steam and condensation can affect stability over time, and the fix is two screws and a wall plug.
Choosing the Right Small Bathroom Interior Direction for Your Home
Before spending anything, spend ten minutes honestly assessing your space. Stand in the bathroom and ask three questions. First: is the door swing eating significant floor space? If yes, that’s the first fix — a pocket door or reversed swing costs far less than any decorative upgrade and immediately changes how the room functions. Second: is the room genuinely dark? If natural light is the limiting factor, a frosted film upgrade or a tubular skylight should come before paint or tile. Third: what’s the highest-impact single change available to you right now?
For structural changes, the walk-in shower conversion typically delivers the most dramatic shift in how the room feels day-to-day. For cosmetic changes, a large mirror upgrade or a monochromatic repaint are the two that return the most per pound spent. For storage changes, a floating vanity is hard to beat if your current vanity is floor-standing.
And if you’re a renter or a first-timer looking for weekend projects: replace the mirror (costs $20–$150, no tools beyond a drill), add frosted window film ($30 and 20 minutes), and swap the hardware — towel bar, toilet roll holder, hooks — for a cohesive matching set in one finish ($30–$100 for a full set). These three changes touch every corner of the room and transform the feeling without touching a single tile. A smart small bathroom interior doesn’t ask for much. It asks for the right things, applied deliberately.