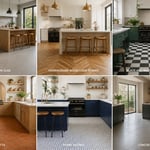
Picture this: you walk into your kitchen every morning and feel that instant lift – the way sunlight dances across pristine white cabinets, how the space feels both expansive and welcoming, and that sense of calm that comes from a perfectly curated space. White kitchens aren’t just Instagram-worthy; they’re the foundation for creating a room that works beautifully for real life. Whether you’re scrambling eggs for the kids before school or hosting friends for a weekend dinner party, these spaces adapt to every moment.
But here’s what I’ve learned after helping hundreds of homeowners transform their kitchens on a budget: creating stunning white dream kitchen ideas doesn’t require a designer’s budget or a complete gut renovation. Smart choices about where to splurge and where to save, combined with some creative DIY solutions, can give you that magazine-worthy look without the magazine-worthy price tag. From choosing the right cabinet style to layering textures that prevent your space from feeling sterile, every decision builds toward a kitchen that’s uniquely yours.
Choose Classic White Shaker Cabinets for Timeless Appeal
When clients ask me about the most foolproof cabinet choice for their white dream kitchen ideas, I always point them toward shaker style. These five-piece doors with their clean recessed panels and simple lines have been my go-to recommendation for over a decade – not because they’re trendy, but because they’re genuinely timeless. I’ve watched kitchen styles come and go, but shaker cabinets just keep looking fresh and relevant.
The beauty of shaker cabinets lies in their chameleon-like ability to adapt. Swap out the hardware for sleek black pulls, and suddenly you have a modern farmhouse vibe. Add brass knobs and you’re leaning traditional. This flexibility means you can update your kitchen’s personality without replacing the cabinets – a money-saving trick that’s served my readers well over the years.
• Budget tip: Look for ready-to-assemble (RTA) shaker cabinets online – you can save 40-60% compared to custom options.
• DIY upgrade: Paint existing cabinets in a crisp white like Benjamin Moore’s “Cloud White” for an instant refresh.
• Hardware hack: Mix knobs and pulls for a custom look that costs less than all matching pieces.
The foundation of great cabinetry leads us naturally to consider more contemporary options that suit modern lifestyles.
Opt for Sleek White Flat-Panel Cabinets in Modern Designs
Look closely and you’ll notice the subtle power of flat-panel cabinets in creating that coveted minimalist aesthetic. These smooth, unadorned surfaces reflect light beautifully, making even compact kitchens feel twice their actual size. After working with dozens of homeowners in smaller spaces, I’ve seen how this simple cabinet style can completely transform the feeling of a room.
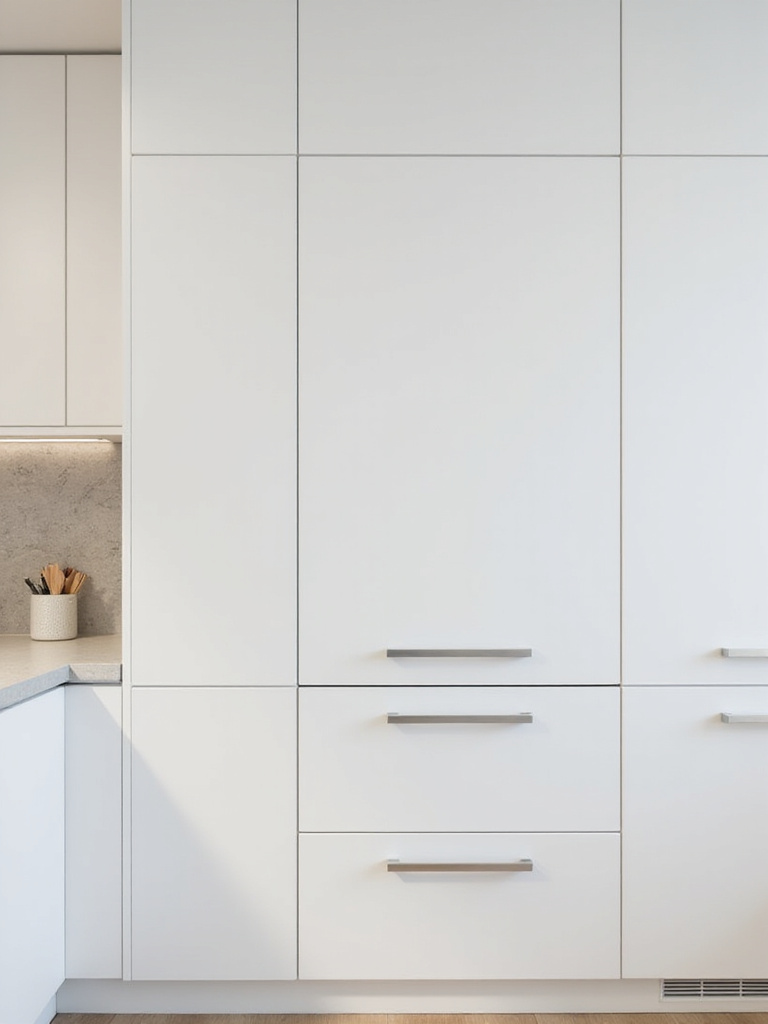
What makes flat-panel cabinets particularly smart for white dream kitchen ideas is their ability to showcase other design elements. Without raised details competing for attention, your beautiful countertops, statement backsplash, or carefully chosen hardware becomes the star. Plus, the smooth surfaces are incredibly easy to clean – no grooves or details to trap grease and grime.
- Material matters: High-gloss laminate gives you that expensive lacquer look for a fraction of the cost.
- Installation insight: Ensure perfect alignment during installation – any imperfections show more on smooth surfaces.
- Styling secret: Add visual interest through varied cabinet heights rather than door details.
Beyond the vertical planes of cabinetry, our attention naturally shifts to the horizontal surfaces that define the workspace.
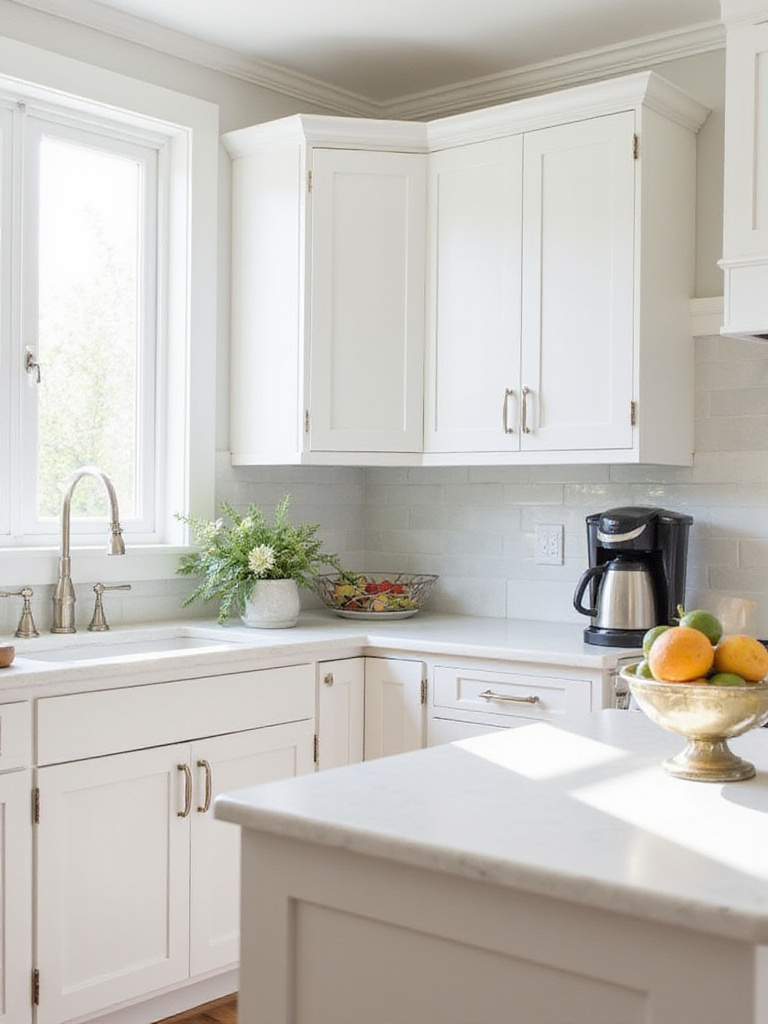
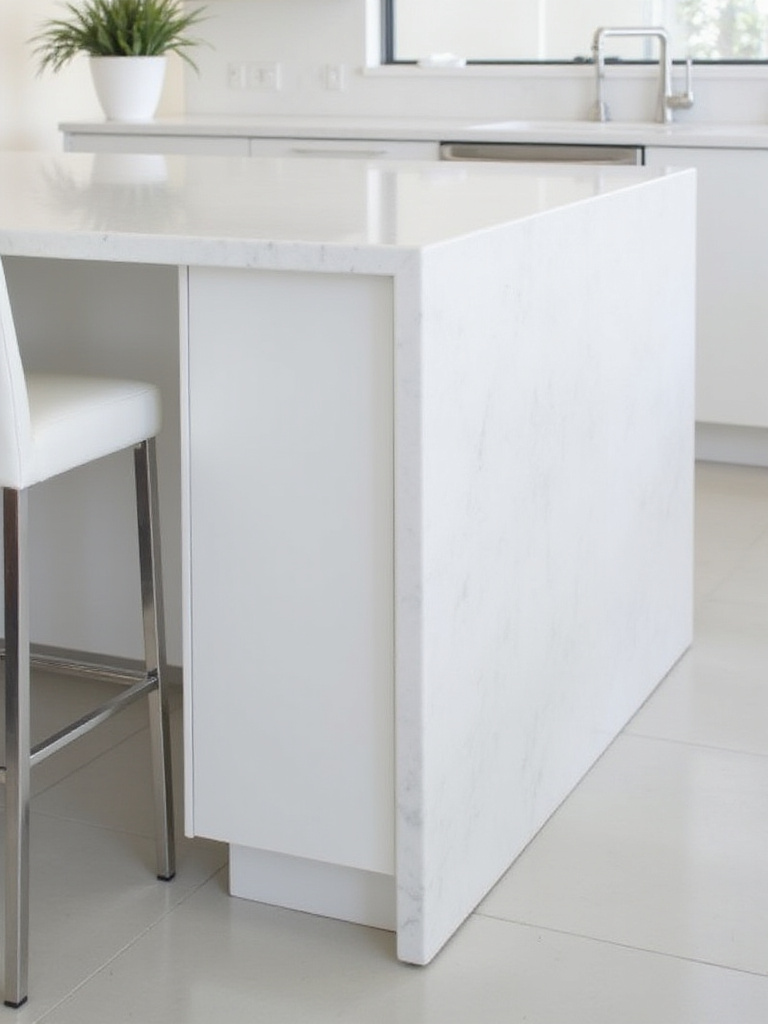
Install Durable White Quartz Countertops for Easy Maintenance
After years of helping homeowners navigate countertop choices, I can tell you that quartz consistently delivers the best combination of beauty and practicality for white kitchens. Unlike natural stone that requires regular sealing and careful maintenance, quartz gives you that gorgeous, consistent look while standing up to everything from red wine spills to kids’ art projects without breaking a sweat.
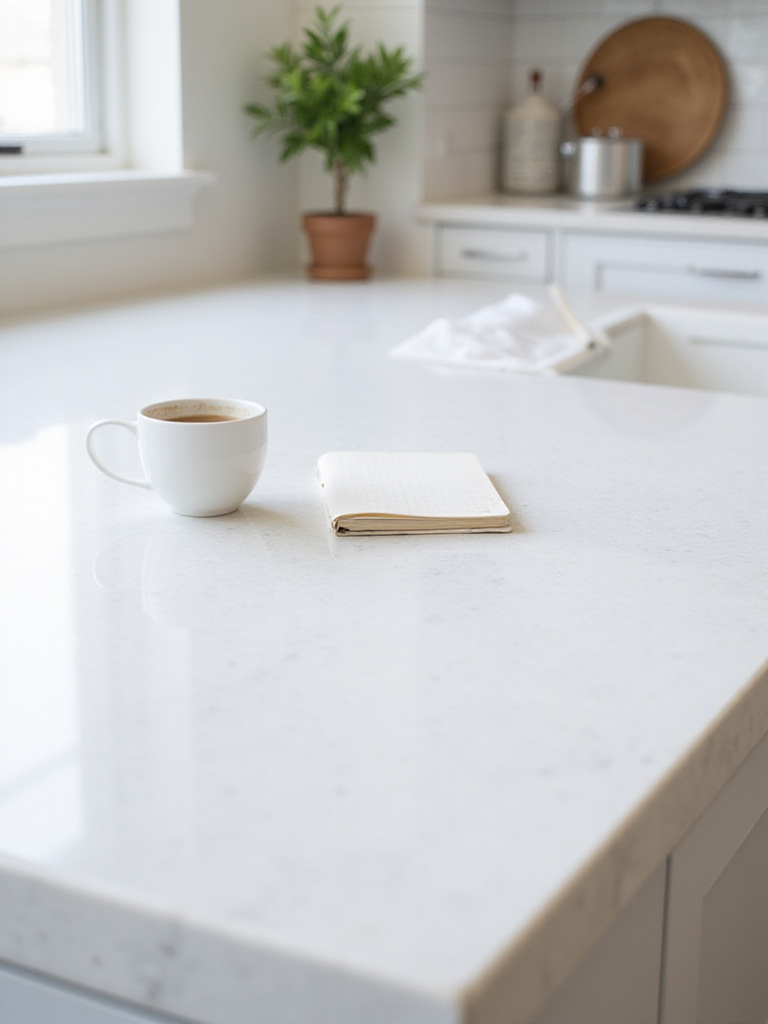
The non-porous surface means you can wipe up spills with just soap and water – no special cleaners required. I’ve had clients with quartz countertops for over five years who tell me they still look brand new. For busy families or anyone who actually cooks (and spills) regularly, this durability translates to real peace of mind and long-term savings on maintenance.
- Color consistency: Unlike natural stone, every slab looks identical – no surprises during installation.
- Edge options: A simple eased edge keeps costs down while maintaining a clean look.
- Remnant savings: Check fabricators for remnant pieces perfect for smaller islands or bathroom vanities.
For those drawn to natural materials and willing to embrace their unique characteristics, marble offers unmatched beauty.
Embrace Luxurious White Marble Countertops (Understand Care Needs)
The interplay between light and natural marble creates something truly magical in white dream kitchen ideas – those subtle veins catch and reflect light throughout the day, creating an ever-changing canvas that no manufactured material can replicate. But let me be honest with you: marble requires a relationship, not just a purchase. I always tell clients that choosing marble means accepting its quirks as part of its charm.
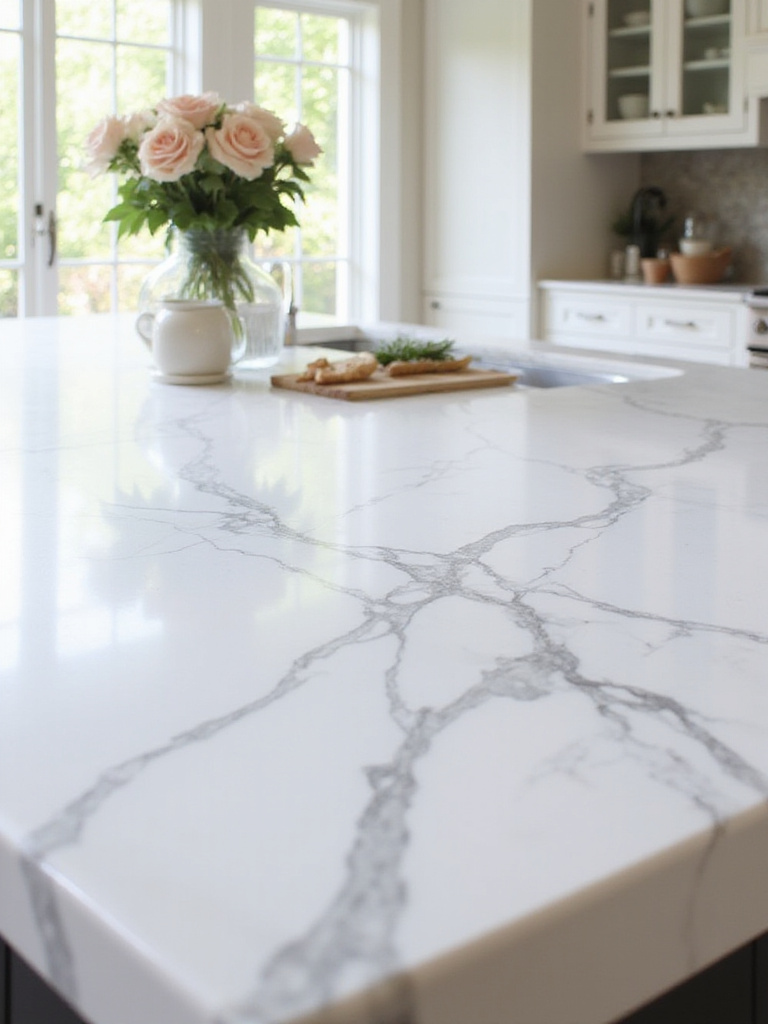
Yes, marble etches when it meets acidic substances like lemon juice or wine. Yes, it needs regular sealing. But here’s what the maintenance warnings don’t tell you: many homeowners find these imperfections become part of the stone’s story. The patina that develops over time often adds character rather than detracting from beauty. If you’re someone who stresses over every mark, marble might not be your best choice. But if you appreciate natural materials that age gracefully, it could be perfect.
• Marble selection: Carrara offers classic beauty at a lower price point than Calacatta.
• Protective measures: Use cutting boards religiously and wipe spills immediately.
• Realistic expectations: Embrace the patina – it’s part of marble’s natural beauty.
From countertops, we move to the walls where backsplashes provide both protection and style opportunities.
Select Simple White Subway Tile for a Clean Backsplash
What surprises clients most is how this humble tile – originally designed for durability in New York’s subway system – has become the backbone of timeless kitchen design. I’ve installed subway tile in kitchens ranging from tiny apartment galley spaces to sprawling suburban layouts, and it works beautifully in every setting. The rectangular shape naturally draws the eye horizontally, making kitchens appear wider and more expansive.
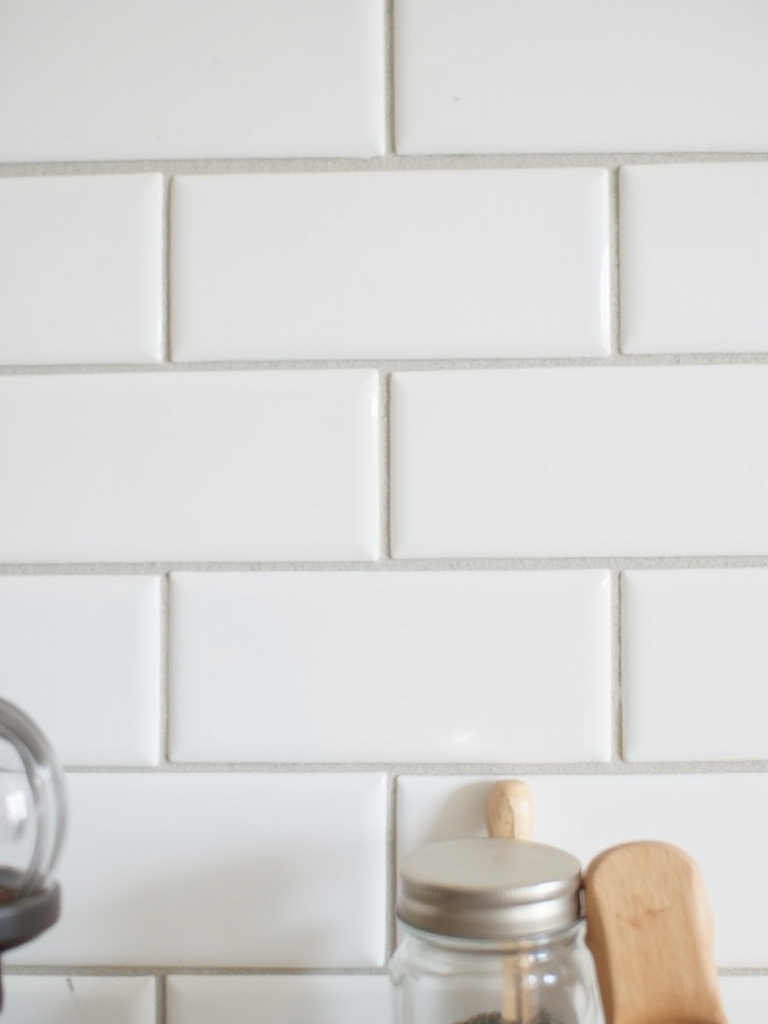
The beauty of subway tile lies not just in its affordability (you can tile an entire backsplash for under $200 in materials), but in its incredible versatility. The grout color alone can completely change the look – white grout for seamless continuity, dark gray for graphic contrast, or even colored grout for unexpected personality. I’ve seen homeowners transform the same basic tile into completely different styles just by changing this one element.
• Layout variations: Try vertical stacking or herringbone patterns for visual interest.
• Grout wisdom: Darker grout hides stains better than pure white.
• Quality matters: Invest in good tile spacers for perfectly even lines.
While classic subway offers timeless appeal, pattern can add sophisticated visual texture to white kitchens.
Add Interest with a Patterned White or Neutral Backsplash Tile
The magic of this approach lies in adding visual complexity without overwhelming your white palette. I’ve worked with homeowners who worried that any pattern might be “too much” in their clean white kitchens, but the right subtle design actually enhances the serene feeling rather than disrupting it. Think geometric hexagons, gentle arabesque curves, or even textured tiles that play with light and shadow.
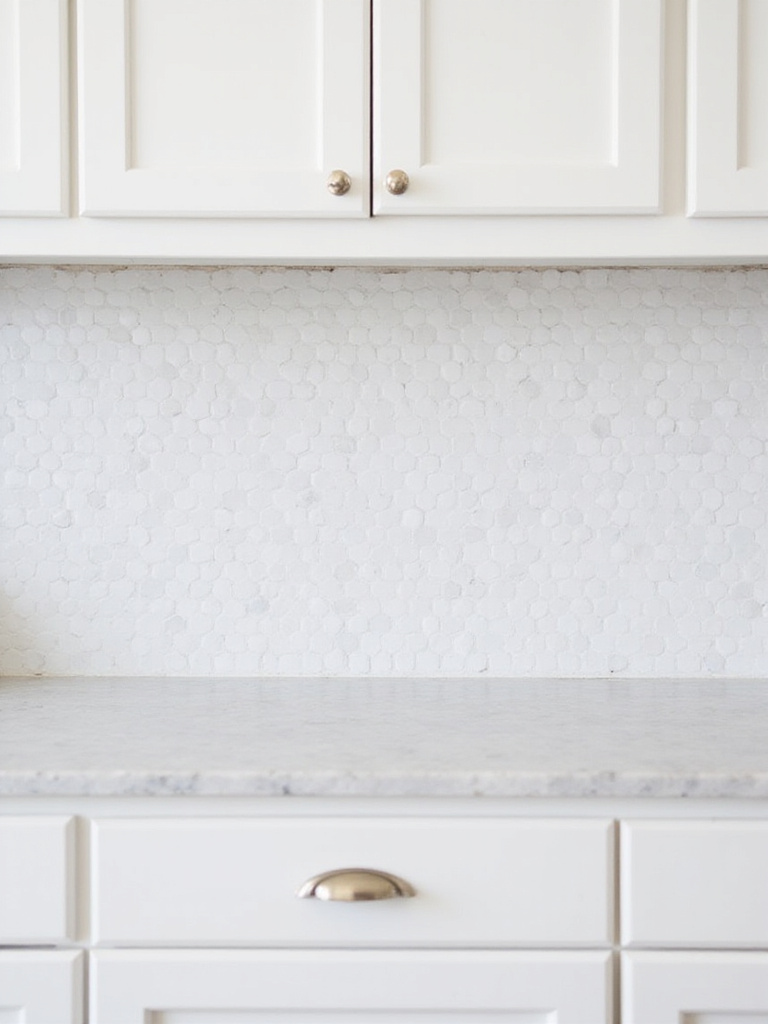
Patterned tiles give you that custom, designer look while often costing the same as basic subway tile. The key is choosing patterns that complement rather than compete with your other design elements. In one recent project, we used white hexagon tiles with the slightest gray veining – from a distance, it read as solid white, but up close, it revealed beautiful depth and interest.
• Scale considerations: Smaller patterns work well in compact kitchens; larger patterns suit spacious areas.
• Sample first: Always view tile samples in your actual kitchen lighting before committing.
• Installation tip: Patterned tiles often require more precise cutting – factor this into your budget.
Now let’s shift our focus to the central gathering spot that often defines the entire kitchen experience.
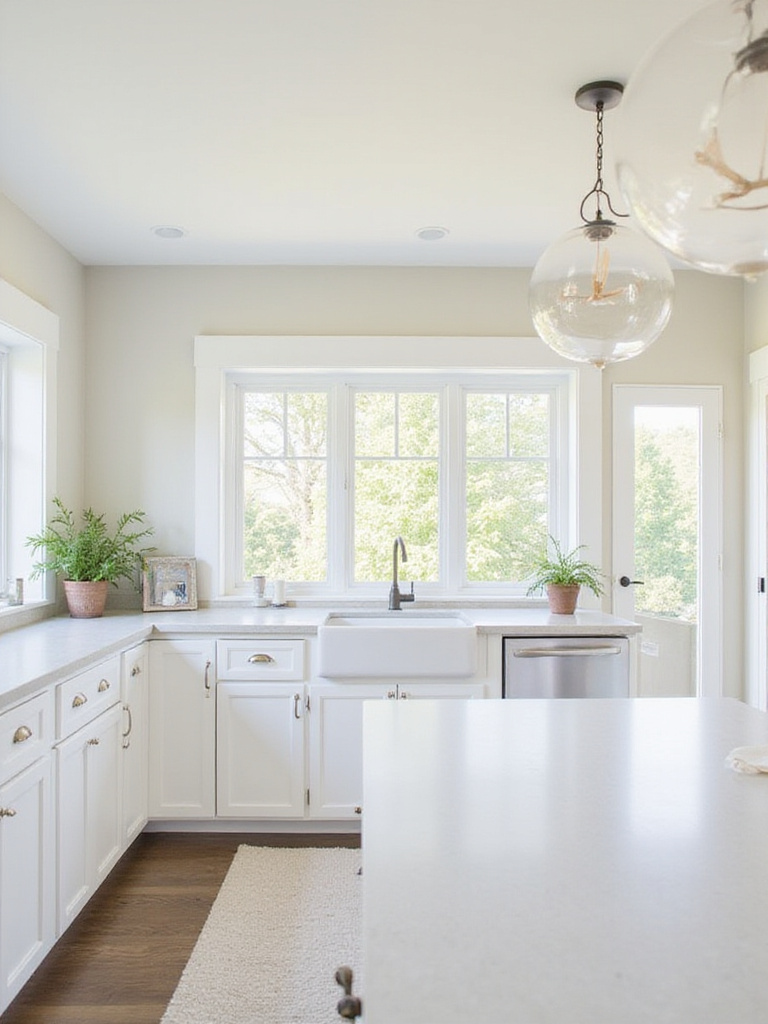
Create a Focal Point with a Large White Kitchen Island
We’ve been working behind the scenes on something special when we design islands – they’re not just extra counter space, they’re the heart of modern family life. A well-proportioned white island naturally draws people in, creating that magical spot where homework happens alongside dinner prep, where morning coffee meets evening wine, and where the best conversations unfold. The scale and bright finish make it impossible to ignore, anchoring your entire design.
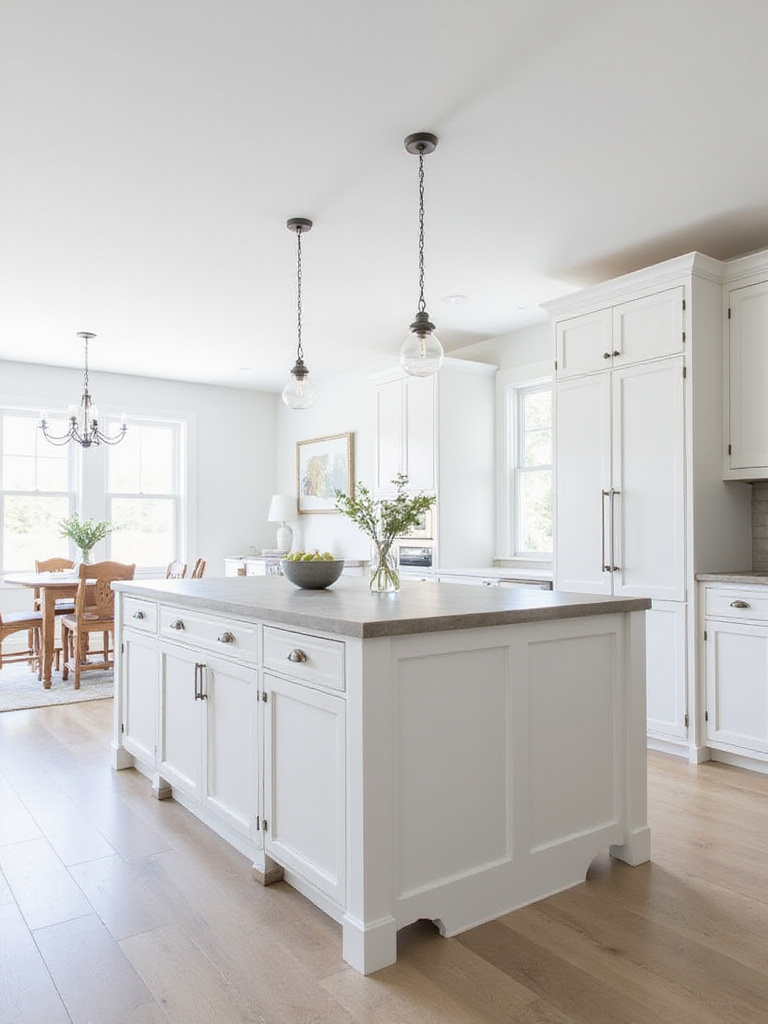
Size matters here, but so does proportion. I’ve seen homeowners cram oversized islands into spaces that can’t support them, creating traffic jams instead of gathering spots. The sweet spot is usually 4 feet by 8 feet for most kitchens – large enough to be functional and impressive, but not so big that you’re constantly walking around it. Remember, you need at least 42 inches of clearance on all sides for comfortable movement.
• Storage maximization: Include deep drawers for pots and pans, shallow ones for utensils.
• Electrical planning: Add outlets on the ends for small appliances and device charging.
• Structural reality: Large islands may require additional floor support – check with a contractor.
With your island in place, designing comfortable seating transforms it from workspace to social hub.
Design Comfortable Seating Areas Around Your Island
Professional stylists approach island seating by first considering how your family actually lives – are you grabbing quick breakfasts on the run, or do you prefer leisurely weekend brunches? The answer shapes everything from seat height to spacing. I always recommend 24 inches of width per person for comfortable seating, though you can squeeze it to 22 inches if needed. Bar-height seating (36-inch counter) works well for quick meals, while counter-height (30-inch) feels more relaxed for longer conversations.
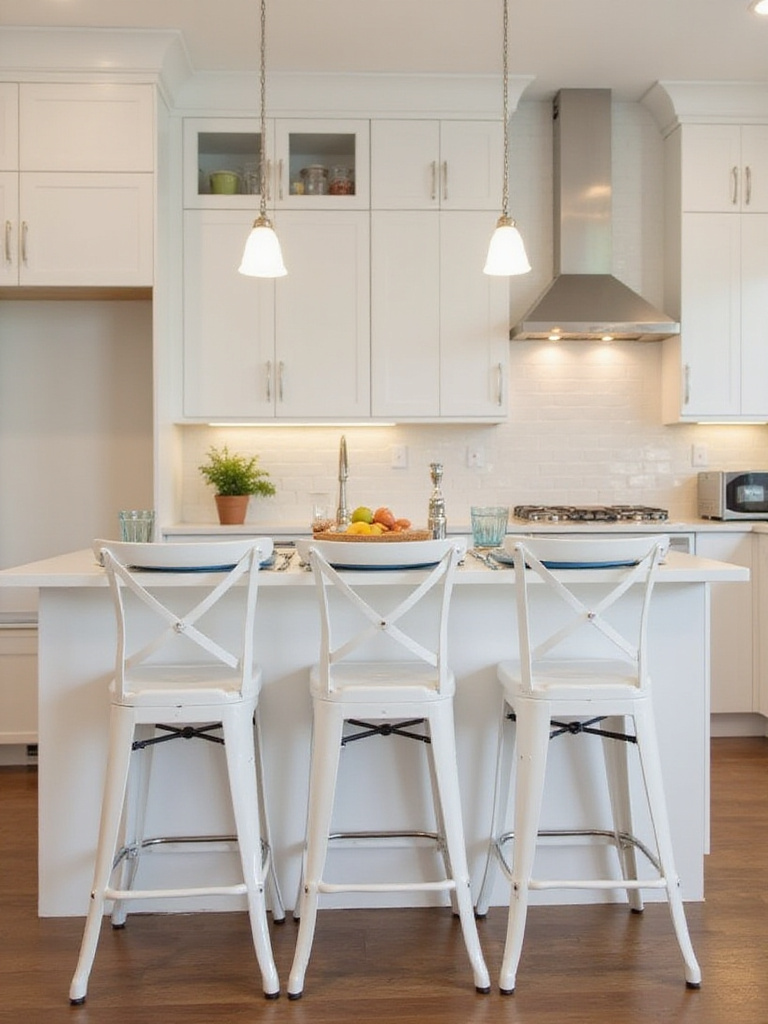
Don’t underestimate the importance of footrests – they’re crucial for comfort, especially for children and shorter adults. I’ve had clients add a wooden footrest rail 18 inches below the counter, and it completely changed how usable their island seating became. Also consider the sight lines: can seated guests easily converse with someone cooking at the stove or sink?
• Stool selection: Backless stools tuck under completely; backed stools offer more comfort.
• Swivel function: 360-degree swivel stools make conversation easier.
• Material durability: Choose easy-to-clean upholstery if you have kids or entertain frequently.
Moving from the island to the foundation beneath our feet, flooring choices dramatically impact the room’s warmth and character.
Warm Up White Kitchens with Light Wood Flooring
Running your hand across natural wood reveals why this material transforms white dream kitchen ideas from potentially sterile spaces into warm, inviting rooms. The organic grain patterns and subtle color variations provide a welcome contrast to the smooth, uniform surfaces of white cabinets and countertops. I’ve watched clients’ faces light up when they see how light oak or maple flooring completely changes the feeling of their space.
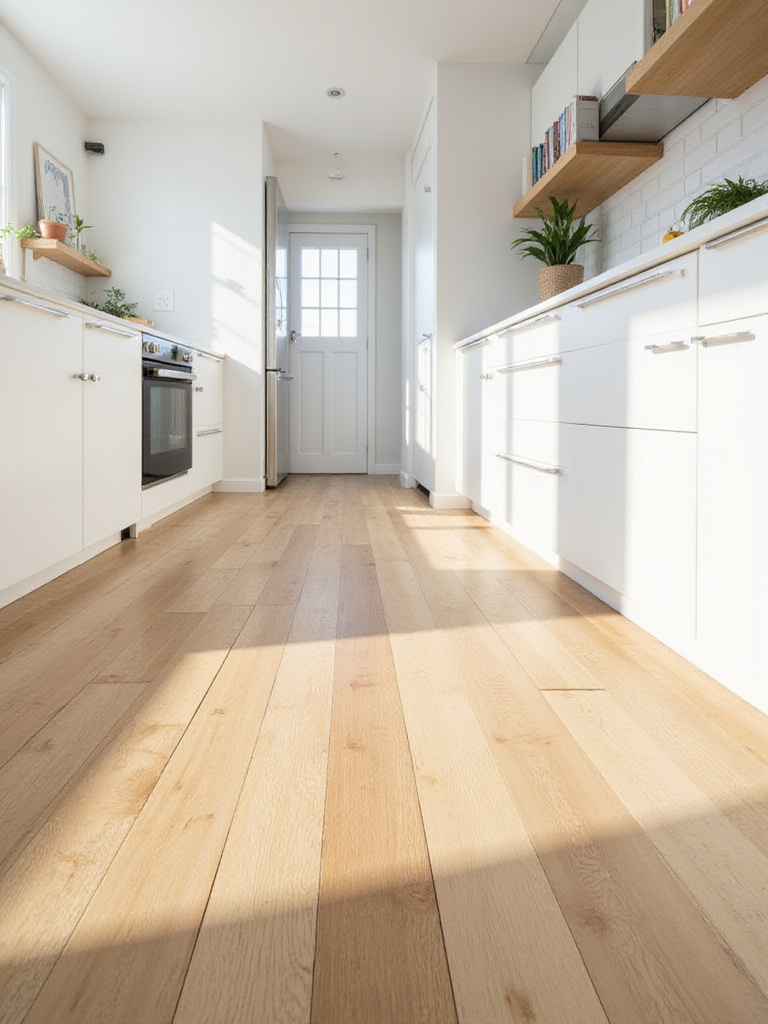
Wood flooring also offers practical benefits beyond aesthetics. It’s naturally antimicrobial, comfortable to stand on for long cooking sessions, and ages beautifully with proper care. While hardwood requires some maintenance, modern polyurethane finishes make it much more durable than previous generations. I often recommend engineered hardwood for kitchens – it gives you the real wood look with better moisture resistance.
• Species selection: White oak offers durability and classic appeal; maple provides lighter, more uniform color.
• Finish options: Matte finishes hide scratches better than high-gloss.
• Installation timing: Install flooring before cabinets for the most professional look.
For those preferring low-maintenance options with contemporary appeal, large format tiles offer compelling advantages.
Choose Large Format Neutral Tiles for a Modern Floor Look
The unexpected benefit of large format tiles comes from their ability to make spaces feel significantly larger through visual trickery. With fewer grout lines interrupting the eye’s path across the floor, even modest kitchens gain a sense of expansiveness that smaller tiles simply can’t achieve. I’ve used 12×24-inch and even 24×48-inch tiles in white kitchens, and the effect is consistently dramatic.
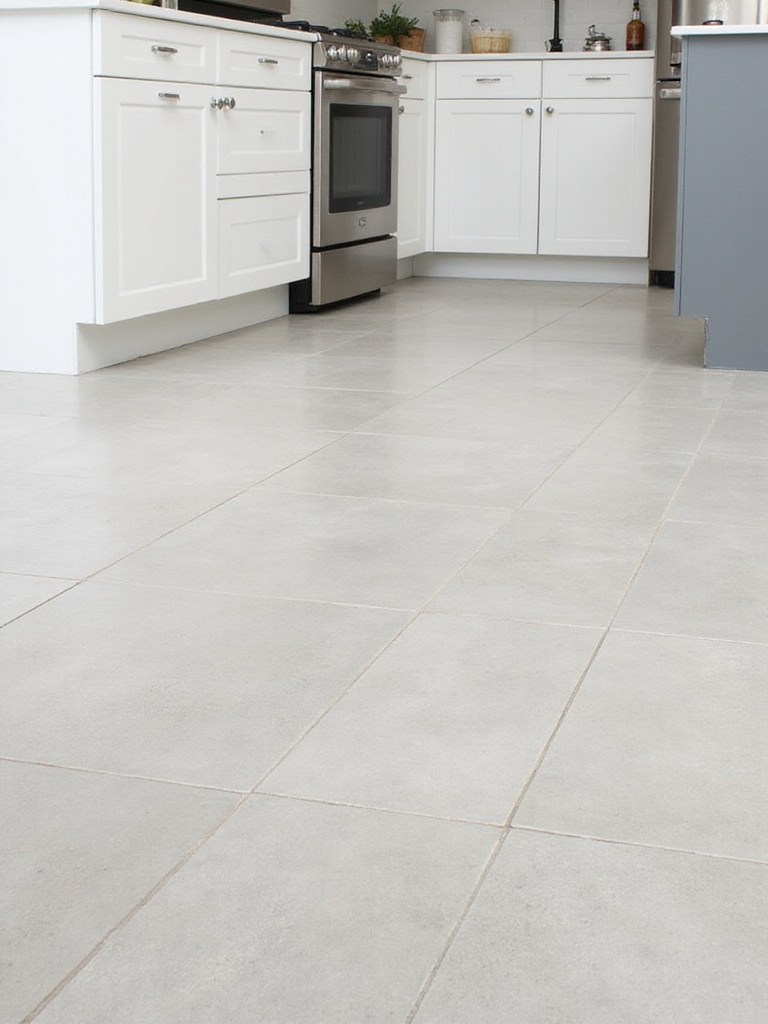
Modern porcelain tiles have come incredibly far in mimicking natural materials – I’ve fooled more than one client with wood-look or stone-look options that offer superior durability and easier maintenance than their natural counterparts. The key is choosing tiles with subtle variation in color and texture to avoid that obviously artificial, too-perfect look.
• Grout considerations: Light gray grout offers the best balance of clean appearance and practicality.
• Layout planning: Start with full tiles in the most visible areas, cutting tiles where they’ll be less noticeable.
• Quality investment: Higher-grade tiles cost more upfront but maintain their appearance longer.
Shifting our attention to the details that truly personalize a space, cabinet hardware offers tremendous impact for modest investment.
Add Gold or Brass Hardware for a Touch of Warm Luxury
What makes this choice particularly smart for white dream kitchen ideas is how warm metals instantly counteract any coldness in the white palette. I’ve seen brass and gold hardware transform kitchens from feeling like sterile laboratories into welcoming, sophisticated spaces. The key is committing fully – mixing metals can work, but it requires a confident hand and careful planning.
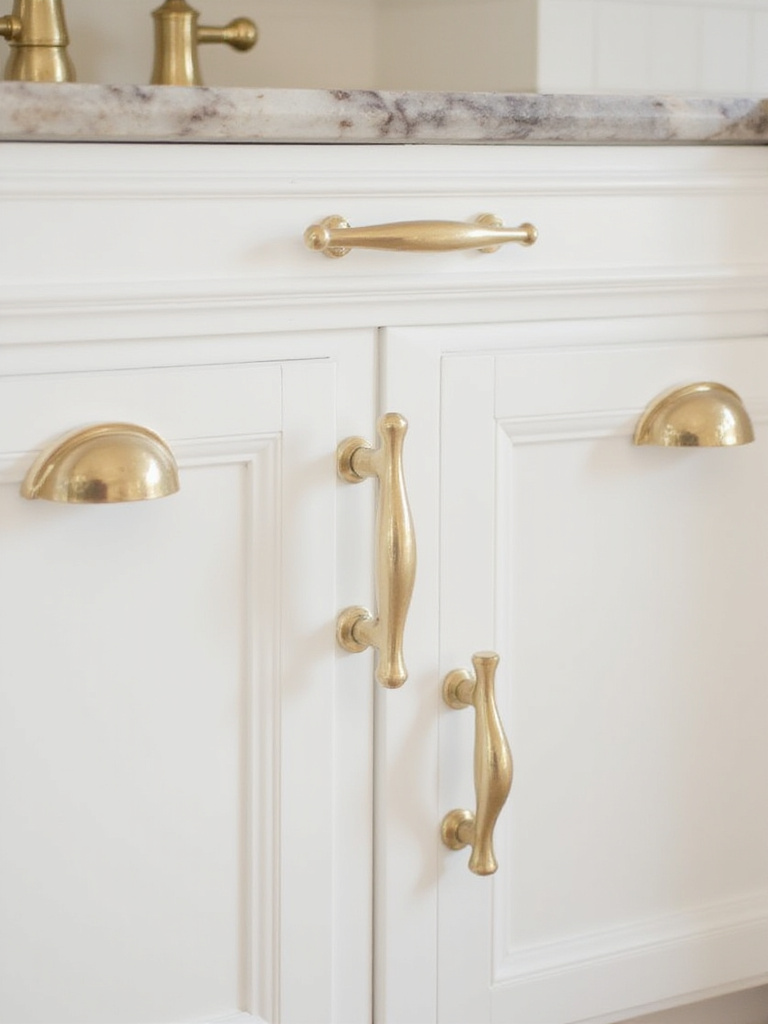
The range of warm metal finishes available today means you can find options for every budget and style preference. Unlacquered brass develops a beautiful patina over time, while lacquered brass maintains its bright finish. Brushed gold offers a more subtle approach, and champagne bronze splits the difference between gold and traditional bronze tones.
• Finish durability: Look for PVD (Physical Vapor Deposition) finishes for superior longevity.
• Coordination strategy: Match your faucet finish to your cabinet hardware for cohesion.
• Budget approach: Splurge on the most visible pieces; save on hidden hardware.
For those drawn to bold contrast and graphic impact, black hardware creates striking definition.
Create Contrast with Bold Black Hardware on White Cabinets
The visual weight balances perfectly when you use black hardware to define the clean lines of white cabinetry. It’s like adding eyeliner to your kitchen – suddenly every cabinet door and drawer front has crisp definition and purpose. I’ve watched this simple change take kitchens from bland to dramatic without requiring any major renovation work.
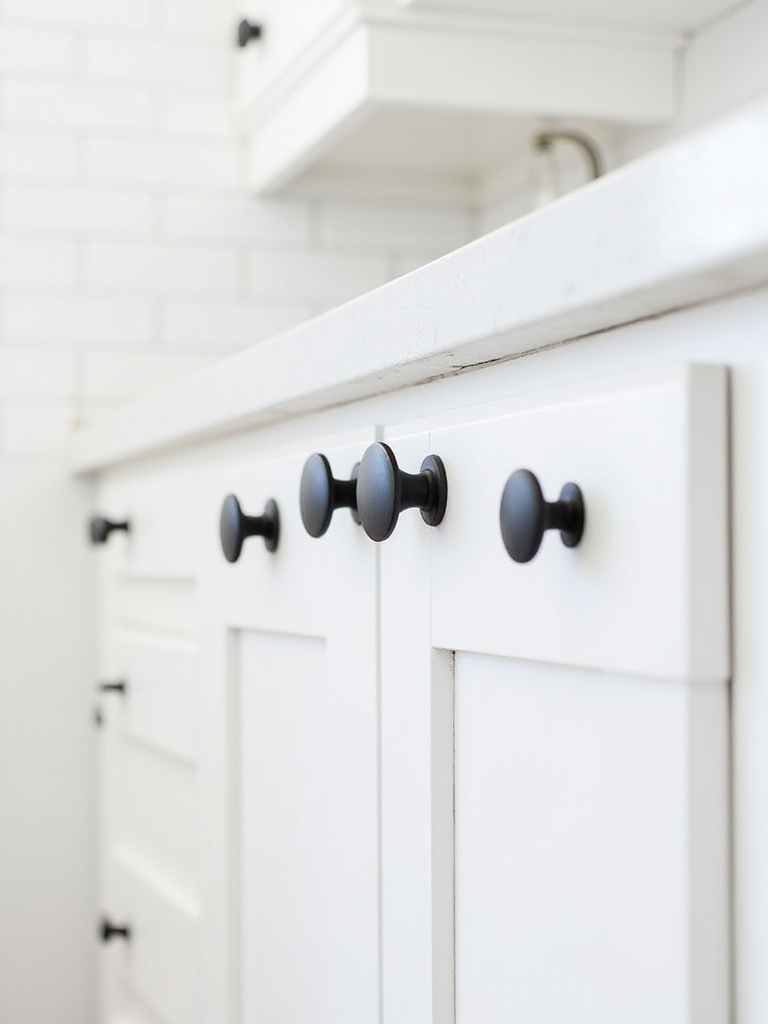
Black hardware works particularly well in white dream kitchen ideas because it photographs beautifully and never looks dated. Unlike trendy colored hardware that might feel tired in a few years, black maintains its graphic appeal indefinitely. The contrast also makes your cabinets appear more custom and expensive, regardless of their actual price point.
• Style variety: Sleek pulls for modern looks, traditional knobs for classic appeal.
• Finish options: Matte black hides fingerprints better than glossy finishes.
• Mixing guidance: Combine knobs on doors with pulls on drawers for varied visual interest.
From cabinet details, we turn our attention upward to lighting that sets the mood and defines the space.
Select Statement Pendant Lights Above Your Island or Table
The finishing touch that elevates the entire look often comes from unexpected lighting choices that reflect your personality while providing essential task illumination. Pendant lights offer the perfect opportunity to introduce color, texture, or metallic accents into your white kitchen without overwhelming the clean palette. I encourage clients to think of pendants as jewelry for their kitchen – they should complement the overall design while adding their own character.
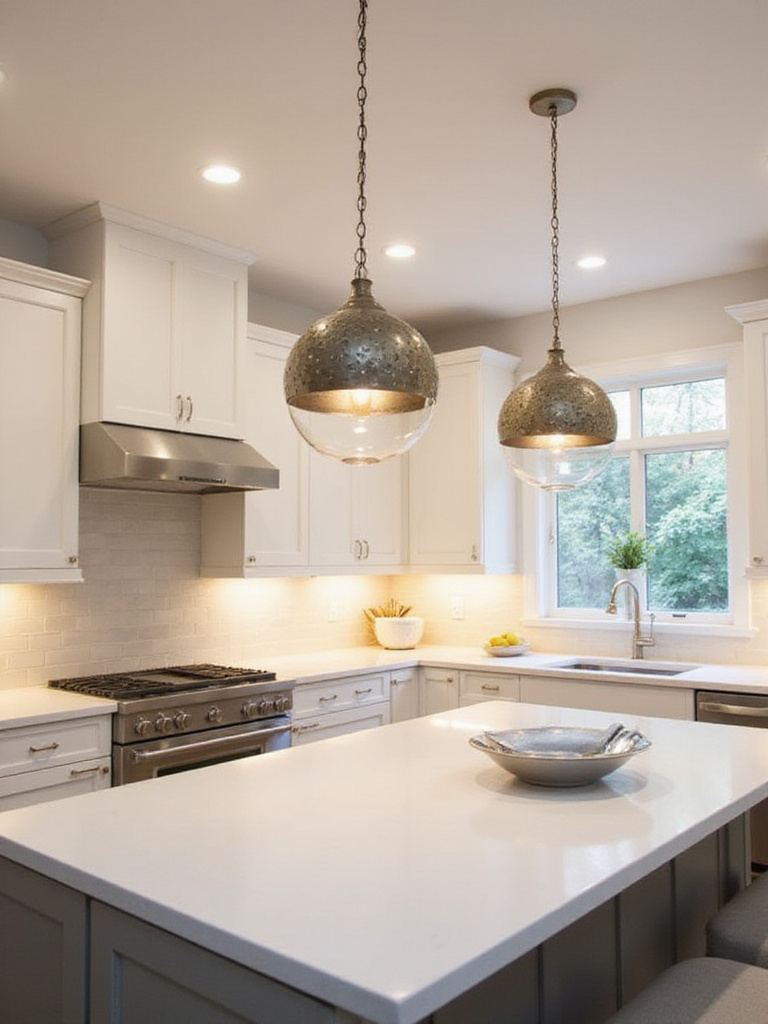
Scale matters enormously with pendant lighting. A common mistake I see is choosing fixtures that are too small for the space – they end up looking like afterthoughts rather than intentional design elements. For a standard 8-foot island, I typically recommend pendants that are 12-15 inches in diameter, hung 30-36 inches above the counter surface.
• Number guidance: Odd numbers (1, 3, or 5) generally look more balanced than even numbers.
• Dimmer necessity: Always install pendants on dimmer switches for versatility.
• Height adjustability: Choose fixtures with adjustable cords for perfect positioning.
Complementing your statement lighting, under-cabinet illumination provides essential task lighting for safe food preparation.
Brighten Workspaces with Essential Under-Cabinet Lighting
Beyond the obvious placement benefits, under-cabinet lighting transforms how your white countertops and backsplash appear throughout the day. LED strips or puck lights eliminate the shadows that overhead lighting inevitably creates, making food preparation safer and more enjoyable. I’ve had clients tell me this addition made them realize how much they’d been struggling to see their work surface clearly.
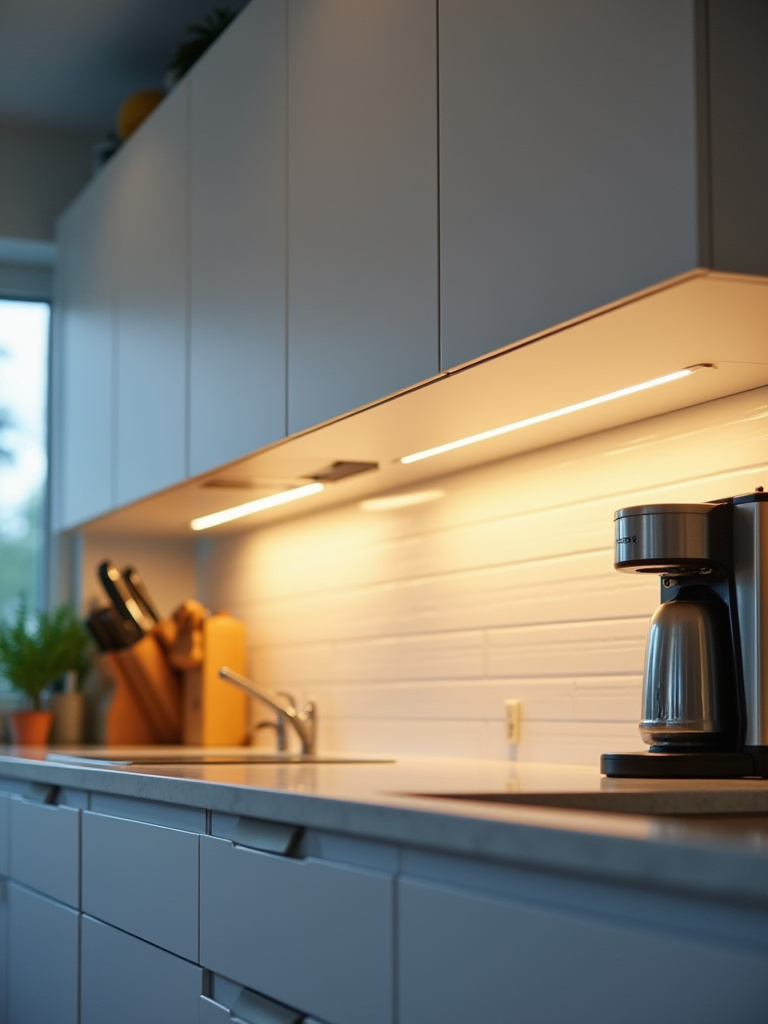
The technology has improved dramatically in recent years, with LED options offering warm, natural light that doesn’t feel harsh or clinical. Battery-operated versions make installation possible even in existing kitchens without rewiring, though hardwired options provide the most seamless look and reliable operation.
• Color temperature: Choose 2700K-3000K for warm, inviting light that complements white cabinetry.
• Installation tip: Hide transformers and connections inside cabinets for the cleanest appearance.
• Control options: Link to smart home systems for automatic scheduling and dimming.
Now let’s consider the sink area, where both function and style converge in important ways.
Include a Classic White Farmhouse Sink for Character
The artisan’s approach to kitchen design often centers around creating focal points that tell a story, and farmhouse sinks excel at this role. Their generous proportions and exposed front panel immediately communicate a sense of craftsmanship and intentional design. I’ve installed these sinks in everything from renovated farmhouses to modern suburban kitchens, and they consistently add soul to the space.
Beyond their aesthetic appeal, farmhouse sinks offer practical advantages that busy cooks appreciate. The deep basin easily accommodates large roasting pans and baking sheets that won’t fit in standard sinks. The front-facing installation also reduces back strain by allowing you to get closer to your work, making dishwashing and food prep more comfortable.
• Material choices: Fireclay offers classic appeal and excellent durability.
• Size considerations: 30-33 inches works for most kitchens; larger sizes may overwhelm smaller spaces.
• Installation requirements: May require cabinet modifications and additional support.
For those preferring sleek, contemporary aesthetics, undermount sinks offer seamless integration.
Opt for an Undermount Stainless Steel Sink for a Seamless Look
What separates professional-looking installations from amateur attempts is the precision required for undermount sink installation. When done correctly, the result is a beautifully seamless transition from countertop to sink that makes cleanup effortless and creates visual continuity. I always recommend this style for white dream kitchen ideas because it maintains the clean, uninterrupted lines that make these spaces feel so serene.
Stainless steel remains the most practical choice for undermount installation due to its durability and resistance to thermal shock. The gauge matters – 16-gauge steel provides better sound dampening and feels more substantial than thinner options. Look for brushed finishes that hide water spots and scratches better than mirror finishes.
• Mounting method: Clips and brackets provide the most secure installation.
• Edge finishing: Properly finished edges prevent water damage to surrounding materials.
• Maintenance ease: Regular cleaning with baking soda paste maintains the finish.
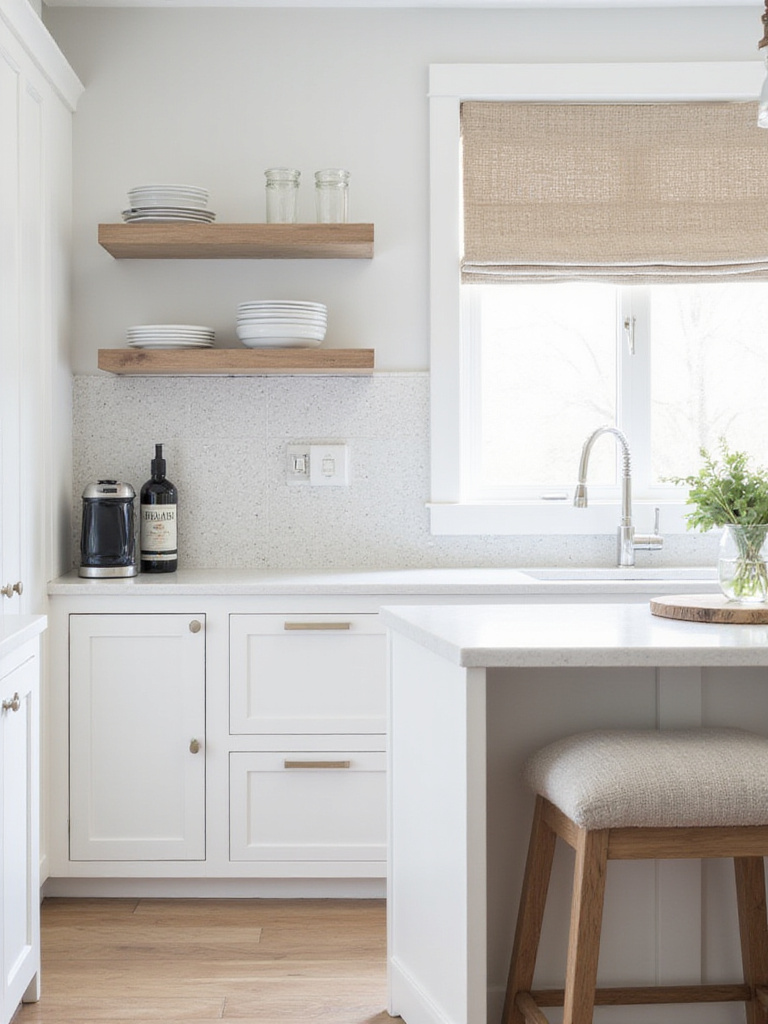
Moving beyond closed storage, open shelving offers opportunities to display personality and create visual lightness.
Incorporate Open White Shelving to Display Decor and Dishes
The challenge of awkward spaces becomes easier when you replace some upper cabinets with open shelving, instantly making kitchens feel larger and more breathable. This approach works particularly well in white dream kitchen ideas because it prevents the space from feeling too enclosed or boxy. I often recommend starting with just one or two sections of open shelving to test how you like the look and maintenance requirements.
Styling open shelves requires a curatorial eye – think of them as display space rather than storage. Group items in odd numbers, vary heights and textures, and include some negative space to avoid a cluttered appearance. I encourage clients to display items they actually use regularly, creating a lived-in authenticity that purely decorative arrangements often lack.
• Depth matters: 10-12 inches provides adequate space without protruding too far into the room.
• Support requirements: Use heavy-duty brackets rated for the weight you plan to display.
• Styling strategy: Mix functional items with decorative pieces for visual interest.
While open storage adds personality, maximizing hidden storage ensures your kitchen functions beautifully.
Maximize Storage with Smart Pull-Out Shelves and Organizers
The sustainable journey of kitchen organization involves creating systems that adapt to your changing needs over time. Pull-out shelves and drawer organizers transform static cabinet space into dynamic, accessible storage that grows with your cooking habits and family requirements. I’ve helped homeowners increase their usable storage by up to 40% simply by retrofitting existing cabinets with these smart solutions.
The investment pays dividends in daily frustration reduction. No more crawling on hands and knees to reach items stored in the back of deep cabinets. No more avalanches of Tupperware when you grab one container. These systems bring everything into clear view and easy reach, making cooking and cleanup genuinely more enjoyable.
• Full-extension slides: Ensure drawers and shelves pull completely out for maximum access.
• Weight ratings: Choose hardware rated for the items you plan to store.
• Retrofit options: Many systems can be added to existing cabinets without major modifications.
Adding architectural drama to your kitchen, waterfall edges create stunning focal points.
Design a Waterfall Counter Edge for a Modern, High-End Detail
The composition comes together when you extend your countertop material vertically down the side of your island, creating a continuous flow that feels both sculptural and functional. This detail instantly elevates white dream kitchen ideas from standard to spectacular, providing a focal point that feels intentional and expensive. I’ve seen this single element transform ordinary islands into showpieces that anchor the entire room.
While beautiful, waterfall edges require precise planning and skilled fabrication. The mitered joint where horizontal and vertical surfaces meet must be nearly invisible to achieve the desired effect. This level of craftsmanship typically adds 20-30% to countertop costs, but the visual impact often justifies the investment, especially in open-concept homes where the kitchen is always on display.
• Material considerations: Quartz and granite work well; marble requires extra care at the joint.
• Support requirements: Vertical sections may need additional reinforcement.
• Design integration: Consider how the waterfall interacts with seating and storage.
Continuing the theme of seamless design, integrated appliances create truly minimalist aesthetics.
Integrate Appliances with Seamless White Cabinet Panels
Unlike conventional installations where appliances interrupt the cabinet flow, panel-ready models disappear completely behind matching cabinet fronts. This approach requires planning from the beginning of your design process, as panel-ready appliances often have different dimensions and ventilation requirements than standard models. The result, however, is a kitchen where the cabinetry design takes center stage without visual interruption.
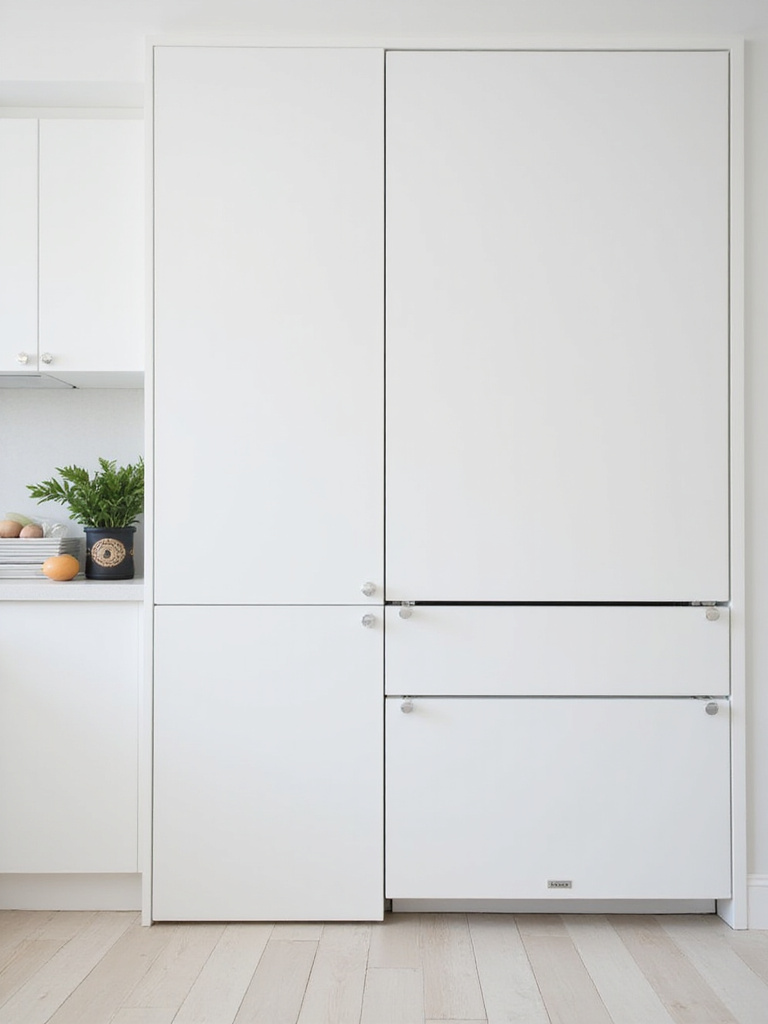
The cost difference varies by appliance type and brand, but panel-ready models typically add 10-20% to appliance costs. Factor in the additional expense of custom panels and installation, and this upgrade represents a significant investment. However, the seamless aesthetic often increases perceived home value more than the actual cost differential.
• Planning requirements: Confirm dimensions and clearances early in the design process.
• Panel coordination: Order cabinet panels from the same batch as your doors for perfect color matching.
• Service considerations: Ensure panels can be removed easily for appliance maintenance.
To prevent sterile feelings in white kitchens, layering textures becomes essential for warmth and interest.
Layer Textures (Wood, Tile, Fabric) to Prevent White from Feeling Sterile
The tactile experience changes the entire room’s energy when you thoughtfully combine different surface textures throughout your white kitchen. Smooth painted cabinets might pair with rough-hewn wood beams, sleek quartz countertops with textured tile backsplashes, and soft fabric window treatments with hard metal hardware. This interplay creates visual richness that prevents the space from feeling flat or institutional.
I encourage clients to think beyond visual texture to actual tactile experiences. How does the counter feel under your hands? What about the cabinet doors and drawer pulls? The floor beneath your feet? When multiple textures engage different senses, the kitchen becomes more interesting and inviting to spend time in.
• Rule of three: Include at least three distinct textures in every sight line.
• Balance consideration: Mix rough and smooth, matte and glossy, hard and soft elements.
• Natural elements: Wood, stone, and plants add organic texture that softens manufactured materials.
Once your foundation is established, strategic color additions can inject personality without overwhelming the white palette.
Inject Personality with Strategic Pops of Color in Accessories
When clients ask about adding color to their white dream kitchen ideas, I always recommend starting with easily changeable elements that allow experimentation without commitment. A vibrant runner, colorful bar stools, fresh flowers, or even a collection of beautiful cookbooks can introduce personality while maintaining the flexibility to evolve with your tastes. This approach lets you test color combinations and seasonal changes without permanent consequences.
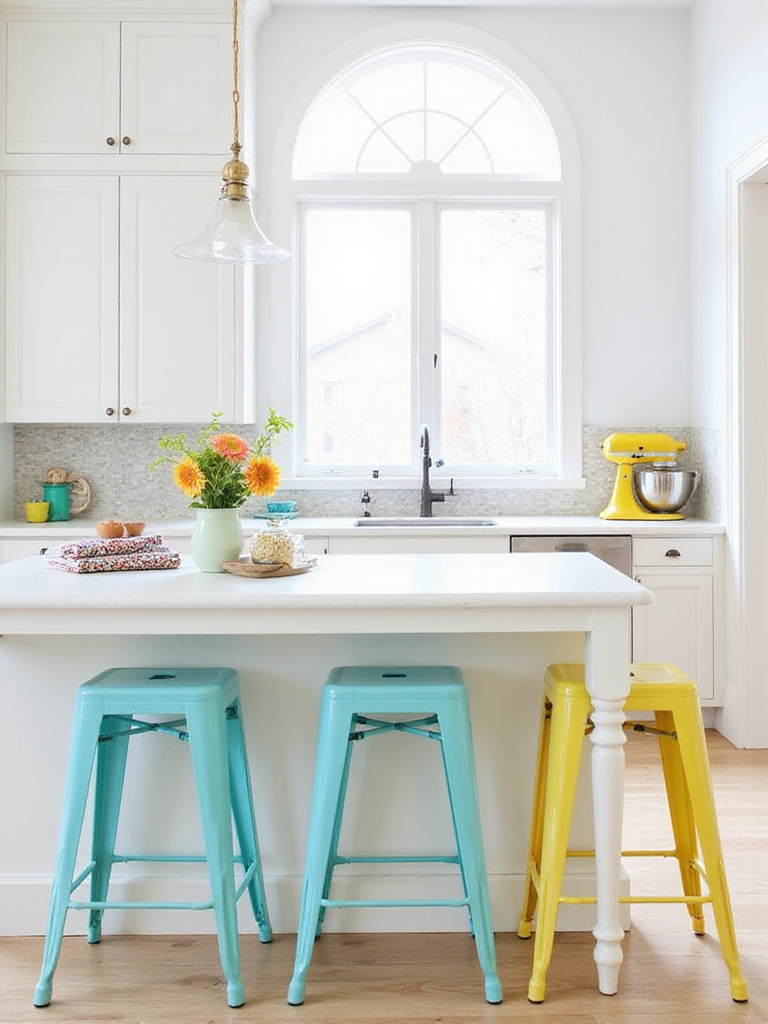
The key is restraint and intention. Choose one or two accent colors and repeat them throughout the space in different ways – perhaps blue appears in your dish towels, a piece of art, and a ceramic vase. This repetition creates cohesion while the limited palette prevents the space from feeling chaotic or overwhelming.
• Seasonal rotation: Change accessories with the seasons to keep the kitchen feeling fresh.
• Color psychology: Warm colors (reds, oranges) energize; cool colors (blues, greens) calm.
• Budget-friendly updates: Accessories cost far less than permanent changes but offer significant visual impact.
Finally, the wall color provides the backdrop that either enhances or detracts from your white kitchen elements.
Choose the Perfect Complementary Wall Paint Shade
The environmental story behind paint color selection often gets overlooked, but it’s crucial for creating the right atmosphere in white dream kitchen ideas. Cool grays can make north-facing kitchens feel cold, while warm beiges might make south-facing spaces feel too yellow. I always recommend testing paint colors at different times of day and under various lighting conditions before making final decisions.
Consider the undertones in your white cabinets when selecting wall colors – pure whites pair well with cool grays, while creamy whites work better with warm neutrals. The goal is creating harmony rather than contrast, allowing your beautiful white elements to remain the stars while the walls provide supportive backdrop.
• Sample strategy: Paint large swatches (at least 2×2 feet) to see how colors actually look in your space.
• Lighting interaction: Test colors under both natural and artificial light.
• Undertone matching: Identify whether your whites lean warm or cool before selecting wall colors.
With all these beautiful elements in place, proper maintenance ensures your white kitchen continues looking pristine.
Learn Essential Tips for Maintaining Pristine White Surfaces
The quality becomes evident after years of use when you’ve maintained your white surfaces properly from the beginning. Prevention is always easier than restoration, so establishing good habits early protects your investment and keeps your kitchen looking magazine-worthy. I’ve developed a simple daily routine that takes less than five minutes but makes an enormous difference in long-term appearance.
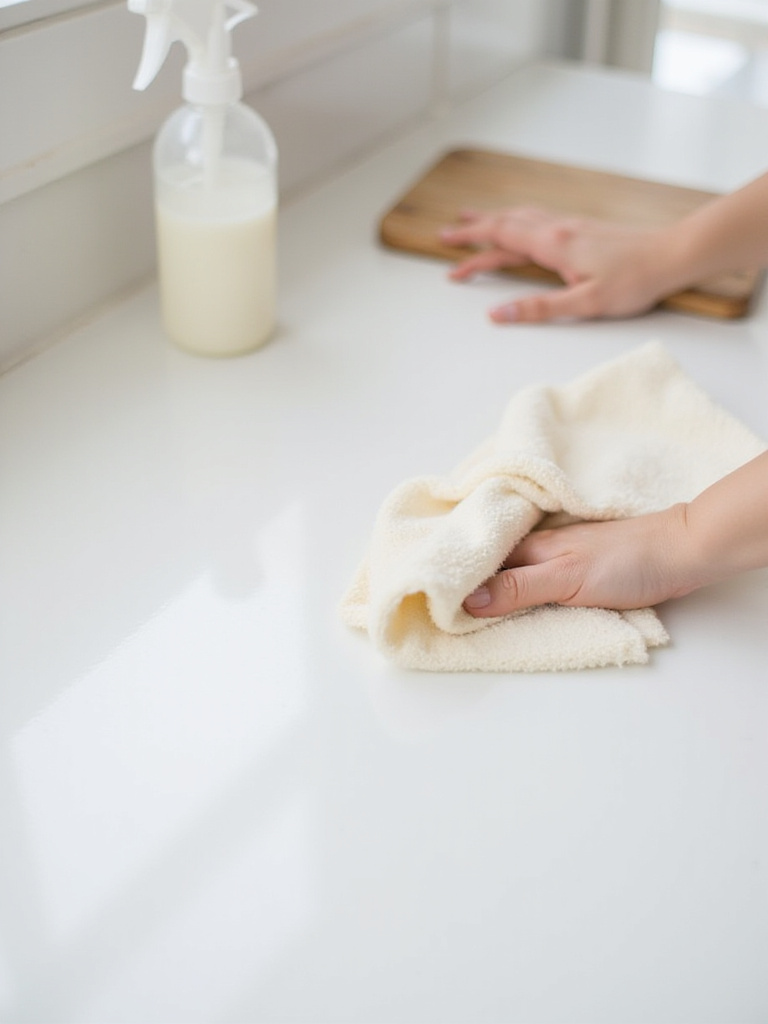
Different white surfaces require specific care approaches. Painted cabinets need gentle cleaning to avoid dulling the finish, while quartz countertops can handle more aggressive cleaning when necessary. Understanding these differences prevents damage and extends the life of your beautiful white elements.
• Daily habits: Wipe spills immediately, especially acidic substances like lemon juice or wine.
• Weekly routine: Deep clean all surfaces with appropriate cleaners for each material.
• Preventive measures: Use cutting boards, trivets, and placemats to protect surfaces from damage.
Conclusion
Creating your dream white kitchen isn’t about following a rigid formula – it’s about understanding how different elements work together to create a space that’s both beautiful and livable. From the foundational choices like shaker or flat-panel cabinets to the finishing touches like hardware and accessories, every decision builds toward a kitchen that reflects your personal style while maintaining that timeless white appeal.
The beauty of white dream kitchen ideas lies in their adaptability. Whether you’re drawn to the warmth of wood floors and brass hardware or prefer the sleek sophistication of large format tiles and black accents, the white foundation provides the perfect canvas. Remember that creating a stunning kitchen doesn’t require unlimited funds – smart choices about where to invest and where to save, combined with some DIY spirit, can achieve remarkable results.
Most importantly, your white kitchen should work for your real life. The most beautiful space in the world isn’t worth much if it doesn’t function well for your family’s needs. By balancing aesthetics with practicality, incorporating smart storage solutions, and choosing materials that age gracefully, you’ll create a kitchen that continues to delight you for years to come.