There’s a moment in every bathroom that hasn’t been touched in years — cold tile, builder-grade chrome, a mirror that’s been on that wall since 1994 — when you stop seeing the room and start feeling it. That flat, clinical chill is exactly what a rustic bathroom makeover is built to fix. And the good news is you don’t need a contractor, a permit, or a budget that makes your stomach drop.
I’ve transformed more bathrooms than I can count using thrift-store finds, hardware store pipe fittings, and a healthy respect for peel-and-stick products. What I’ve learned is that the rustic look isn’t about spending more — it’s about swapping the right things. Warm wood, natural textures, black iron, and a little weathered charm go a long way when you know where to put them.
Here are 18 rustic bathroom makeover ideas ranging from a 30-minute hardware swap to a full weekend project. For each one, I’ve included real costs, real techniques, and the common mistakes I see people make. Start anywhere. Start small. The warmth adds up faster than you’d expect.
1. Shiplap Accent Wall to Start Your Rustic Bathroom Makeover
If you’re only going to tackle one wall treatment in your rustic bathroom makeover, make it shiplap. Nothing else delivers that immediate farmhouse warmth quite as efficiently — the overlapping horizontal planks add depth, texture, and a quiet confidence that plain painted drywall simply can’t replicate.
The good news is you don’t need to panel the whole room. One accent wall — typically behind the tub, the toilet, or the vanity — does the job. For a typical 6×8 ft wall, you’re looking at roughly 48 sq ft of material. Real pine shiplap runs $2–$4 per square foot, which puts a single accent wall between $100 and $200 all-in. Cedar is better for humid rooms at $3–$7 per square foot, but pine sealed properly will last just as long.
That said, skip MDF shiplap entirely in a bathroom. It swells, bubbles, and peels the moment it meets consistent steam — I’ve seen it happen within six months. Stick with pine, cedar, or PVC. Once installed, seal with polycrylic (not polyurethane, which yellows) in at least two coats, three near the tub. For a whitewash effect, mix white latex paint 50/50 with water and apply with a rag — it lets the grain show while brightening the space beautifully. For renters nervous about commitment, peel-and-stick shiplap wallpaper from brands like WoodPlank or Stikwood removes cleanly with a blow-dryer and is a fully viable alternative. You’ll also find more bathroom wall decor ideas that pair well with shiplap once the wall is done.
2. Repurposed Wooden Ladder for Open Towel Storage
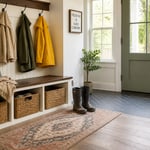
Here’s a rustic bathroom makeover idea that costs almost nothing and takes about an hour: a leaning wooden ladder as a towel rack. It uses the vertical wall space that standard towel bars completely ignore — the zone between countertop height and the ceiling — and it does it with a casual, collected charm that no store-bought bar can replicate.
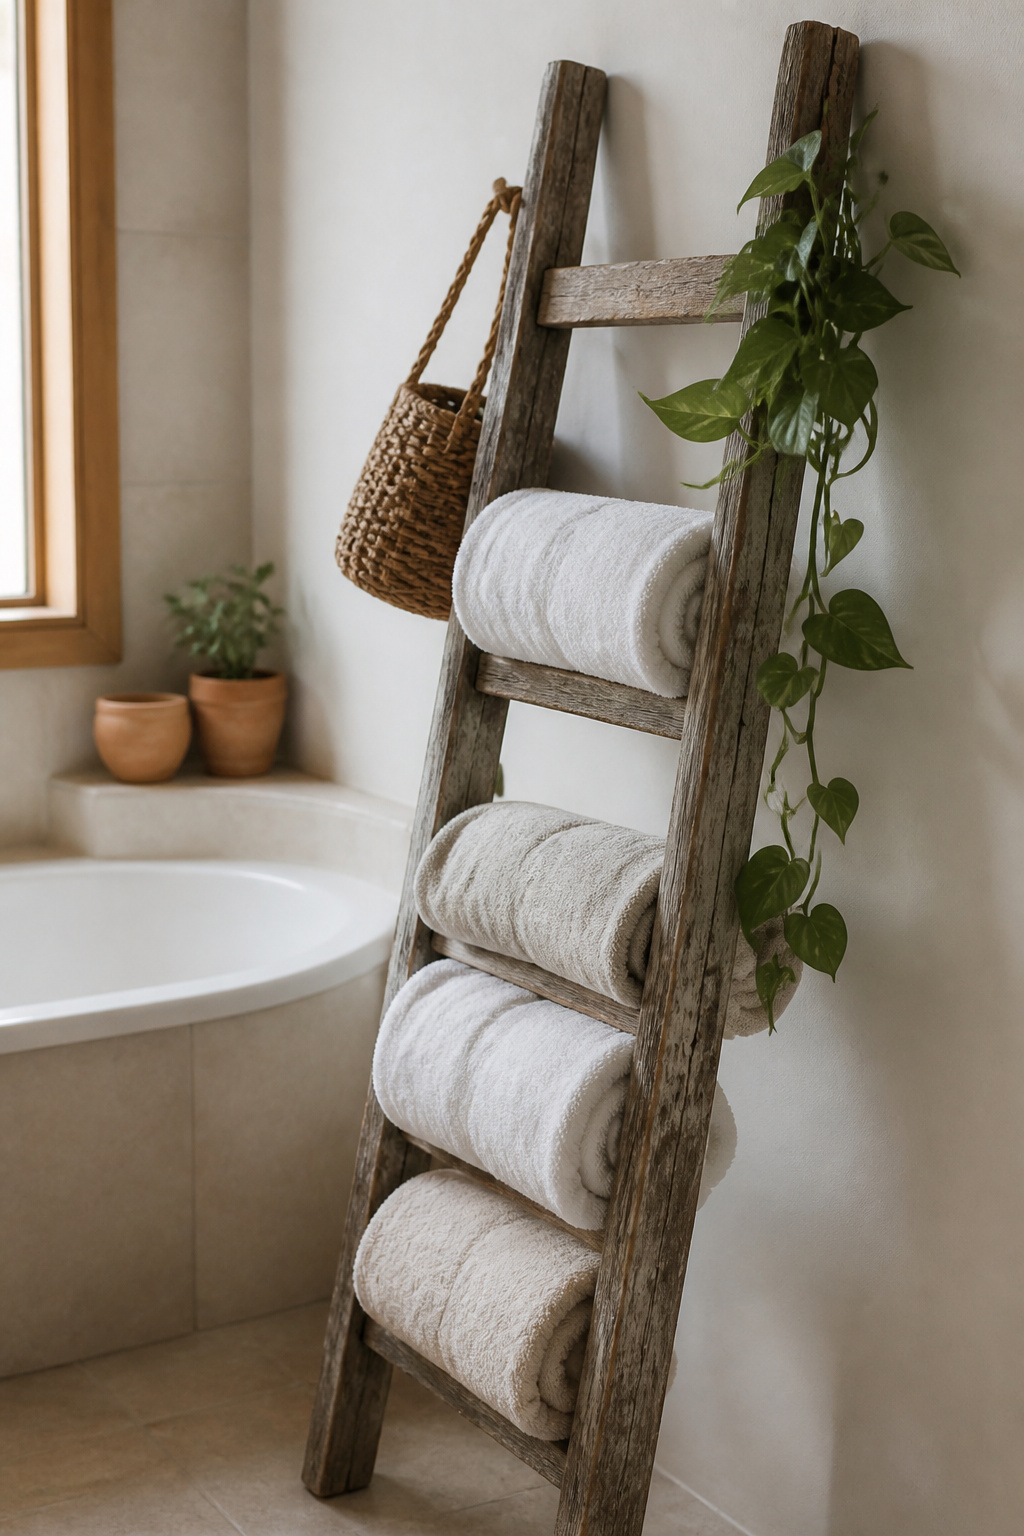
Hunt for solid wood ladders at thrift stores, garage sales, or Facebook Marketplace. You’re looking for solid pine or oak construction — never plywood, which delaminates in bathroom humidity. Budget $5–$25 for a thrifted find, or build a simple version from 2×2 lumber in an afternoon. Before installation, sand to 220-grit, fill any cracks with wood filler, then seal with spar urethane — it handles bathroom steam without yellowing and lasts 2–3 years between applications.
Cut the bottom feet at a 5-degree angle so the ladder leans flush against the wall without rocking, and add felt pads to protect your floor. Then style it properly: roll towels rather than folding them flat (more spa-like and fits more per rung), hang a small rattan basket from the top rung for cotton balls or hair ties, and consider draping a trailing pothos plant over the side. It tolerates bathroom humidity beautifully and adds life without any upkeep pressure.
3. Barn Door Conversion for a Statement Bathroom Entry
The first thing you see walking into a bathroom is the door. If it’s a standard hollow-core door swinging inward, it’s quietly communicating “builder spec.” A sliding barn door communicates something entirely different — that someone made a deliberate choice about this room.
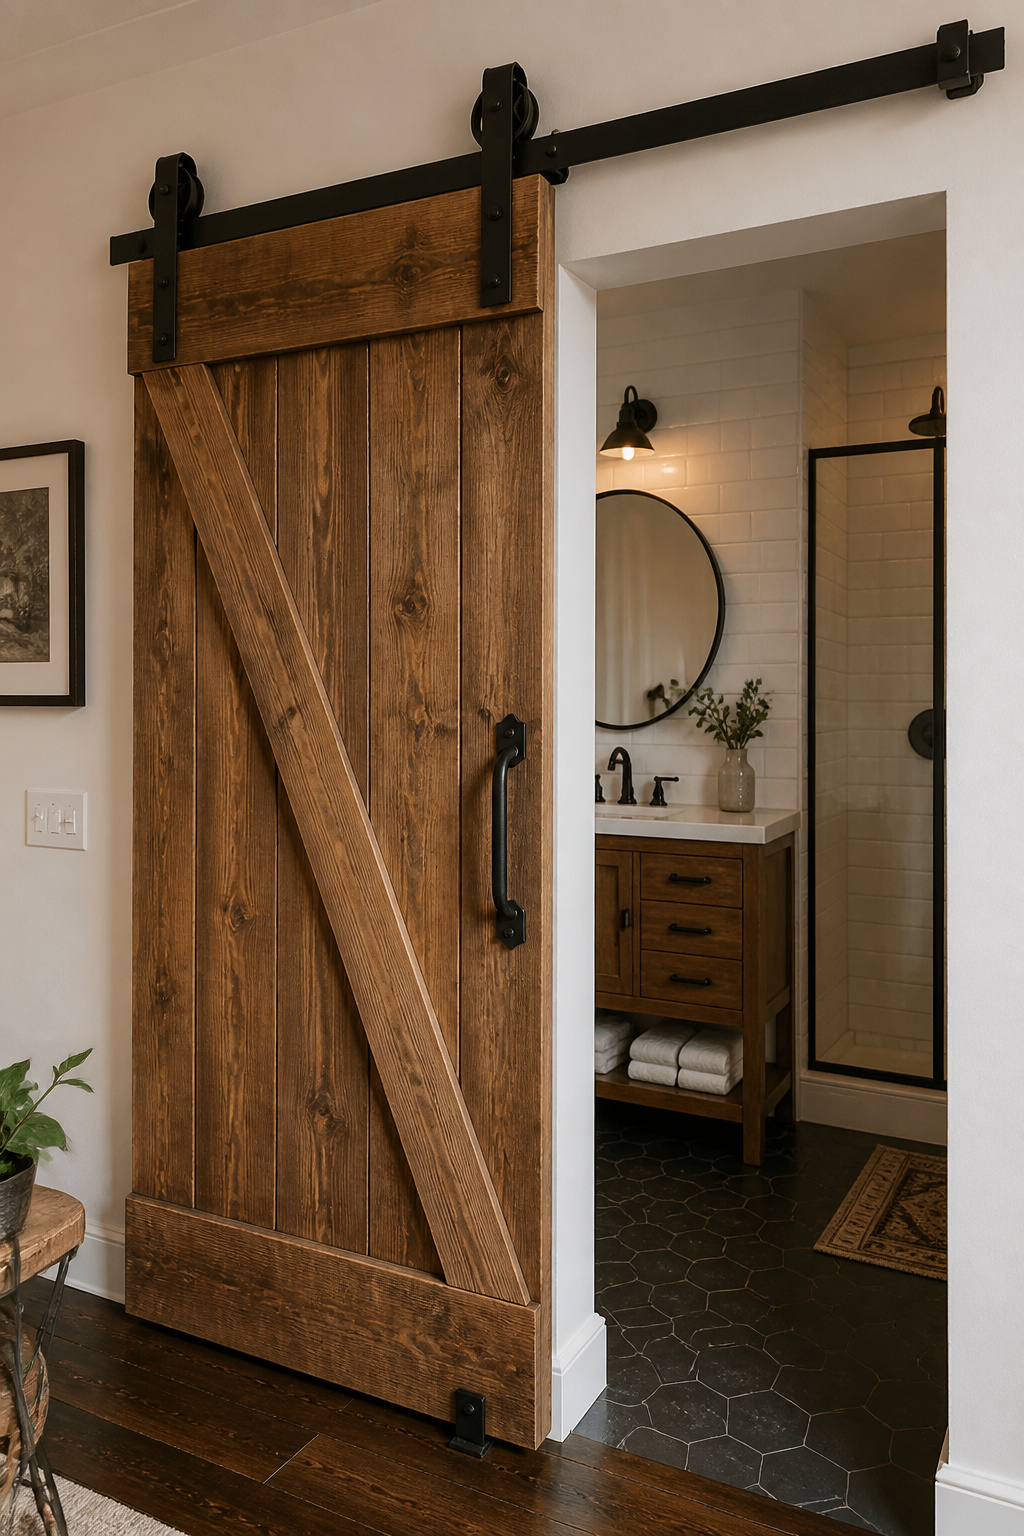
The practical case is just as strong as the visual one. A sliding barn door eliminates door swing clearance, freeing 6–10 sq ft of floor space in a small bathroom. That’s not a small thing in rooms under 50 sq ft. The most budget-friendly approach: use your existing door. Buy a barn door hardware kit ($50–$100 from brands like Homacer or WINSOON), then dress up the door face with horizontal 1×6 pine boards in a Z-brace pattern ($30–$50 in lumber). Sand, stain or paint, and you’ve got a custom-looking barn door for under $150 total.
For humid bathroom environments, look for powder-coated or stainless steel roller hardware — raw iron without a protective coat will surface-rust within a season. Add foam weatherstripping ($20–$40) to the door edges to address the privacy gap that barn doors inherently have. My favourite finishes: reclaimed pallet wood for maximum authentic age, whitewashed pine for a Scandinavian-rustic feel, or matte black stain on plain pine for a moody, contemporary edge. These pair beautifully with the farmhouse bathroom decoration ideas that tie the entire room together.
4. Vintage Medicine Cabinet With Farmhouse Bathroom Trim
A vintage medicine cabinet wrapped in a beadboard or shiplap surround is one of the most effective “looks custom-built but isn’t” tricks I know. It transforms a surface-mount cabinet into something that reads like it was designed for exactly this space — a built-in feature rather than an afterthought bolted to the wall.
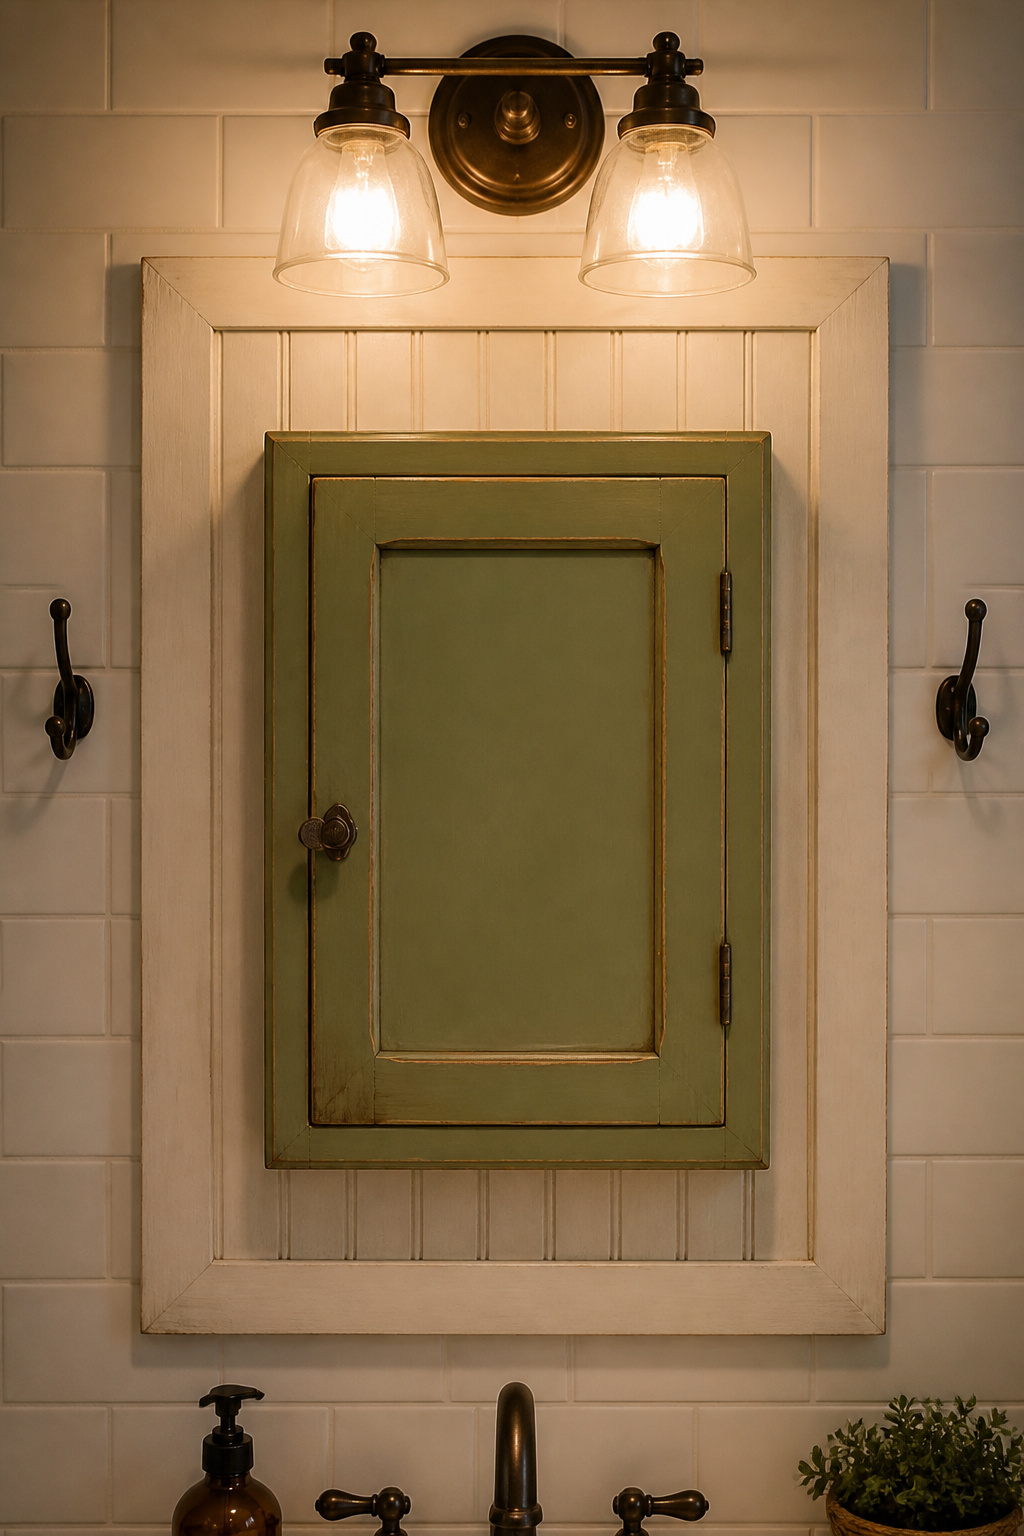
Start with the cabinet itself. Thrift stores, architectural salvage yards, Craigslist, and Etsy regularly stock pre-1970s medicine cabinets with solid steel or wood frames. Budget $15–$60 for a vintage find in good working order. For steel cabinets, sand lightly with 400-grit wet/dry paper, prime with a metal primer, and finish with semi-gloss enamel. For wood, chalk paint in off-white or sage green followed by a clear wax gives a soft farmhouse finish that photographs well. Beadboard panels from the hardware store run $1.50–$2.50 per square foot — enough to frame a standard 16×20-inch cabinet for under $25 in materials.
Cut panels to extend 4–6 inches beyond the cabinet on all sides, creating a rectangle that makes the whole assembly look like an intentional architectural feature. Caulk every edge with paintable silicone before painting — this detail separates a professional result from a DIY one. For color, try the cabinet in Benjamin Moore White Dove (OC-17) against a surround in Sherwin-Williams Accessible Beige (SW 7036) for a warm, cohesive result. Or go bolder: sage green on the cabinet with a natural wood surround is the strongest farmhouse bathroom direction right now.
5. Exposed Brick Effect Using Textured Paint and Rollers
Not every rustic bathroom makeover idea has to involve real materials. A faux brick painted finish — done well — surprises almost everyone who sees it in person. The key is understanding that you’re creating a visual effect that reads as warmth and texture from a normal viewing distance, not a tactile replica of masonry.
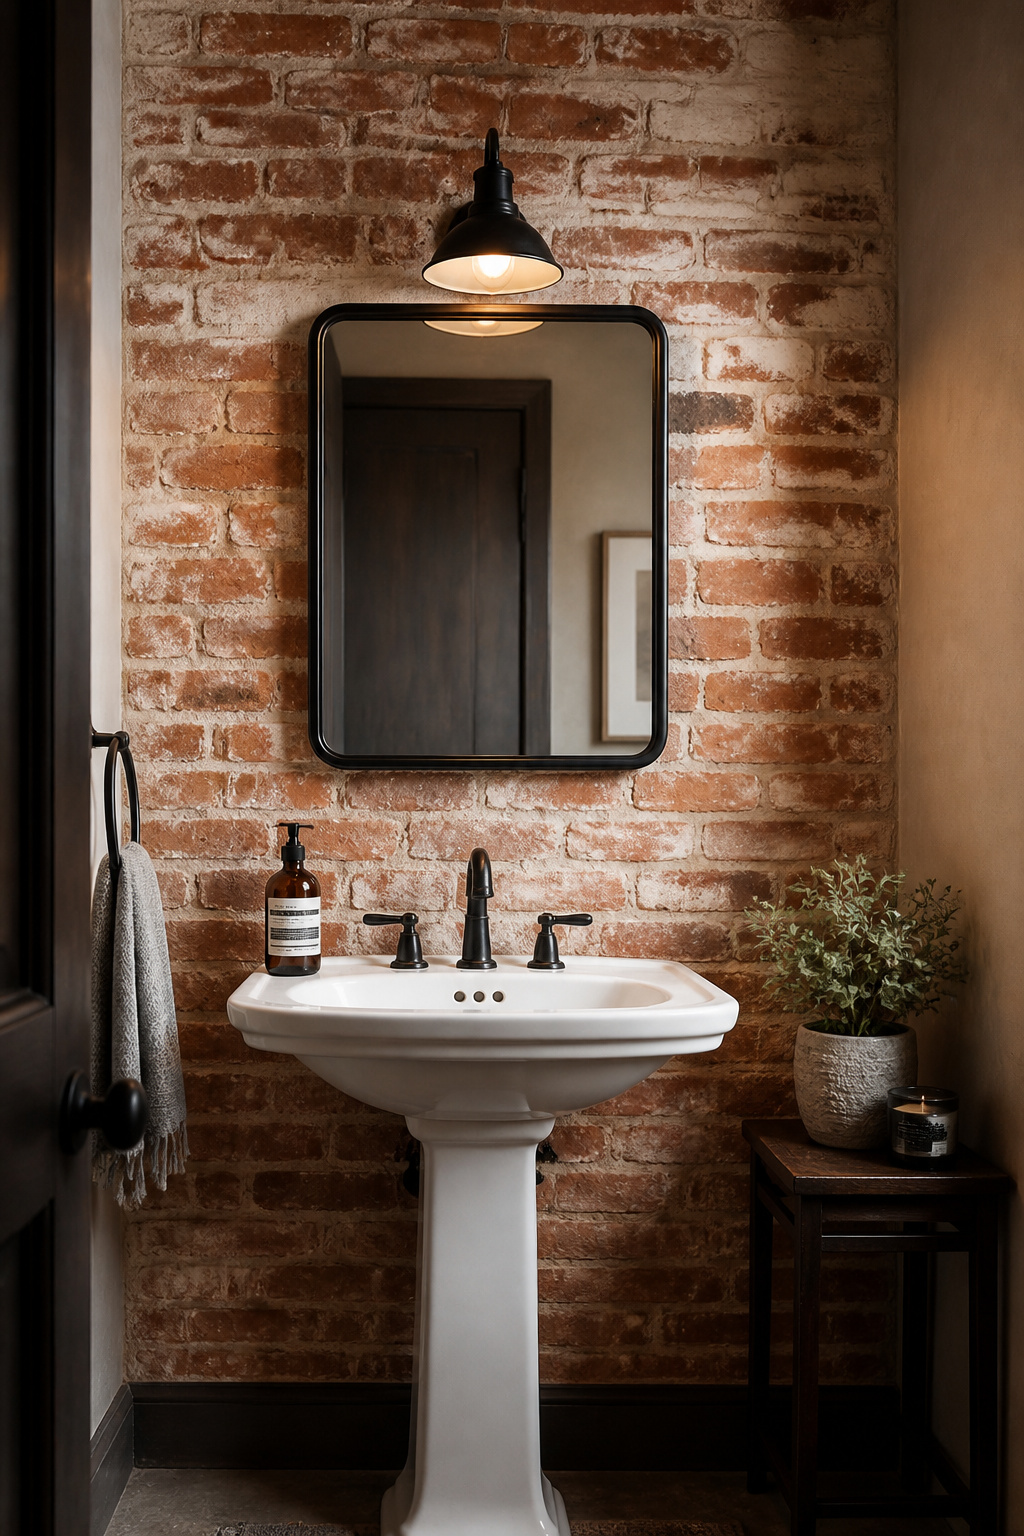
The most accessible technique uses a brick stamp roller: apply a mortar-grey flat latex base coat, let it dry fully, then roll the stamp (loaded with terracotta or warm red acrylic) in overlapping horizontal passes, offsetting each row by half a brick width. For more depth, add a stipple layer using a 3/4-inch nap roller over the base coat before stamping. Venetian plaster troweled in irregular passes is a more dimensional alternative — and its surface variation is genuinely convincing at close range.
In a bathroom, the sealing step is non-negotiable. Apply two to three coats of polycrylic (water-based, non-yellowing) over the finished surface; near the shower or tub, add a masonry-grade penetrating sealer as a base coat under the paint. Skip this and you’ll be repainting within six months — bathroom steam works behind any unsealed paint film. Total materials run $30–$60 for a standard accent wall. Also, the technique is forgiving: imperfections in the mortar lines read as character rather than error, which makes it genuinely accessible for beginners.
6. Mason Jar Sconce Fixtures and Vanity Shelf Displays
Mason jar lighting has earned its place as a rustic bathroom makeover staple because it does something no standard vanity globe can: it turns the bulb itself into the decorative element. The warm filament glow fills the jar and radiates outward in a soft, omnidirectional light that’s flattering on skin tones and deeply cozy on warm walls and wood surfaces.
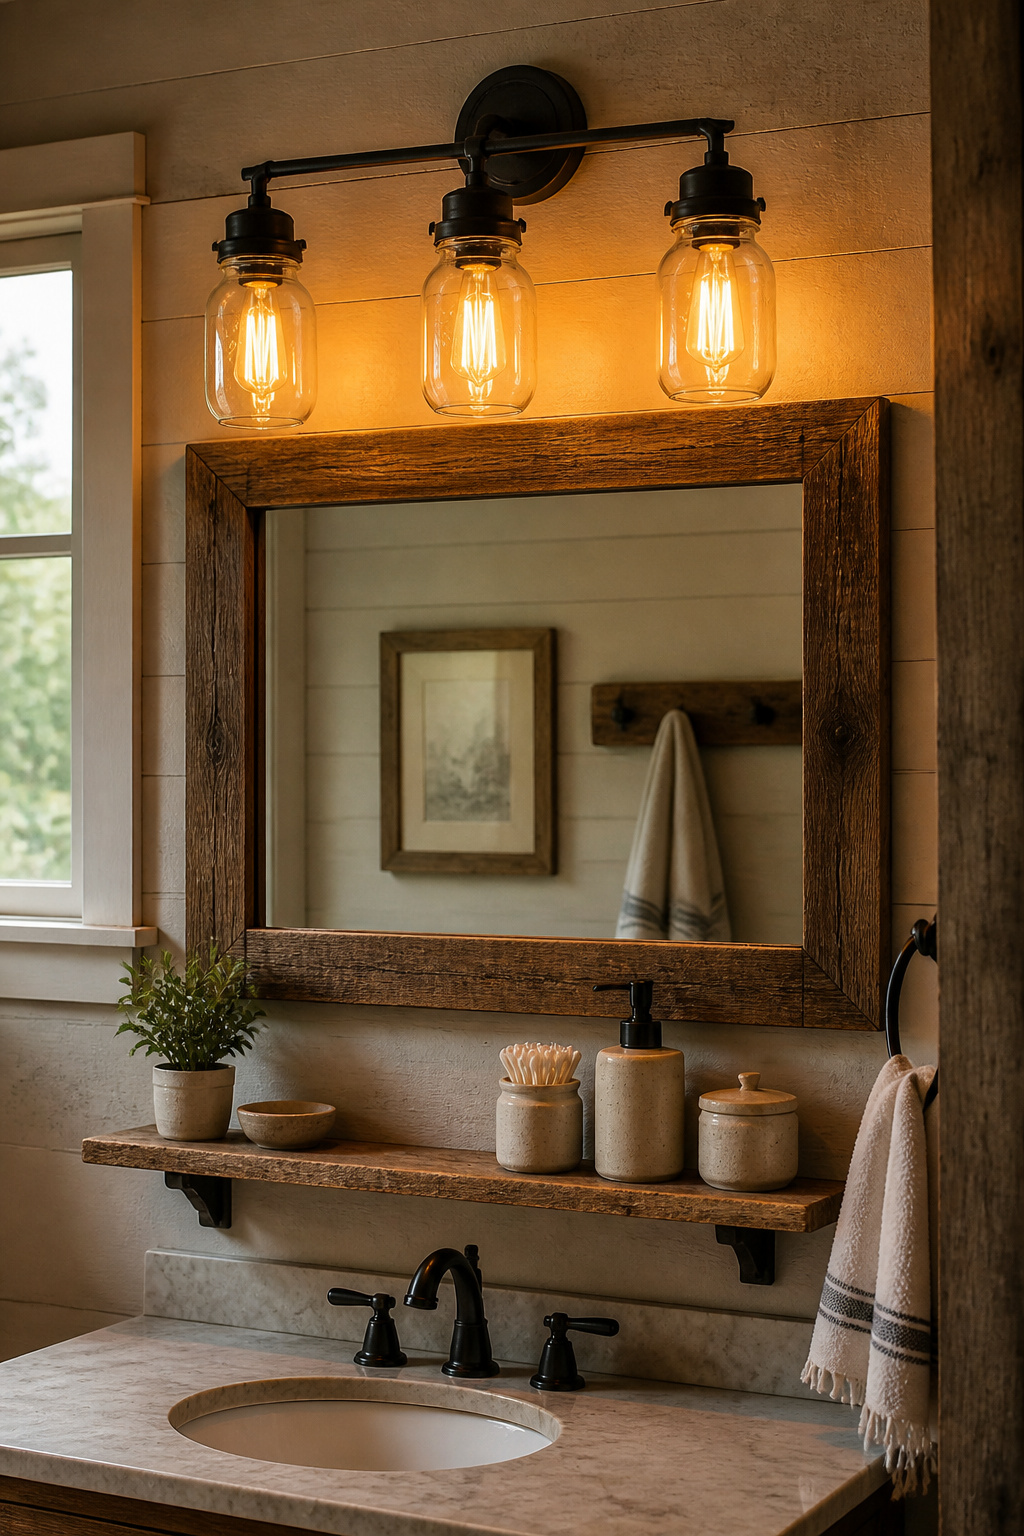
The simplest version: remove your existing vanity light globes, spray paint the fixture frame in matte black or oil-rubbed bronze, then screw wide-mouth quart mason jars onto the sockets (cut holes in the lids with a hole saw to fit). Project time: roughly 45 minutes. Cost: under $20 if you already own the jars. One critical note — use LED bulbs only in sealed mason jar fixtures. LED bulbs generate less than 5% of the heat of incandescent bulbs, which matters inside an airtight glass container. Incandescent bulbs can crack the jar or, in worst cases, create a fire hazard in a sealed housing.
Beyond the lights, mason jars make excellent vanity organizers. A set of three pint jars on a small reclaimed wood tray — one for cotton balls, one for makeup brushes, one as a bud vase with dried eucalyptus — creates a cohesive vanity display for almost no money. Spray paint the lids in matching matte black to tie them visually to your fixtures. For a wall-mounted version, attach three jars to a length of reclaimed wood with hose clamps — total hardware store cost under $15.
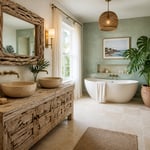
7. Clawfoot Tub Refinishing for a Bathroom Makeover Centerpiece
A clawfoot tub is the kind of focal point that defines a rustic bathroom around itself. Its silhouette has barely changed since the 1880s, and in an era when every design trend cycles through in 18 months, that staying power means something. It reads as timeless rather than trendy — and in a rustic bathroom, its curved, freestanding form looks right at home beside shiplap walls, iron pipe fixtures, and warm wood finishes.
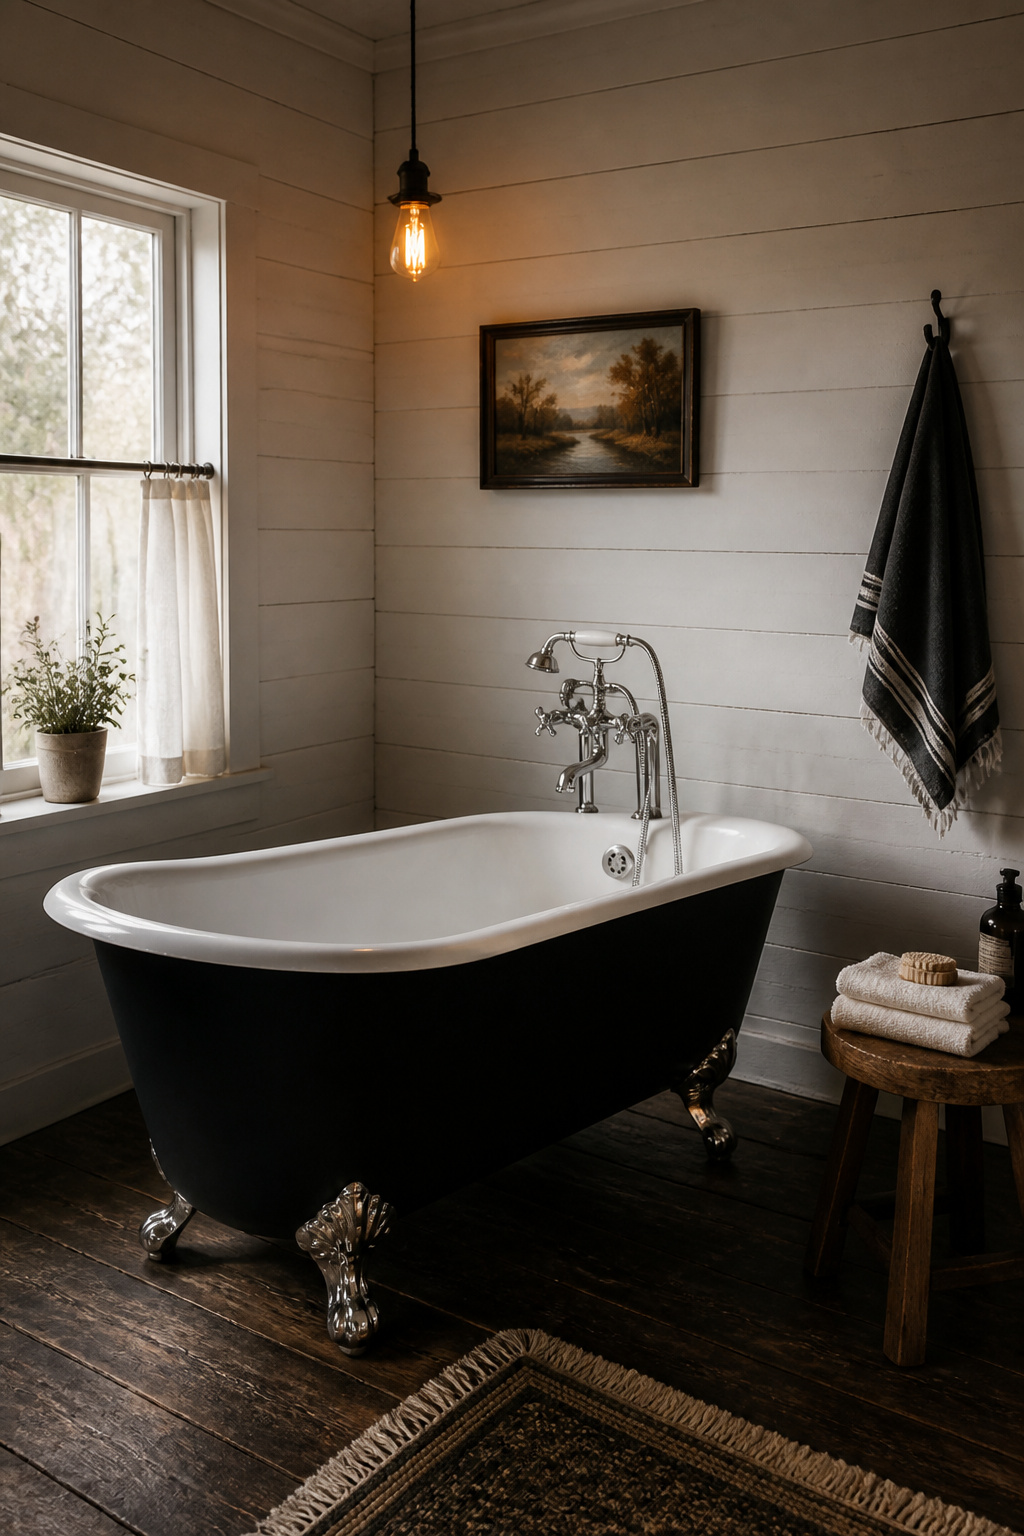
The refinishing equation: DIY epoxy kits run $60–$150 (Armoglaze and Rust-Oleum Tub & Tile are the most consistently reviewed) and last roughly 2–3 years before needing touch-up. Professional spray-applied refinishing costs $400–$1,400 for a clawfoot tub but lasts 10–15 years with proper care. A smart middle path: DIY the exterior and hire a professional for the interior — the interior is the surface you use every day, and it’s worth getting right. For more context on the full scope of a rustic bathroom remodel, there’s solid guidance in these rustic bathroom remodel ideas that covers the bigger picture.
For the exterior, Rust-Oleum 2X matte black spray paint on primed cast iron is a proven combination. Sourcing the tub: architectural salvage yards price vintage clawfoot tubs at $150–$500, and Facebook Marketplace regularly surfaces them free to $200 from homes being renovated. That’s genuinely the best value in any rustic bathroom makeover.
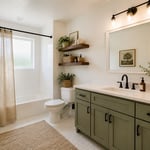
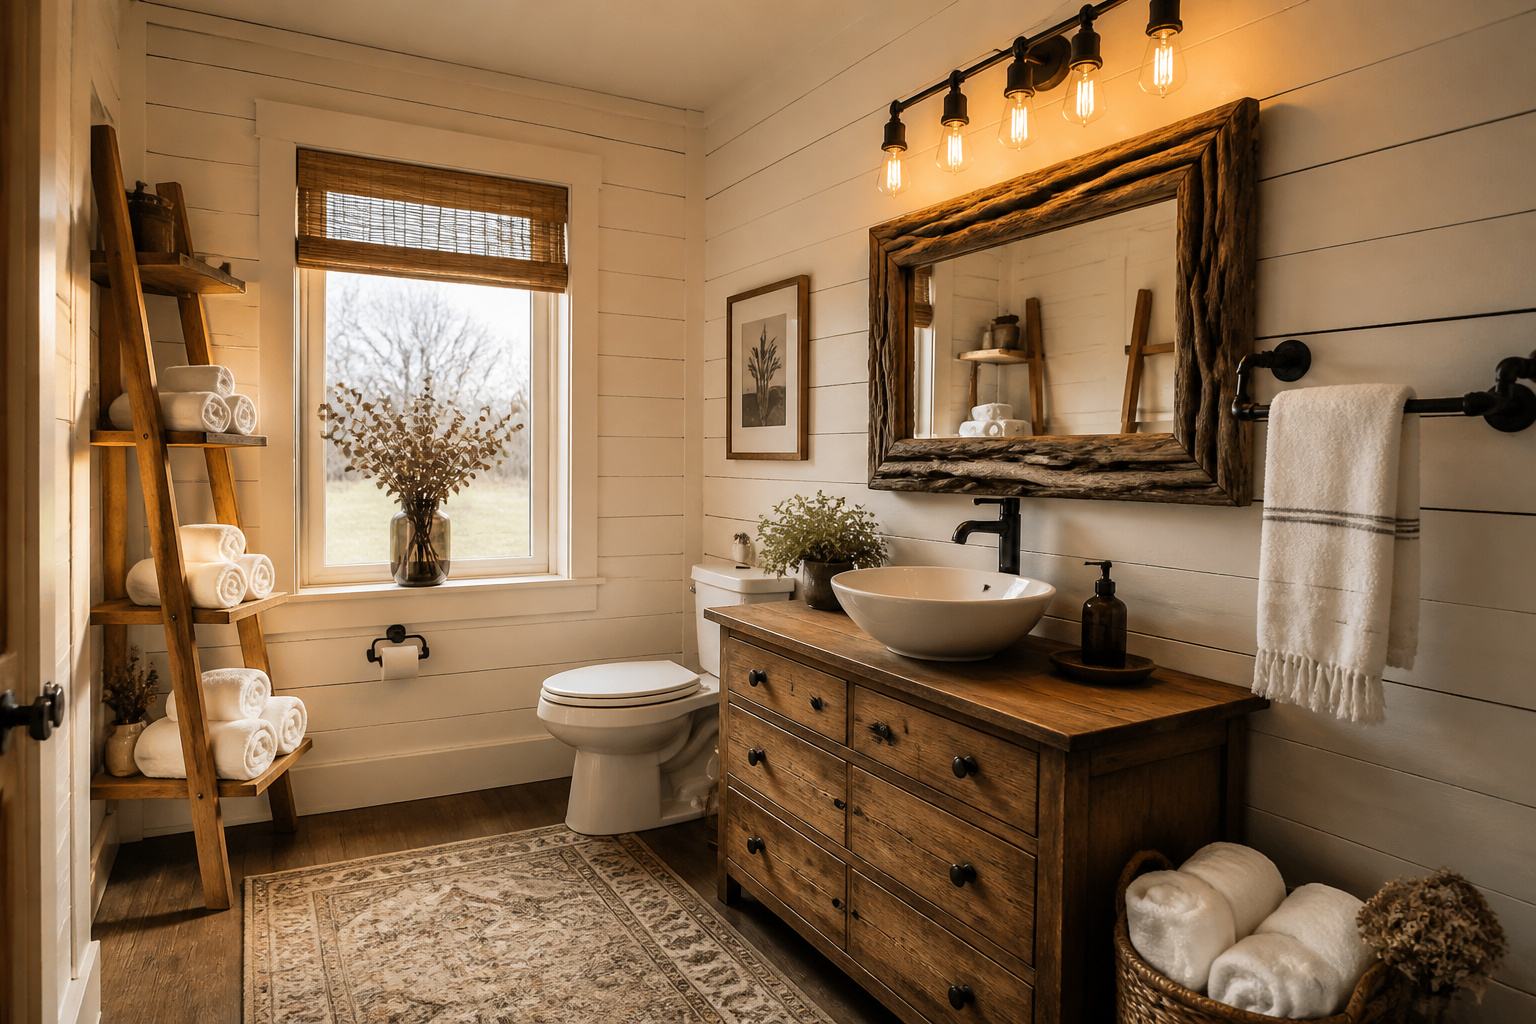
8. Natural Wood Vanity Built From a Rustic Bathroom Dresser Find
The dresser-to-vanity conversion is one of the most satisfying DIY bathroom projects you can take on. You start with something that looks like junk, and you end with a vanity that looks like it came from a boutique in the Hudson Valley. The key is choosing the right dresser and waterproofing the top correctly — two straightforward decisions that make everything else easier.
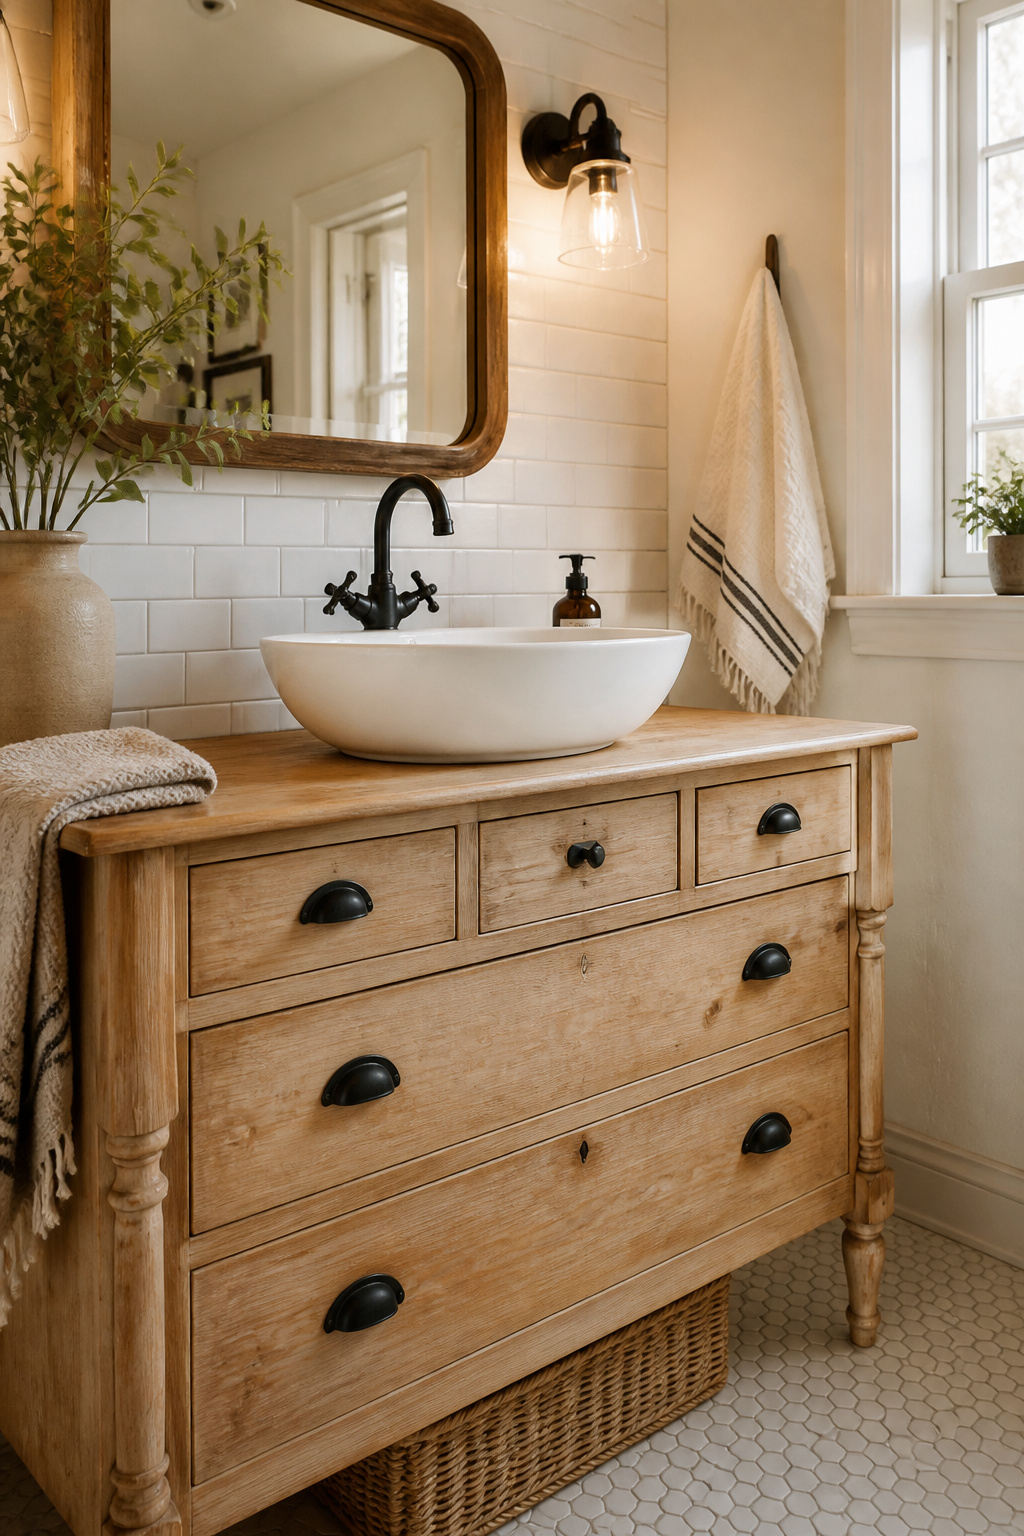
Look for a solid wood top — not pressed board, not MDF, not particle board with veneer. Pressed wood swells irreversibly the moment water gets behind the drain joint, and it will. For the sink, go vessel (one that sits on top of the surface) rather than drop-in: a vessel requires only a drain hole rather than a large cutout, and the hole saw kit for that runs $15 at any hardware store. Standard vessel drain fittings need a 1-3/8-inch hole — measure your specific drain before cutting.
Seal the entire top surface, including all cut edges, with marine-grade epoxy or spar urethane in two to three coats before the sink goes anywhere near it. Run a bead of clear silicone caulk where the sink base meets the wood, and allow the full 24 hours for cure before running water. For hardware, oil-rubbed bronze bin pulls on a whitewashed pine dresser is the quintessential rustic-farmhouse pairing. Matte black hardware on a painted dresser pushes it toward modern farmhouse. Either way, new pulls on an old dresser is the detail that makes the whole piece look intentional rather than improvised.
9. Stone-Look Peel-and-Stick Floor Tiles on a Real Budget
The bathroom floor is the surface people overlook most when planning a rustic bathroom makeover — and yet it’s one of the fastest things to change without any demolition. Modern peel-and-stick vinyl tiles have come a long way. SPC (Stone Plastic Composite) tiles have a rigid multi-layer structure that resists moisture, dents, and wear far better than older vinyl versions, and they convincingly mimic slate, travertine, and aged stone at $1–$3 per square foot.
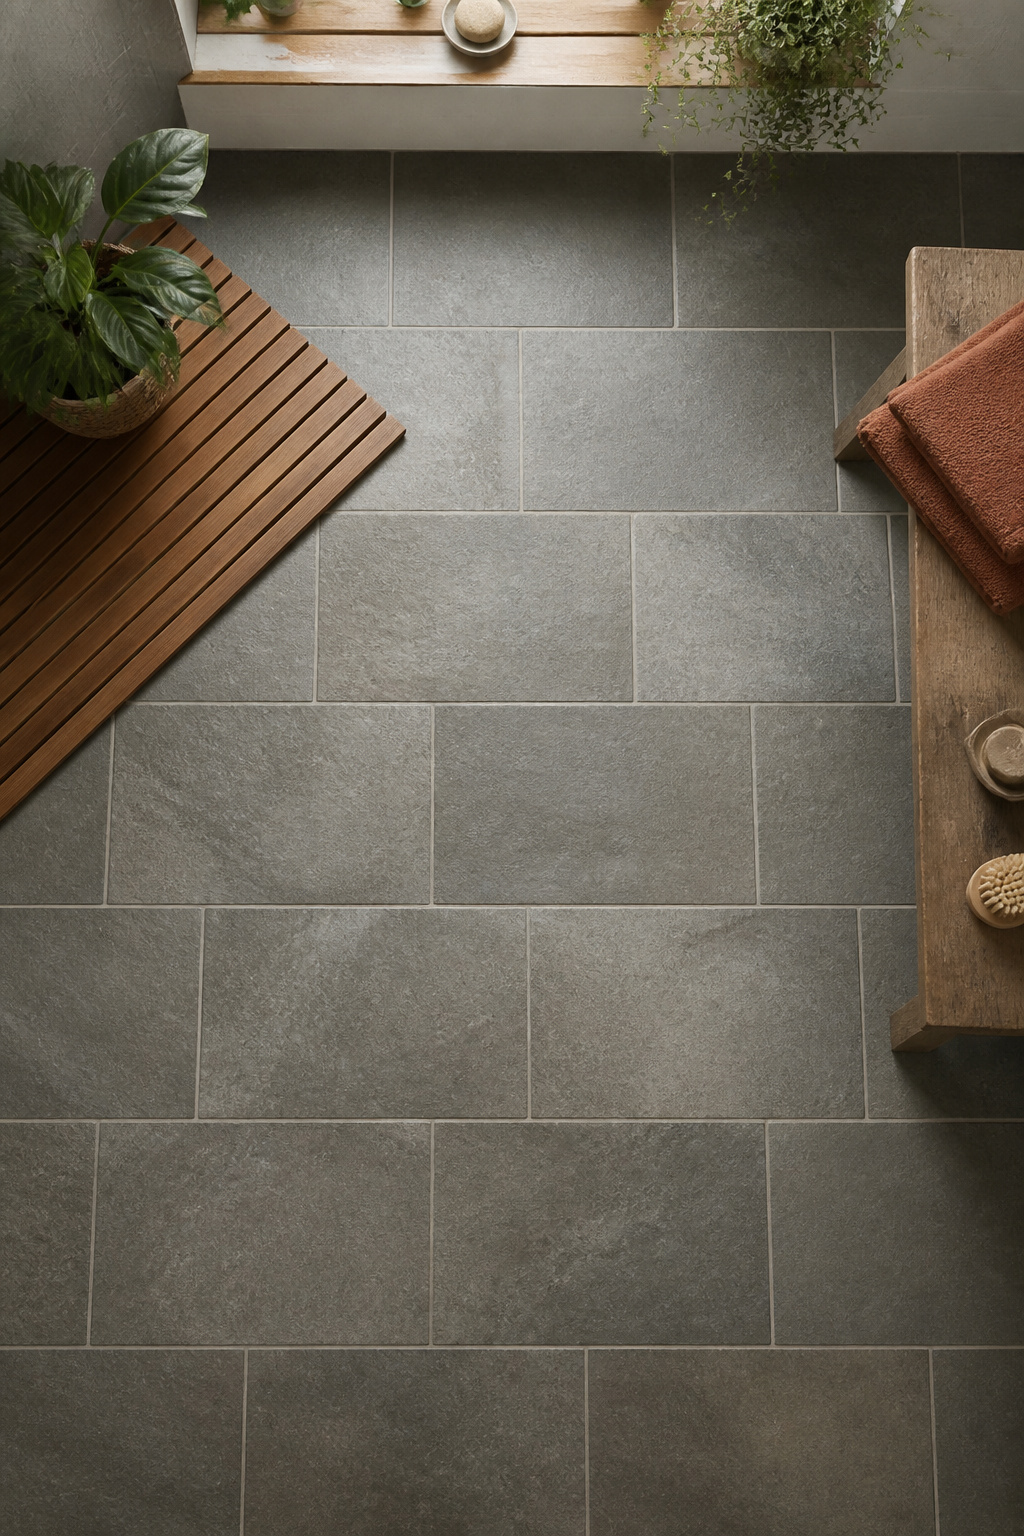
For rustic bathrooms, look for slate grey, travertine ivory, or aged terracotta patterns. TrafficMaster’s slate-look tiles carry a 30-year residential warranty; Style Selections offers a 15-year warranty and easy installation. Both are widely available at Home Depot and Lowe’s. You can also explore bathroom flooring trends worth considering before committing to a pattern.
The number-one cause of peel-and-stick tile failure is poor surface prep — not bad tiles. Clean the existing floor with a degreaser, allow 24 hours to dry fully in a humid bathroom, and sand down any high spots or seam ridges before laying. For installation over existing ceramic tile, lightly score the glazed surface with 60-grit sandpaper to give the adhesive tooth. After installation, run a grout pen in charcoal or dark grey along the joints. This $8–$10 step adds depth that makes the floor look genuinely grouted rather than applied — one of the best small finishing moves in any rustic bathroom makeover.
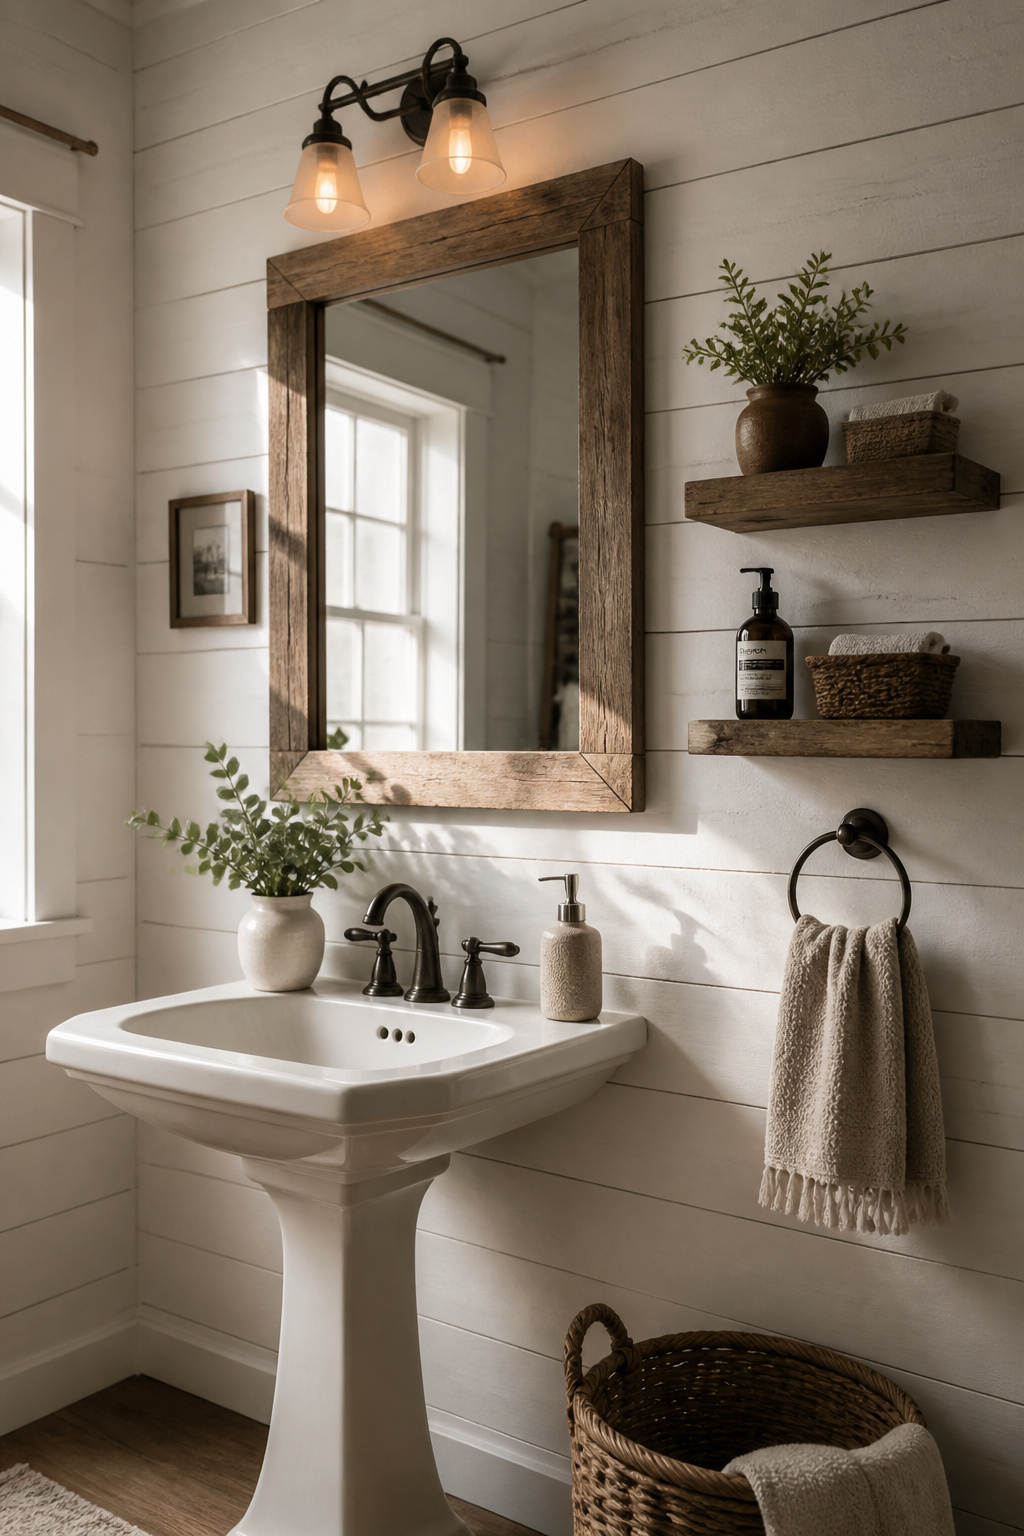
10. Open Shelving With Reclaimed Wood Brackets and Boards
Closed bathroom cabinets hide everything — including the opportunity to add texture and warmth to your walls. Open wood shelves do the opposite: they display, layer, and tell a small story about the person who lives here. In a small bathroom, they also make the room feel bigger by letting the eye travel to the wall rather than stop at a cabinet face.
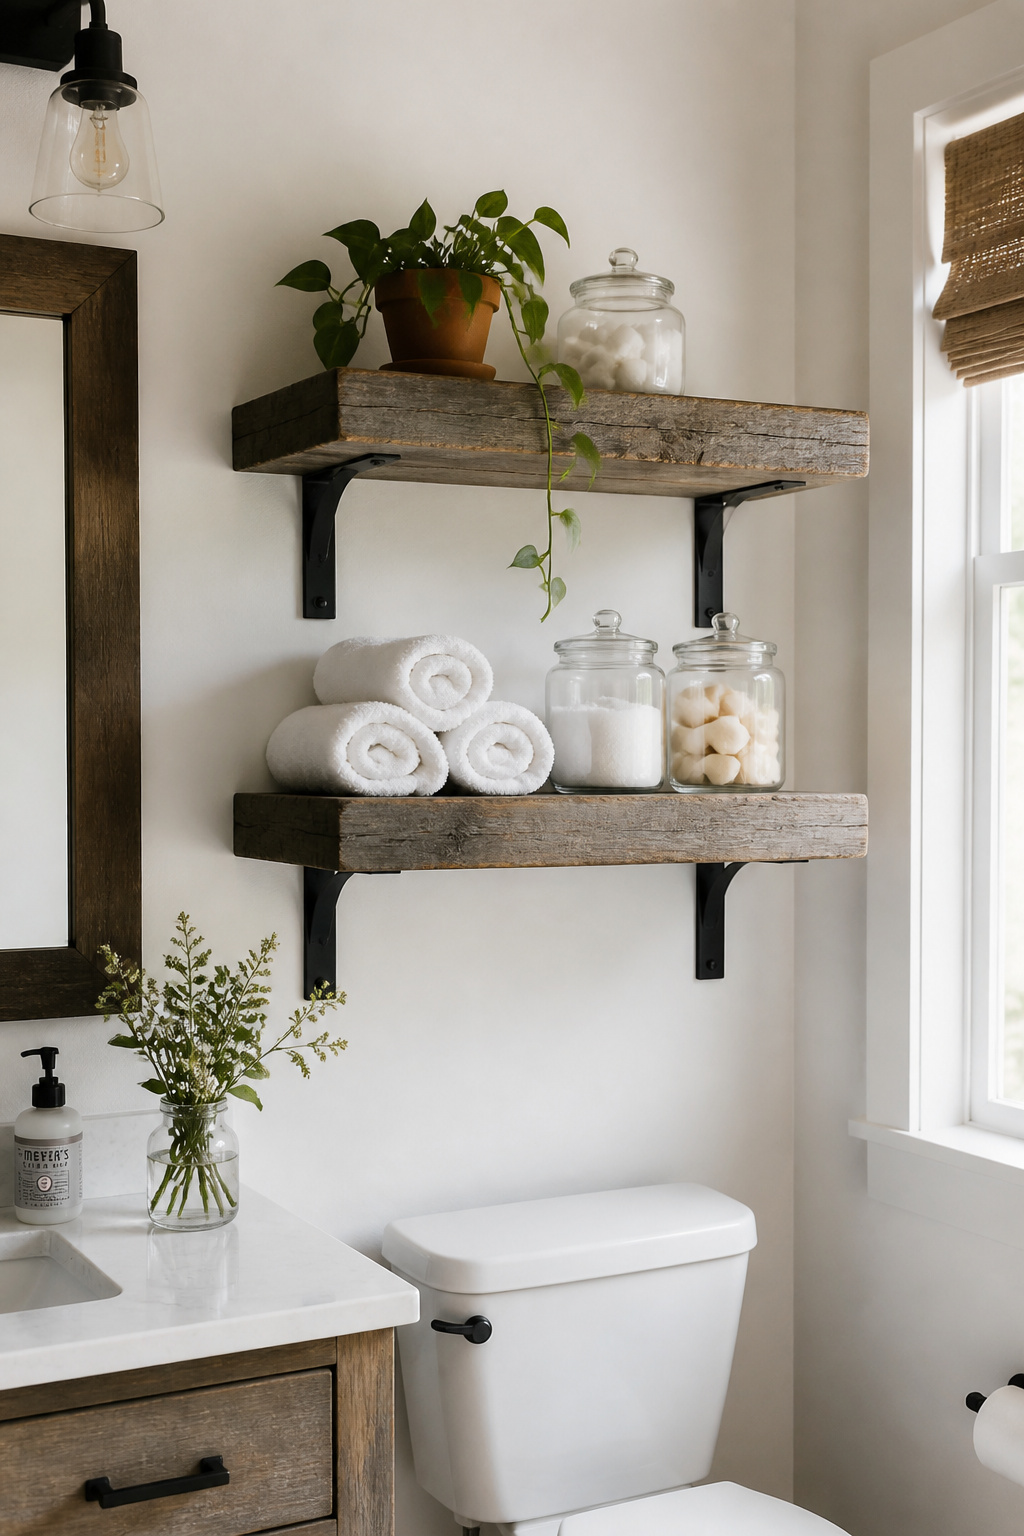
Source your wood from Habitat for Humanity ReStores, lumber salvage yards, or Facebook Marketplace listings for old fence boards and pallet wood. Old-growth pine and barn wood are the most sought-after — both are naturally denser than modern timber and handle bathroom humidity more reliably. Treat every piece the same way before installing: sand to 180-grit, clean with mineral spirits to remove residual oils, let dry, then apply two coats of spar urethane. Mark your calendar for reapplication every 12–18 months — missed resealing is how bathroom wood shelves eventually fail.
The styling principle: leave one-third of each shelf’s visual width empty. Negative space makes a shelf look curated rather than crammed. Fill the remaining two-thirds with rolled white towels, woven baskets for closed storage within the open format, glass apothecary jars, and one or two small plants. The baskets are the key — they provide hidden storage for daily-use products while maintaining the clean, intentional look from across the room.
11. Industrial Pipe Fixtures That Nail the Rustic Bathroom Design
Chrome hardware is the enemy of rustic style. The high shine, standard dimensions, and complete absence of character signal “I haven’t thought about this bathroom at all.” Black iron pipe hardware signals the exact opposite.
The entry-level version of this rustic bathroom makeover idea is a DIY towel bar: two floor flanges, two 90-degree elbows, two 3-inch nipple sections, and one 18-inch threaded crossbar pipe, all from the plumbing aisle at any hardware store. Total materials: under $20. Assembly takes under an hour with no special tools. Before assembly, wash every fitting with dish soap to remove the factory oil coating — skip this and your towels will pick up the smell for months. After assembly, spray the completed hardware with two light coats of clear polyacrylic to prevent rust in bathroom humidity.
If you’d rather skip the assembly, Pipe Decor sells pre-made bathroom hardware sets (towel bar, robe hook, and toilet paper holder) for $45–$60 with an electroplated black finish. Either approach works. What matters is consistency: use the same black finish on all metal elements in the bathroom — faucets, light fixtures, mirror frame, shower curtain rod. That consistent metal finish ties a mixed-style room together more effectively than any single piece. Three matching pipe pieces is the sweet spot — beyond that, the look tips from rustic-industrial into something that resembles a plumbing diagram.
12. Linen and Burlap Window Treatments for Soft Natural Light
Most bathroom windows get a plastic roller blind (practical, personality-free) or nothing at all. Natural fabric curtains are the rustic alternative — they filter light into a warm, dappled glow while adding organic texture that reinforces every other element in the room.
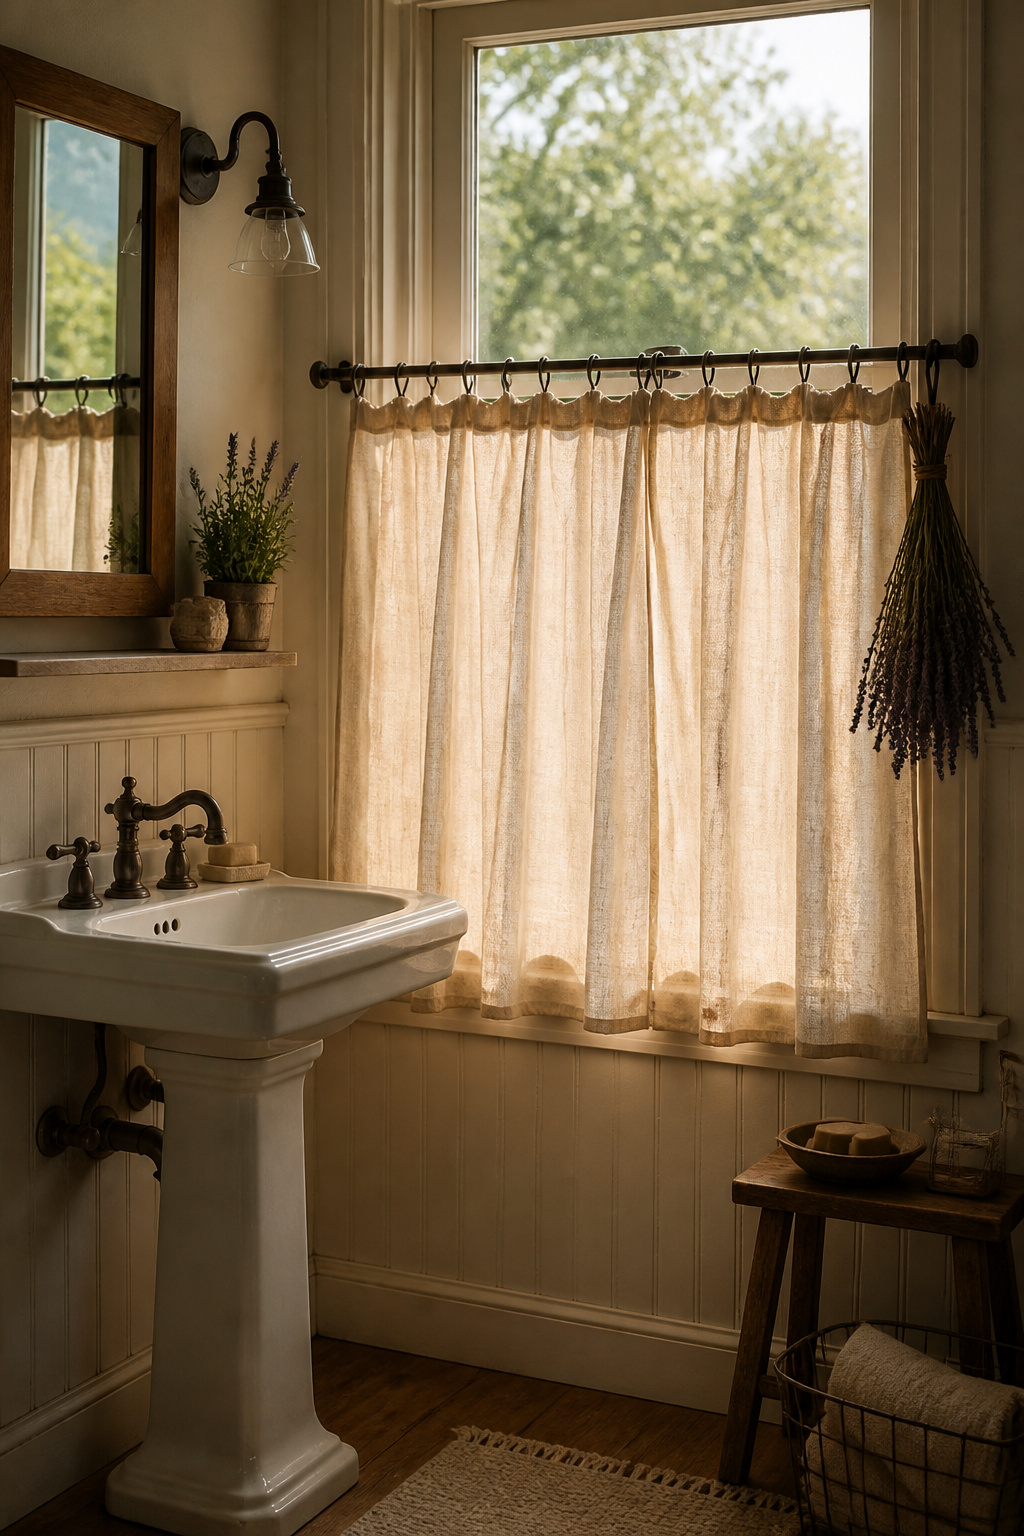
True burlap works, but linen burlap — 100% raw linen woven to mimic burlap’s texture — is the better bathroom choice. It has the same appearance without burlap’s tendency to shed fibres, and it handles humidity more gracefully. Hemp is even better if you can find it: it dries fastest of all natural fabrics and has natural mold-resistant properties.
You don’t need to sew a stitch. Cut your fabric panel to window height plus 8 inches (for hems), width plus 4 inches (for side hems). Fold, press, and iron the hems in place using Stitch Witchery hem tape — an iron-on product from any craft store. Fold the top edge over twice to create a rod pocket and press that down too. You have a finished, functional curtain in under an hour. For privacy without blocking natural light, a café curtain (lower-half coverage only) is the most practical rustic bathroom window treatment. Mount the rod at the window midpoint; the fabric covers the bottom for shower and tub privacy while natural light floods in from above.
13. Woven Baskets and Rattan Organizers for Effortless Storage
Before you buy a single basket, do one thing: remove every plastic bin from your bathroom. Pull them all out. Now look at the empty shelves, the bare floor, the open cabinet under the vanity. That’s what naturally grown rattan is designed for.
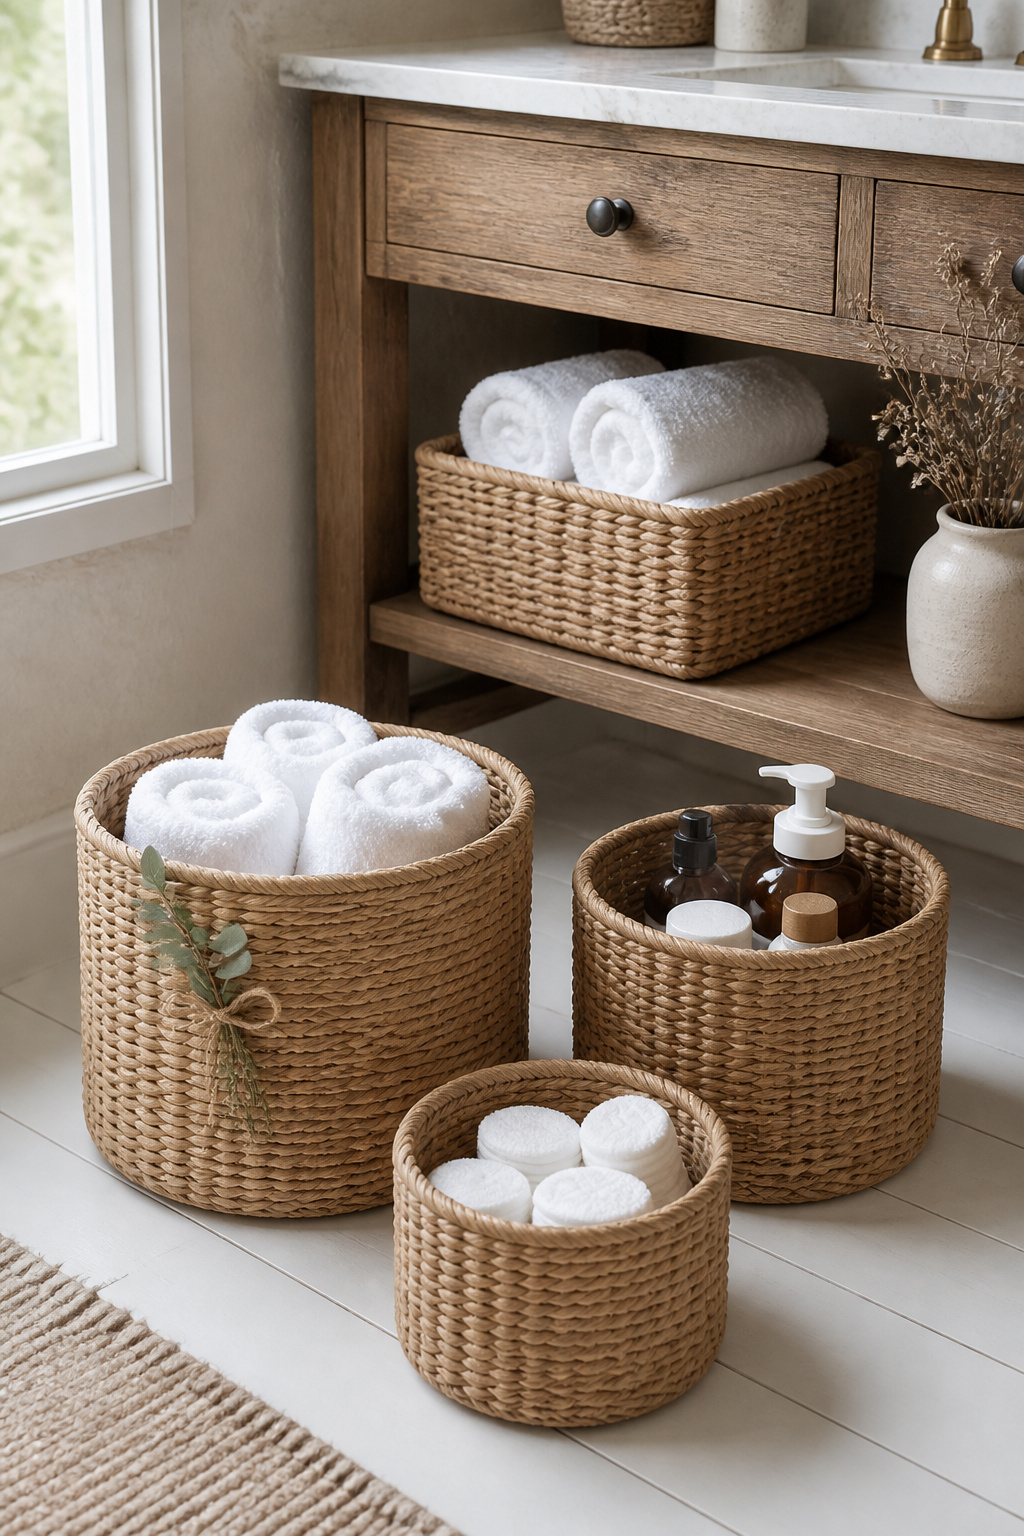
Replacing plastic containers with identically sized woven baskets immediately changes the visual register of the room from generic to intentional. Naturally grown rattan handles bathroom humidity without warping or becoming brittle — it outperforms water hyacinth (which softens with repeated moisture) and seagrass (which can mold in confined spaces) for long-term use. For more ideas on getting storage right in a small bathroom, these clever bathroom storage ideas for small spaces are worth a look before you buy.
Under the vanity: two medium baskets (8–10 inches wide each) set side by side fit perfectly in the opening beneath most pedestal sinks for hidden product storage. For the over-toilet zone: a three-tier ladder shelf ($30–$60) with one basket per tier creates three storage zones in a completely unused footprint. For the wall: three small flat-back baskets attached with heavy-duty adhesive strips add storage and texture without drilling. Line any basket holding loose small items with a folded piece of linen so things don’t fall through the weave. Label them with kraft paper tags tied with twine — this small step keeps the system working rather than slowly dissolving into attractive-looking chaos.
14. Peel-and-Stick Shiplap Panels for a Renter-Friendly Rustic Bathroom Makeover
Renters have more rustic bathroom makeover options than they probably realize. The most deposit-protecting version of the shiplap accent wall is peel-and-stick shiplap wallpaper — specifically engineered for lease-compliant installation and removal, with adhesive that releases cleanly from painted drywall when heated.
The removal process is genuinely straightforward. Hold a blow-dryer on medium heat 2 inches from the panel edge, wait about 10 seconds, and lift slowly. The adhesive softens at around 130°F — low enough to be safe, high enough to release cleanly. For any residual stickiness, rubbing alcohol on a damp cloth removes it without affecting paint. The wall should be indistinguishable from pre-installation — I’ve watched friends pass their move-out inspections after removing a full accent wall in under an hour.
Rocky Mountain Decals and WoodPlank both make shiplap patterns in fully removable formats that meet standard “no permanent alterations” rental clauses. WoodPlank’s panels are 100% waterproof and specifically tested for high-moisture rooms. Stikwood uses real wood veneer over a backing substrate — the wood grain is genuinely authentic, not a printed photograph. One important installation tip: allow 30 days after any fresh paint before applying peel-and-stick panels. Fresh paint hasn’t fully cured, and adhesive on under-cured paint is exactly how you end up with pulled-off patches at move-out.
15. Dried Wildflower and Herb Bundles as Year-Round Bathroom Decor
Fresh flowers are beautiful. They’re also the worst choice for a rustic bathroom — they wilt in humidity, struggle in low light, and need replacing weekly. Dried botanicals work in the opposite direction: they thrive in warm, humid air and improve with age as their muted, natural tones settle into the space.
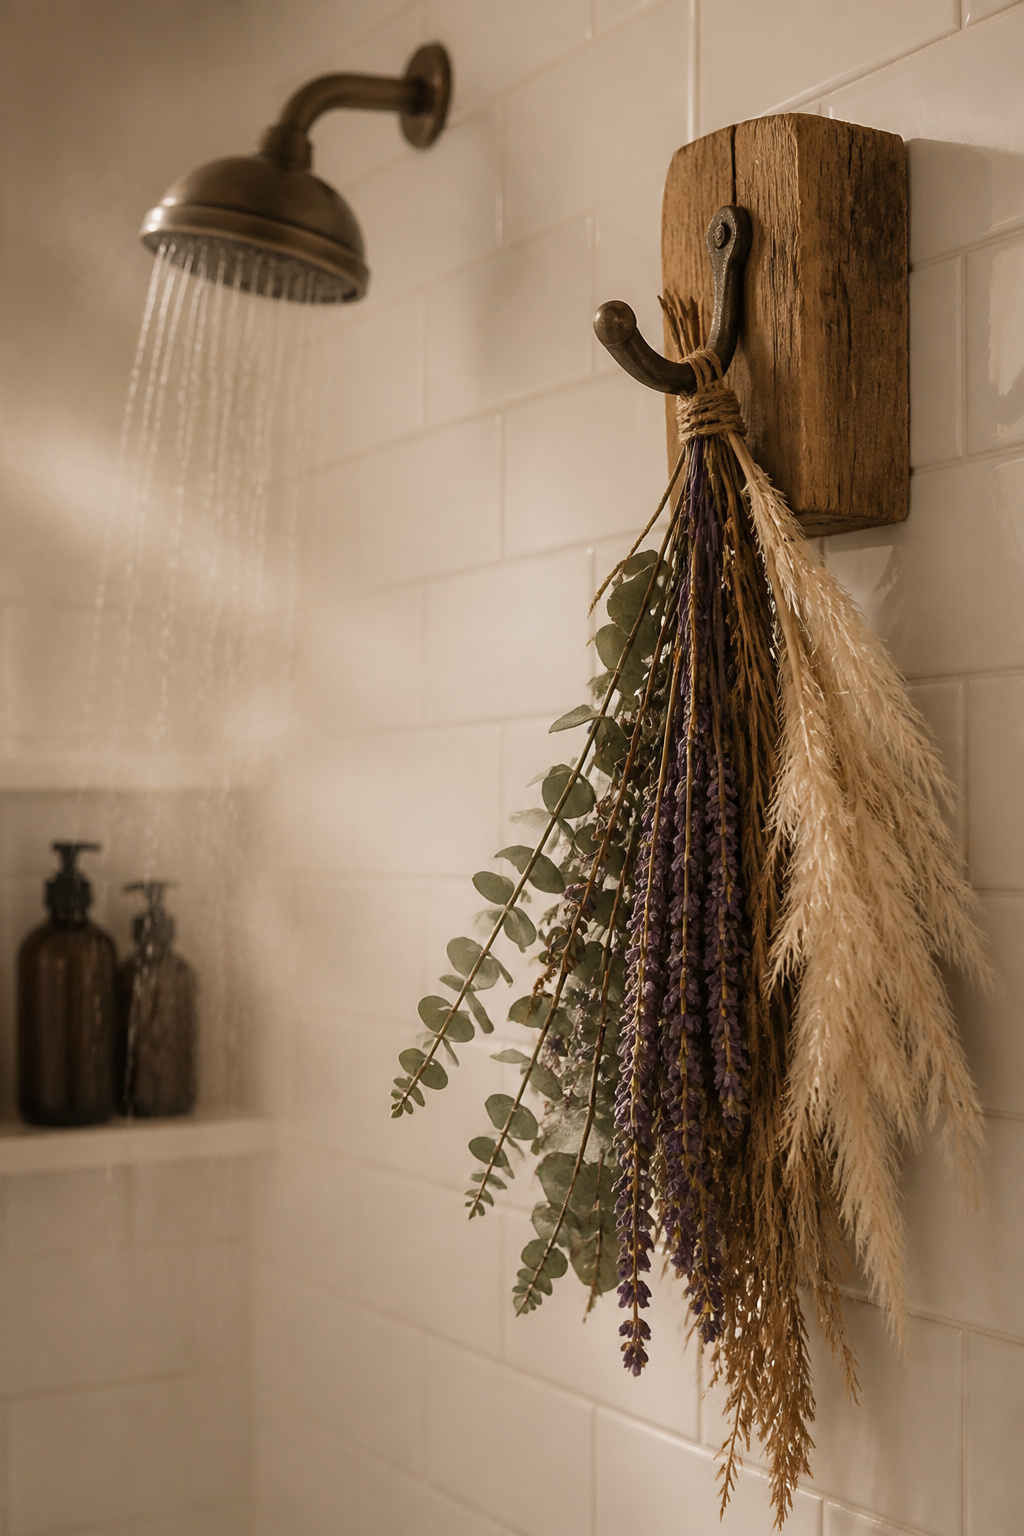
Dried eucalyptus is the entry point. A bundle hung between the shower head and the wall activates with every shower — the steam releases the natural oils and fills the bathroom with a faint menthol scent that turns your morning routine into something approaching a spa experience. It lasts up to three months before the leaves lose color and fragrance. Ten-stem bundles are available on Amazon and Etsy for $12–$18 — far cheaper than buying fresh flowers weekly. Hang the bundle where steam reaches it but direct spray doesn’t; sustained water contact will mold even dried plant material eventually.
For a vanity display, a matte terracotta or hand-thrown ceramic vase with dried pampas grass on a small reclaimed wood tray is one of the most cohesive rustic bathroom vignettes you can put together. Three materials — clay, plant, wood — in a single small composition. Keep it to two or three botanical varieties in any arrangement; more than that starts to look like a haystack rather than a display. Also, keep every dried arrangement away from direct sunlight — UV exposure bleaches natural tones within weeks.
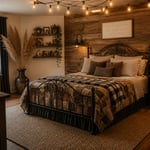
16. Edison Bulb Vanity Lighting for That Warm Rustic Glow
The color temperature of your bathroom lighting affects how every other design decision in the room looks. Builder-grade vanity globes typically emit 4,000–5,000K (cool white), which makes skin look washed out, white walls look sterile, and wood tones look flat. Edison filament bulbs emit 2,200–2,700K — the same amber range as candlelight.
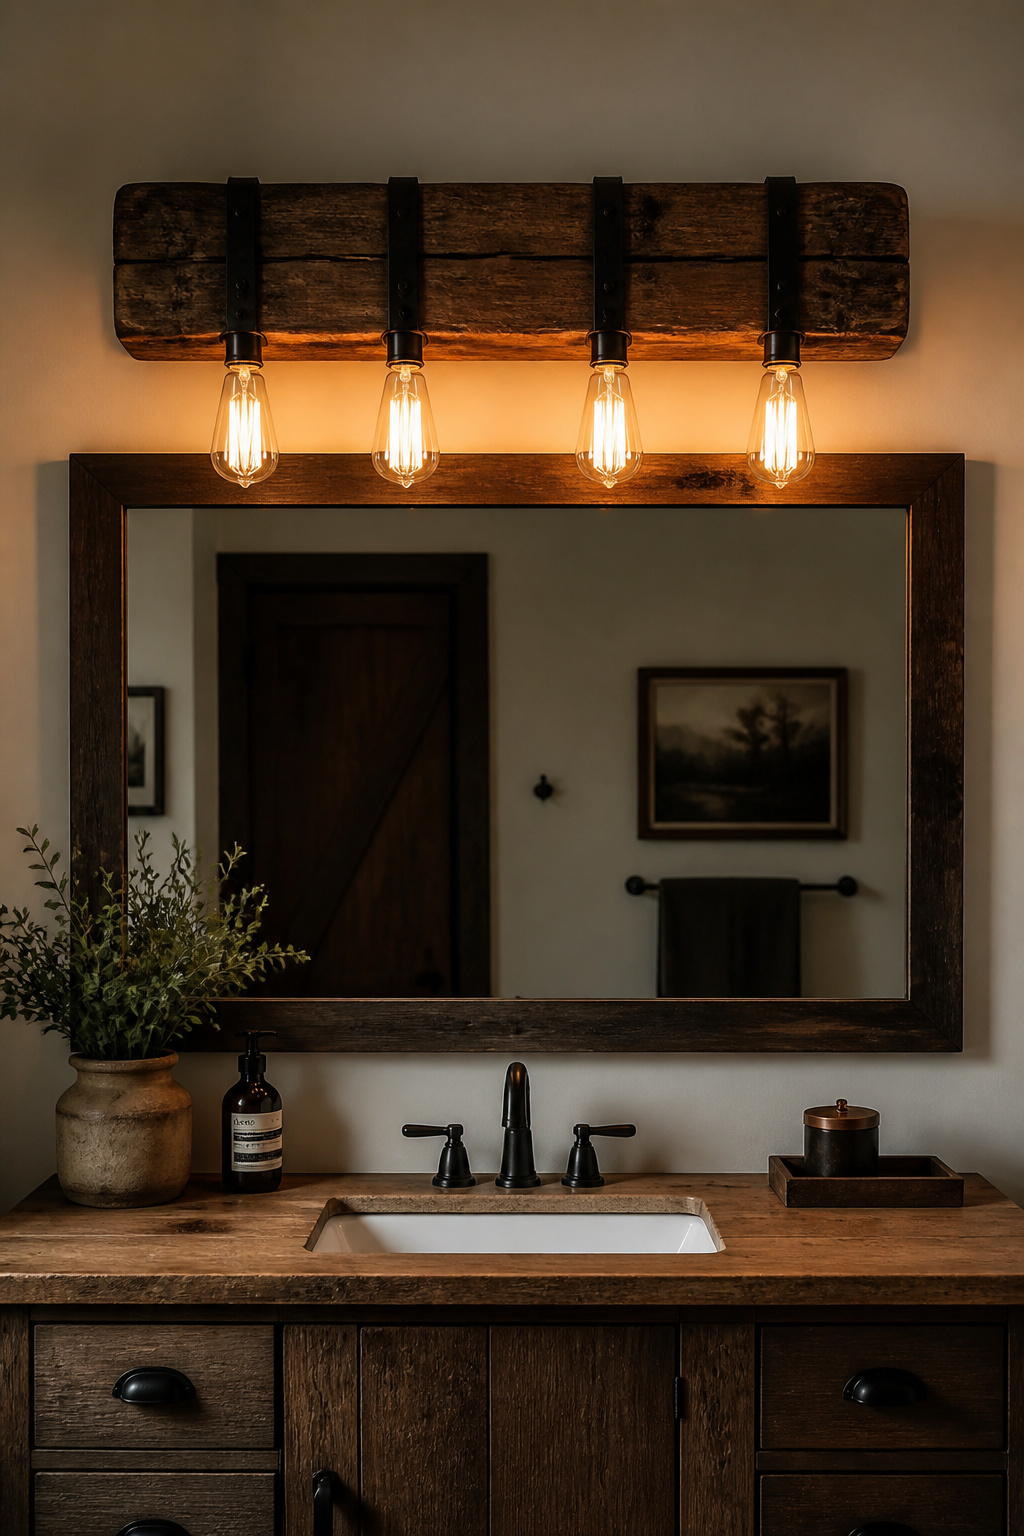
In practice, warm light makes wood glow deeper, makes terracotta look richer, and turns white shiplap the color of cream instead of office paper. It’s the one change in a rustic bathroom makeover that affects every other element simultaneously. Changing your vanity bulbs takes literally five minutes and costs $10–$20 for a full set of LED Edison filament bulbs — the highest return on investment of anything on this list. For expert guidance on placement and fixture types, check out these expert tips for bathroom lighting over mirror.
For the fixture itself: a reclaimed wood beam or black pipe vanity bar with three to five exposed Edison bulbs is the most characteristic rustic format. Lulight Shop and Rustic Artistry both make these for $80–$200 in solid wood and iron. A pair of black cage sconces flanking the mirror is a more symmetrical option that eliminates top-down shadow — the kind that makes everyone look tired. Choose LED Edison bulbs rated at 2200K (extra warm white) rather than the standard 2700K, and add a dimmer switch ($15–$30 to install) to unlock the full mood range. Without a dimmer, you’re leaving half the investment on the table.
17. Stenciled Floor Pattern for a Budget Bathroom Makeover With Character
Ceramic tile floors are one of the most permanent-seeming things in a bathroom, which makes most people reluctant to touch them. But a painted and stenciled finish can transform an outdated floor for under $50 in materials — no tile removal, no adhesive, no skills beyond patience and a dry brush.
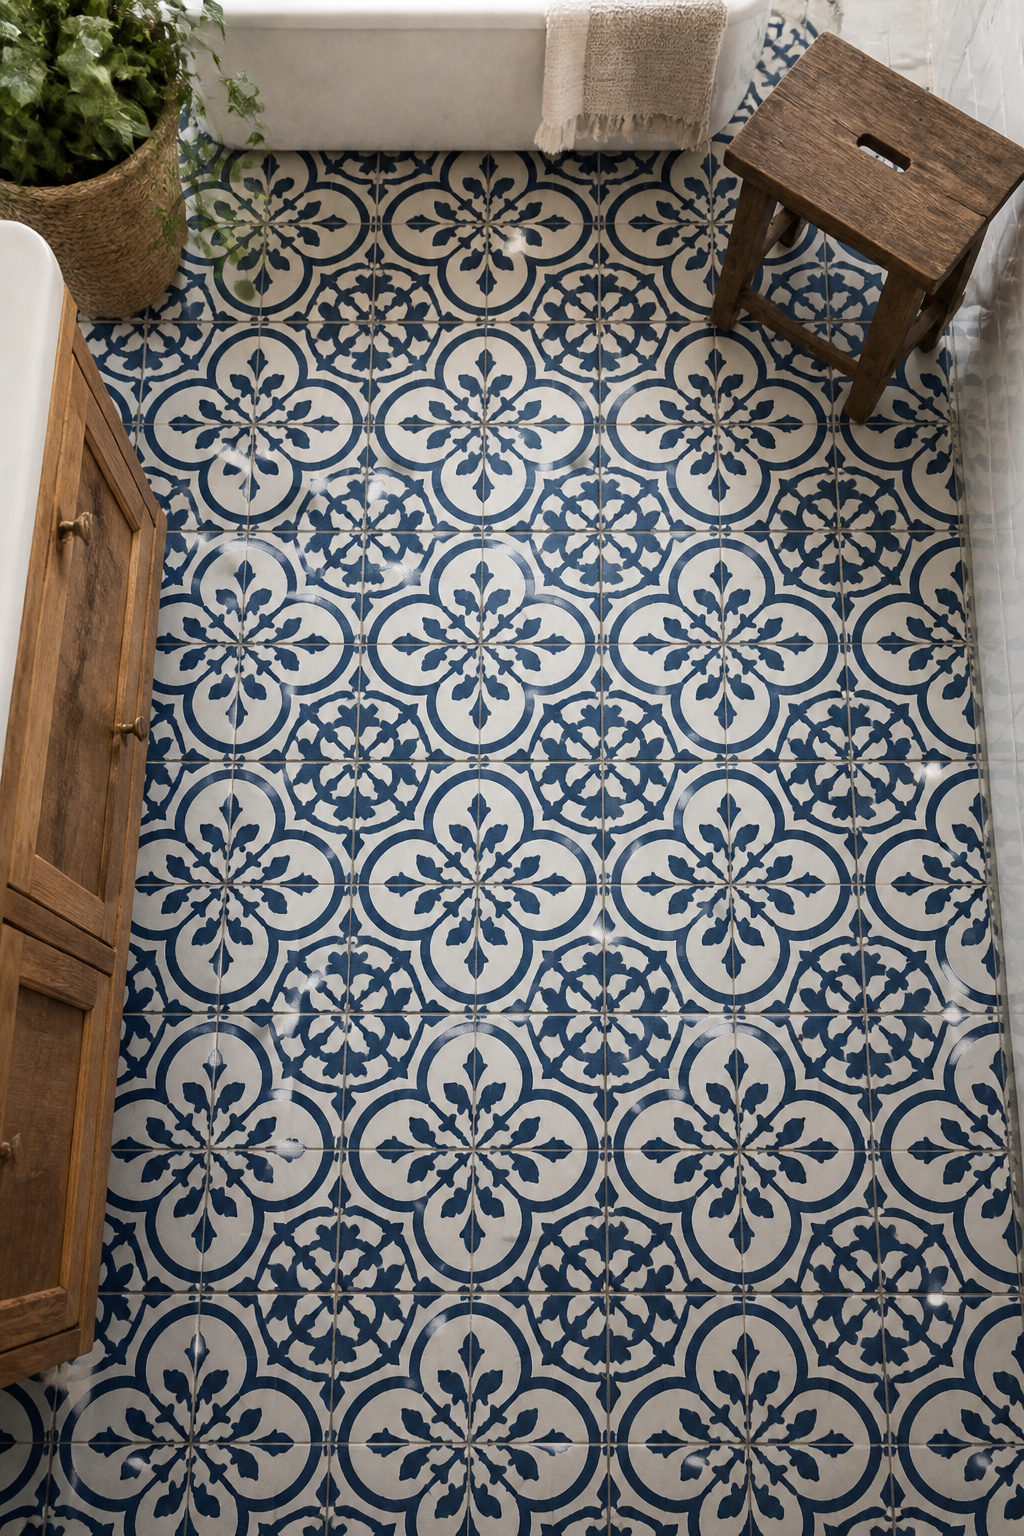
The material list is short: a floor stencil ($12–$20 from Royal Design Studio or Etsy), one quart of floor paint ($10–$15), and a can of water-based polyurethane sealer ($12–$18). Moroccan, hexagonal, and geometric patterns work best for rustic bathrooms. Also, the technique works on ceramic, porcelain, vinyl, and linoleum — virtually any existing bathroom floor.
The technique secret is dry-brushing: load your stencil brush or dense foam roller with paint, then wipe 80% of that paint off onto a paper towel before the brush touches the stencil. This “almost dry” approach gives you crisp, clean edges rather than the bleed-under smears that ruin stenciled floors. Use low-tack spray adhesive on the back of the stencil before each placement; work from the center outward; allow each section to dry fully before repositioning. For sealing: apply three to four coats of non-yellowing, water-based polyurethane in satin sheen, using a foam roller. Wait the full 72 hours for complete cure before placing rugs. Done properly, a stenciled rustic bathroom floor lasts five to seven years before it needs refreshing.
18. Driftwood Mirror Frame Makeover Using Thrift-Store Finds
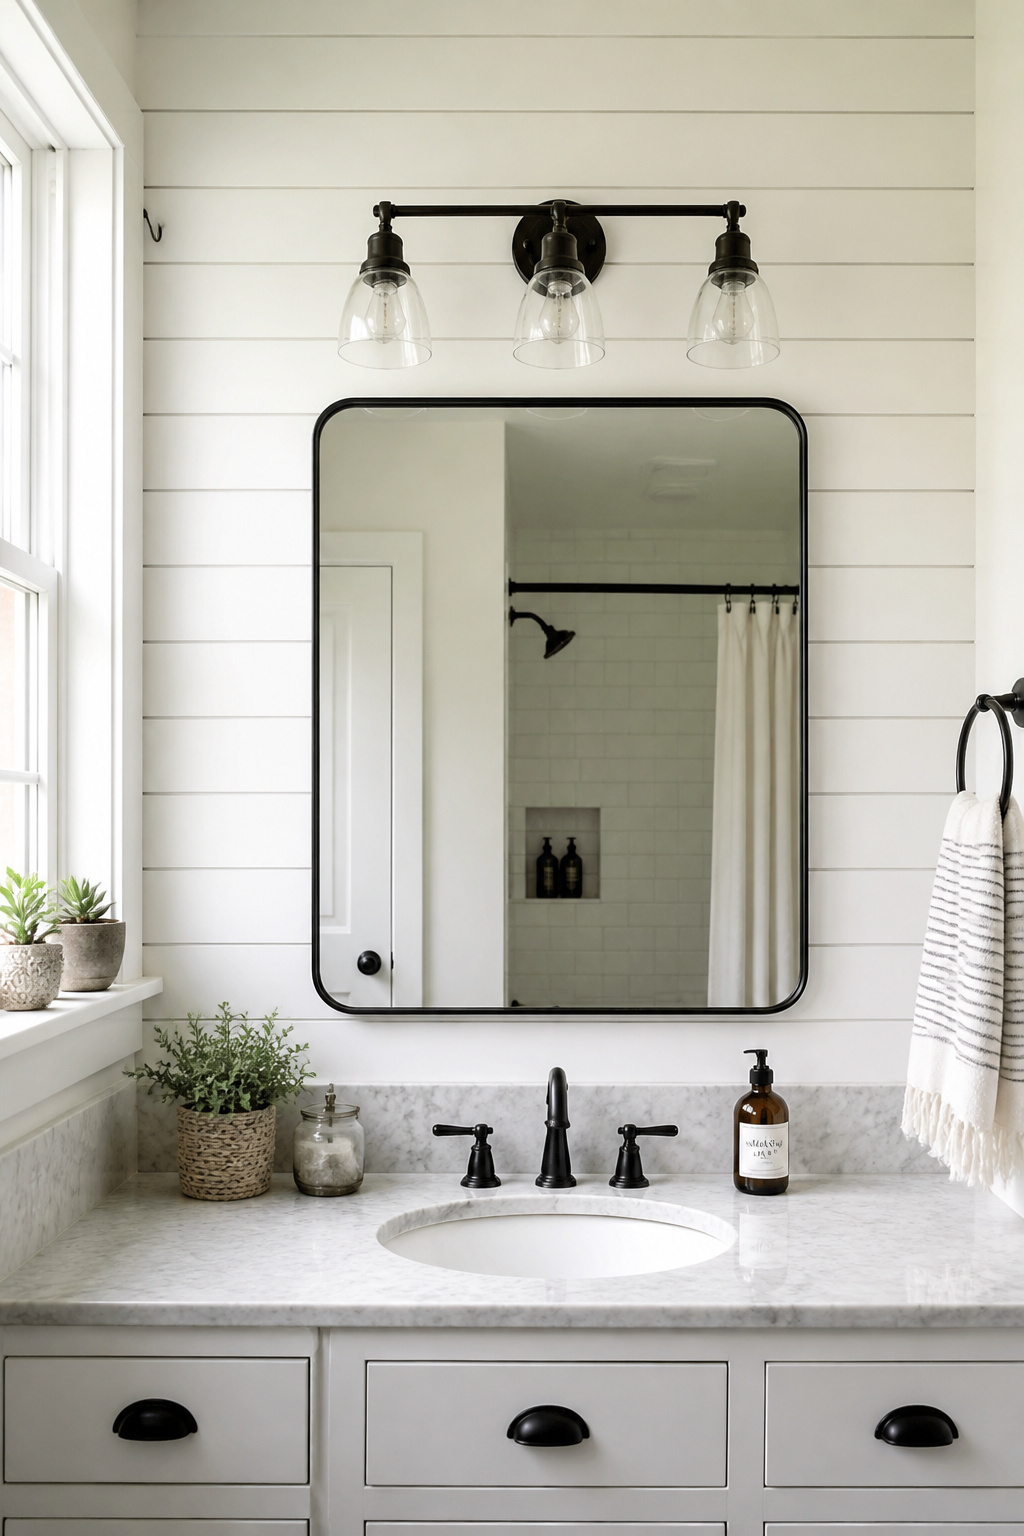
The bathroom mirror is the most underrated upgrade opportunity in the entire room. It’s the largest surface on the vanity wall, the first thing you face every morning, and its frame — or lack of one — sets the visual tone for everything around it. A builder-grade frameless mirror or plastic-trimmed box reads as unfinished. A driftwood or reclaimed wood frame reads as intentional, organic, and genuinely distinctive.
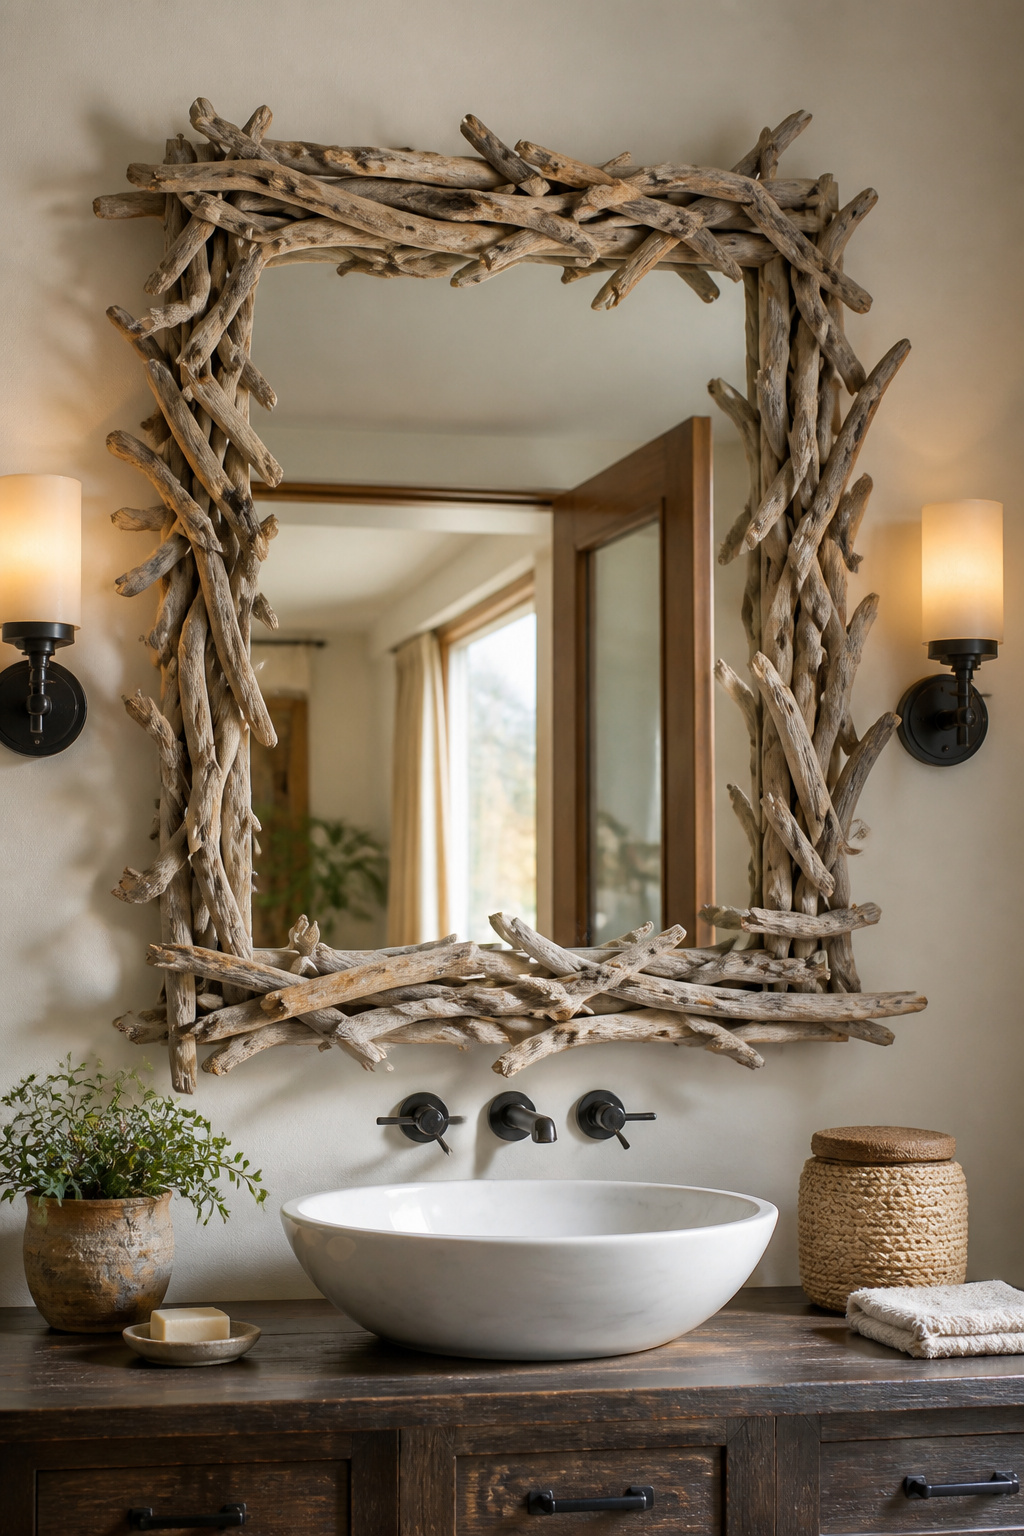
For a mirror that’s glued directly to the wall, as many builder mirrors are, cut four lengths of driftwood board or natural branches to the mirror’s outer dimensions. Attach the two side pieces first using mirror-safe construction adhesive — Liquid Nails Mirror specifically, not standard construction adhesive, which is not moisture-resistant. Then attach top and bottom pieces across the ends. The frame stays flush with the wall because it’s adhered to the glass edge itself, not the wall behind it.
Driftwood sourcing is almost free. Coastal beaches and riverbeds offer ready-weathered material (check local ordinances for collection rules). In landlocked areas, fallen branches from your yard work equally well — strip bark, dry for two weeks, sand rough edges. Pallet wood ripped to 1–2-inch strips and whitewashed mimics driftwood convincingly. For inspiration on how a mirror frame can anchor the whole room, these innovative bathroom mirror designs show what’s possible before you start gluing. One frame, zero dollars in materials, and immediately the most asked-about piece in the bathroom.
How to Plan and Prioritise Your Rustic Bathroom Makeover
The question I hear most often isn’t “how do I do this?” — it’s “where do I start?” If you’ve ever spent an afternoon reading about rustic bathroom makeover ideas and ended the day with more browser tabs than decisions, you’re not alone.
Here’s the framework that’s worked for me: start with hardware and lighting. Swap the chrome towel bars and toilet paper holder for iron pipe fittings, change your vanity bulbs to warm LED Edison options, and replace every plastic bin with a woven basket. Total cost: $60–$120. Total time: one Saturday. And when you stand back and look at the result, you’ll know which bigger changes are actually worth making — and which you can skip entirely.
Weekend two: accessories. The mirror frame makeover, dried botanical arrangements, a wooden ladder for towels. Weekend three, if you’re still hungry for more: choose one wall treatment. Not all of them — one. A shiplap accent wall behind the tub, a faux brick effect behind the toilet, or peel-and-stick shiplap panels for renters — any one of them is enough to define the room’s character without making the space feel overdressed.
The rustic bathroom makeover is built one considered piece at a time. It doesn’t arrive all at once — and that’s actually what makes it feel collected and real rather than decorated. Start with the hardware swap this weekend. Everything else follows from there.