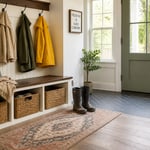
I still remember the morning I opened my own front door to a half-melted puddle of slush. Two sets of dog paw prints tracked straight across what used to be a pretty, and very much not waterproof, rug. That’s the moment I finally got serious about mudroom flooring. No amount of cute storage bins fixes a floor that can’t handle real life. I’ve spent years testing, tearing out, and replacing flooring in my own high-traffic entry spaces on a real budget. I’ve learned which mudroom flooring materials earn their keep, and which ones just look good in photos before the first snowstorm proves them wrong.
Below are 15 mudroom floor ideas that range from a weekend vinyl upgrade to a full tile splurge. Every single one was chosen because it can handle muddy boots, wet paws, and melting snow without falling apart on you. I’ll walk you through real cost ranges and what’s realistic to DIY yourself. I’ll also flag the small details, like grout color or wear-layer thickness. They’re the difference between a floor that looks good for a season and one that holds up for years.
1. Porcelain Wood-Look Tile for a Warm, Durable First Impression
As entryway flooring goes, wood-look porcelain has a way of tricking your brain. It makes your space feel cozier than it actually is. You get all that warm, plank-style charm without a single drop of moisture risk. That’s because porcelain is non-porous and 100% waterproof at the tile level, a claim real hardwood simply can’t make. It’s why so many flooring guides rank it as the single best mudroom flooring choice out there.
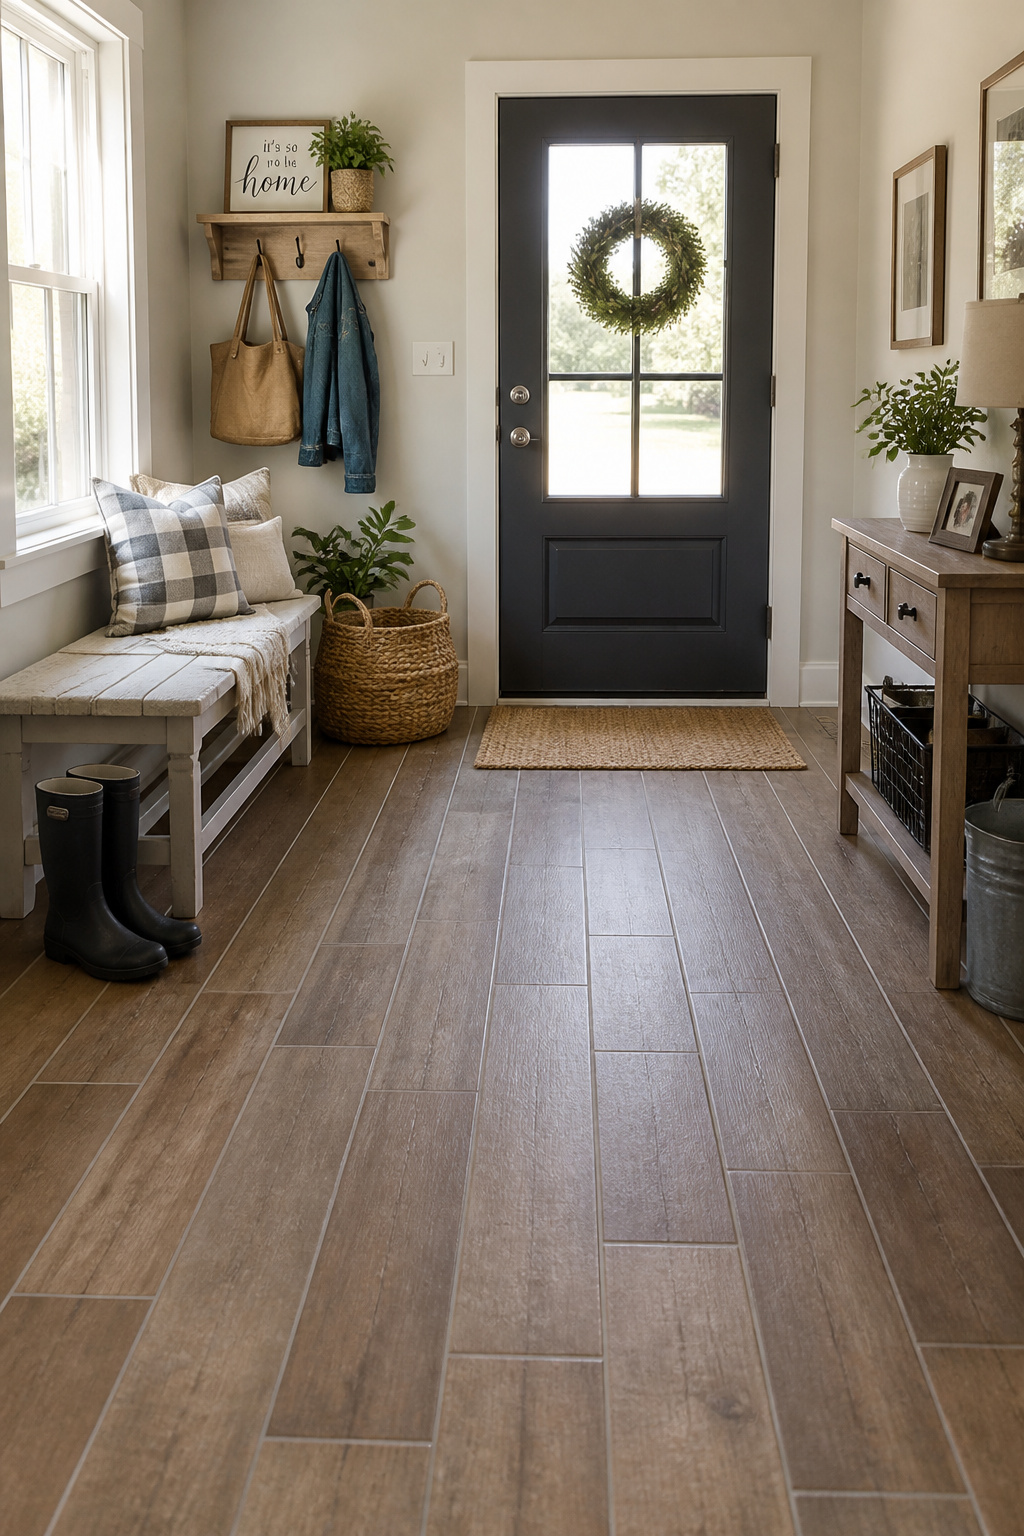
Many flooring guides call this the best flooring for mudroom spaces specifically, and the price backs that up. Material runs $2-8 per square foot for standard lines, climbing to $3-30 for premium options that mimic a specific wood species. So, a typical small entryway installed lands around $10-30 per square foot once labor and prep are factored in, usually $600-2,500 total. If you’re tackling this as a DIY project, lay a waterproof underlayment first. Use thin-set mortar rated specifically for porcelain, and keep your spacers at a consistent 1/4 inch to mimic real plank joints. While you’re planning the floor, it’s worth thinking through boot storage and entryway organization ideas too. The two projects tend to happen together.
My honest pro tip: skip the polished finish and go matte or textured instead. Glossy porcelain shows every bit of salt residue and scuff, while matte hides it beautifully. And don’t cheap out on subfloor prep. It only adds $2-5 per square foot. Skipping it is the number one reason DIYers end up with cracked grout within a year or two.
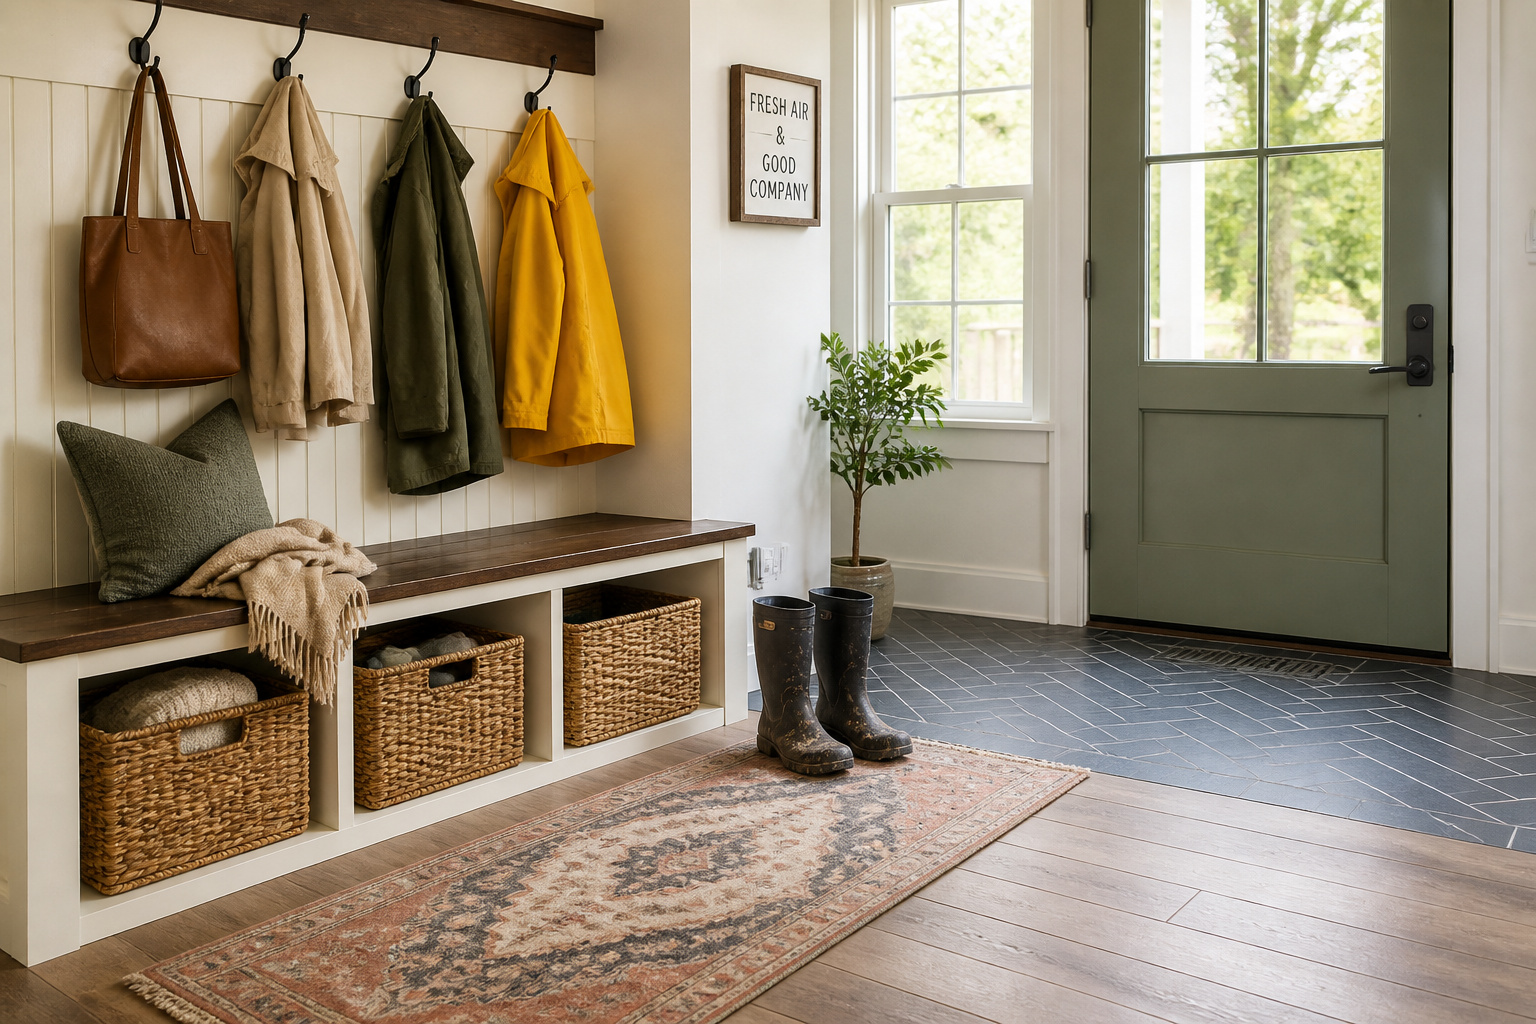
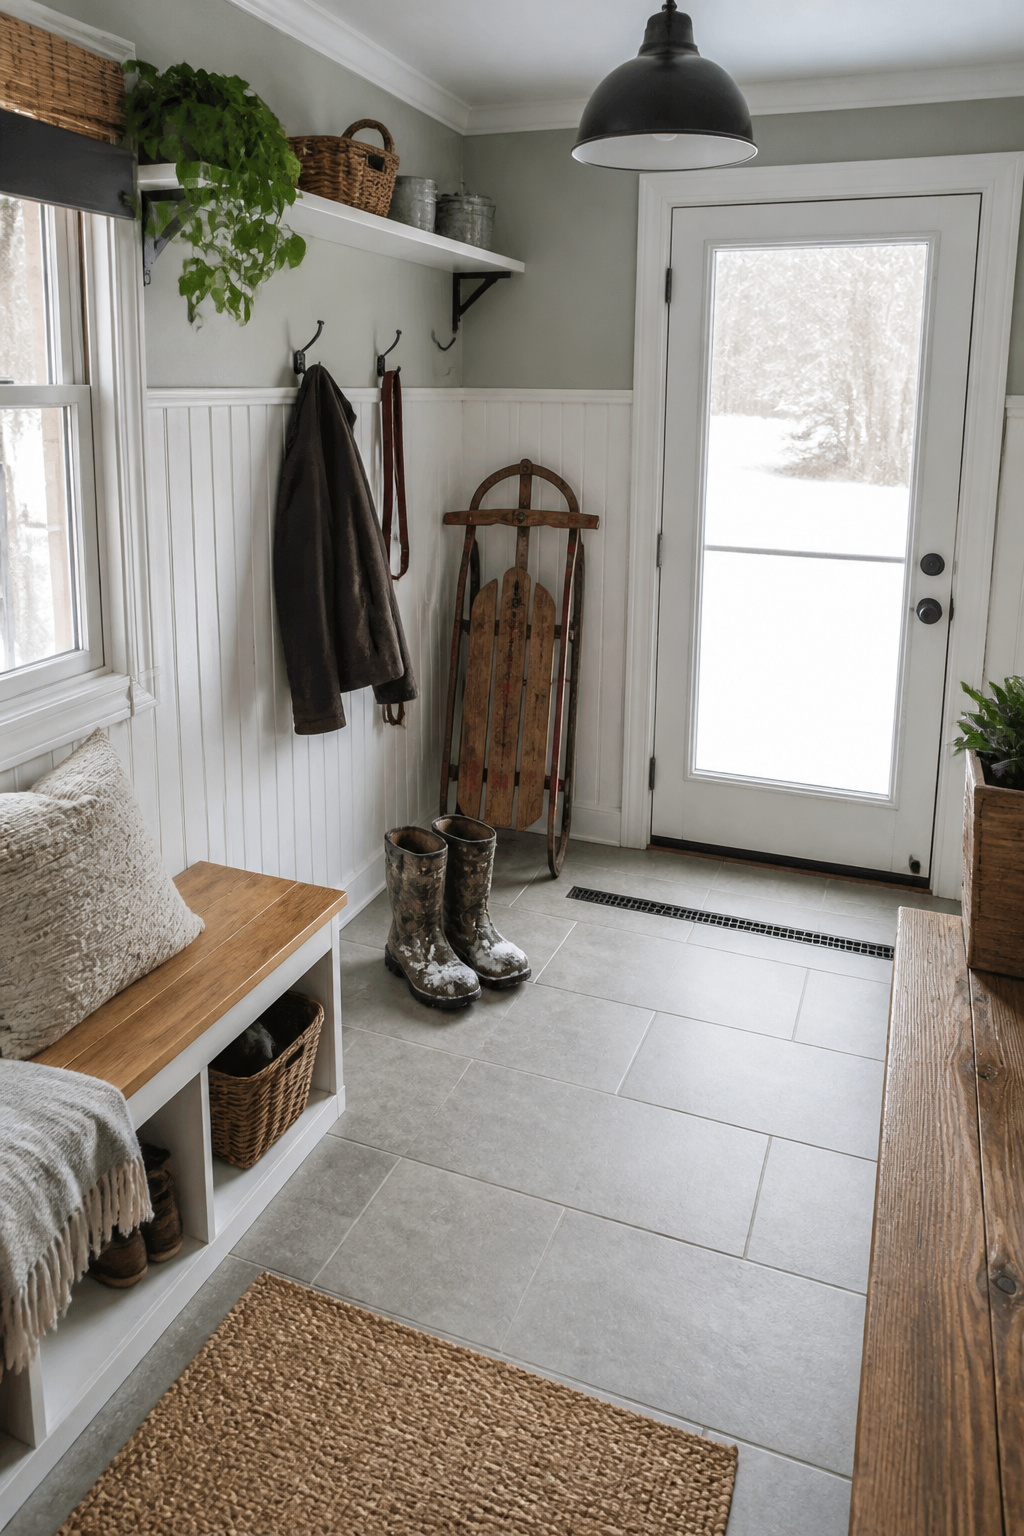
2. Large-Format Slate Tile for a Rugged Mudroom Floor That Lasts
If you want a durable mudroom floor with real character, slate is a strong place to start. It has a naturally cleft, almost stormy texture that just looks like it belongs in a hardworking entryway. That texture isn’t only for show. That same roughness gives slate real grip underfoot, even when it’s wet. That’s exactly what you want for mudroom flooring when boots are dripping snowmelt across your floor.
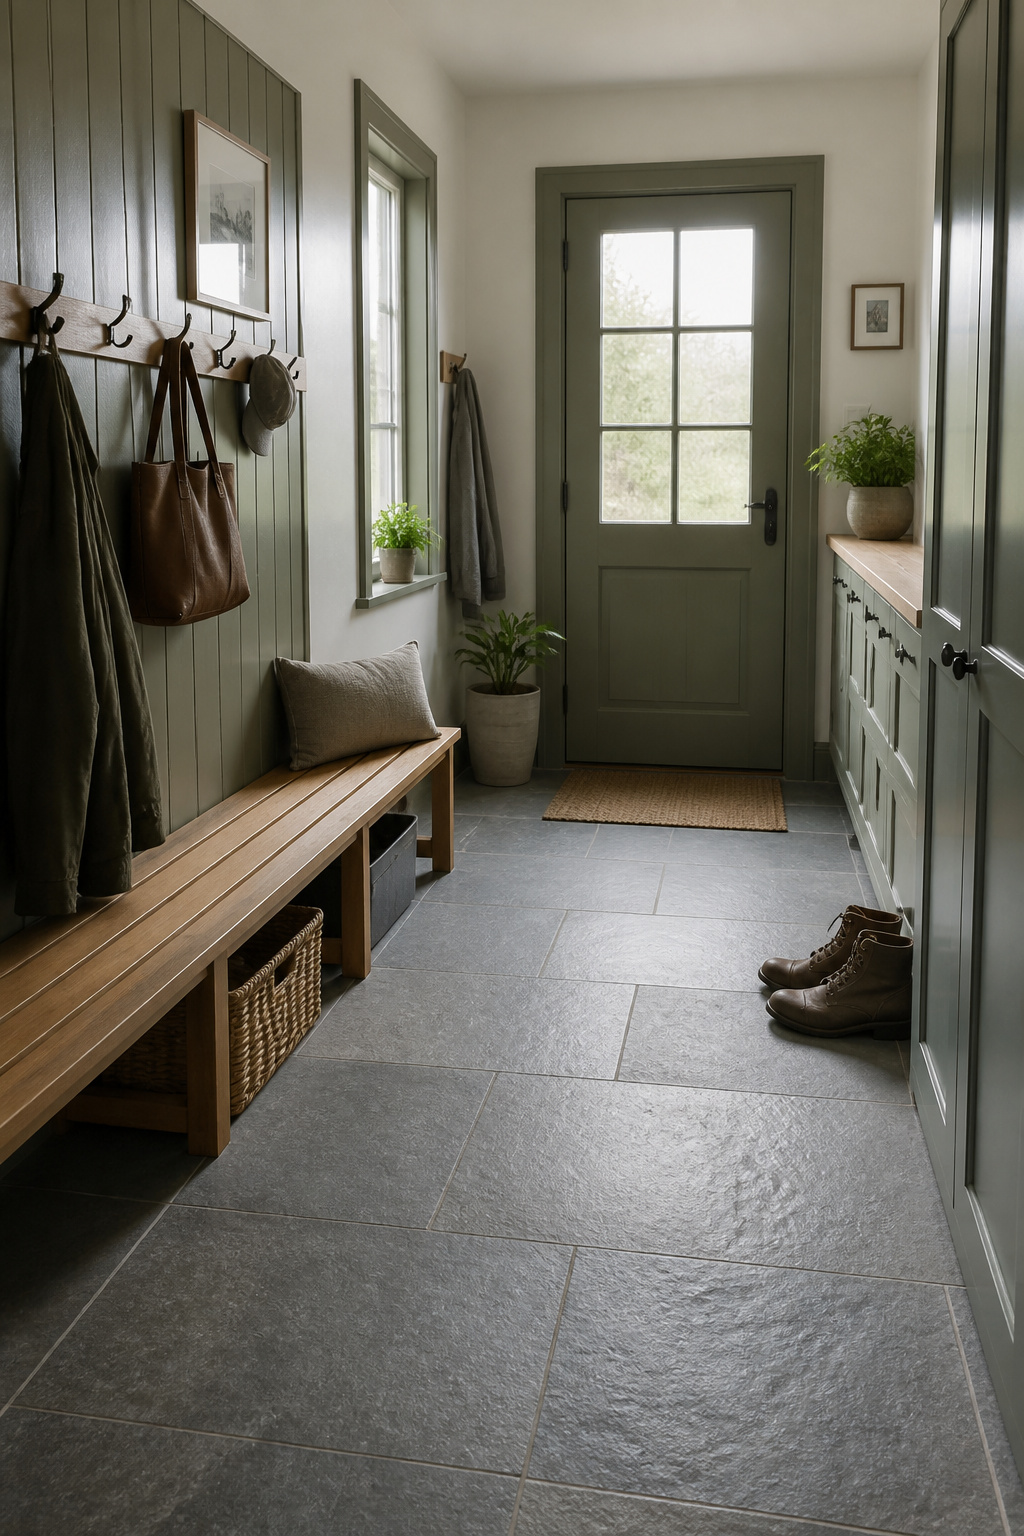
This is a stone that plays the long game. In fact, slate can last up to 100 years compared to roughly 25 for laminate or linoleum. The higher upfront cost stretches a lot further than it looks at first glance. Material runs $9-40 per square foot depending on size and thickness. That’s because larger format tiles cost more, since they’re heavier and harder to cut without breaking. Full installs average $10-16 per square foot, or about $2,200-3,600 for a 200-square-foot space. Scale that down for a typical 40-80-square-foot mudroom and it’s much more manageable. Going large-format in a small space actually works in your favor here, since fewer grout lines means less to scrub. That matters when you’re trying to keep a farmhouse-style entry looking pulled together.
One caveat before you fall in love with a sample: slate is softer than granite or porcelain and can scuff more easily. It also needs resealing every 1-2 years in a high-traffic, wet entry, closer to annually than every other year. A quick water-drop test tells you when. If it darkens or absorbs within 10-30 minutes, it’s time. And please, choose a honed or textured finish over polished. A beautiful glossy slate floor right by the door is a slip waiting to happen.
3. Luxury Vinyl Plank for Waterproof, Budget-Friendly Style
If you’re working with a tight budget and an even tighter weekend, LVP is probably going to be your answer. In fact, I’ve recommended this mudroom flooring option to more readers than almost anything else on this list. It’s 100% waterproof at the plank level. So the material itself won’t absorb, swell, or warp no matter how many wet boots and muddy paws cross it.
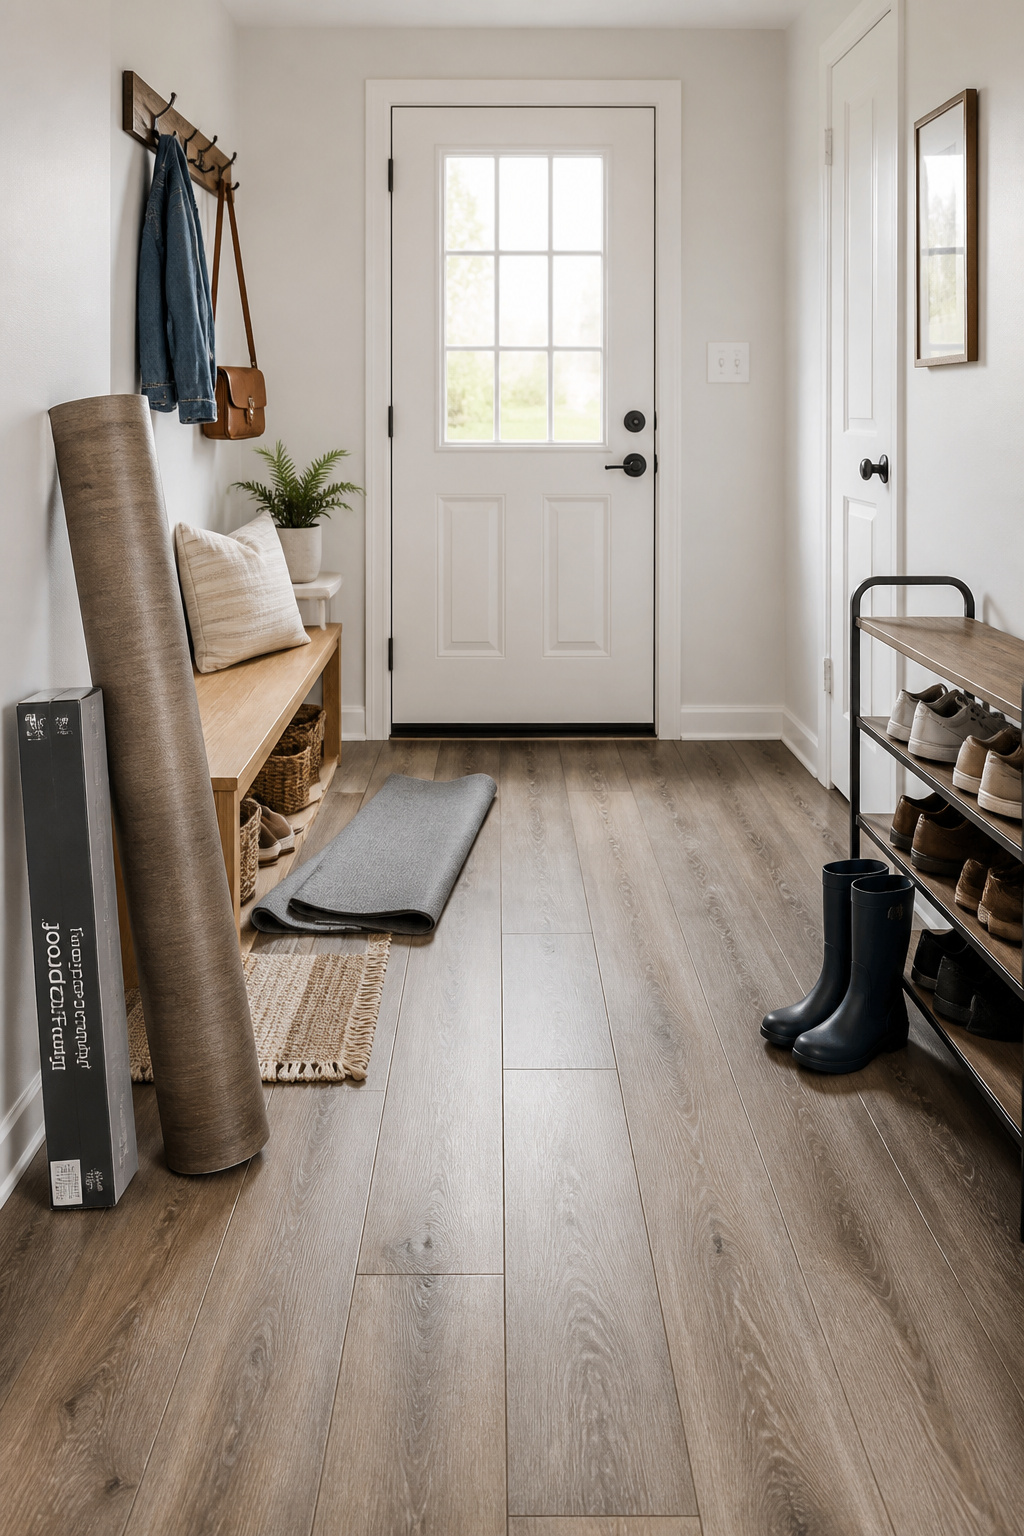
Pricing breaks down by wear-layer quality: budget LVP (6-12 mil, WPC core) runs $1.50-2.50 per square foot, while mid-range (12-20 mil) lands at $2.50-4.50. Premium 20+ mil rigid SPC core runs $4.50-7. For a mudroom specifically, I push readers toward at least a 20-mil wear layer. It can realistically hold up 10-15+ years against boots, claws, and tracked-in grit, while anything under 12 mil shows wear fast. Brands like COREtec Plus and Shaw Floorte Pro are specifically built to handle the cold, moisture, and grit a mudroom throws at them. Since click-lock LVP is one of the few upgrades that’s genuinely reversible, it’s a smart pick if you’re renting rather than owning.
The best part, though, is the install itself. Click-lock LVP needs nothing but basic tools: a utility knife, tapping block, and rubber mallet. A confident first-timer can lay 75-125 square feet in a day, which covers most mudrooms in a single weekend afternoon. This is the upgrade I’d point a first-time DIYer toward before any other on this list. DIYing it instead of hiring it out saves roughly $150-300 in labor on a 100-square-foot room. I’d rather see that money go toward a thicker wear layer.
4. Stained and Sealed Concrete: An Industrial Mudroom Floor Idea
If your mudroom already sits on a concrete slab, you might be standing on your cheapest, toughest option without even realizing it. Stained and sealed concrete is essentially indestructible against boots, cleats, dropped tools, and road salt. It also never chips or needs refinishing the way other floors eventually do.
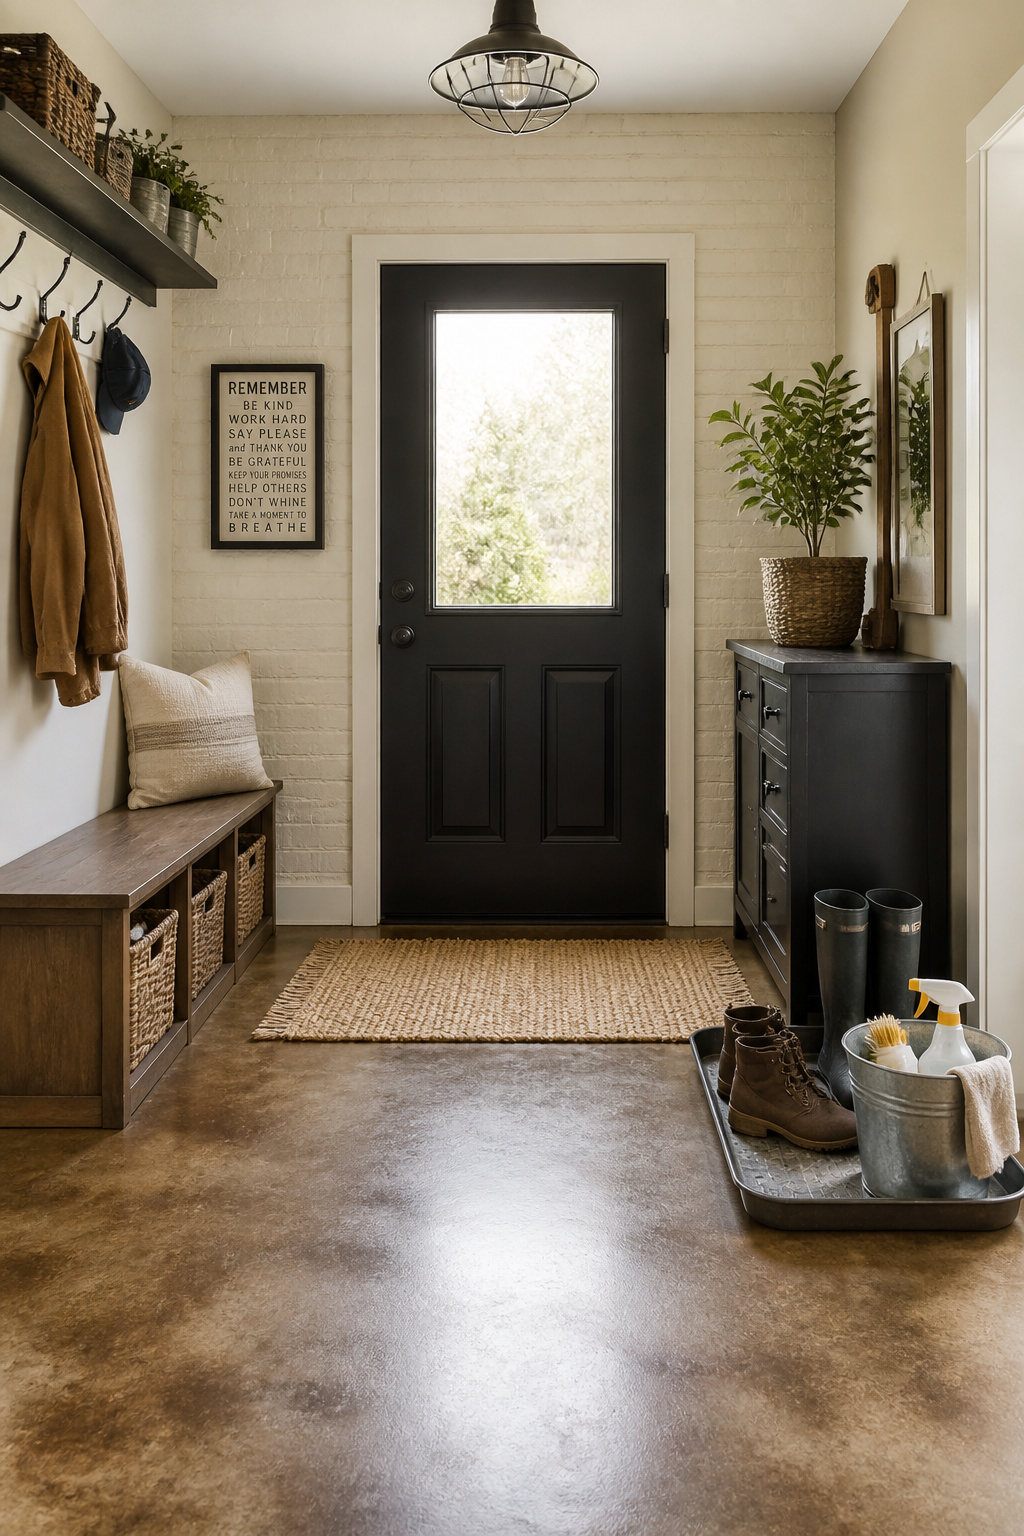
Basic stained concrete with minor slab prep runs just $2-4 per square foot. That makes it one of the most affordable mudroom flooring entries on this list. Sealer adds another $1-3 per square foot. Here’s where it gets technical but matters: acrylic sealers guard against water and chloride well but wear faster. Polyurethane runs nearly twice as thick and resists abrasion, scuffs, and stains far better. That’s worth the upcharge for a family entry that sees daily traffic. Whatever sealer you choose, don’t skip it. Unsealed stained color wears off within a season or two of foot traffic. The industrial look pairs beautifully with modern farmhouse decorating ideas. Soften the concrete with warmer accents elsewhere in the space.
My pro tip, one I wish someone had told me sooner: mix an anti-slip additive like OxiGrip into your clear sealer before applying it. It’s the same engineered grit used in commercial entrance ramps. It adds real traction without changing how the floor looks, just a subtle texture underfoot, even when wet.
5. Heated Mudroom Flooring to Melt Snow and Mud Before It Tracks Inside
This is the upgrade that sounds like a splurge until you actually run the numbers. That said, once you’ve stood on a heated floor in January, it’s hard to go back. Tile and stone are the best materials to pair with radiant heat because they conduct and retain warmth faster than vinyl or wood. That means they actively dry boots and melt tracked-in snow rather than just sitting there cold and wet.
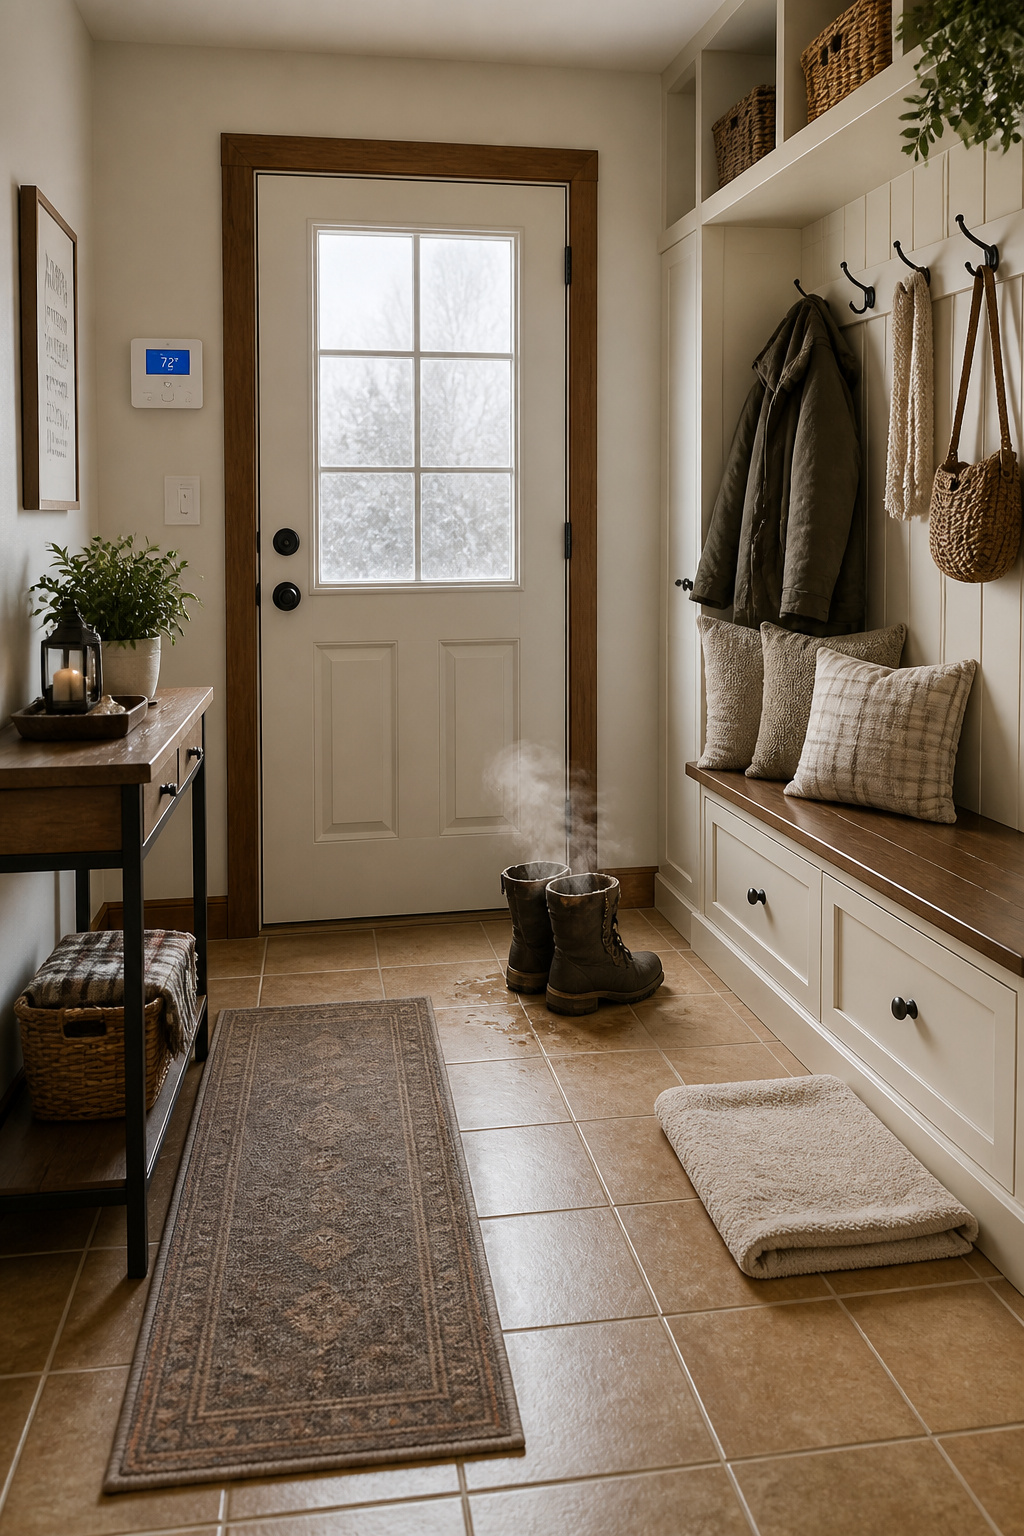
For a single room like a mudroom, electric radiant heat beats hydronic almost every time. Hydronic systems require a boiler or heat pump tie-in that simply isn’t cost-effective for one small space. Electric systems run roughly $6-12 per square foot for materials and $8-15 for professional installation. Heating mats alone are just $5-8 per square foot and are entirely DIY-installable. You lay the mat yourself, then bring in a licensed electrician for the final thermostat and breaker connection, typically $200-500. Operating cost is surprisingly modest too, around $0.07-0.36 per hour. Running heat just in the entry zone won’t blow up your power bill.
It’s worth the splurge if you’re already weighing other budget-friendly upgrades with strong long-term value. A WiFi smart thermostat ($150-250) can cut operating costs another 20-30% through scheduling. That makes a lot of sense if you only need heat during the morning and evening rush. Just don’t pair this system with thick vinyl plank, since it insulates rather than conducts and defeats the whole purpose.
6. Encaustic Cement Tile: Bold Mudroom Flooring With a Pattern That Never Wears Off
Encaustic cement tile is one of those materials that photographs like a million bucks. That’s because the pattern is baked all the way through the tile, inlaid roughly 1/4 inch deep, not just printed on the surface. That means even decades of foot traffic won’t wear the design away.
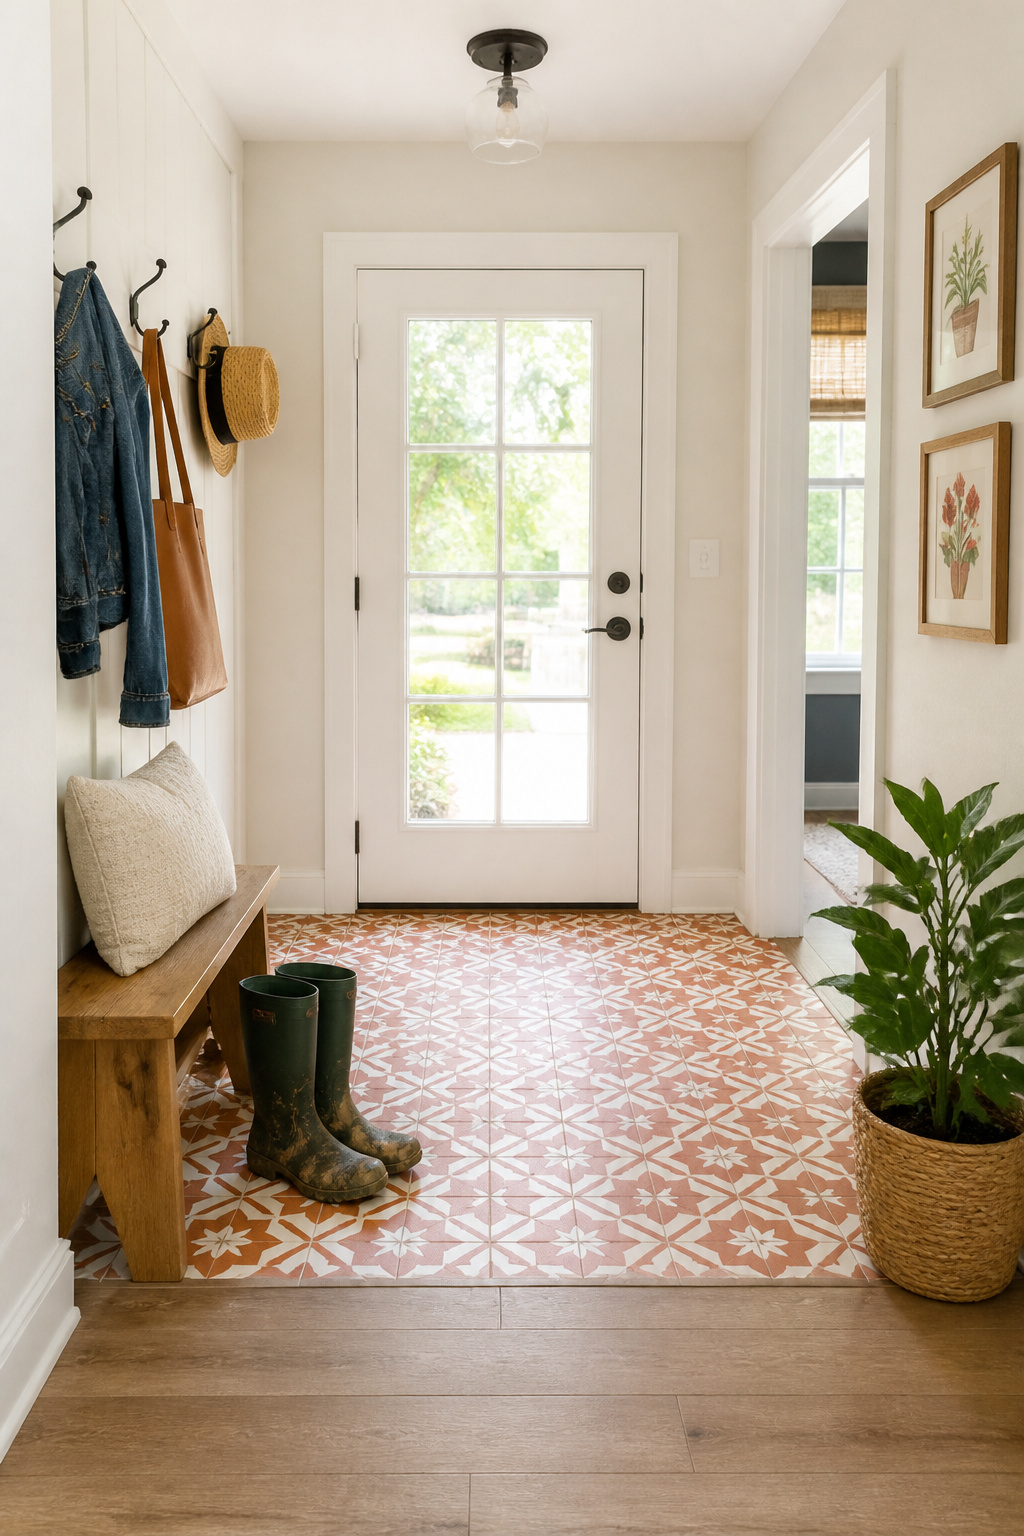
Authentic handmade tile runs $10-30+ per square foot, with a full 40-60-square-foot entryway project totaling $800-3,000 once installation and sealing are included. I’ll be straight with you, though: it’s high-maintenance. The tile needs two coats of penetrating sealer with dry time between coats before grouting even begins. The full process can take 10+ days start to finish. One flooring pro I came across had resealed a client’s floor five times and was still fighting staining. Go in with realistic expectations, not just Pinterest expectations. If that maintenance level gives you pause, cement-look porcelain delivers nearly the same bold visual starting under $5 per square foot. Being non-porous, it needs zero sealing at all.
Whichever route you choose, here’s a smart way to use the pattern: keep the boldest design to just the first few feet. It creates a built-in, decorative walk-off zone without needing a separate transition material. Pairing it with darker grout keeps staining less visible between resealing cycles. It’s a small-space styling trick that works just as well for bold pattern anywhere else in your home.
7. Rubber Flooring Tiles for Maximum Slip Resistance and Comfort
For households with young kids, aging knees, or a dog who skids around corners, rubber flooring might be the most underrated pick here. It naturally has a high coefficient of friction and holds onto that traction even after contact with moisture. It’s purpose-built for exactly the kind of room a mudroom is.
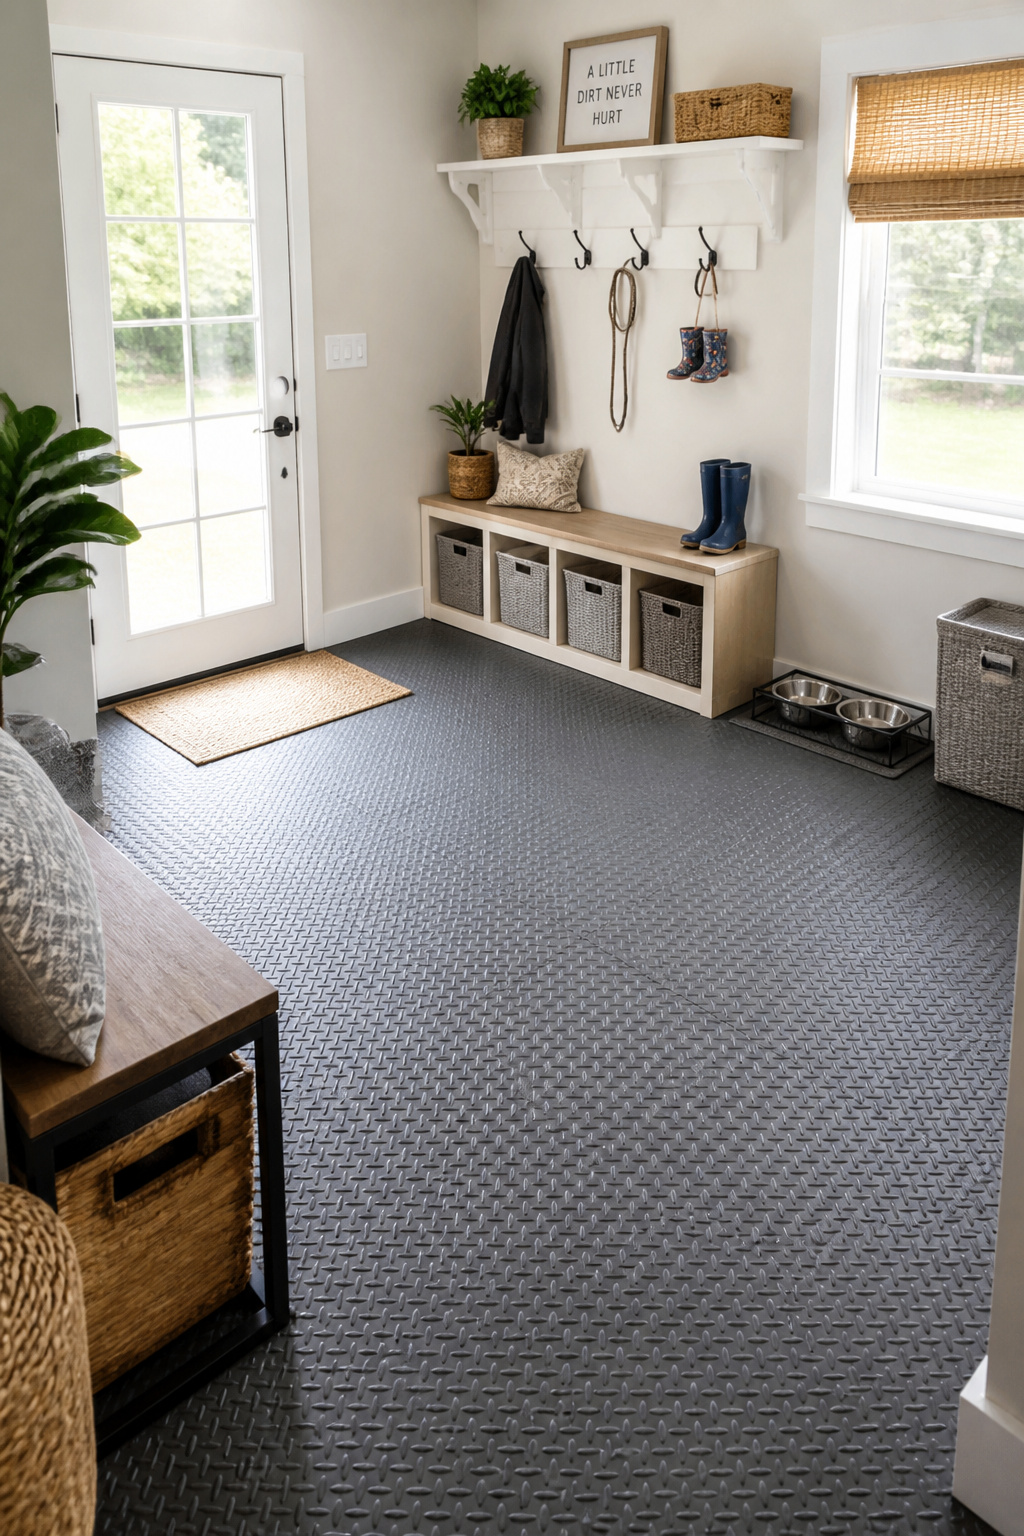
Rubber tiles average $3-10 per square foot, putting them right in the budget tier alongside LVP. Still, they bring something neither tile nor concrete can: real cushioning underfoot. That softness is genuinely easier on standing, on kids playing, and on older pets navigating the entry. Most rubber tiles interlock with perforated edges or connector pins, so there’s no adhesive or mortar involved. It’s essentially puzzle-piece assembly with a small mallet. Just let the tiles acclimate on the subfloor for 24 hours before installing to avoid gapping later. For families juggling gear at the door, it’s also worth browsing creative storage solutions for busy families to pair with this kind of floor.
Here’s the detail that trips people up: not all rubber is created equal. Brands like Swisstrax make tiles with a textured surface and a built-in channel system that drains moisture and debris underneath rather than trapping it. Look specifically for textured rather than smooth rubber. Smooth surfaces lose most of their slip-resistance advantage the moment they get wet.
8. Ceramic Herringbone Mudroom Flooring for Classic Entryway Charm
Herringbone is proof that you don’t need an expensive material to get a designer-looking floor. Instead, you just need a smarter layout. Standard, budget-friendly ceramic tile takes on a completely different personality once it’s laid in that classic zigzag pattern. No upsized budget required.
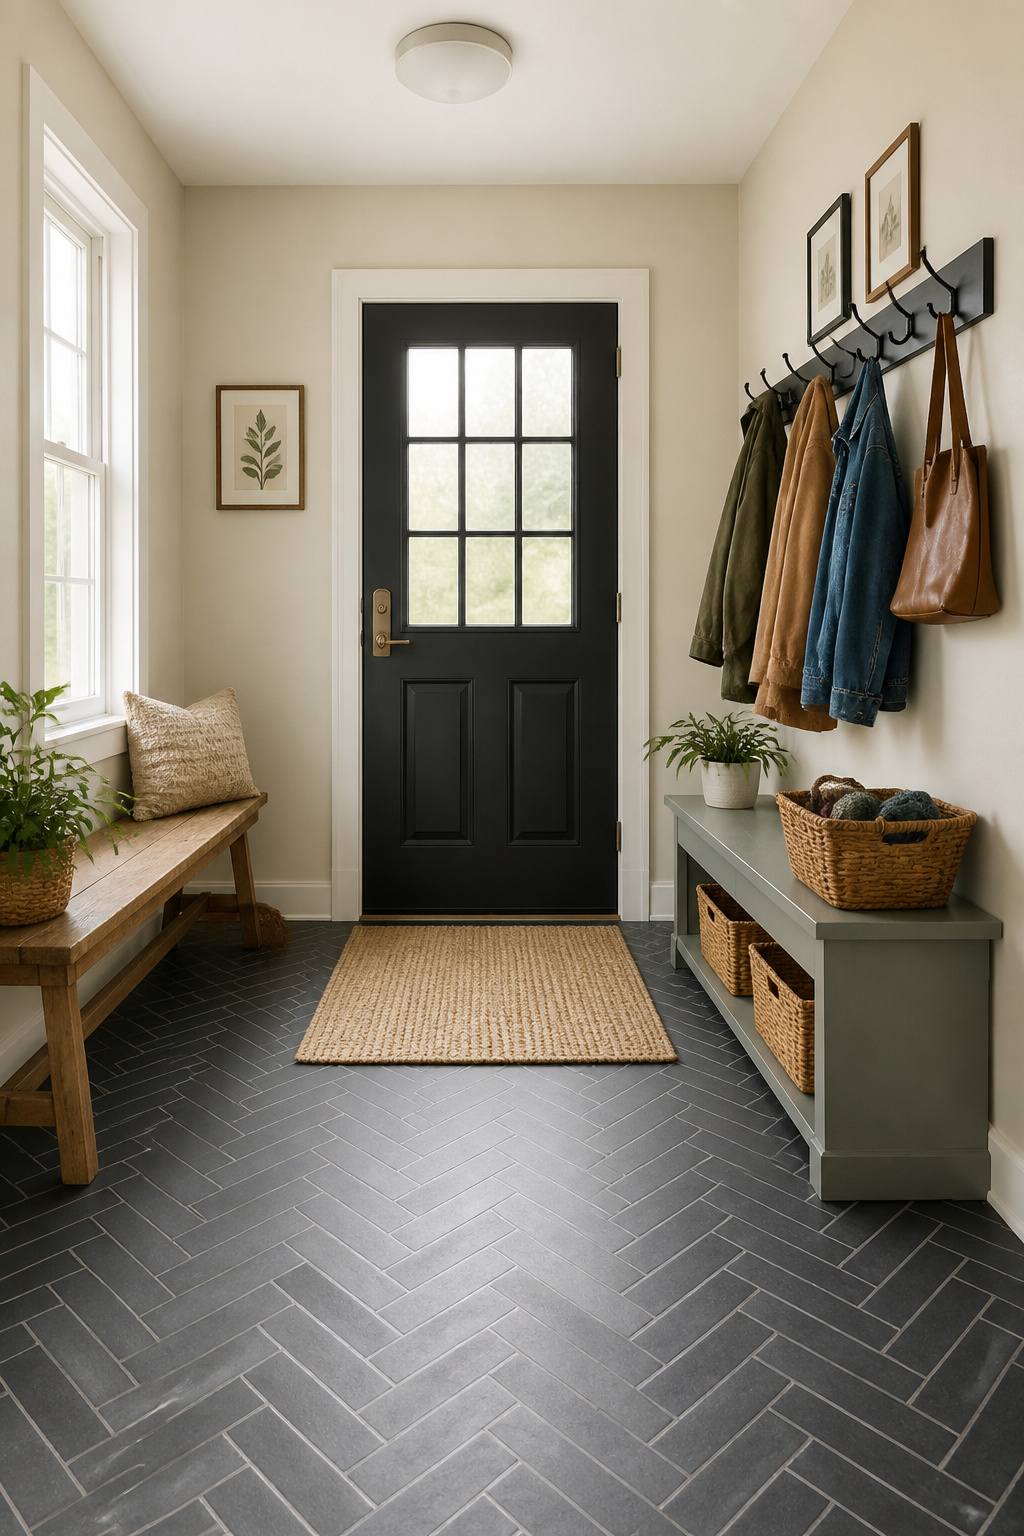
Standard entryway ceramic installed runs $10-30 per square foot, or roughly $600-2,500 total. Herringbone specifically adds about $2-5 per square foot to labor, typically a 15-25% bump over a straight grid. Budget for that extra cost going in, and order more tile than you think you need. Herringbone patterns create 15-22% material waste from all those 45-degree cuts, compared to just 5-10% for a straight layout. Your subfloor also needs to be genuinely flat, with no more than 3mm of variation over a 3-meter span. Diagonal joints make every imperfection more visible than a straight pattern would.
A small trick that makes a big visual difference: line the center zigzag up with your main doorway sightline. It balances the cuts on both sides and cuts down on wasted triangle scraps. And as always in a mudroom, grout color matters more than people think. Charcoal or greige grout hides mud and dust far better than anything light, even though the lighter option looks crisper on installation day. It’s a classic, timeless look that earns its keep long after the trend cycle moves on.
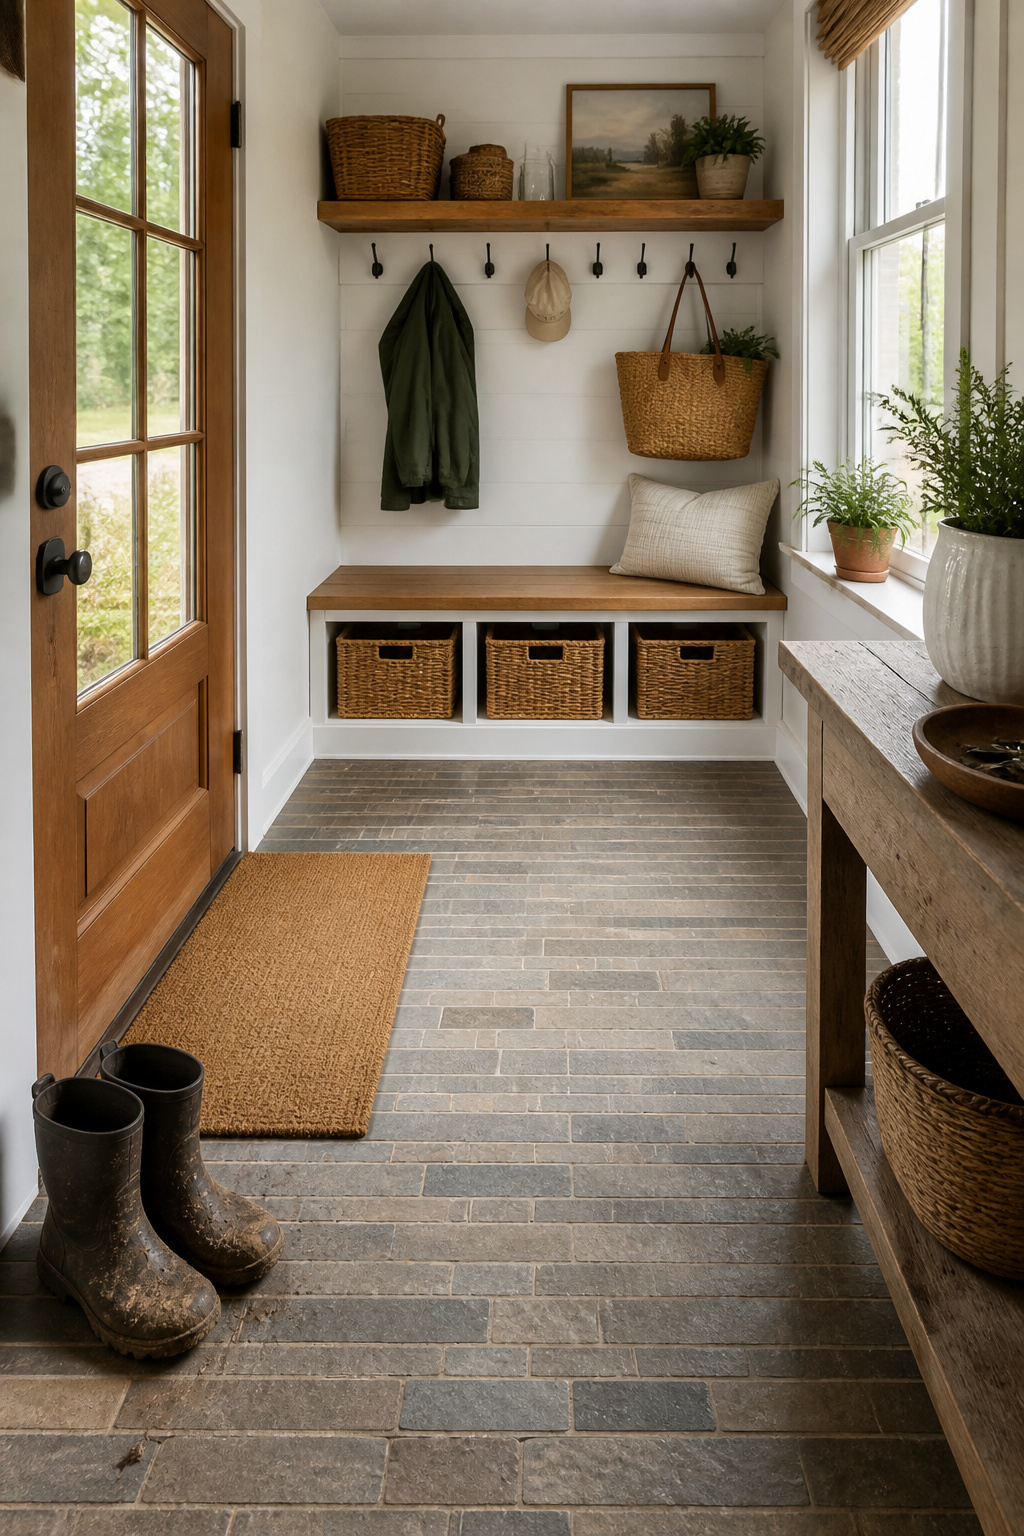
9. Reclaimed Brick Pavers for a Farmhouse-Inspired Mudroom Floor
There’s a warmth to reclaimed brick that no new material can fully fake. In fact, every paver carries a little history, salvaged from a building that stood somewhere else first. For a farmhouse-leaning mudroom, it’s hard to beat for character. It also pairs naturally with 21 brilliant mudroom laundry ideas if this room doing double duty also handles your laundry routine.
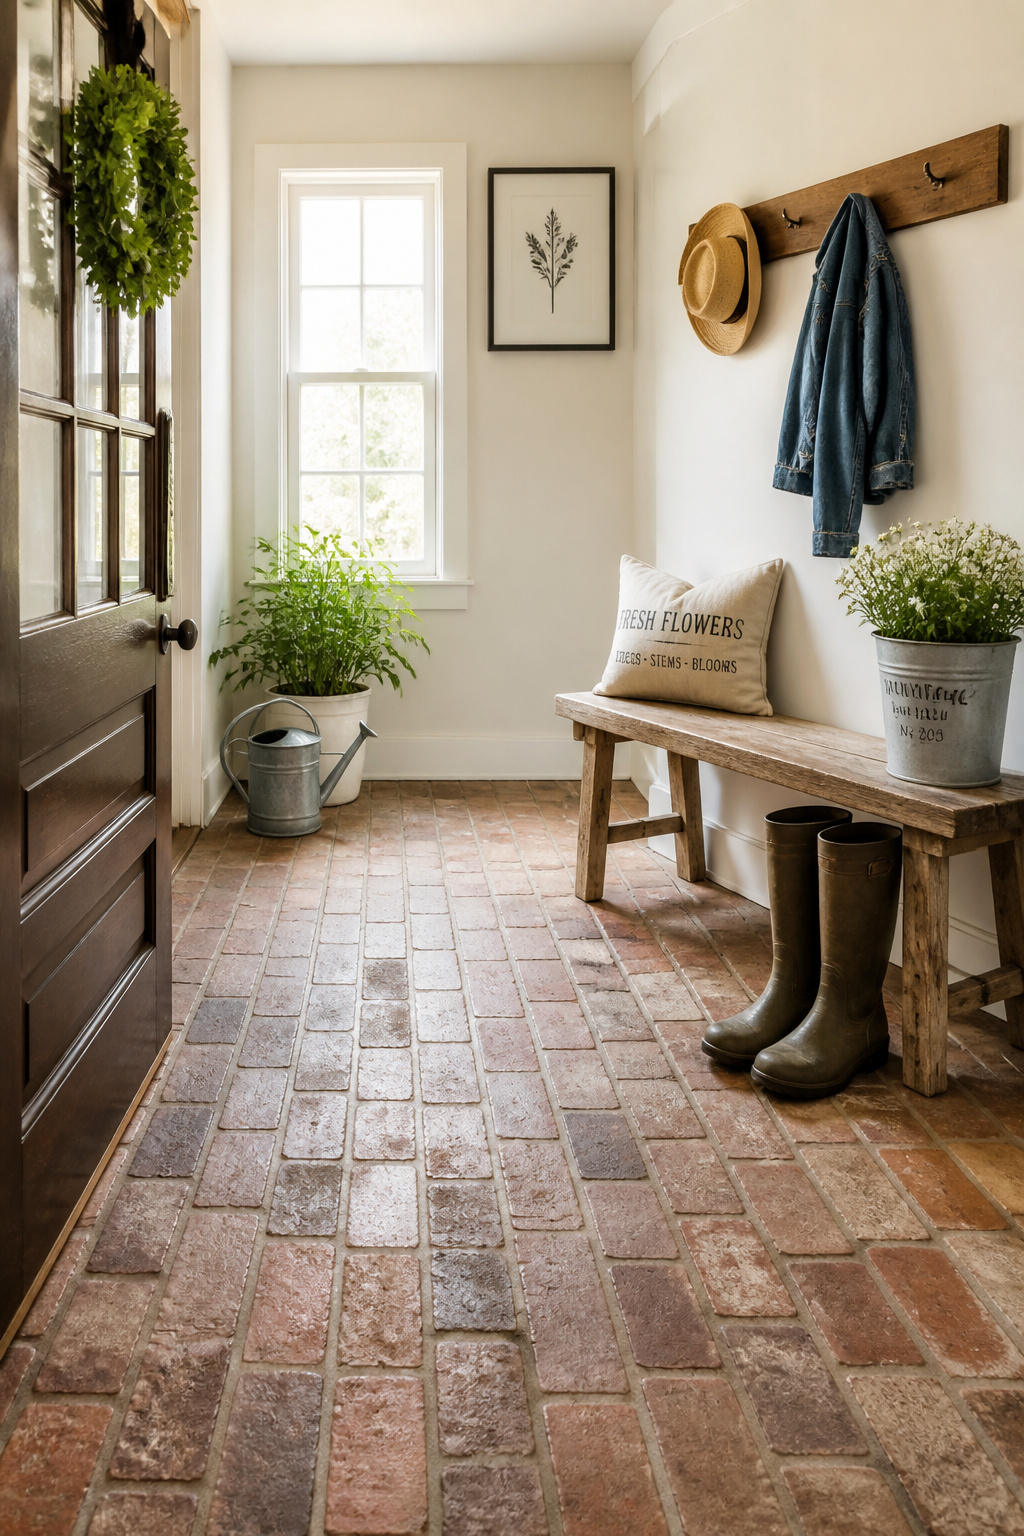
Reclaimed antique pavers run $8-20 per square foot for material alone. In contrast, brick flooring overall, new or reclaimed, lands at $10-30 per square foot depending on type and installation method. If full-thickness pavers feel like too much weight or cost, thin brick veneer gets you the same reclaimed look at a lower price point. Professional installation, which I’d genuinely recommend here over DIY, runs $5-15 per square foot and typically includes grouting, sealing, and edge trim. Because reclaimed brick varies in thickness and condition piece to piece, expect more cutting and fitting time than you’d spend with uniform manufactured tile. It’s part of the charm, but it does add labor hours. For more inspiration in this vein, check out these farmhouse decor ideas on a budget to carry the look beyond the entry.
The one thing you absolutely cannot skip: sealing. Brick is porous, and unsealed interior brick will soak up spills, stain, and become genuinely harder to clean as the months go on. A penetrating sealer protects against that staining. It also guards against efflorescence, those chalky white mineral deposits that show up on unsealed brick exposed to moisture. Skip it, and you’re likely looking at salt staining by the end of your first winter.
10. Terrazzo Flooring for a Polished, Easy-to-Clean Finish
Terrazzo has had a real design renaissance lately, and as mudroom flooring goes, it earns its place for more than looks. That dense, seamless surface resists tracked-in grime and needs minimal upkeep, which is exactly the math you want in your highest-traffic room.
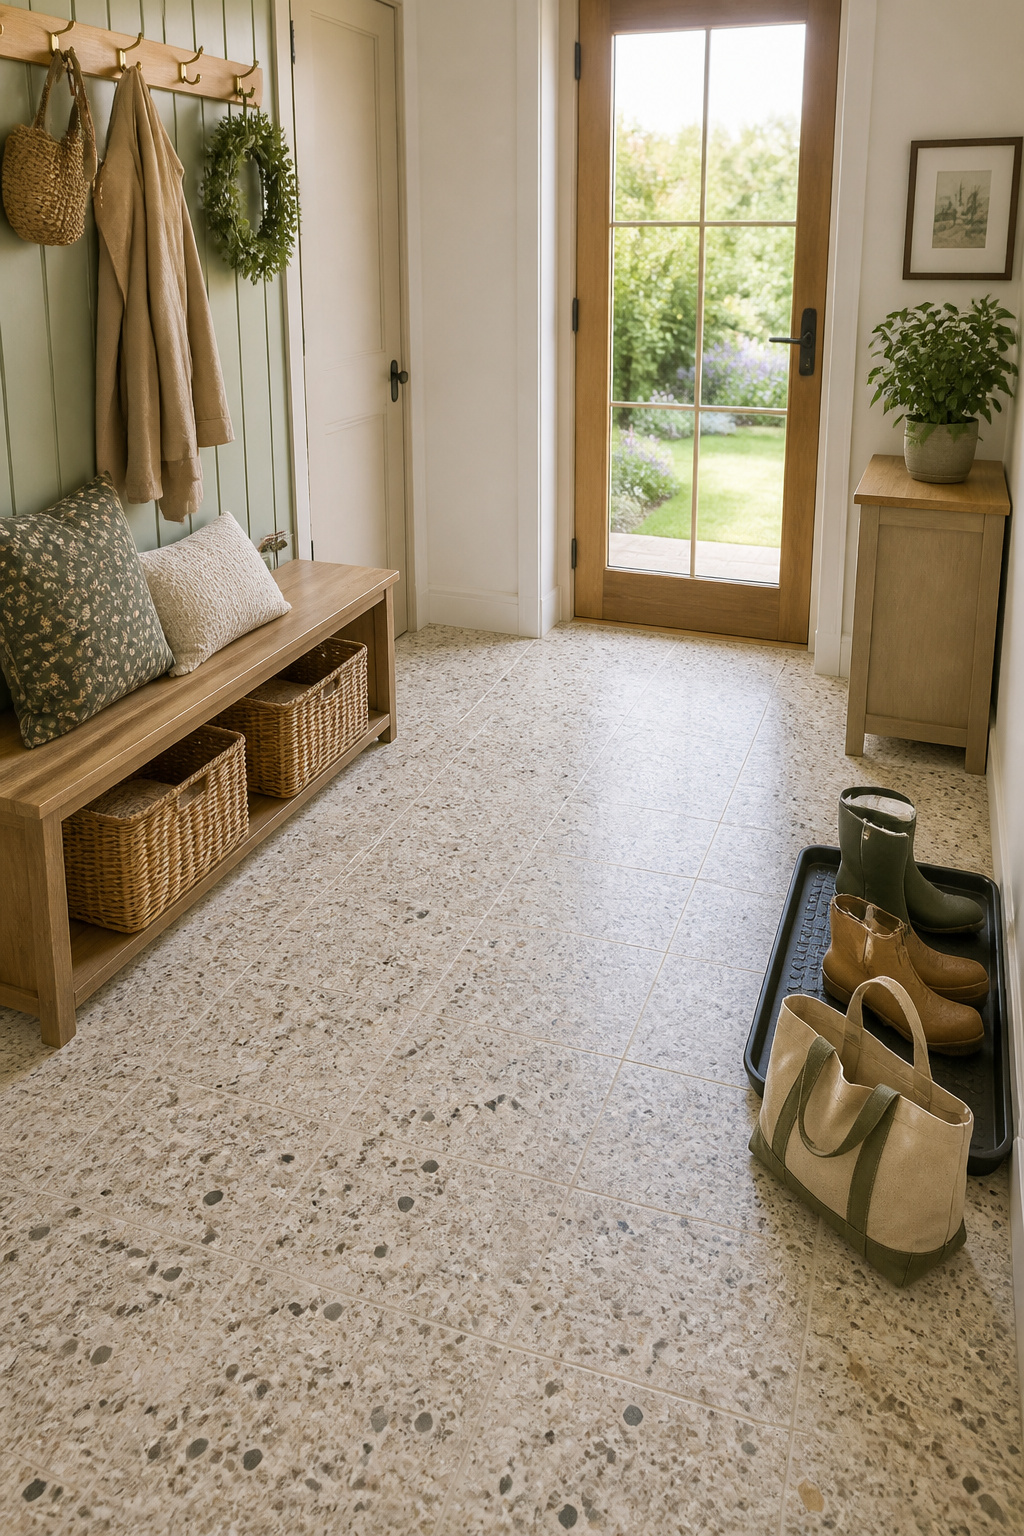
Here’s the budget reality check, though. Traditional poured terrazzo runs $25-50+ per square foot once you add up $5-15 in materials and $10-20 in labor. That’s genuinely overkill for most mudroom footprints. Terrazzo tile is the far more sensible route for a space this size: $4-12 per square foot for materials plus $5-10 for labor. It delivers the same look with far lower labor requirements. Poured systems make more sense for large continuous commercial floors where true seamlessness is the whole point. Your mudroom doesn’t need that, especially if low-maintenance, easy-to-clean flooring is your top priority across busy households.
When you’re choosing a pattern, go busier than you think you want. A multi-color speckled aggregate camouflages dust and grit between cleanings far better than a solid color. A dramatic black-and-white combination, gorgeous as it is, shows tracked-in dirt much faster. And before you sign off on any installer’s quote, confirm sealing is included. Terrazzo’s low-maintenance reputation only holds up when the surface is properly finished.
11. Cork Mudroom Flooring for an Eco-Friendly, Cushioned Feel
Cork doesn’t get talked about enough for entryways, probably because people assume it’s too delicate for mud and snow. That’s simply outdated thinking, though. Cork is naturally water-resistant, fine for splashes and tracked-in moisture, though not standing water, and becomes effectively waterproof once it’s properly sealed. It stays warmer and more cushioned underfoot than tile or concrete ever will.
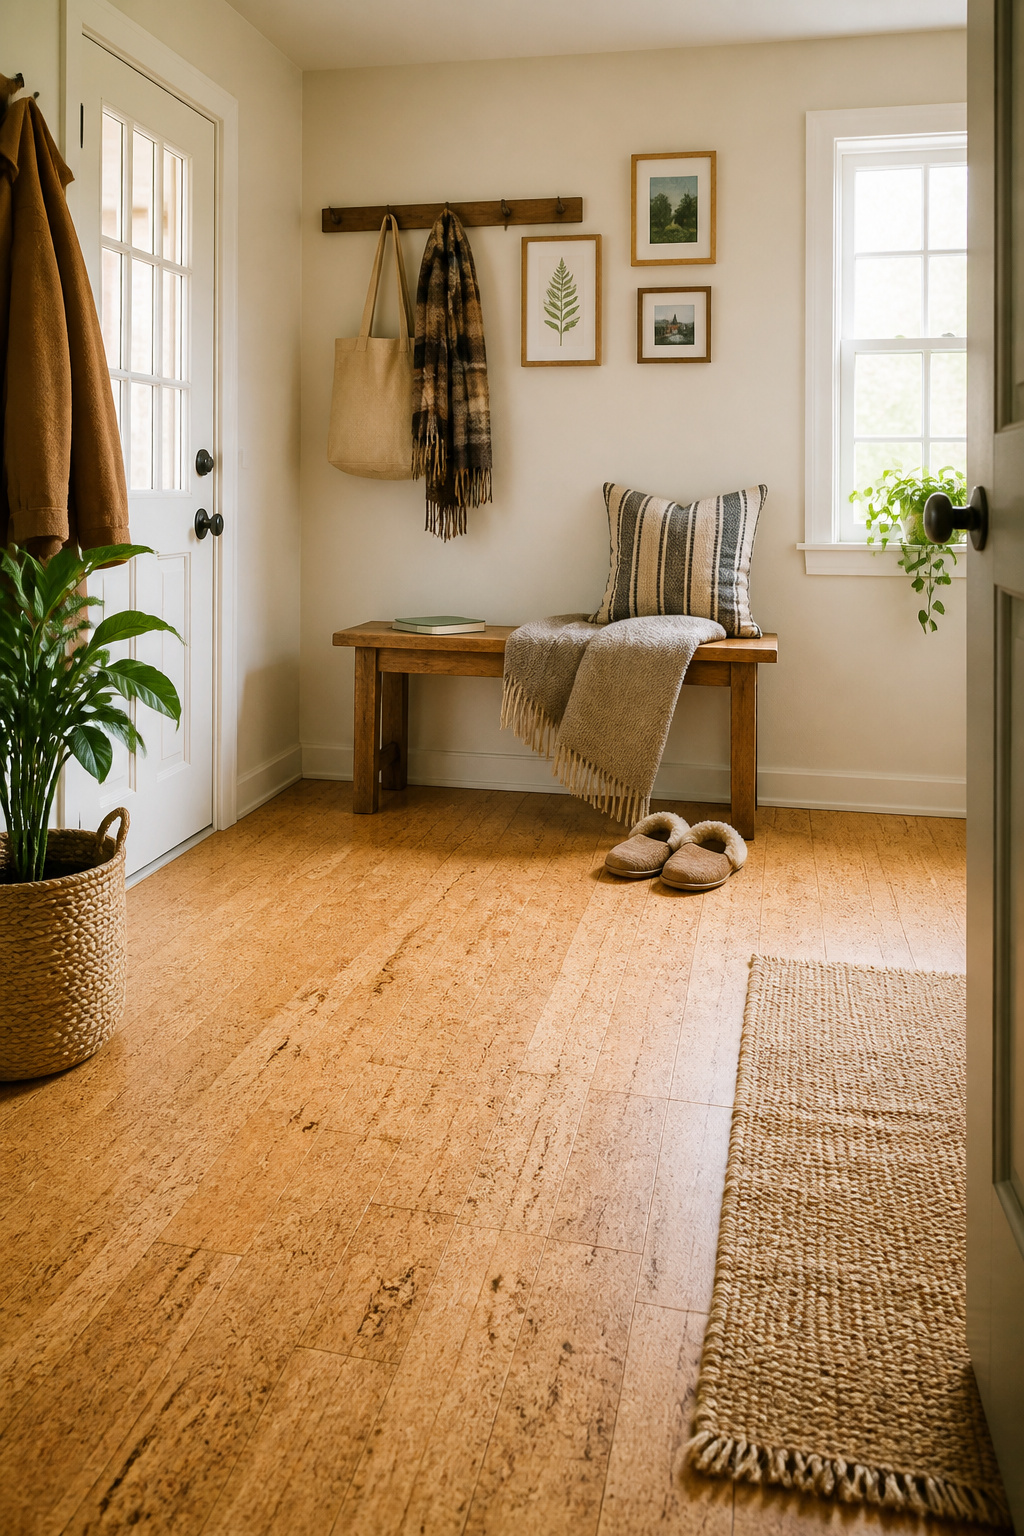
Plank material runs $4-9 per square foot depending on thickness, with common options at 4mm, 8mm, and 12mm. Installed cost averages $6-16 per square foot. Sealing adds a modest $0.30-0.70 per square foot and needs to be redone every 3-10 years. A busy mudroom will land at the more frequent end of that range. The real game-changer is modern water-resistant cork with a rigid waterproof core, like Wicanders WISE. It’s rated for mudrooms and laundry rooms, not just kitchens and living rooms. It’s a great fit if eco-friendly, sustainable materials matter to you beyond just the floor.
If you’re new to cork, buy pre-finished planks rather than sealing on-site yourself. The factory-applied sealant, often using Superior Resistance Technology, gives better stain resistance and saves you the labor and risk of uneven coverage. This is also the rare mudroom flooring upgrade that genuinely feels good underfoot on a cold morning, which counts for something. And even with a waterproof core, keep a boot tray by the door. Prolonged standing water, not just splashes, can still cause warping over time.
12. Natural Stone Ledger Tile for Texture Underfoot
Ledger stone started life as a wall material, that stacked, dimensional stone you see behind a fireplace. Increasingly, though, it’s showing up as flooring or a textured walk-off accent. I love it for breaking up an otherwise flat entry. The organic, uneven surface adds real visual depth.
The safety detail matters more here than with flat tile: choose a textured, honed, brushed, or naturally cleft finish, never polished. Most building inspectors look for a DCOF, or dynamic coefficient of friction, of 0.42 or higher in wet conditions. That’s the accepted safety benchmark. A smooth polished stone simply won’t hit that mark in a wet entry. Installation calls for a polymer-modified thin-set suited to natural stone. The floor also needs at least a 2% slope away from walls for proper drainage. Where that slope isn’t achievable, a floor drain should be planned in instead, not bolted on as an afterthought.
Because ledger stone has so much surface texture, it traps fine grit in its crevices more than flat tile does. Reach for a stiff-bristle broom instead of a flat mop for routine cleaning. Pairing it with a durable boot-scrape or coir mat at the threshold cuts down significantly on how much debris reaches the stone. It’s a small habit worth adopting if you’re drawn to organic surfaces elsewhere in your home too.
13. Walk-Off Zones With Contrasting Tile to Trap Dirt at the Door
Sometimes the smartest move isn’t re-flooring the whole mudroom. Instead, it’s being strategic about just the first few feet. Commercial walk-off systems prove the concept at scale. Just 10-30 feet of transitional entry flooring can stop up to 80% of dirt and moisture from being tracked further inside. You can absolutely apply that same zone thinking on a residential scale.
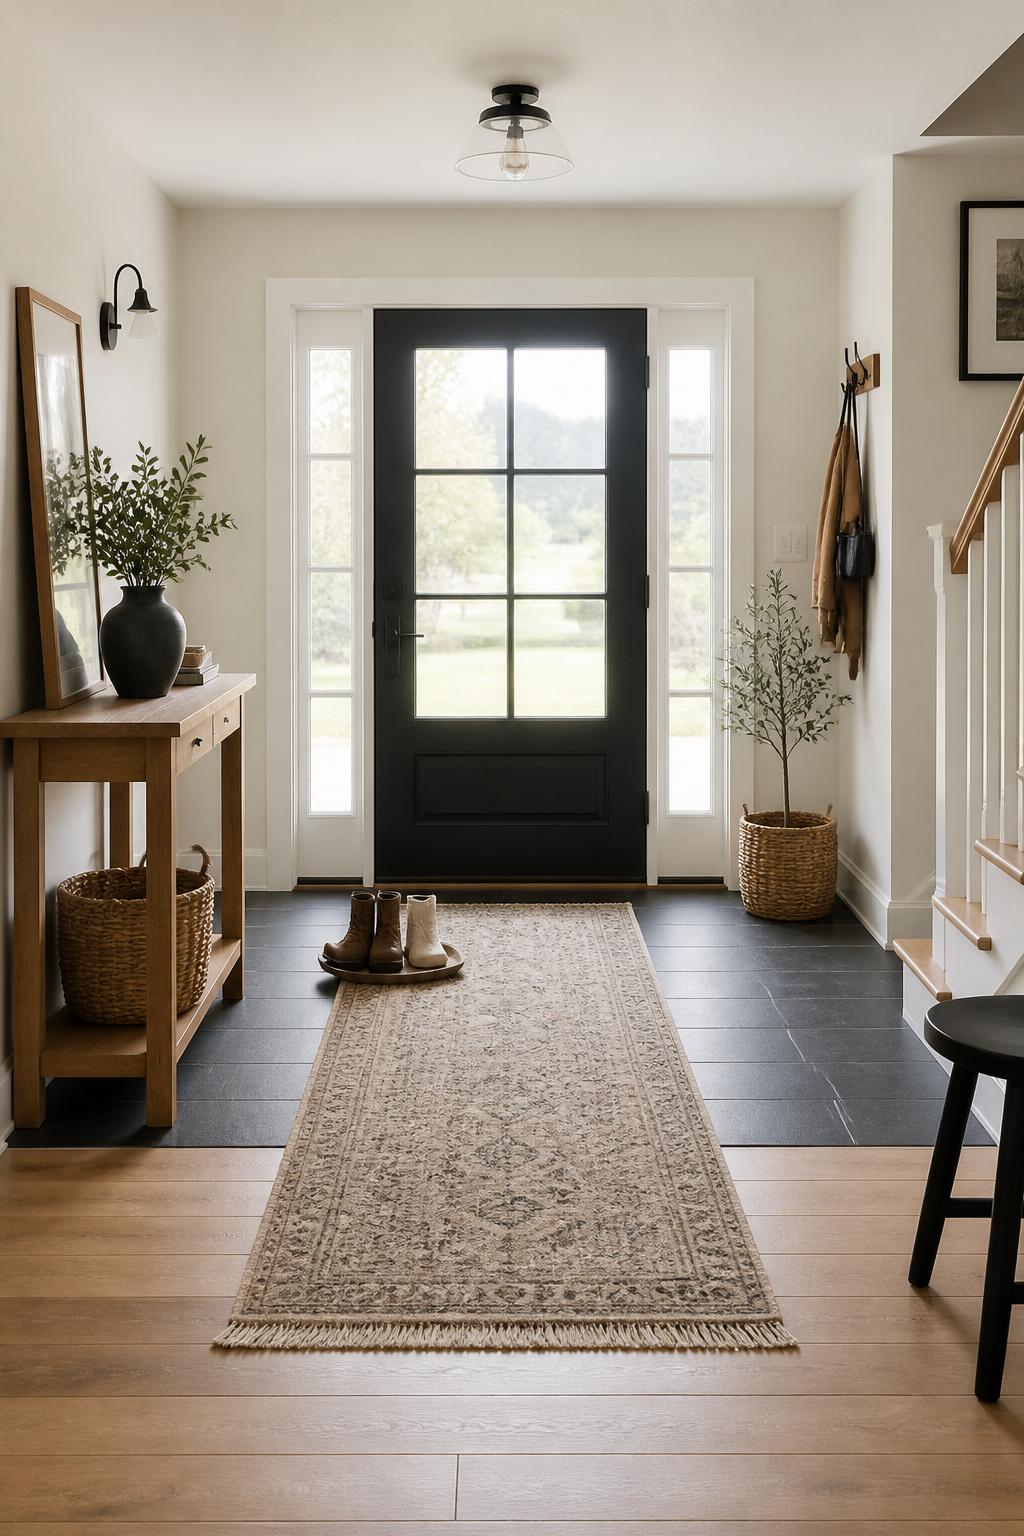
A contrasting tile color or pattern at the door makes the walk-off zone feel intentional rather than like an afterthought. It also quietly does the practical job of trapping grit before it spreads. Even a modest 3-6 foot contrasting band captures a meaningful share of debris, though going smaller than that meaningfully undercuts how well it works. A sloped reducer or transition strip where the walk-off tile meets your main flooring keeps the change trip-free. Coordinating the walk-off color with your home’s main floor, rather than a jarring contrast, keeps it feeling designed.
My favorite layering trick: top the walk-off tile with a washable, low-pile rug or runner in a similar tone. It adds extra grit-trapping capacity on top of the tile without compromising the wipe-clean surface underneath. You can swap it seasonally: something heavier-textured for winter mud, something lighter for summer, without touching your underlying tile investment. Browse washable rugs for high-traffic spaces to find one that suits your zone.
14. Sloped Drainage Mudroom Floor Designs for Wet Boots and Snow
If you’re dealing with serious snow volume, like ski gear or a rural property, a flat floor and a good mat aren’t always enough. Mud season can feel like its own season entirely. This is where slope and drainage planning earns its keep.
Tile and stone floors should slope a minimum of 2% away from walls. That directs meltwater toward a drain instead of letting it pool against your baseboards. Correct pitch is something to plan alongside your tile layout from day one, not retrofit later. For homes with lighter snow volume, slope plus a good absorbent mat may be all you need. For households with heavier traffic, a dedicated drain is the more reliable long-term fix. Trench drain installation averages $30-150 per linear foot depending on the grate and channel material. Interior drain tile systems run $40-85 per linear foot. Both are separate line items from the floor tile itself, which for a standard 120-square-foot mudroom runs another $300-2,400. If your mudroom backs up to a laundry area, plan the plumbing for both rooms together while the floor is already open.
For ski families, farms, or anyone hauling in serious snow and mud regularly, a floor drain is genuinely worth the added cost. It’s not just a nice-to-have. And if you really want to go all in, pair a drain with the heated flooring from Item 5. Together they actively melt and clear snow instead of just managing runoff after it’s already on the floor.
15. Textured Anti-Slip Tile: The Mudroom Flooring Detail Safety Depends On
I’ll say this plainly: slip resistance is the single most important spec on this entire list, more important than color, pattern, or price. Indeed, a mudroom combines wet, icy footwear with heavy daily traffic. That arguably makes it the highest slip-risk room in your house. It’s a bigger risk than even a bathroom, just by sheer frequency of water coming through.
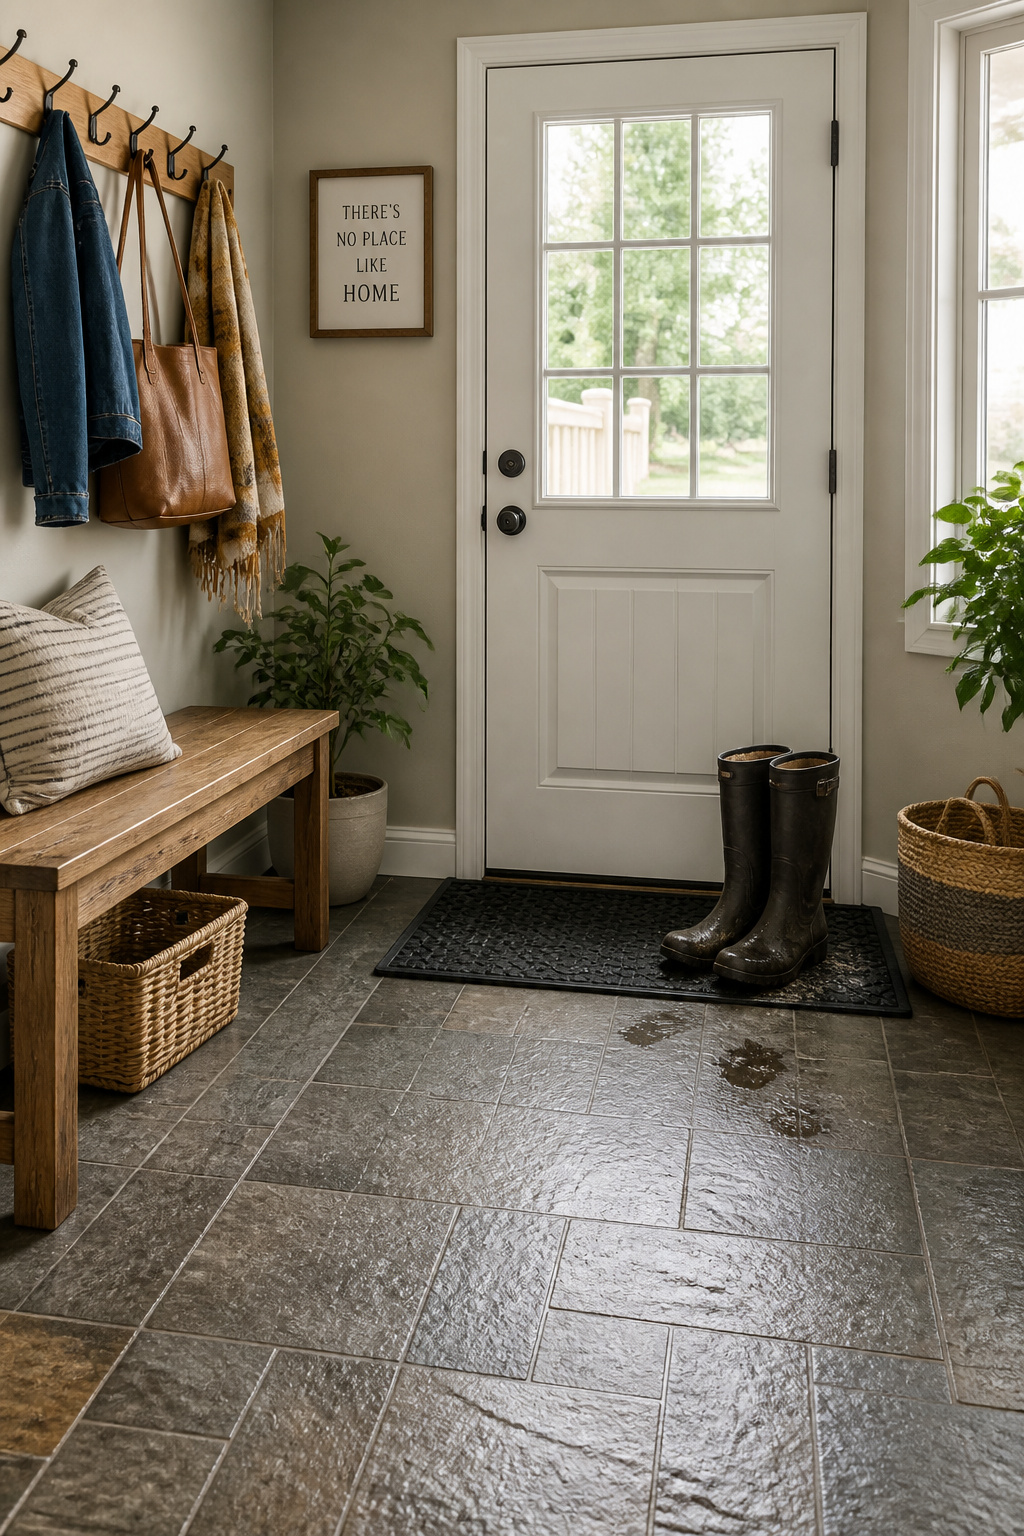
The number to know is DCOF, or dynamic coefficient of friction, the primary slip-safety metric used across the North American tile industry. ANSI A326.3, the official U.S. test standard, requires a wet DCOF of 0.42 or greater for tile recommended for level interior spaces. That covers anywhere likely to get walked on wet. That test is actually performed with slightly soapy water to mimic real-world, slightly soiled conditions. Treat 0.42 as a floor, not a ceiling. For a heavy-snow household, look for tile rated meaningfully above that minimum.
If you’re working with an existing smooth floor rather than starting fresh, you have options short of a full tear-out. Chemical etching treatments use a light acid to create microscopic pores in the tile surface. They work instantly and never wear off since they alter the tile itself. Topical anti-slip coatings with mineral aggregate accomplish something similar by adding grip on top of the existing surface. Budget DIYers can mix fine sand into a clear epoxy and apply it directly. Or just stick down inexpensive non-slip treads at the spots closest to the door. It’s a small project with outsized payoff. That matters even more if you care about home safety tips for families with kids throughout the rest of the house.
Choosing the Right Mudroom Flooring for Your Household and Climate
So how do you narrow fifteen good mudroom flooring options down to one? Start with your climate and your traffic, not your Pinterest board. In a freeze-thaw region, porcelain and ceramic tile top most expert recommendations: water-resistant, able to last 50+ years compared to 15-25 for laminate, and stable through repeated temperature swings. If budget and speed matter more than longevity, LVP is genuinely the strongest mudroom flooring pick. It’s cheaper, warmer underfoot than tile, fully waterproof, and realistically good for 10-15 years.
A few materials are worth ruling out for a true mudroom. Solid hardwood expands and warps with temperature swings. Carpet holds onto moisture, mud, and odor. Standard laminate can buckle from prolonged moisture. None are wrong for other rooms, just the wrong tool for this job.
Once you’ve landed on a direction, measure carefully. Check each wall in two spots since older homes are rarely perfectly square, use the larger measurement, and add 2-3 square feet per doorway transition. Budget-wise, plan $3-25 per square foot depending on material, with a standard 120-square-foot mudroom landing around $300-2,400 total. For a DIY project, figure roughly 1.5 times material cost for underlayment and tools; for a pro install, plan closer to 2.5-3 times material cost. Whatever mudroom flooring you land on, you’re building the part of your home that takes the hardest hit and asks for the least credit. Pick the option you can finish this season over the one that only looks good on a mood board.