The kitchen has evolved far beyond its traditional role as a simple cooking space. Today, it serves as the command center of modern homes—where families gather for morning coffee, children tackle homework assignments, and friends linger over evening wine. At the heart of this transformation stands the kitchen island, a versatile centerpiece that can dramatically reshape how you experience your most important room.
Yet designing the perfect island involves far more than selecting an attractive countertop. The most successful kitchen island designs seamlessly blend form with function, creating a workspace that enhances daily routines while reflecting your personal style. From optimizing traffic flow to integrating smart storage solutions, every decision impacts how your kitchen performs for years to come.
The challenge lies in navigating countless possibilities while avoiding common pitfalls that can turn your dream island into a costly mistake. Poor placement can create bottlenecks, inadequate storage leaves you frustrated, and mismatched materials can clash with your existing design. However, when thoughtfully planned, an island becomes the catalyst that elevates your entire kitchen.
We’ve curated 19 innovative kitchen island designs and essential planning strategies to guide your transformation. Whether you’re embarking on a complete renovation or seeking strategic updates, these insights will help you create an island that not only looks magnificent but also enhances every aspect of your culinary experience.
1. Define Your Island’s Primary Functional Purpose
The foundation of exceptional kitchen island designs begins with crystal-clear functional priorities. Rather than attempting to incorporate every possible feature, successful islands excel at one or two primary roles—whether that’s maximizing storage capacity, creating a social dining hub, or establishing a dedicated prep station. This focused approach prevents the common mistake of designing an island that attempts everything but delivers nothing particularly well.
Professional designers consistently emphasize that the island’s core function should dictate every subsequent decision, from dimensions and placement to material selection and feature integration. A storage-focused island might sacrifice seating space for deep drawers and pull-out shelves, while a social island prioritizes generous overhangs and comfortable stools. By establishing these priorities early, you ensure every dollar invested serves your specific lifestyle needs rather than generic design trends.
What makes this choice better for our planet is understanding how purposeful design reduces waste and maximizes long-term satisfaction with your investment.
2. Calculate Optimal Dimensions for Seamless Traffic Flow
The National Kitchen and Bath Association’s guidelines aren’t merely suggestions—they’re the difference between a functional workspace and a daily frustration. Maintaining 42 inches of clearance around your island ensures multiple family members can work simultaneously without creating dangerous bottlenecks or blocking access to essential appliances. These measurements account for opened dishwasher doors, pulled-out drawers, and the natural movement patterns of busy kitchens.

Beyond basic clearance, consider how your island’s footprint affects the kitchen’s overall proportions. An oversized island can overwhelm smaller spaces, while an undersized one may appear lost in expansive rooms. Professional kitchen designers often recommend using painter’s tape to outline proposed dimensions on your floor, allowing you to physically test the layout before committing to construction.
The designer’s secret here is to walk through your daily kitchen routines within the taped outline, simulating everything from unloading groceries to hosting dinner parties.
3. Select Island Shapes That Enhance Kitchen Workflow
Rectangular islands dominate kitchen island designs for compelling reasons—they maximize linear workspace while fitting efficiently into most layouts. However, alternative shapes can solve specific challenges in unique kitchen configurations. L-shaped islands work beautifully in corner locations, creating intimate work zones while directing traffic around the perimeter. Curved or oval islands soften the visual impact in smaller spaces while eliminating sharp corners that can catch clothing or cause injuries.
The key lies in matching your island’s shape to your kitchen’s existing geometry and traffic patterns. Galley kitchens often benefit from narrow rectangular islands that maintain clear sight lines, while open-concept spaces can accommodate more dramatic shapes that serve as architectural focal points. Consider how each shape affects both functionality and visual flow throughout your connected living areas.
The unexpected pairing that always works is combining curved island ends with straight sides, creating visual softness while maintaining maximum workspace efficiency.
4. Choose Countertop Materials for Long-Term Performance
Engineered quartz has emerged as the gold standard for kitchen island designs, offering exceptional durability without the maintenance demands of natural stone. With a Mohs hardness rating of 6-7, quartz surfaces resist scratches from daily prep work while maintaining consistent color and pattern throughout the slab. Unlike granite or marble, quartz requires no periodic sealing and won’t stain from wine spills or acidic ingredients.
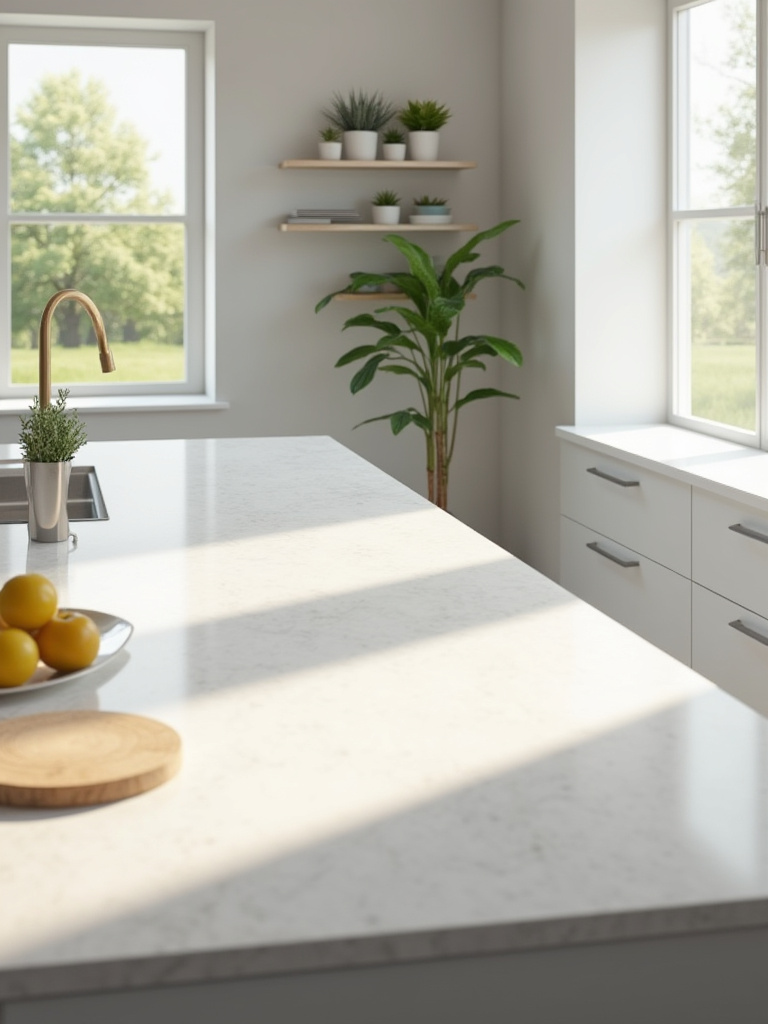
However, material selection should align with your island’s primary function and aesthetic goals. Butcher block creates warmth and character while providing an ideal cutting surface, though it requires regular oiling to prevent water damage. Natural stone offers unmatched beauty and heat resistance but demands more attentive care. Consider obtaining samples to test with common kitchen stressors—coffee, red wine, oil, and even keys—before making your final decision.
The craftsmanship reveals itself in details like the precision of edge profiles and the seamless integration of undermount sinks or cooktop cutouts.
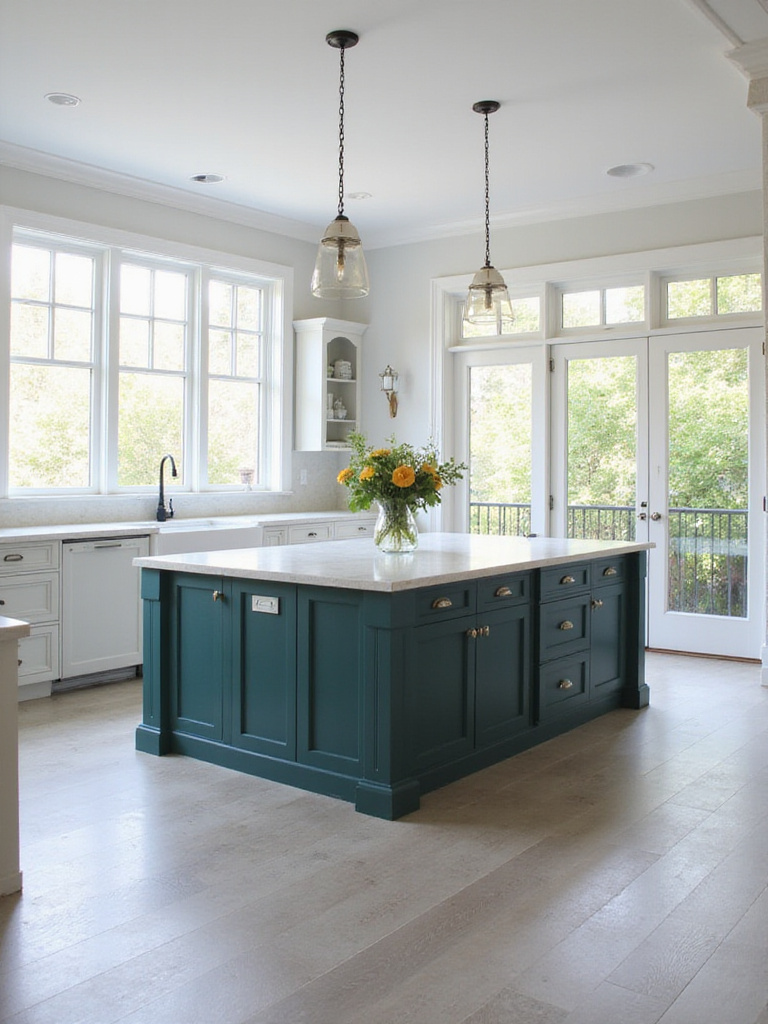
5. Design Island Bases That Complement Your Kitchen’s Character
The island base serves as your kitchen’s furniture centerpiece, making its finish and style crucial to overall design success. While matching perimeter cabinetry creates seamless integration, contrasting finishes can transform your island into a striking focal point. Navy blue islands against white kitchens have become particularly popular, adding depth and sophistication while maintaining timeless appeal.
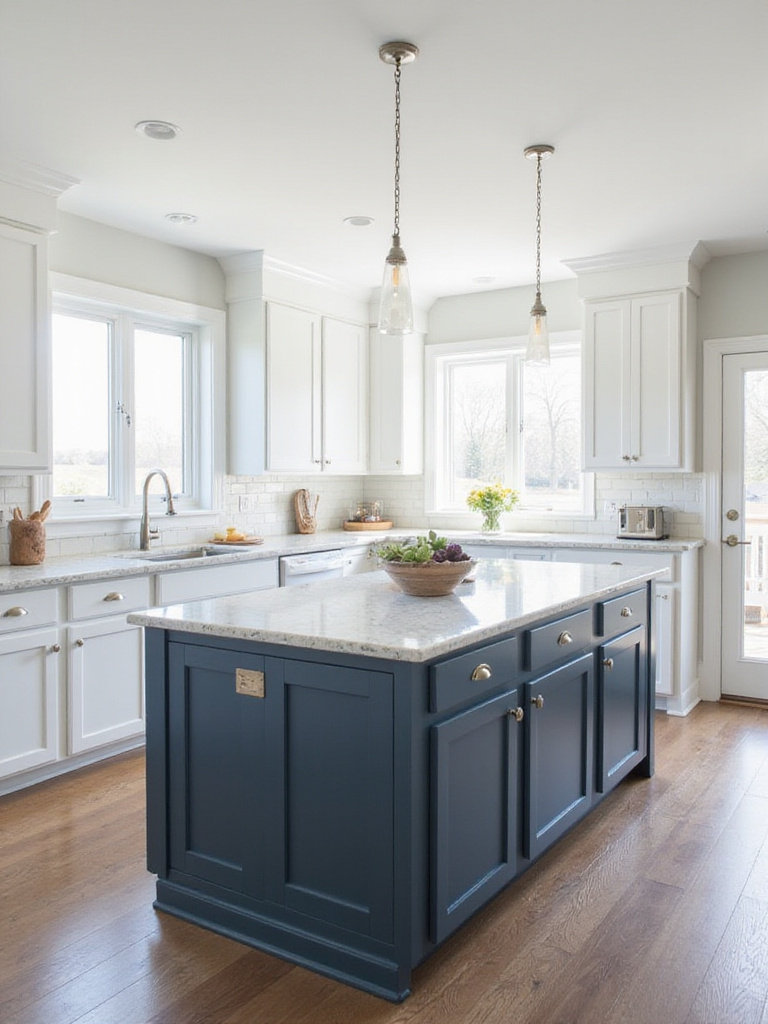
Consider your island as a substantial piece of furniture that should harmonize with your home’s architectural style. Shaker-style doors suit both traditional and transitional spaces, while flat-panel designs complement contemporary aesthetics. The key lies in ensuring the island feels intentional rather than afterthought—its finish should either blend seamlessly or contrast purposefully with existing elements.
The heritage technique gets a contemporary update through combining classic door styles with modern hardware and unexpected color choices that honor tradition while embracing current trends.
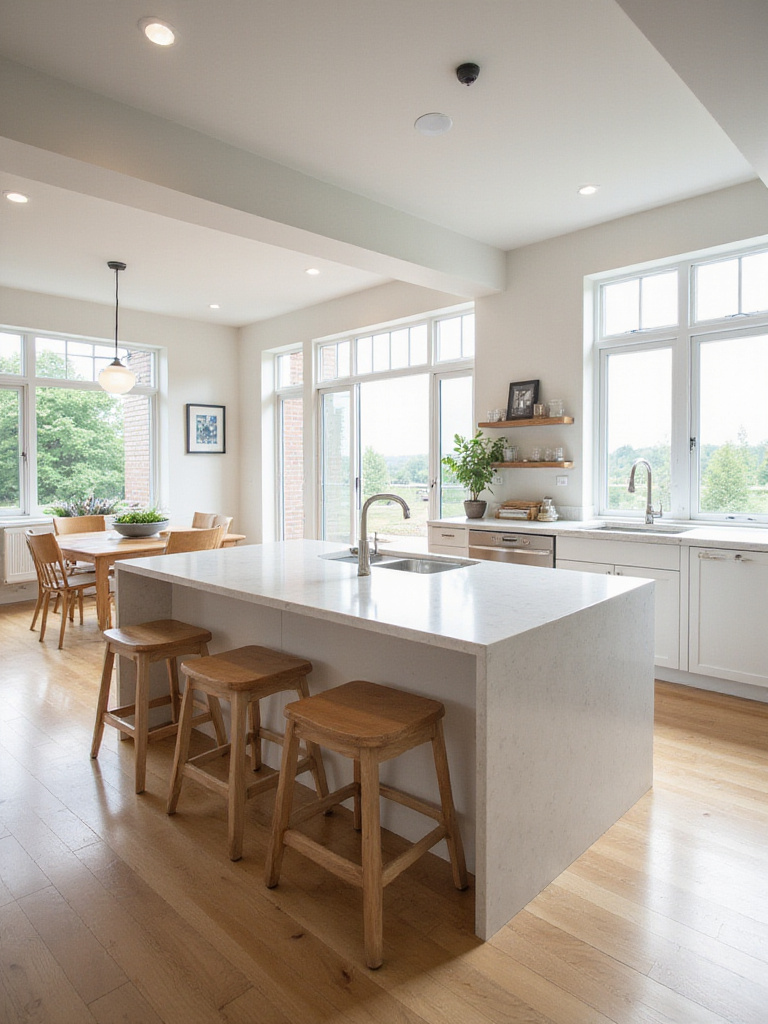
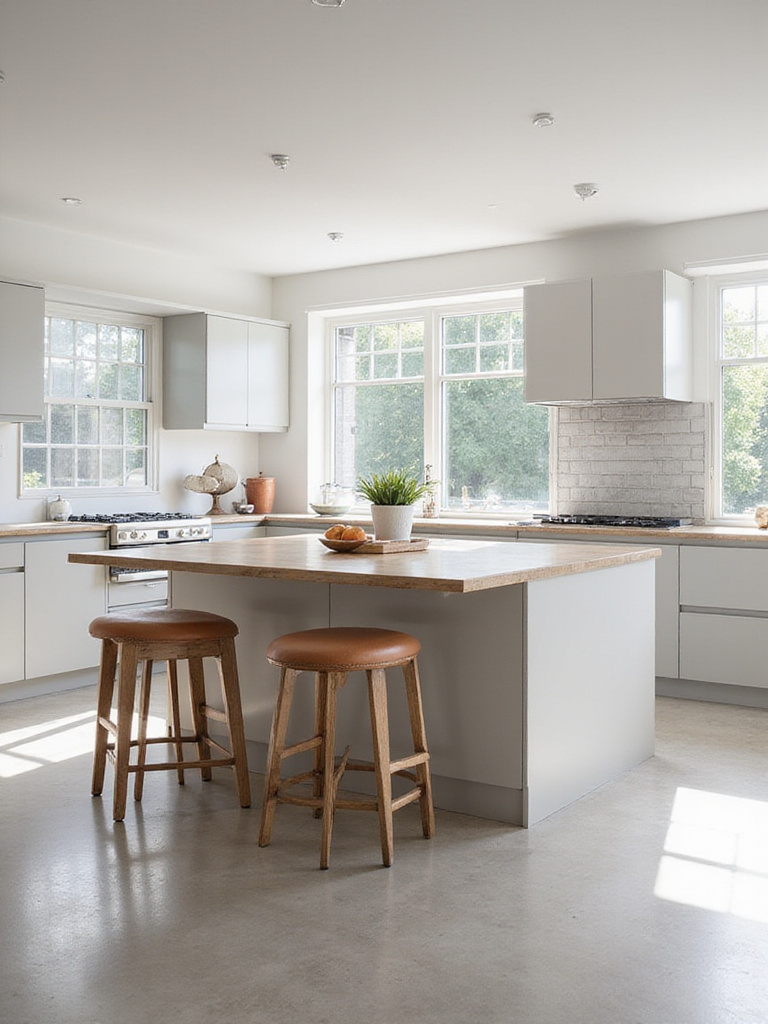
6. Integrate Comfortable Seating for Social Connection
Successful seating integration requires precise attention to ergonomic principles and spatial relationships. The standard 12-inch overhang for counter-height seating isn’t arbitrary—it provides essential knee clearance while allowing stools to tuck neatly beneath the counter when not in use. Allocating 24-30 inches of width per person prevents the cramped feeling that discourages lingering and conversation.
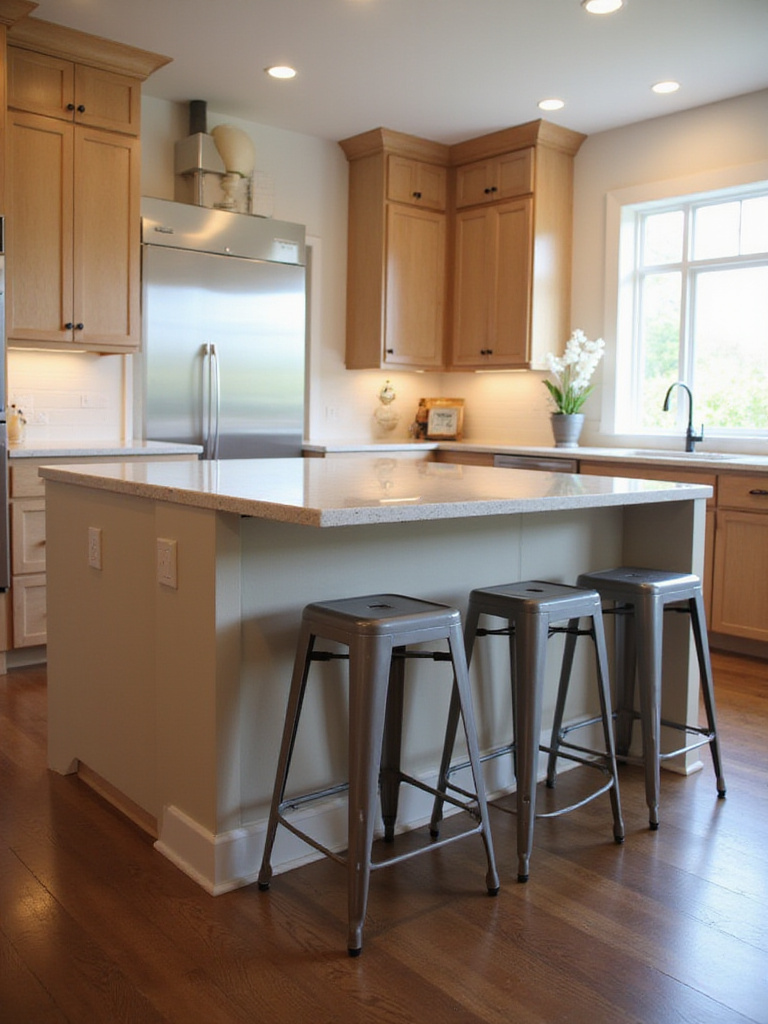
Consider the relationship between your island seating and surrounding spaces. Stools facing the kitchen allow seated guests to interact with the cook, while those facing the family room create connection with broader living areas. The height differential between counter and bar seating affects both comfort and sight lines—bar height works well for quick meals and homework, while counter height feels more inclusive for extended conversations.
Professional stylists approach this by first determining the primary users and their typical activities, then selecting stool heights and styles that support those specific functions.
7. Install Prep Sinks for Enhanced Kitchen Efficiency
A well-positioned prep sink transforms your island into a self-contained workspace, eliminating countless steps during meal preparation. This secondary sink excels at tasks like washing produce, filling pots, and rinsing hands without interrupting cleanup activities at the main sink. For families who cook frequently or entertain regularly, this addition can reduce meal prep time by up to 30 percent.
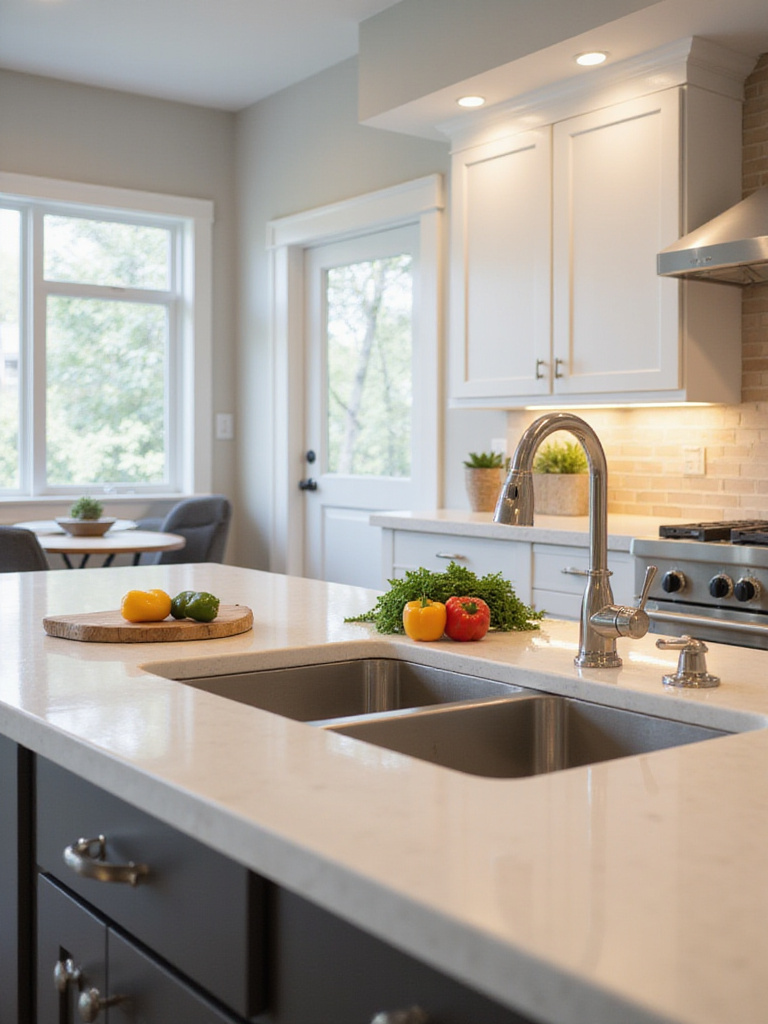
Installation requires careful coordination with plumbing and electrical systems, making early planning essential. The prep sink should connect to your main drainage system while maintaining proper venting for optimal performance. Consider pairing it with a small under-counter water heater for instant hot water access, particularly useful for tasks like dissolving gelatin or quickly warming ingredients.
The environmental story behind this piece began with recognizing how efficient kitchen layouts reduce water waste and energy consumption during daily cooking routines.
8. Create Cooking Hubs with Integrated Cooktops
Moving your primary cooking surface to the island fundamentally changes kitchen dynamics, transforming meal preparation from a solitary activity into a social experience. This configuration allows the chef to face family and guests while cooking, making the kitchen a true gathering space. However, success depends entirely on proper ventilation planning—inadequate exhaust systems will fill your home with smoke and cooking odors.
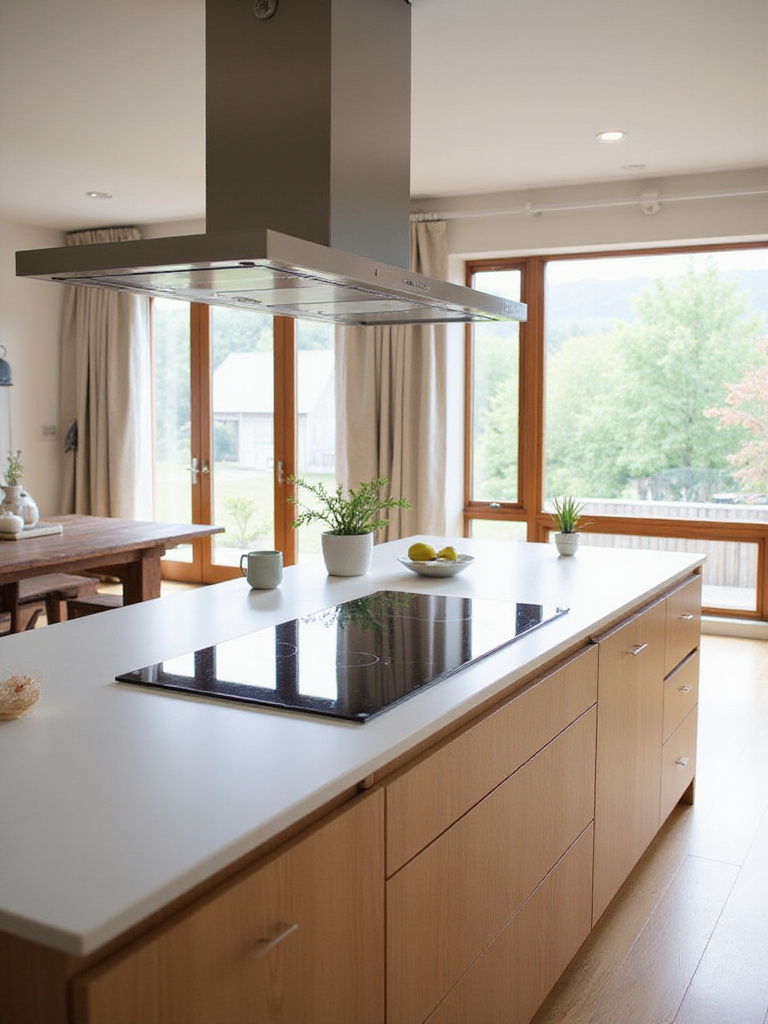
Island range hoods require significantly more power than wall-mounted units, typically needing 400-600 CFM or higher to effectively capture smoke and grease. The hood should extend at least 3 inches beyond the cooktop on all sides for optimal performance. Many installations also require makeup air systems to replace exhausted air, particularly in tightly sealed modern homes.
The challenge of awkward spaces becomes easier when you work with HVAC professionals early in the design process to ensure proper ventilation integration.
9. Incorporate Strategic Appliance Integration
Microwave drawers represent a breakthrough in kitchen island designs, eliminating countertop clutter while improving accessibility. Positioned at a comfortable height, these units allow easy access for all family members while keeping the island’s surface clear for food preparation. Similarly, beverage centers and wine refrigerators transform islands into entertainment hubs, centralizing hosting essentials within easy reach.

The key to successful appliance integration lies in matching features to your lifestyle patterns. Families with young children benefit from lowered microwave placement, while wine enthusiasts appreciate dual-zone refrigeration for proper storage temperatures. Consider how each appliance affects the island’s storage capacity and ensure adequate ventilation for proper operation.
Beyond the obvious placement, consider using this for creating dedicated zones that separate noisy appliances from quiet conversation areas.
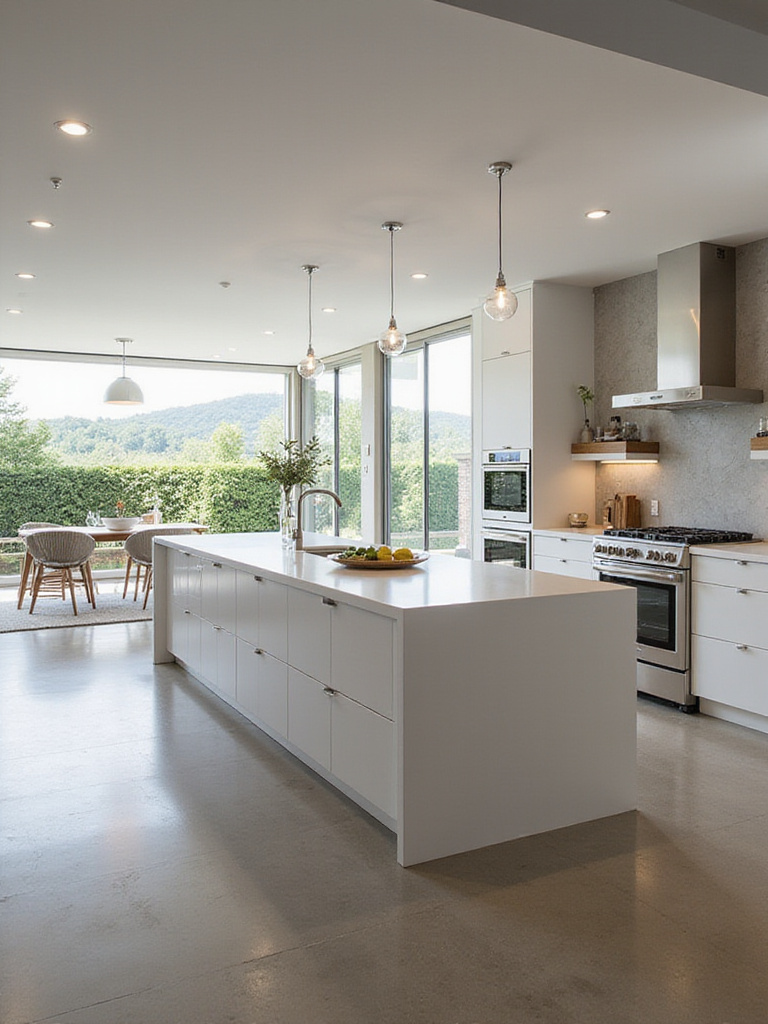
10. Layer Task and Ambient Lighting for Optimal Function
Pendant lights serve dual purposes in kitchen island designs—providing focused task lighting for detailed work while contributing to the room’s overall ambiance. The optimal height of 30-36 inches above the counter ensures adequate illumination without obstructing sight lines across the kitchen. Installing dimmer controls allows seamless transitions from bright task lighting during food prep to soft ambient lighting during dining.
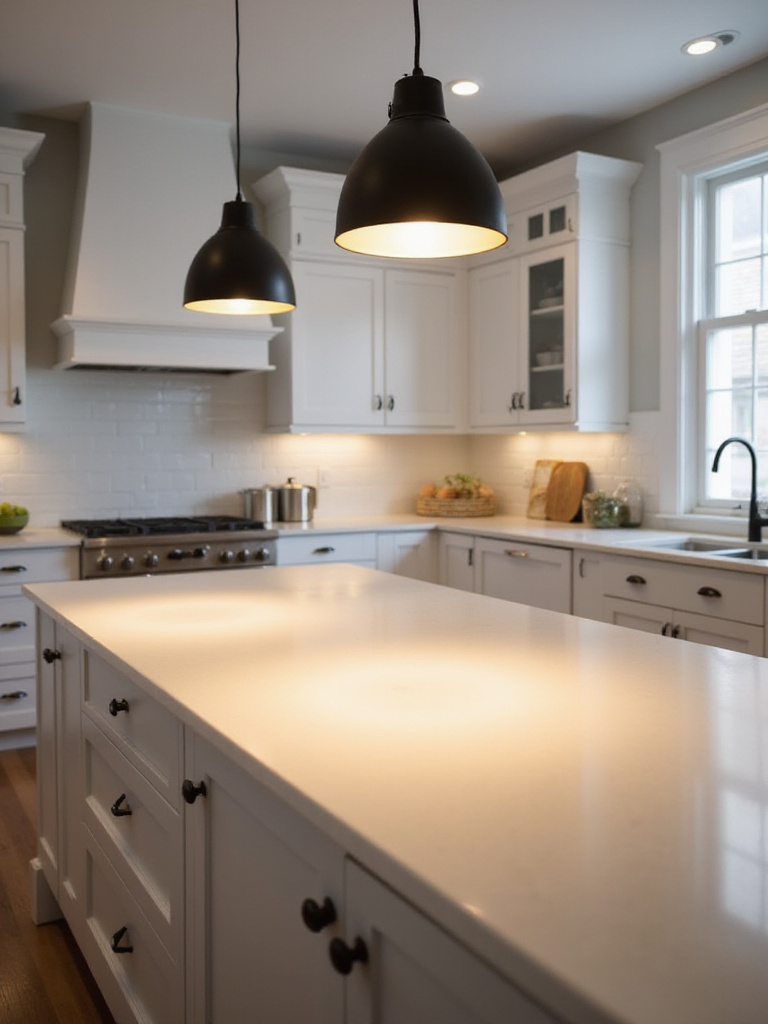
The number and spacing of pendants should relate directly to your island’s size and configuration. A general rule suggests one pendant per 24-30 inches of island length, though this can be adjusted based on pendant size and light output. Consider how pendant placement interacts with seating arrangements—lights should illuminate work surfaces without creating glare for seated guests.
The ambiance evolves throughout the day as natural light interacts with your pendant fixtures, creating dynamic lighting conditions that enhance both function and atmosphere.
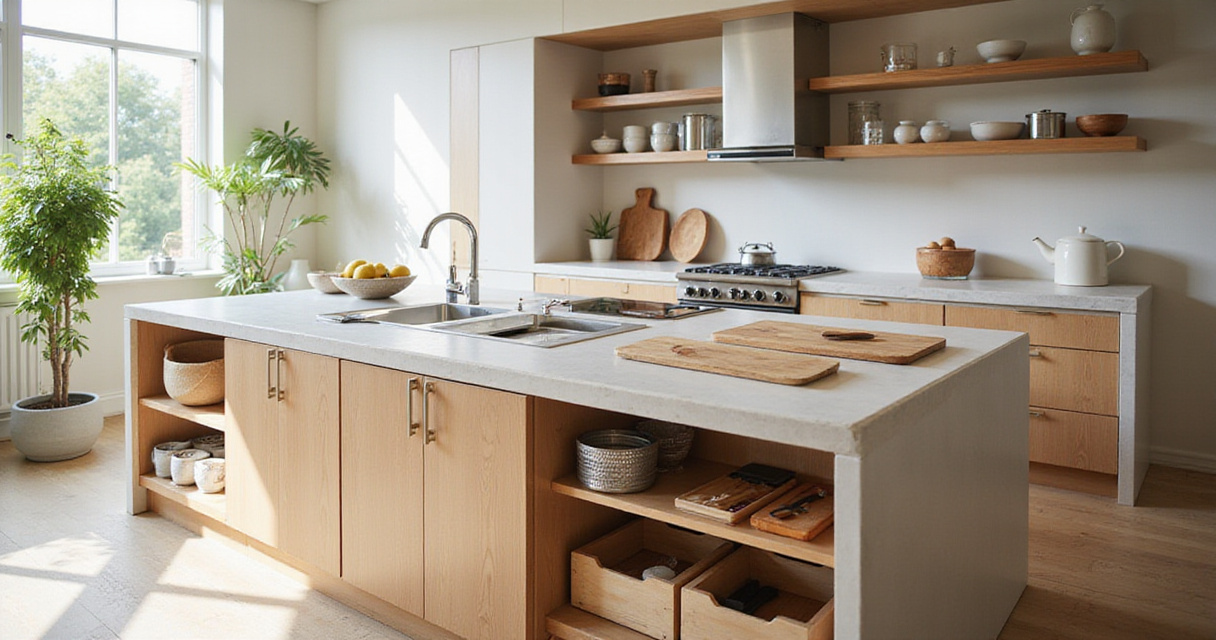
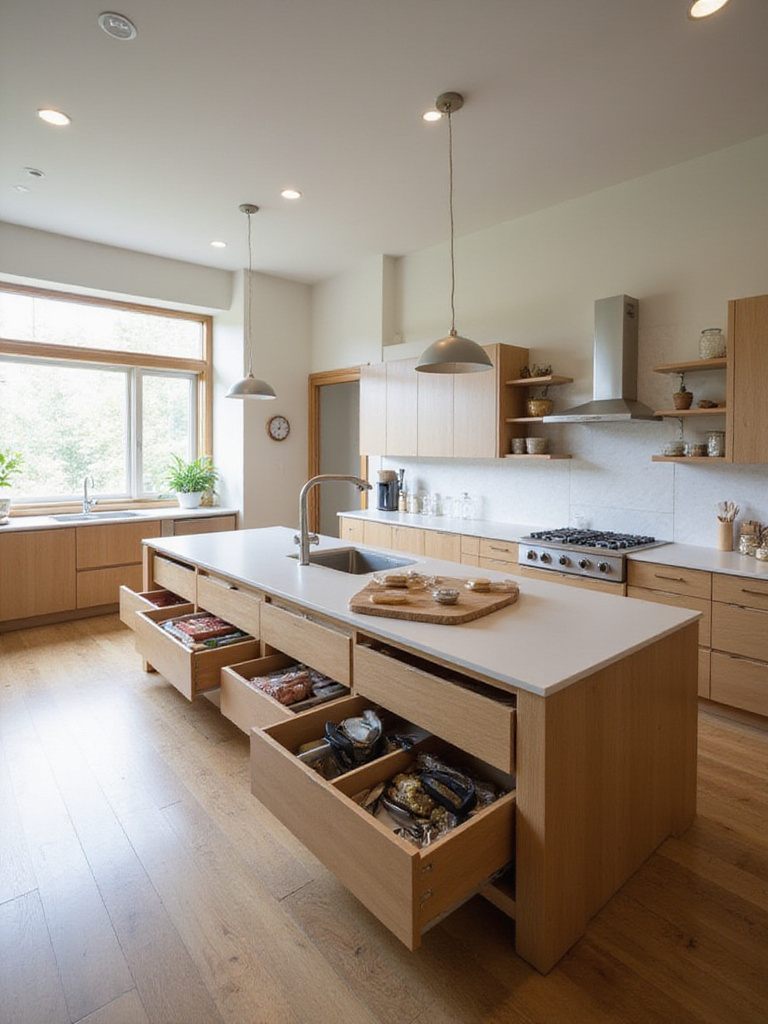
11. Maximize Storage with Intelligent Organization Systems
Deep drawers with full-extension slides revolutionize kitchen island storage, providing easy access to items typically buried in traditional cabinets. These systems can accommodate everything from large stock pots to small utensils when equipped with appropriate dividers and organizers. Pull-out trash and recycling systems keep waste management convenient while maintaining clean sight lines.
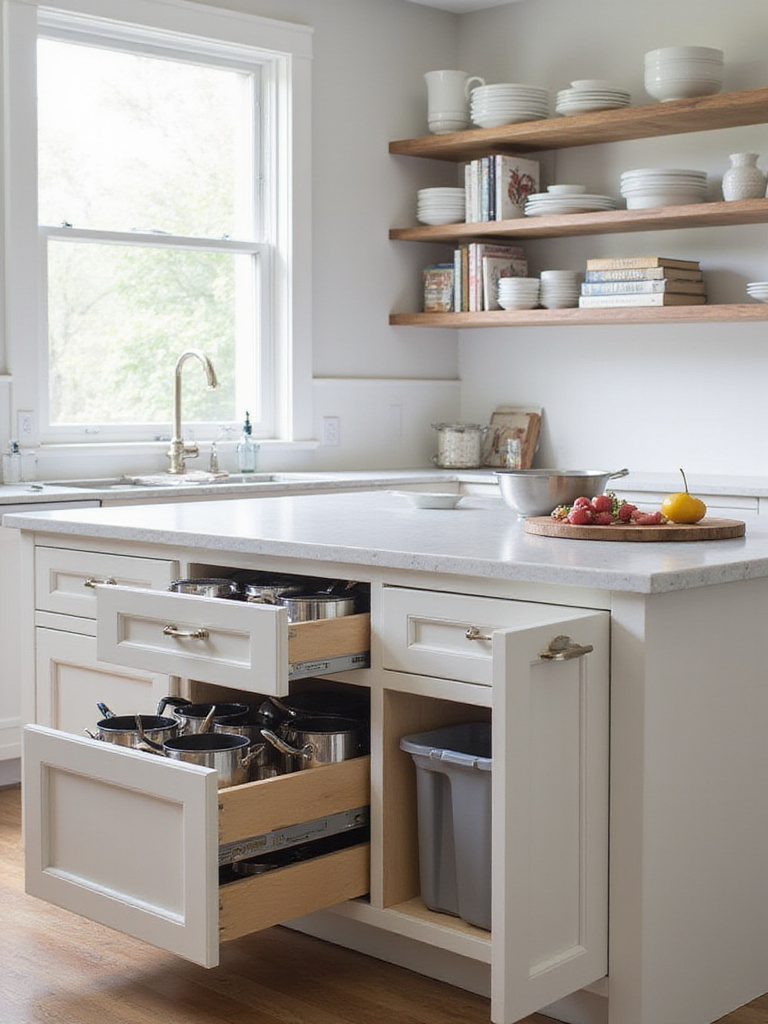
Vertical storage solutions multiply your island’s capacity without increasing its footprint. Drawer dividers, pull-out shelves, and specialized inserts for items like cutting boards or baking sheets ensure every cubic inch serves a purpose. Consider your specific storage needs—do you need space for small appliances, extensive cookware collections, or children’s art supplies?
The maker’s journey from apprentice to master influenced how modern storage systems prioritize both accessibility and organization efficiency.
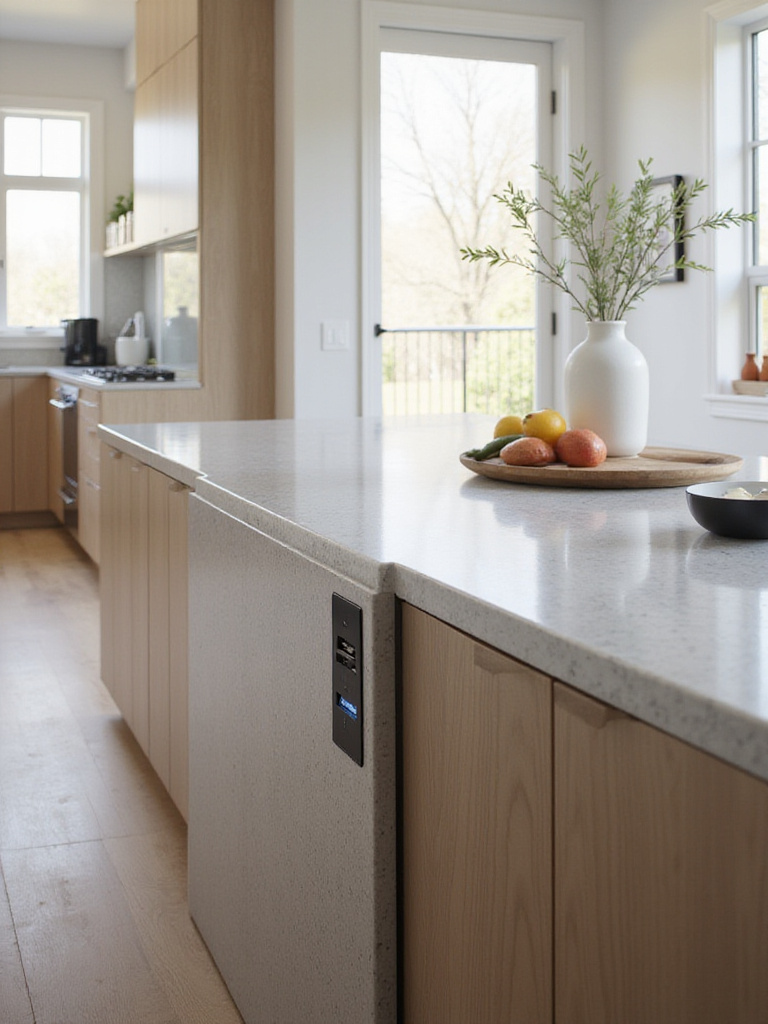
12. Plan Electrical Access for Modern Kitchen Demands
Contemporary kitchen island designs must accommodate our increasingly connected lifestyles. Strategically placed outlets enable the use of small appliances directly on the island while providing convenient charging stations for tablets displaying recipes or phones playing music. The National Electrical Code requires GFCI outlets near water sources, making proper planning essential for safety compliance.
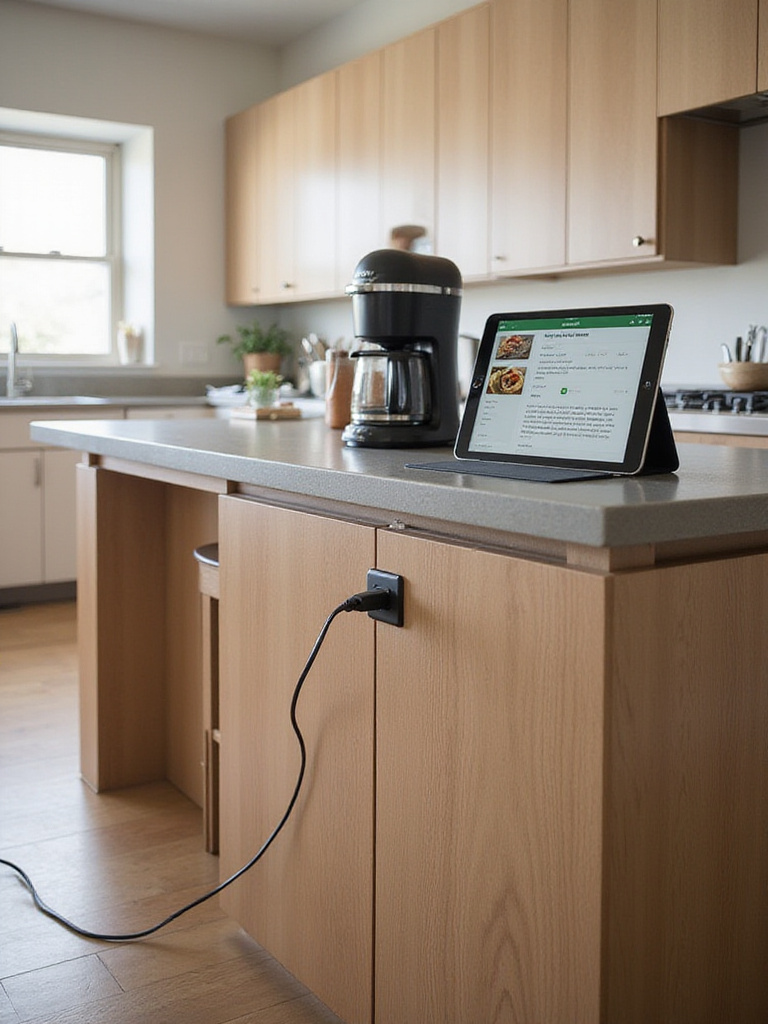
Pop-up outlets and USB charging stations maintain clean counter lines while providing necessary power access. Consider outlets on island sides or beneath overhangs to keep them accessible but visually unobtrusive. Plan for both current needs and future technology—what seems adequate today may feel insufficient in five years.
Unlike conventional options, this approach reduces visual clutter while ensuring power access exactly where and when you need it most.
13. Evaluate Fixed Versus Mobile Island Solutions
Fixed islands offer substantial workspace and storage capacity, typically measuring 3 by 6 feet or larger. These permanent installations can accommodate major features like sinks, cooktops, and extensive storage systems while serving as architectural anchors in open floor plans. However, they require significant space commitments and careful planning for utility connections.
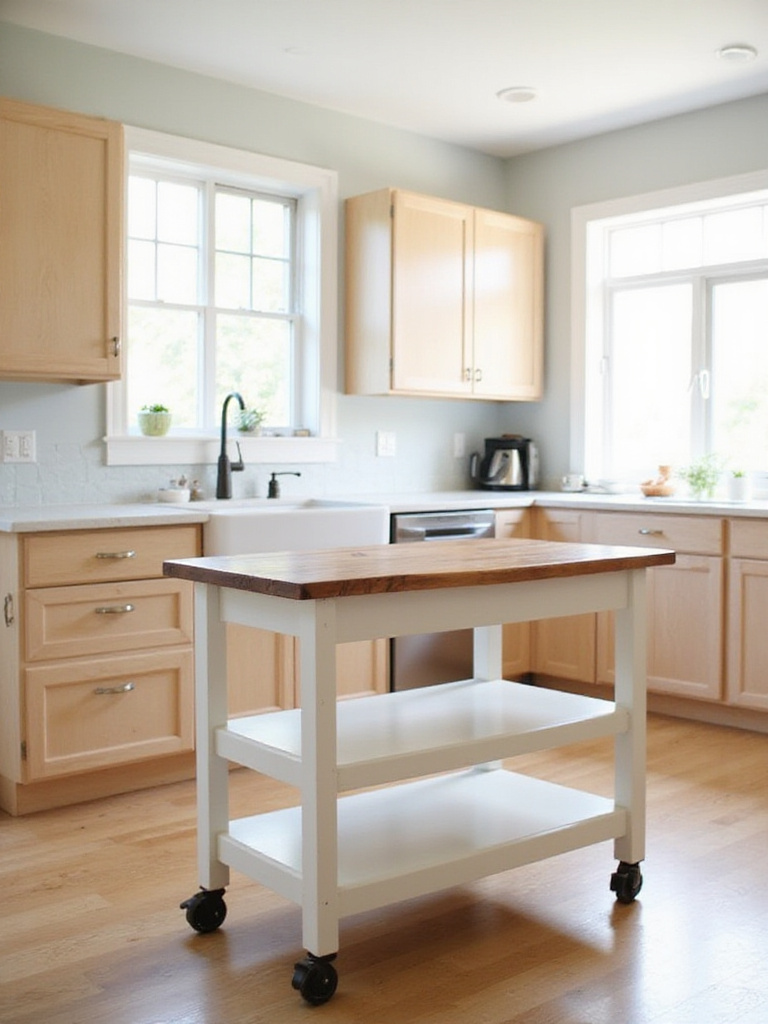
Mobile carts provide flexibility for smaller kitchens or changing needs. Quality rolling islands offer surprising functionality while maintaining the ability to reconfigure your space for large gatherings or deep cleaning. Look for models with locking wheels, solid construction, and surfaces that complement your existing finishes.
The versatility reveals itself when you pair this with careful assessment of your kitchen’s size constraints and your family’s evolving needs over time.
14. Design Multi-Level Islands for Enhanced Functionality
Multi-level kitchen island designs create distinct zones for different activities, typically featuring a lower prep surface at standard counter height and a raised dining area at bar height. This configuration naturally separates messy food preparation from clean dining surfaces while providing visual barriers that conceal kitchen chaos from guests.
The height differential also offers ergonomic benefits, providing comfortable work surfaces for various tasks while accommodating different seating preferences. Standard counter height (36 inches) works well for food prep, while bar height (42 inches) creates casual dining spaces that connect visually with adjacent living areas.
The composition comes together when you integrate storage solutions that serve both levels while maintaining clean sight lines throughout the space.
15. Harmonize Colors with Your Kitchen’s Existing Palette
Color selection can make or break kitchen island designs, either creating seamless integration or establishing dramatic focal points. While matching perimeter cabinetry ensures cohesive flow, contrasting colors like deep navy, forest green, or rich charcoal can transform your island into a sophisticated centerpiece. The key lies in ensuring any contrast feels intentional rather than jarring.
Consider how your chosen color interacts with existing elements—flooring, backsplashes, and adjacent living spaces all influence the overall harmony. Test large color samples in your actual lighting conditions throughout the day, as artificial and natural light can dramatically affect color perception.
The revival of this classic form comes with a twist as modern paint technologies offer unprecedented durability and color retention for high-use kitchen surfaces.
16. Establish Realistic Project Budgets
Kitchen island costs vary dramatically based on size, materials, and features, typically ranging from $3,000 for basic installations to $20,000 or more for custom designs with premium materials and integrated appliances. Adding plumbing for sinks can increase costs by $1,000-$3,000, while electrical work for outlets and lighting adds additional expenses.
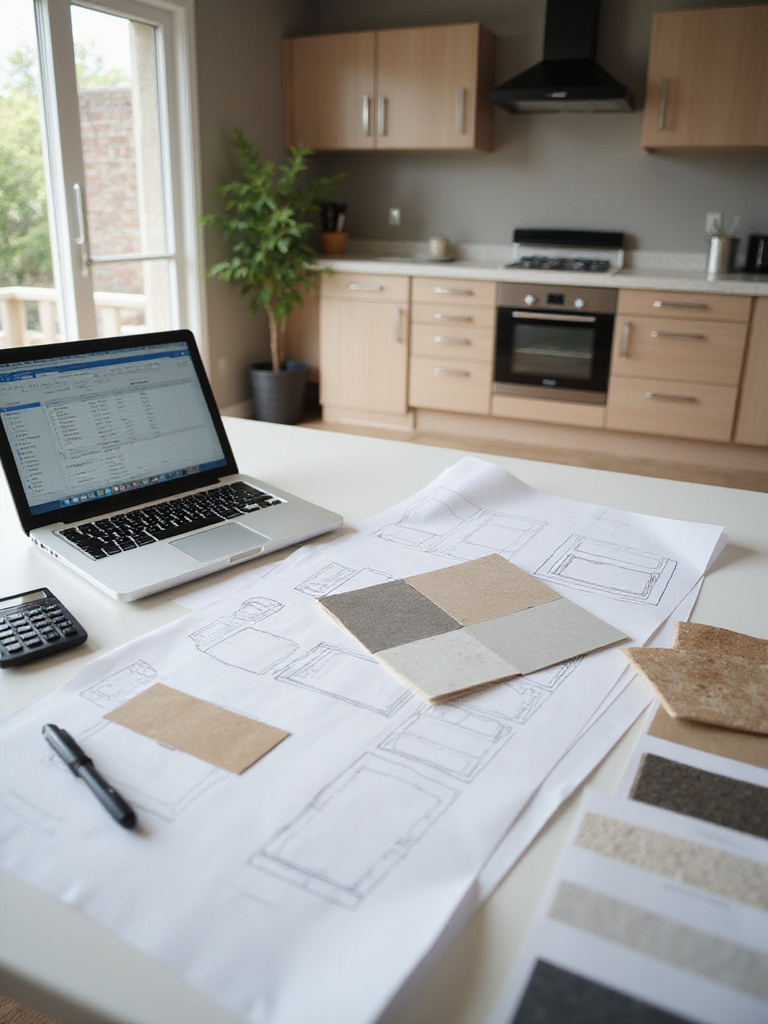
Professional installation ensures code compliance and proper integration with existing systems, though DIY approaches can reduce labor costs for simpler projects. Always include a 15-20 percent contingency fund for unexpected issues—older homes particularly may reveal hidden complications during installation.
The investment value comes from the exceptional long-term functionality and aesthetic enhancement that well-designed islands provide to your home’s most important space.
17. Ensure Adequate Clearance for Safety and Function
The 42-inch clearance standard isn’t merely a guideline—it’s essential for kitchen safety and efficiency. This measurement allows appliance doors to open fully while providing comfortable passage for multiple users. Inadequate clearance creates bottlenecks that make cooking frustrating and potentially dangerous.
Consider clearance needs around specific appliances. Dishwashers require additional space for loading and unloading, while ovens need clear areas for safe removal of hot dishes. Use physical mockups with cardboard or tape to test these relationships before finalizing your island placement.
When clients ask us about balancing style with comfort we emphasize that proper clearance actually enhances the kitchen’s visual flow by preventing cramped, cluttered feelings.
18. Integrate Contemporary Features for Modern Appeal
Waterfall edges, where countertop material extends vertically down the island’s sides, create stunning visual impact while protecting cabinetry from damage. This detail works particularly well with dramatic stone patterns or solid colors, though it does increase material costs significantly. Built-in charging stations and smart technology integration address our connected lifestyles while maintaining clean aesthetics.
Consider which trending features align with your long-term needs versus those that might feel dated in a few years. USB outlets and wireless charging surfaces offer lasting utility, while some smart features may require updates as technology evolves.
The design language evolved from traditional patterns that emphasized craftsmanship details, now updated with contemporary technology integration and streamlined aesthetics.
19. Choose Between DIY and Professional Installation
Simple cabinet-style islands may suit experienced DIYers, potentially saving 30-60 percent in labor costs. However, projects involving plumbing, electrical work, or gas connections typically require professional expertise for safety and code compliance. Many jurisdictions require permits for these installations, adding complexity to DIY approaches.
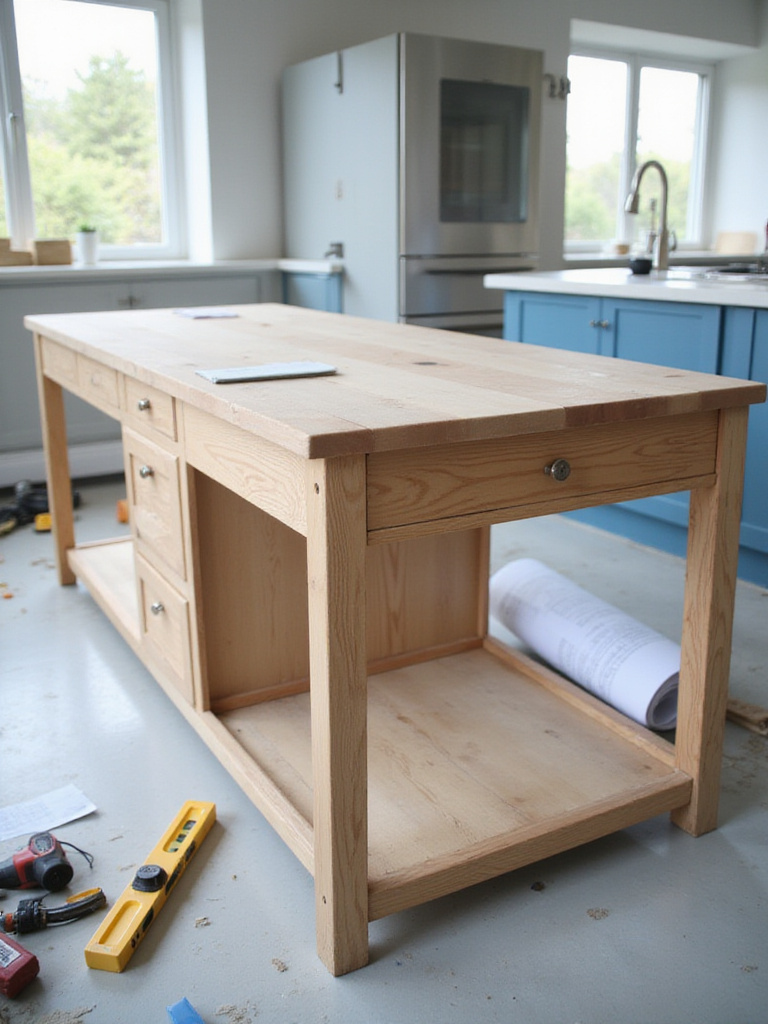
Professional installation offers speed, expertise, and warranty protection, typically completing projects in 1-3 days compared to weeks for DIY efforts. Contractors also have access to trade discounts and specialized tools that can offset some labor costs while ensuring proper execution.
The sustainable journey of this material involves weighing the long-term value of professional installation against potential savings from DIY approaches, considering your skill level and available time.
Transform Your Kitchen with the Perfect Island Design
Creating the ideal kitchen island requires balancing numerous factors—from functional priorities and spatial constraints to material selections and budget considerations. The most successful kitchen island designs emerge from careful planning that prioritizes your family’s specific needs while ensuring seamless integration with your existing space. Whether you envision a simple prep station or an elaborate cooking and entertaining hub, the key lies in making informed decisions that serve both immediate needs and long-term satisfaction.
Remember that your island will likely outlast changing trends and evolving family dynamics. Investing in quality materials, proper installation, and timeless design elements ensures your island remains both beautiful and functional for decades. The planning process may seem complex, but each decision builds toward creating a centerpiece that truly enhances your daily life.
Start by honestly assessing your needs, measuring your space carefully, and gathering inspiration from successful installations. Don’t hesitate to consult with design professionals for complex projects—their expertise can prevent costly mistakes while ensuring your vision becomes reality. Your perfect kitchen island awaits, ready to transform your culinary space into the heart of your home.