I’ll be honest—when I first started tackling kitchen organization, I thought I needed to gut my entire cabinet system and start over. Spoiler alert: I didn’t. What actually changed everything was discovering that you don’t need a complete overhaul to get a functional, beautiful kitchen. Instead, strategic kitchen organizers cabinet by cabinet let you work with what you’ve got, squeeze out unused space, and make everything you actually use easy to find.
Whether you’re renting (and can’t drill anything), working with a tiny kitchen, or just tired of reaching to the back of a cabinet only to knock over three things, the right organizers are game-changers. They’re also way cheaper than a remodel. Kitchen organizers cabinet options come in endless styles—from simple tension rods to fancy pull-out systems—and the best part? Most of them require zero installation skills. I’ve tested (and frustrated myself with) plenty of options, and I’m sharing the fifteen that actually delivered results for real kitchens with real budgets. Let’s start with the classics and work our way up to the ones that’ll make you wonder how you ever survived without them.
1. Stackable Shelf Risers: The Classic Kitchen Cabinet Organizer That Works
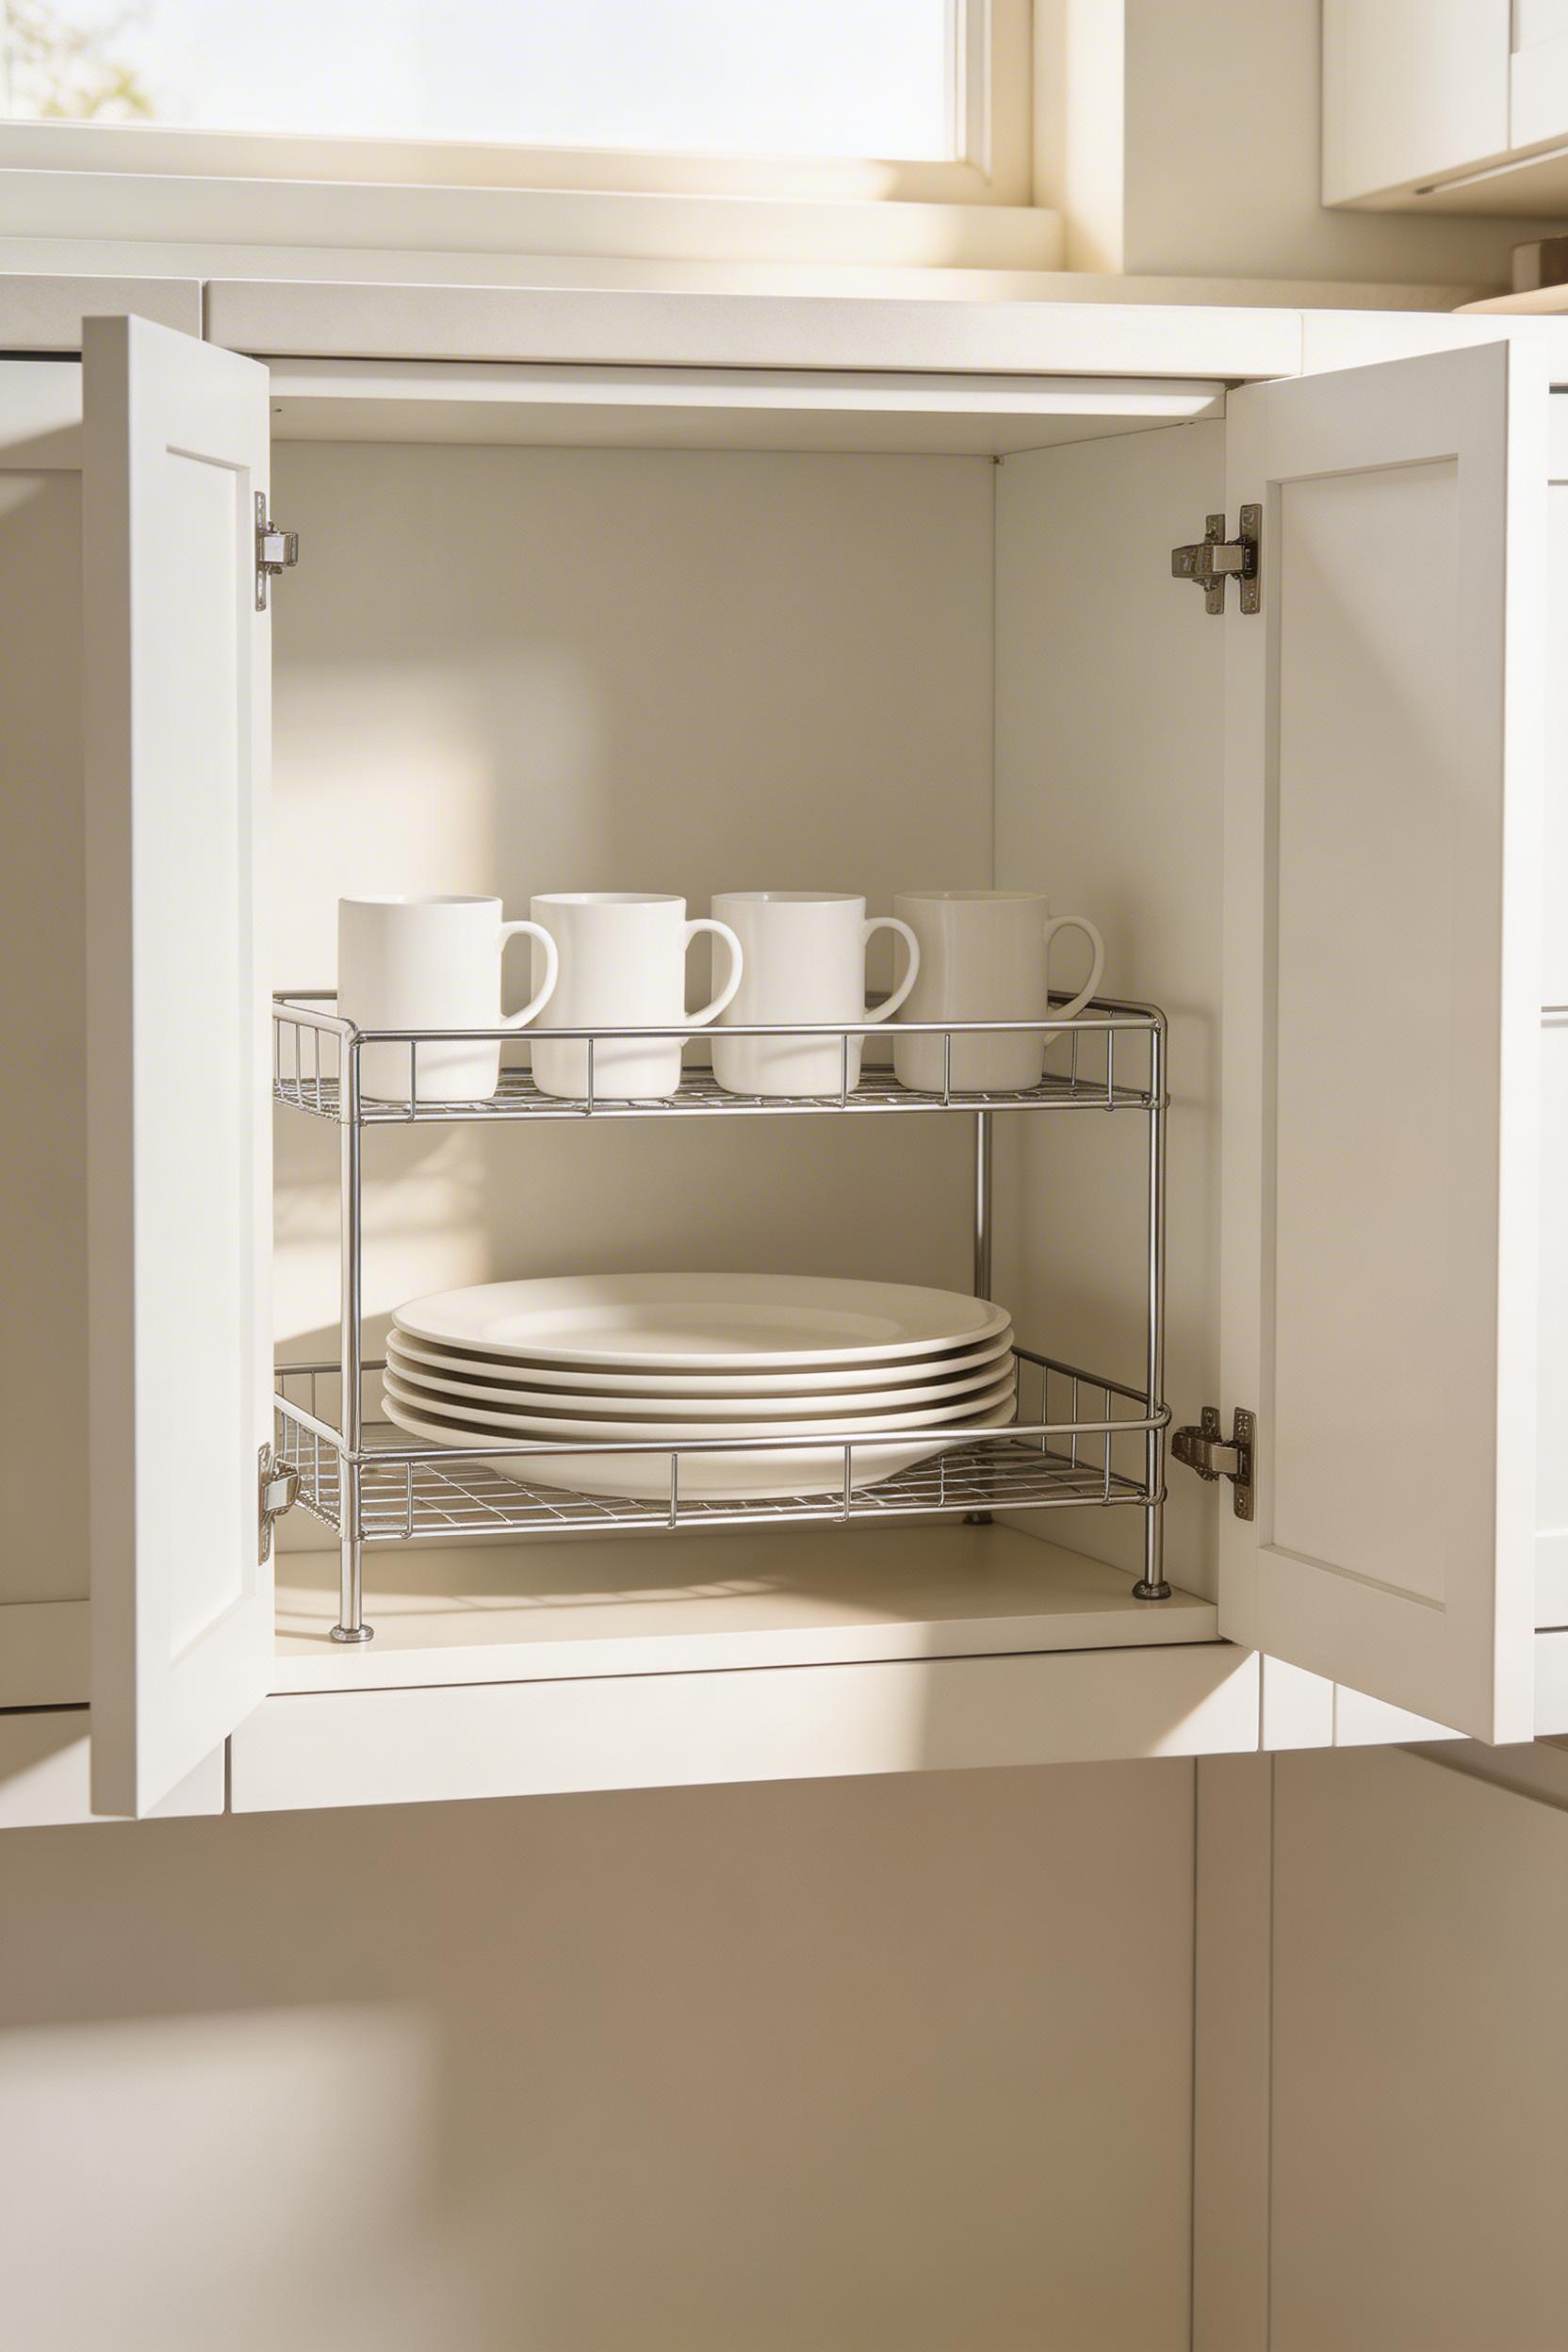
Shelf risers are one of those “why didn’t I think of this sooner?” solutions. They’re basically platforms that sit on your existing shelf and create a second tier of storage space above. The YouCopia UpSpace is my go-to recommendation—it’s got a 25-pound capacity, measures 9 inches deep by 16 inches wide, and costs around $23. The bamboo NEX risers hold up to 33 pounds per shelf if you need something beefier, but honestly, for most people’s spice collections and small appliances, the YouCopia does the job without breaking the bank.
Here’s the thing about risers: they only work if you’ve got clearance above them. You’ll need at least 8 to 10 inches of space between the riser and your cabinet’s roof, so measure before you buy. The best part? They’ve got rubber feet, require zero tools, and they’re totally renter-safe. You just plop them down and go. I’ve used them for everything from storing canned goods to keeping small bowls and plates organized. If you’re looking for more kitchen organization hacks, risers are genuinely one of the easiest wins.
A common mistake I see people make is stacking two risers on top of each other thinking they’ll magically double their space. Don’t do it—they weren’t designed for that, and you’ll end up with a wobbly disaster. Also, even though risers hold a decent amount of weight, don’t load them up with cast iron. Stick to lighter items like canned goods, dishes, or cookbooks, and you’ll be golden.
2. Pull-Out Drawer Inserts for Lower Cabinets
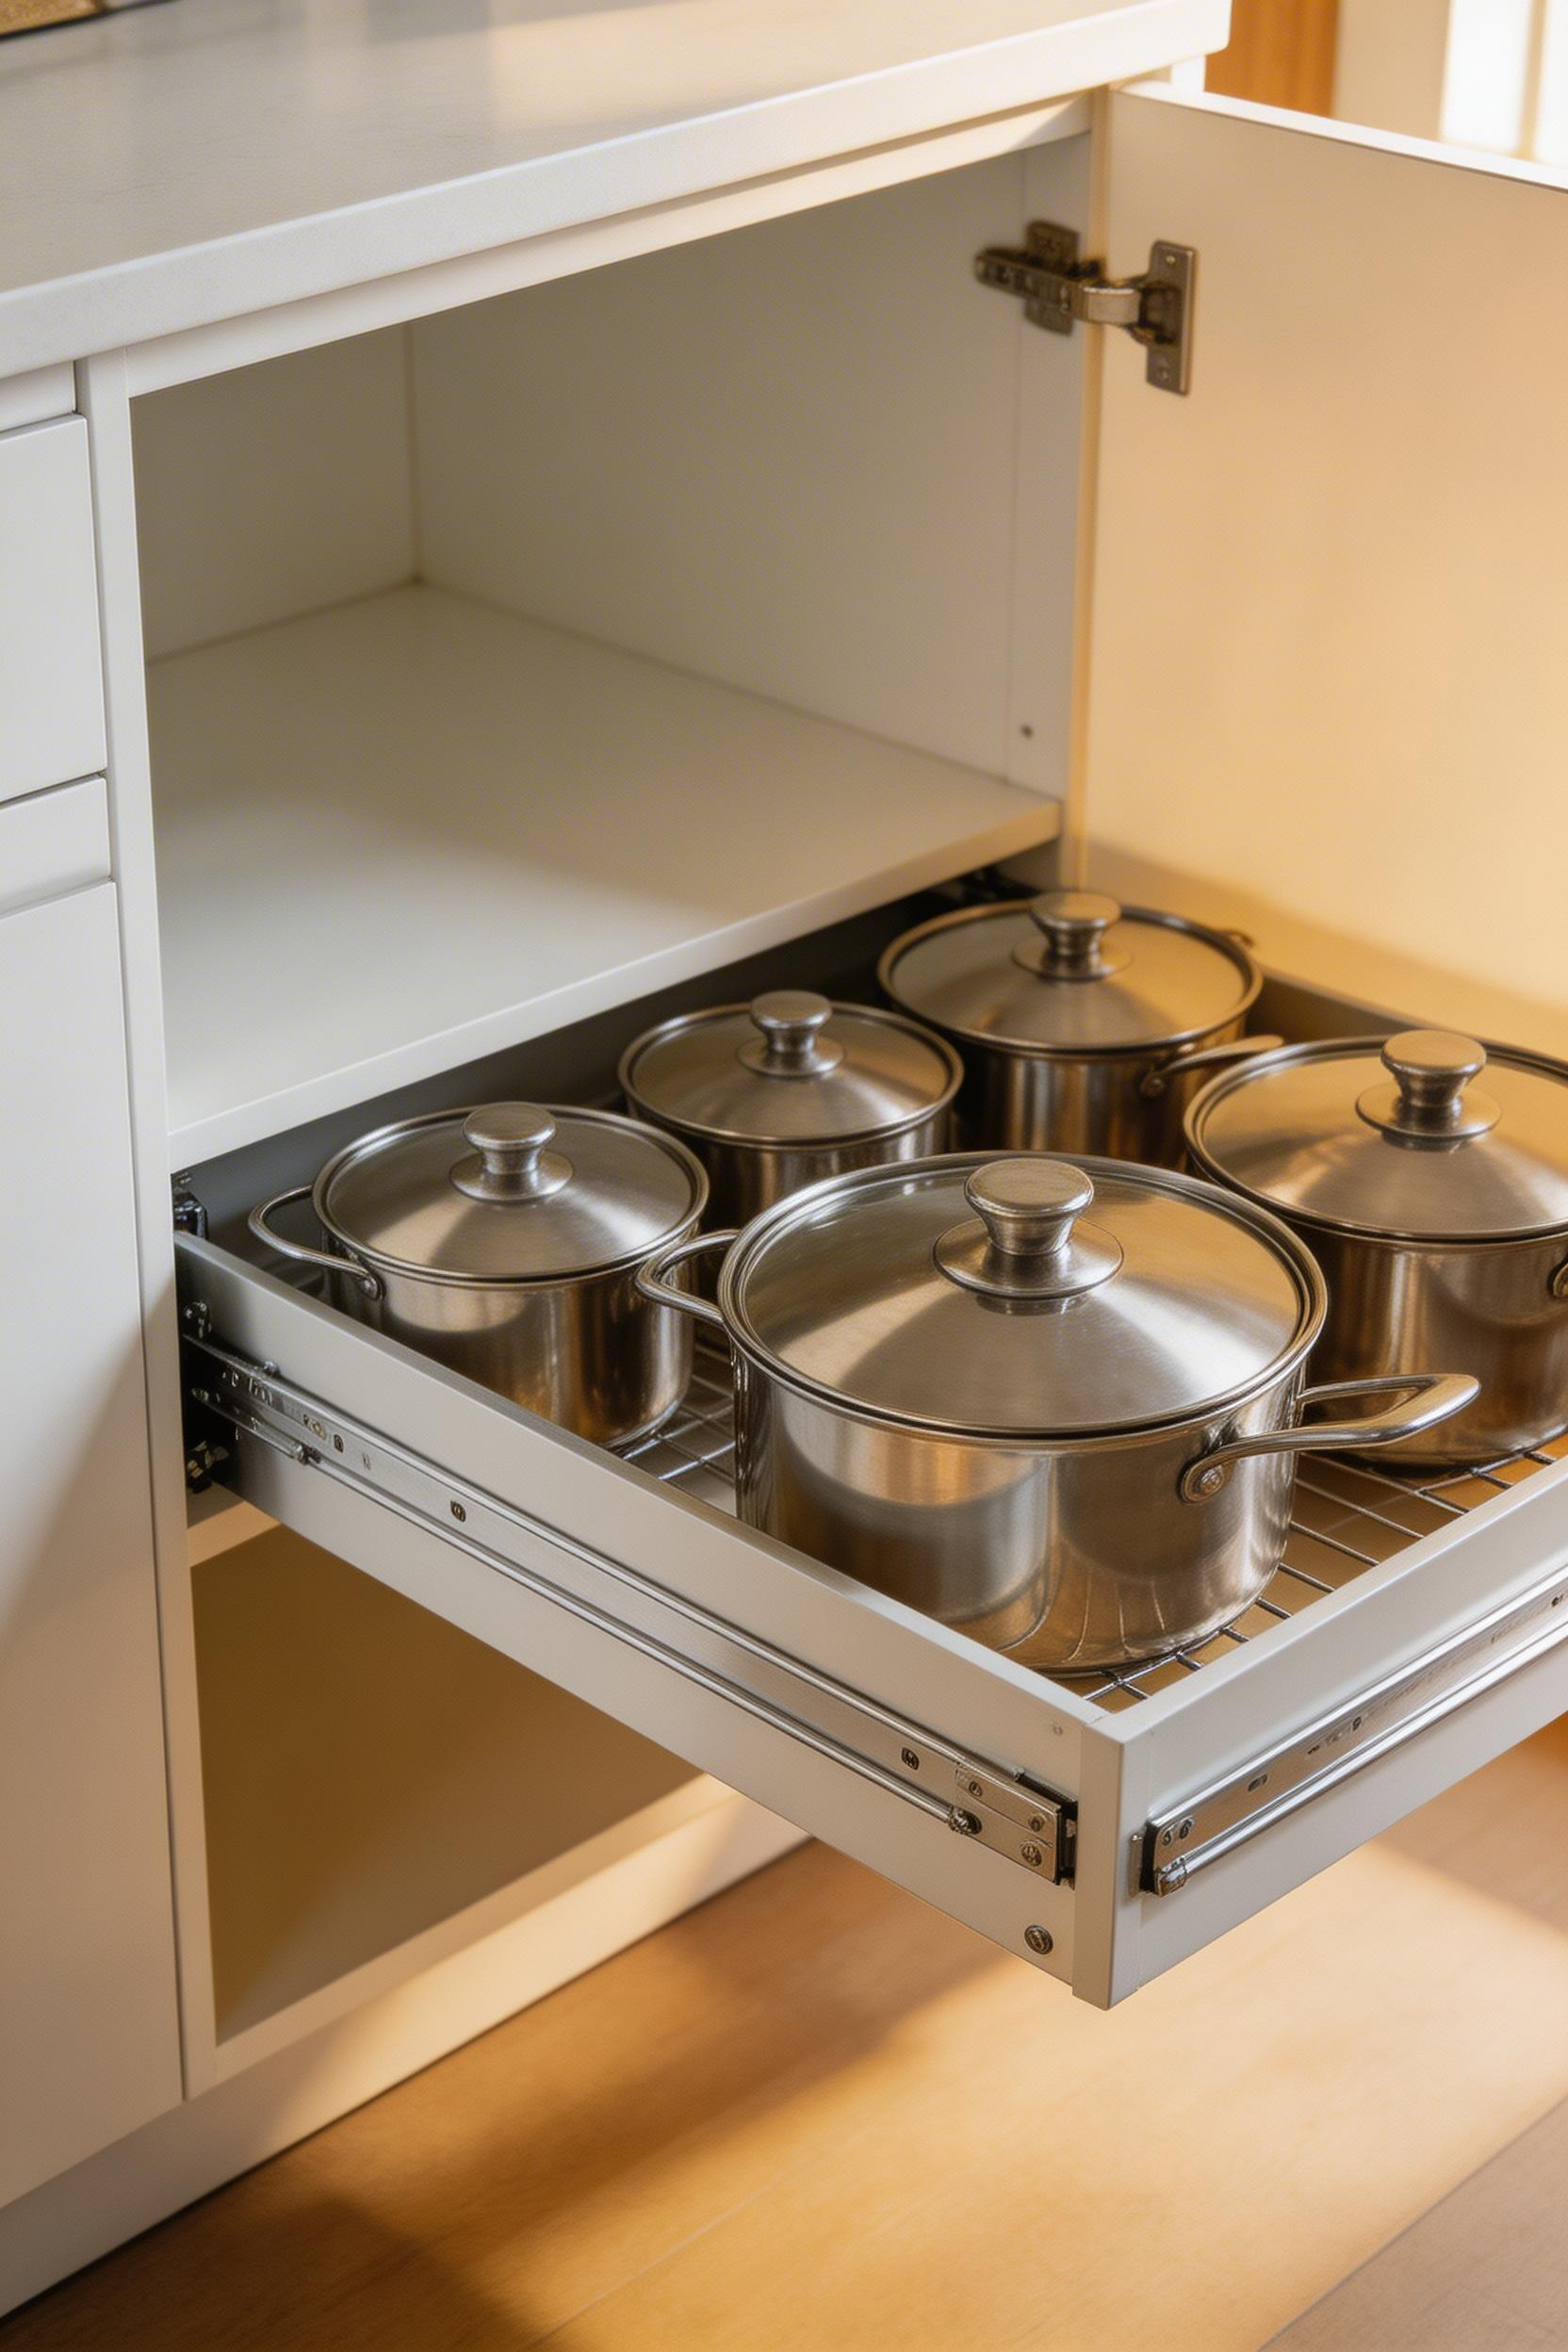
If you’ve ever had to crouch down and practically climb into a lower cabinet just to grab one thing from the back, you understand why pull-out drawer inserts are worth the investment. IKEA’s MAXIMERA system is solid and budget-friendly—it features full-extension slides with soft-close dampers and comes with a ridiculously good 25-year warranty. For something with more capacity, Rev-A-Shelf’s Filler Pullout can handle 100 pounds and costs between $185 and $280. Installation takes about 30 to 45 minutes with just a screwdriver and the included template, making it very doable for a kitchen remodel on a budget.
Here’s why this matters: a full-extension slide means you can access 100 percent of what’s inside your cabinet. With partial extension slides, you’re only getting about two-thirds of the space. When you’re dealing with lower cabinets—which are usually prime real estate for pots, pans, or cleaning supplies—that extra accessibility is huge.
Before you install one, check two things. First, your cabinet needs to be at least 22 inches deep for a full-extension drawer to work properly. Second, measure your door swing carefully. The pullout extends about 24 inches forward, and you need roughly 0.75 inches of clearance on each side for the door to close smoothly. I made this mistake once and had a pullout that looked great until we tried to close the cabinet door. Measure twice, install once.
3. Lazy Susan Turntables for Corner Kitchen Cabinet Organization
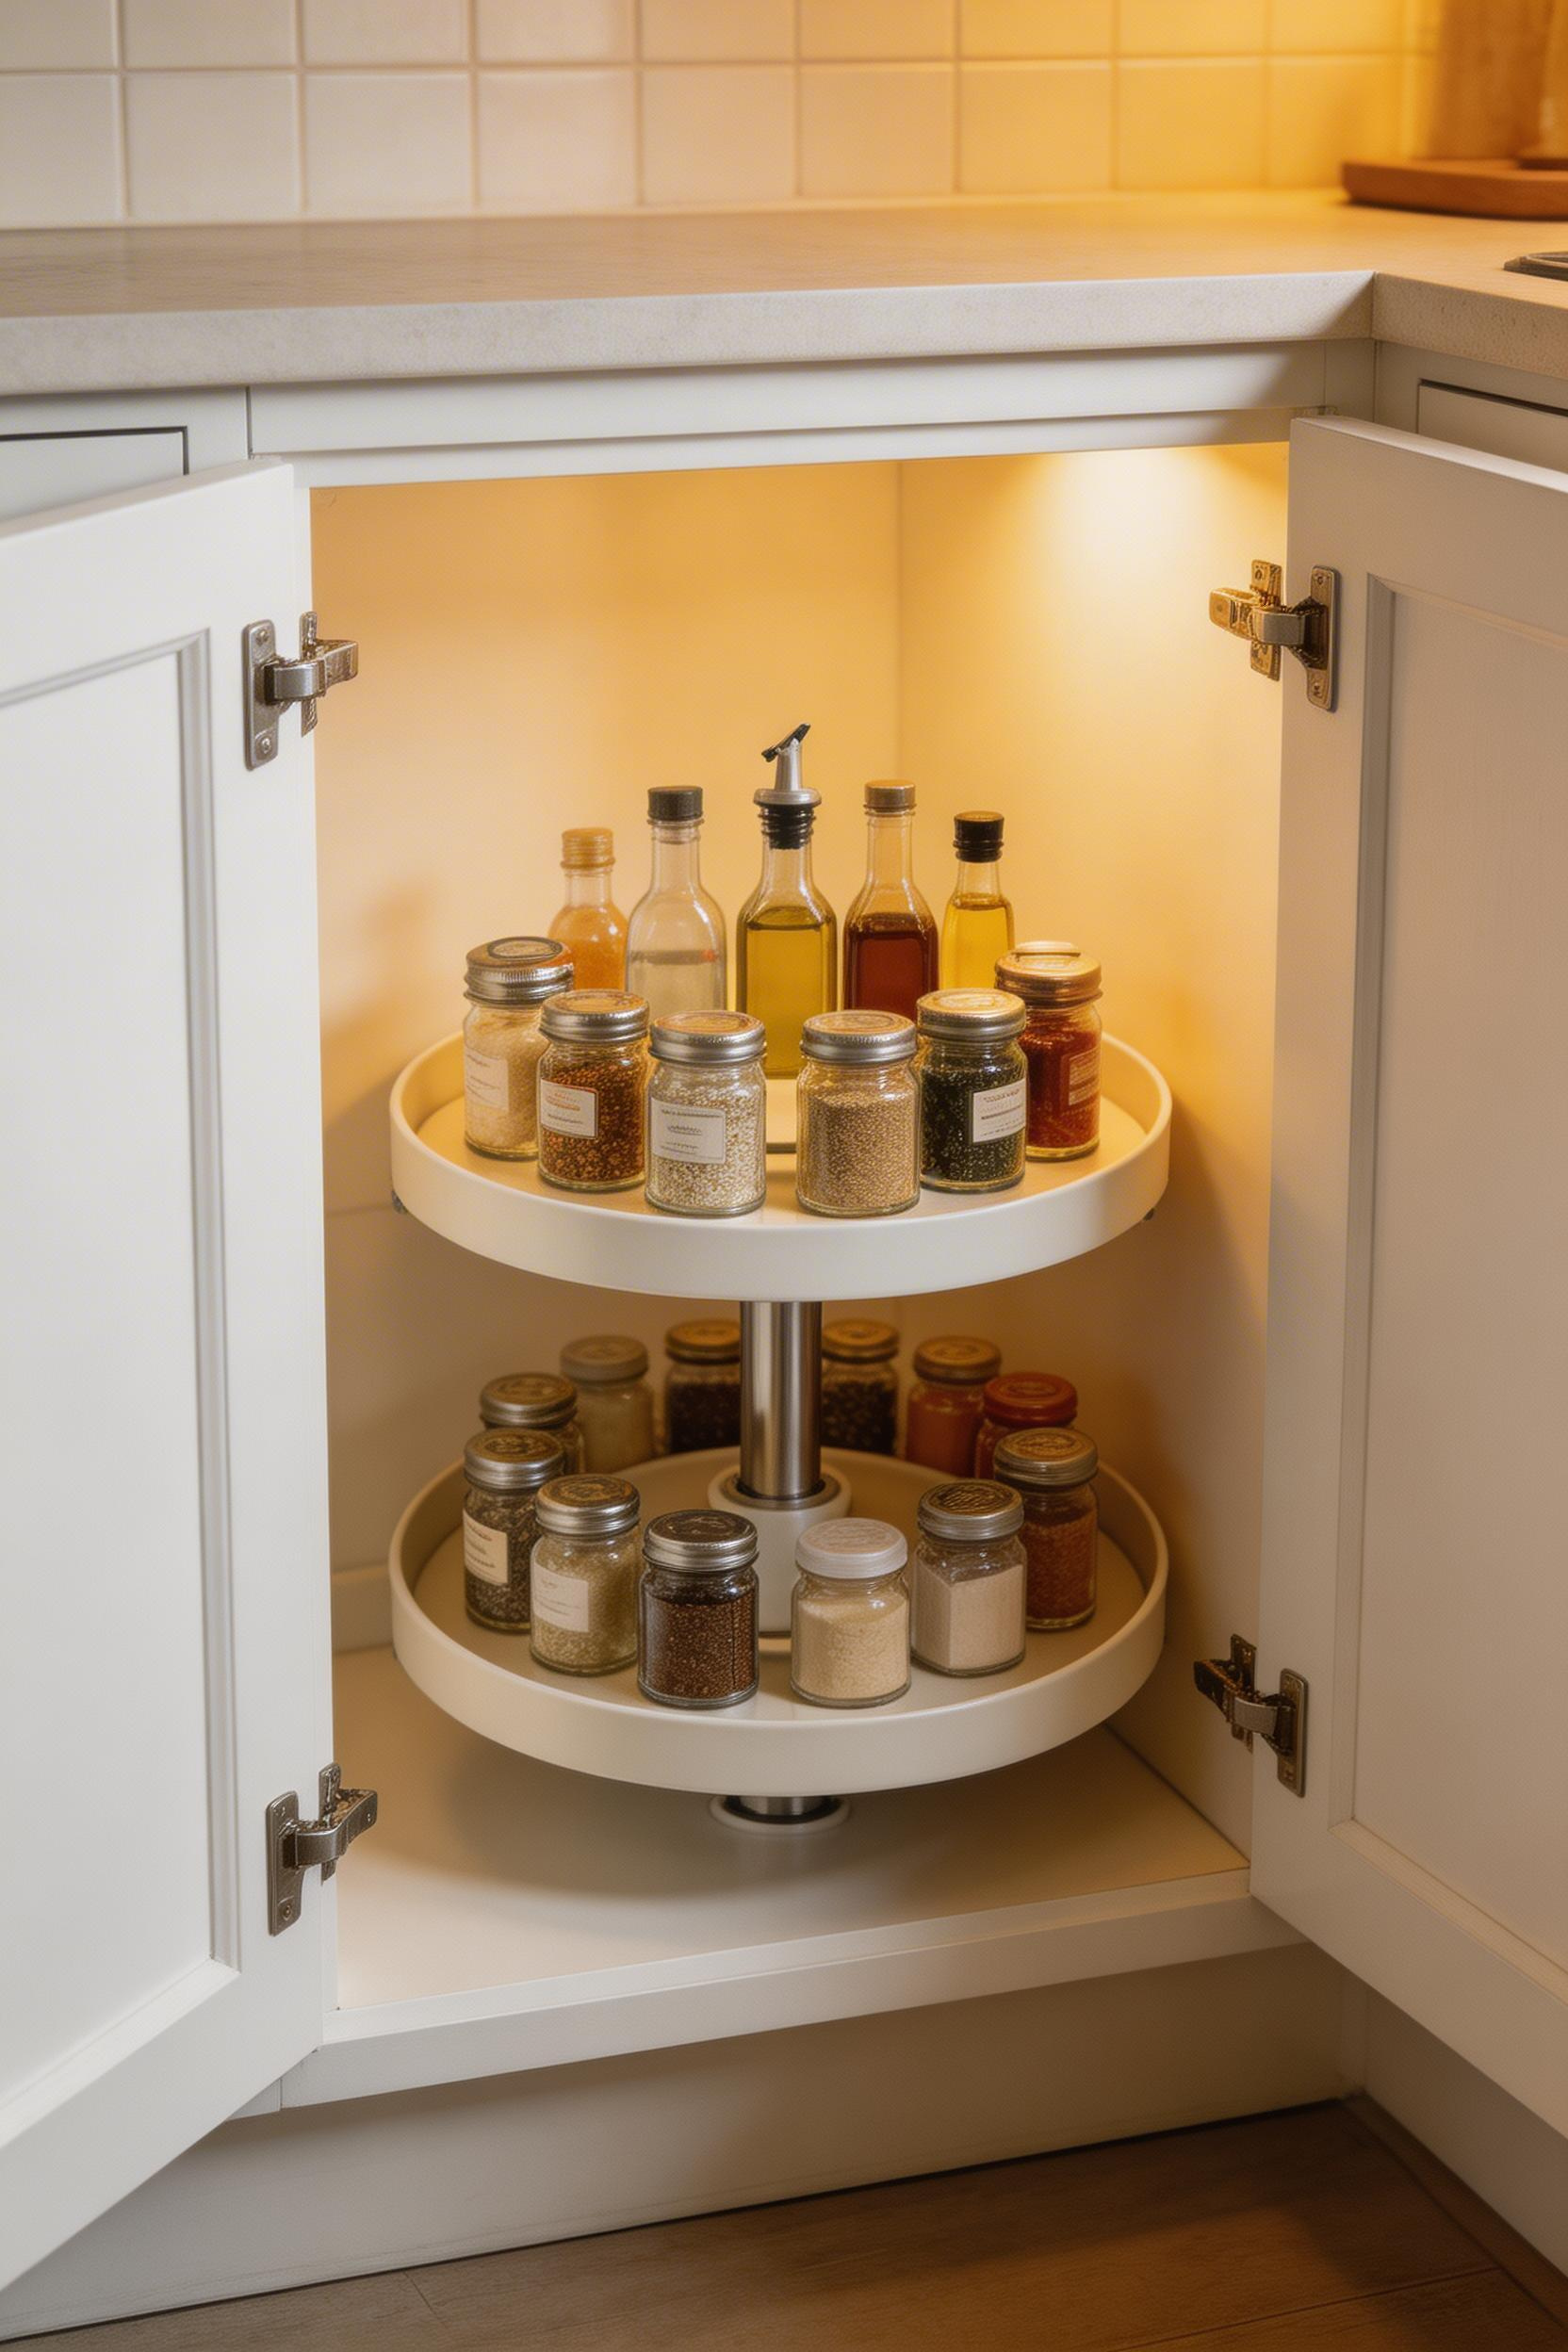
Corner cabinets are either total dead zones or absolute gold, depending on what you put in them. A Lazy Susan turntable is the best way to make sure it’s the latter. The Copco 12-inch turntable is my top pick for most corner base cabinets—it’s perfectly sized for spices, canned goods, and condiments, and it costs under $20. If your cabinet is deeper (22 to 24 inches), the Copco 18-inch version gives you even more storage. For something with a bit more grip and a deep ledge to prevent things from sliding off, the OXO Good Grips 16-inch turntable has a 14.25-inch inner surface and is worth the extra few dollars.
Want to maximize even more? Copco makes a 2-tier version that literally doubles your capacity. I love these for keeping frequently used items on top and backup supplies or specialty ingredients on the bottom tier. You spin it, grab what you need, and everything rotates into view. No more playing “what’s in the back corner” every time you cook. If you’re working with a compact space, this is one of the small kitchen ideas that pays the biggest dividends per dollar spent.
Here’s the mistake I’ve seen countless times: someone buys an 18-inch turntable without measuring their cabinet depth, then the rotation jams halfway around because there isn’t enough space. Measure from front to back first—if you’ve got less than 22 inches, stick with the 12-inch or 16-inch sizes. Otherwise, you’re wasting money on something that won’t actually function in your space.
4. Tension Rod Dividers for Bakeware and Cutting Boards
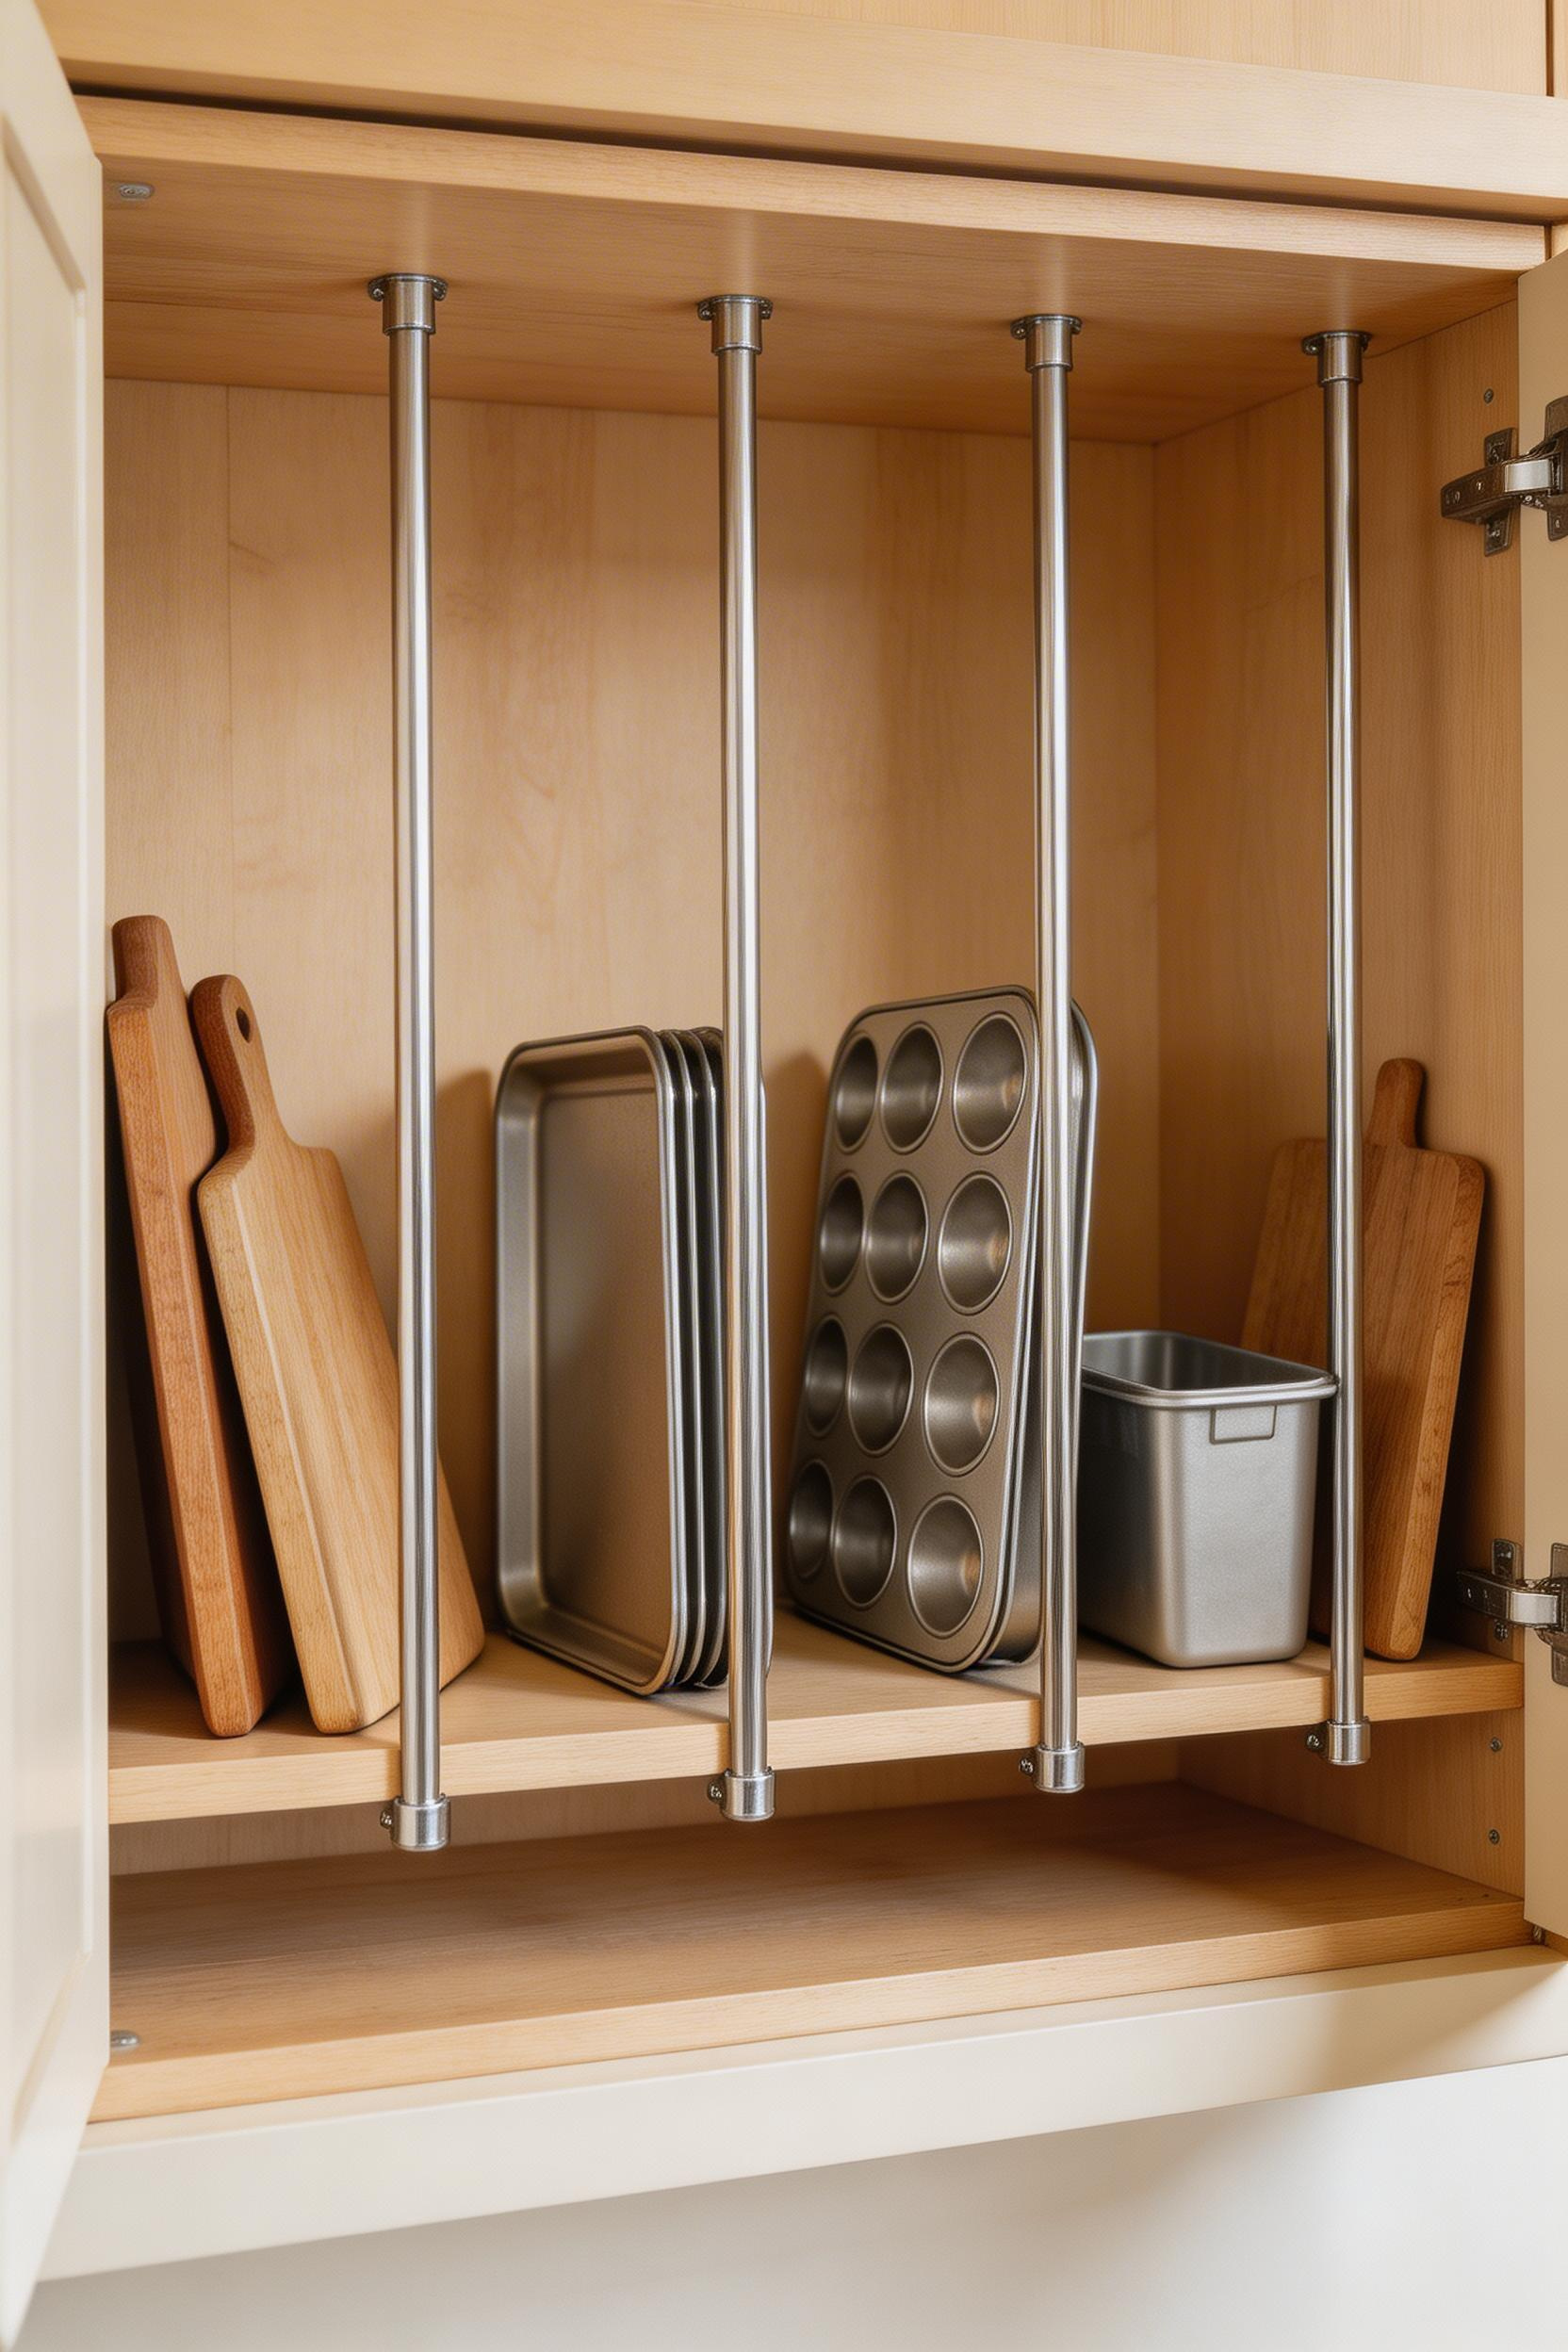
This is my favorite budget hack, and it’s almost embarrassing how well it works. Tension rod dividers cost between $2 and $5 each, require zero tools, and they’re completely renter-friendly. They use spring tension to stay in place, so you just wedge them in your cabinet vertically and you’ve instantly created organized sections for cutting boards, baking sheets, pizza pans, cooling racks, or anything flat and sturdy.
The spacing matters more than you’d think. For cutting boards, space your rods about 1.5 to 2 inches apart. For muffin tins or larger baking sheets, go wider—2.5 to 3 inches between rods works better. I typically use 3 to 5 rods per cabinet, depending on how much bakeware I’m storing. The goal is to keep everything upright and visible so you can actually see what you have instead of just stacking things and hoping the bottom items don’t get crushed.
One more thing: don’t crank those tension rods too tight. If they’re less than 1.5 inches apart, they won’t grip properly, and your items will lean or fall. Also, skip the heavy cast iron on these—they’re not meant to handle that kind of weight. Stick to lighter items, and these dividers will last forever.
5. Drawer Organizer Inserts for Utensils and Cutlery

Utensil drawers are prime real estate, and a good organizer insert makes all the difference between a functional drawer and a frustrating jumble. The Joseph Joseph expandable bamboo insert adjusts from 11.4 to 19 inches, comes with 7 compartments, and costs around $31 to $35. If you’ve got oddly shaped utensils (large serving spoons, pastry tools, specialty gadgets), the OXO Good Grips version has adjustable compartments that are more flexible.
Make sure your drawer is at least 3.25 inches deep if you want room for tool storage. Most standard kitchen drawers are 18 to 24 inches wide and 18 to 20 inches deep, so most inserts will fit. The expandable versions are my top recommendation because you can literally pull the sides apart to fit your exact cabinet width—no tools needed. Just slide it in, adjust it, and you’re done.
Once you’ve got your organizer in place, spend 10 minutes organizing by what you actually use. I keep my most-used spoons, spatulas, and measuring spoons in the front compartments and shuffle the occasional-use stuff toward the back. It takes maybe a week to get used to where everything lives, then it becomes second nature.
6. Over-the-Door Cabinet Organizers for Pantry Doors
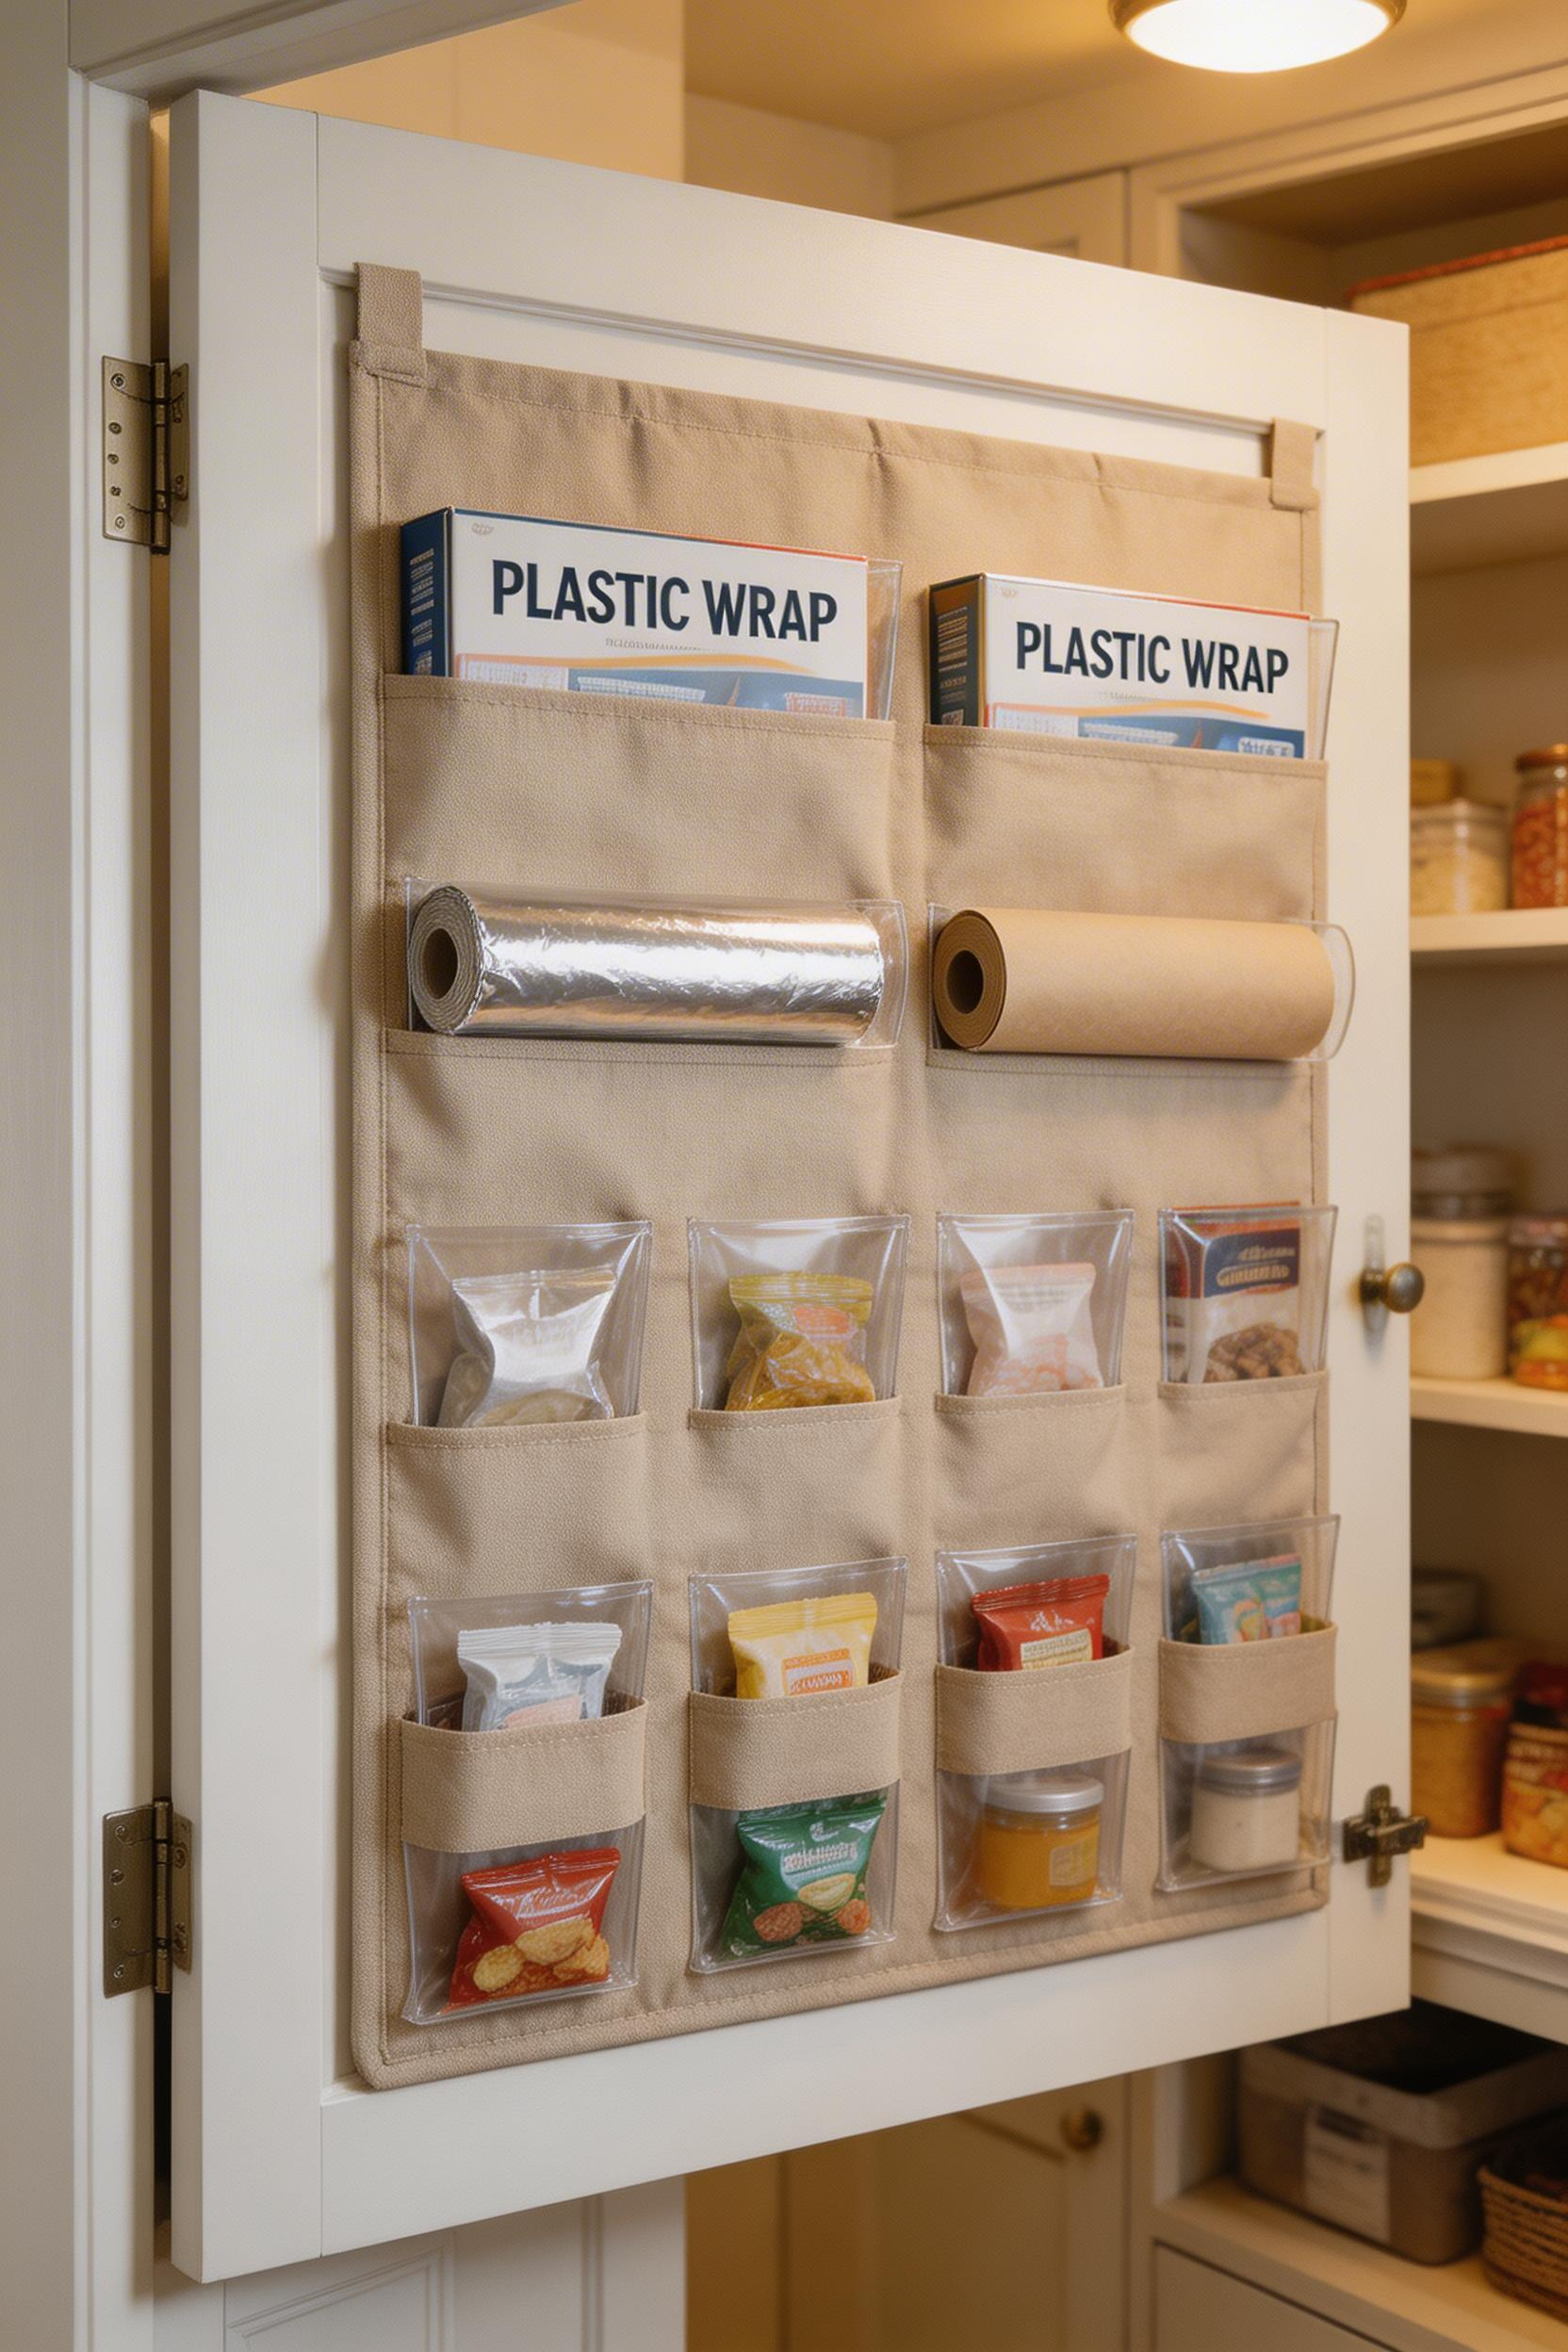
If your pantry or cabinet doors are basically wasted space, over-the-door organizers are your answer. The SimpleHouseware 2-pack offers 15 pockets per unit, measures 52 inches by 18 inches, and weighs less than 2 pounds. The mDesign version has foam-lined hooks that protect your cabinet doors from scratches, and it fits doors up to 1.75 inches thick. For renters looking for damage-free solutions, both of these work beautifully alongside other apartment kitchen decorating ideas.
Before you hang one, check that you’ve got 0.75 to 1.5 inches of clearance from the door edge to the nearest interior shelf. You want the organizer to hang flat without bumping into anything when you close the door. Also measure your door thickness—most interior cabinet doors are 0.75 to 1.5 inches, but some pantry doors run thicker. These kitchen organizers cabinet-style work best when they fit snugly without forcing the door to bend. Test the fit by holding the organizer against the inside of your door before purchasing.
These are perfect for wraps, foils, grocery bags, bag clips, and small spice jars—basically all the things that usually create cabinet chaos. One heads-up: don’t overload these with heavy items like canned goods. The pockets can tear if you’re not careful, and honestly, they’re not designed to handle that kind of weight. Stick to lightweight items like plastic wrap, aluminum foil, small bottles, and cooking sprays. The door-hang hooks should only support about 10 to 15 pounds total. Stay within that limit, and these organizers will serve you well for years. I’ve also seen people pair these with a tension rod inside the door for even more options—just make sure you’re not creating a weight problem that causes the door to sag or close unevenly.
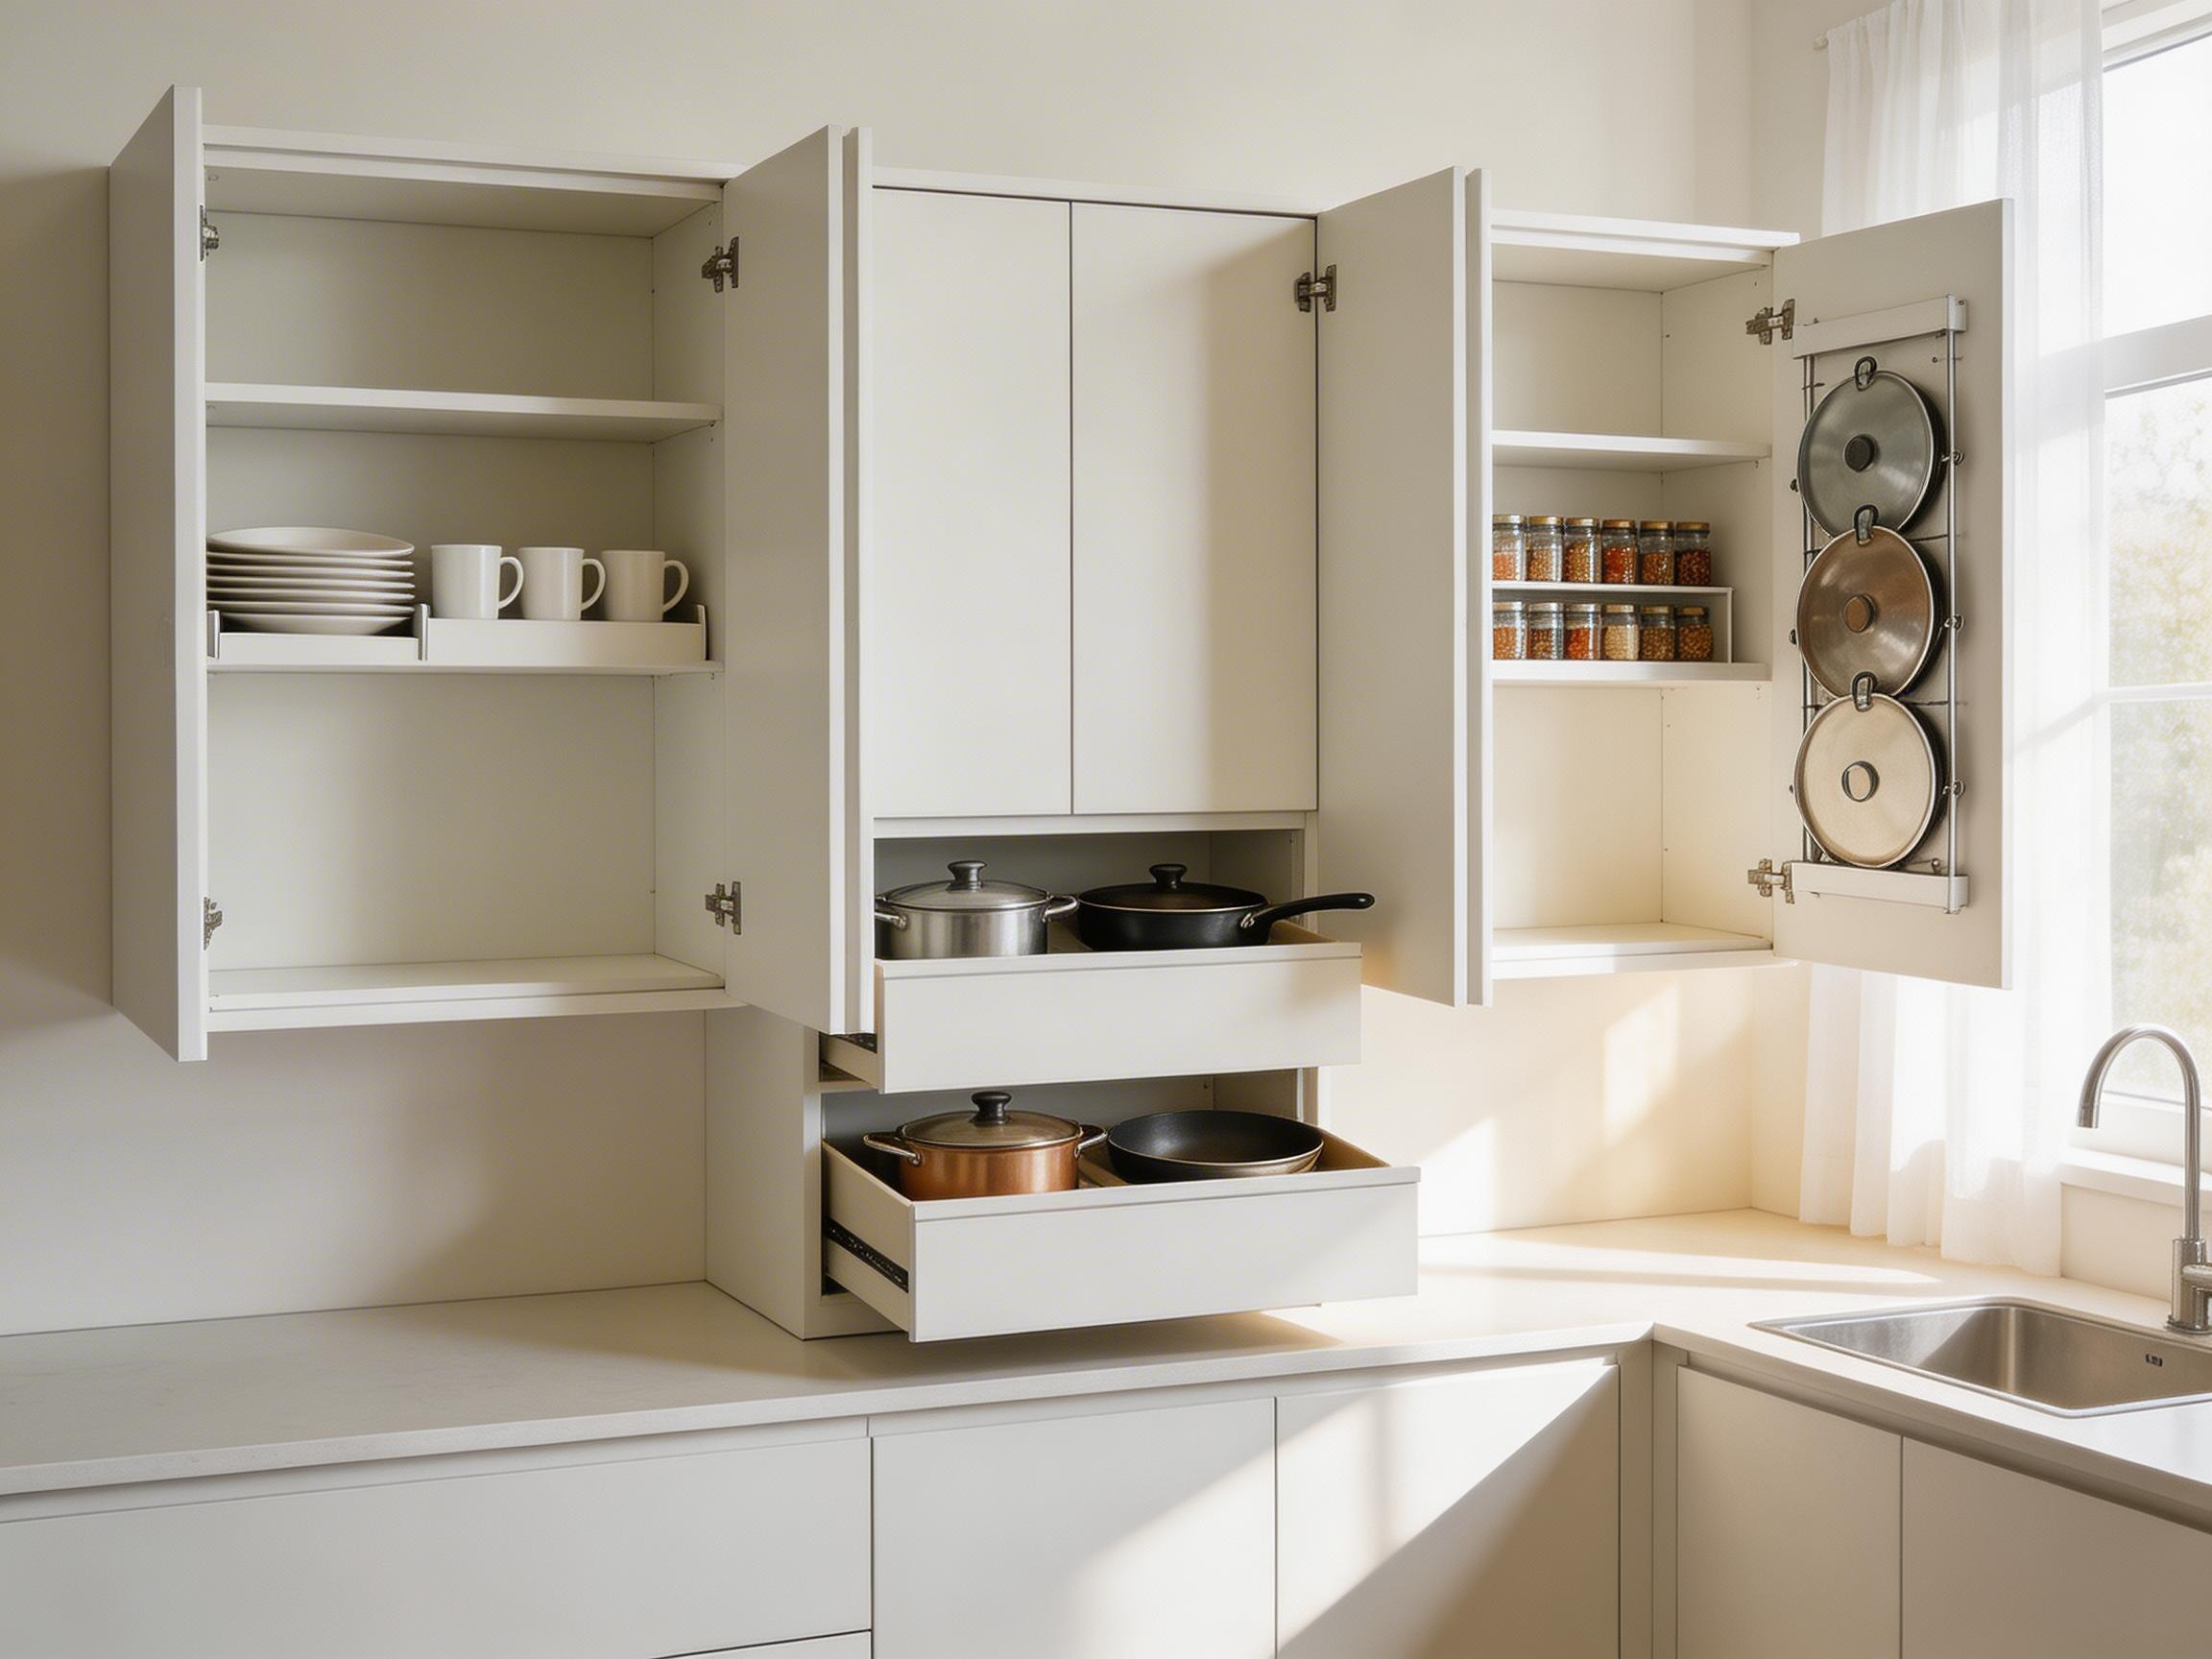
7. Pull-Out Kitchen Cabinet Organizers for Pots and Pans
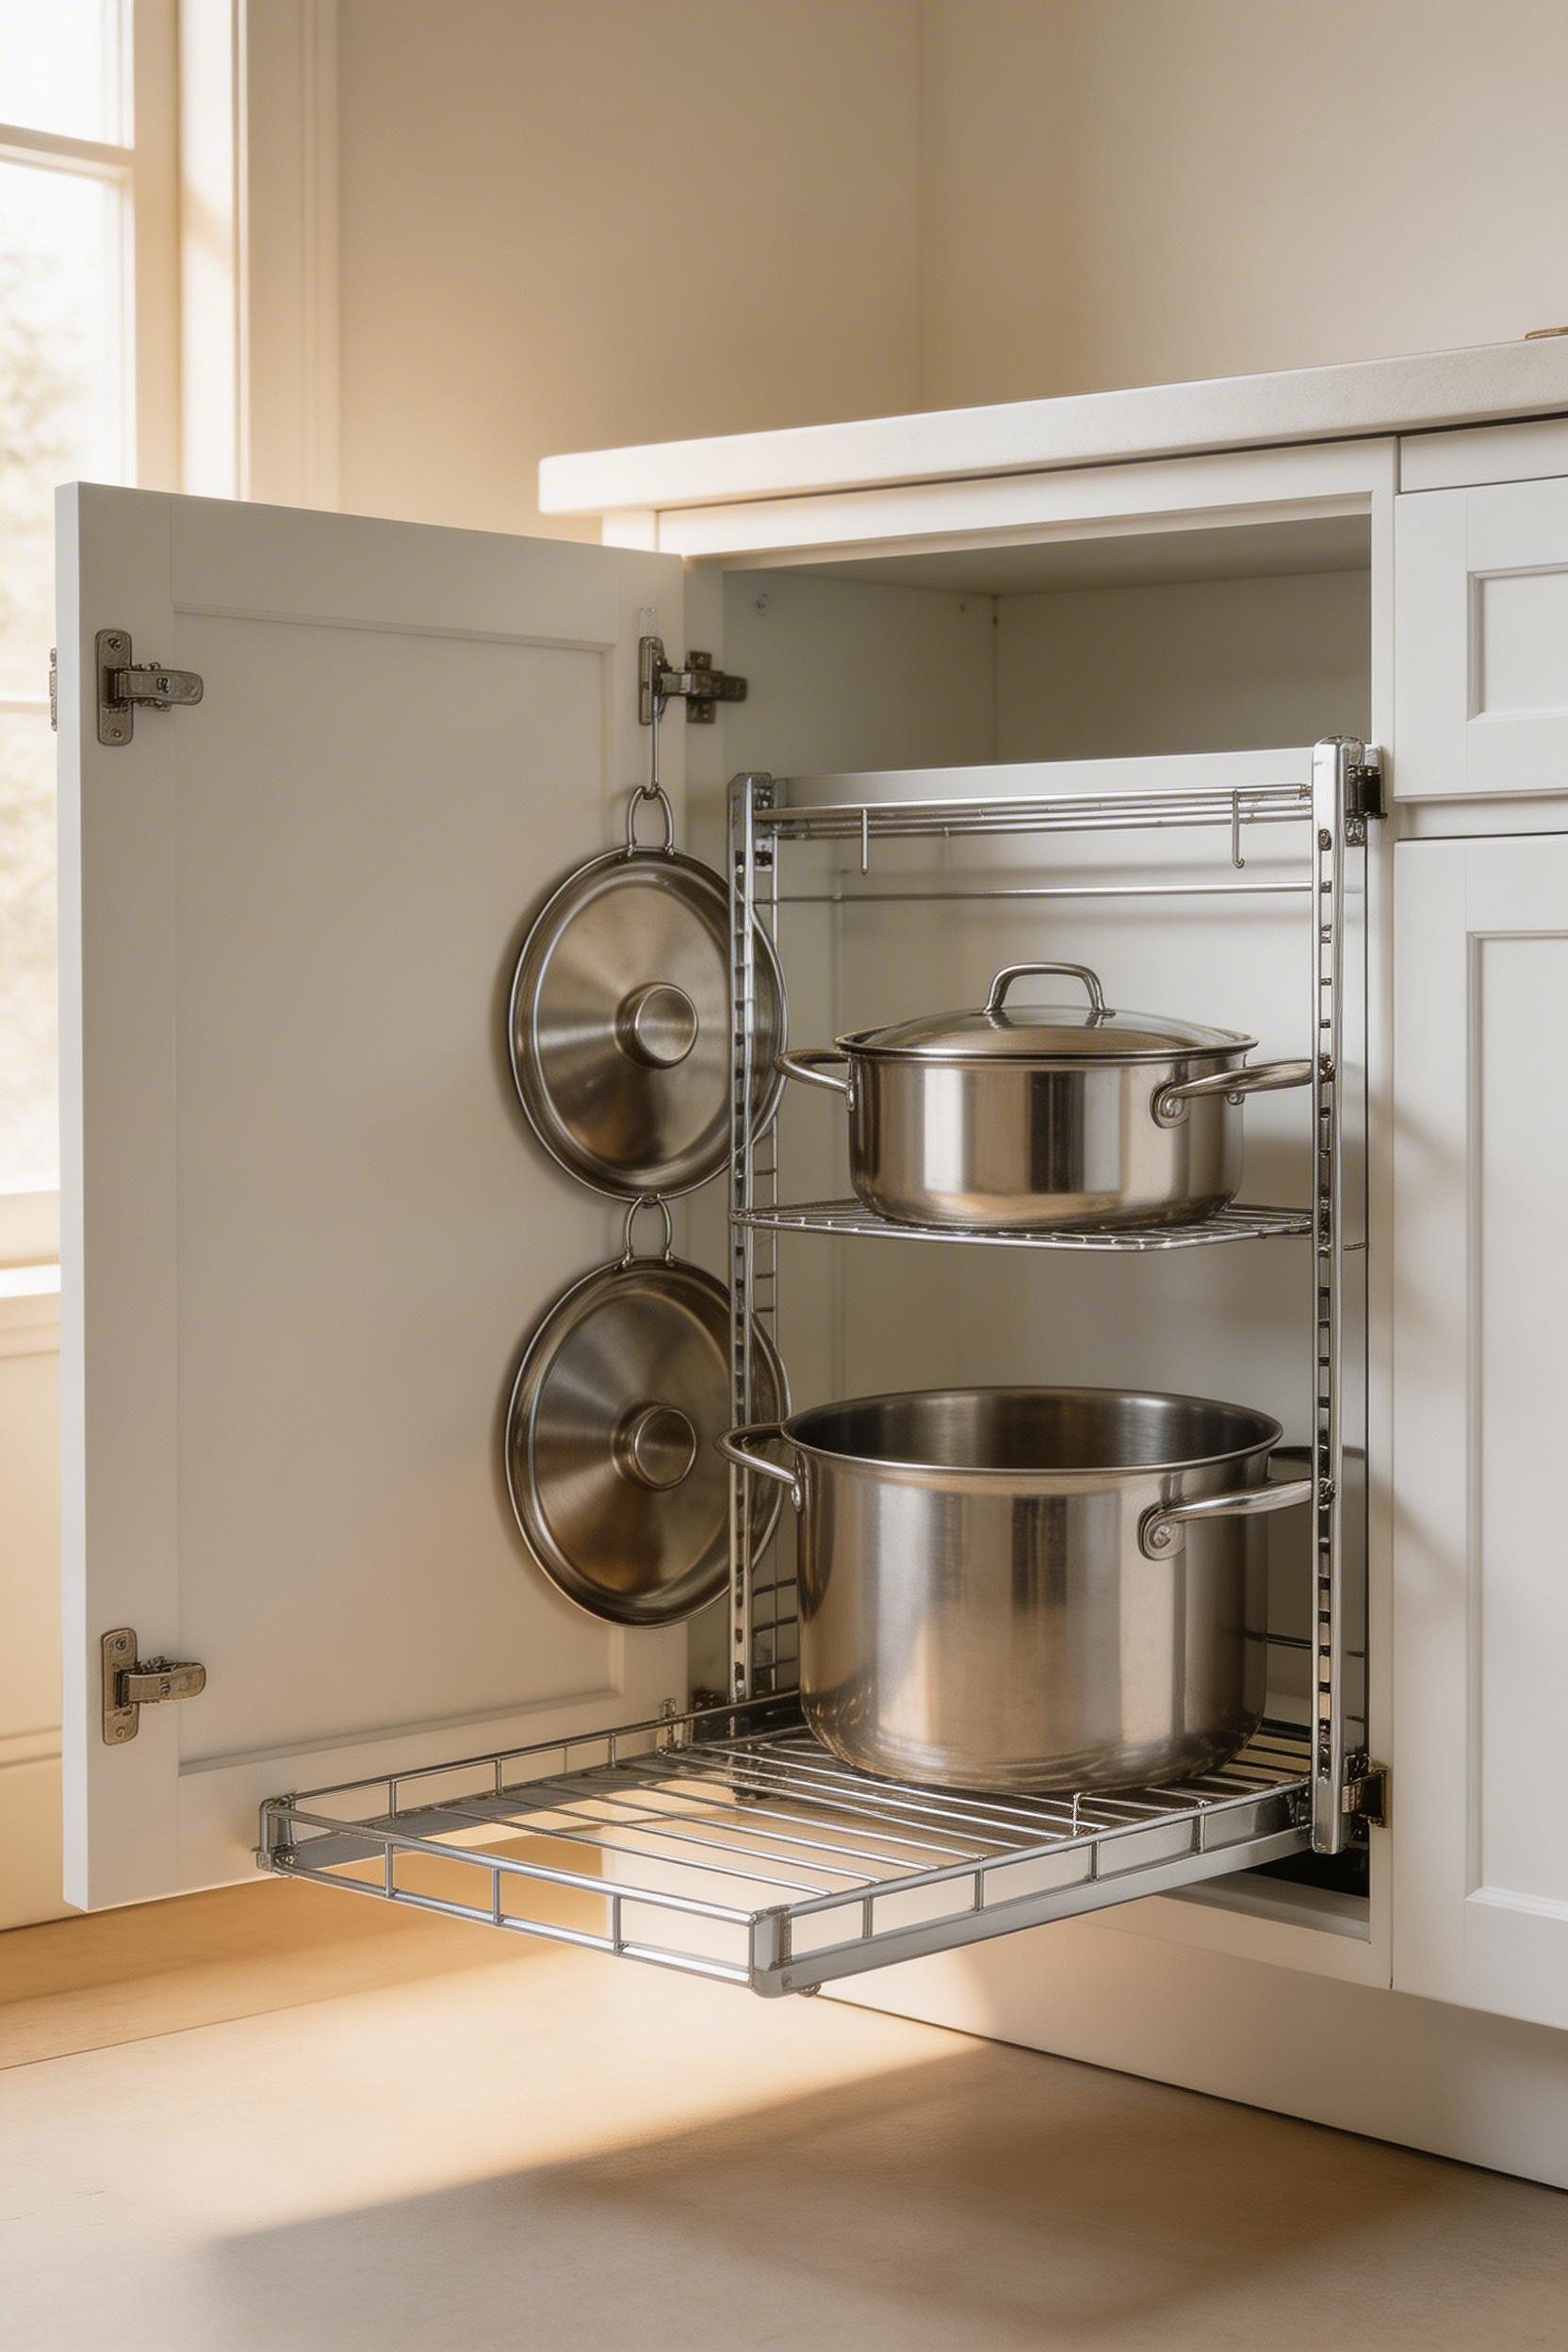
Pots and pans are bulky, heavy, and seem to take up way more space than they should. A pull-out organizer designed specifically for cookware is an absolute game-changer. Rev-A-Shelf’s 5CW2 model handles 100 pounds, has adjustable dividers, soft-close full-extension slides, and costs between $185 and $280. For something that fits into corner cabinet space, IKEA’s UTRUSTA corner carousel is a 2-tray option that works beautifully in a 50-inch corner cabinet. Both of these kitchen organizers cabinet solutions give you dramatically better access than traditional stacking.
Installation typically takes 30 to 45 minutes—the template guide and screwdriver are all you need. Once it’s in, you’ll never go back to stacking pans haphazardly in a cabinet again. Everything is visible, accessible, and actually organized. The difference in your cooking experience is real. You spend less time hunting for the right pan size, you stop accidentally knocking things over when reaching to the back, and your cookware stays in better condition because you’re not stacking cast iron on top of nonstick surfaces.
Before you install, verify two measurements. First, your cabinet needs to be at least 22 to 24 inches deep for a full-extension drawer to function properly—the mechanism needs room to glide smoothly. Second, measure your cabinet width; you’ll need at least 15 inches for the smallest Rev-A-Shelf model. Check your door swing carefully too. The pullout extends forward roughly 24 inches, and you need 0.75 inches of clearance on each side for the door to close smoothly. Here’s where people mess up: they think the 100-pound capacity is unlimited and start loading it with cast iron Dutch ovens, multiple stockpots, and every specialty pan they own. Weight adds up fast with cookware. Distribute your items, be honest about what you actually use regularly, and you’ll be fine. If you’re truly a serious cook with dozens of pans, you might need two pull-outs instead of one—better to have two half-full drawers that work smoothly than one overloaded drawer that strains the slides.
8. Spice Rack Drawer Inserts for Organized Cooking
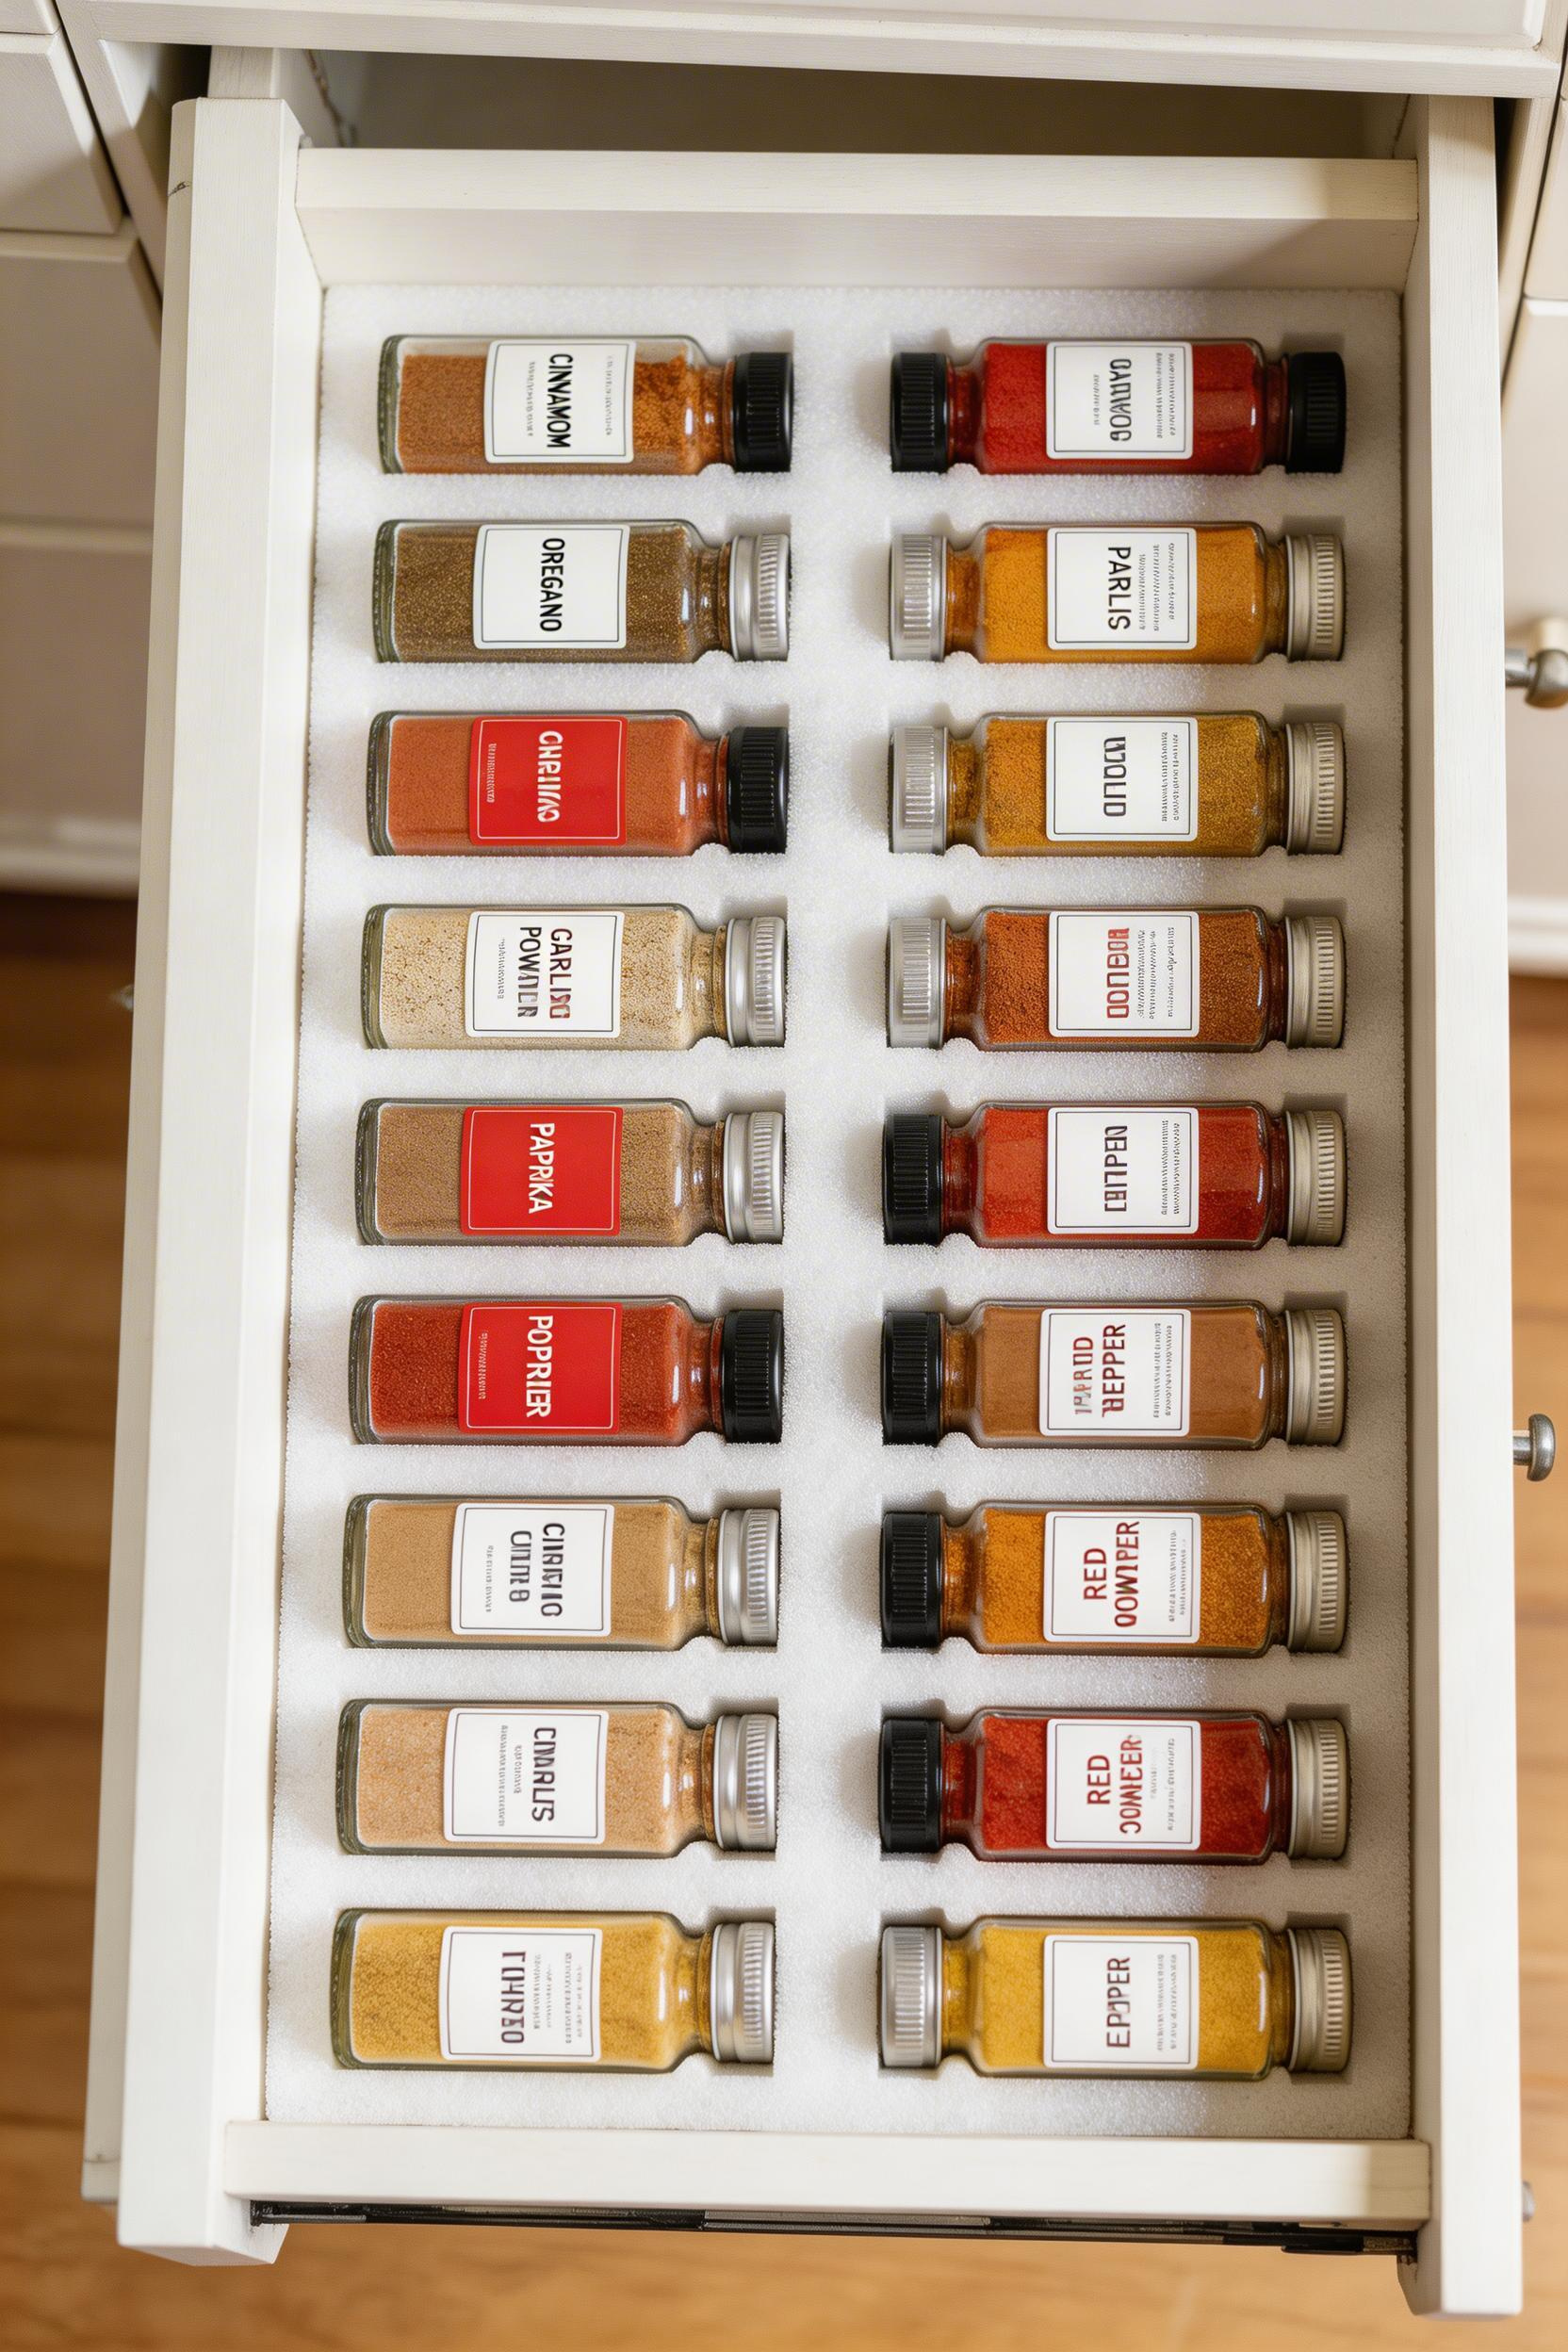
Spice organization sounds simple until you realize you’ve got 40 bottles jammed into a cabinet in no logical order. The YouCopia SpiceLiner solves this elegantly—it’s a 120-inch foam roll that’s 2.5 inches wide, costs $19.99, and holds 30 or more bottles. You literally cut it to width with scissors, and there’s no adhesive involved, so it’s totally removable and renter-safe. This is one of the best kitchen organizers cabinet-focused solutions for actually seeing what you own.
Your drawer needs to be at least 2.5 inches deep for bottles to lay flat with labels facing up. Once they’re laid out horizontally in the foam, you can see every label instantly—no more buying duplicate paprika because you forgot you had it. Arrange spices by cuisine or frequency of use, and cooking gets noticeably faster because you’re not hunting for individual bottles mid-recipe. The horizontal layout is genuinely superior to upright racks because you’re not limited by bottle height or shape—tall bottles, short bottles, odd-shaped containers, everything fits.
Here’s a practical tip that changed how I organize: group spices by the cuisine you make most often. Keep Italian herbs (oregano, basil, thyme) together in one section, Mexican spices (cumin, chili powder, garlic) in another, and baking staples (cinnamon, nutmeg, vanilla) in a third. When you’re in the middle of cooking, you grab one section and you’ve got everything you need. This kitchen organizers cabinet-style organization also makes it easier to notice when you’re running low on a spice—you see the foam gap and know it’s time to restock. These inserts are also fantastic if you have odd-sized spice bottles or a collection that’s grown beyond your original rack. The foam is forgiving enough to fit different shapes, and you can reorganize whenever you need to without any hassle. Most people reorganize seasonally—adding more warm spices in fall or fresh herbs in spring—and the no-adhesive design means you can adjust instantly.
9. Lid Organizers to End the Pan Lid Avalanche
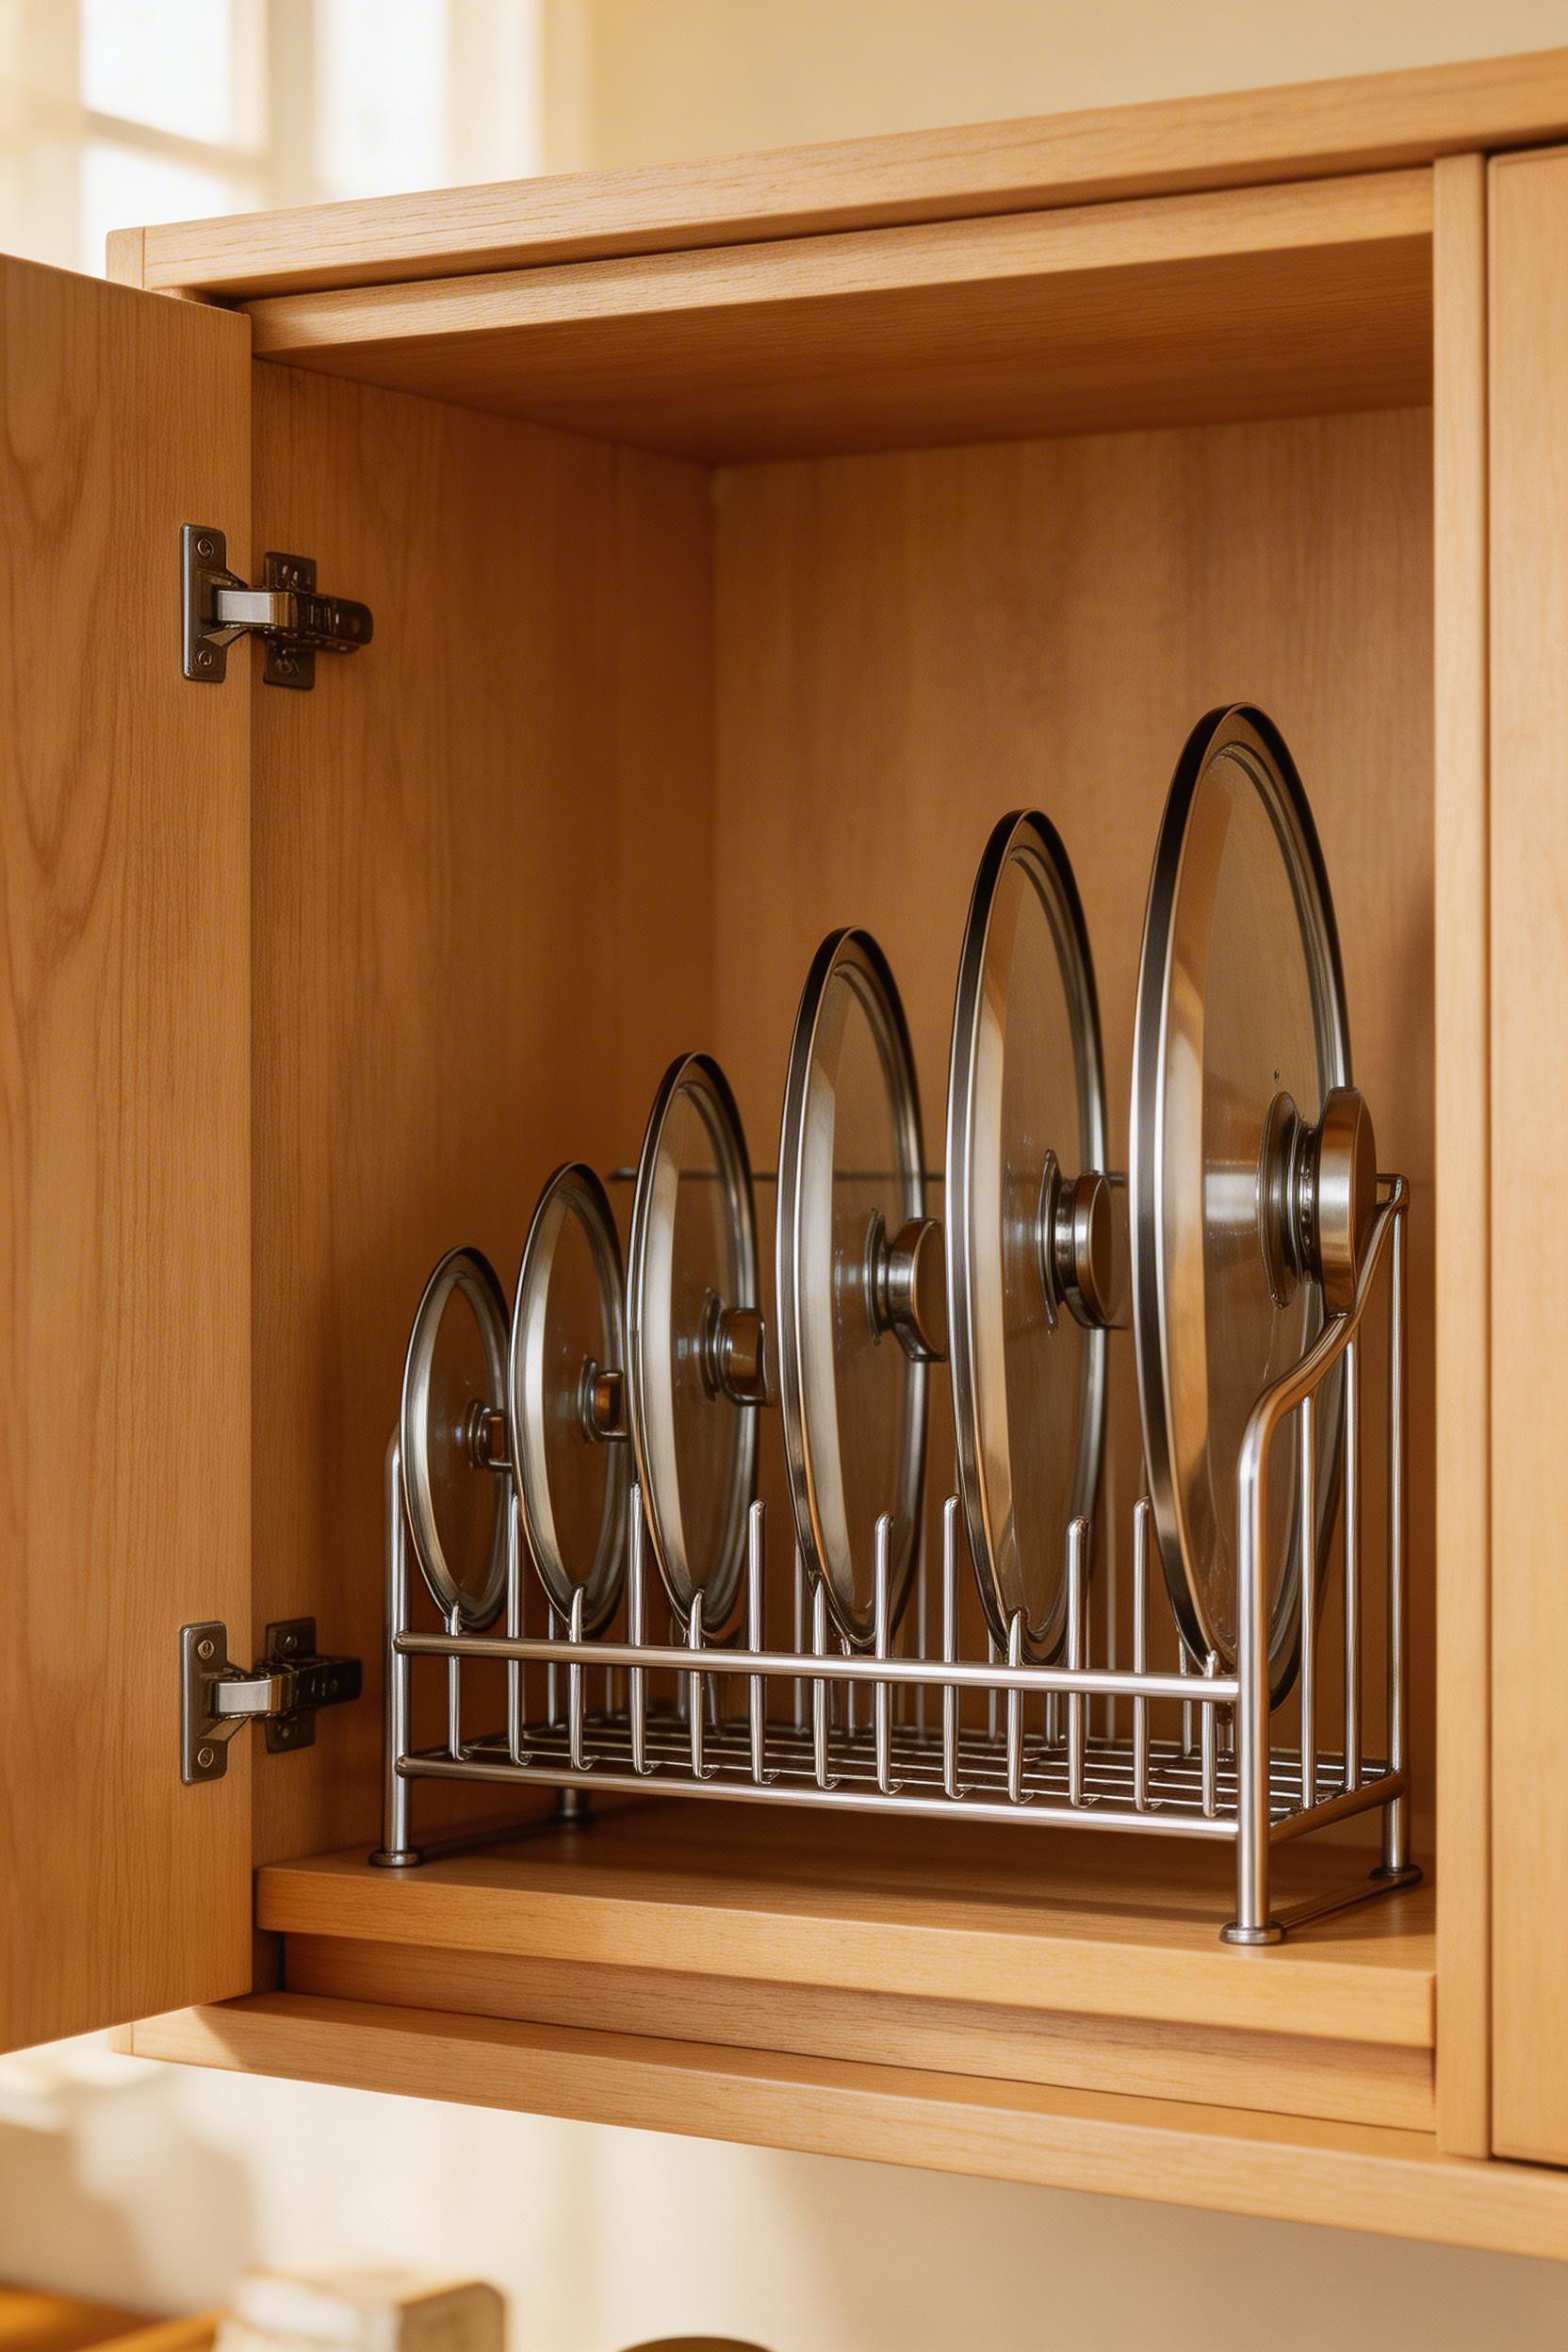
If you’ve ever opened a cabinet and watched a cascade of pot lids clatter to the floor, you’re not alone—this might be the most universal kitchen disaster. The problem isn’t that lids are hard to store; it’s that flat stacking wastes space and makes grabbing one feel like a game of kitchen Jenga. Upright lid organizers change everything by storing them vertically, which cuts your footprint by 60 to 70 percent compared to flat stacking and lets you actually see what you’ve got.
The YouCopia StoreMore ($12 to $18) is the budget-friendly workhorse. It holds lids from 6 to 14 inches in diameter and adjusts to fit different cabinet widths—perfect if you’re not ready to commit big money to a system. If you want something more durable, the KitchenEdge ($15 to $25) features rubber-coated posts that won’t scratch your lids, and it stores six or more lids securely. For the full upgrade, Rev-A-Shelf’s pull-out lid organizer ($40 to $60) mounts inside your cabinet and holds up to 10 lids vertically on sliding rails, giving you the easiest access when you’re actually cooking.
You’ll also see door-mount racks that hold 3 to 6 lids, and they look neat—until you realize cabinet hinges weren’t designed to handle that weight. Stick with lightweight aluminum or stainless steel lids on door racks, or go upright inside the cabinet where weight isn’t an issue. Once you’ve got lids organized vertically, you’ll wonder why you didn’t do it sooner.
10. Under-Cabinet Storage for Kitchen Organization Under the Sink
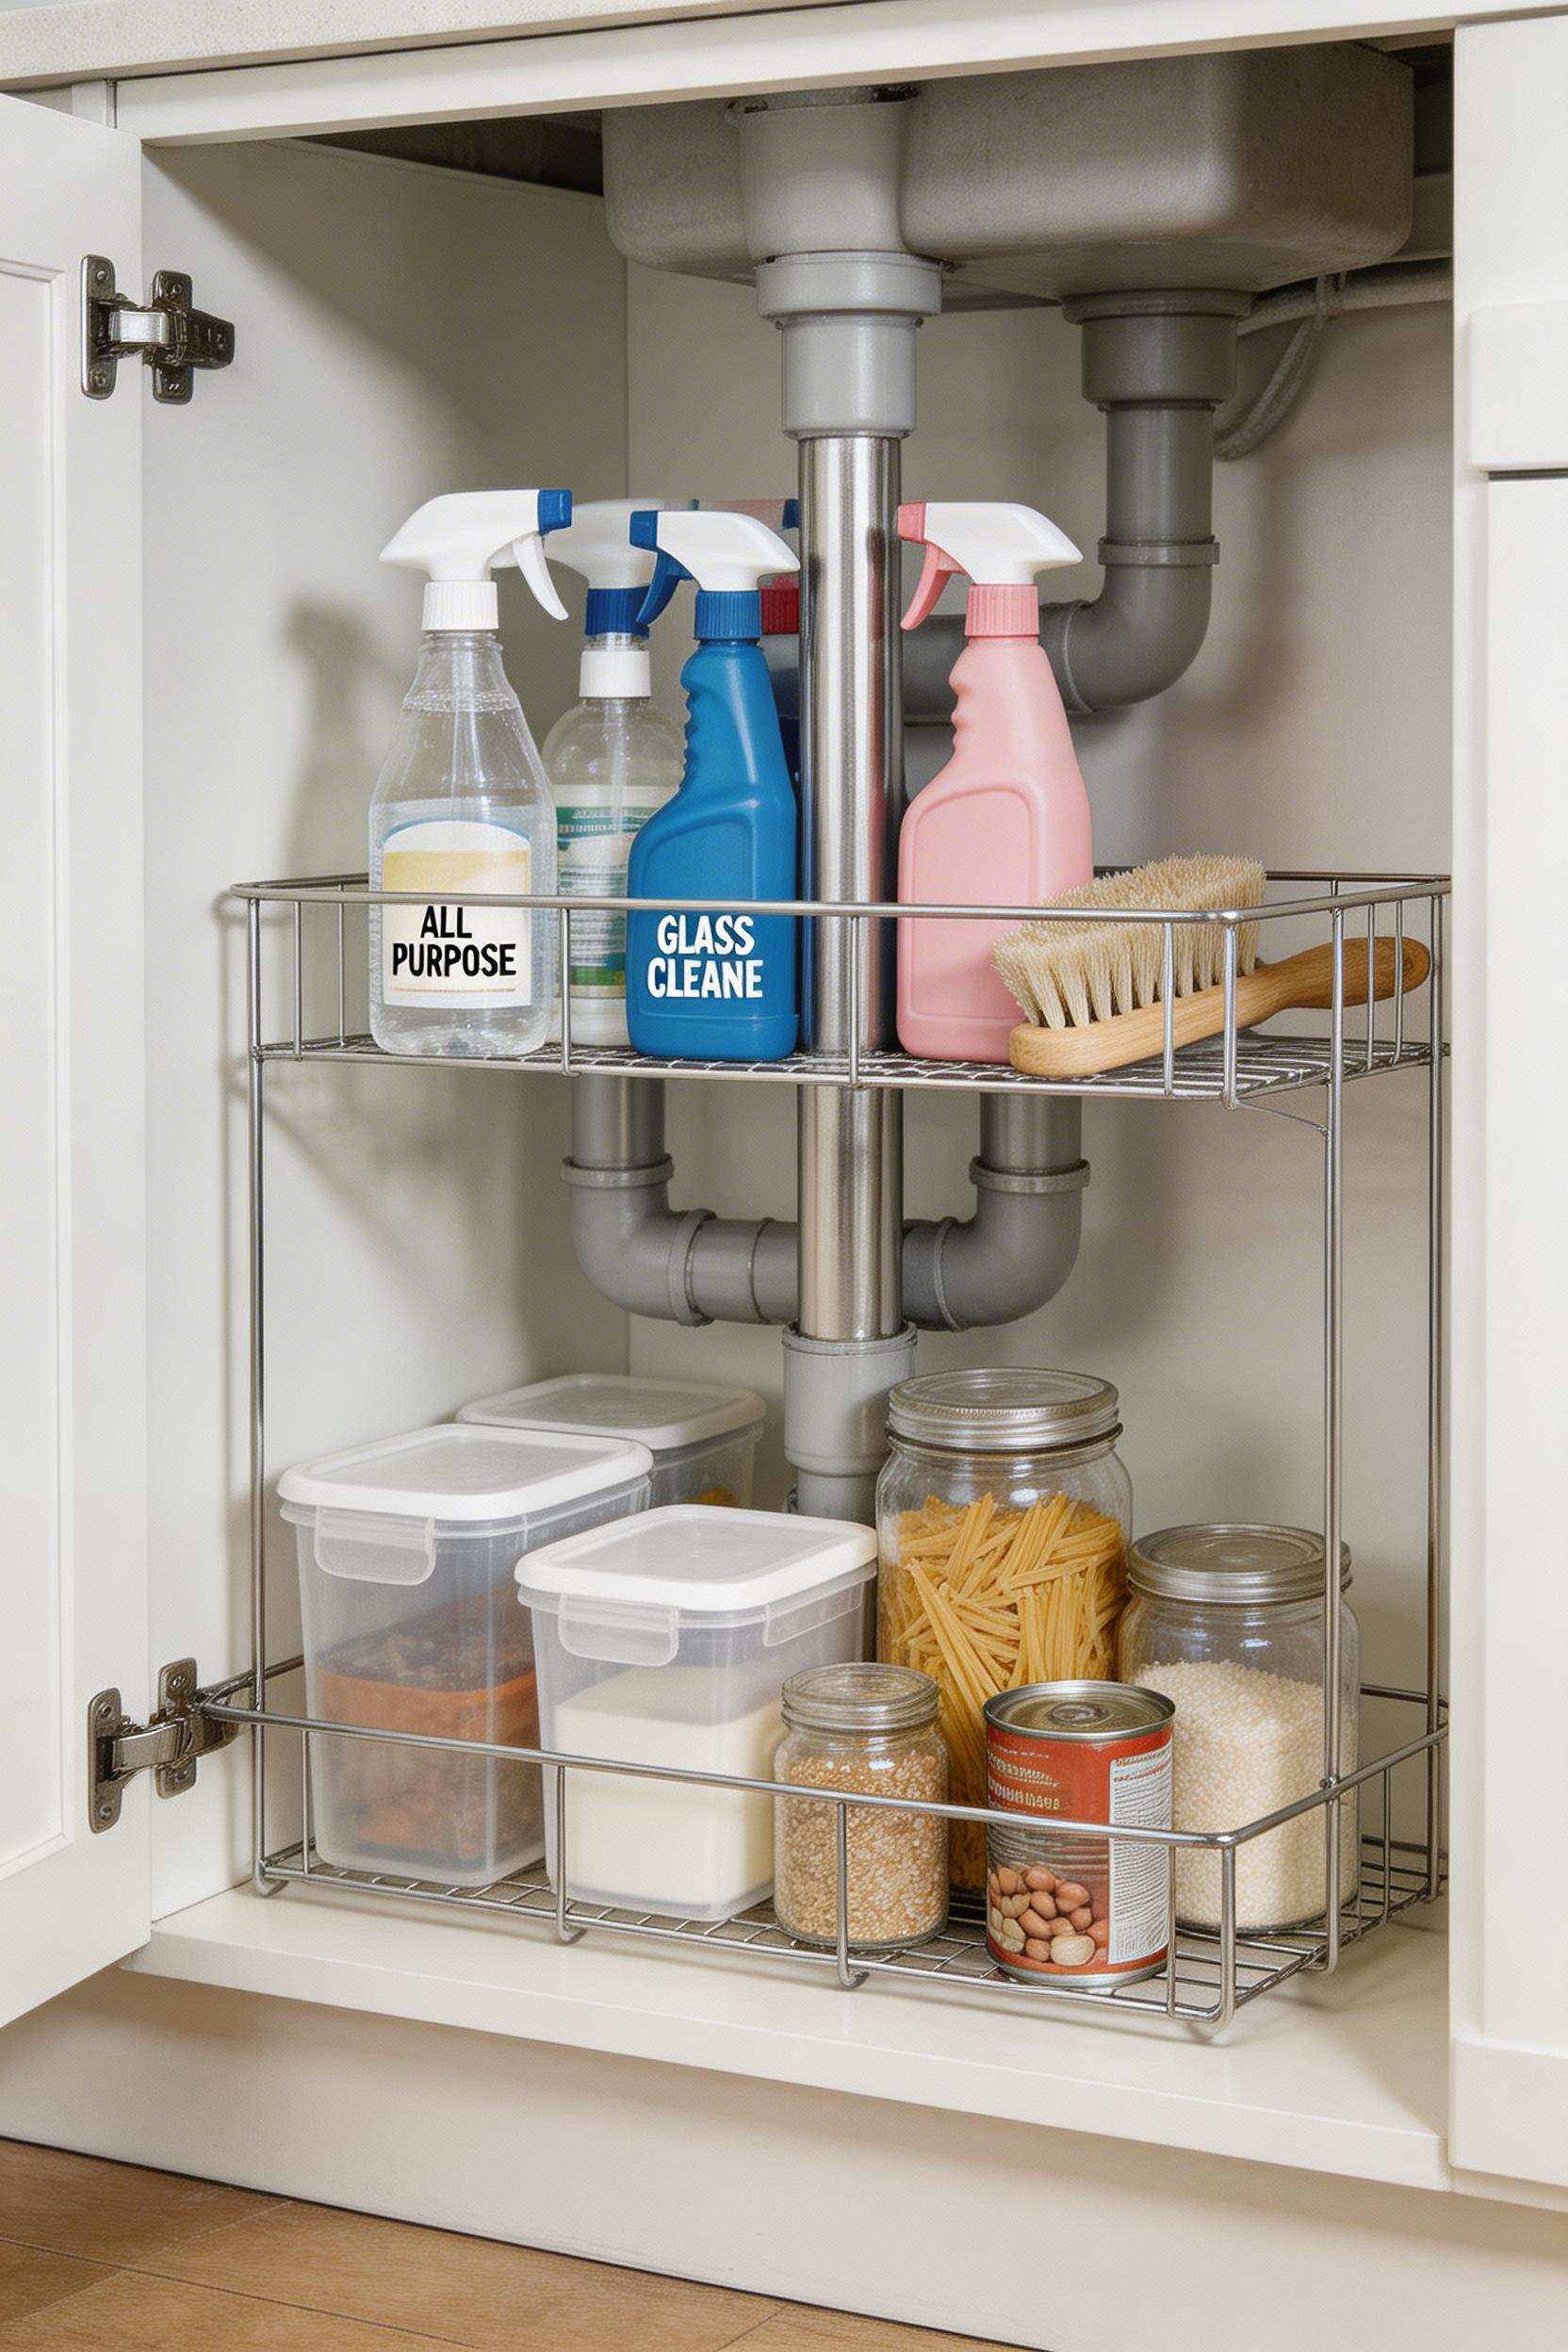
The space under your sink is prime real estate, but it’s tricky. Plumbing eats up most of the vertical room—you’re really working with only 6 to 10 inches above the P-trap—which means you need organizers designed around those pipes, not fighting them. The good news? There are solid solutions built specifically for this awkward space.
The SONGMICS 2-tier ($25 to $35) has cutouts designed for standard plumbing, so it actually fits. If your cabinet width varies, the mDesign expandable shelf ($18 to $28) adjusts from 17 to 30 inches wide. For the ultimate in ease, the Rev-A-Shelf under-sink pull-out ($45 to $75) slides out on rails—no more reaching into the back corner. Adding a lazy Susan ($15 to $25) in the back corner for spray bottles is also a great move for visibility and access. If you’re looking for more small kitchen decor ideas that maximize tight spaces like this one, there are plenty of creative approaches.
Storing food items on the cabinet floor under the sink is one of the most common mistakes I see. Even if it looks dry, that area gets moisture from splashes and humidity, which invites mold and spoilage. Save that space for cleaning supplies only. Measure your cabinet width (the inside measurement, not the outer frame) before buying, and take a photo of your plumbing layout—it’ll help you pick the right organizer on your first try.
11. Adjustable Cabinet Shelf Dividers for Plates and Bowls
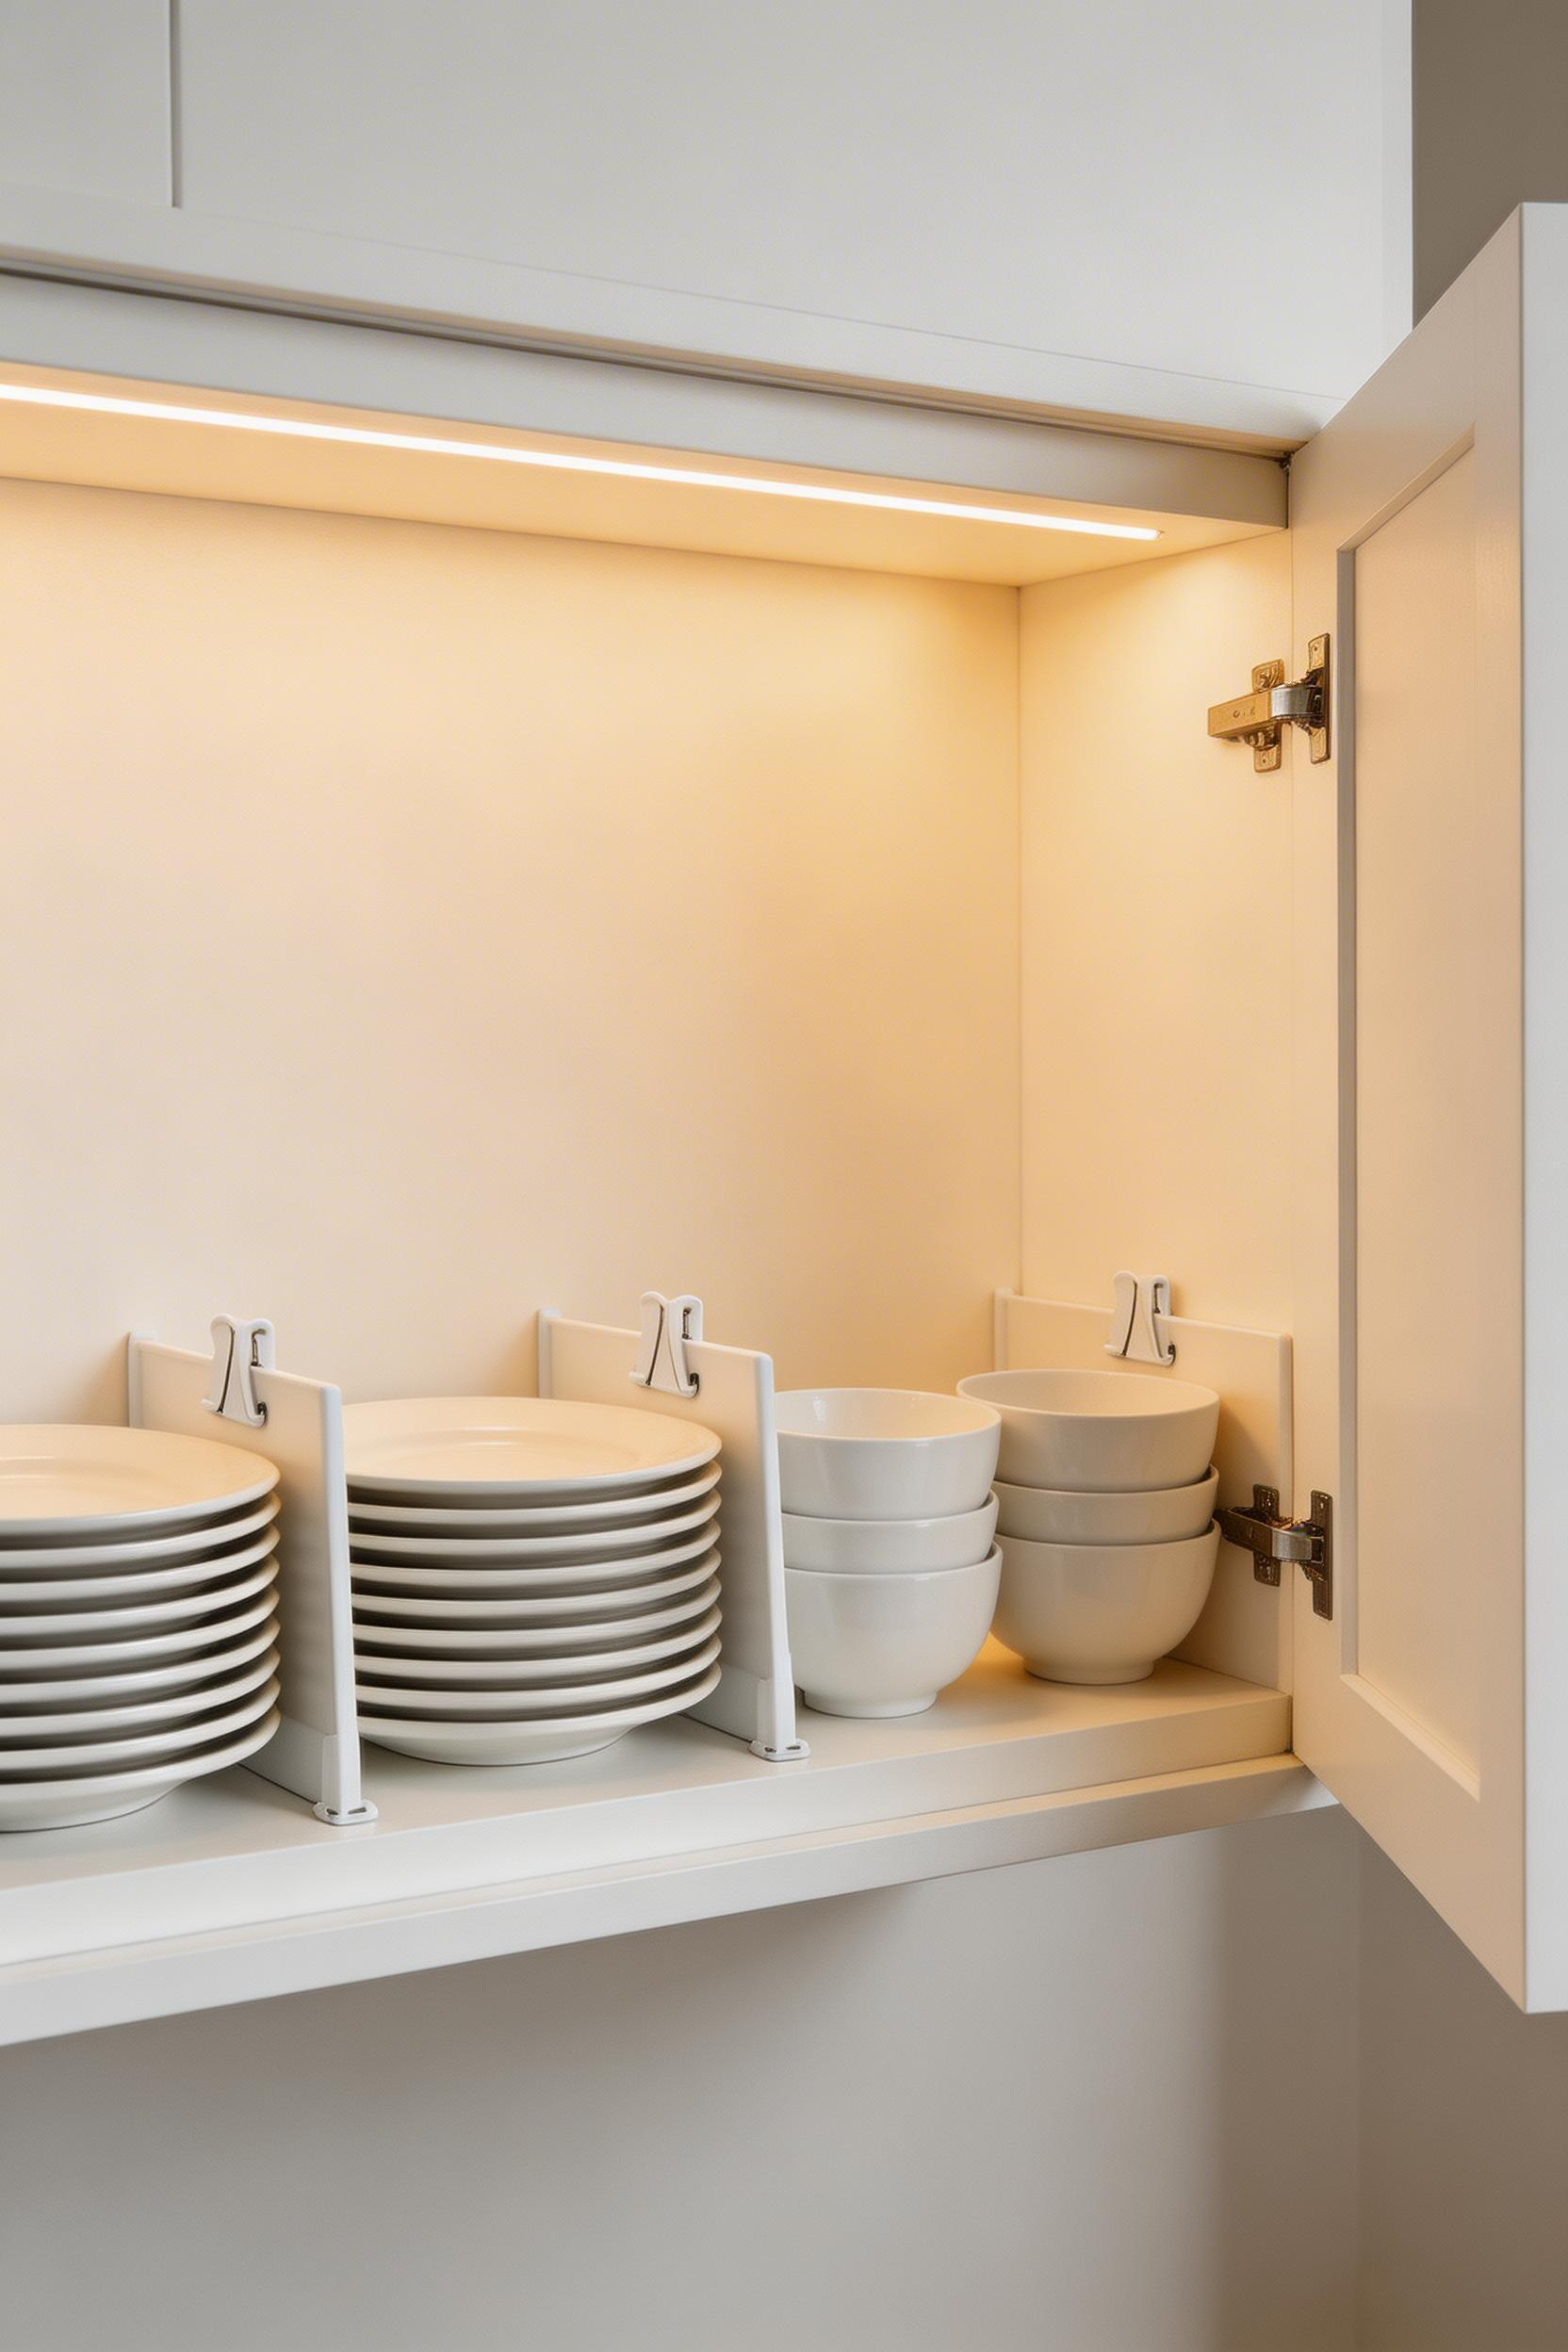
Stacked plates and bowls look organized until you need one from the middle and the whole pile shifts. Shelf dividers solve this by keeping stacks separate and accessible without toppling. The YouCopia pressure-mount dividers ($12 to $20 per pair) fit shelves between 0.75 and 1.5 inches thick and need no tools—just tighten the knobs. These kitchen organizers cabinet-compatible dividers work beautifully for everything from dinner plates to baking sheets to folded kitchen towels. For heavier loads like six or more dinner plates stacked together, go with the LYNK Official clip-on dividers ($15 to $25) instead. These lock both top and bottom of the shelf, so they won’t slip under weight. They adjust from 13 to 36 inches wide, which covers most cabinets.
The practical difference between YouCopia and LYNK shows up when you’re actually using them daily. The pressure-mount version works great for lighter items and is easier to reposition—you just loosen the knobs, slide it, and tighten again. The clip-on version is sturdier and holds heavy stacks without any movement, but it takes a bit more effort to install because you’re gripping both top and bottom of the shelf. In practice, most people end up using both: pressure mounts for lightweight organizing (kitchen towels, placemats, small bowls) and clip-ons for the serious weight (stacks of dinner plates, serving platters). You can also pair these dividers with your riser shelves to create multi-level organization—put dividers on your main shelf and your riser shelf for even more separation and visibility.
One mistake I see often: people buy pressure-mount dividers for smooth laminate shelves. Laminate is slippery—pressure mounts just don’t grip well, and those plates will shift. Test your shelf texture before you buy. Wire shelves? Clip-ons work best there. Wood shelves? Either option works, but pressure-mount is faster. Both types are completely repositionable without tools, so as your storage needs change, you just move them.
12. Wire Basket Pull-Outs for Produce and Pantry Items
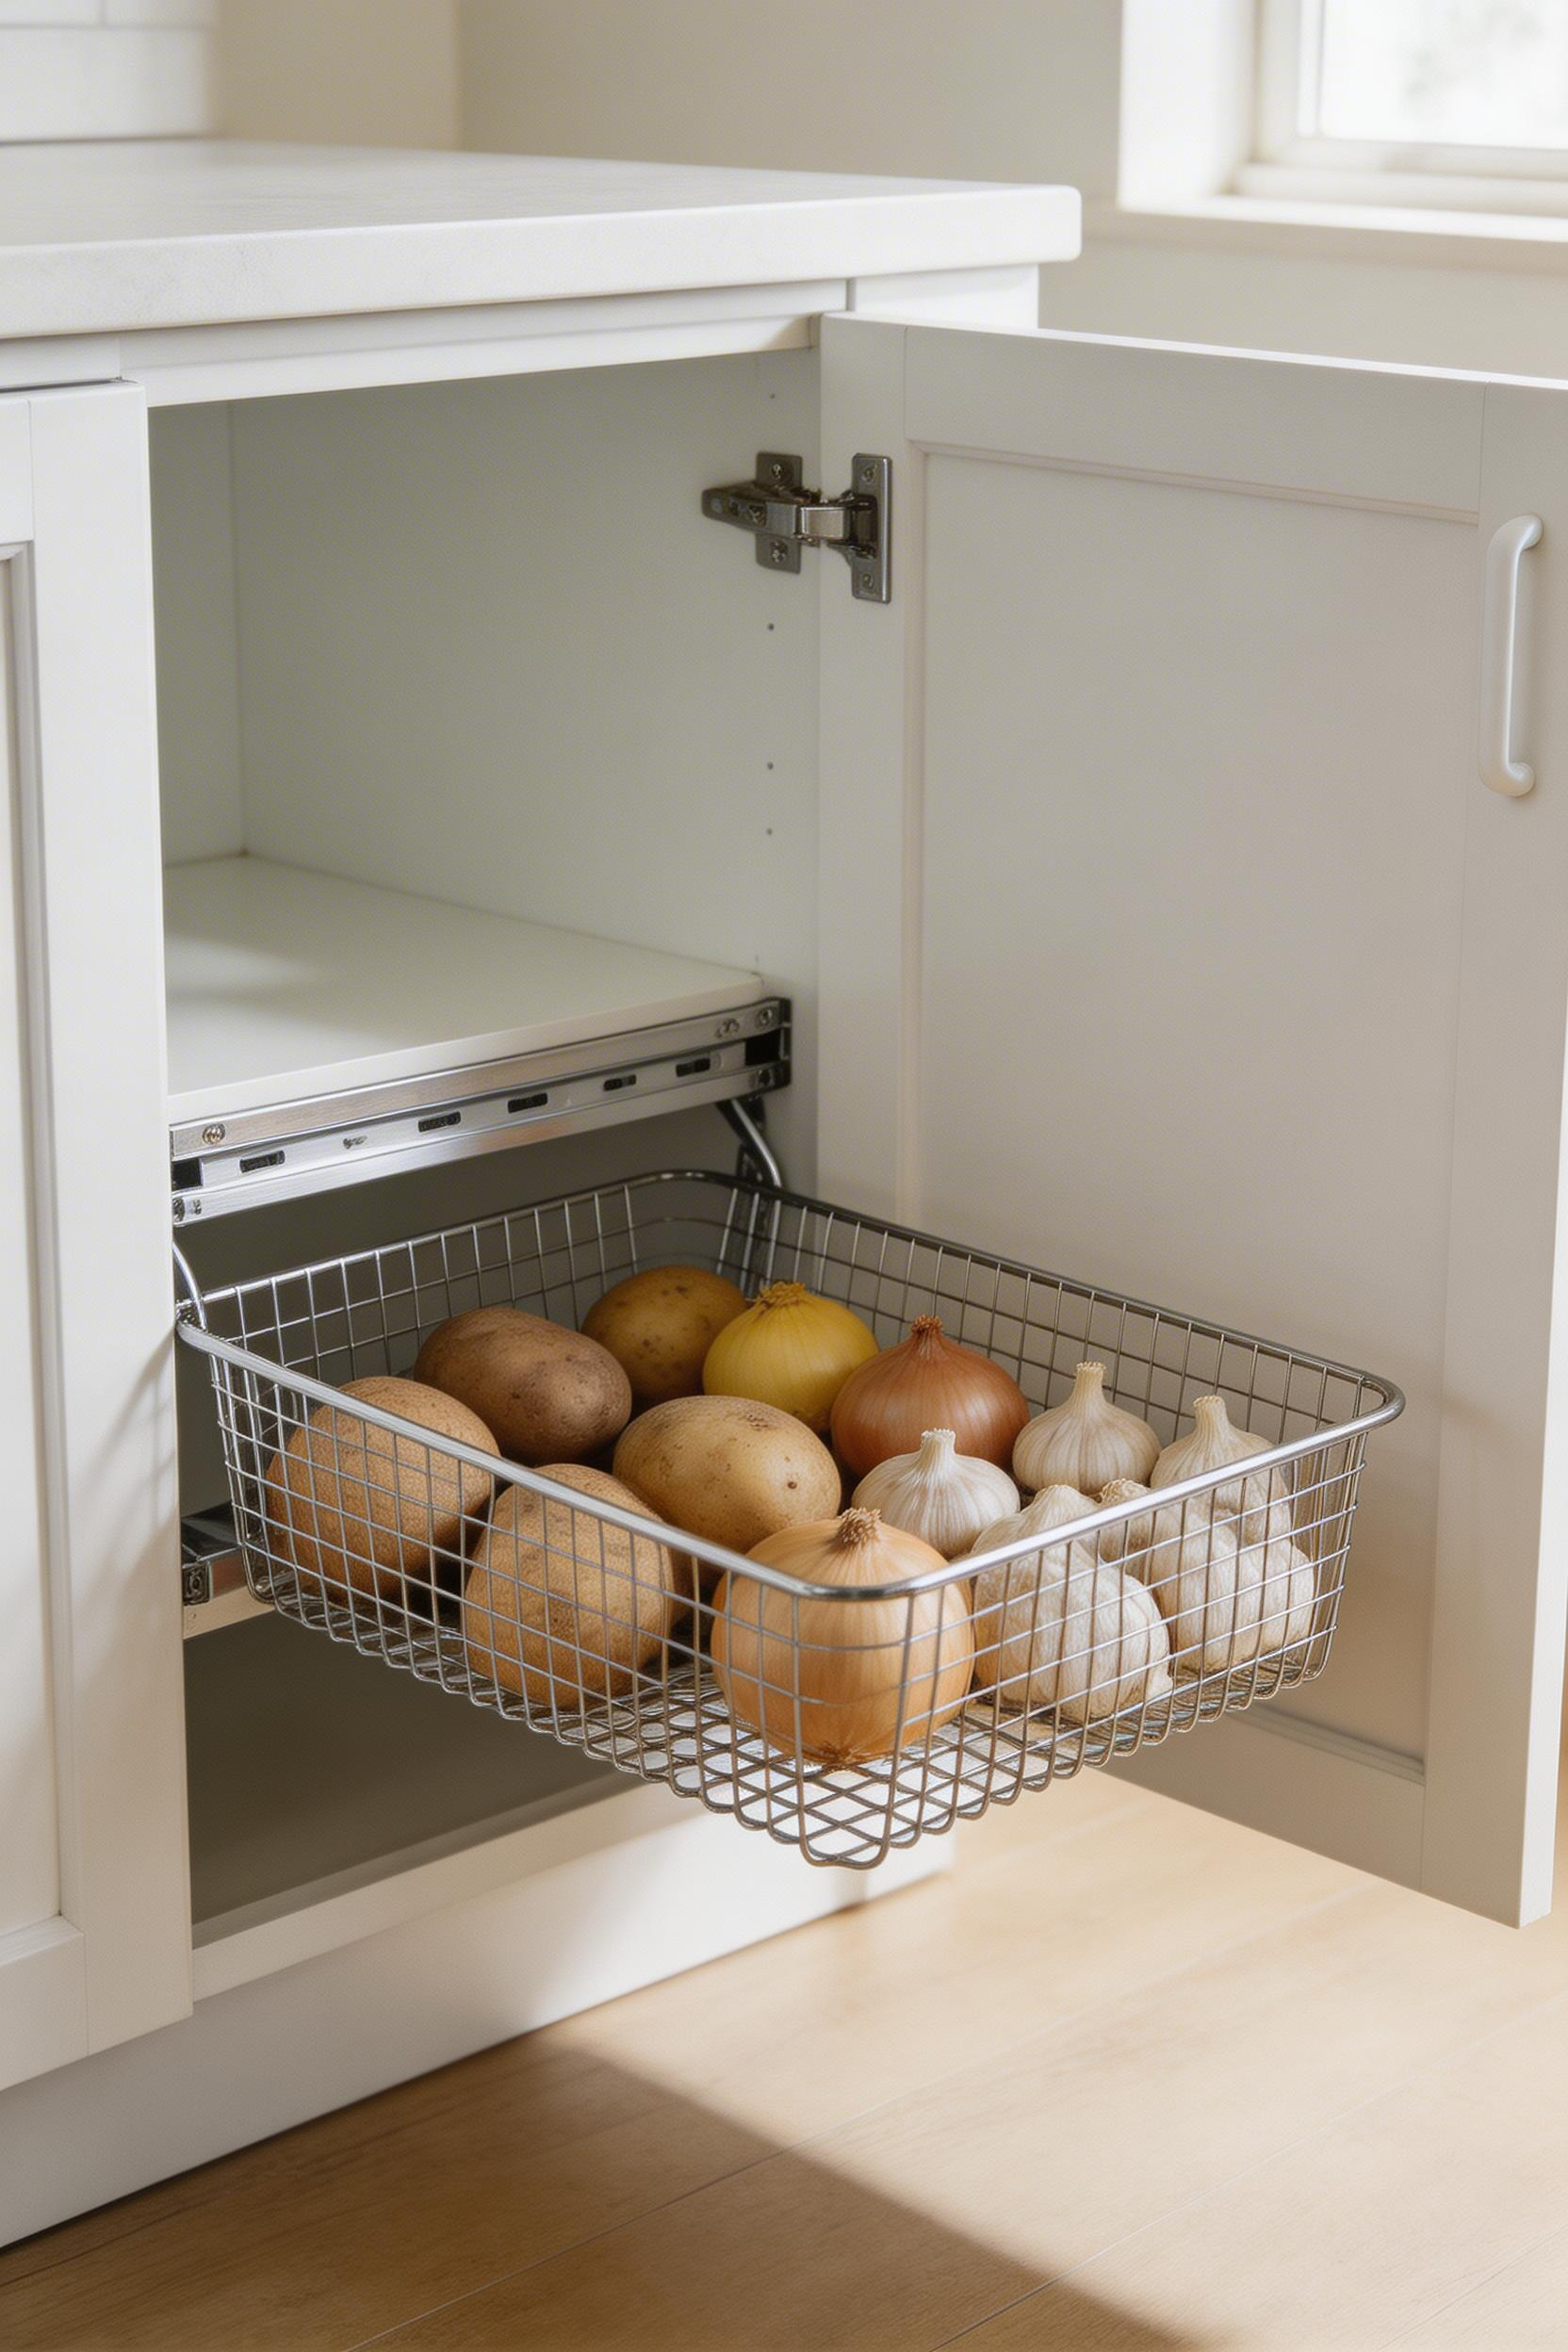
Wire basket pull-outs look simple, but they’re surprisingly smart for keeping produce fresh and pantry items visible. The open construction lets air circulate around potatoes, onions, and garlic—they’ll stay fresher two to three times longer than sealed containers. Plus, you can see what you have at a glance instead of pushing things around looking for ingredients.
The Rev-A-Shelf chrome wire pull-outs ($55 to $85) are the gold standard: full-extension rails, 50 to 100 lb load rating, and multiple widths to fit your cabinet. Knape & Vogt ($40 to $65) offers solid alternatives in widths from 11 to 20 inches. Budget options from mDesign and Amazon Basics ($20 to $35) work fine for lighter use. Keep in mind you’ll need at least 20 inches of cabinet depth for these to function properly.
One thing catches people: storing loose small items like pasta or rice in wire baskets. They fall through the gaps, and you end up with a mess on your cabinet floor. Stick to produce, baking supplies in bags or boxes, and canned goods. The visibility factor alone will cut down on duplicate purchases—you’ll actually know what you have before heading to the store.
13. Tiered Shelf Inserts: Smart Kitchen Cabinet Organizers for Canned Goods
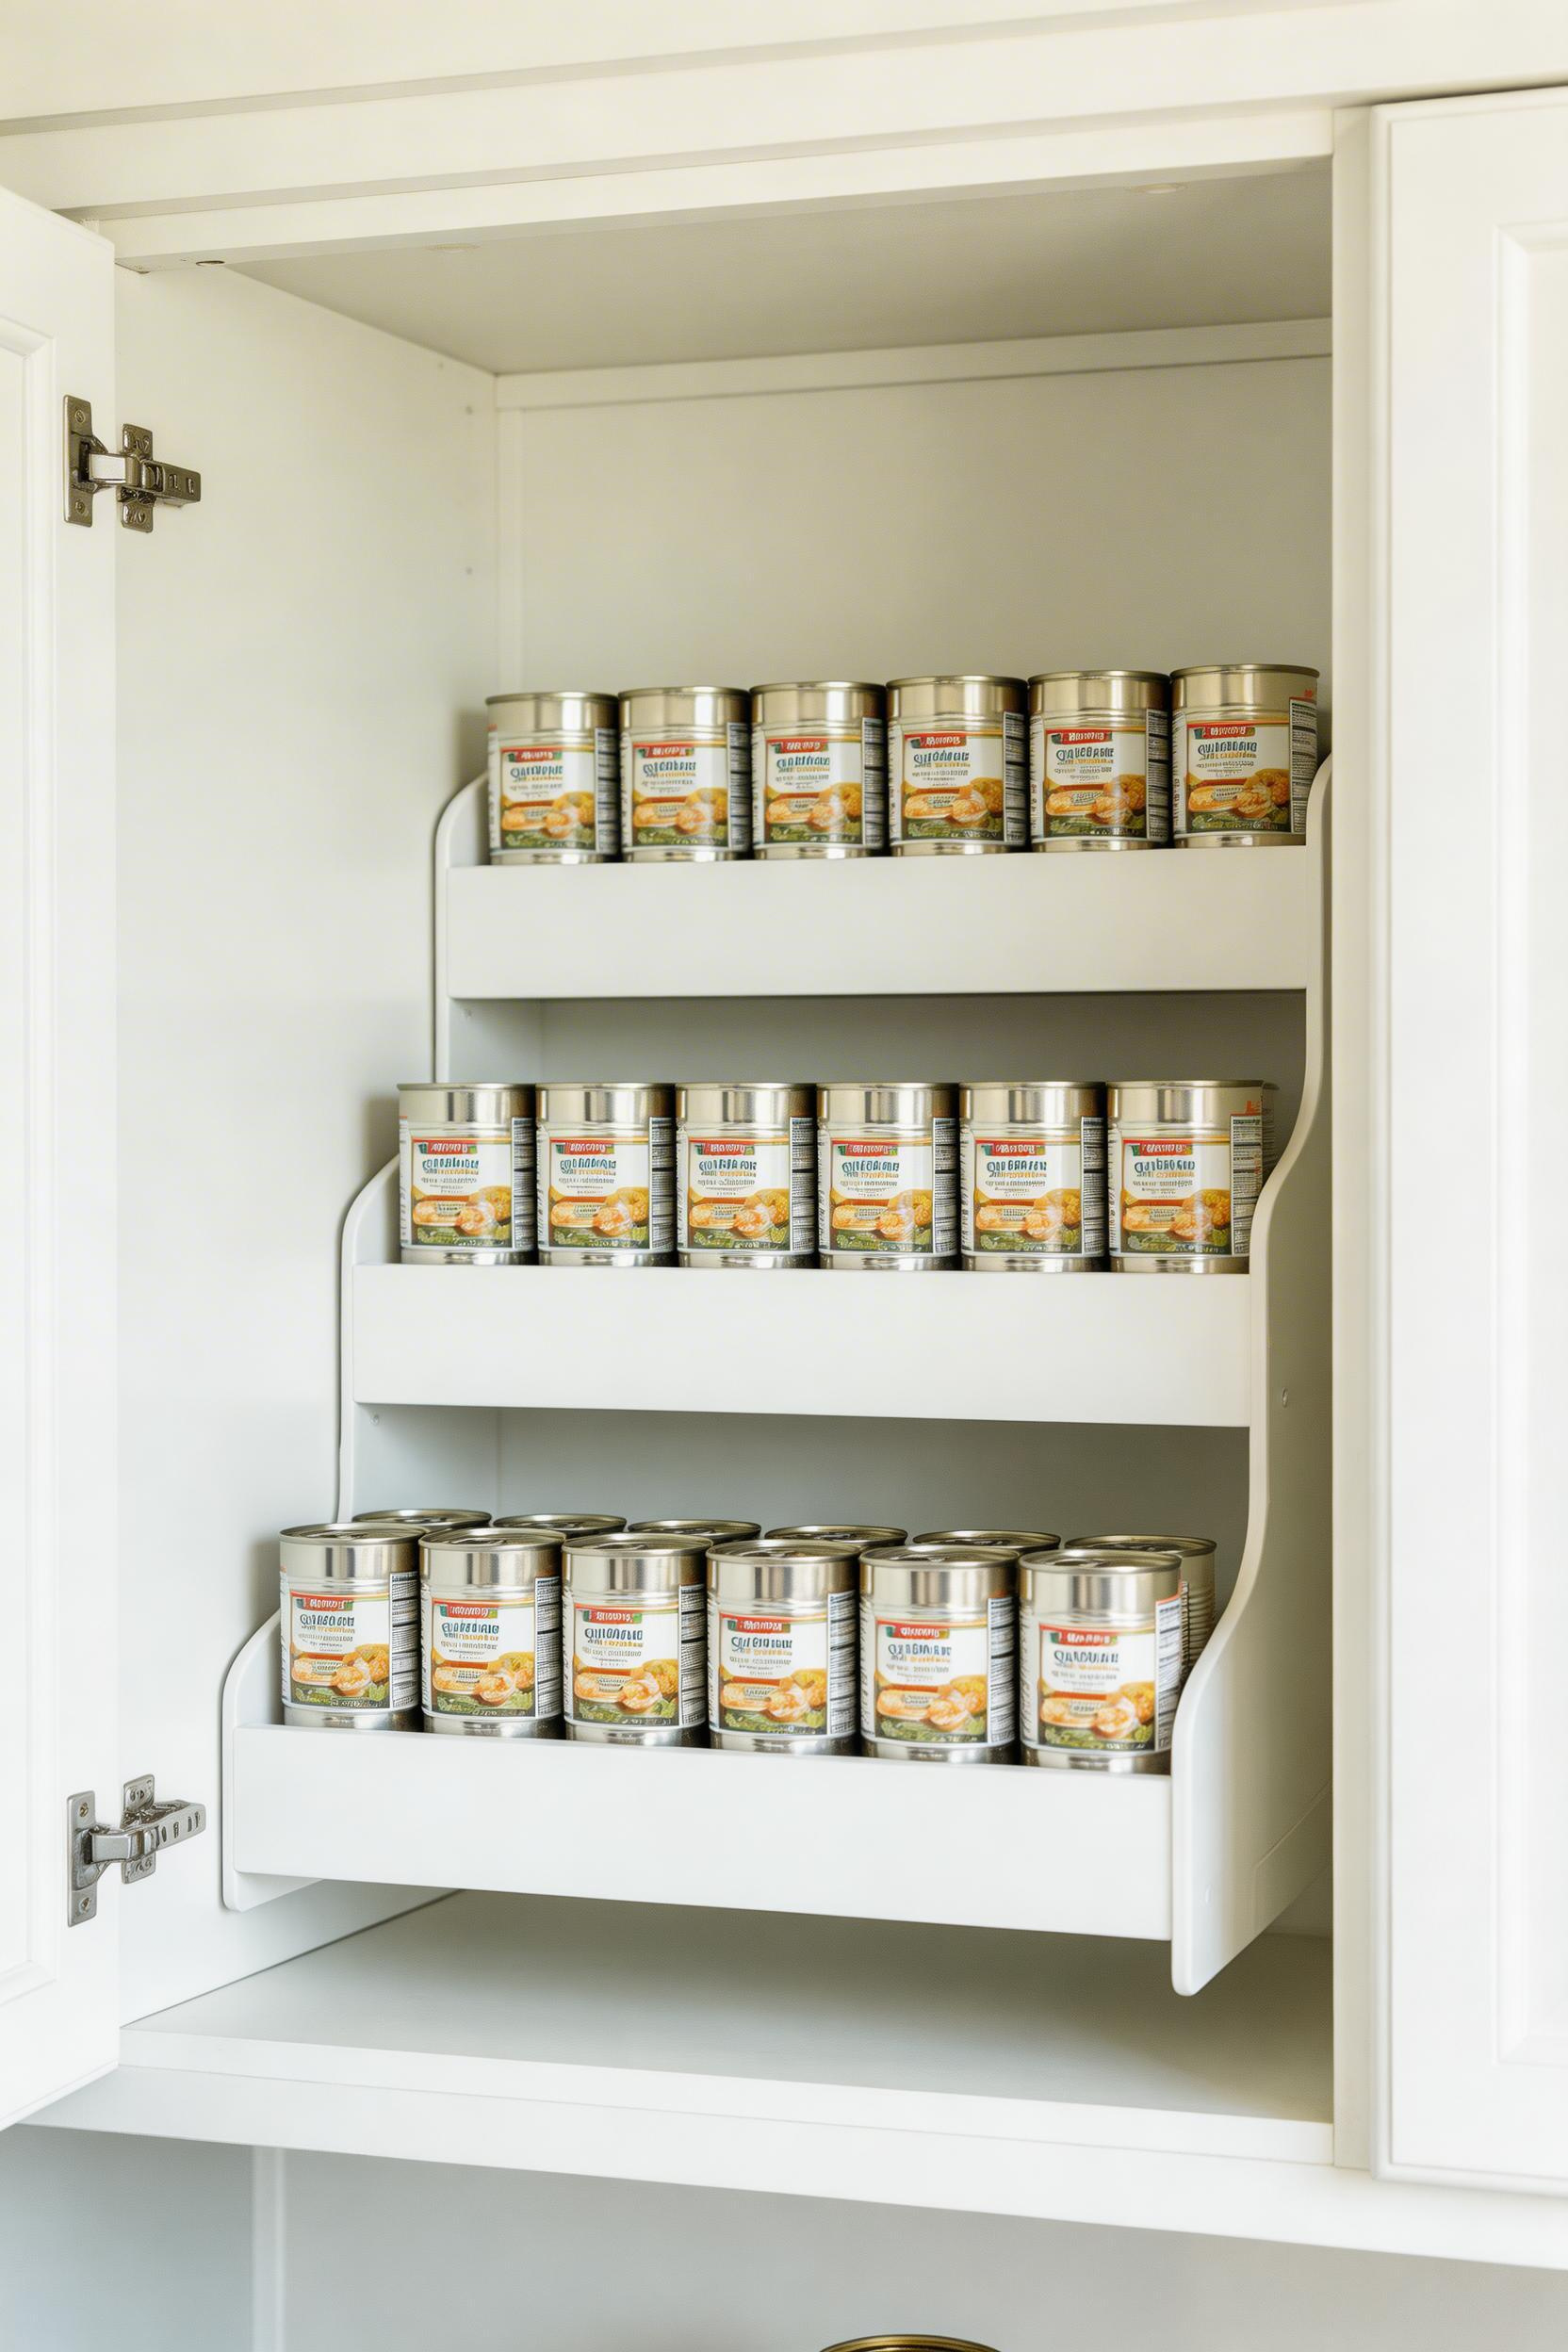
Tiered shelf risers are one of those “why didn’t I think of this?” solutions. They elevate the back row of cans by 1.5 to 2 inches, so you can read every label without playing can Tetris or pulling everything forward. It sounds simple, but it saves real frustration every time you cook.
The STORi clear step risers ($15 to $25) are transparent, so you can see through the tiers without removing the riser. The ExpandableKitchen 3-tier organizer ($18 to $28) adjusts from 13 to 29 inches wide and handles most cabinet sizes. Material options include clear plastic ($15 to $25), metal ($25 to $40, built to last 10-plus years), and bamboo ($20 to $30, looks great on open shelving). Each has a different lifespan and price point—pick what fits your budget and aesthetic.
Before buying, measure your shelf depth. You need at least 12 inches of depth for the back row to sit safely. If your shelves are shallower than that, a tiered organizer won’t work—you’ll just create frustration and blocked door access. It’s one of those kitchen organizers cabinet-check situations where measuring first saves you a return trip to the store.
14. Food Container Lid Organizers for Tupperware Chaos
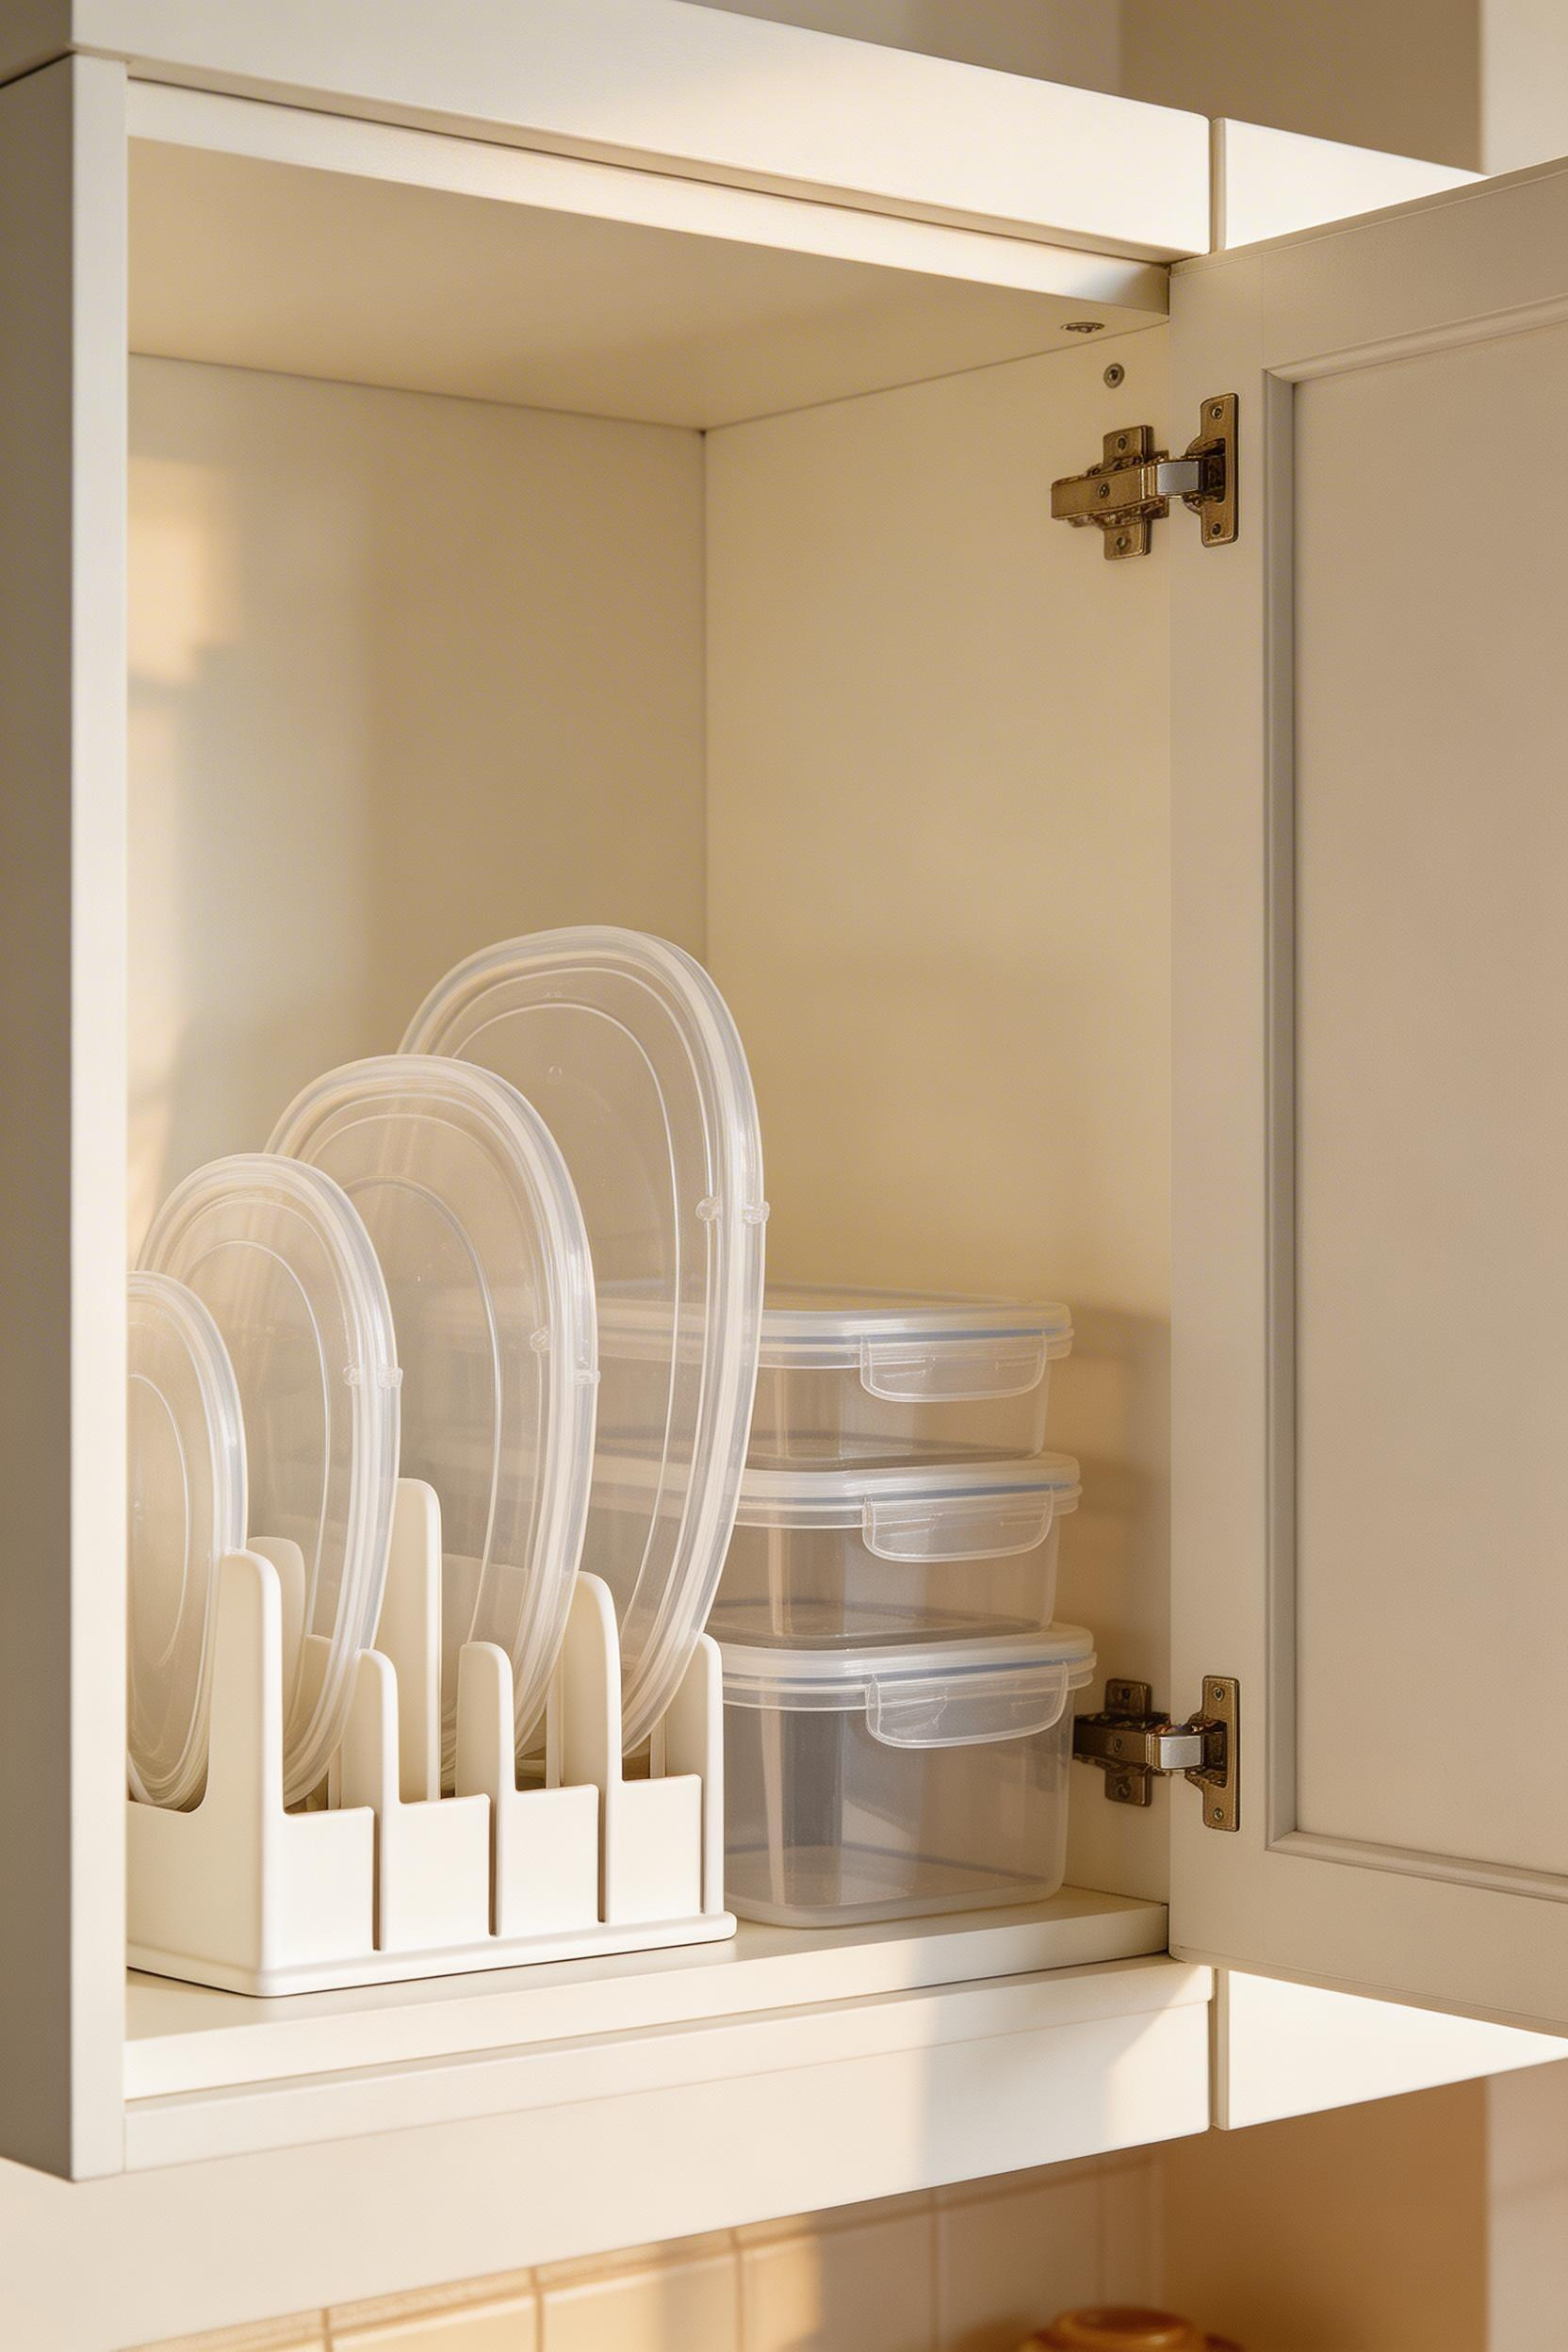
That pile of plastic lids shoved in a drawer? It’s not your fault. Those lids multiply somehow. An upright lid organizer corrals them like file folders and reduces the space they take up by 40 to 50 percent compared to flat stacking. You’ll actually be able to find matching lids instead of giving up and grabbing foil.
The OXO upright file-style lid organizer ($15 to $25) lets you slide lids in vertically and see everything at once. If you’re dealing with a truly chaotic situation—20-plus orphaned lids floating around—honestly, it might be cheaper and less frustrating to buy a fresh matched set like Rubbermaid Brilliance ($20 to $35 for a 20-piece set) where all the lids are interchangeable within size ranges. Sometimes starting over costs less in time and energy than organizing a collection that’s beyond saving.
Here’s my tough-love tip: any lid without a matching container, or any container without a lid, gets recycled. That’s the rule. Those “just in case” containers are exactly what cause the avalanche in the first place. Purge first, then organize. You’ll be amazed at how much cleaner that cabinet feels when you’re not fighting a bunch of useless lids every time you open the door.
15. Magnetic Knife Strips and Wall-Mount Organizers to Free Up Cabinet Space
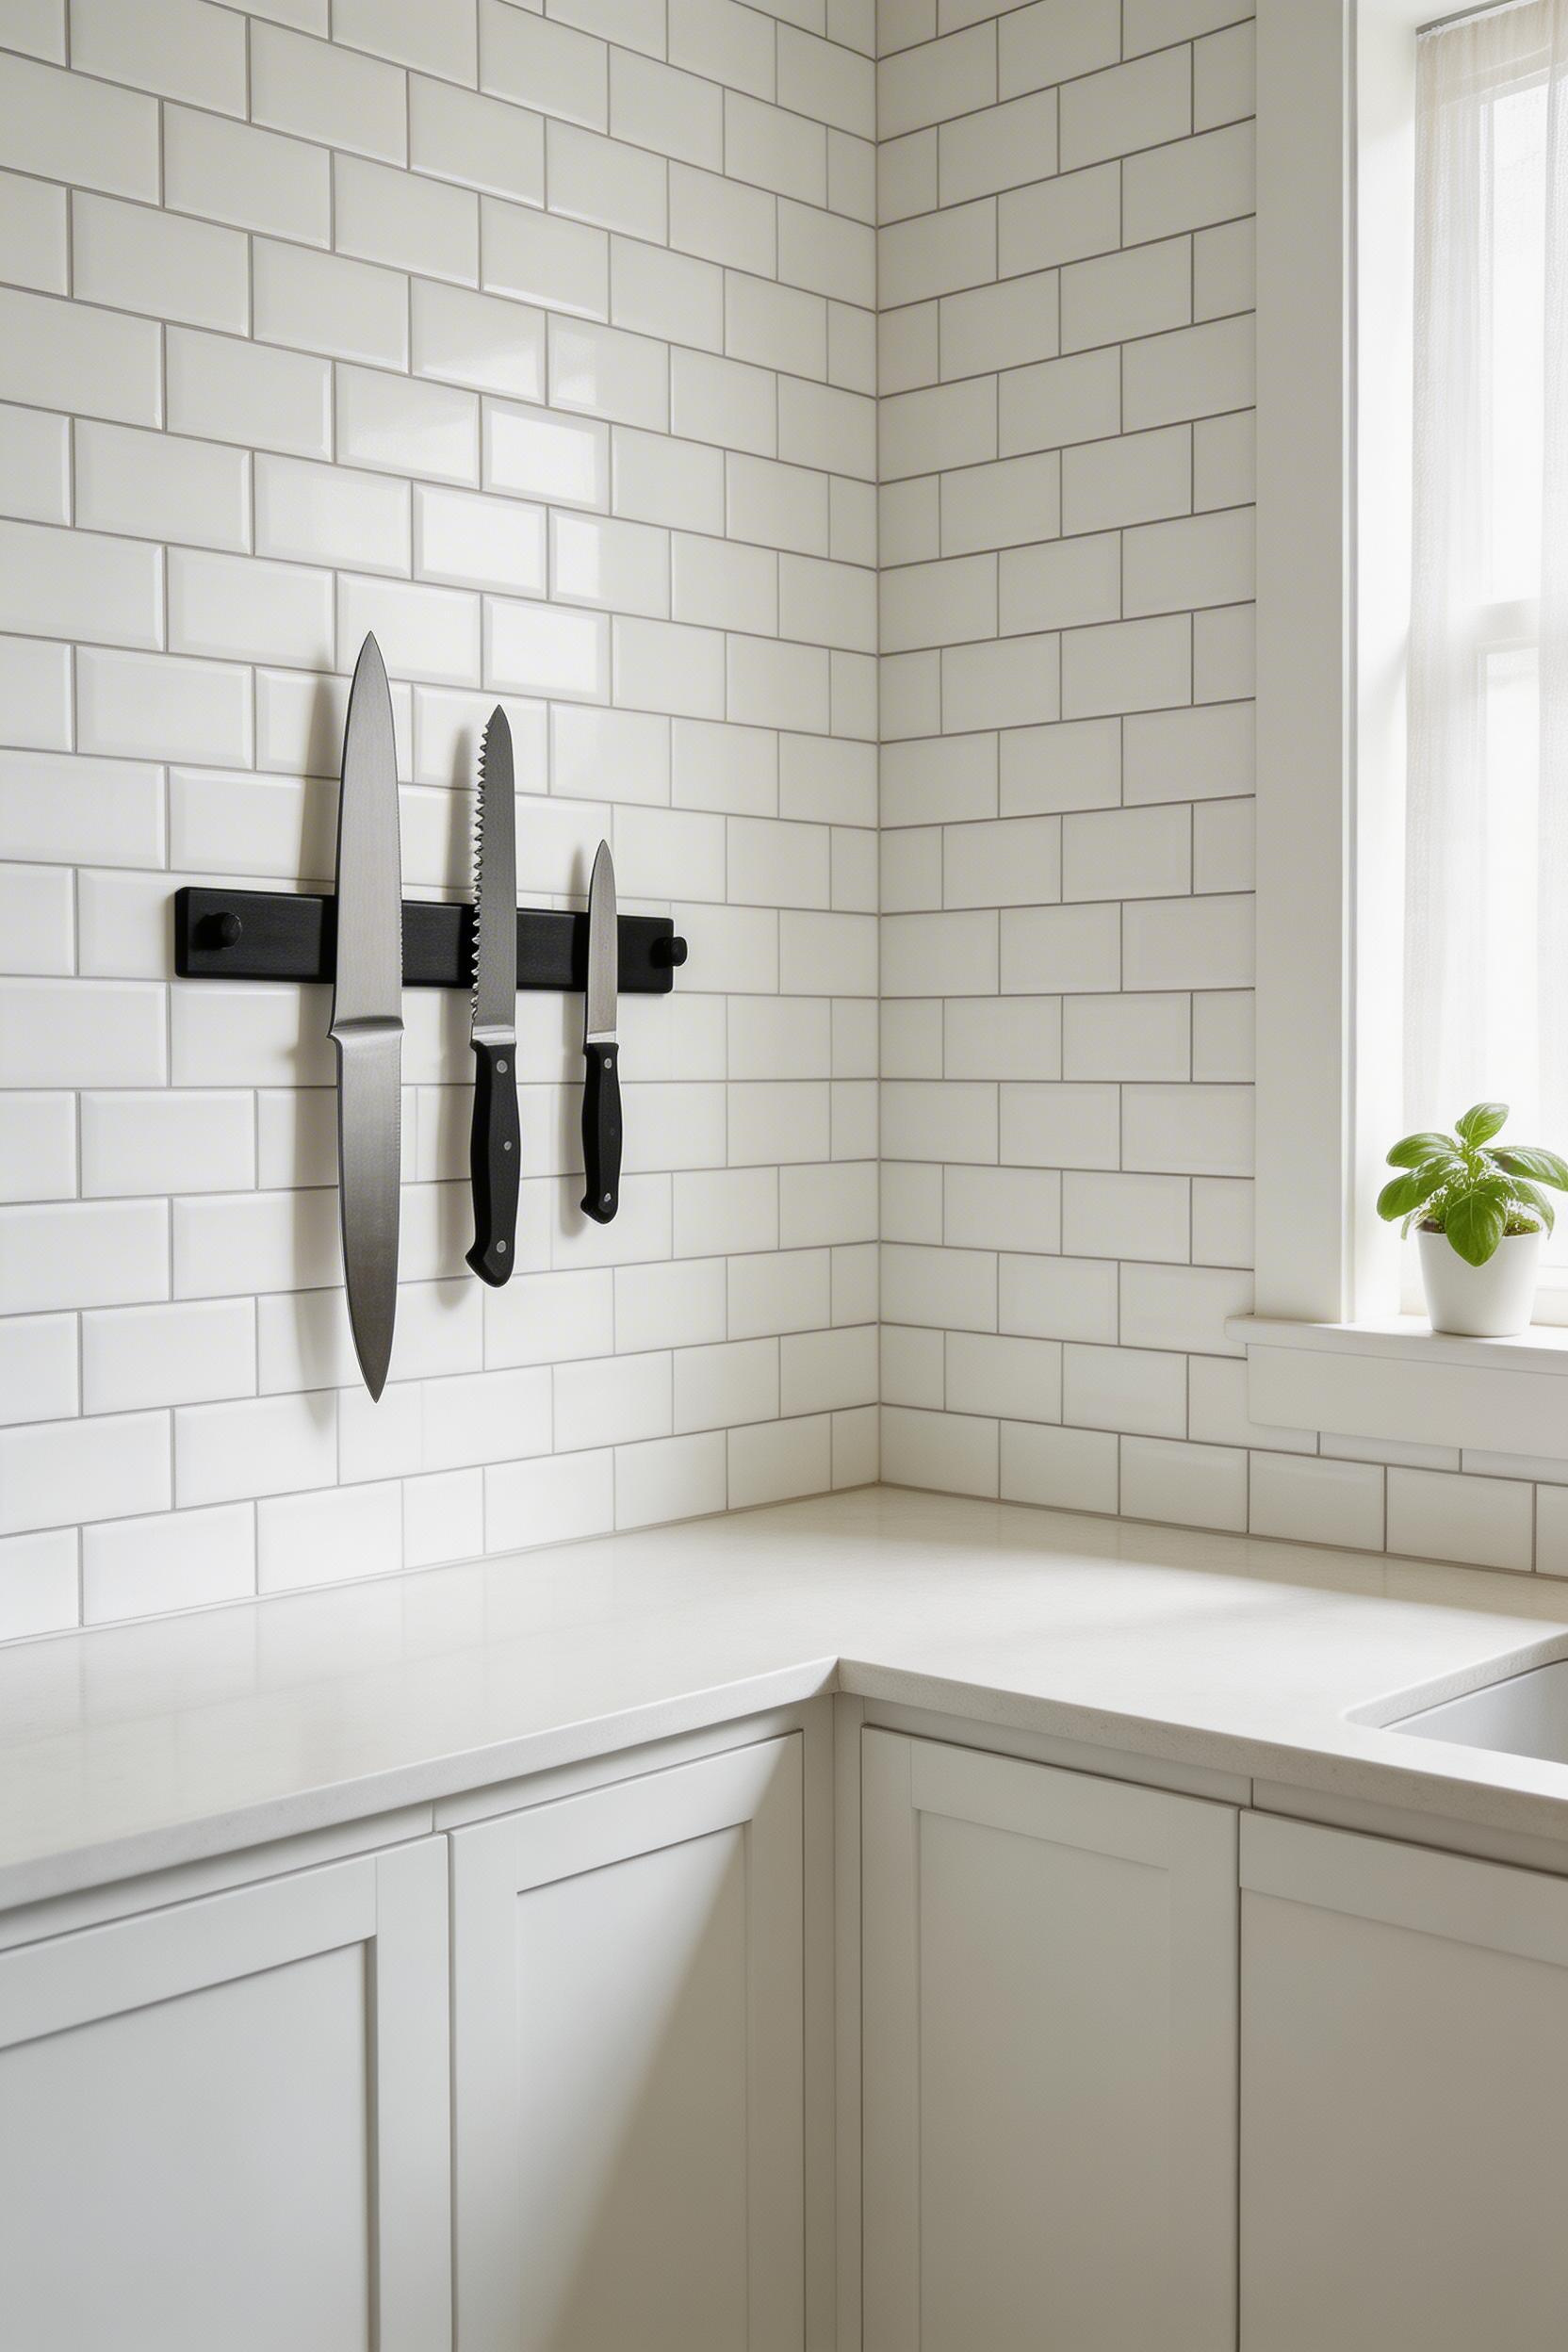
Magnetic knife strips do two things well: they free up a whole cabinet drawer and make your best knives visible and accessible. The Winco restaurant-grade strip ($25 to $35) comes in 12-, 18-, and 24-inch lengths and holds 4 to 8 knives depending on size. The Ouddy wood-backed option ($15 to $25) looks more decorative if you like the visible storage aesthetic. If you’re thinking about how knife storage connects to an overall kitchen upgrade, there are some excellent contemporary kitchen cabinet ideas that tie organization and aesthetics together.
For weight capacity: a stud mount handles 50-plus pounds and works well for a full set including heavy chef’s knives. Drywall anchors hold 25 to 40 pounds, fine for 4 to 6 mid-weight knives. Command adhesive strips ($5 to $10) handle 10 to 15 pounds—renter-safe for 3 to 4 lighter knives. An 18-inch strip is the sweet spot for most home kitchens, with enough room for 5 to 8 knives at comfortable 2 to 3 inch spacing.
Bonus idea: magnetic spice tins ($30 to $50 for a 12-jar set) mount inside a cabinet door with an adhesive magnetic strip. It stores spices out of sight while keeping them accessible. One critical warning: using adhesive strips for a full set of heavy knives is a safety hazard. Adhesive fails eventually, and knives falling off a wall is genuinely dangerous. Match your mounting method to your actual knife weight, and you’ll have a solution that lasts.
Building Your Kitchen Cabinet Organization System That Actually Sticks
The temptation is to buy everything at once and transform your kitchen in a weekend. Don’t do it. The reason most organization systems fail isn’t because the products are bad—it’s because they don’t match your actual needs or your budget reaches its breaking point halfway through.
Start with your top three pain points. Is it the lid avalanche? Canned goods you can’t find? Tupperware chaos? Phase 1 ($30 to $50) might be shelf risers, tension rods, and spice liners. Phase 2 ($100 to $200) adds drawer organizers, a lid holder, and a lazy Susan. Spread your purchases over a few weeks, live with each system for a bit, and adjust before buying the next thing. You’ll end up with kitchen organizers cabinet options that actually work for your kitchen, not just for someone else’s Pinterest board.
Before you shop, grab a measuring tape and write down three measurements: cabinet width (inside, not outside—that’s almost always 1 to 3 inches smaller), shelf depth, and the clearance from shelf edge to the inside of your closed cabinet door. Those three numbers solve 90 percent of fit problems. Take photos of your plumbing under the sink and any weird cabinet corners too. Most returns happen because people measure the outside of cabinets or don’t account for pipe placement. Ten minutes with a tape measure now saves you hours of frustration later.
—