We often view open shelving as a simple aesthetic upgrade—a chance to display curated ceramics on sleek wooden planks. Yet, through the lens of architectural photography, the flaw in this logic becomes visible immediately. Finding the right kitchen shelving ideas means addressing structural integrity first.
Most shelves fail structurally not because they break, but because they deflect. The human eye detects sag as little as 1/32 of an inch. This threshold is easily breached when materials succumb to “creep,” a time-dependent deformation that causes a stable shelf to droop an additional 50% over time.
This structural fatigue is often compounded by aesthetic failure. Homeowners frequently underestimate the operational load of open storage, transforming a design feature into a magnet for kitchen grease and visual clutter. Success lies in a critical, often-missed engineering margin I call the “12% Rule.” This concept represents the narrow line between a pristine architectural feature and a warped maintenance nightmare.
This guide explores the engineering principles required to keep your lines straight and your kitchen functional. We will cover why doubling shelf thickness reduces deflection to one-eighth of the original amount and why industry standards suggest limiting open shelving to 40% of your upper storage. By mastering these ratios, you ensure your kitchen handles the weight of daily life as beautifully as it photographs.
The Revelation: Shelving is infrastructure, not just decoration
Treat kitchen shelving as essential infrastructure rather than a gallery for fine china. To maximize efficiency, prioritize your “High-Frequency Zone” by placing daily essentials like dinner plates, coffee mugs, and cooking oils on open shelves. This eliminates the repetitive motion of opening and closing cabinet doors, significantly streamlining your workflow during meal prep.
In smaller kitchens, swapping bulky upper cabinets for open shelving also solves spatial constraints. This structural shift reduces the visual weight of the room. It prevents the space from feeling oppressive, creating a much-needed sense of airiness that allows you to utilize wall space for kitchen storage effectively.
Because these shelves function as heavy-duty workhorses, structural integrity is paramount. You must calculate the weight-bearing capacity before installation. Secure brackets directly into wall studs and select robust materials, such as thick solid wood, to support the full weight of heavy dishware or dry goods. This foundational step guarantees the long-term safety and usability required for a working kitchen, ensuring the system handles the physical demands of daily use.
True infrastructure requires adaptability. Opt for customizable systems with adjustable brackets, such as industrial piping or vertical tracks, which allow you to change shelf heights as your storage needs evolve. Furthermore, move beyond simple flat surfaces by integrating task-specific storage. Install hooks or rails directly beneath a floating shelf to hang measuring cups or pots. This turns a static storage unit into a multi-functional organization hub, ensuring your kitchen adapts to your specific habits.
Phase 1: Architectural Integration & Layout
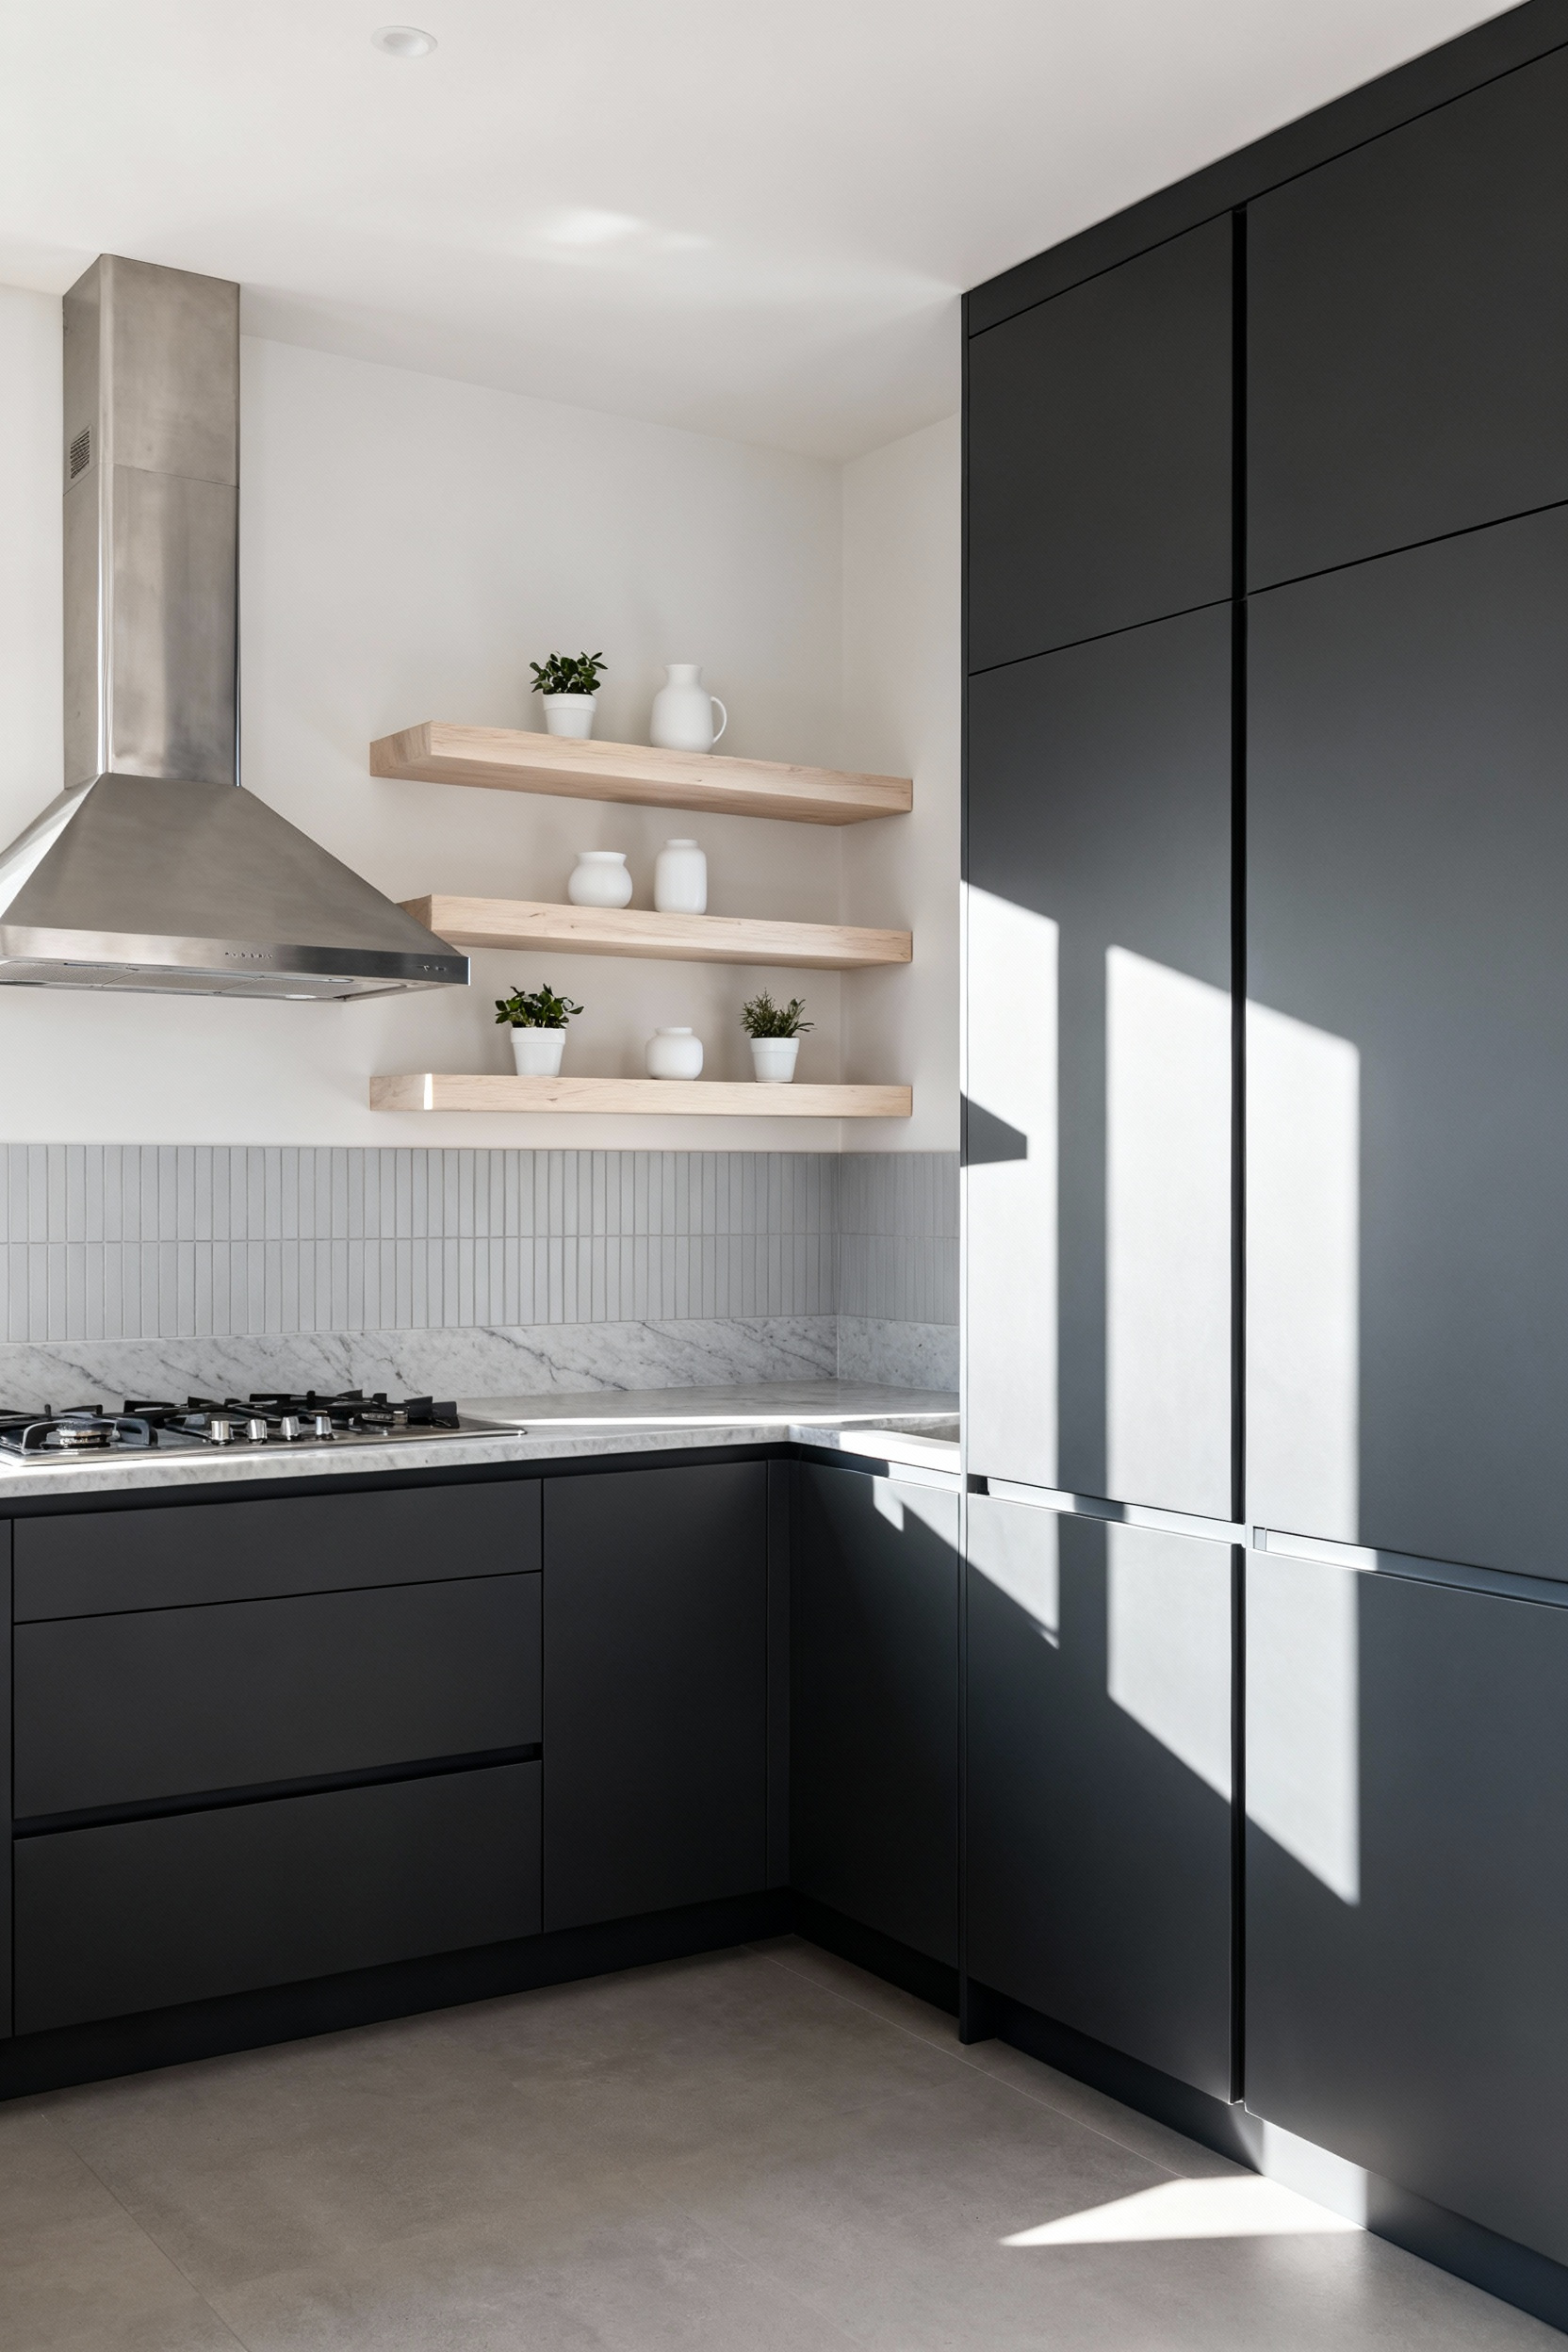
Successful kitchen interior design begins with visual balance. Continuous upper cabinetry often creates a heavy, enclosed atmosphere, particularly in L-shaped or U-shaped layouts. To counteract this, use open shelving to break up the visual bulk and allow the room to breathe.
A strong architectural strategy involves dedicating one wall to floor-to-ceiling closed storage. This frees up adjacent walls for lighter, floating shelves. This approach also creates natural focal points; framing a range hood or a sink window with symmetrical shelving draws the eye and transforms utility items into a curated gallery.
Aesthetics must always support the workflow. During the layout phase, position your shelves specifically to enhance the kitchen’s work triangle. Place storage for glasses near the sink and spices or oils near the stove to keep essential items within arm’s reach.
You must also adhere to standard vertical clearances to maintain usability. Plan for a minimum of 18 inches between the countertop and the bottom of the first shelf. This specific height accommodates tall countertop appliances and ensures the workspace remains functional rather than decorative.
The most critical aspect of integration happens behind the walls. Floating shelves carry significant live loads, especially when stacked with heavy stoneware or cookbooks. You cannot rely on standard drywall anchors for this application. Specify the exact shelf locations in your architectural plans immediately. This alerts your contractor to install robust wood blocking or specific stud placement before the drywall or tile is installed. Securing this structural support early prevents sagging and eliminates the need for invasive retrofitting later in the build.
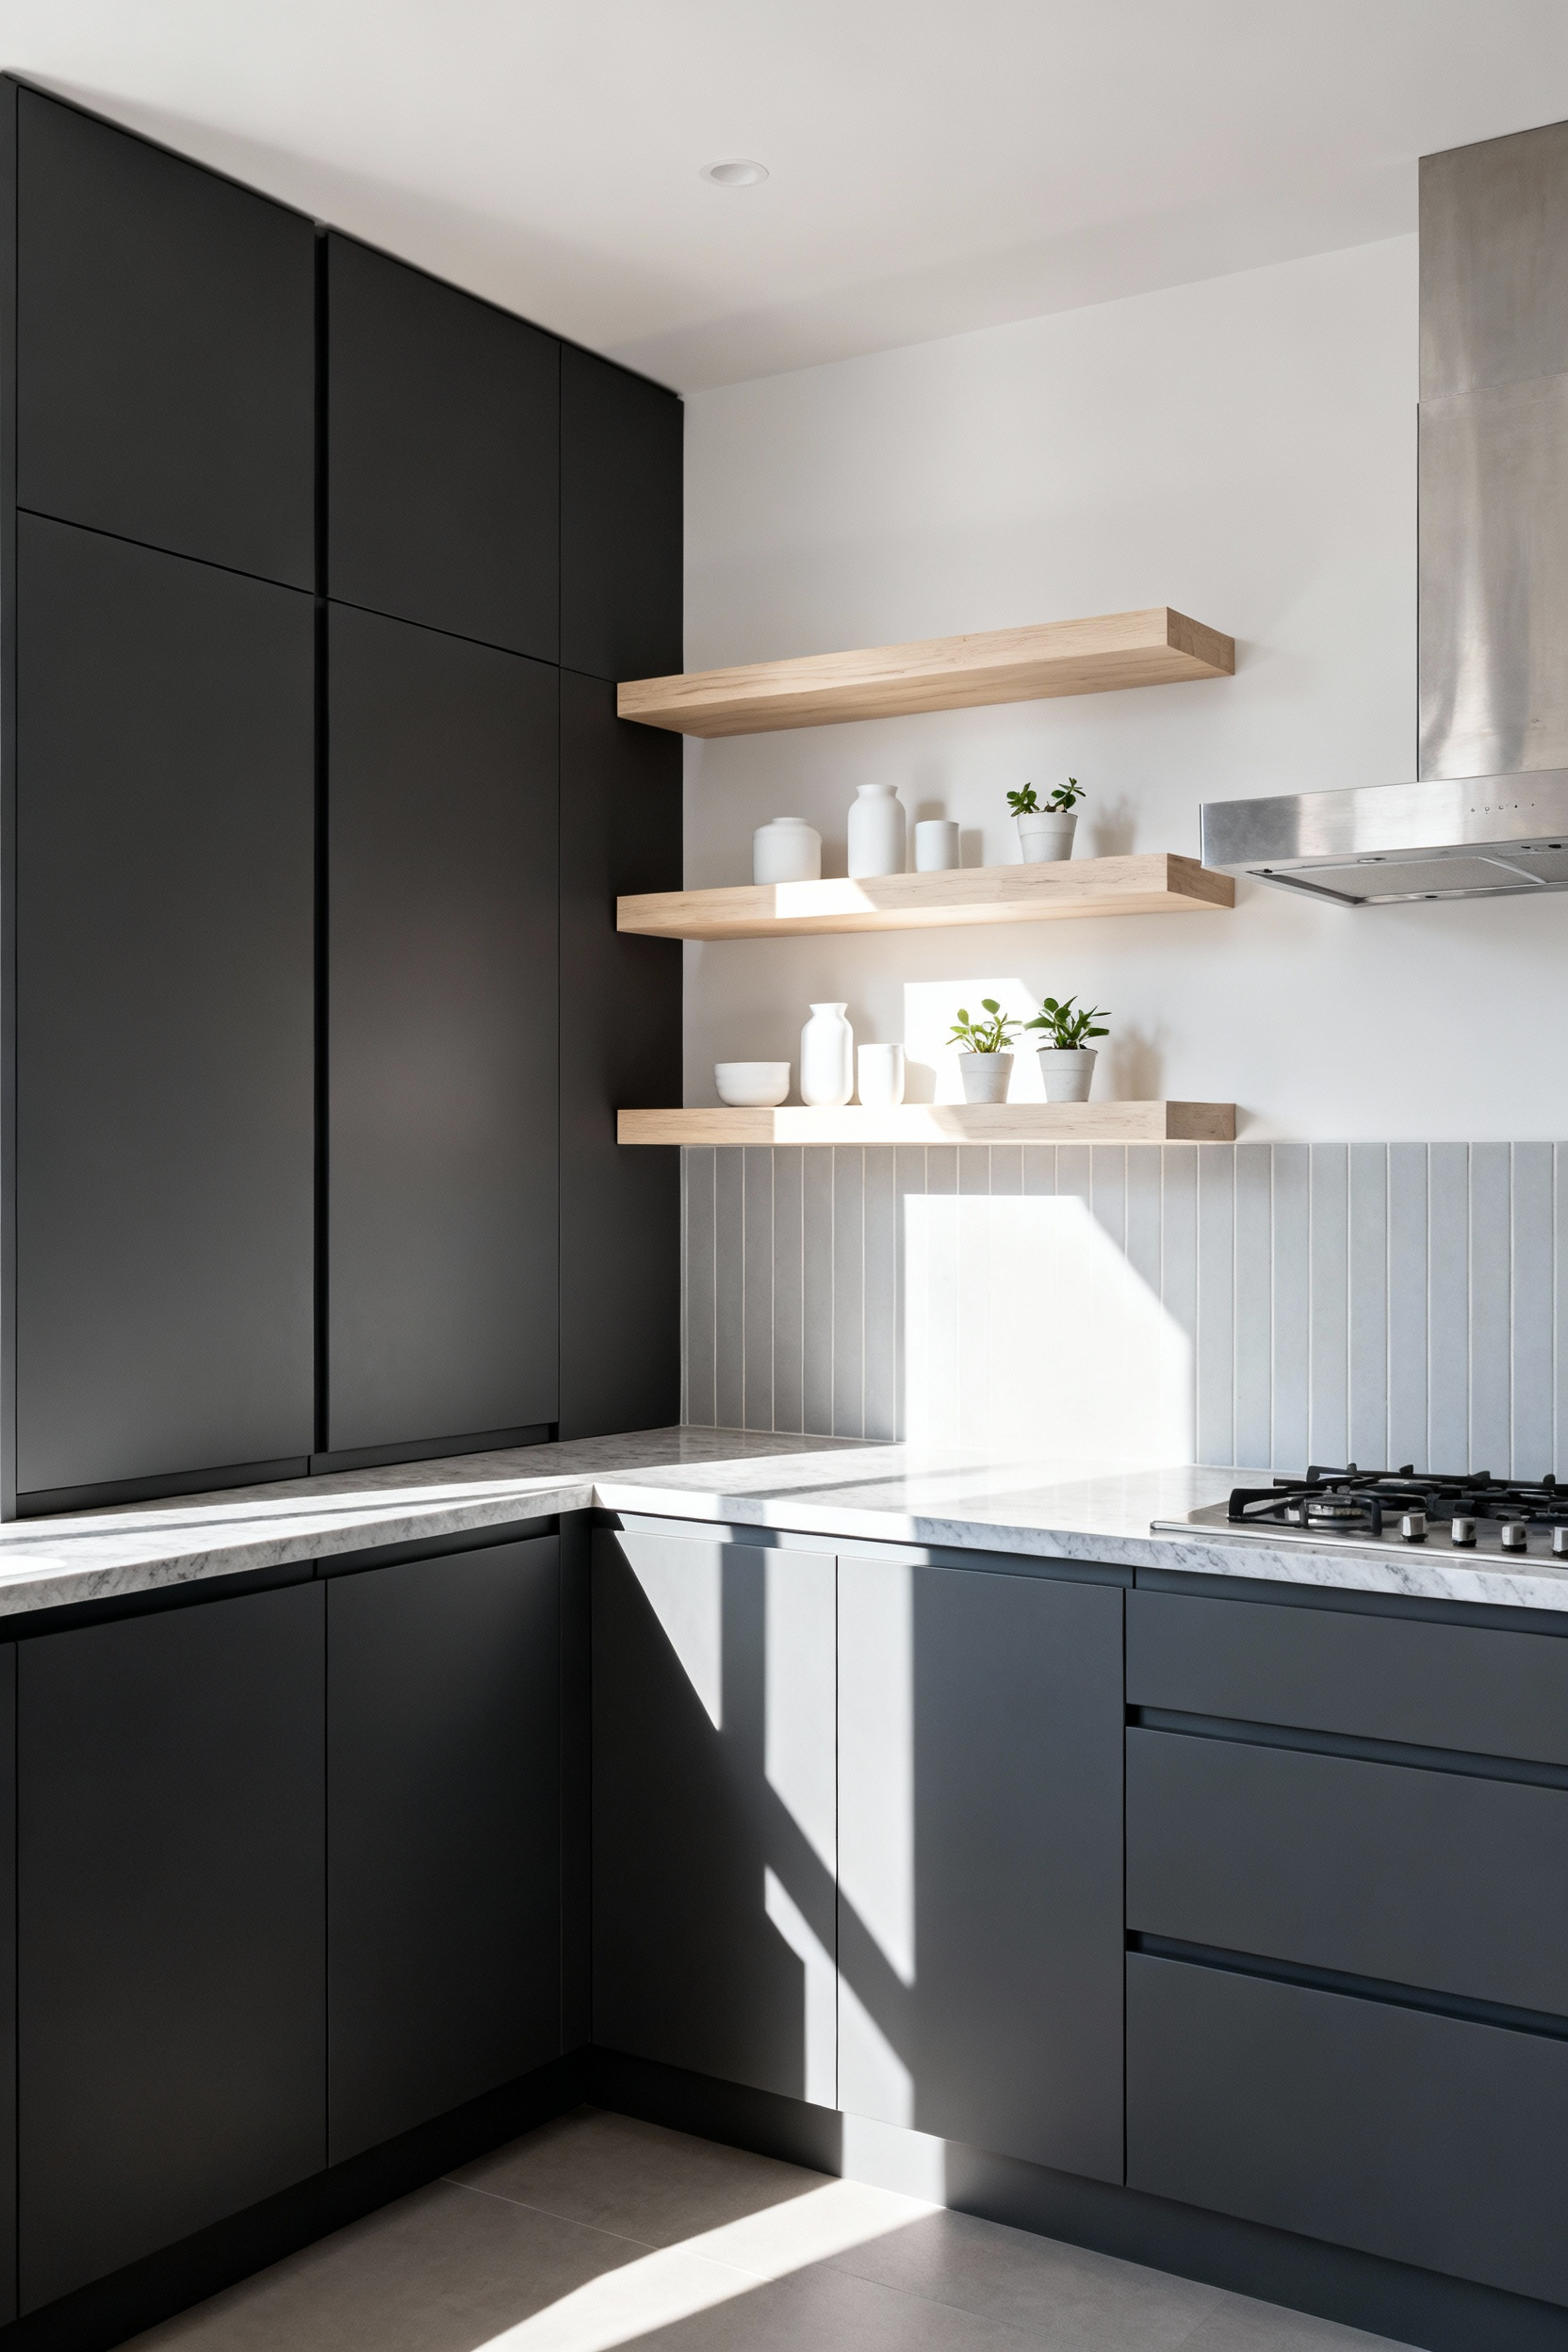
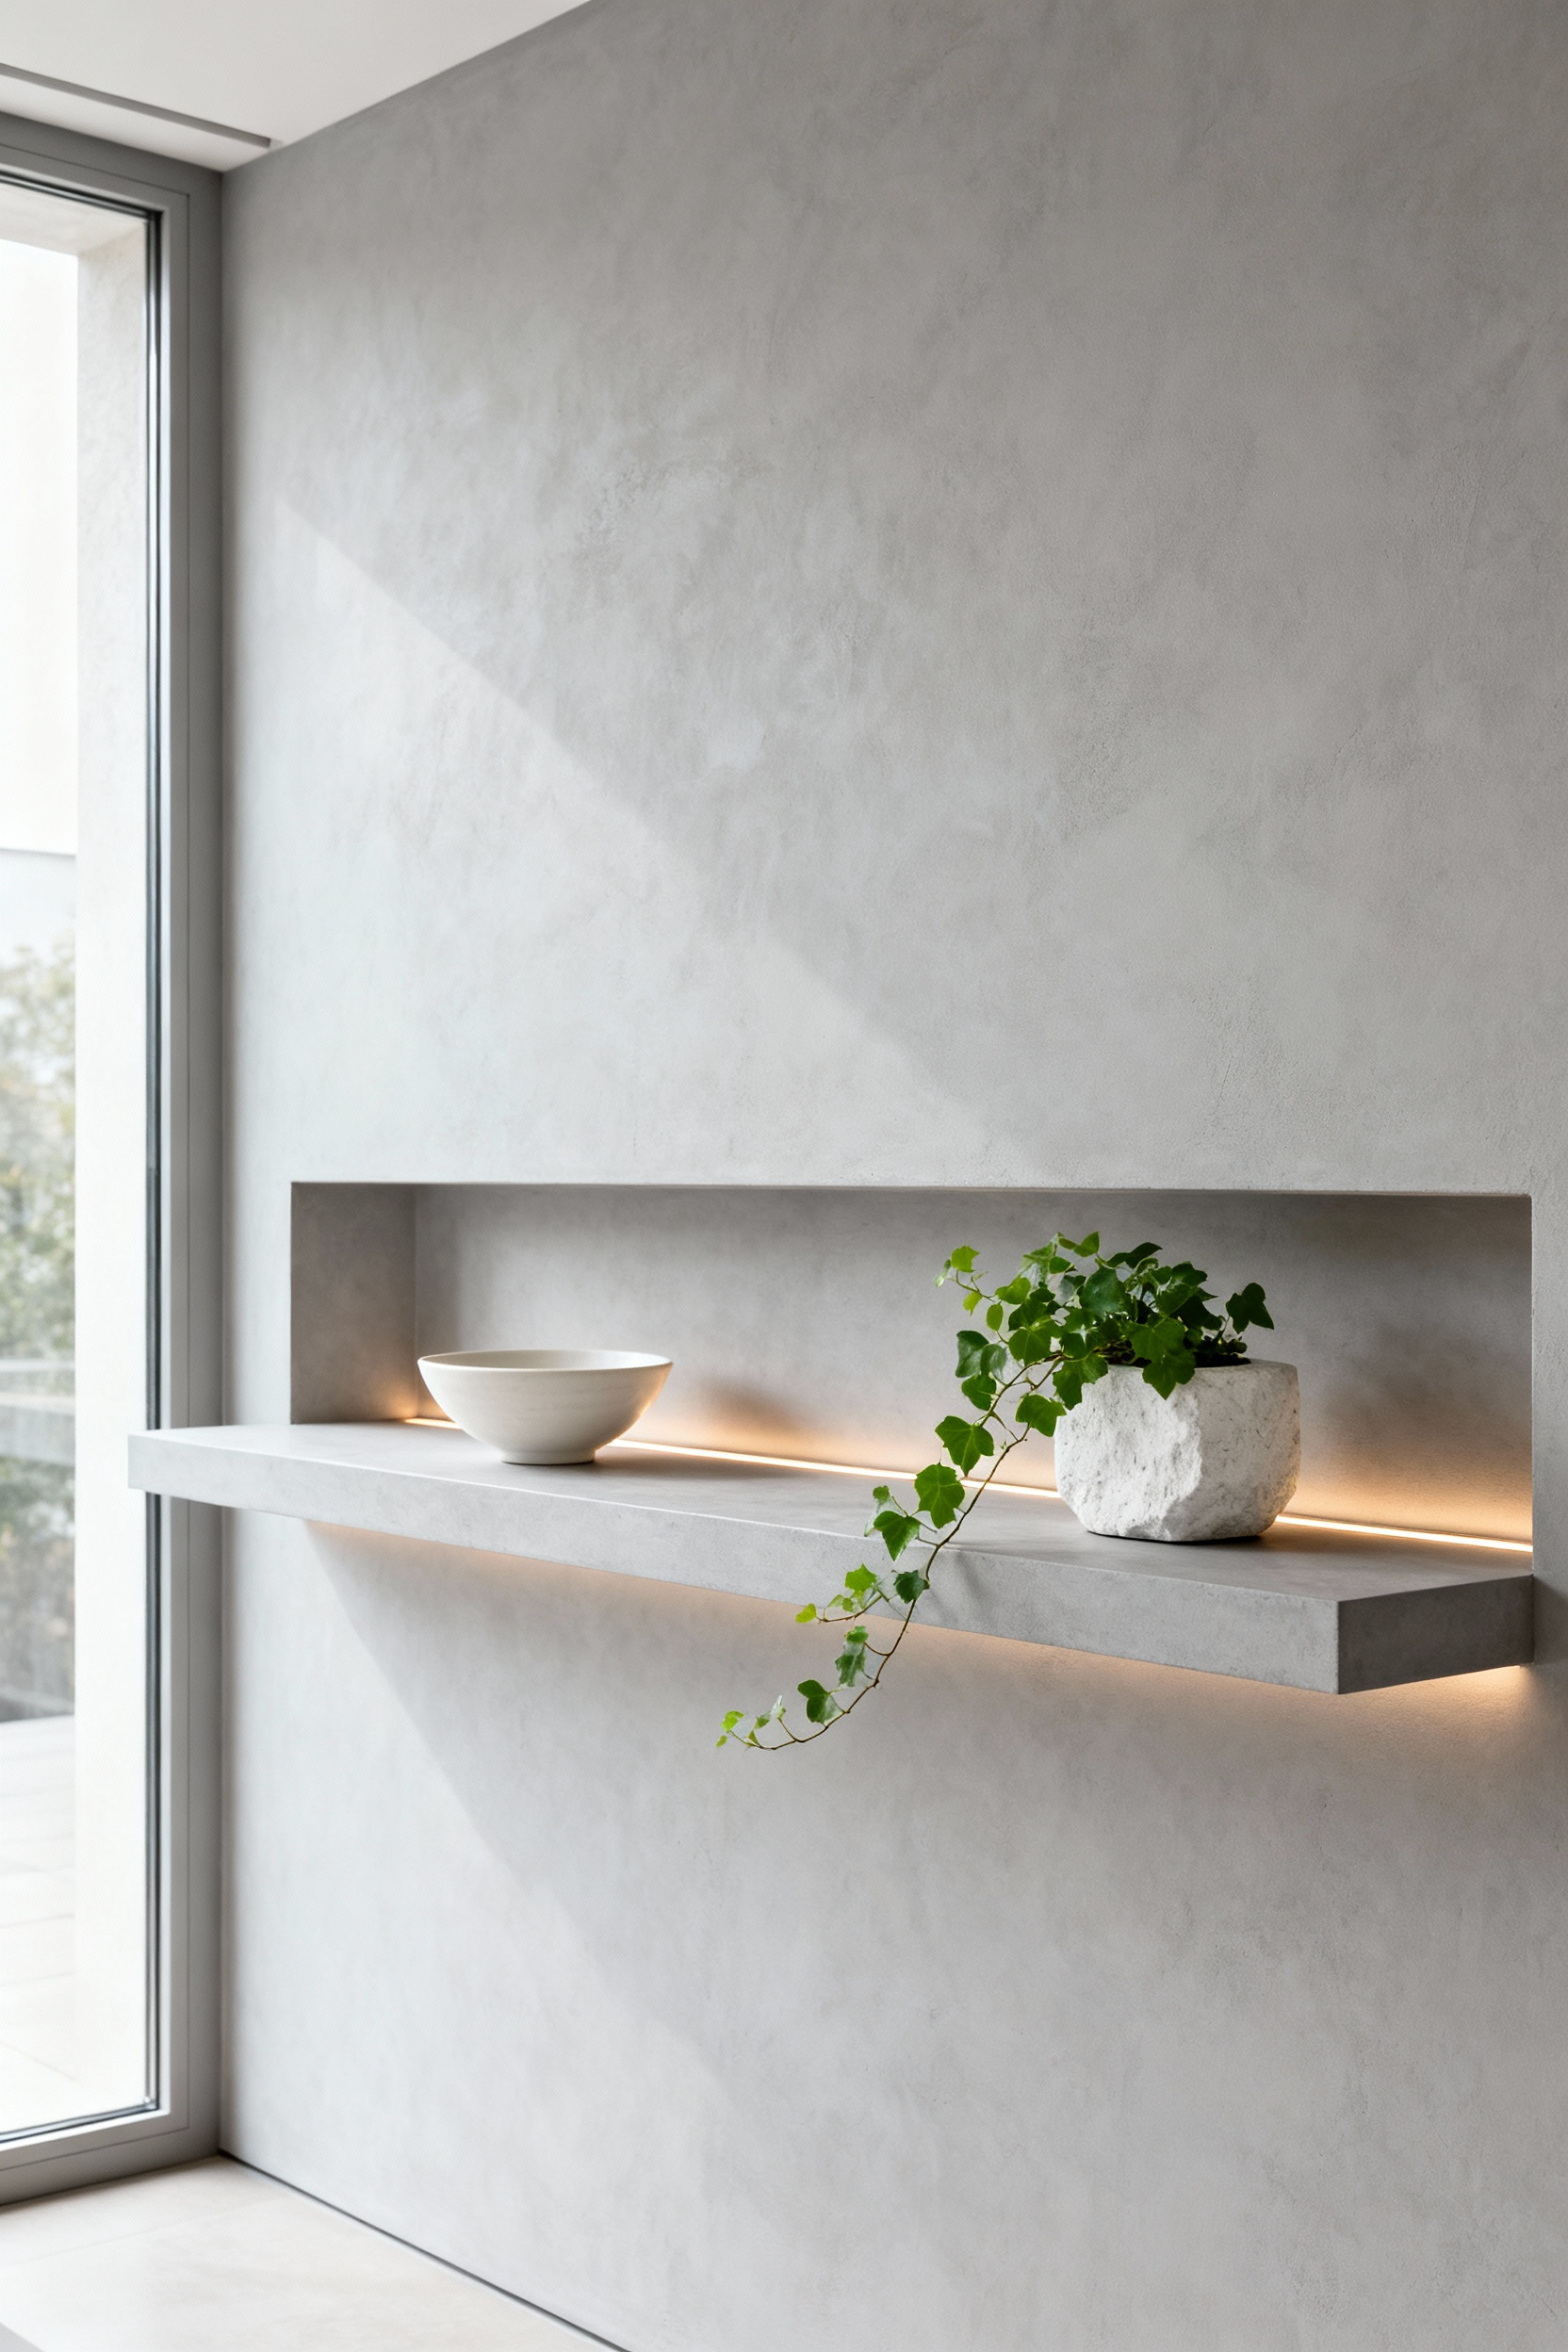
1. The ‘Invisible’ Floating Shelf: Achieving zero-profile suspension for true minimalism
True minimalism demands the absence of visible mechanics. To achieve a zero-profile look where the shelf appears to extrude directly from the wall, you must forego standard L-brackets in favor of heavy-duty concealed hardware.
Specify systems like blind shelf supports (steel rods) or recessed interlocking metal brackets. These components embed fully within the shelf material and the wall, eliminating any external profile. For an even sleeker visual, consider matching the shelf finish to your wall color; this creates an illusion where the architectural lines dissolve into the background.
However, invisible hardware dictates the physical dimensions of your cabinetry. To accommodate the robust rods required for kitchen loads, your shelves generally need a minimum thickness of 1.5 to 1.75 inches. This depth is necessary to conceal the support arm while maintaining structural integrity. If you require a thinner profile, you must source specialized low-profile bracket systems designed specifically for slim materials, though this often reduces overall weight capacity.
Proper installation defines the difference between a sleek design element and a safety hazard. To prevent sagging and ensure the shelf sits completely flush against the drywall, you must anchor the hidden supports directly into the wall studs. Precision here is non-negotiable. Secure mounting into the studs allows for significant load-bearing capabilities—often 75 to 150 lbs per pair—ensuring your minimalist shelf safely holds heavy ceramic dishes without pulling away from the wall.
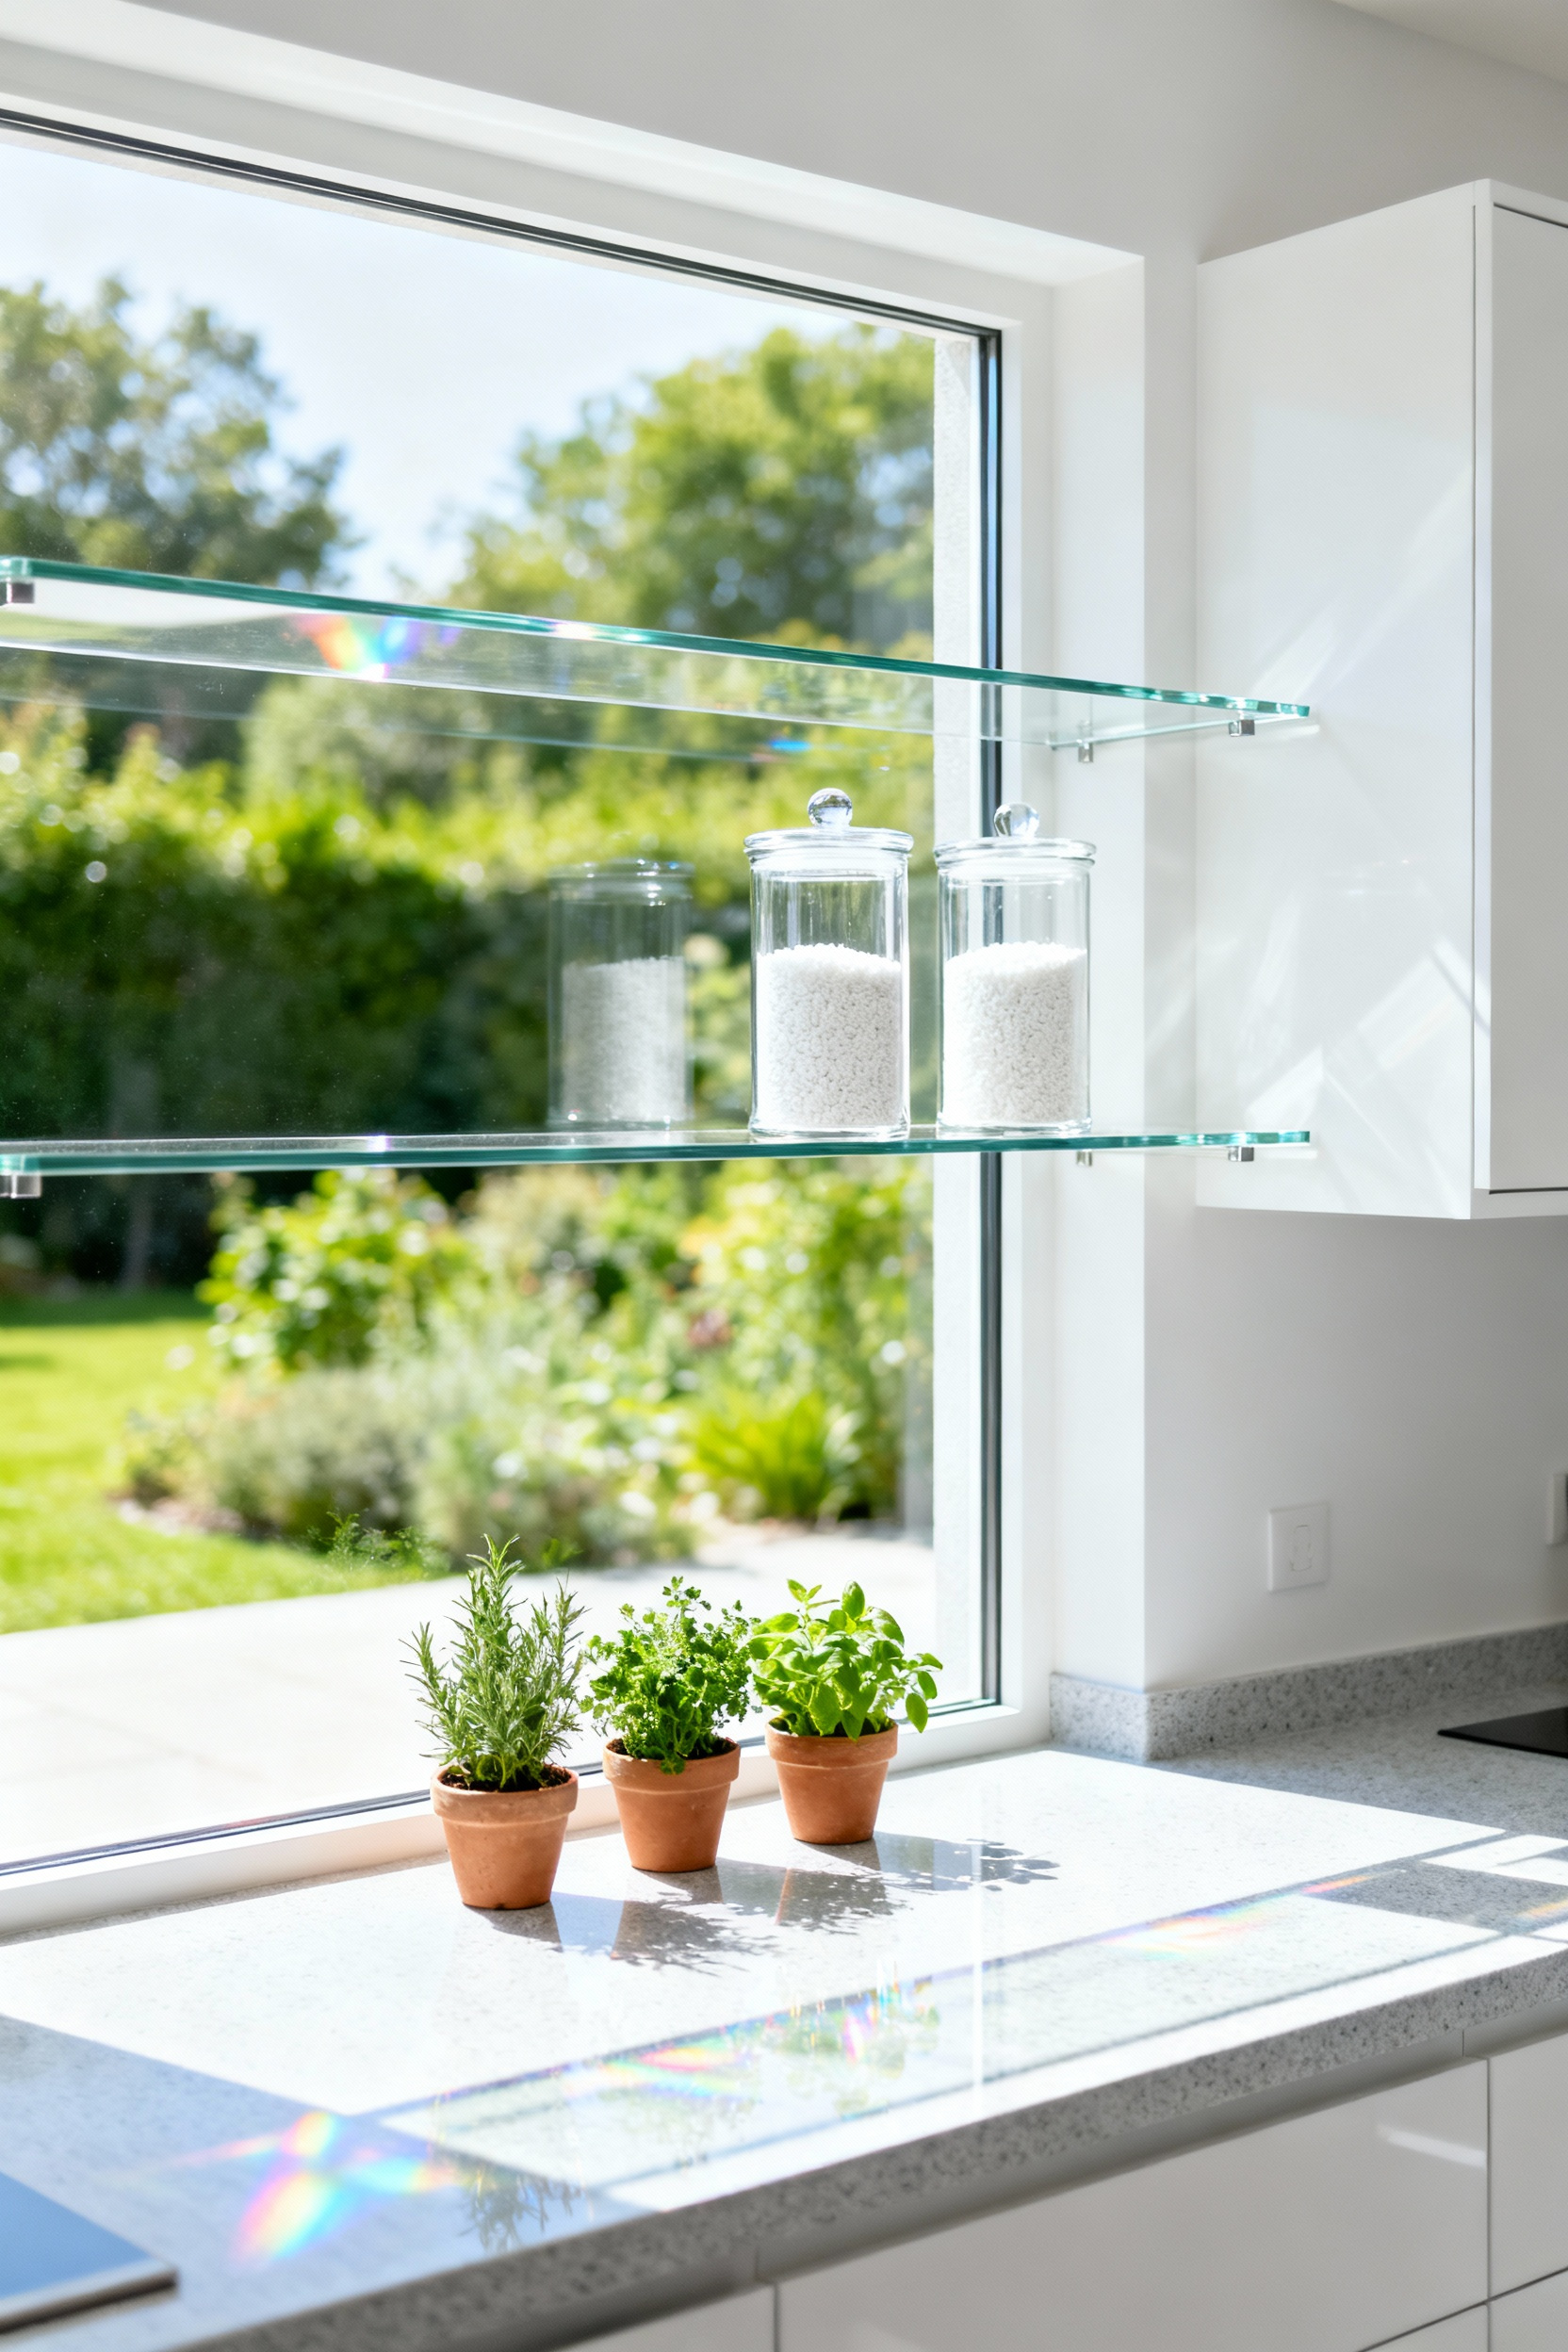
2. Across-the-Window Spans: Maximizing natural light diffusion without sacrificing storage
Spanning a shelf across a window utilizes often-overlooked vertical space, but you must avoid creating a visual barricade. The key lies in transparency. Replace opaque wood with clear tempered glass or acrylic.
These materials allow sunlight to pass directly through the surface, eliminating heavy shadows and maintaining an airy aesthetic. To further preserve the view, limit the design to a single level or a maximum of two shelves. This restraint reclaims valuable storage without creating a barrier that impedes daylight transmission.
Structural execution requires precision to minimize obstruction. Select a shallow shelf depth, typically between six and eight inches, to reduce the physical profile against the glass. Support these spans with minimalist hardware, such as cable suspension systems or discreet mounting brackets.
For the cleanest visual result, align mounting points with the window’s vertical mullions or frames. This technique allows the hardware to visually disappear into the existing architecture, keeping the focus on the light.
Finally, curate the contents of these shelves to work with the sunlight rather than against it. Stock the span with light-reflecting items like clear glassware, white ceramics, or translucent jars. These objects help bounce natural light deeper into the kitchen. Avoid storing bulky or dark cookware in this specific zone, as opaque items create hard shadows and defeat the purpose of the light-maximizing placement.
3. Structural Recessed Niches: Utilizing stud bays for flush-mount storage
Structural recessed niches capitalize on the often-overlooked voids within your home’s framing. By repurposing the empty space between wall studs, you create storage that sits flush with the surface rather than protruding into the room.
This approach preserves valuable floor space and delivers the streamlined, built-in aesthetic that defines high-end custom joinery. It effectively turns a structural necessity into a functional design feature, ideal for tight kitchens or narrow passageways.
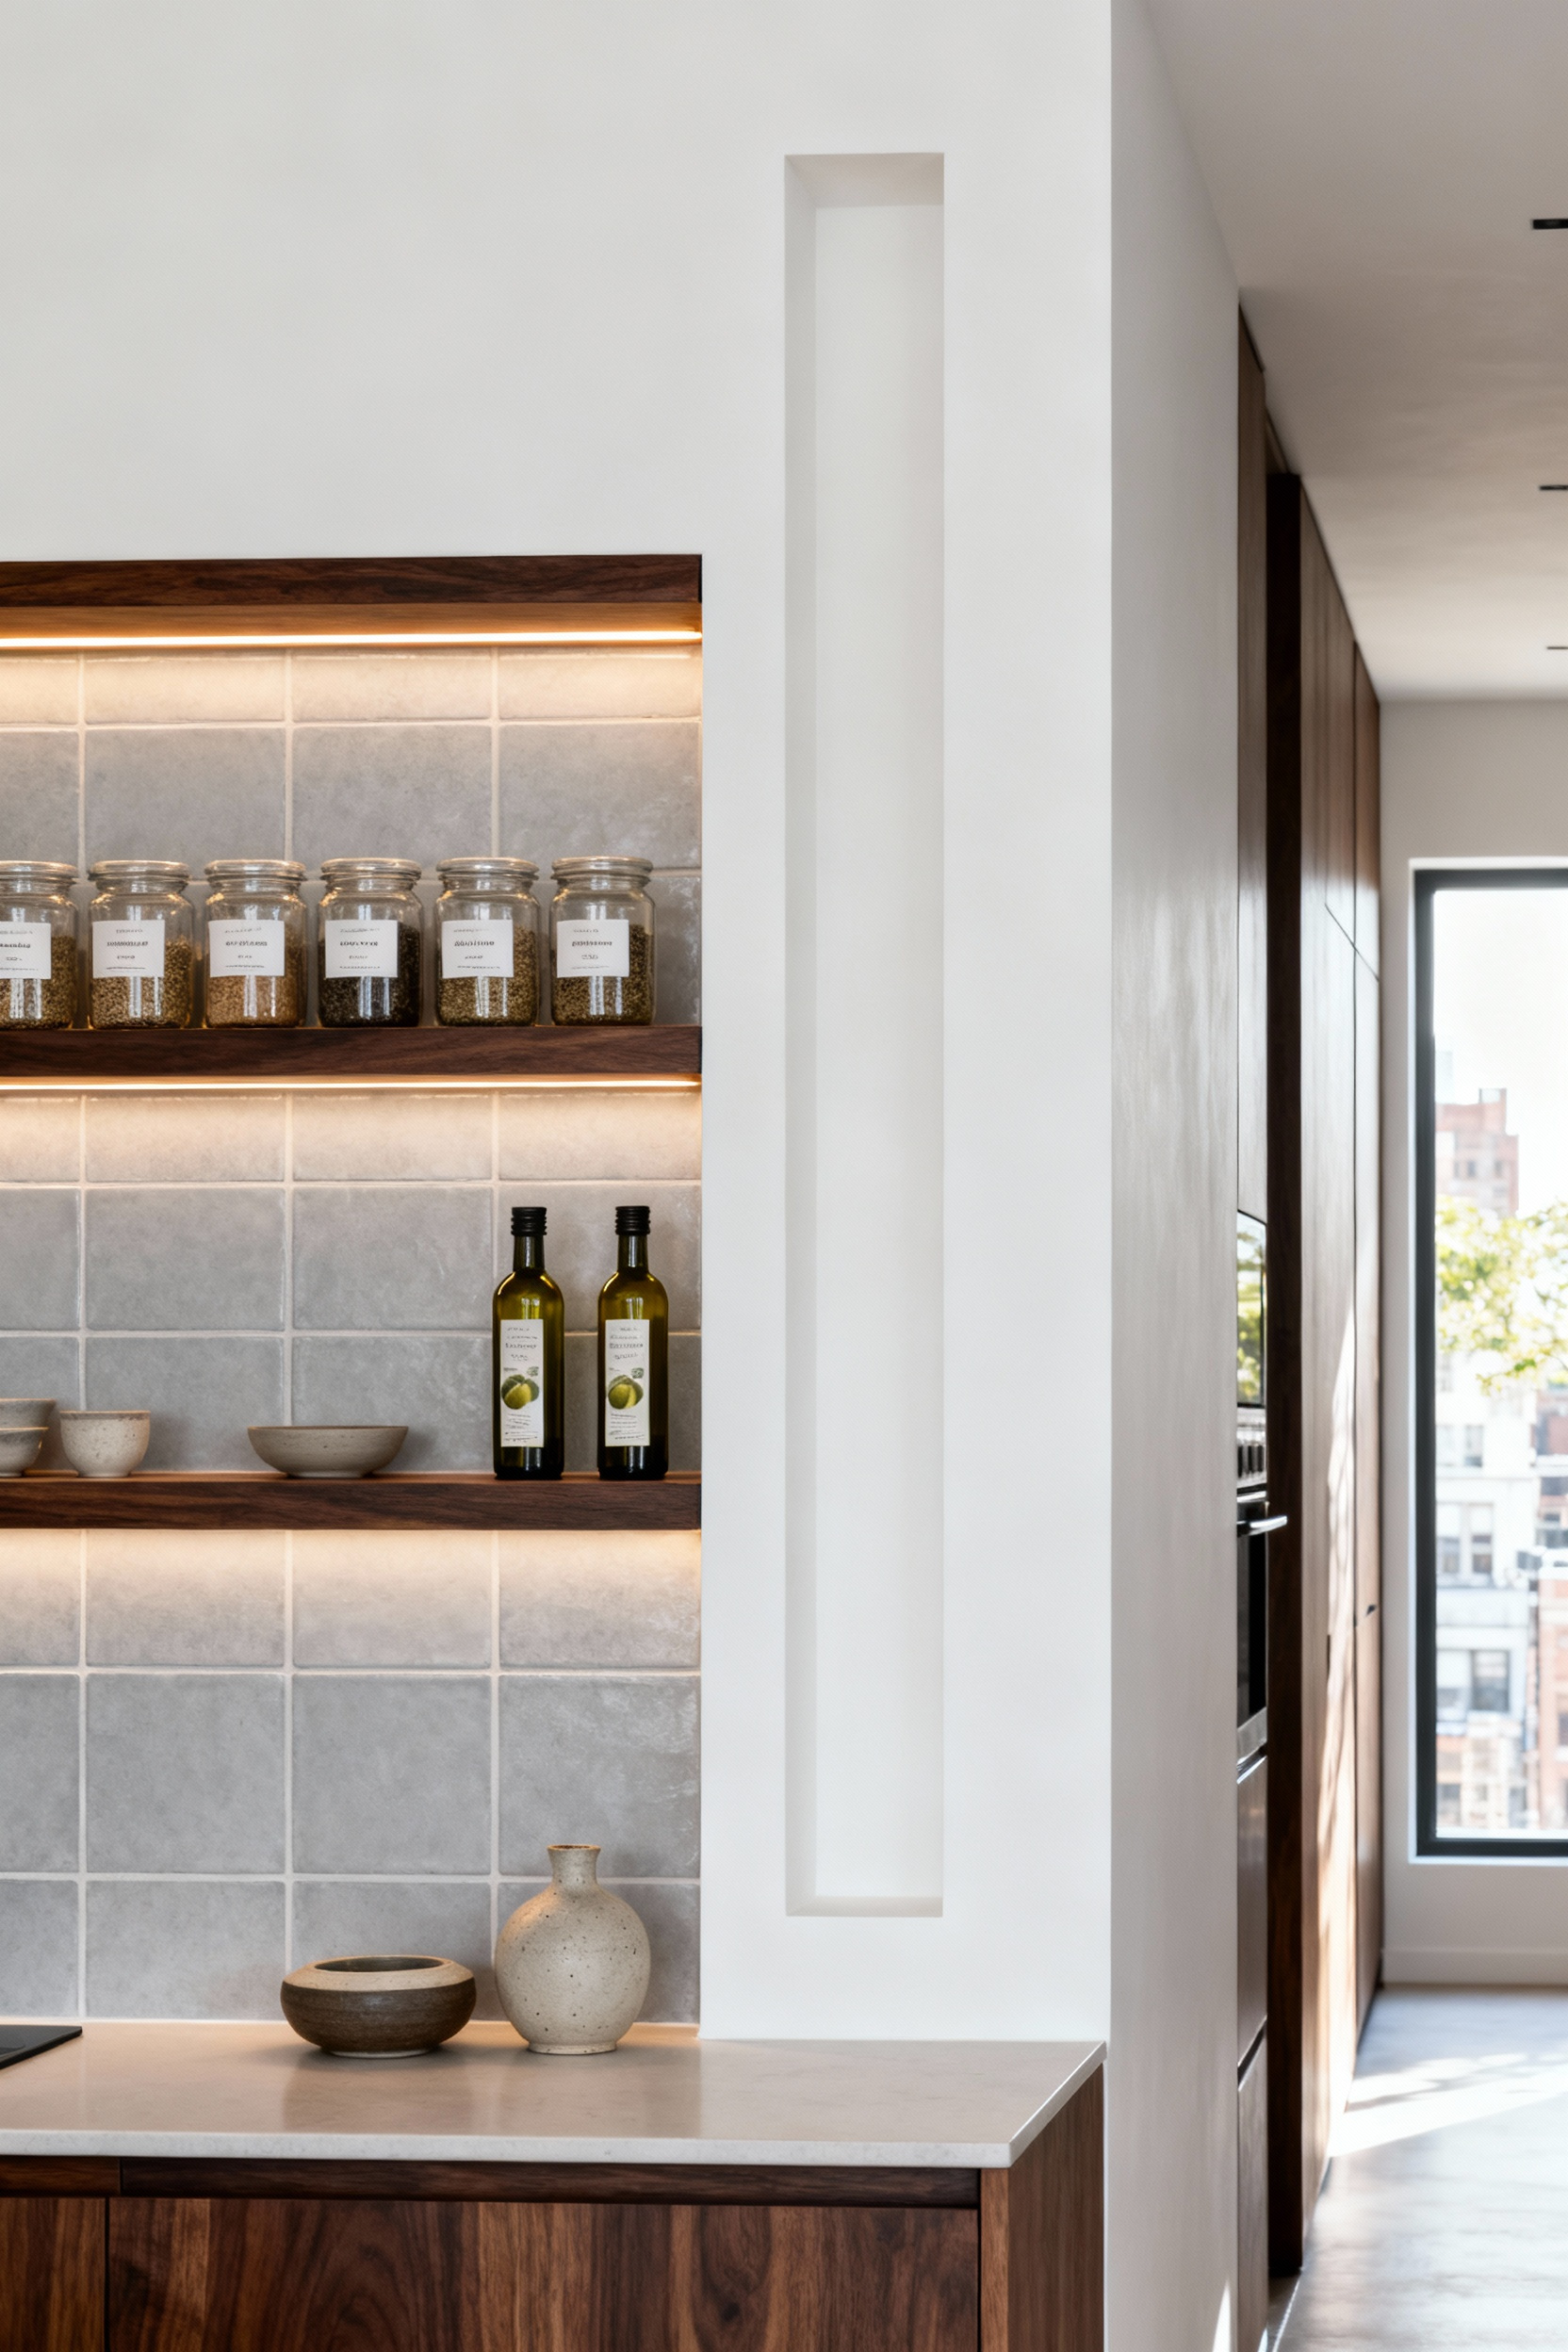
Before you cut into the drywall, you must understand the physical limitations of the wall assembly. Standard 2×4 studs generally allow for a recess depth of approximately 3.5 inches. This dimension suits single-file storage perfectly, accommodating spice jars, oil bottles, or rows of canned goods, but it will not hold bulky appliances.
Always inspect the selected cavity for electrical wiring, plumbing, or ductwork using a high-quality stud finder. Selecting a bay free of utility lines eliminates the complex and costly need for professional relocation.
To achieve a professional result, insert a custom-built wooden box snugly between the studs. Finish the opening with a face frame or trim that slightly overlaps the rough drywall edges to mirror the look of traditional cabinetry. These shallow cavities work exceptionally well as auxiliary pantries in otherwise unusable wall spaces or as prep niches above countertops, keeping frequently used ingredients immediately accessible without cluttering your workspace.
4. The Suspension System: Ceiling-mounted industrial racks for island overheads
Leveraging the vertical space above a kitchen island merges heavy-duty commercial utility with a strong industrial-chic aesthetic. To achieve this contemporary look, prioritize raw materials like black lacquered steel, wrought iron, or dark plumbing pipe frames.
Pair these structures with rustic wood or 304 stainless steel shelves for maximum durability. Stainless steel is particularly effective; it resists corrosion, creates a clean visual line, and withstands the substantial weight typical of overhead storage.
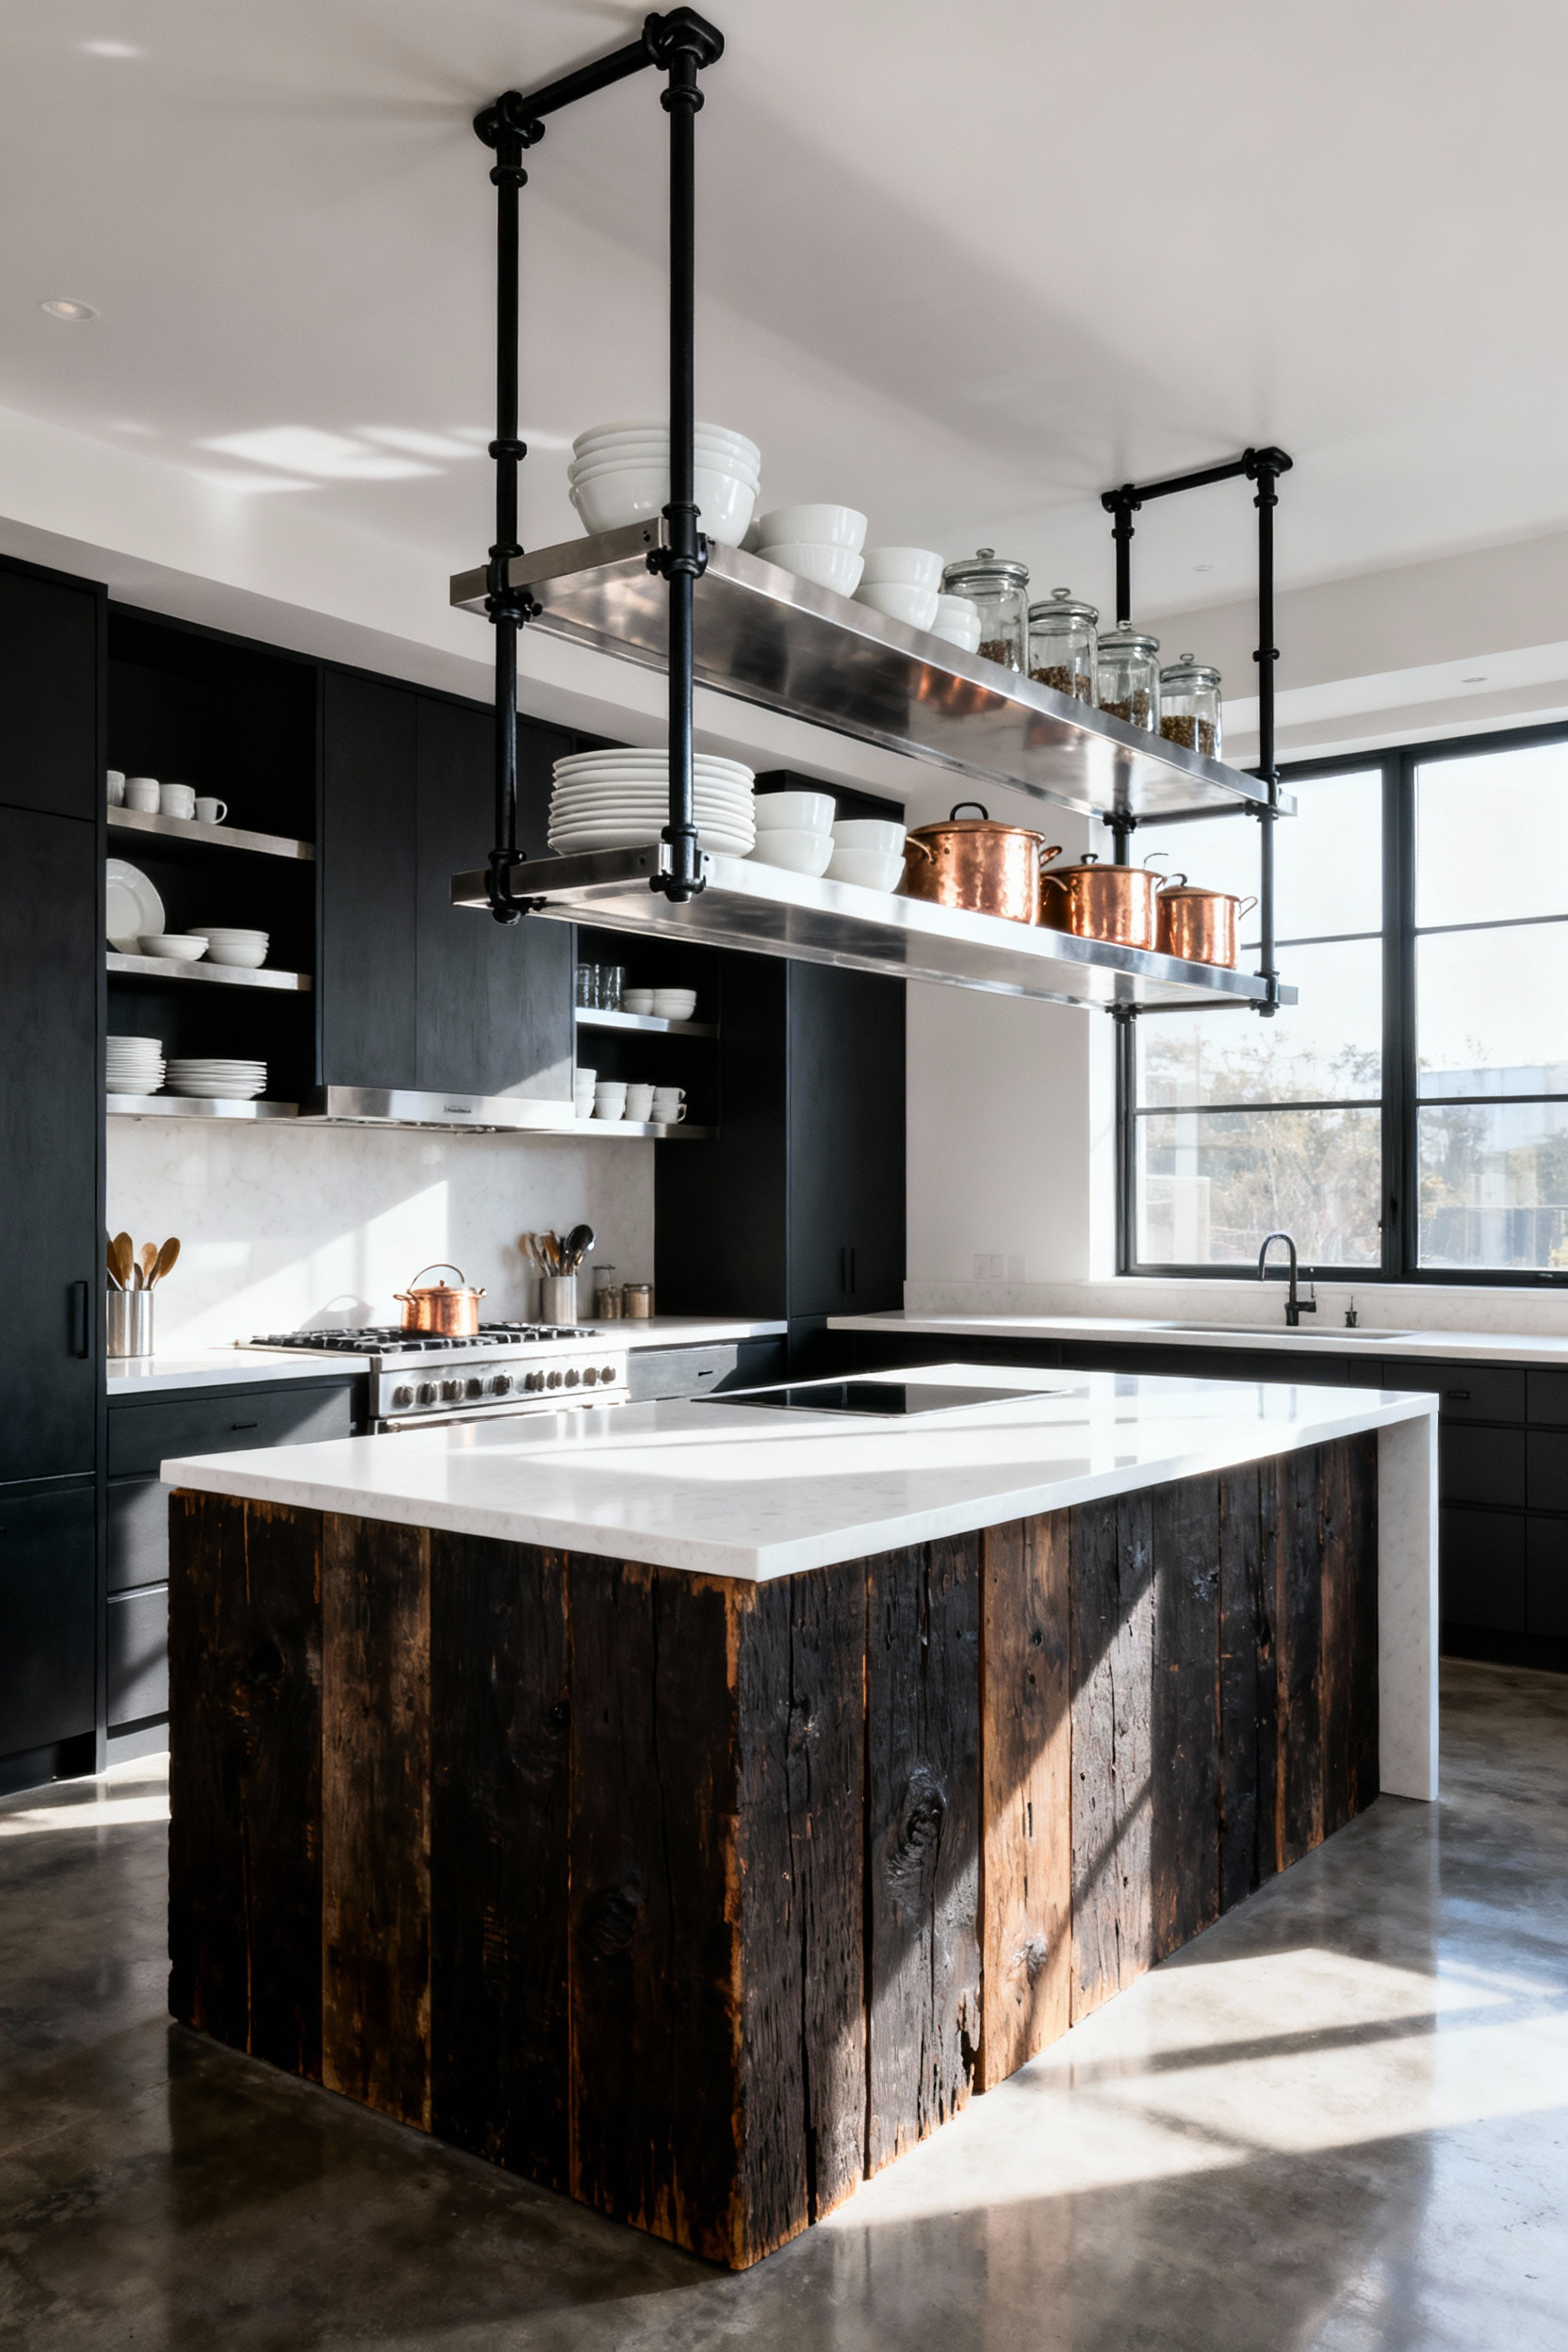
Structural integrity dictates the success of this design. You must secure the suspension system directly into ceiling joists or structural beams, never relying on drywall alone. These units are inherently heavy, with some frames weighing 40kg before you add a single item. When you factor in the weight of cast-iron cookware, professional installation becomes critical to ensure the rack remains stable and safe above your primary workspace.
Beyond structure, this system should enhance your workflow. Utilize the lower frame by installing S-hooks to create an integrated rack for pots, pans, and utensils. This keeps frequently used tools within reach and clears valuable surface area on the countertop. Finally, treat the rack as a lighting fixture. Integrate thin tube lights or LED strips into the frame or beneath the shelves. This addition provides necessary task lighting for the island while highlighting the architectural details of the storage system.
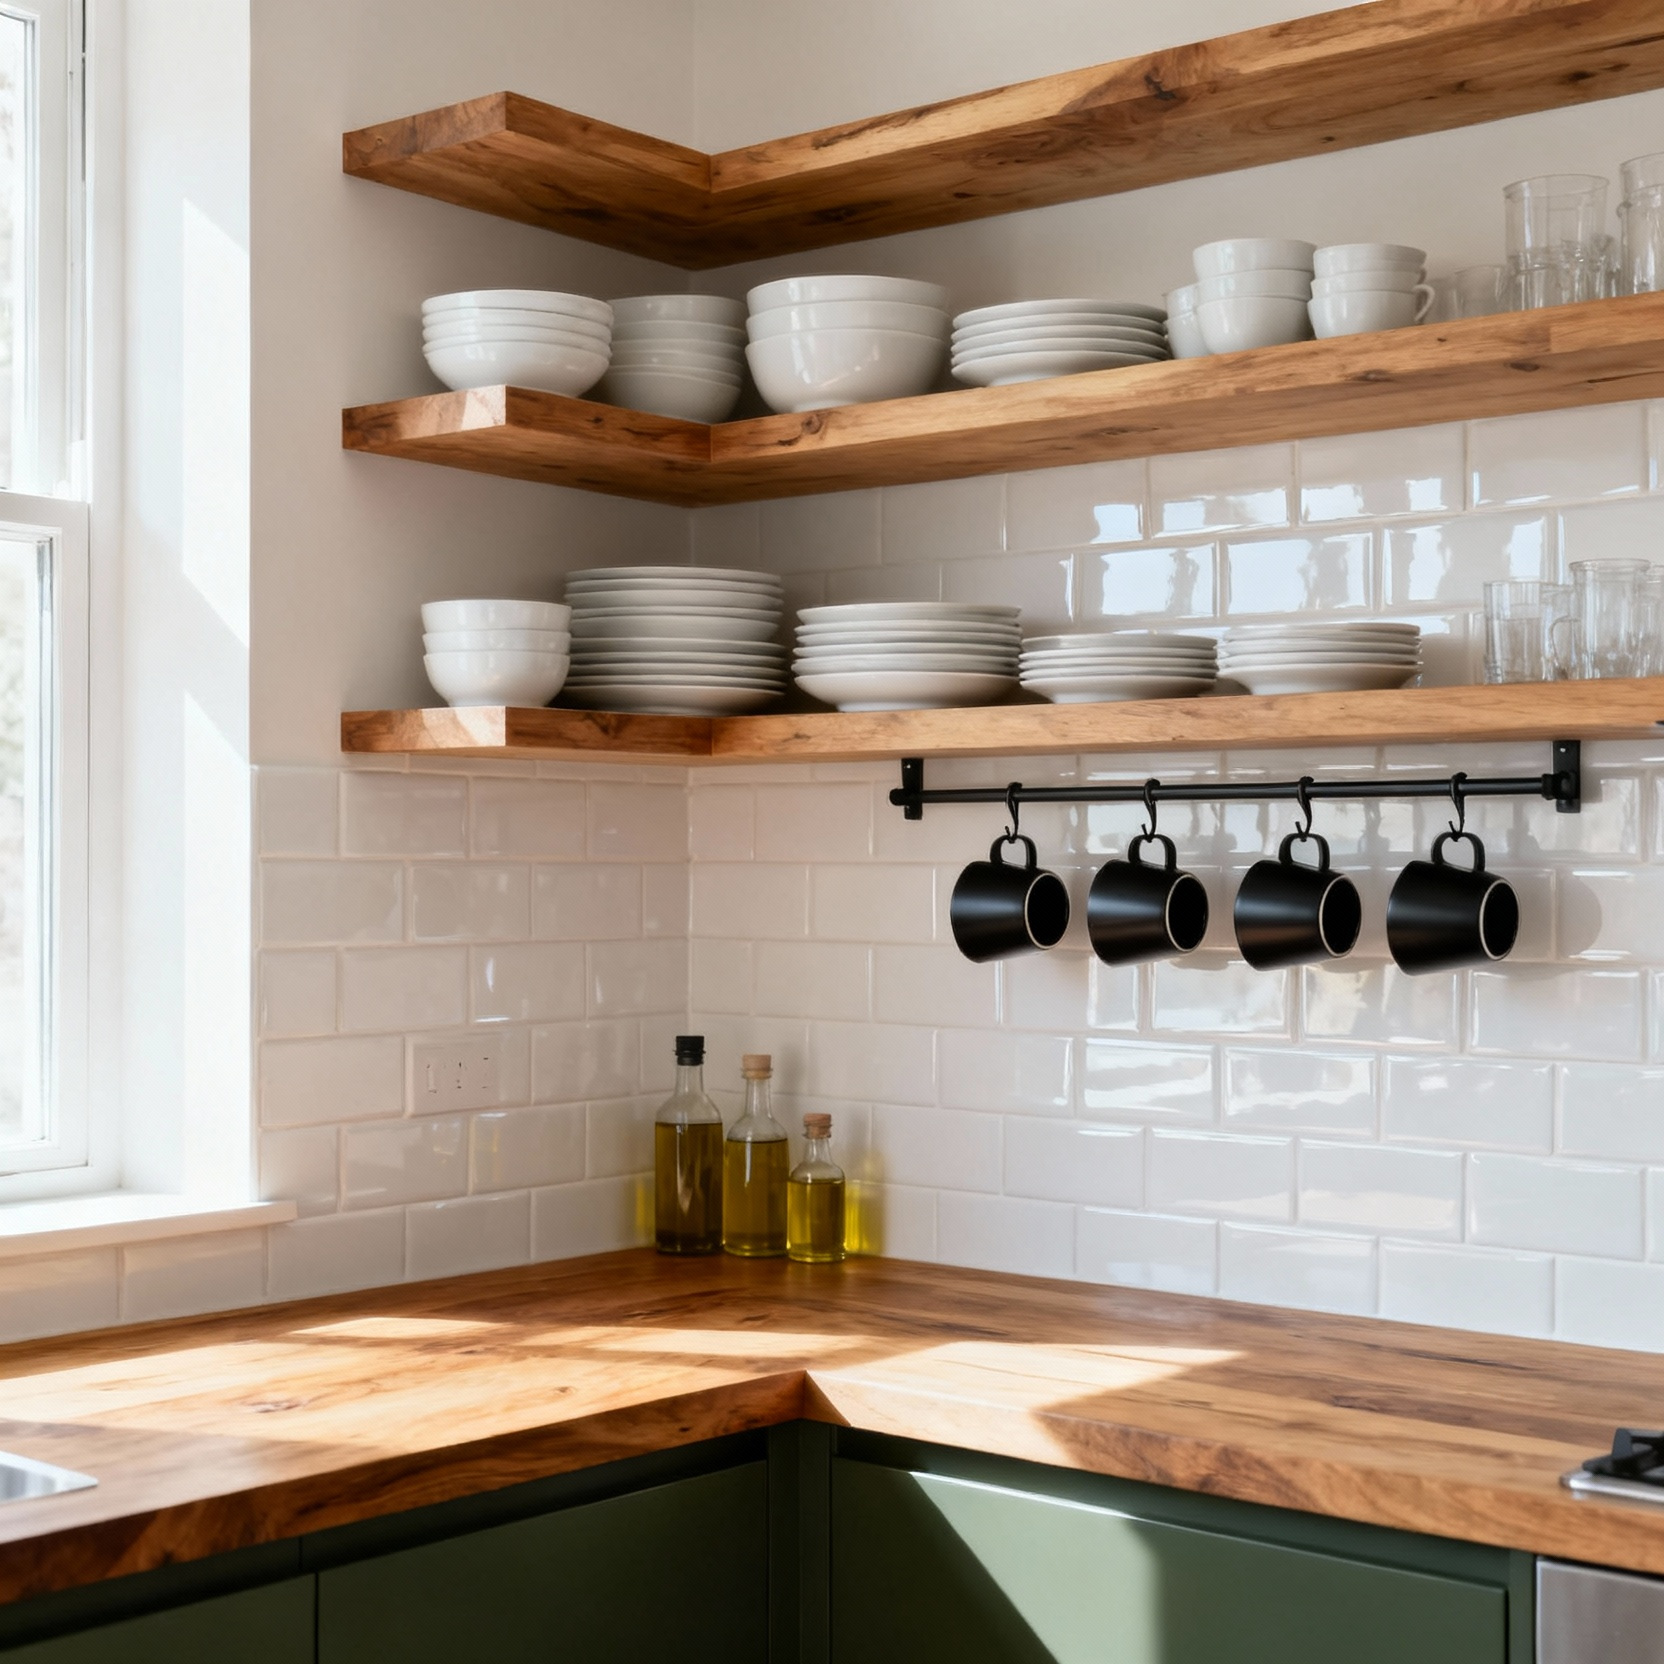
5. Corner-Wrap Methodology: Eliminating dead zones with continuous geometric lines
The “Corner-Wrap Methodology” addresses the notorious “black hole” found in L-shaped and U-shaped kitchens by prioritizing accessibility over raw cubic volume. For more clever kitchen corner solutions, read our comprehensive guide.
From a design perspective, the goal is to maintain a continuous line of usable storage rather than simply maximizing deep, dark space. Traditional 90-degree shelves often trap items in inaccessible recesses, rendering them useless. By accepting a slight reduction in total storage capacity, you gain a functional system where every item remains visible and within easy reach.
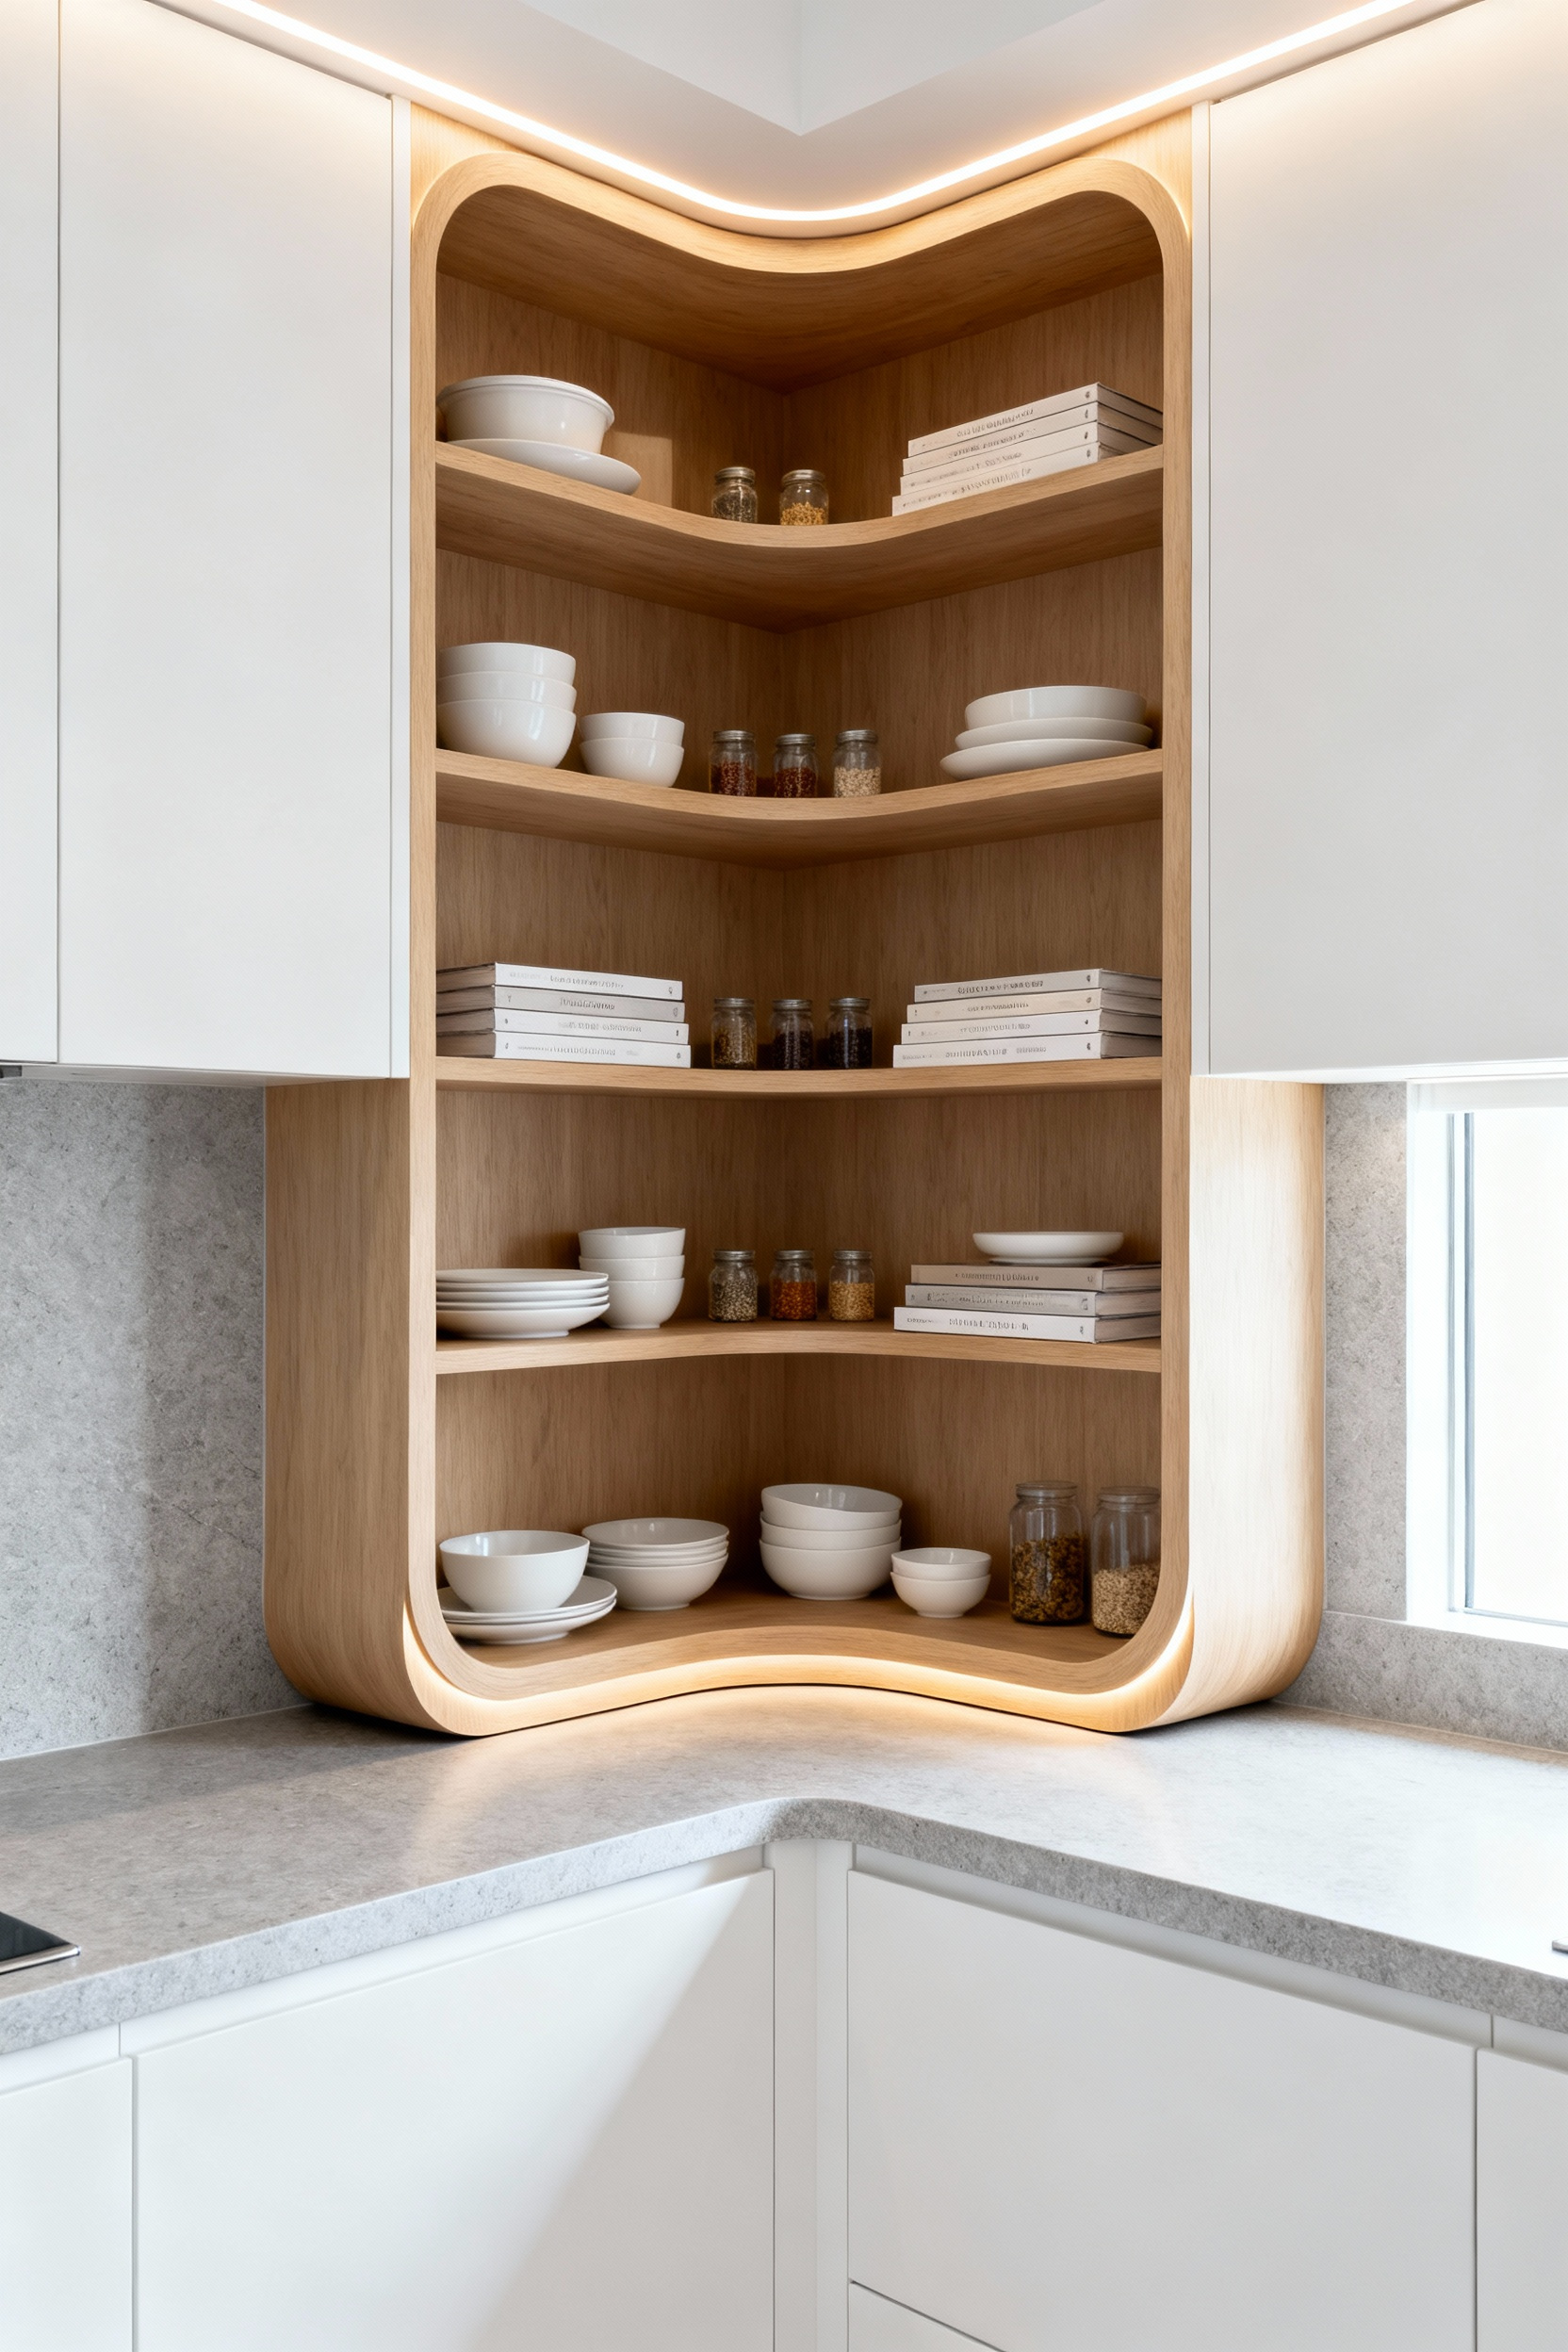
To achieve this fluid geometry, designers often employ mechanical pull-out systems or diagonal cabinetry. Articulated hardware, such as Magic Corners or Lemans systems, allows nested shelves to physically swing out of the cabinet structure. This motion wraps the contents around the bend, presenting them fully outside the cabinet for effortless retrieval. Alternatively, installing a 45-degree diagonal cabinet creates a softer visual transition. These units frequently accommodate rotating Super Susans, which eliminate the center pole obstruction and utilize the full internal geometry of the corner.
In some layouts, the most efficient solution involves “blocking off” the corner entirely with a filler panel. While this strategy seems counter-intuitive, it allows you to extend adjacent cabinet runs into wider, high-utility drawer banks. This approach effectively dissolves the deep corner dead zone and reallocates that space to neighboring walls. The result is a streamlined, continuous run of efficient storage that eliminates the need to dig through dark cabinet depths.
Phase 2: Materiality & Technical Specifications
Nothing disrupts the architectural lines of a kitchen faster than a bowing shelf. To ensure long-term stability, you must prioritize the material’s thickness relative to its span. For any shelf spanning 30 inches or more, specify a minimum thickness of 3/4-inch using solid lumber, veneer, or high-grade plywood. Avoid MDF or particleboard for these applications, as they lack the tensile strength to support heavy dish stacks without sagging over time.
Your material choice must also respond to the specific environmental conditions of each kitchen zone. In high-humidity areas near the sink or dishwasher, utilize moisture-resistant materials like polymer or Type 304 stainless steel, which offers superior corrosion resistance. Regardless of the location, opt for smooth, non-porous surfaces like polished wood or laminate. These finishes are easier to wipe clean of dust and grease compared to raw or vented options, maximizing hygiene and minimizing maintenance efforts.
Finally, balance structural requirements with the room’s visual warmth. Current trends favor a softer, organic aesthetic, often achieved by specifying natural materials like white oak, ash, or walnut paired with sleek, matte metal hardware. However, before committing to a finish, calculate your required load capacity. Estimate the maximum weight of your intended storage—whether it is heavy canned goods or stacks of ceramic plates—and verify that your chosen wood species and mounting system are rated to safely handle that specific load.
6. Heavy-Gauge Steel & Glass: Mixing industrial strength with visual transparency
Pairing heavy-gauge steel with glass creates a striking balance between raw strength and visual lightness. This combination anchors a room without overwhelming it, making it the definitive choice for Modern Industrial or French Bistro aesthetics.
Unlike solid wood or metal shelving that blocks sightlines, the transparency of glass allows natural and artificial light to pass through the entire unit. This eliminates dark shadows and prevents the structural steel frame from making the kitchen feel claustrophobic, a crucial advantage in smaller or darker spaces.
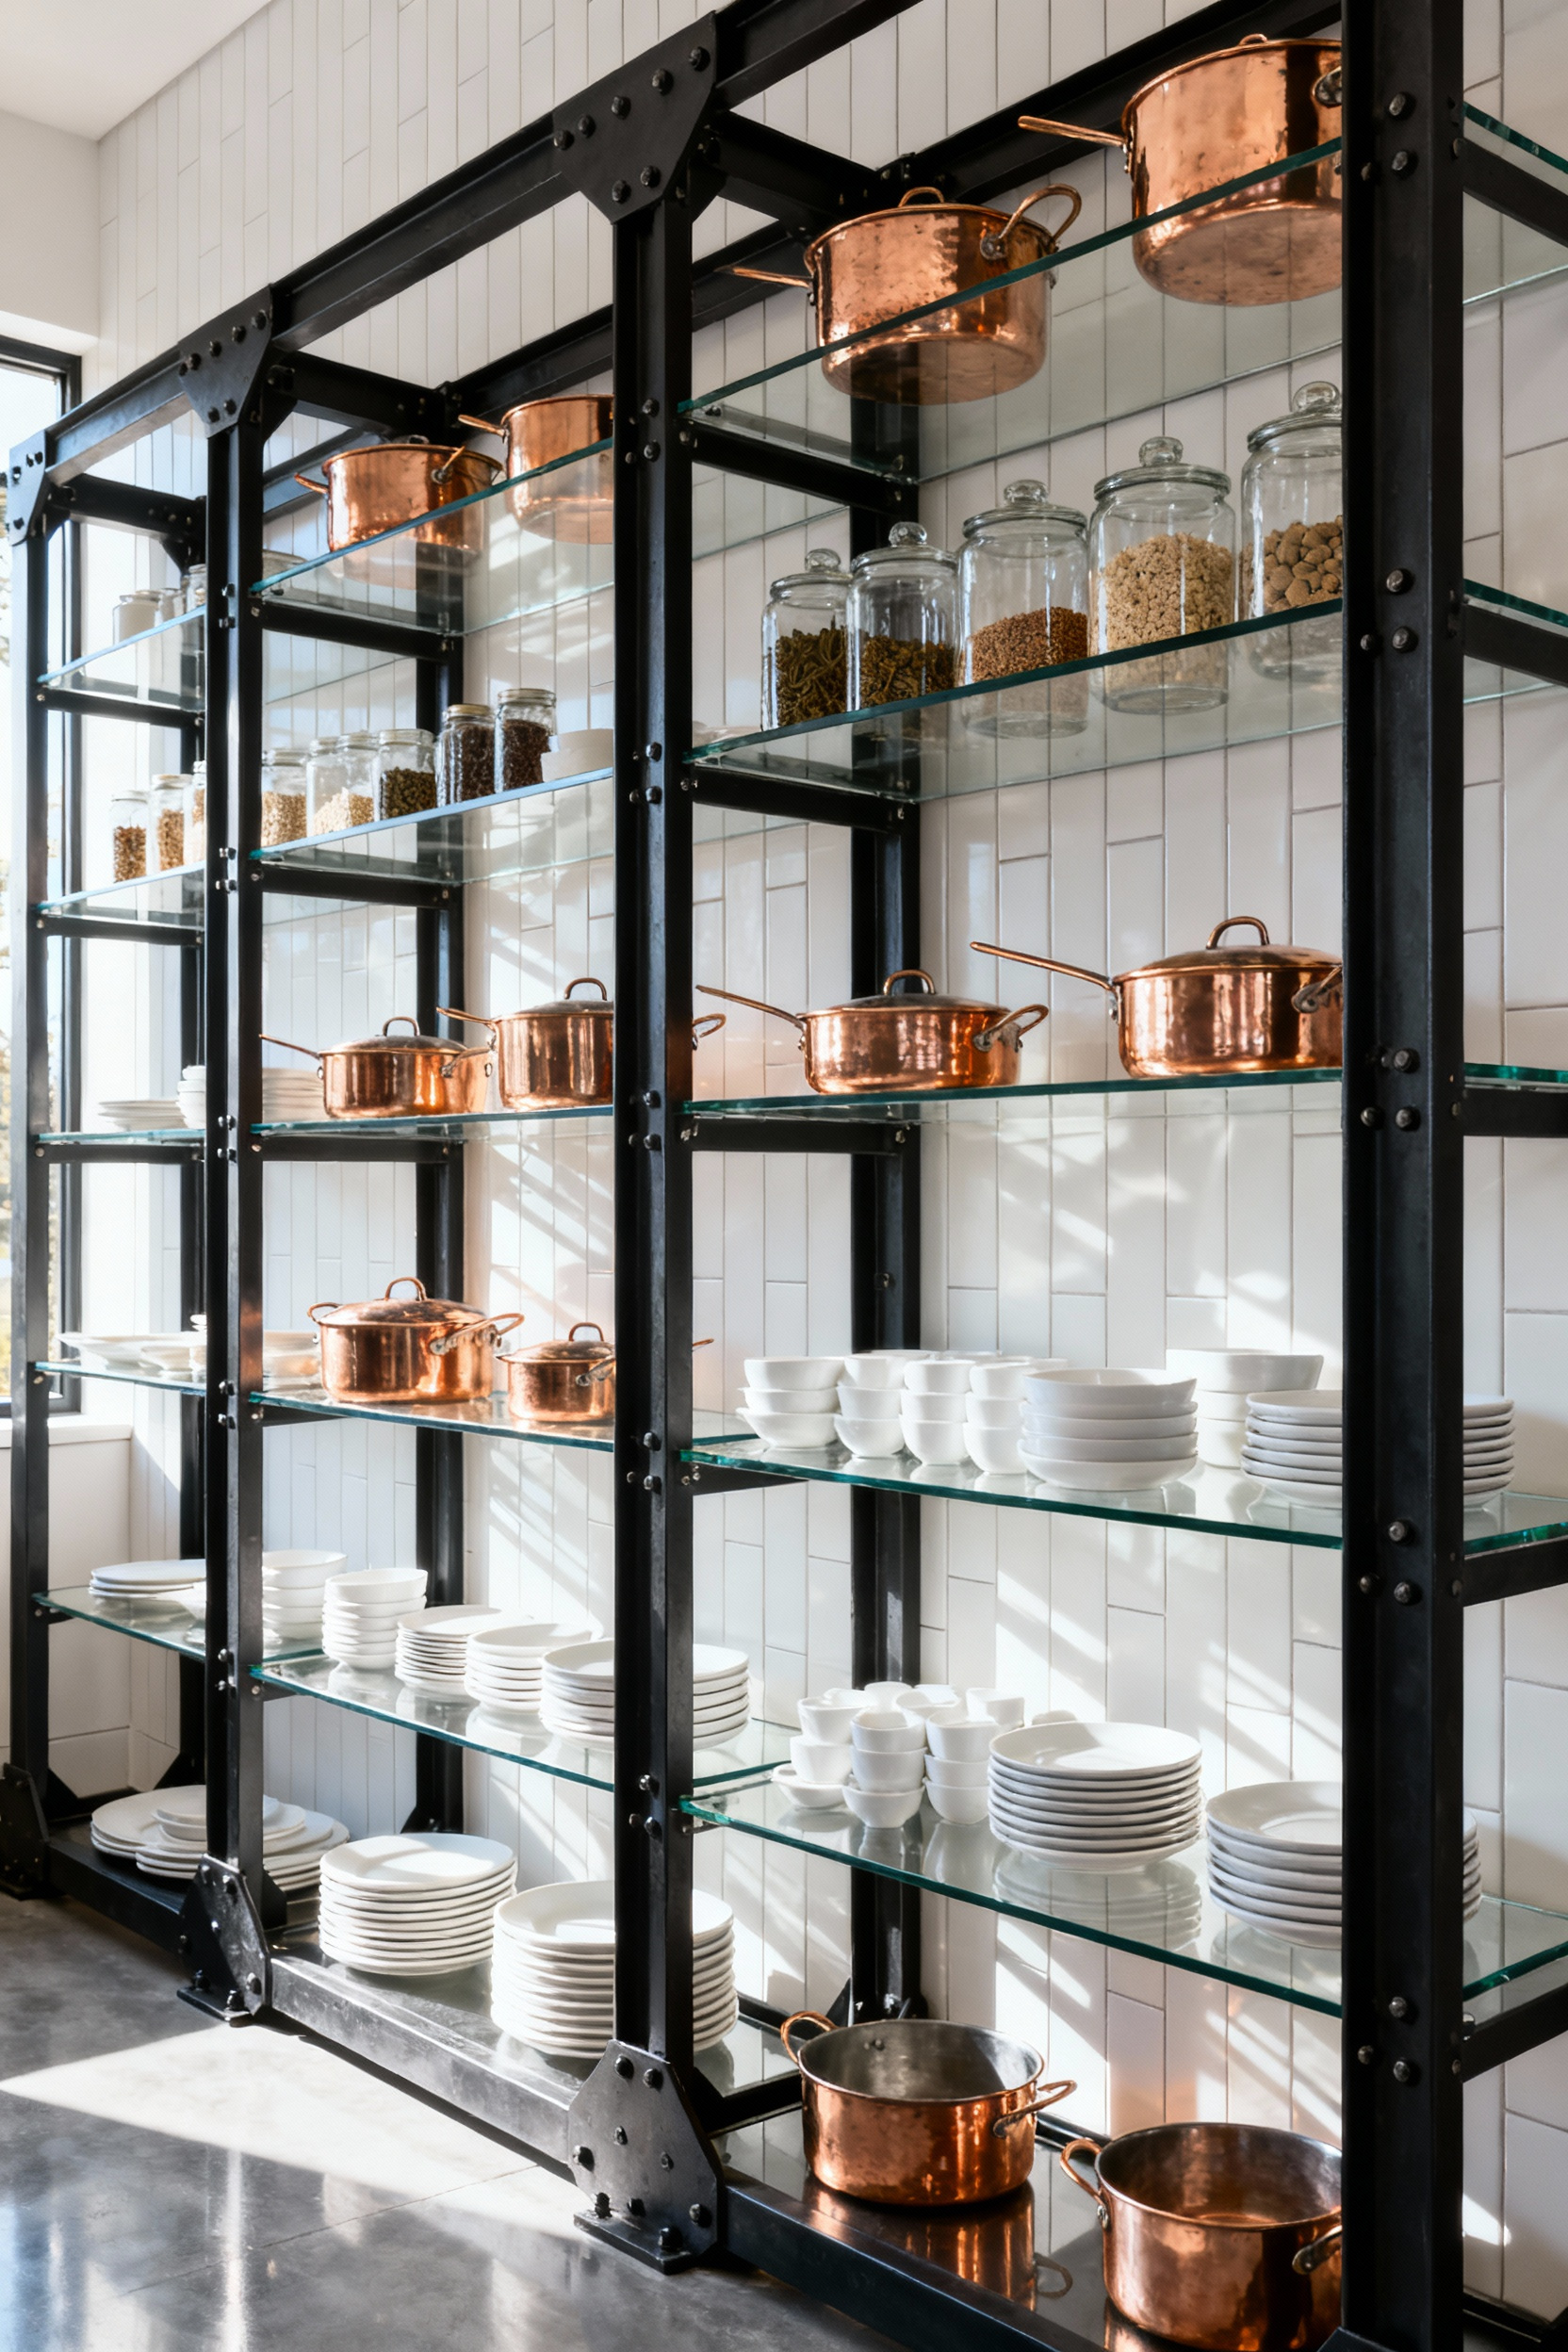
While the aesthetic is refined, the materials must be robust enough for daily use. You should specify thick, tempered glass rather than standard glazing. Tempered glass provides up to four times the strength of regular glass, ensuring the shelves can securely hold stacks of heavy dinnerware and barware. This pairing also offers commercial-grade maintenance benefits; both stainless steel and glass are non-porous and resistant to heat and moisture. Homeowners can simply wipe down surfaces with standard cleaners without worrying about warping or corrosion.
To maximize the visual impact, treat the shelving unit as a lighting feature. A current design trend involves installing discreet LED strip lighting beneath the steel frame or directly under the glass. Because the shelves are permeable, the light shines through them to illuminate your curated items from top to bottom. This technique not only highlights your display but also amplifies the transparency of the system, keeping the kitchen bright and open.
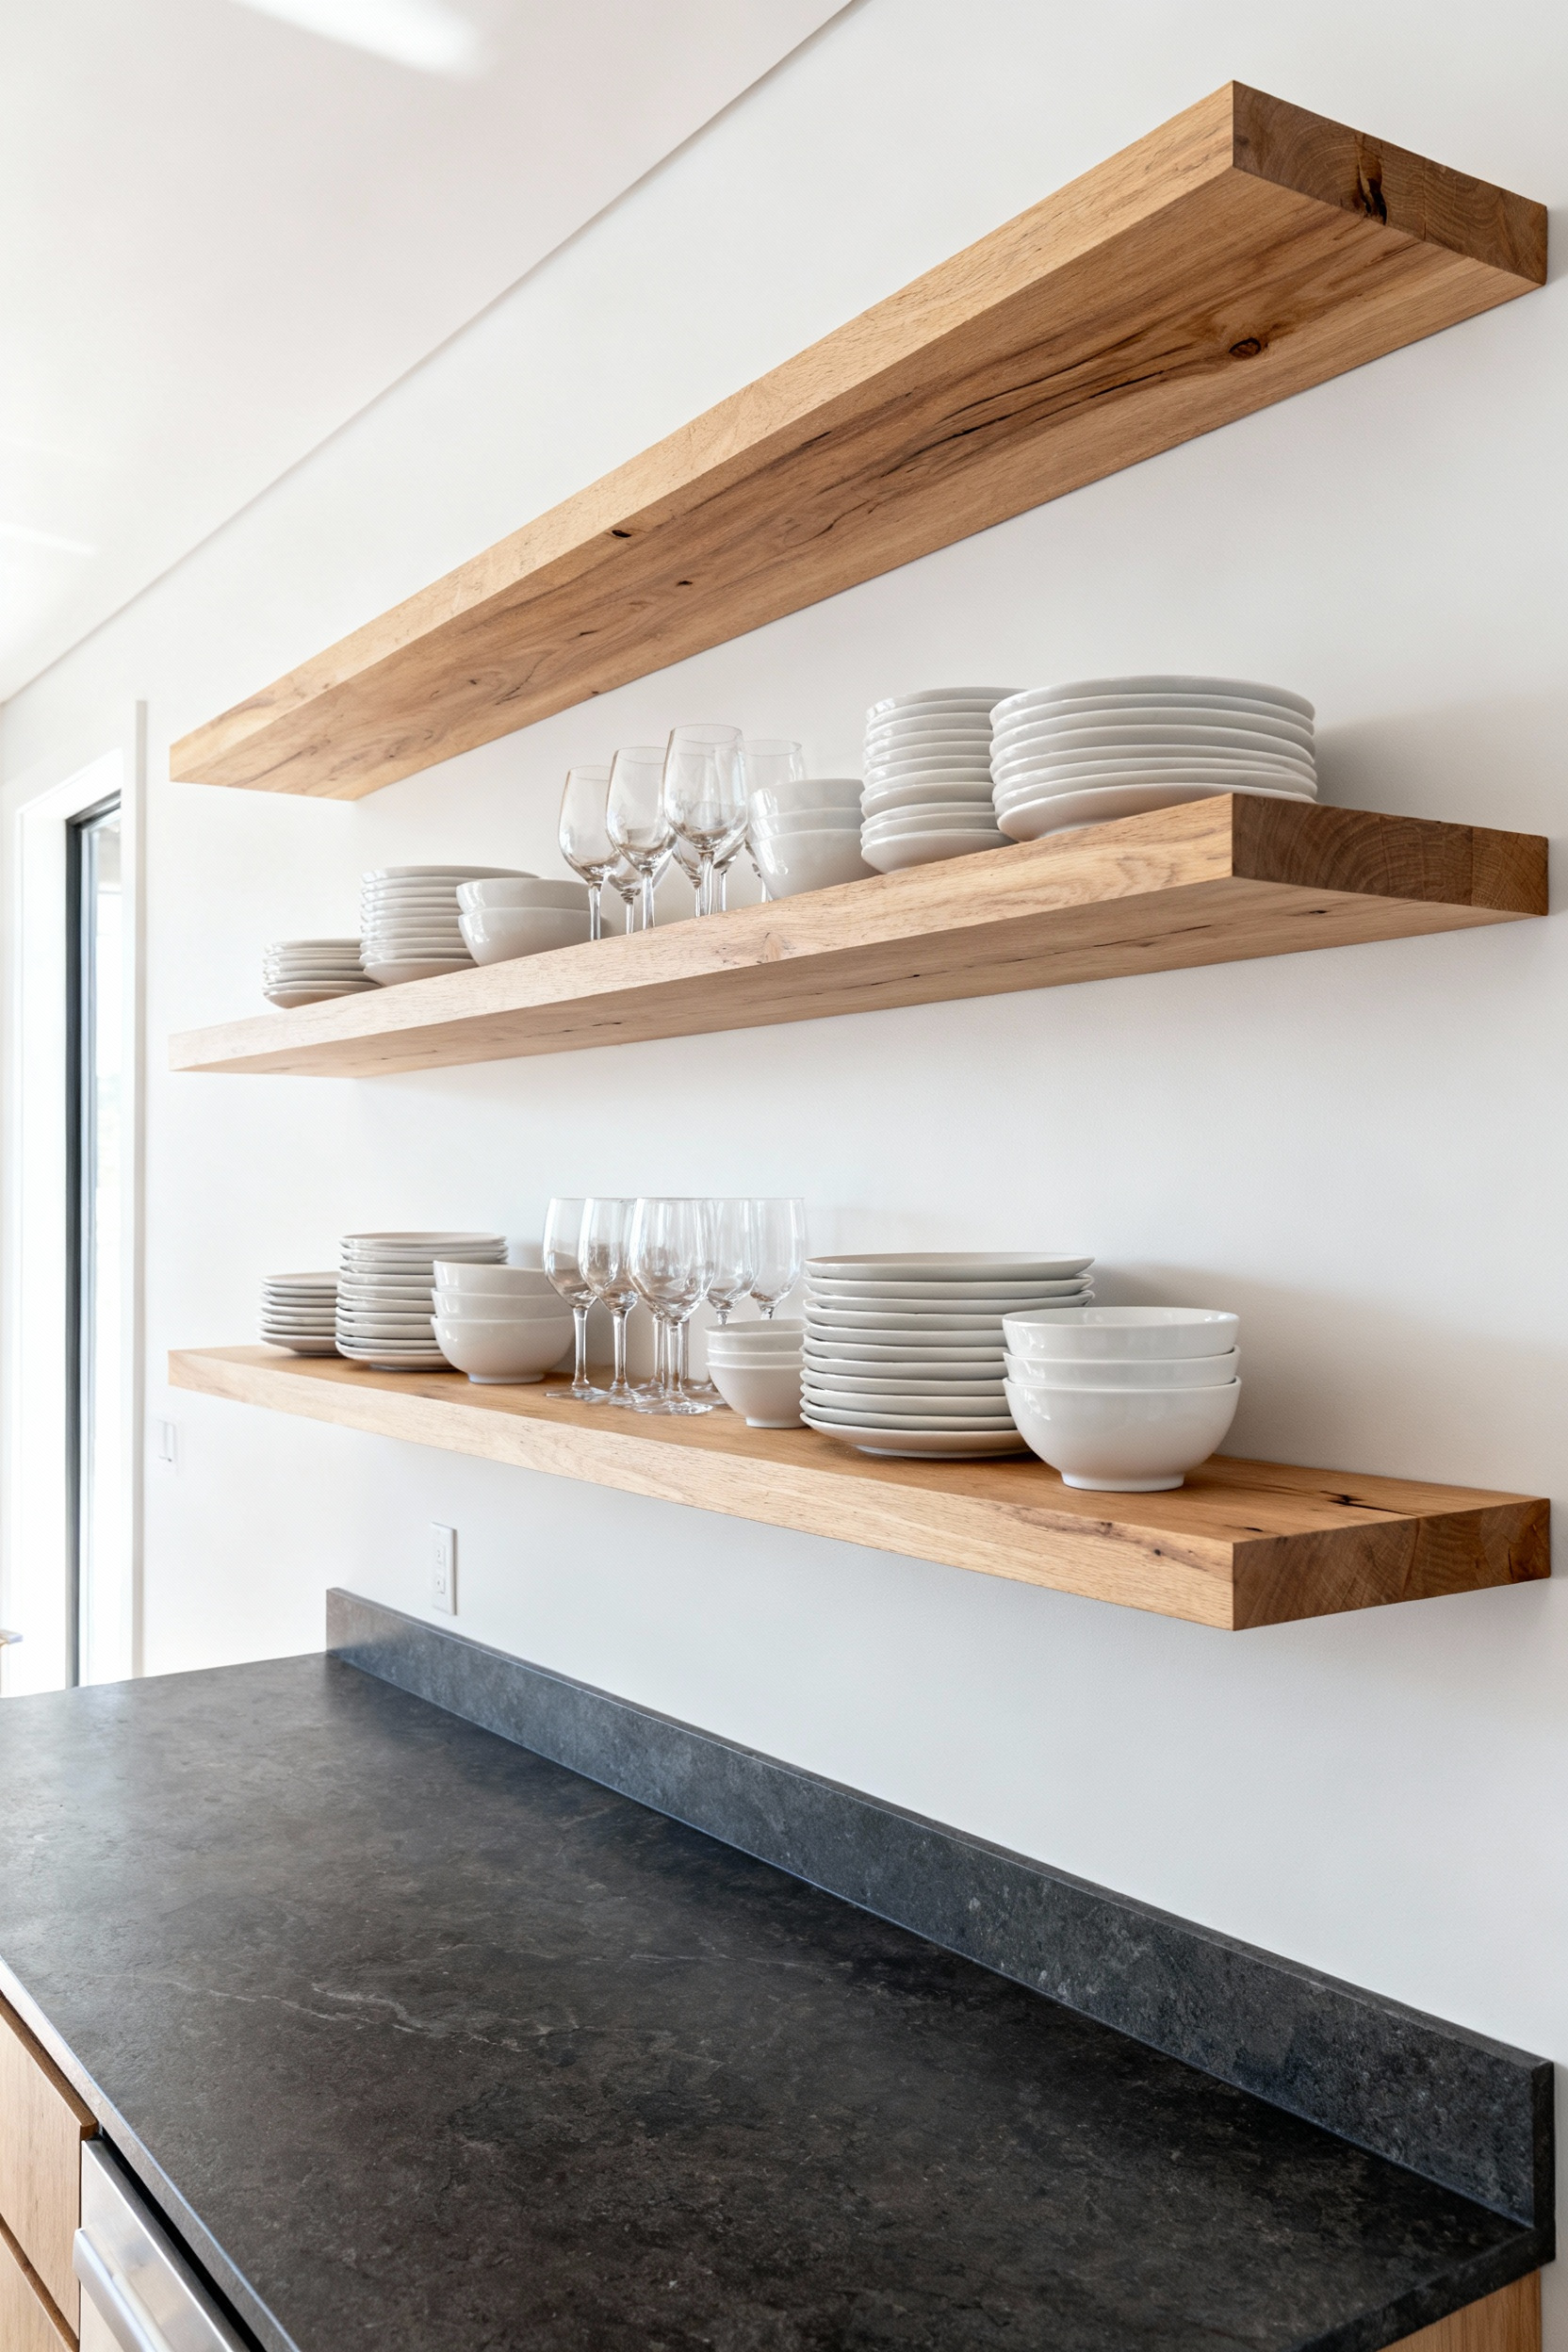
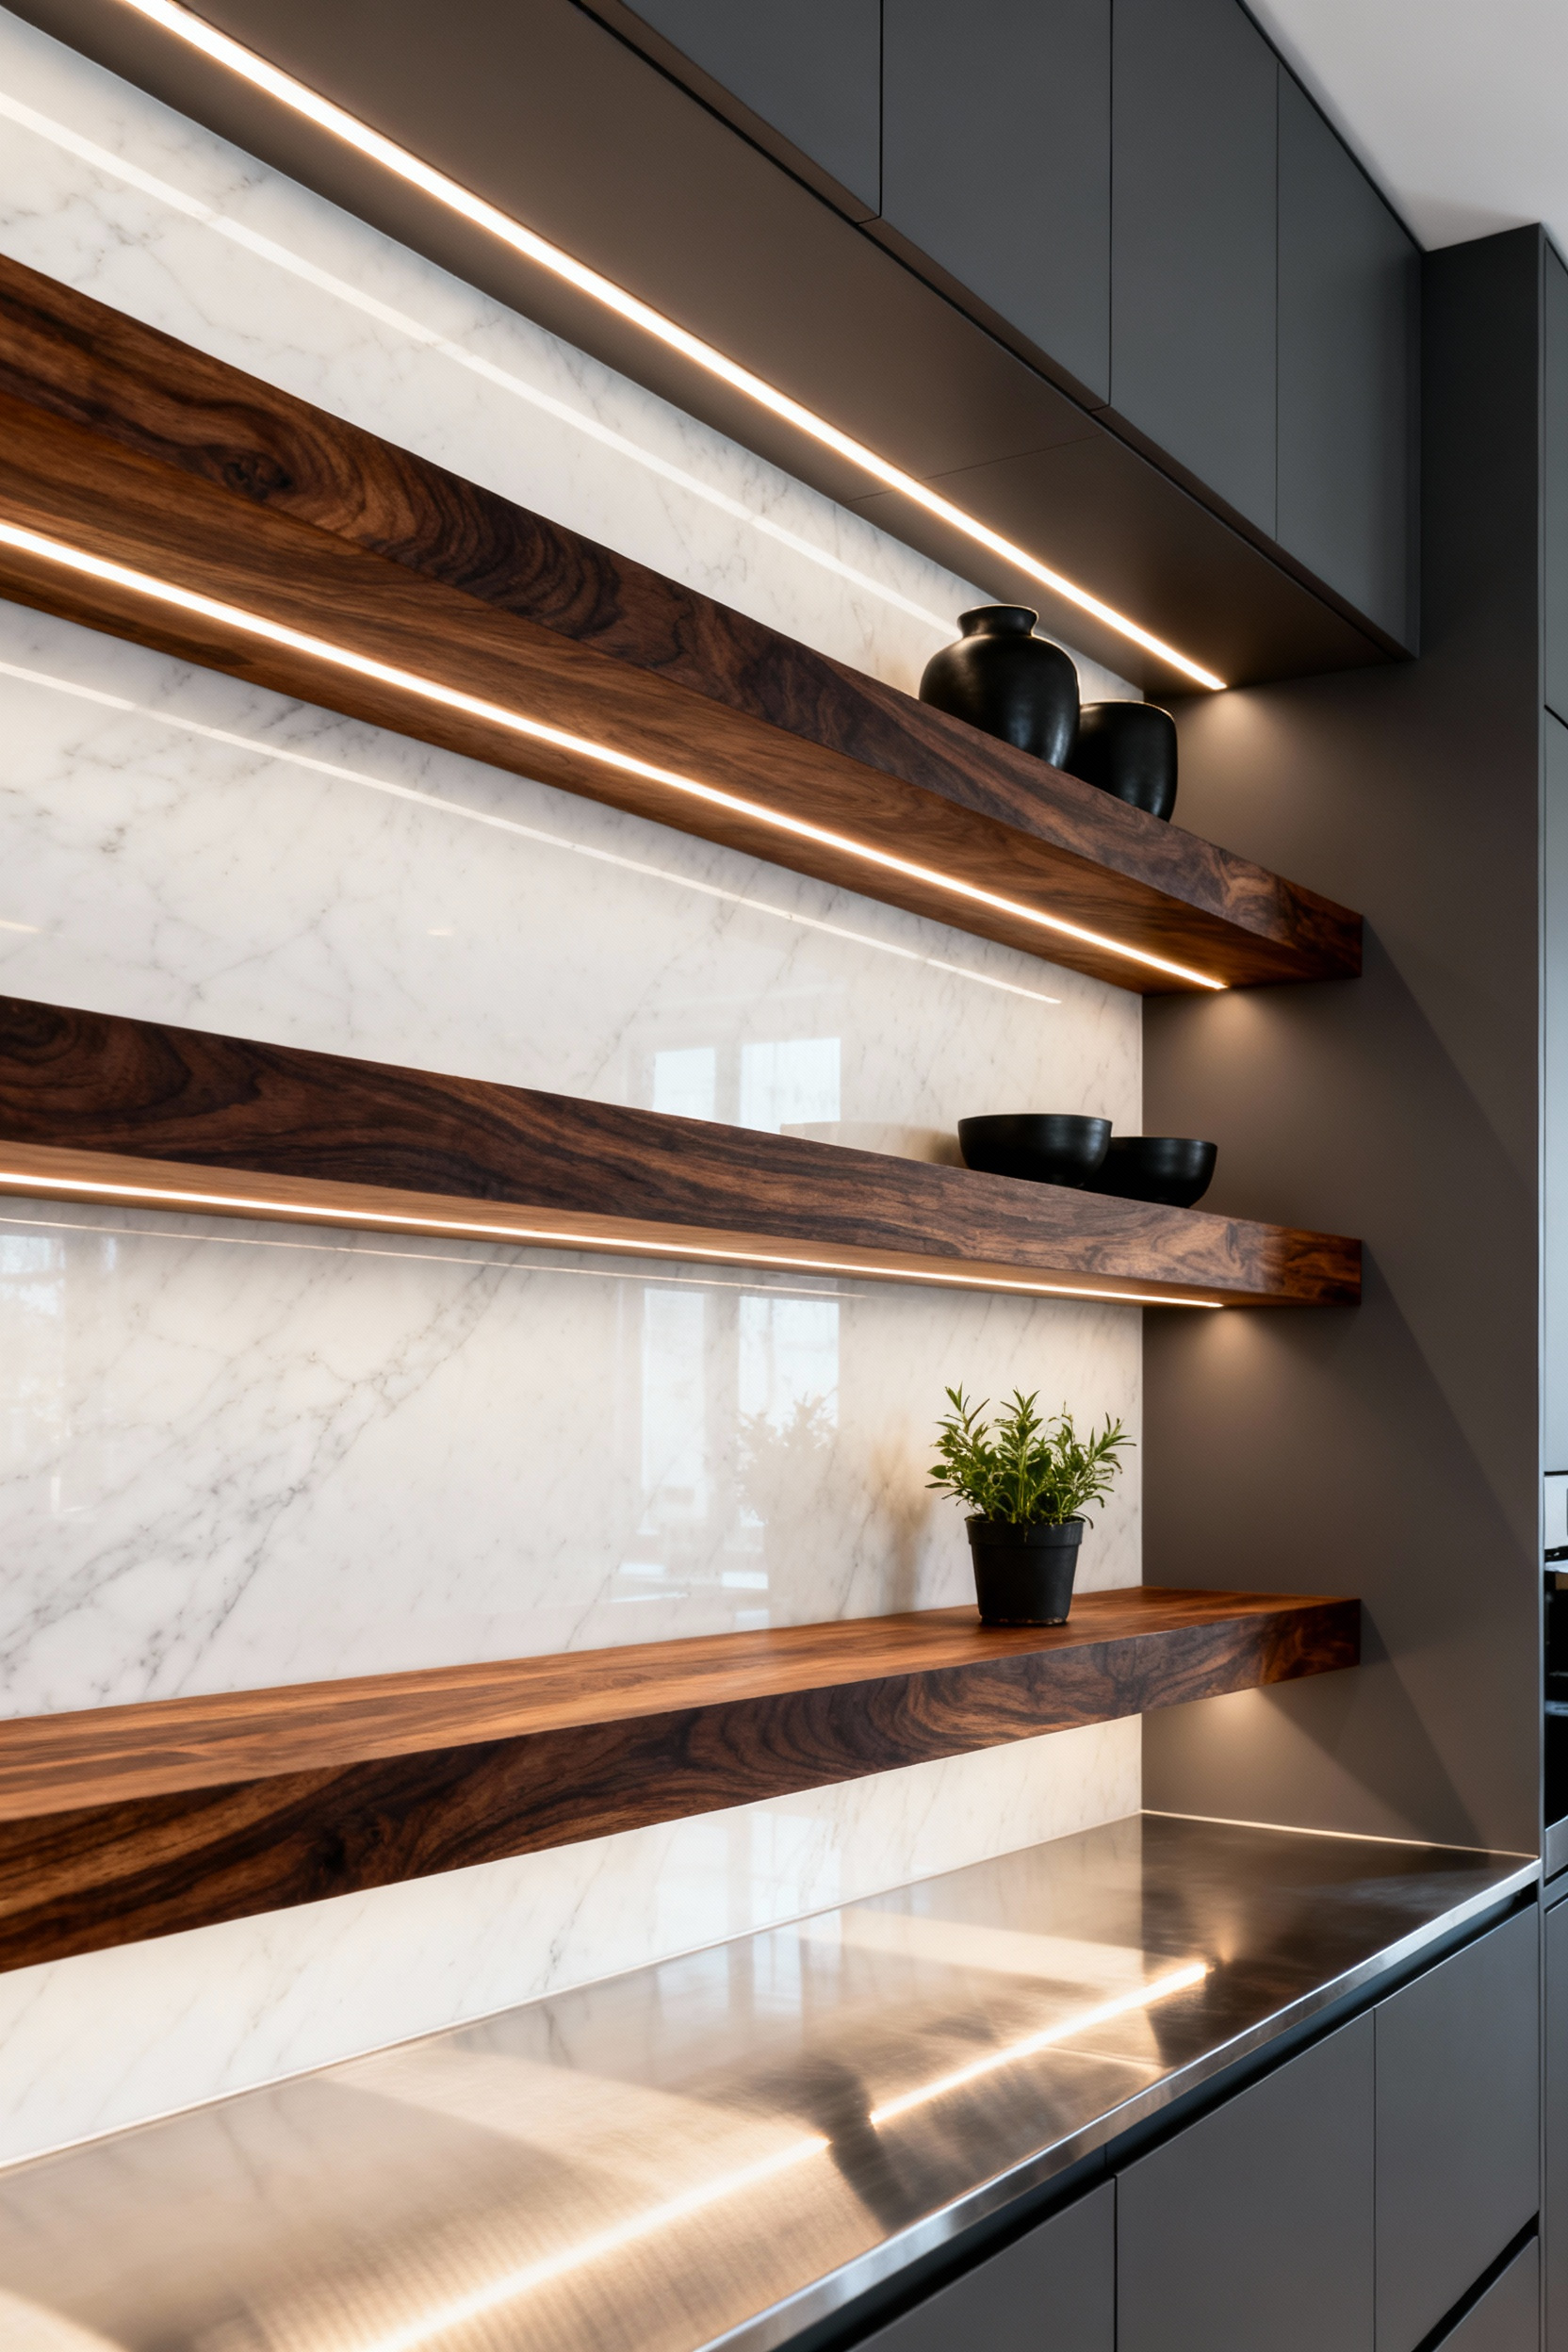
7. Live-Edge Integration: Balancing modern lines with organic architectural elements
Integrating a live-edge slab creates a balanced, organic modern aesthetic that softens the clean, geometric lines typically found in contemporary kitchens. To maximize this visual contrast, place the shelves against a backdrop of stark, flat-panel, or handleless cabinetry. The choice of timber is critical for setting the mood; select rich Walnut to introduce warmth against cool, white, or gray palettes, or choose lighter woods like Maple or Oak to foster a serene, minimalist feel.
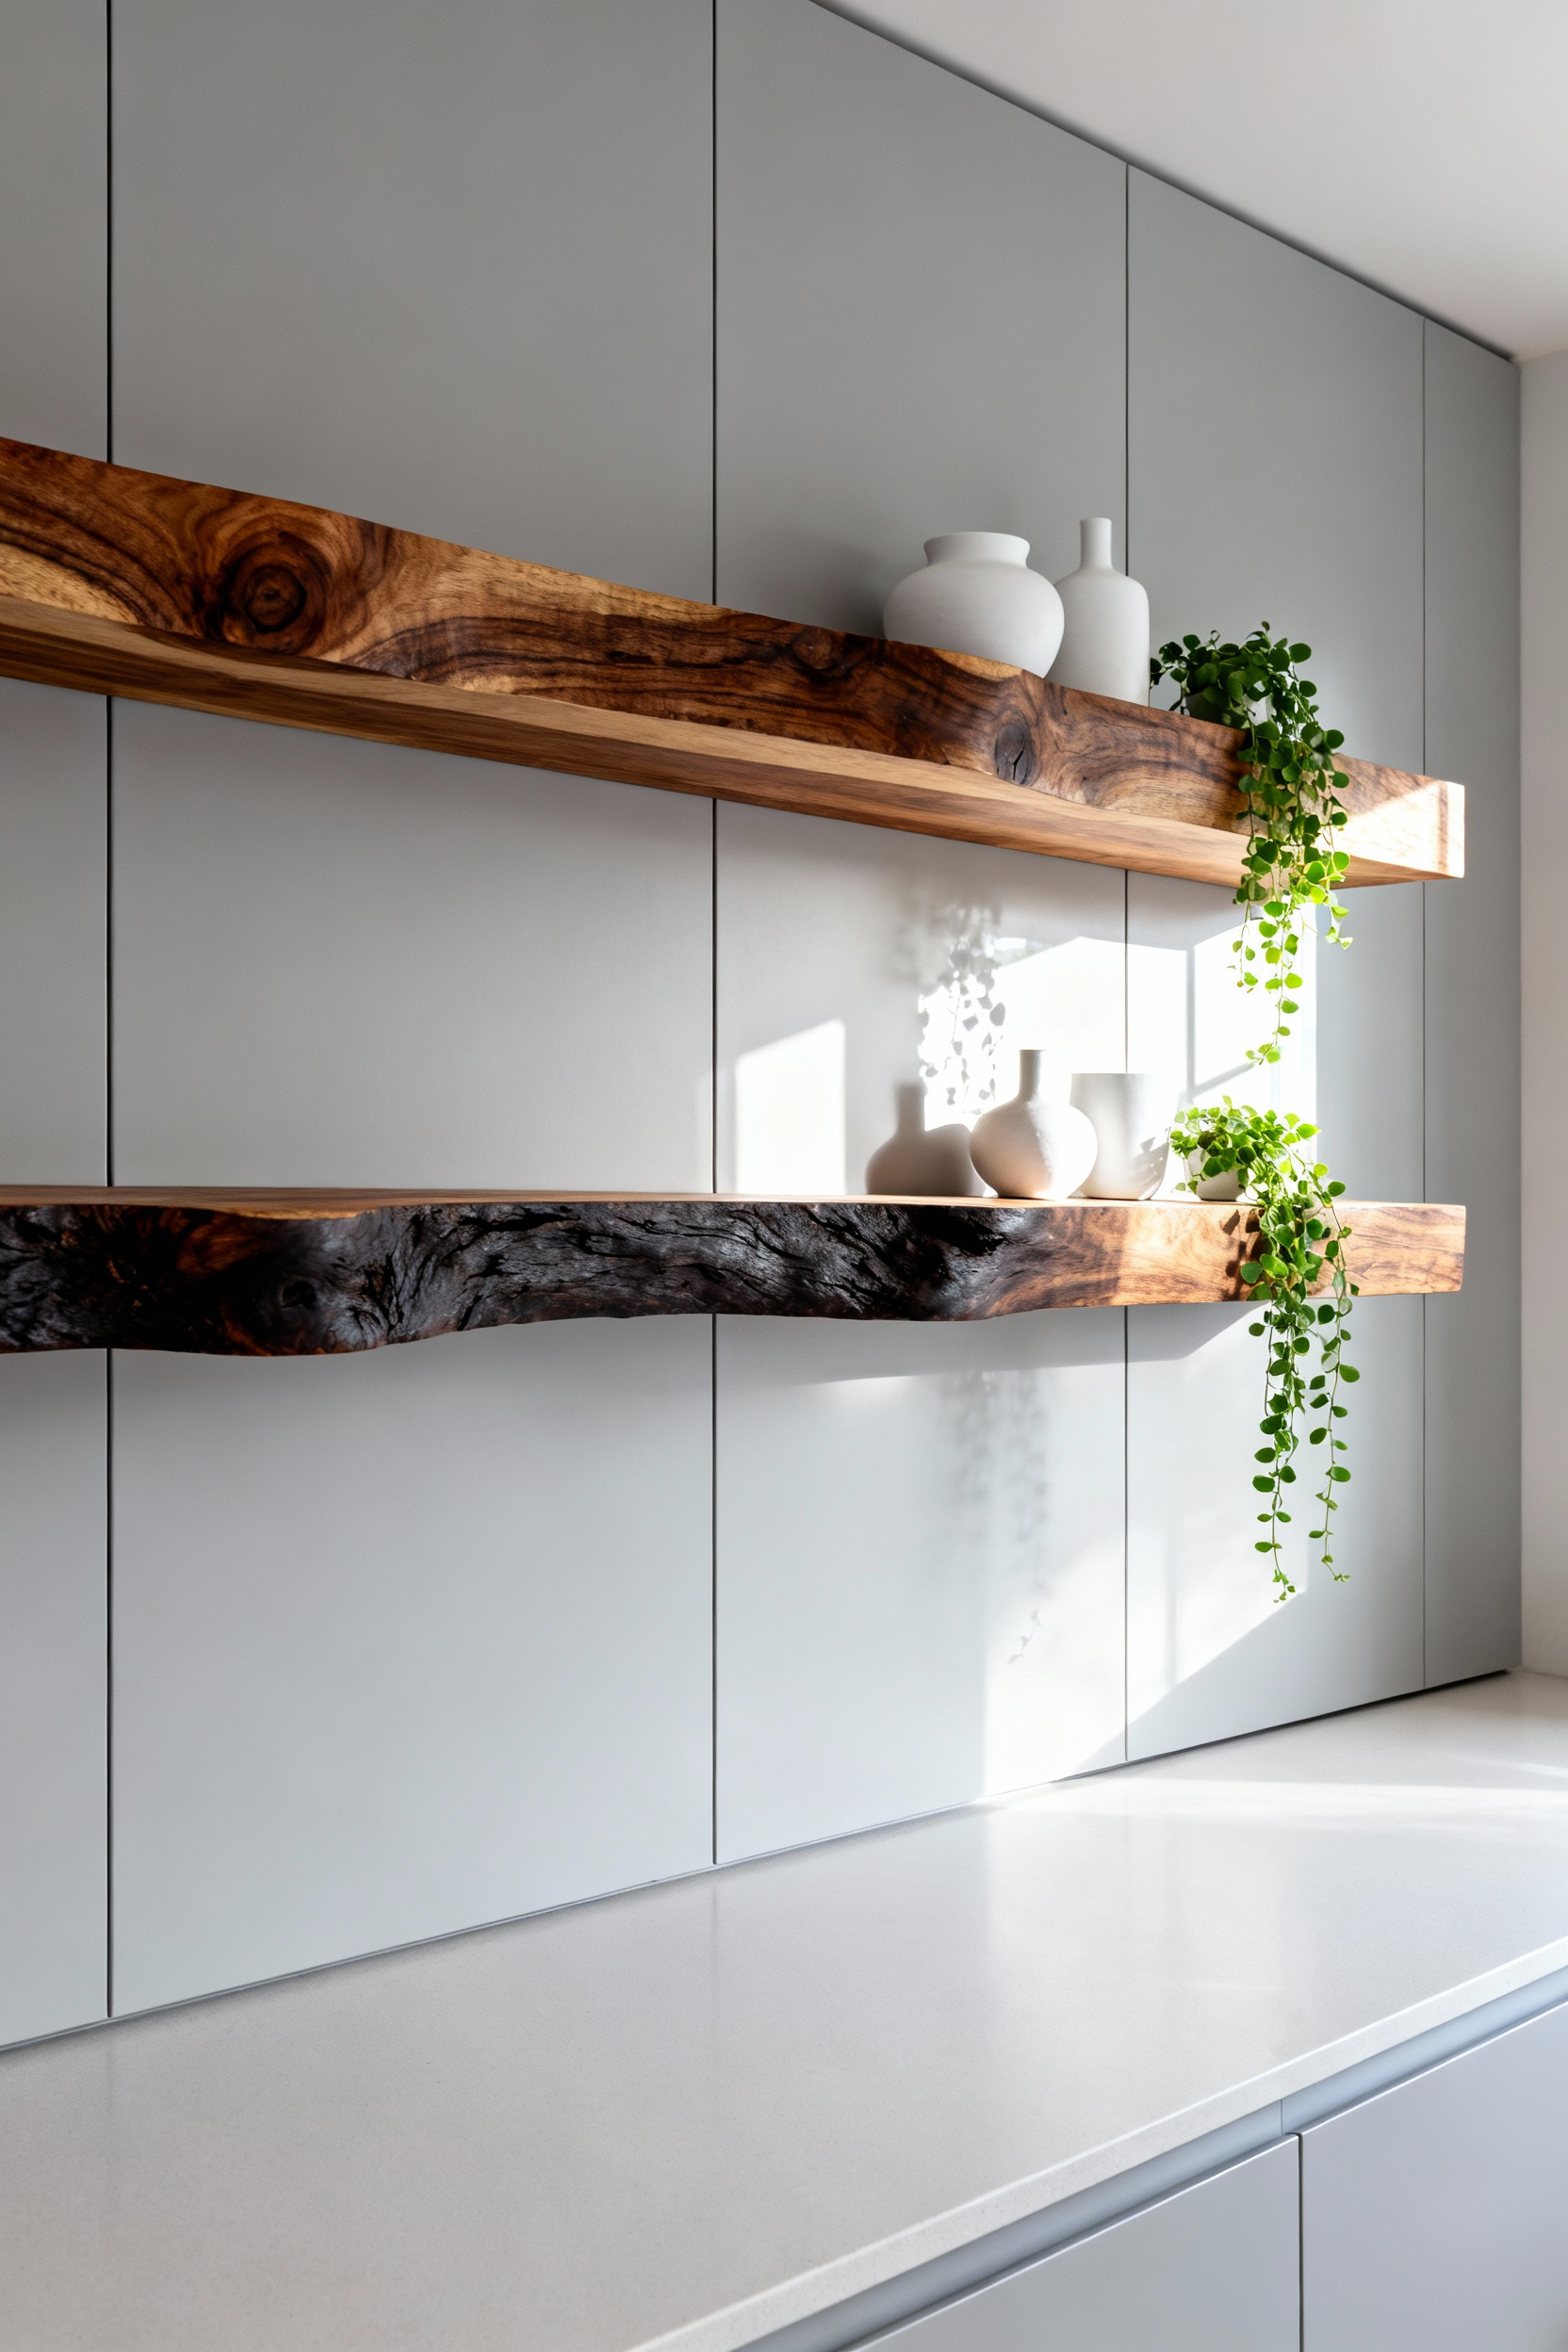
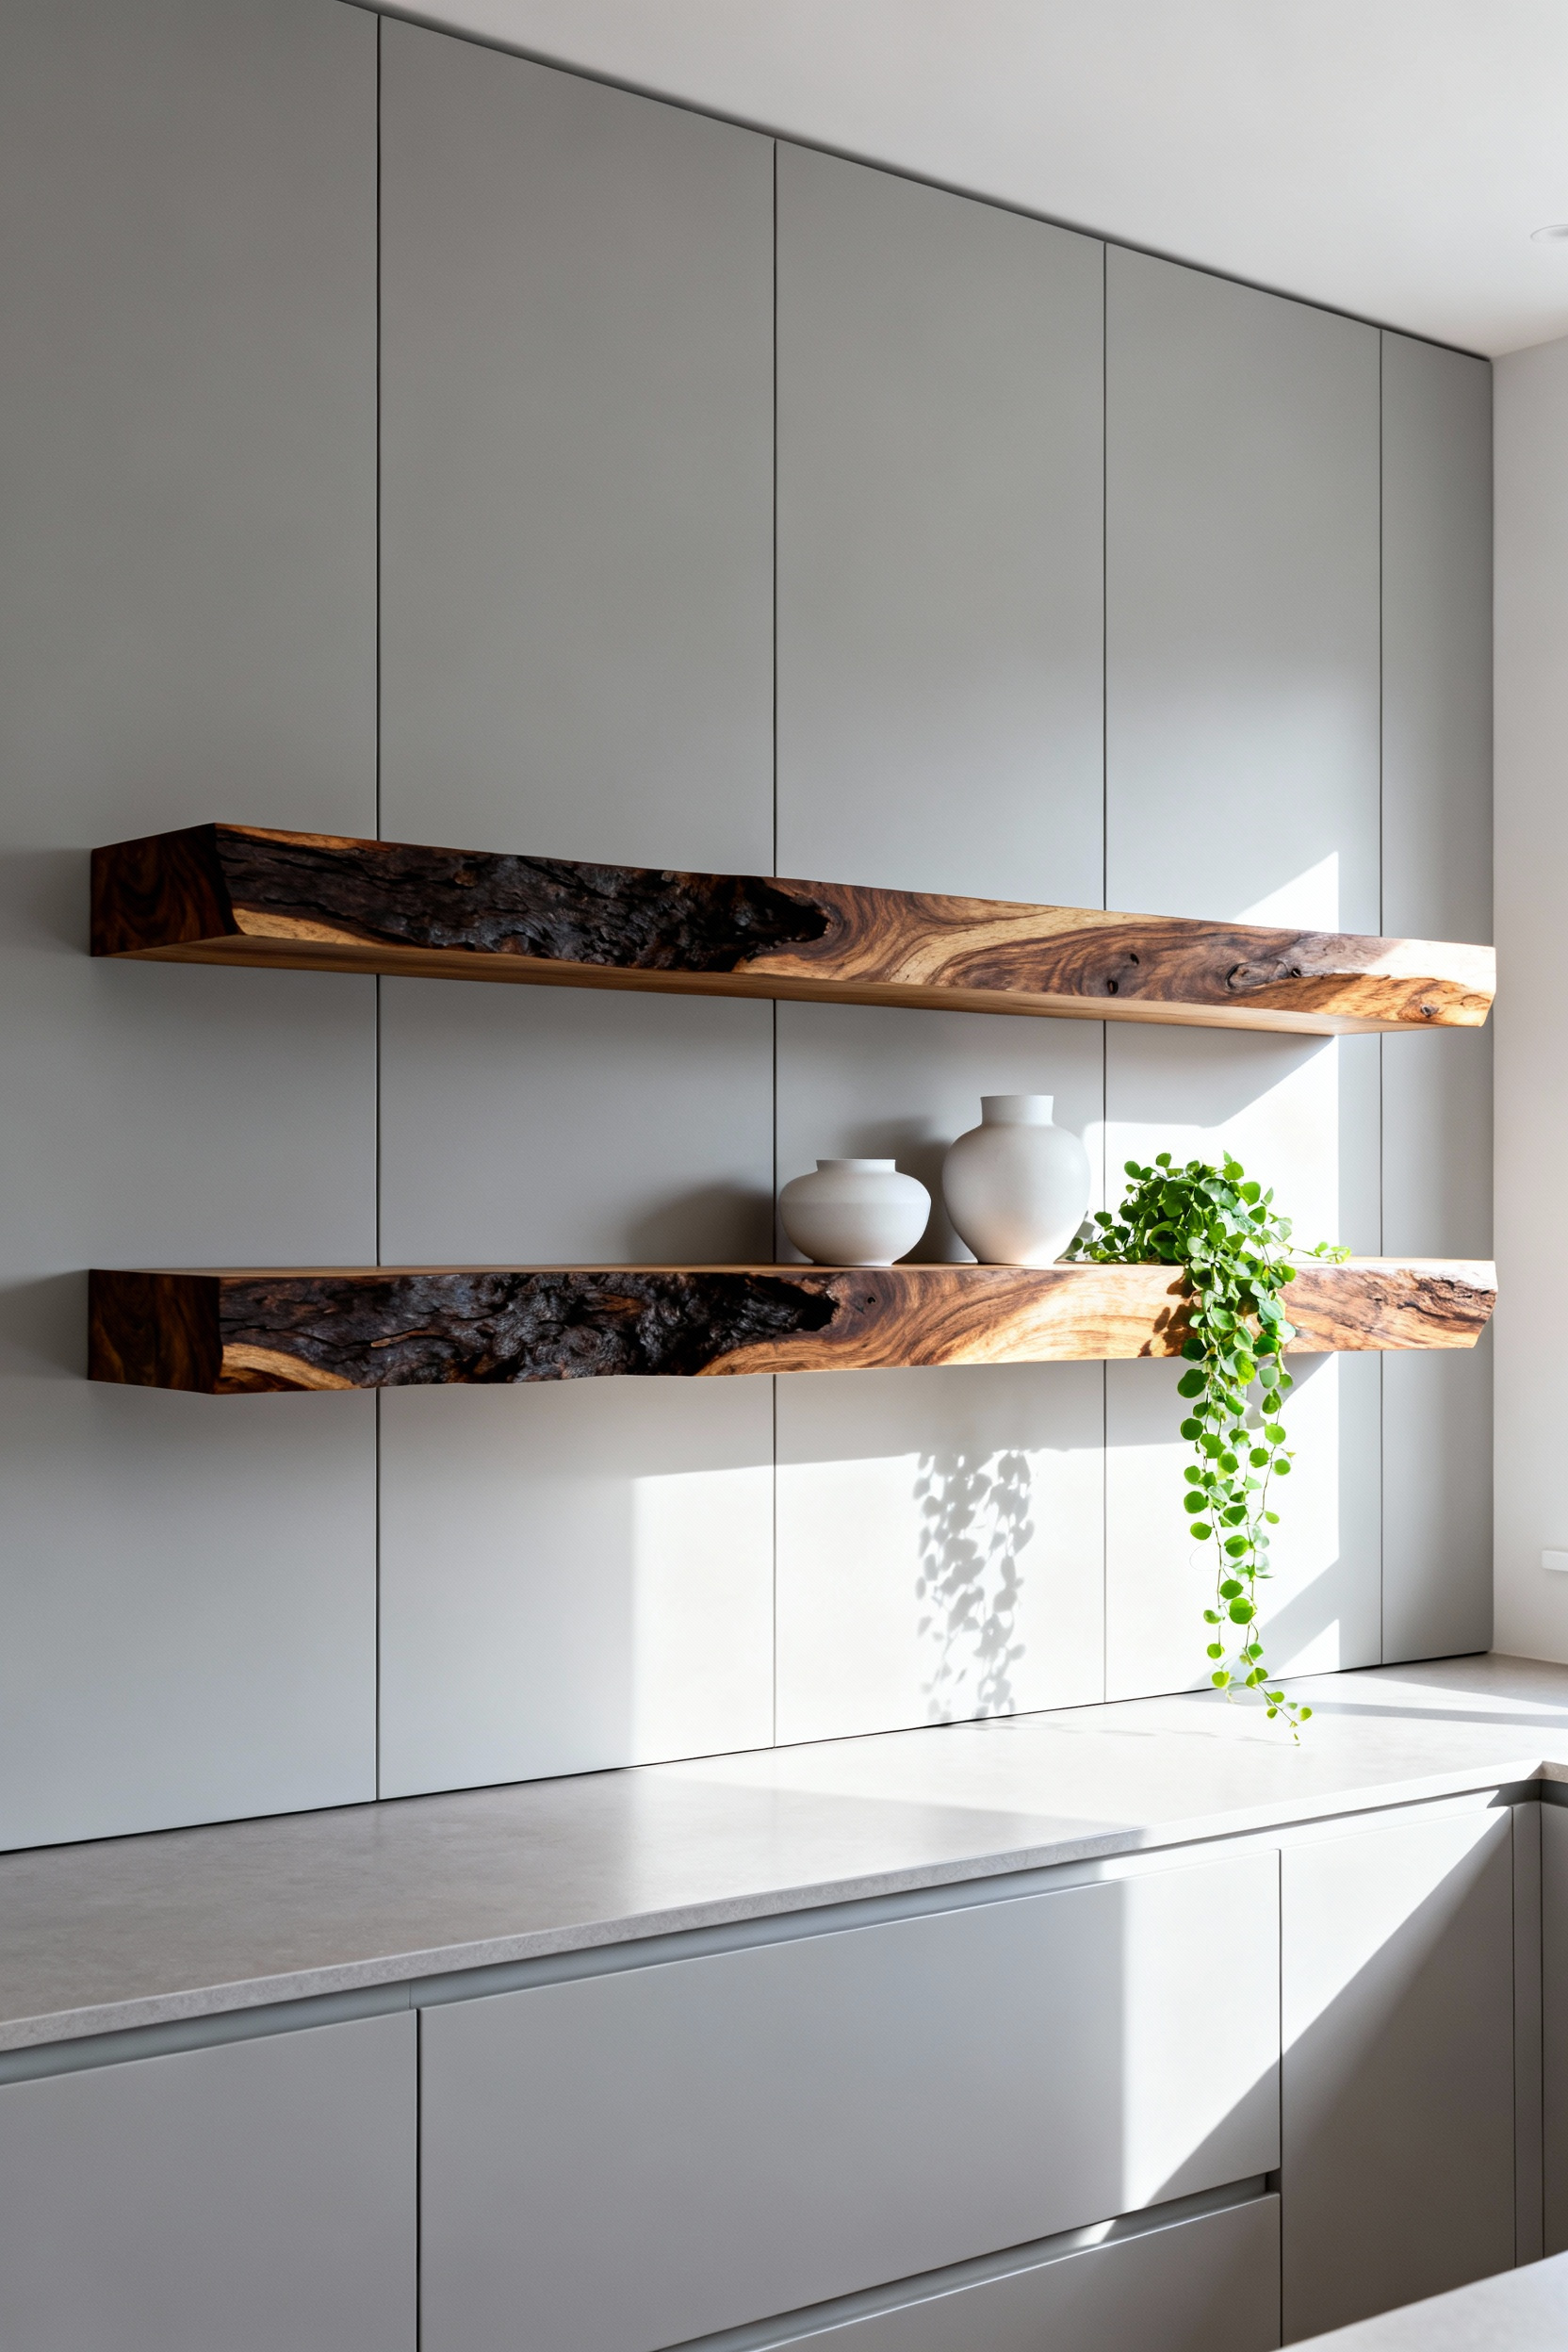
Successful integration relies on unobtrusive hardware and lighting that allow the material to speak for itself. Opt for hidden floating shelf brackets or minimalist supports in thin, matte-black metal. This approach reinforces the modern aesthetic and ensures the organic edge remains the focal point. To elevate the architectural impact, install discreet LED strip lighting underneath the slab. This creates a warm, ethereal glow that highlights the natural grain while adding a sophisticated, contemporary element to the room.
Finish the design by curating display items that lean modern rather than rustic. The goal is architectural balance, not a cabin aesthetic. Use sleek, smooth objects like glass jars, modern ceramic vessels, or metal canisters. These geometric shapes contrast effectively with the wood’s raw, undulating texture, completing the bridge between organic warmth and modern precision.
8. High-Load Capacity Anchoring: Technical solutions for storing cast iron and ceramics
When displaying heavy cast iron collections or stacks of ceramics, drywall anchors are never an acceptable solution. You must anchor shelving brackets directly into the wall studs to ensure safety and structural integrity.
Use heavy-duty structural screws or lag bolts rather than standard wood screws to achieve a secure hold into the framing. A pair of high-quality brackets can support anywhere from 150 to 1,000 pounds, but this load rating remains theoretical unless the hardware connects firmly to the wooden studs.
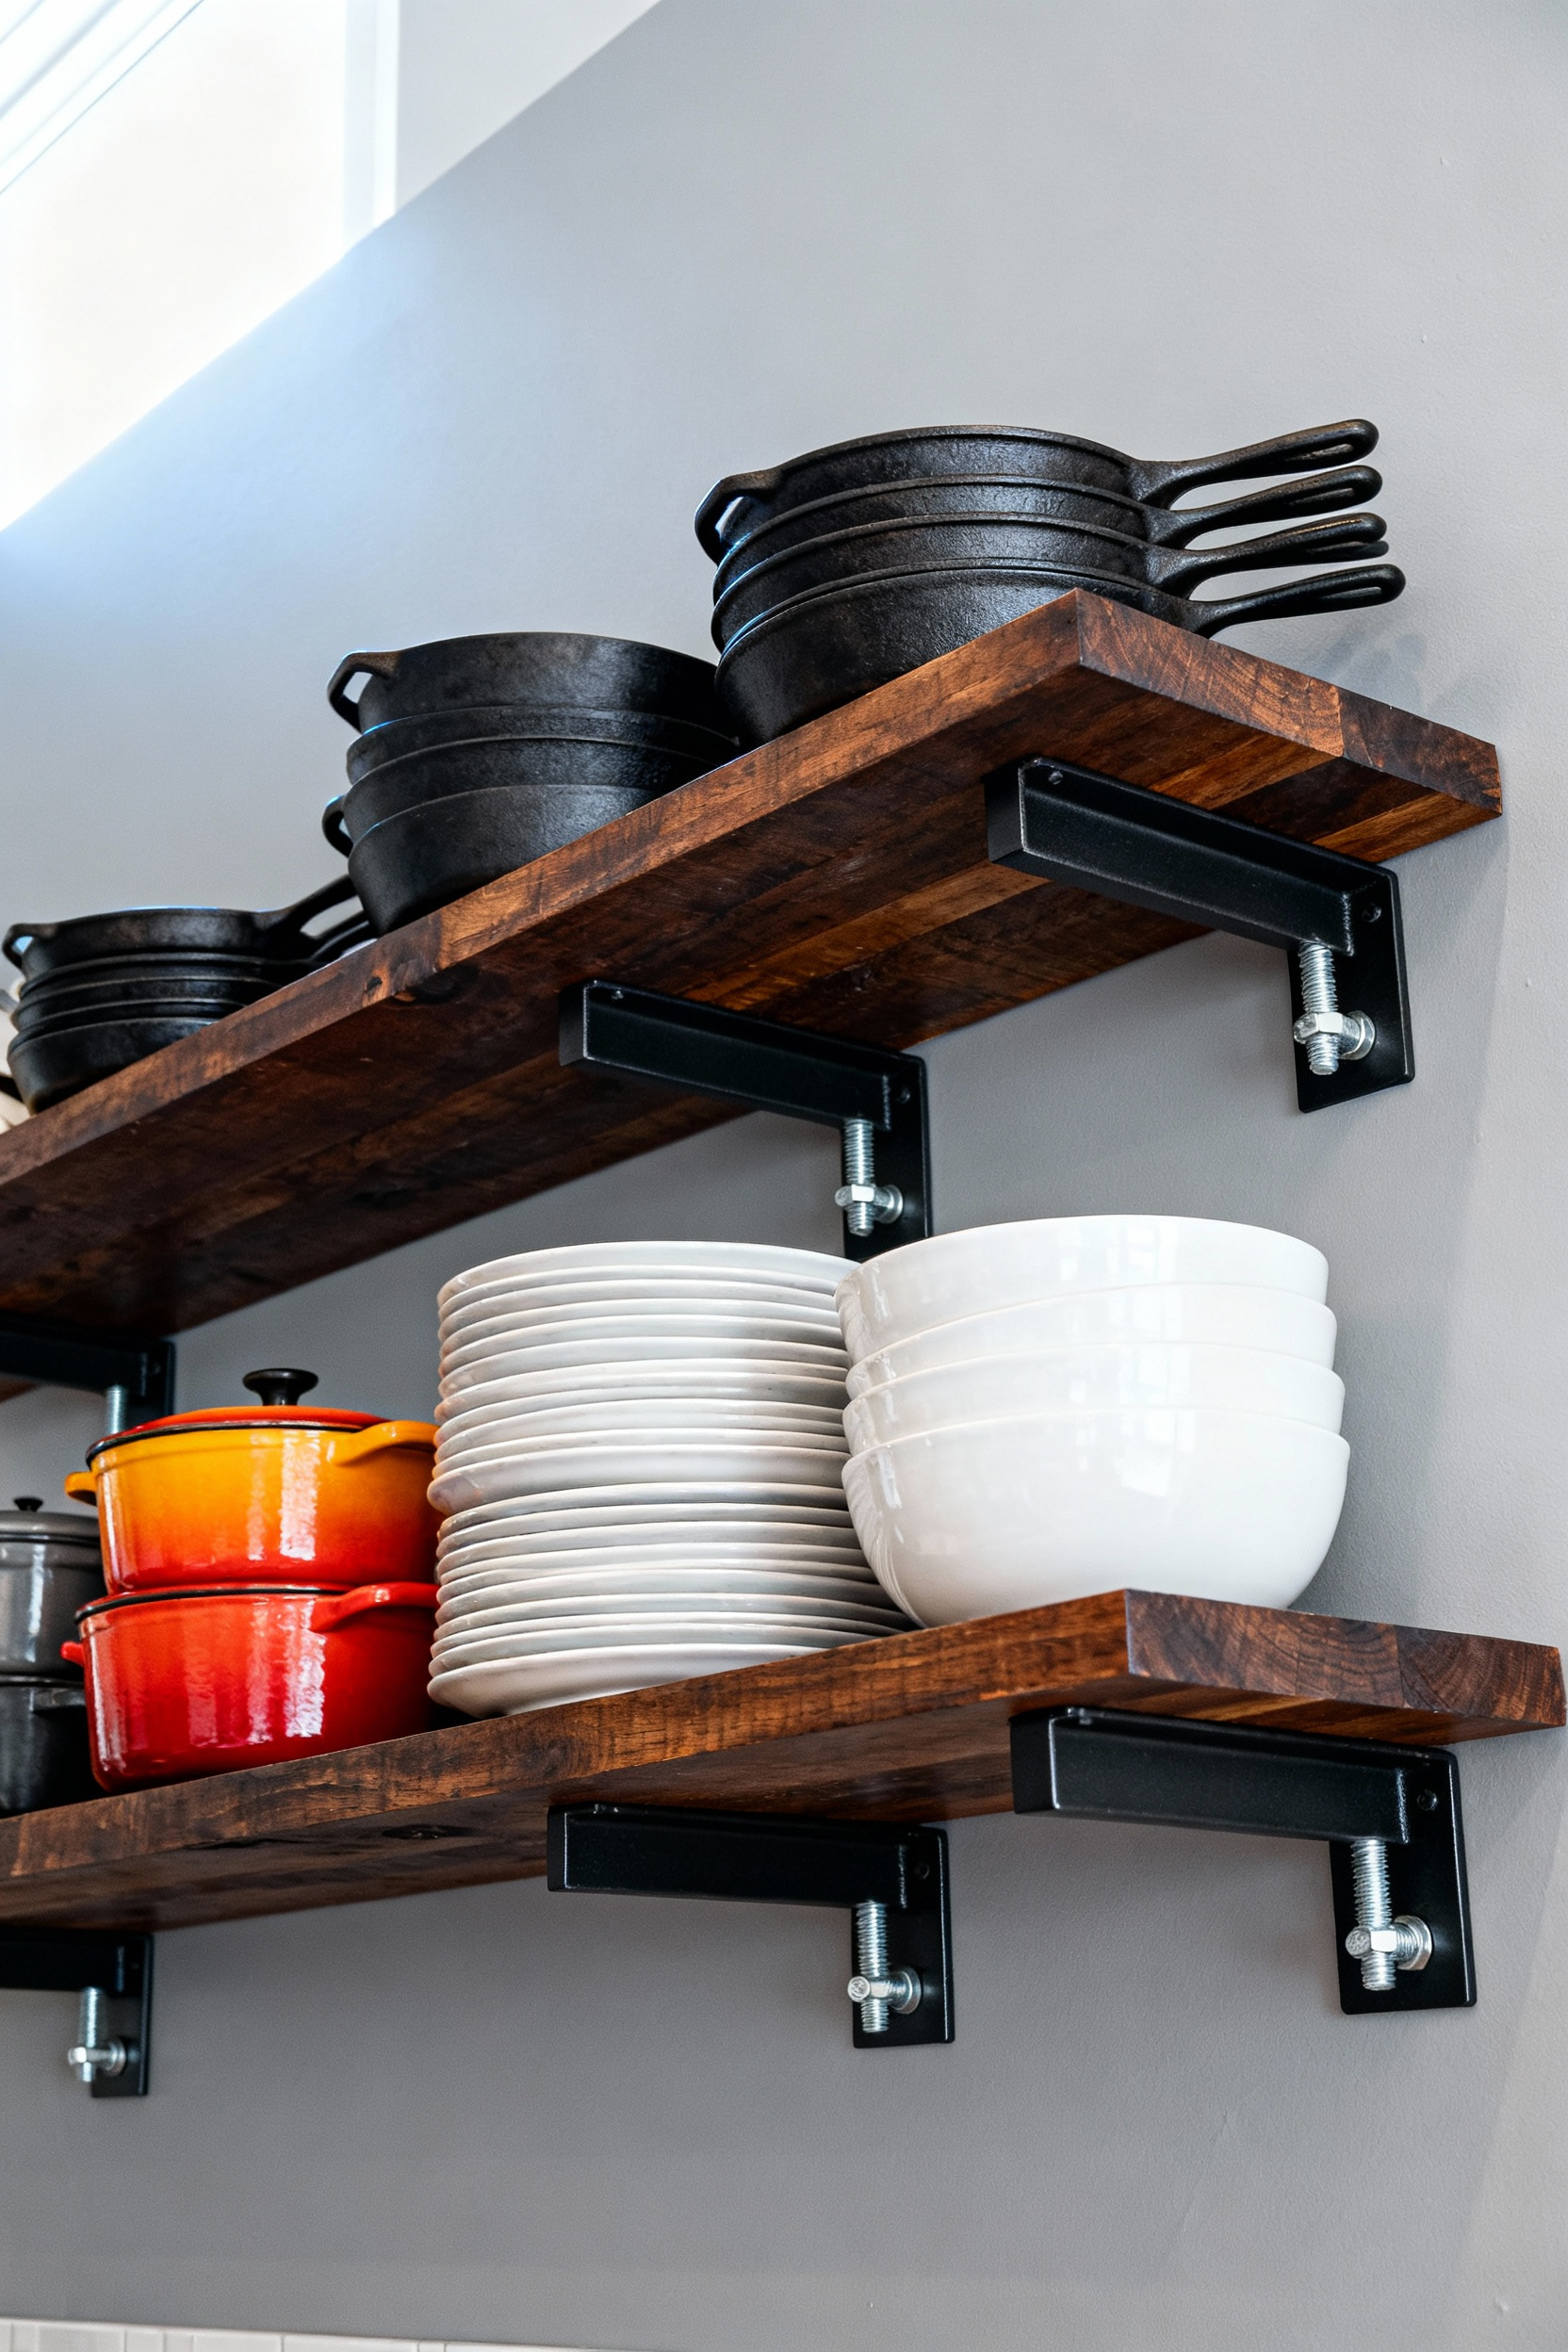
Material selection and geometry play equally vital roles in preventing failure. Choose brackets made from thick steel or cast iron, as these materials offer superior compressive resistance against the downward force of heavy cookware. Look for designs that feature an integrated diagonal brace, forming a triangle, which provides the strongest reinforcement against gravity. To prevent the shelf itself from sagging or bowing under the load, adhere to strict spacing guidelines:
- Position brackets no more than 16 to 24 inches apart along the wall.
- Select brackets with a projection depth that covers at least two-thirds of the shelf’s total depth.
For expansive storage needs, standard solid wood planks may still deflect over time. In these cases, implement a torsion box shelf design, which utilizes a rigid internal grid to prevent sagging without adding excessive dead weight to the wall. Alternatively, if your collection implies an extreme load that might compromise residential studs, opt for a heavy-duty, freestanding utility rack. These units bypass wall attachment concerns entirely and can safely handle thousands of pounds.
9. The Stainless Backsplash Ledge: Commercial efficiency meets residential sleekness
Borrowing from professional kitchens, the stainless backsplash ledge introduces industrial durability to the modern home. These units are typically crafted from heavy-duty 18-to-20 gauge stainless steel, a material chosen for its rust resistance and hygienic properties.
Beyond utility, stainless steel serves as a “new neutral” in residential design. The surface reflects light, visually expanding the kitchen and establishing a sleek aesthetic that integrates seamlessly with standard appliances.
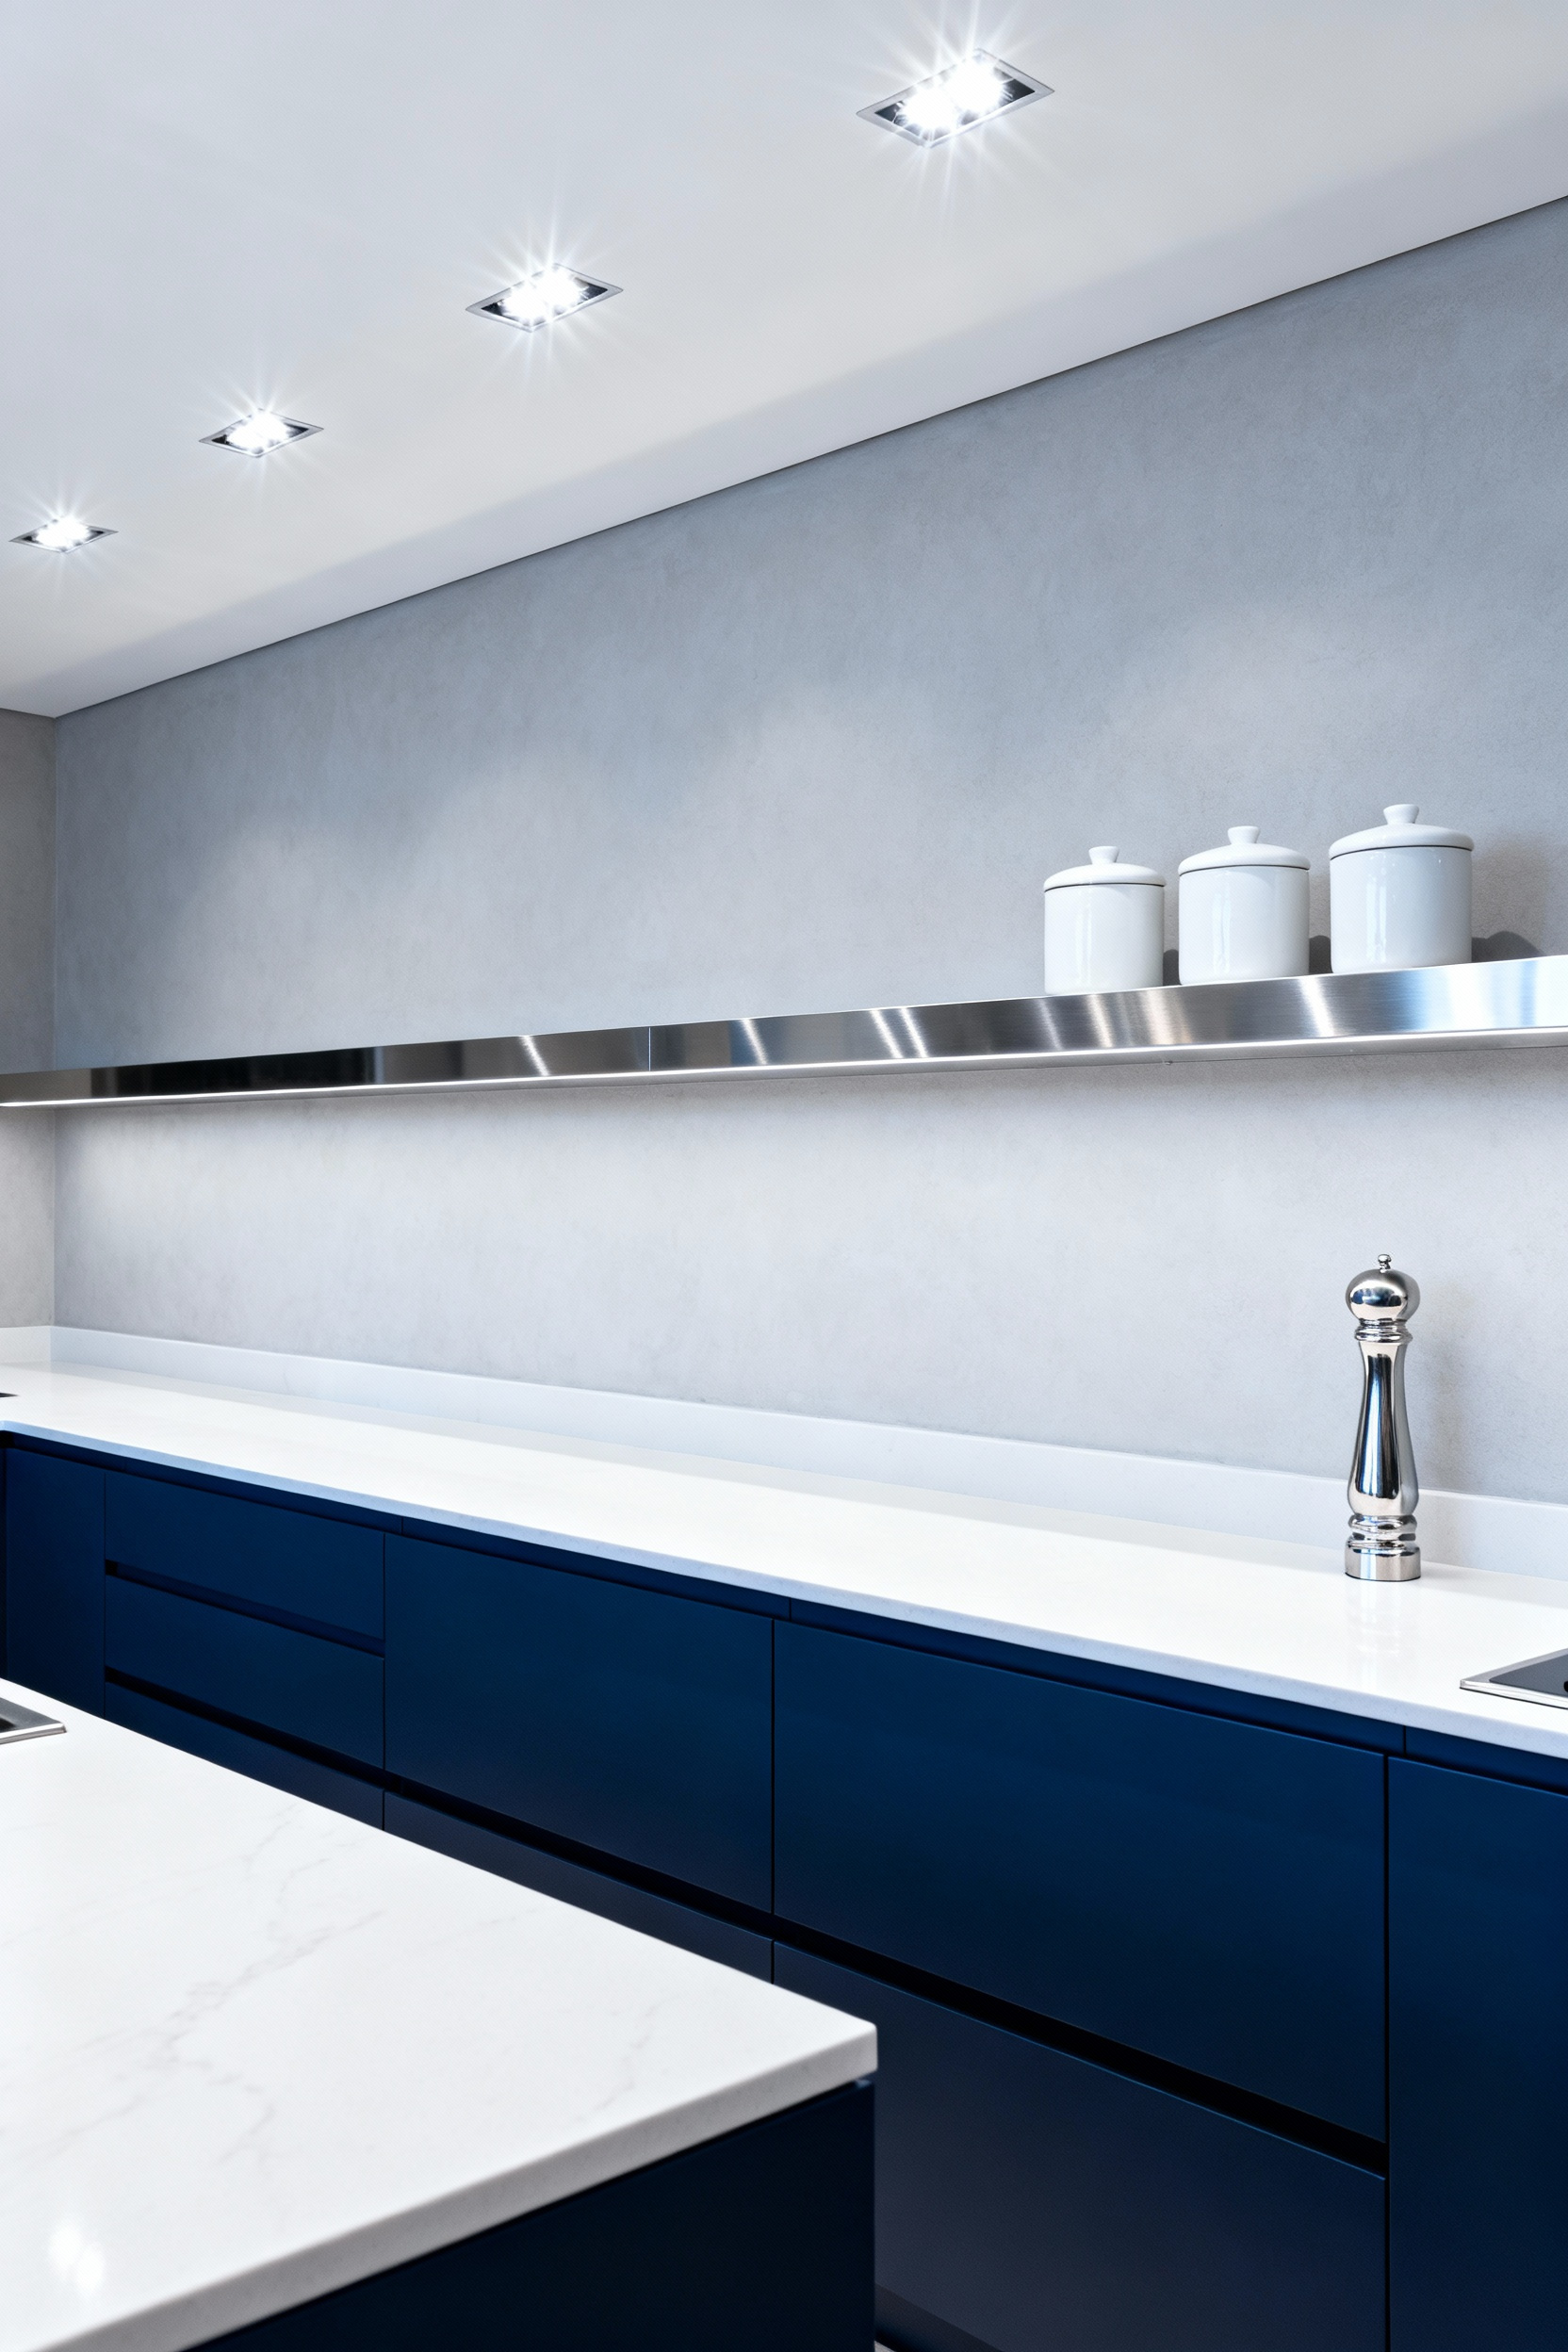
Functionally, this design resolves the issue of wasted vertical space. By installing a ledge directly above the cooktop or main prep area, you convert a high-splash zone into accessible storage. This placement keeps cooking essentials—such as oils, spices, or specialized tools—within arm’s reach but off the counter. These shelves are engineered for substance; many models support loads exceeding 44 pounds, allowing for the safe storage of heavy cookware without compromising stability.
For maximum versatility, opt for 430 series stainless steel. Unlike other alloys, this series is magnetic, which unlocks a layer of hardware-free customization. You can attach magnetic spice tins, recipe holders, or knife bars directly to the backsplash panel. This approach eliminates the need for drilling and maintains the clean, clutter-free lines essential to a contemporary kitchen.
Phase 3: Smart Integration & Lighting
Lighting transforms open shelving from simple storage into a distinctive architectural focal point. To achieve a high-end look, prioritize the seamless integration of fixtures. Route slimline LED strips into the underside of shelves or recess them directly into the cabinet structure. This technique eliminates visible hardware and minimizes harsh shadows. The result provides consistent ambient glow and direct task lighting without cluttering the visual lines of the kitchen.
Beyond aesthetics, functionality relies on layered lighting. Select systems that offer “tunable white” capabilities to adapt the atmosphere to the time of day. Use cooler, higher-Kelvin temperatures to create bright, focused light during food preparation. For dining or entertaining, shift to warmer, dimmer tones to establish a cozy environment. This versatility allows your shelving to serve dual purposes, acting as both a practical workspace and a mood-setting design element.
Finally, modernize your kitchen’s usability with smart automation. Connect your under-cabinet and shelf lighting to platforms like Google Home or Alexa for hands-free voice control. This proves invaluable when cooking with messy hands. For deep pantries or closed utility cabinets, install motion sensors. These devices automatically illuminate dark corners the moment a door opens, ensuring immediate visibility and maximizing energy efficiency.
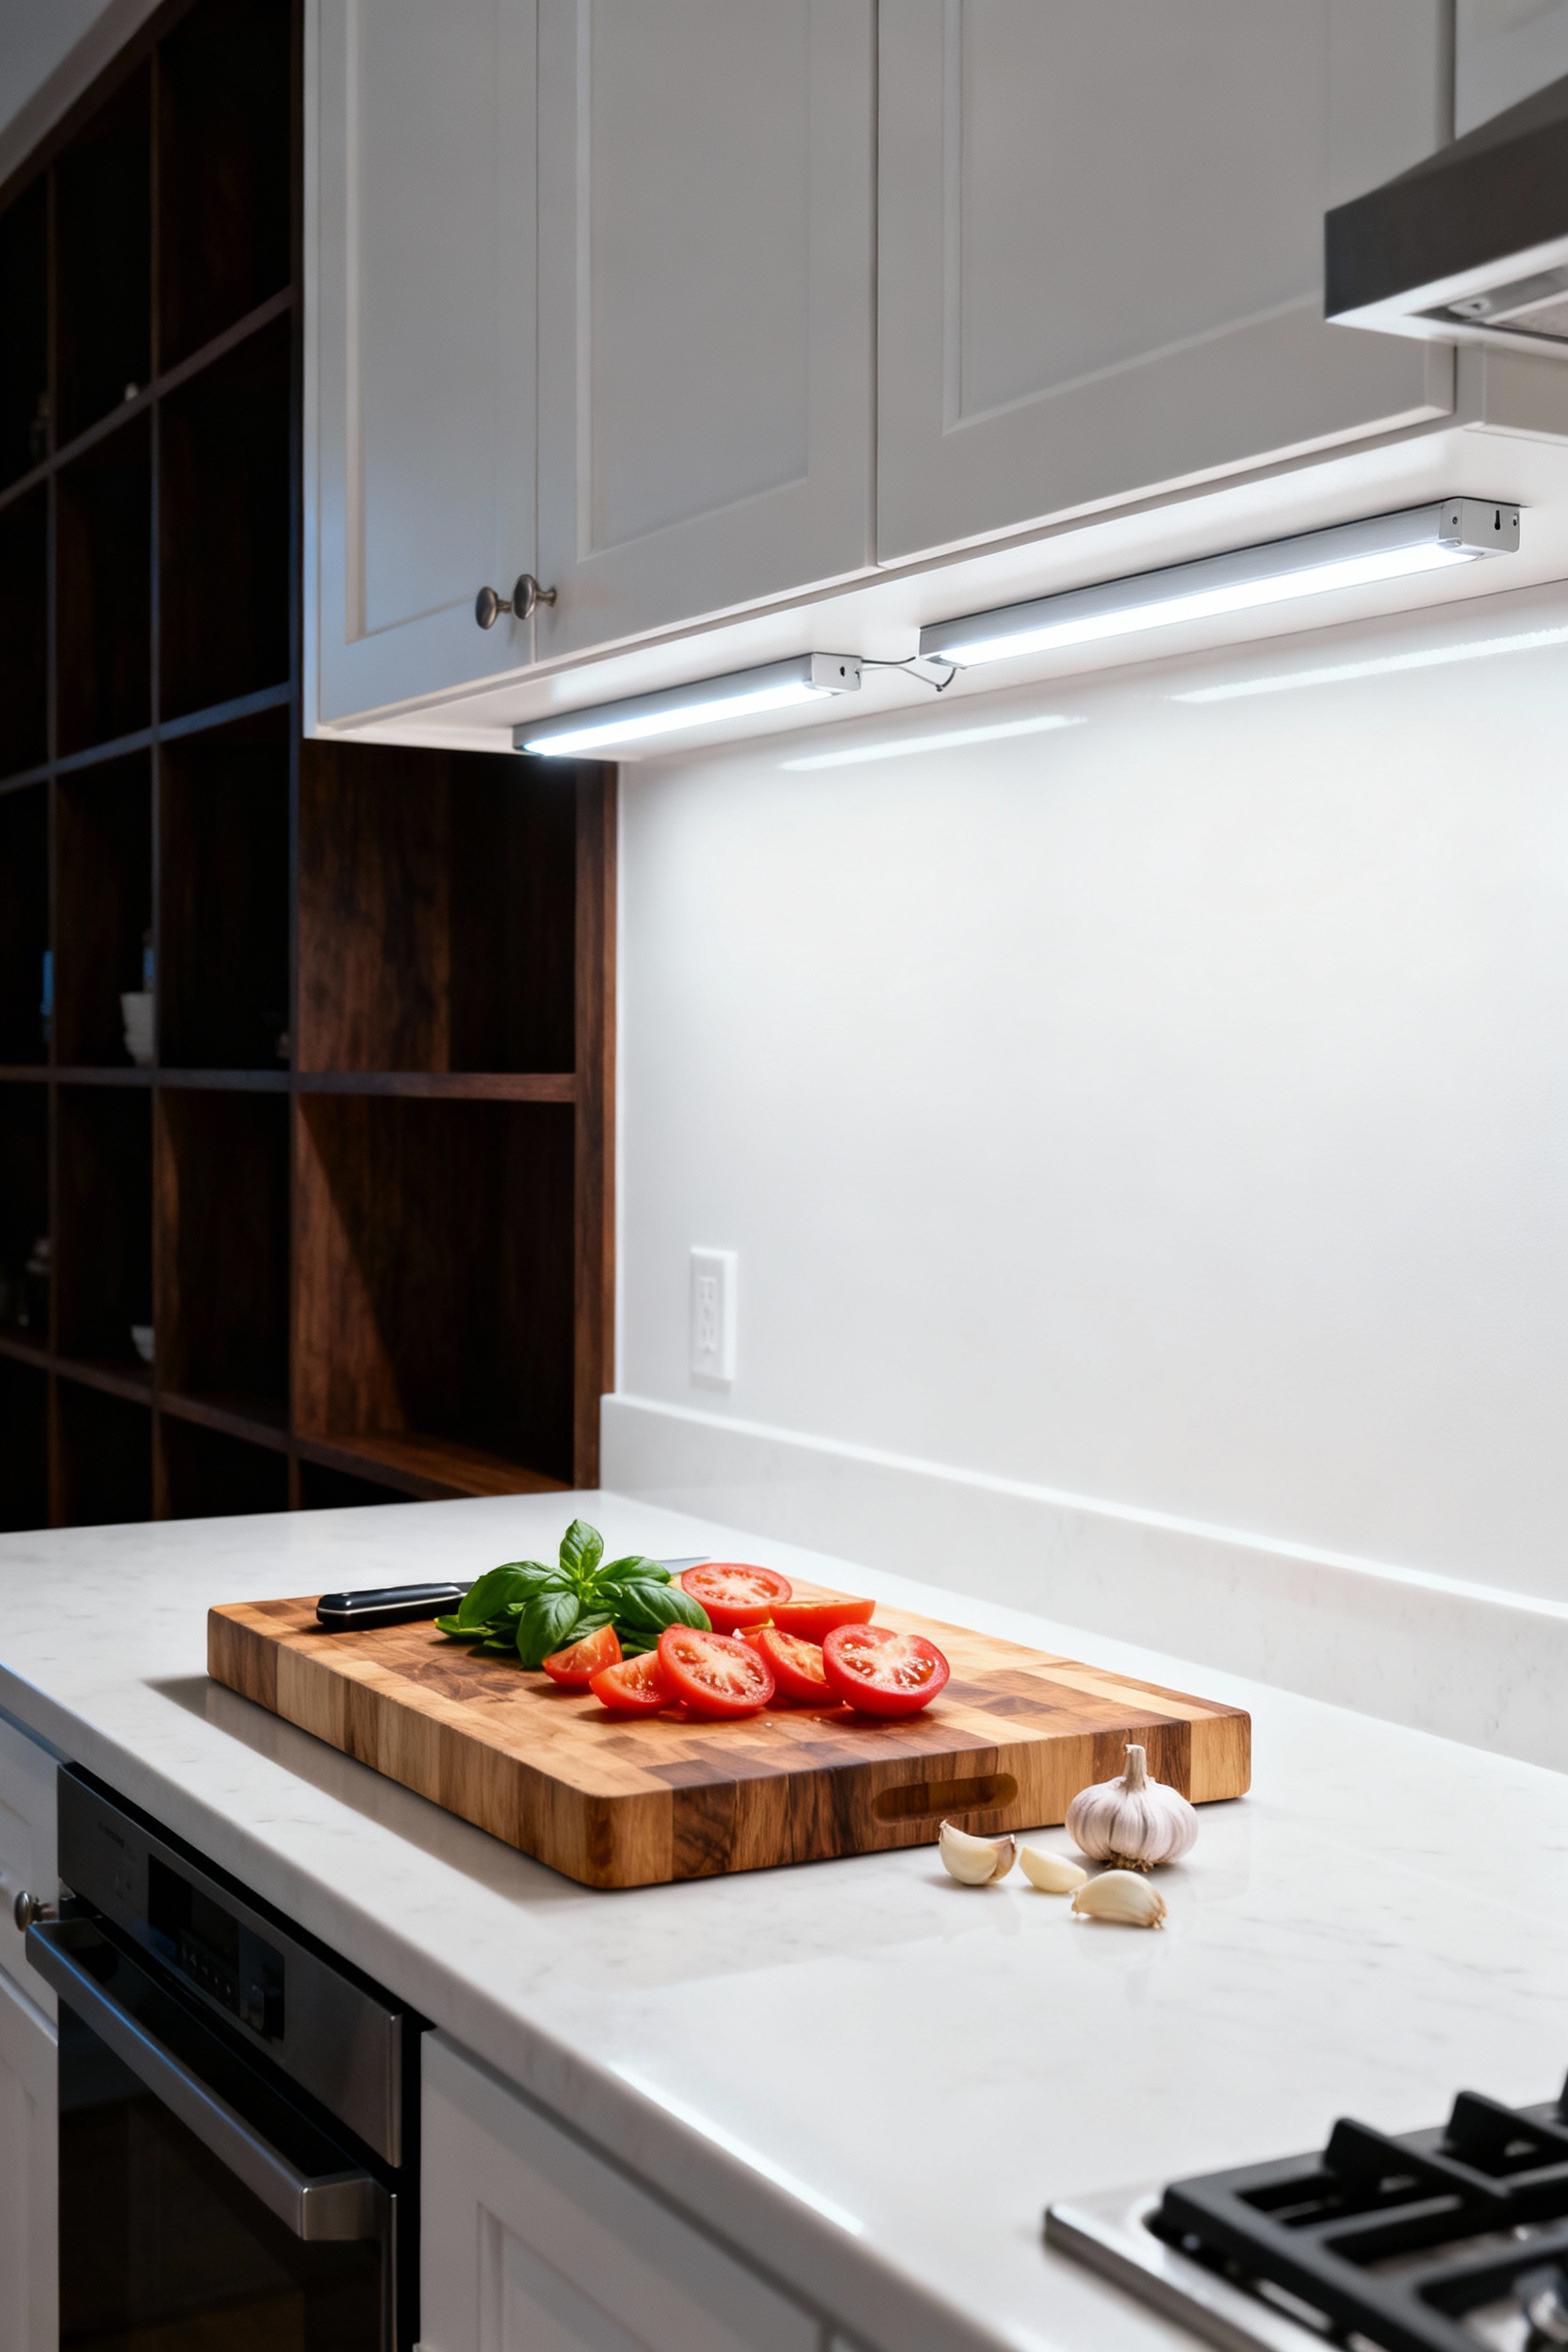
10. Hardwired LED Channels: Recessed lighting diagrams for shadow-free workspaces
Nothing ruins the functionality of a prep station like a shadow cast by your own body. To achieve a professional, shadow-free workspace, you must recess a low-profile aluminum channel flush into the underside of your cabinetry. Positioning is critical here; install the channel exactly 2 to 4 inches back from the front edge. This specific placement directs the light beam directly over your work zone rather than behind you, ensuring the countertop remains fully illuminated while you chop and plate.
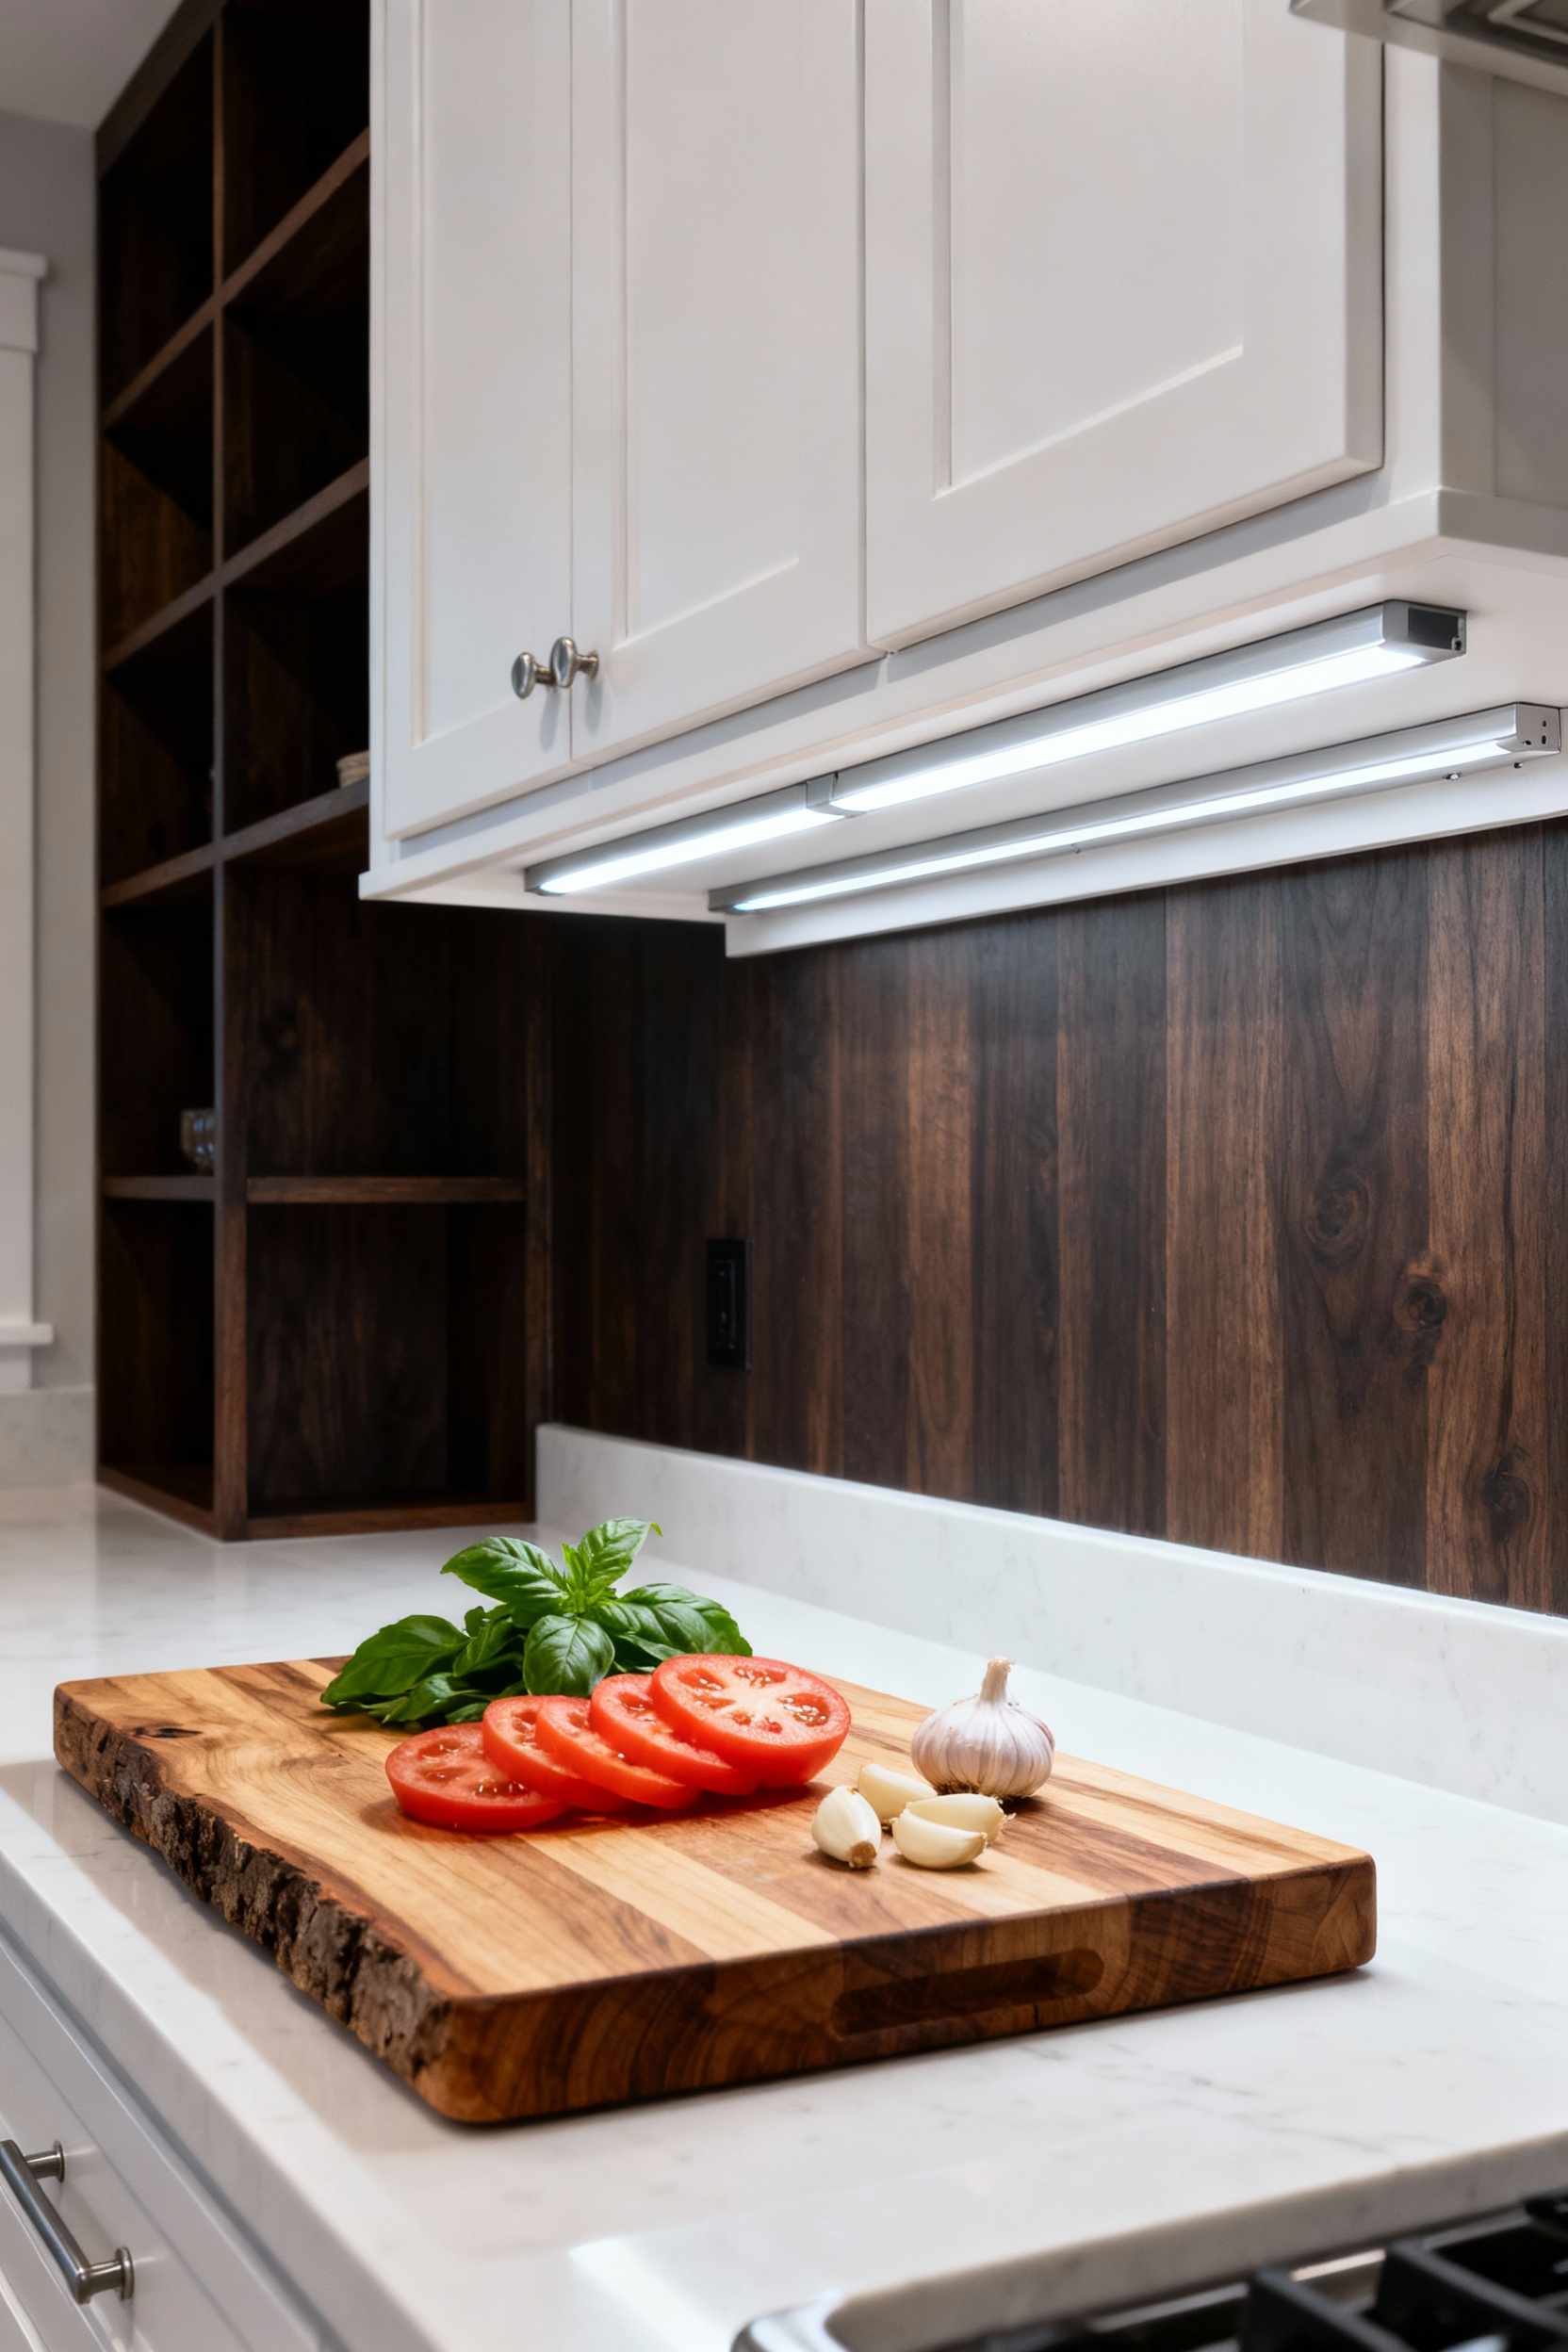
The hardware you select determines both the longevity of the system and the quality of the light. The aluminum profile acts as an essential heat sink, protecting the LED tape from overheating, while a frosted diffuser cover eliminates the distracting “dotting” effect of individual chips.
For the light source itself, prioritize a strip with a Color Rendering Index (CRI) of 90 or higher and an output of 800 to 1500 lumens per linear foot. This combination guarantees that food appears vibrant and true-to-life without creating harsh glare on polished surfaces.
For a seamless architectural finish, planning the power supply is just as important as the light fixture. Avoid visible cords by having an electrician run low-voltage wiring through routed grooves or inside cabinet walls. Connect the system to a transformer driver hidden in an adjacent cabinet to keep all bulky components completely out of sight. This hardwired approach results in a flawless, integrated look that elevates the kitchen from a simple renovation to a custom design.
11. The ‘Smart’ Shelf: Hidden charging docks and voice-assistant integration points
Modern kitchens often suffer from “cord creep,” where tangles of chargers disrupt clean architectural lines and clutter valuable prep space. The “Smart Shelf” eliminates this visual noise by embedding technology directly into the millwork.
A highly effective implementation involves converting a standard cabinet drawer into a concealed docking station. By installing electrical outlets and USB ports inside the drawer, you create a secure, designated zone for phones and tablets. This keeps devices charged and countertops clear, while integrated temperature-sensing technology ensures the enclosed space remains safe during charging cycles.
For a cleaner look, architects and designers are now prioritizing invisible wireless charging. You can install a Qi charging transmitter directly beneath a floating shelf or a specific section of a non-metallic countertop. This allows you to simply place a compatible phone on the surface to power up, removing the need for visible docks entirely.
To further streamline the workspace, design a shallow niche specifically for voice assistants like a Google Nest Hub or Amazon Echo. Positioning this nook under an upper cabinet keeps the device off the counter but ensures it remains audible for hands-free recipe lookups and timer settings.
The most advanced iterations of this trend pair structural design with home automation for improved ergonomics. High-end cabinetry systems now link shelving and doors to voice assistants using servo-drive technology. This allows for completely hands-free operation, letting you command a pantry shelf or trash drawer to open without touching a handle. This integration proves invaluable when your hands are messy during food prep, merging high-tech utility with practical kitchen safety.
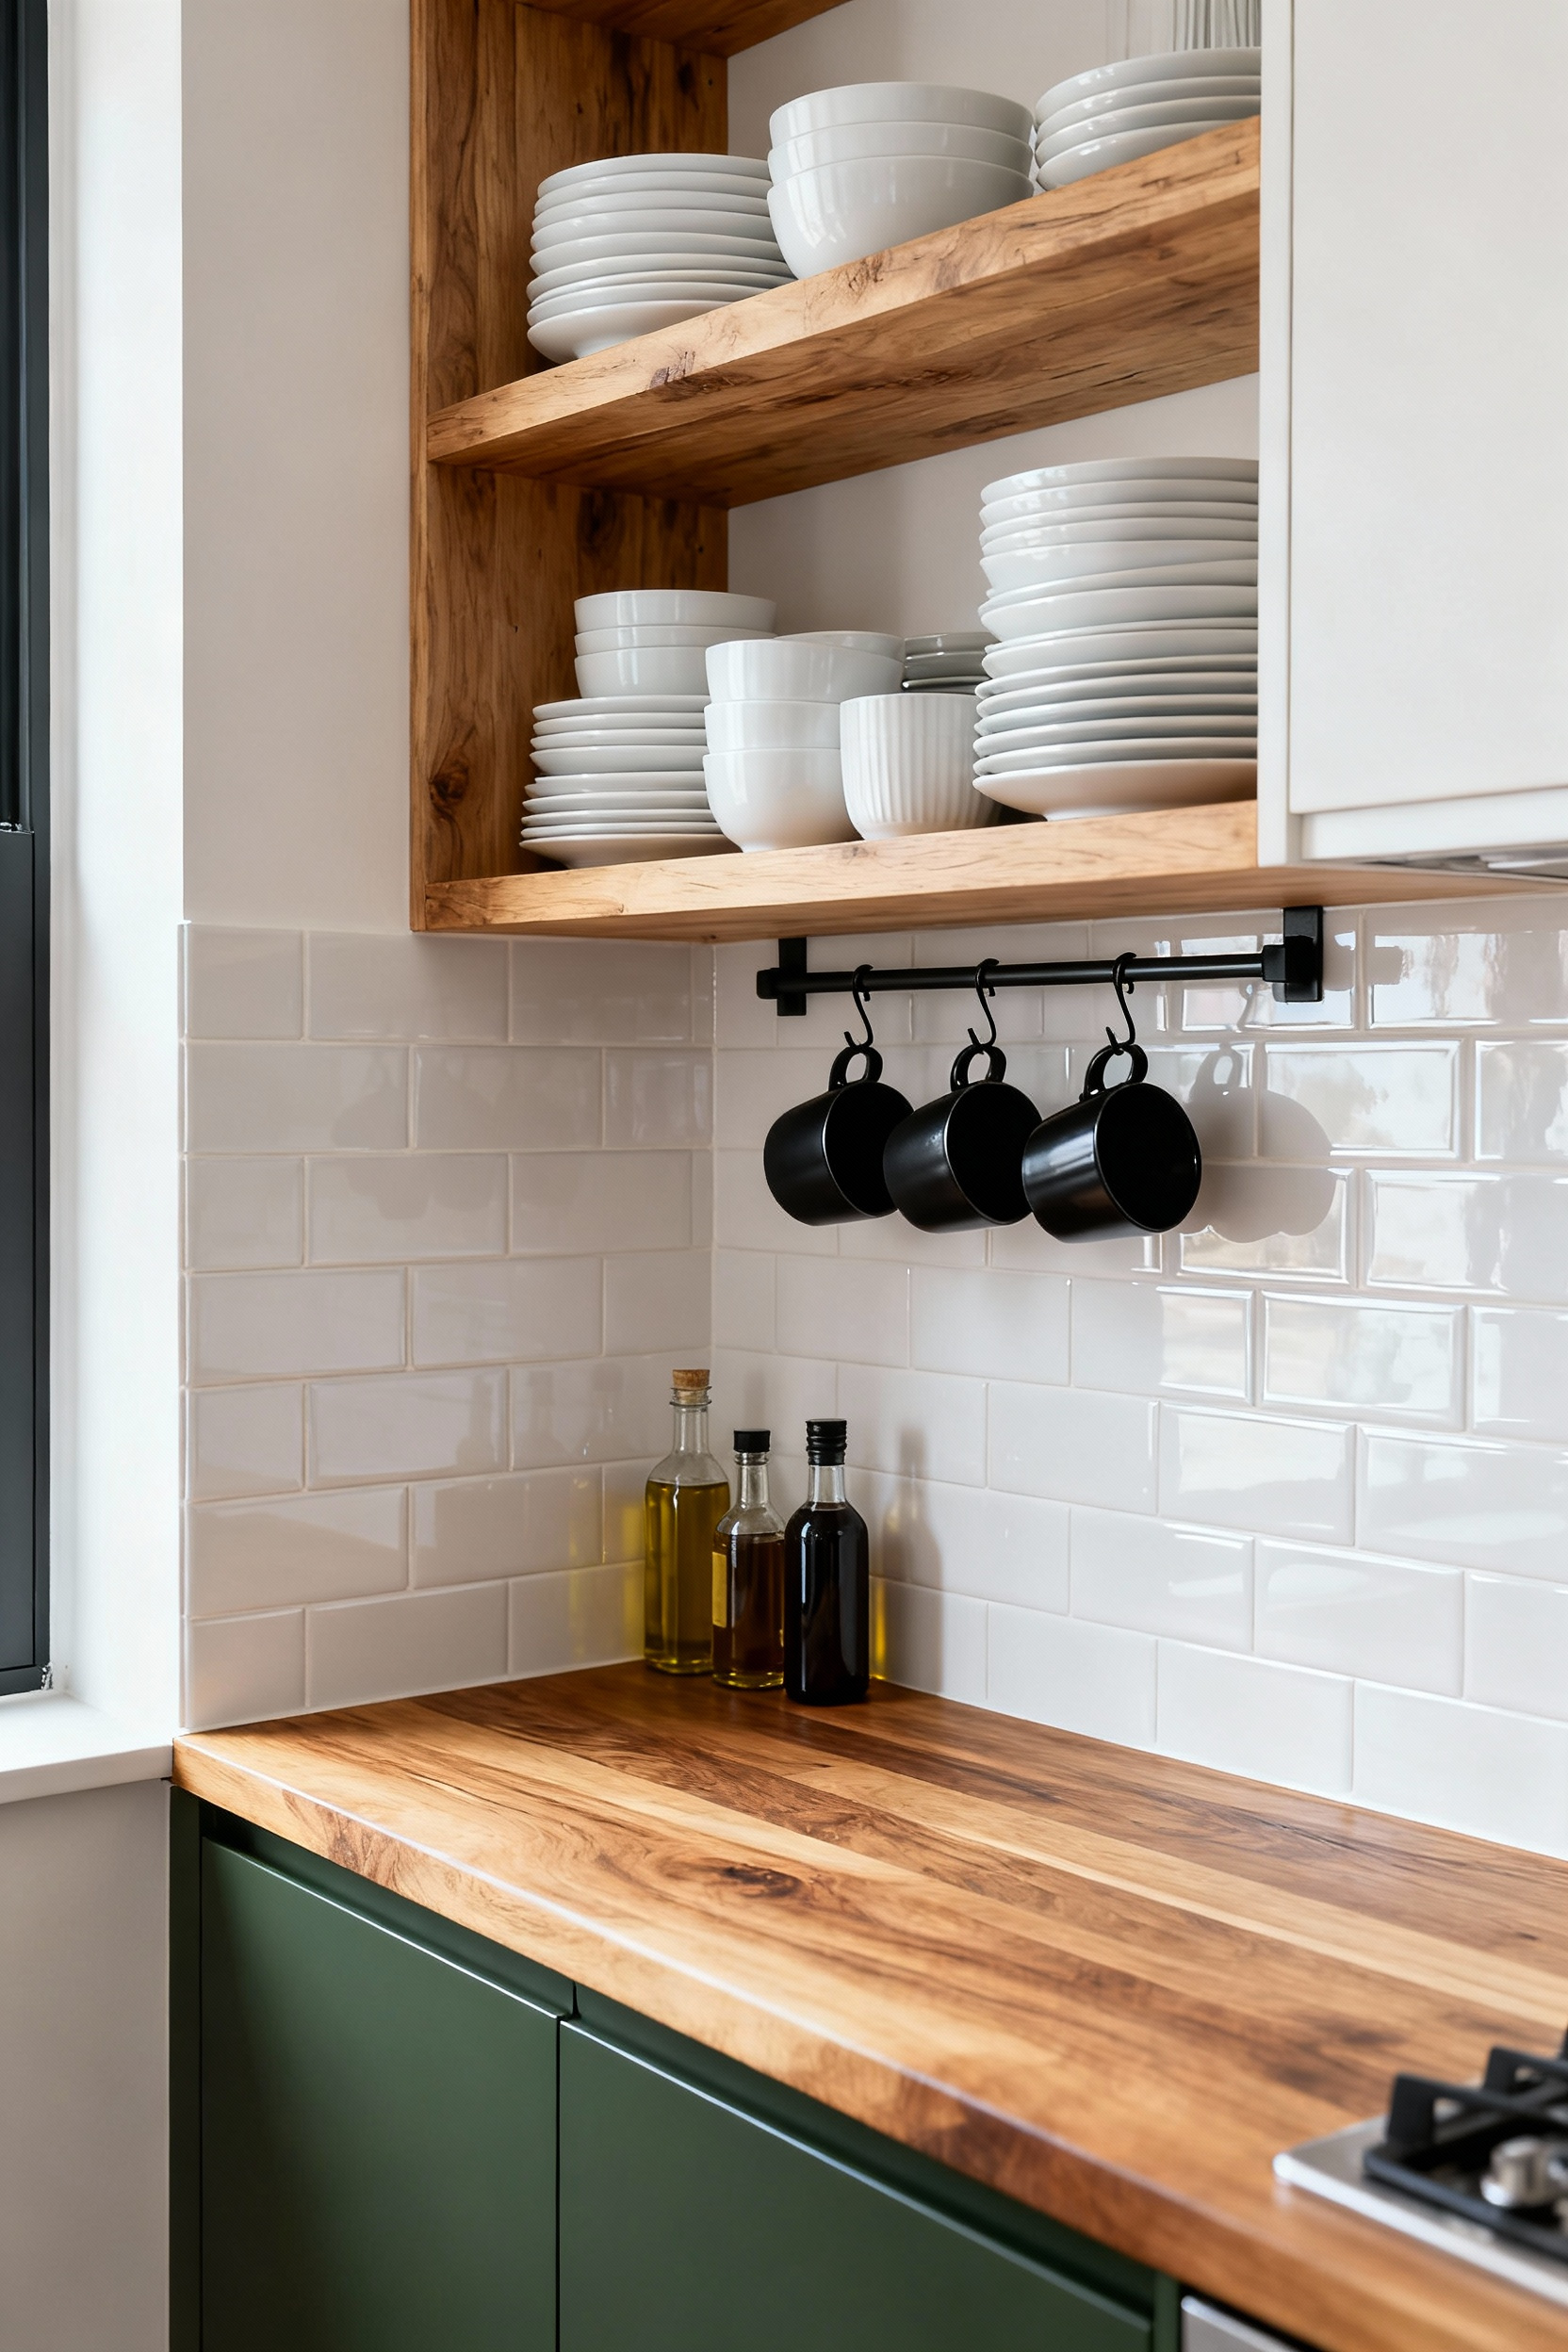
12. Underside Utility: Magnetic strips and hanging rail systems for vertical tool access
The area immediately beneath open shelves often goes unnoticed, yet it offers prime real estate for maximizing storage. By installing magnetic strips or hanging rail systems here, you activate this dead space and clear clutter from your drawers.
Use magnetic bars for metal tools like knives and shears, and opt for rails with S-hooks to suspend non-magnetic items such as wooden spoons, whisks, or mugs. This vertical approach keeps countertops open for prep work while ensuring your essential tools remain visible.
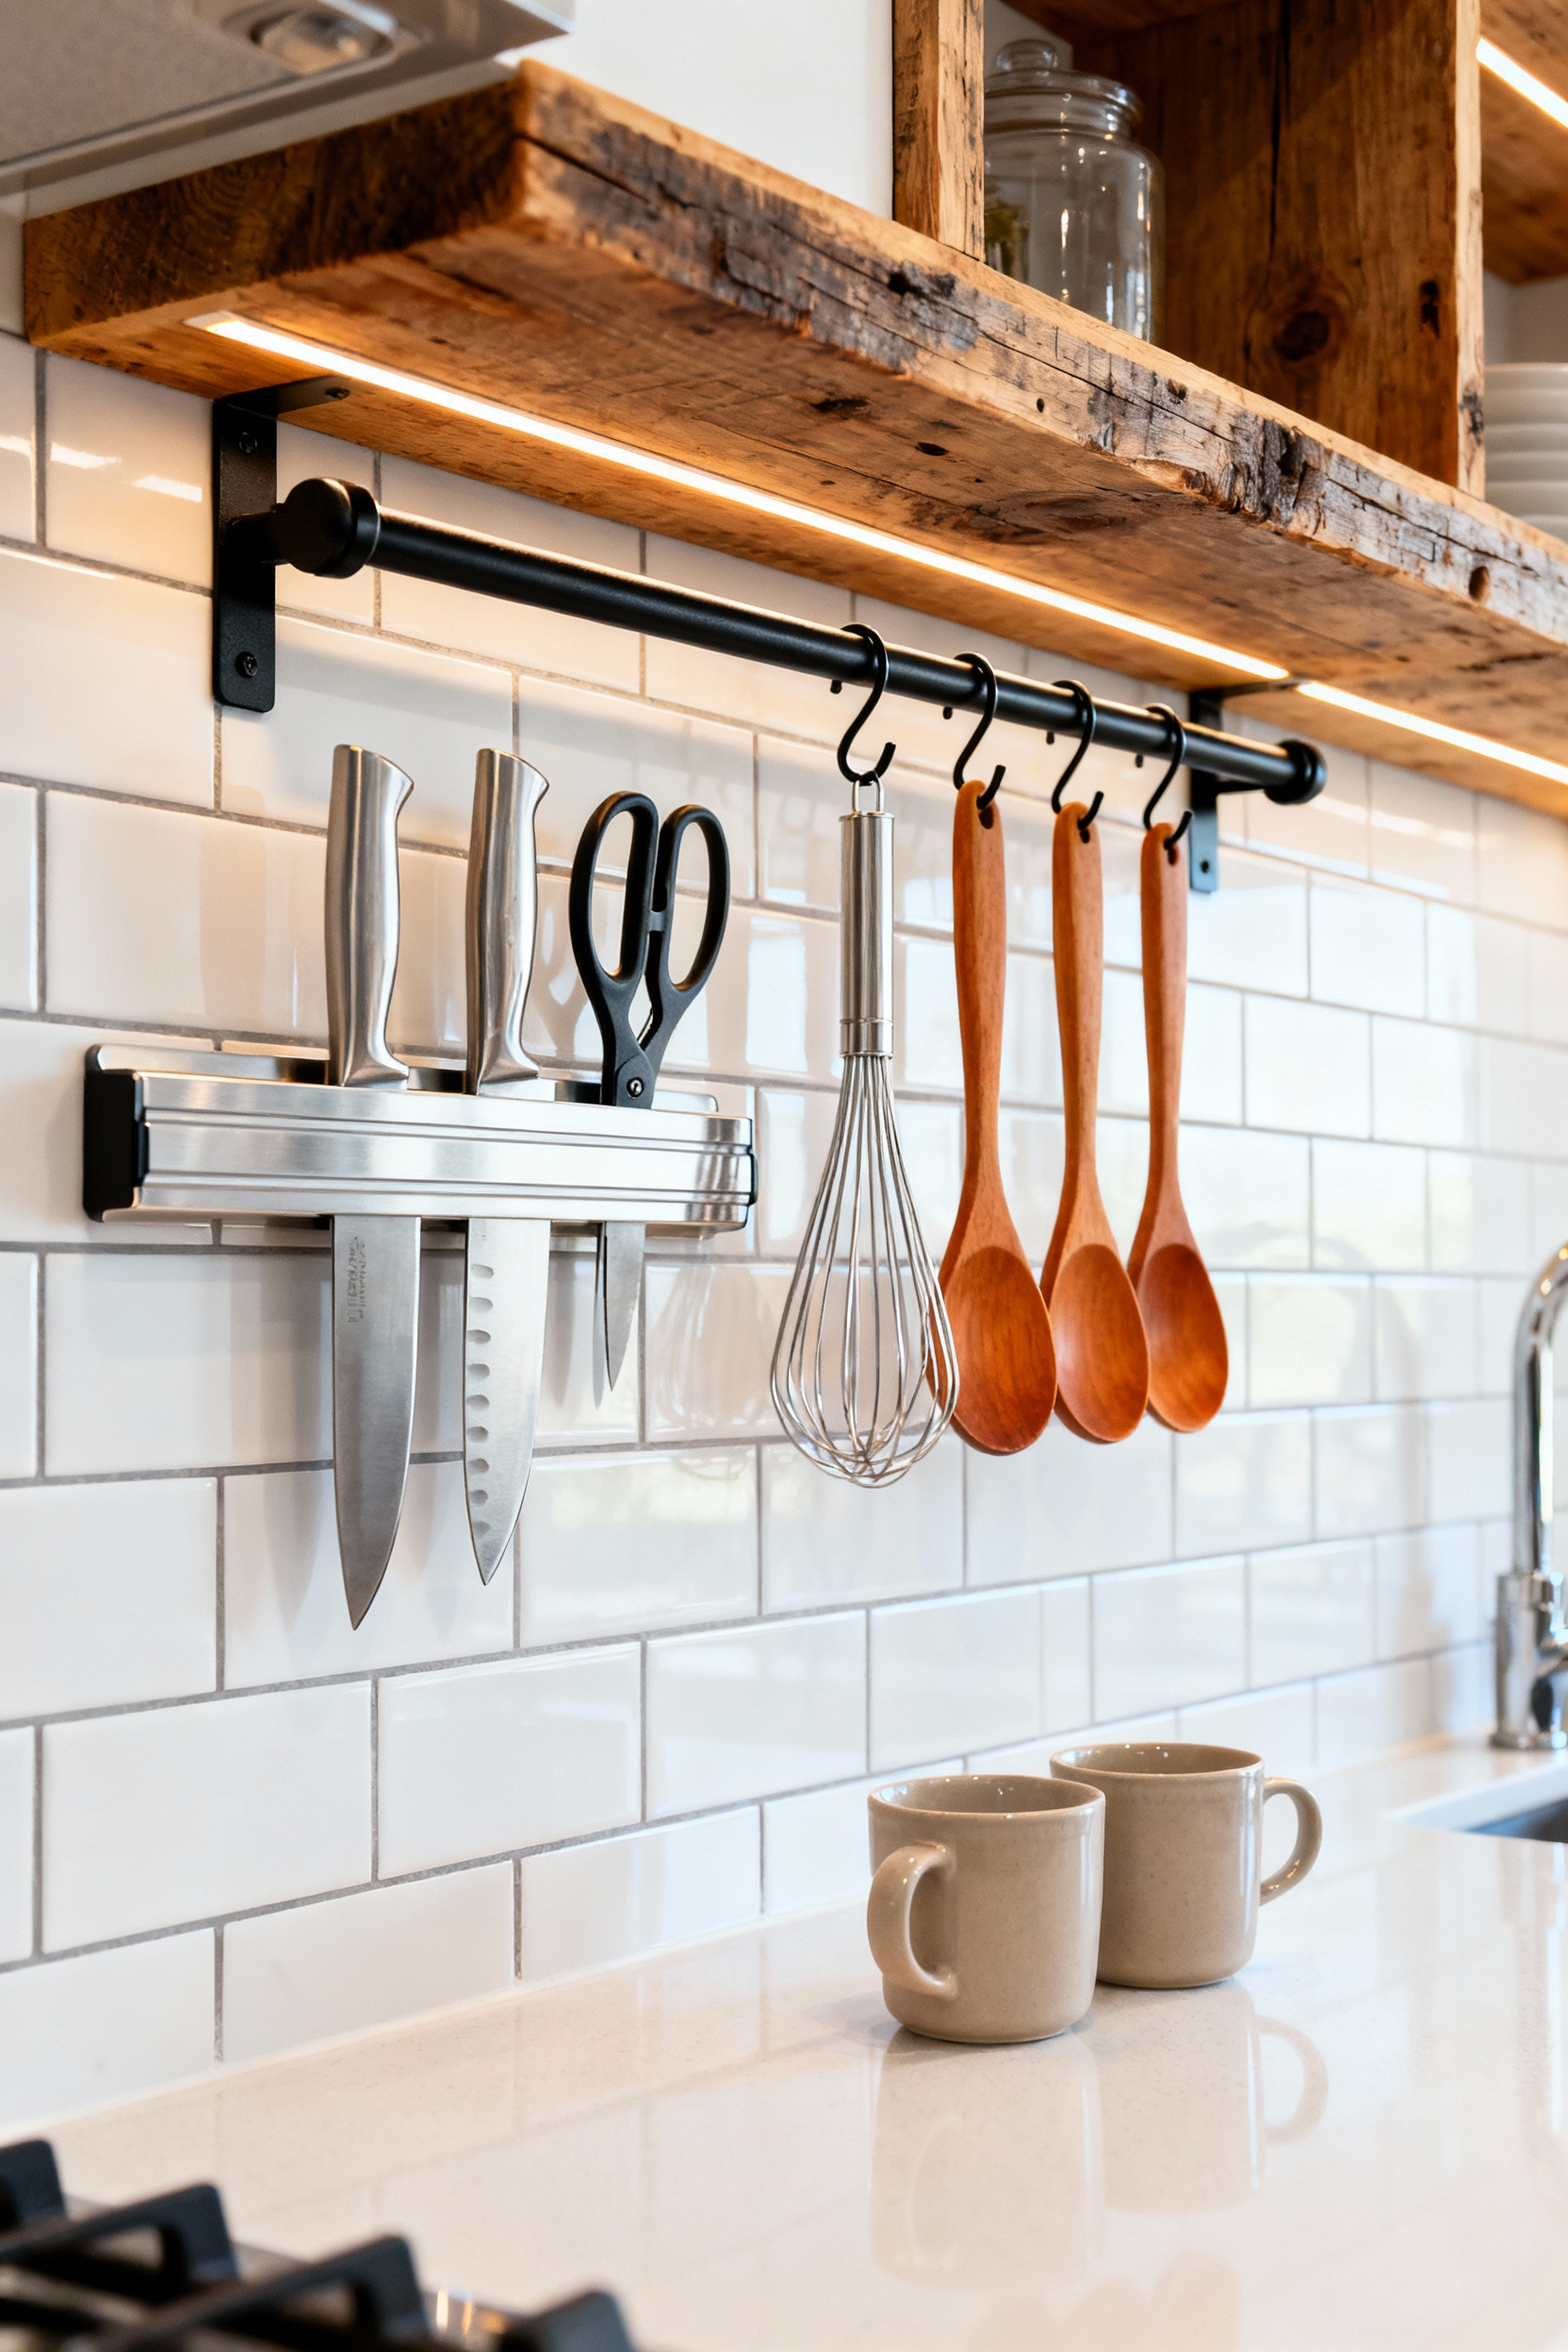
Security is paramount when suspending sharp or heavy objects. Select heavy-duty strips featuring strong neodymium magnets to ensure larger chef’s knives remain fixed without slipping or wobbling. When installing these strips, position them approximately 4 to 6 inches back from the front edge of the counter or shelf. This specific recess provides easy access to the handle while preventing accidental bumps against the blade during food preparation.
To truly optimize your workflow, organize these hanging zones by function. Group your tools based on frequency of use, such as placing all prep knives on a single strip or hanging cooking utensils on a rail near the stovetop. This visual organization eliminates the need to rummage through crowded drawers. You gain “at-a-glance” access to your most-used items, effectively merging industrial utility with clean, accessible design.
Phase 4: Composition & Workflow (The Photographer’s Eye)
Capturing the architectural intent of your shelving requires prioritizing perfect geometry. Ensure your camera is perfectly level to keep vertical lines straight; skewed lines make cabinetry and tiles look distorted. Use a tripod and your camera’s gridlines to align the dominant edges of the shelving with your frame. Once aligned, set a moderate aperture between f/4 and f/8. This creates a deep depth of field, keeping both the items on the front of the shelf and the kitchen backdrop in sharp focus.
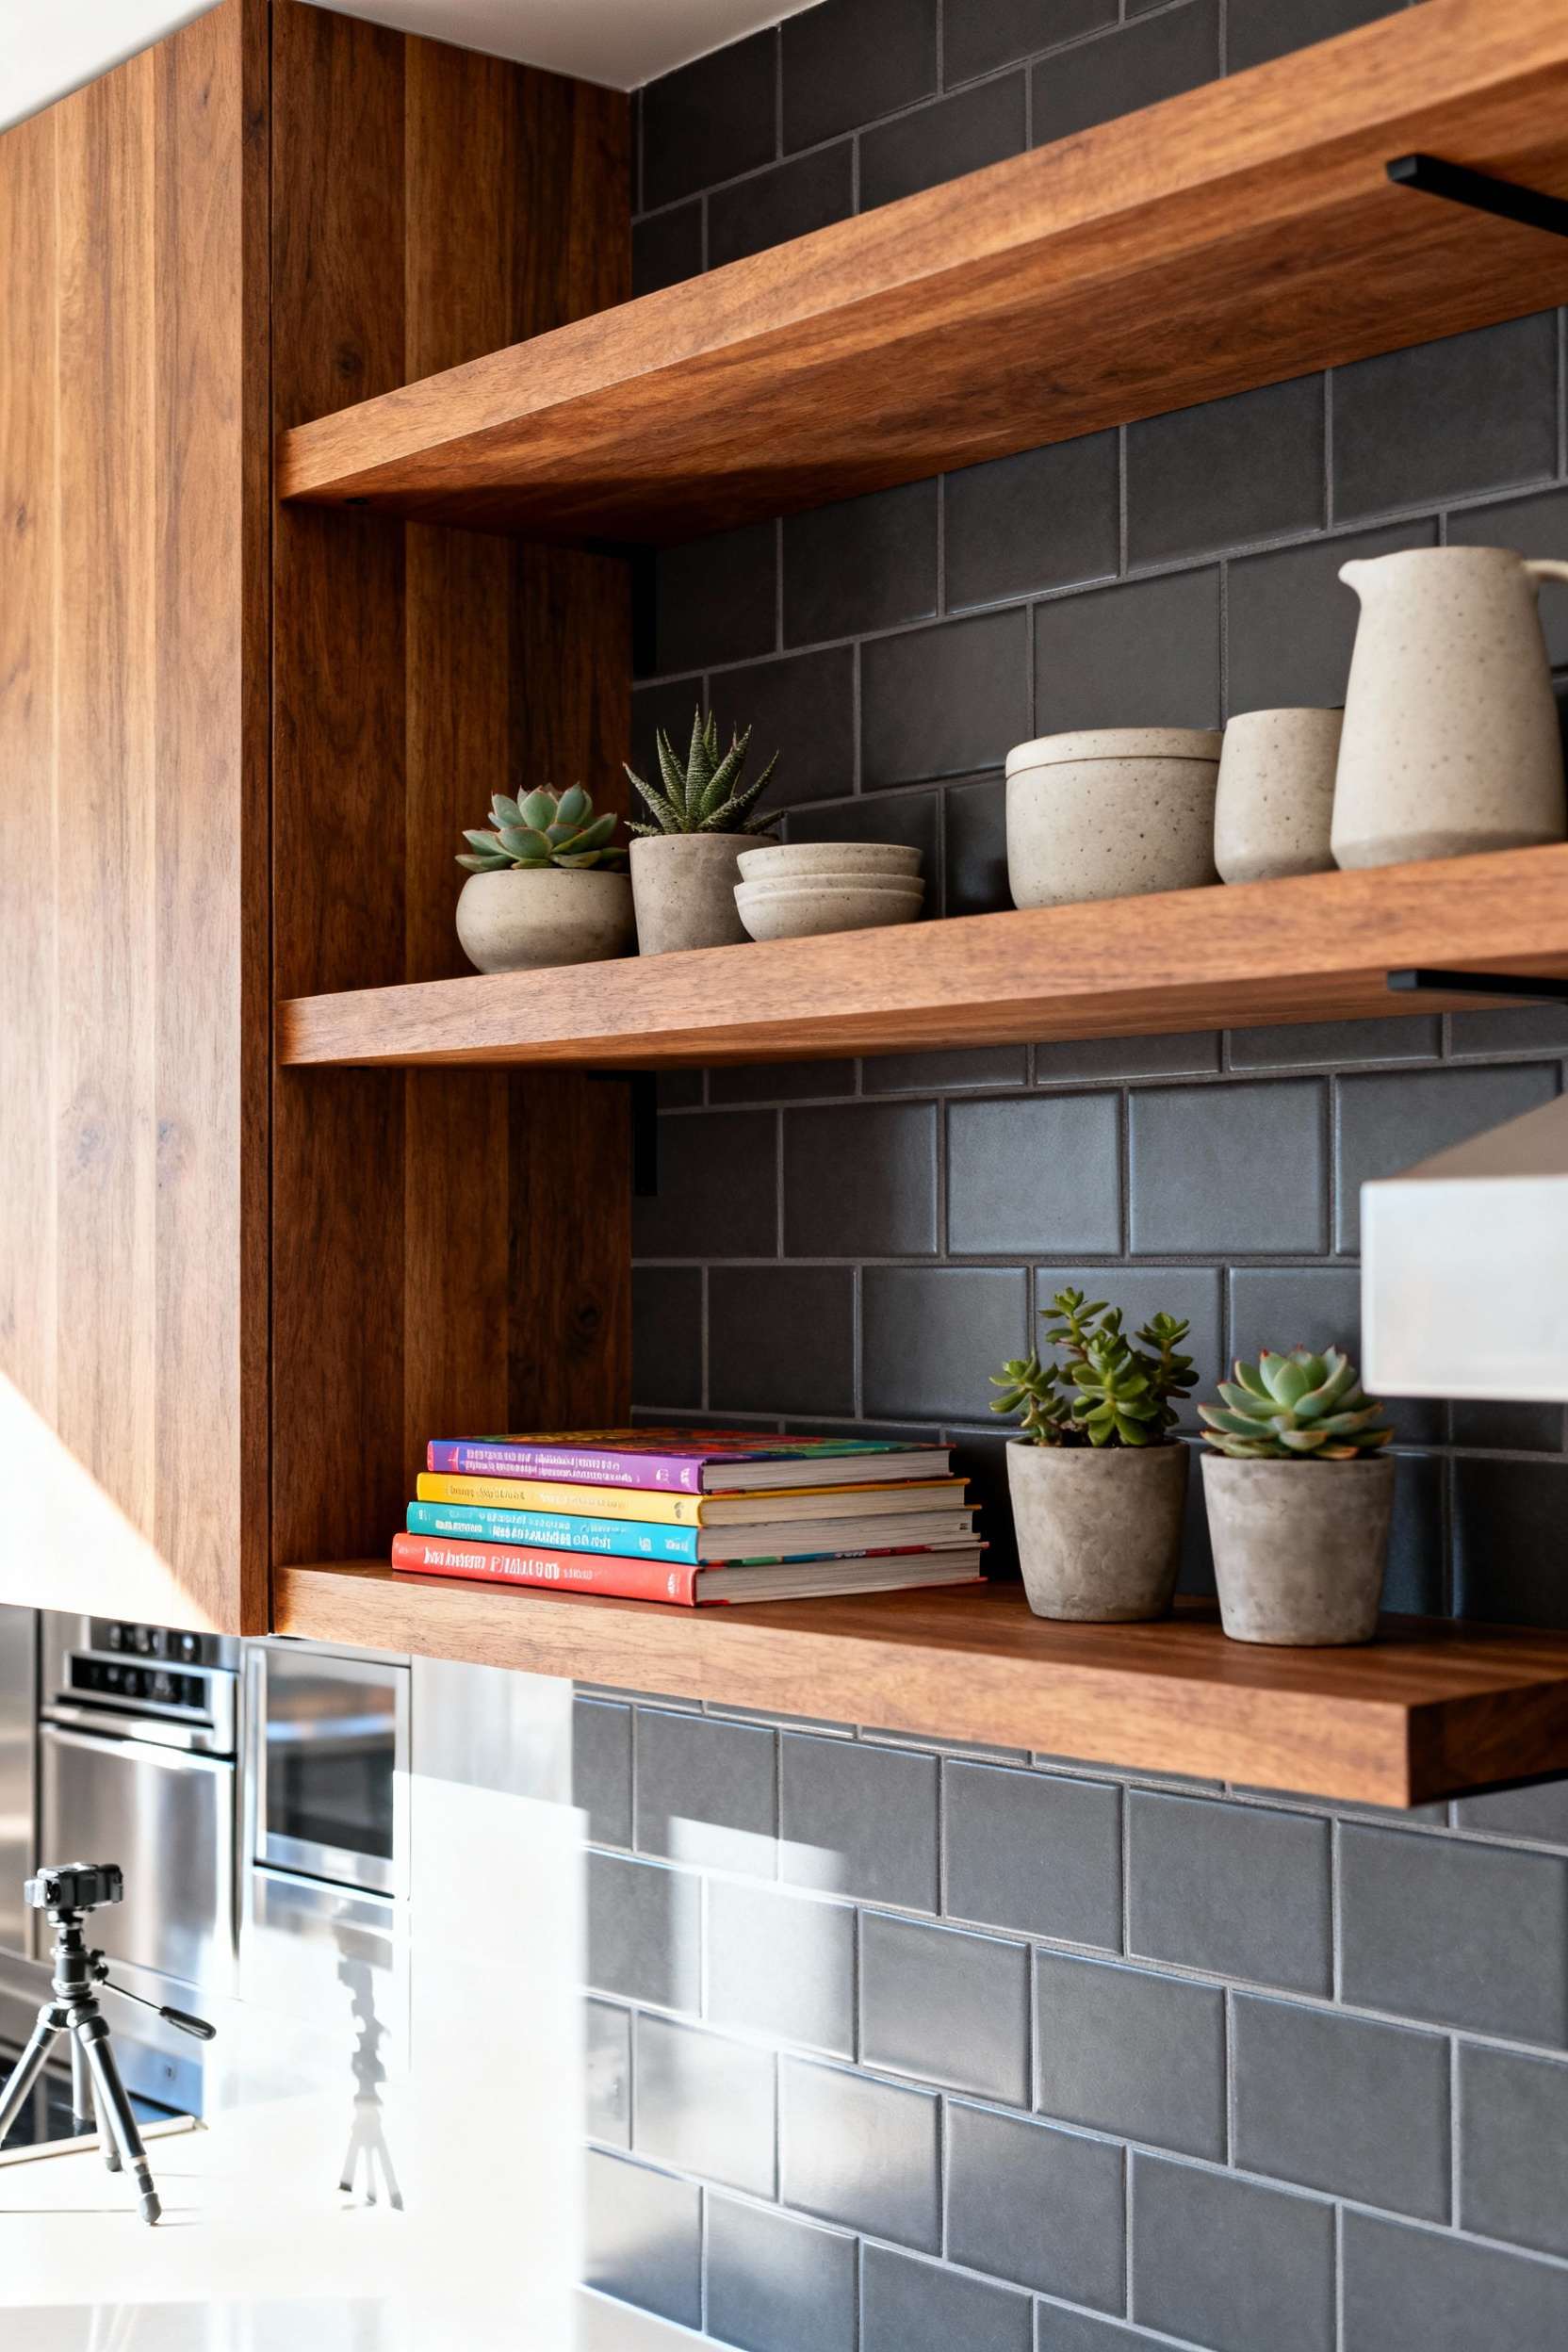
Lighting and perspective determine the mood of the final image. Rely on natural light and adjust your white balance to ensure light-colored finishes appear true to life, avoiding the yellow cast common in artificial indoor lighting. While a straight-on angle works for symmetry, varying your vantage point adds dimension. Move slightly off-center to show the depth of the shelves, or move closer to capture specific details of hardware and texture.
Finally, execute a disciplined styling workflow to control the composition. A professional image requires a curated approach to what stays and what goes:
- Declutter First: Remove all non-essential kitchen items and daily clutter that distract from the shelving structure.
- Stage Second: Artfully place a small selection of objects, such as simple ceramics or a plant, to add visual interest without overcrowding the frame.
13. The ‘Golden Triangle’ Placement: Positioning essentials within arm’s reach of the range
The kitchen work triangle connects the sink, refrigerator, and range, but modern design demands micro-zones within that geometry. The area immediately surrounding your stove functions as the primary “Cooking Zone.”
The goal here is to position essentials where you need them most: while the burner is active. Dedicate the shelving or cabinetry within arm’s reach strictly to items used during the actual cooking process, such as oils, vinegars, and primary seasonings. If you have to step away from a searing pan to find the olive oil, the layout has failed.
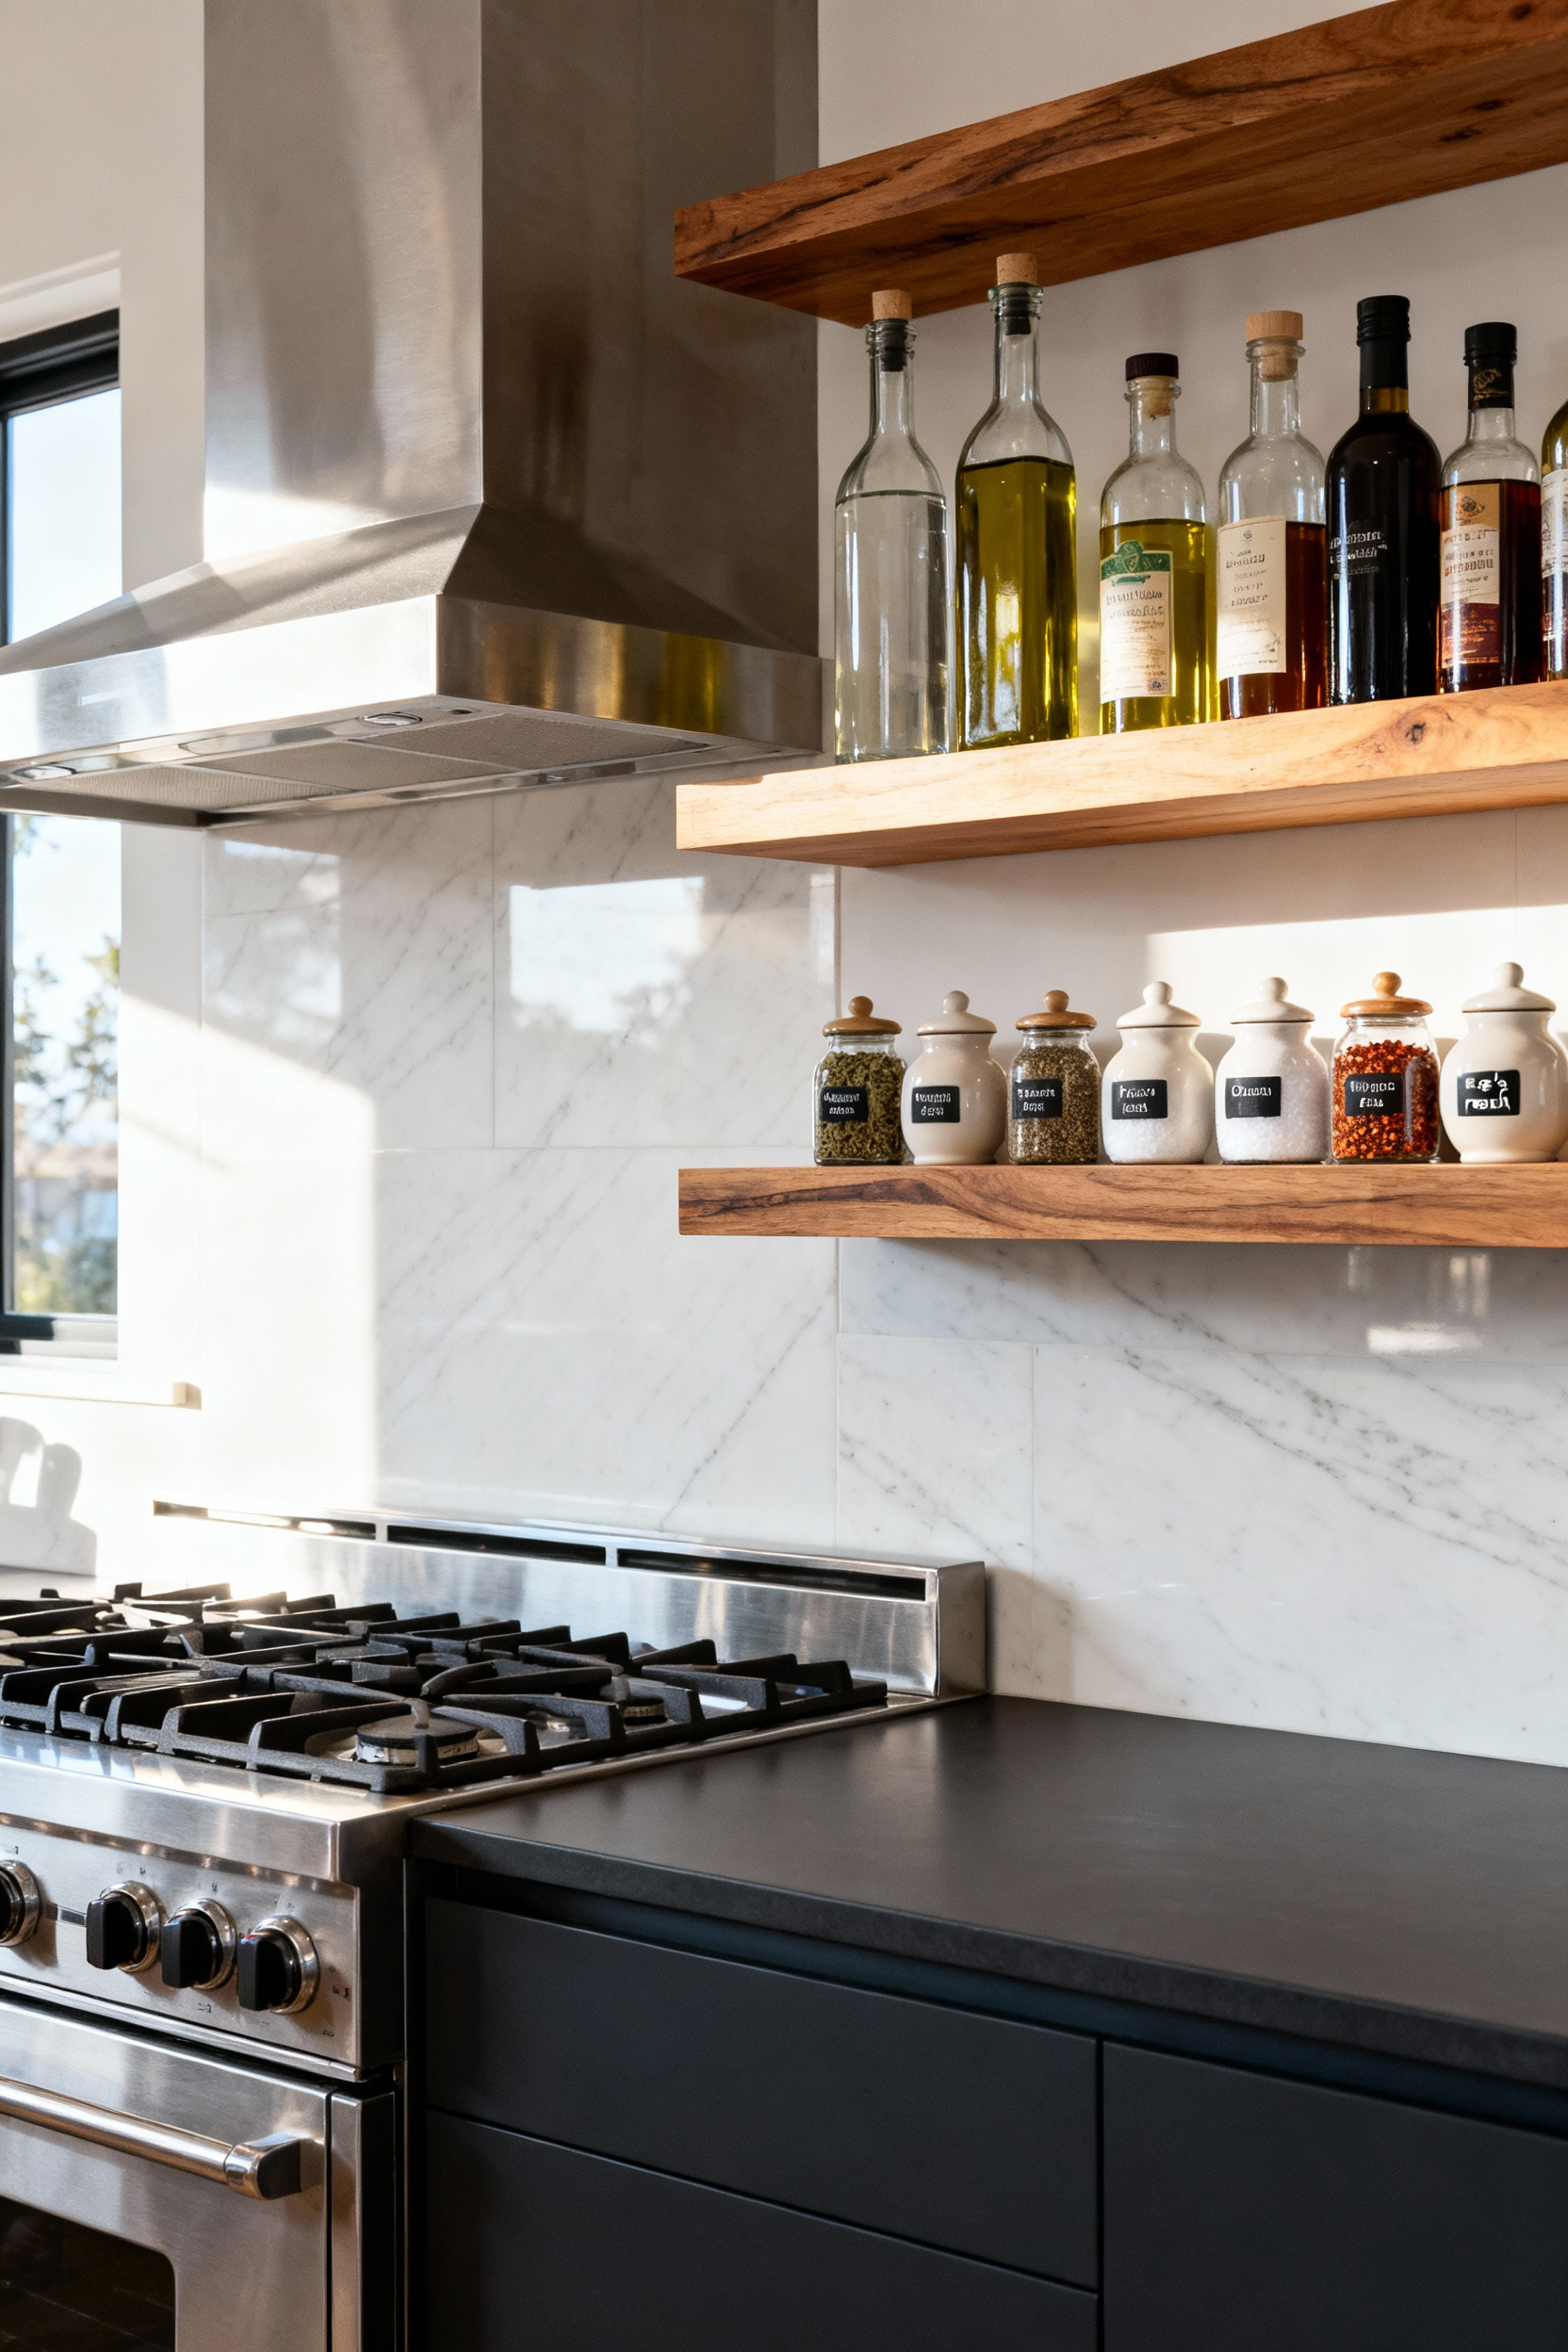
Maximize the vertical real estate flanking your range or along the backsplash to keep these items accessible. Installing shallow floating shelves, ideally six to eight inches deep, keeps spices visible without encroaching on your physical workspace. Alternatively, a wall-mounted rail system offers a sleek, industrial solution for hanging high-use tools like spatulas, ladles, and tongs. This approach prevents drawer clutter and ensures the right tool is instantly available mid-stir. By lifting these items off the surface, you preserve precious counter space for prep work while maintaining a clean visual line.
For items stored behind cabinet doors, organization is critical to maximize your kitchen storage cabinets. Employ tiered risers to prevent small spice jars from disappearing into the dark recesses of a shelf. Turntables, or lazy susans, are equally effective for grouping bottles of oil or vinegar near the stove. These compact organizers allow you to spin and grab exactly what you need without knocking over other items. A disorganized cabinet slows down the cooking process; these small adjustments keep your workflow smooth, safe, and efficient.
14. Negative Space Ratios: The 60/40 rule for balancing storage density and visual breathing room
Through the lens of a camera, a cluttered shelf immediately reads as visual noise. To correct this, apply the 60/40 rule, a composition principle that balances storage density with necessary breathing room.
This rule dictates that 60% of your visible shelf area should be filled with positive space—your actual items—while the remaining 40% stays intentionally empty. This negative space is not wasted real estate; it is a strategic design element that provides clarity and calm, allowing the architecture of the room to breathe.
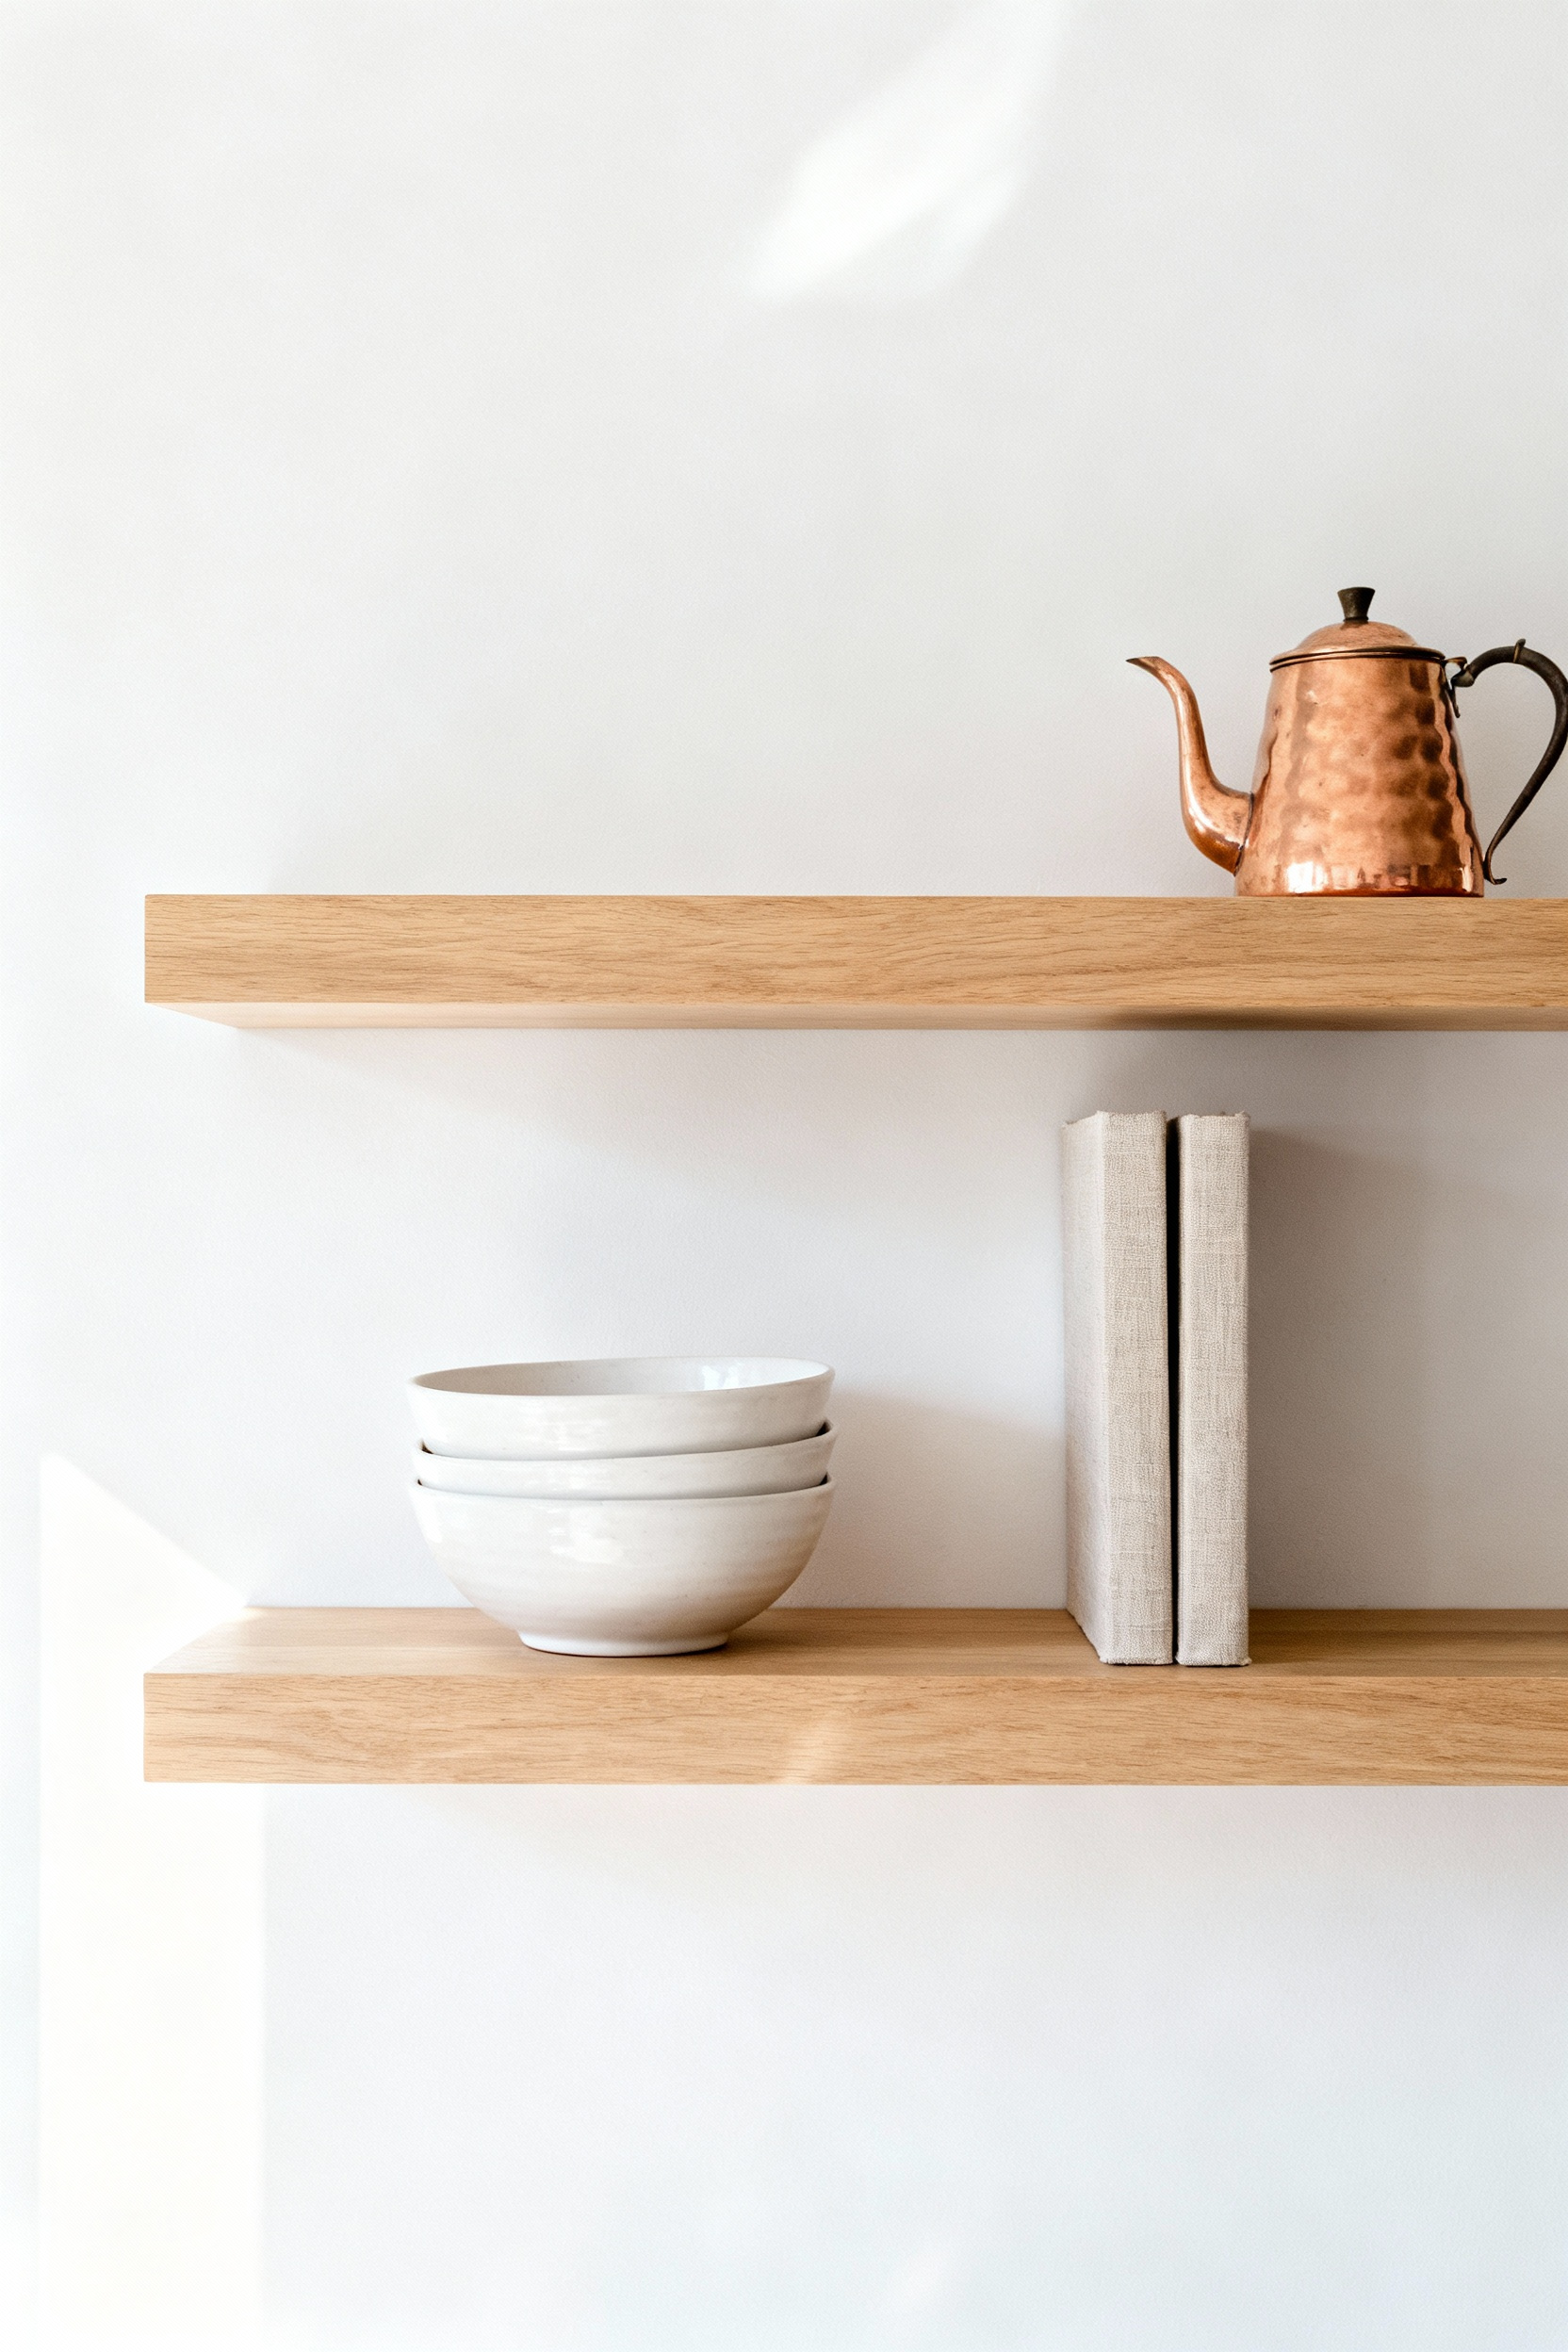
Finding this balance requires editing and precise placement. You must resist the temptation to fill every corner. Prioritize your most aesthetically pleasing and frequently used items, such as matching glassware or artisan ceramics, to occupy the functional 60%. Instead of lining these items up single-file, arrange them in distinct clusters. These groupings naturally create pockets of positive space separated by the necessary 40% negative space. On multi-tiered units, consider leaving specific sections entirely blank to create a visual “pause” for the eye.
To maximize the utility of your filled space without encroaching on the empty zones, focus on depth layering. Place taller, functional pieces behind shorter decorative items within your designated groups. This technique increases storage density in a contained footprint while preserving the impact of the surrounding negative space. When you respect the 40% void, your displayed items stop competing for attention and become clear, deliberate focal points.
15. Color Blocking via Ceramics: Using dishware as a dynamic architectural finish
Open shelving lets you treat everyday items as architectural elements. Instead of viewing dishware individually, view stacked ceramics as solid fields of color. Select items in one to three bold hues, such as deep cobalt or sage green.
When you stack these tightly, they transform from simple storage into a dynamic visual block that disrupts neutral kitchen schemes. To elevate this effect, prioritize materials with visual weight. Matte finishes, reactive glazes, and natural stoneware prevent the display from looking flat. These textures ensure your collection reads as a curated material finish rather than mere clutter.
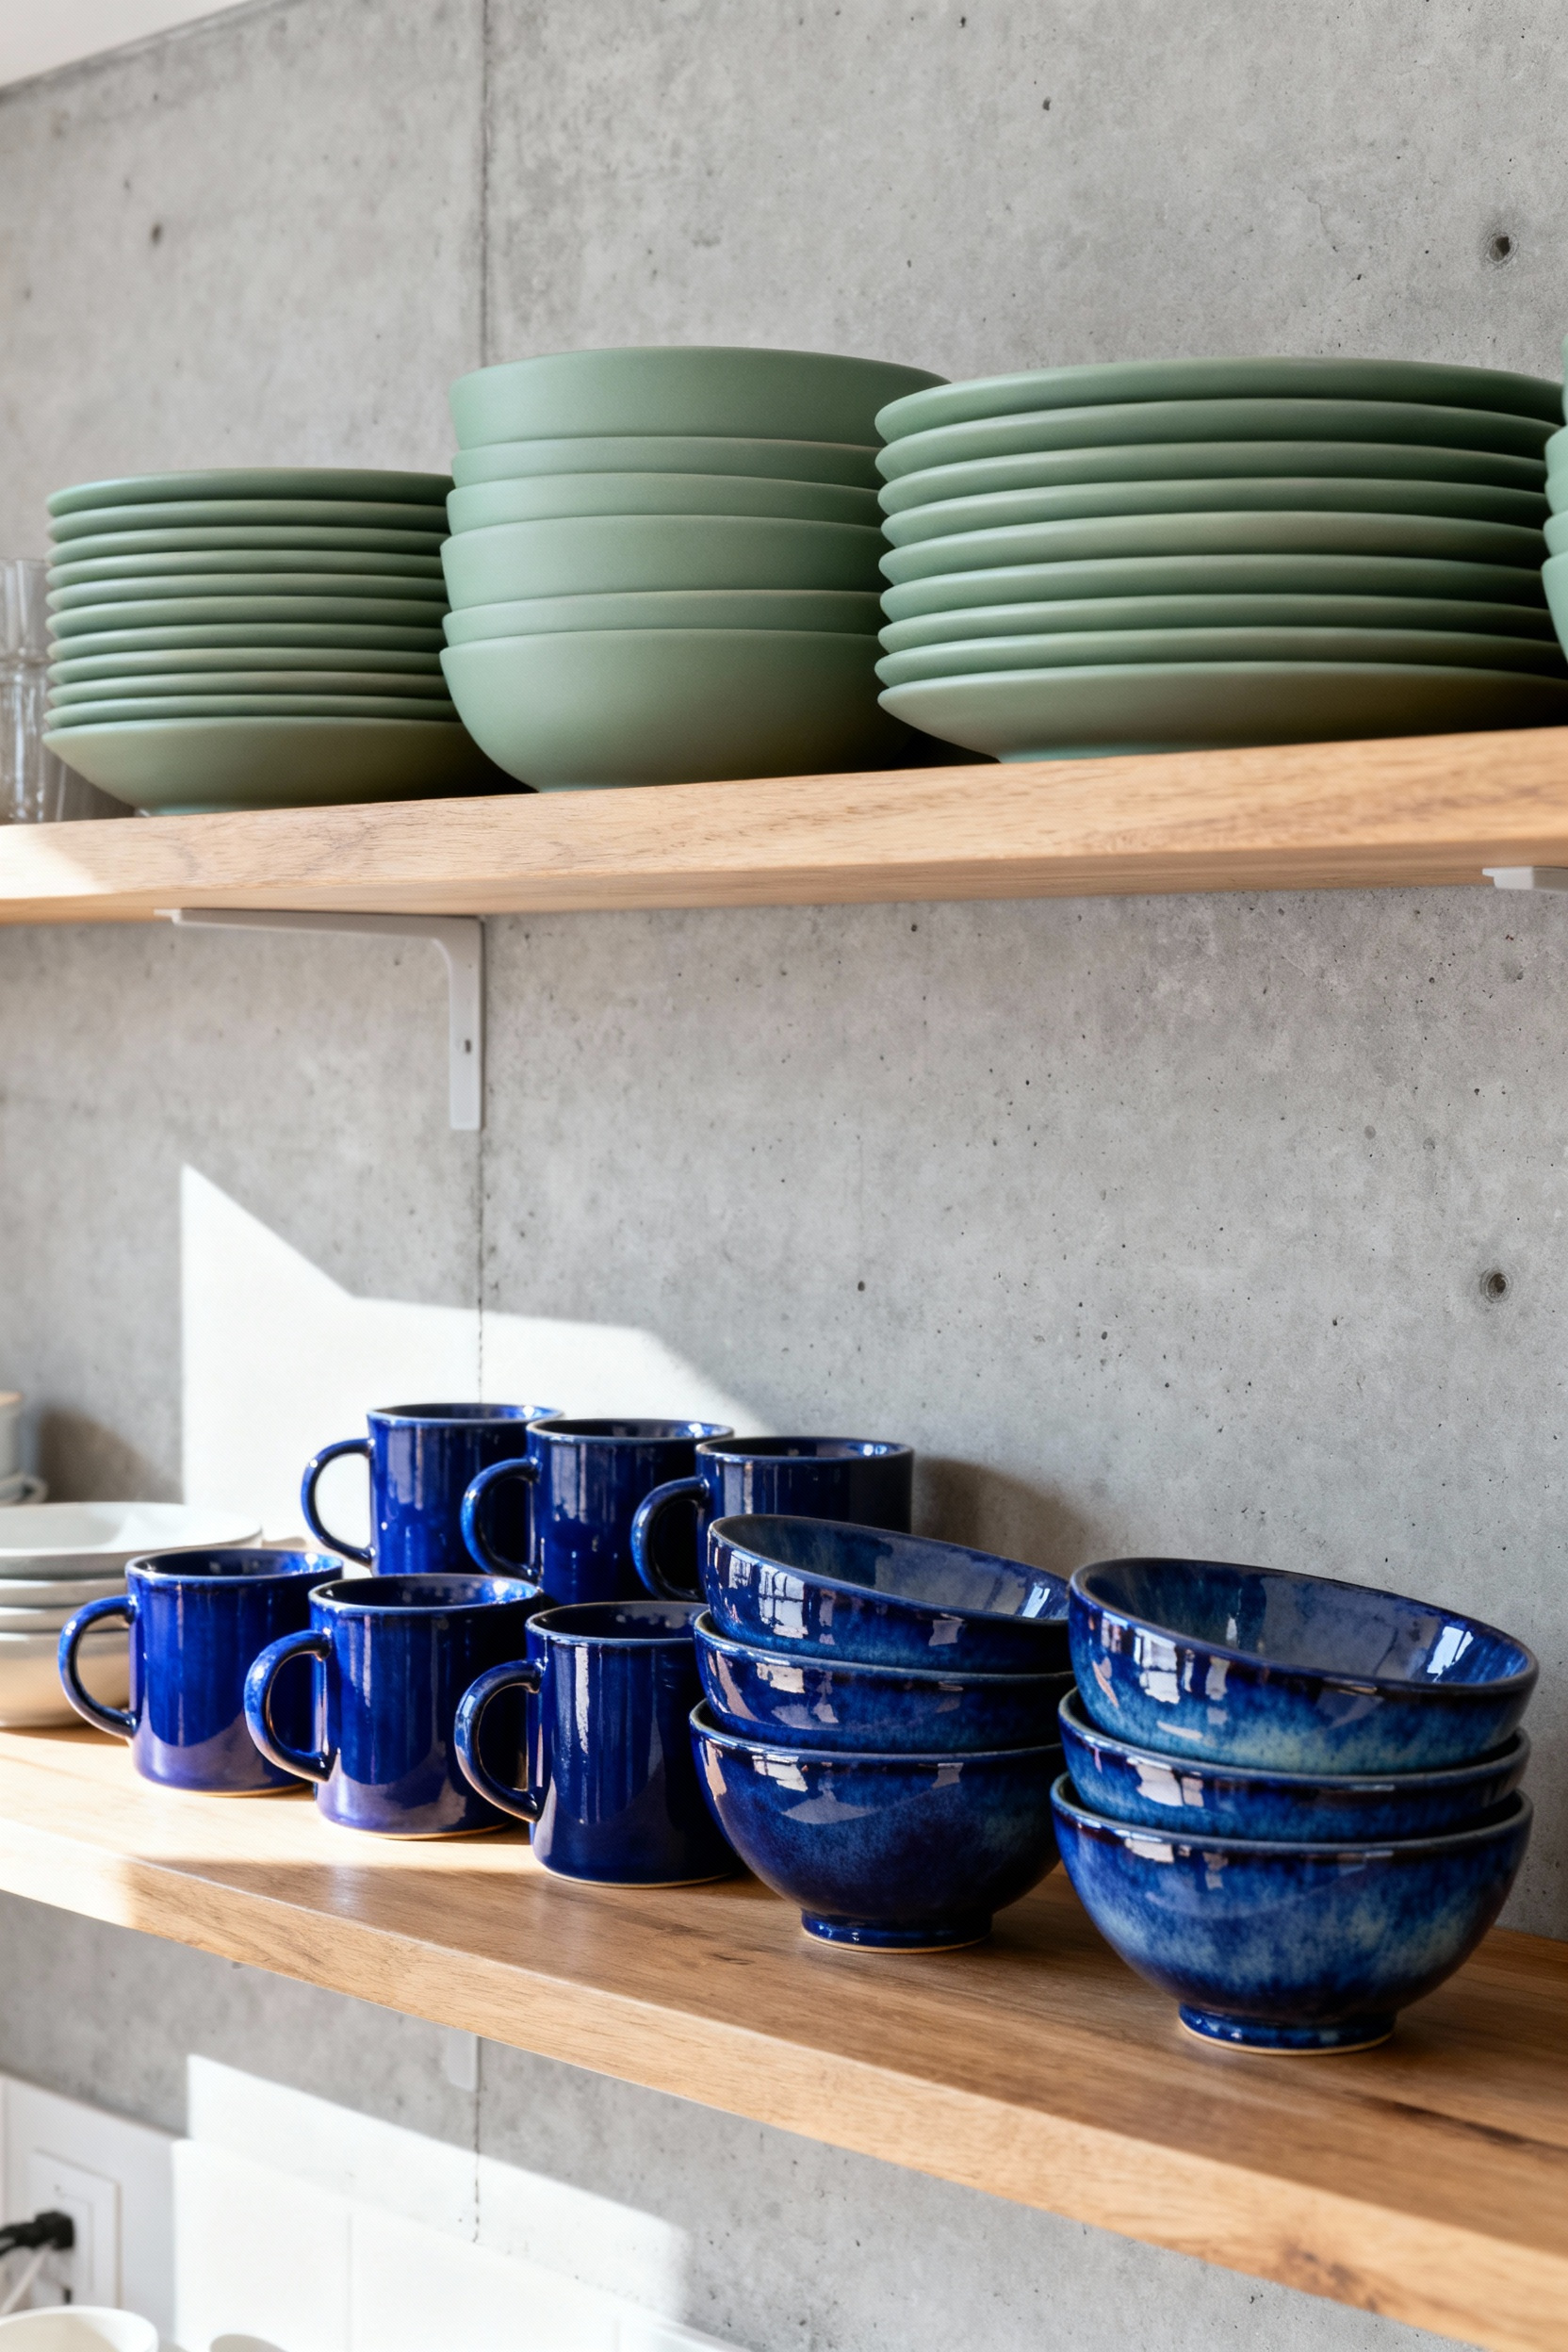
Achieving a professional composition requires a disciplined palette. Apply the classic 60-30-10 rule to your shelves to maintain balance. Let the shelf and wall serve as your dominant neutral background (60%), while your primary ceramic color occupies the majority of the usable space (30%). Reserve a third, contrasting hue for the remaining 10% to act as a high-impact accent. This technique creates a cohesive visual rhythm, turning a collection of plates and bowls into a unified design feature.
Finally, focus on the physical arrangement of these blocks to add depth. Avoid lining items up in rigid, linear rows. Instead, build visual clusters by layering plates against the back of the shelf or placing them behind a sculptural vessel. Group items in odd numbers to make the arrangement feel intentional and organic. By manipulating depth and spacing, you remove the utilitarian feel of the shelves and create a focal point that rivals permanent tile or wallpaper.
16. Vertical Dividers: Slot-based organization for trays and boards to create vertical rhythm
Treat your kitchen storage like an efficient filing system. Stacking baking sheets and cutting boards horizontally creates a chaotic “pancake stack” that wastes cubic footage and complicates meal prep. Instead, utilize the full height of your cabinetry by organizing these flat items upright.
This method works exceptionally well in tall, narrow spaces, such as the cabinet above a refrigerator or a base cabinet next to the oven. By standing items on their edge, you establish a clean vertical rhythm that offers instant visibility. You can execute a quick “grab-and-go” maneuver without needing to shuffle or unstack heavy platters.
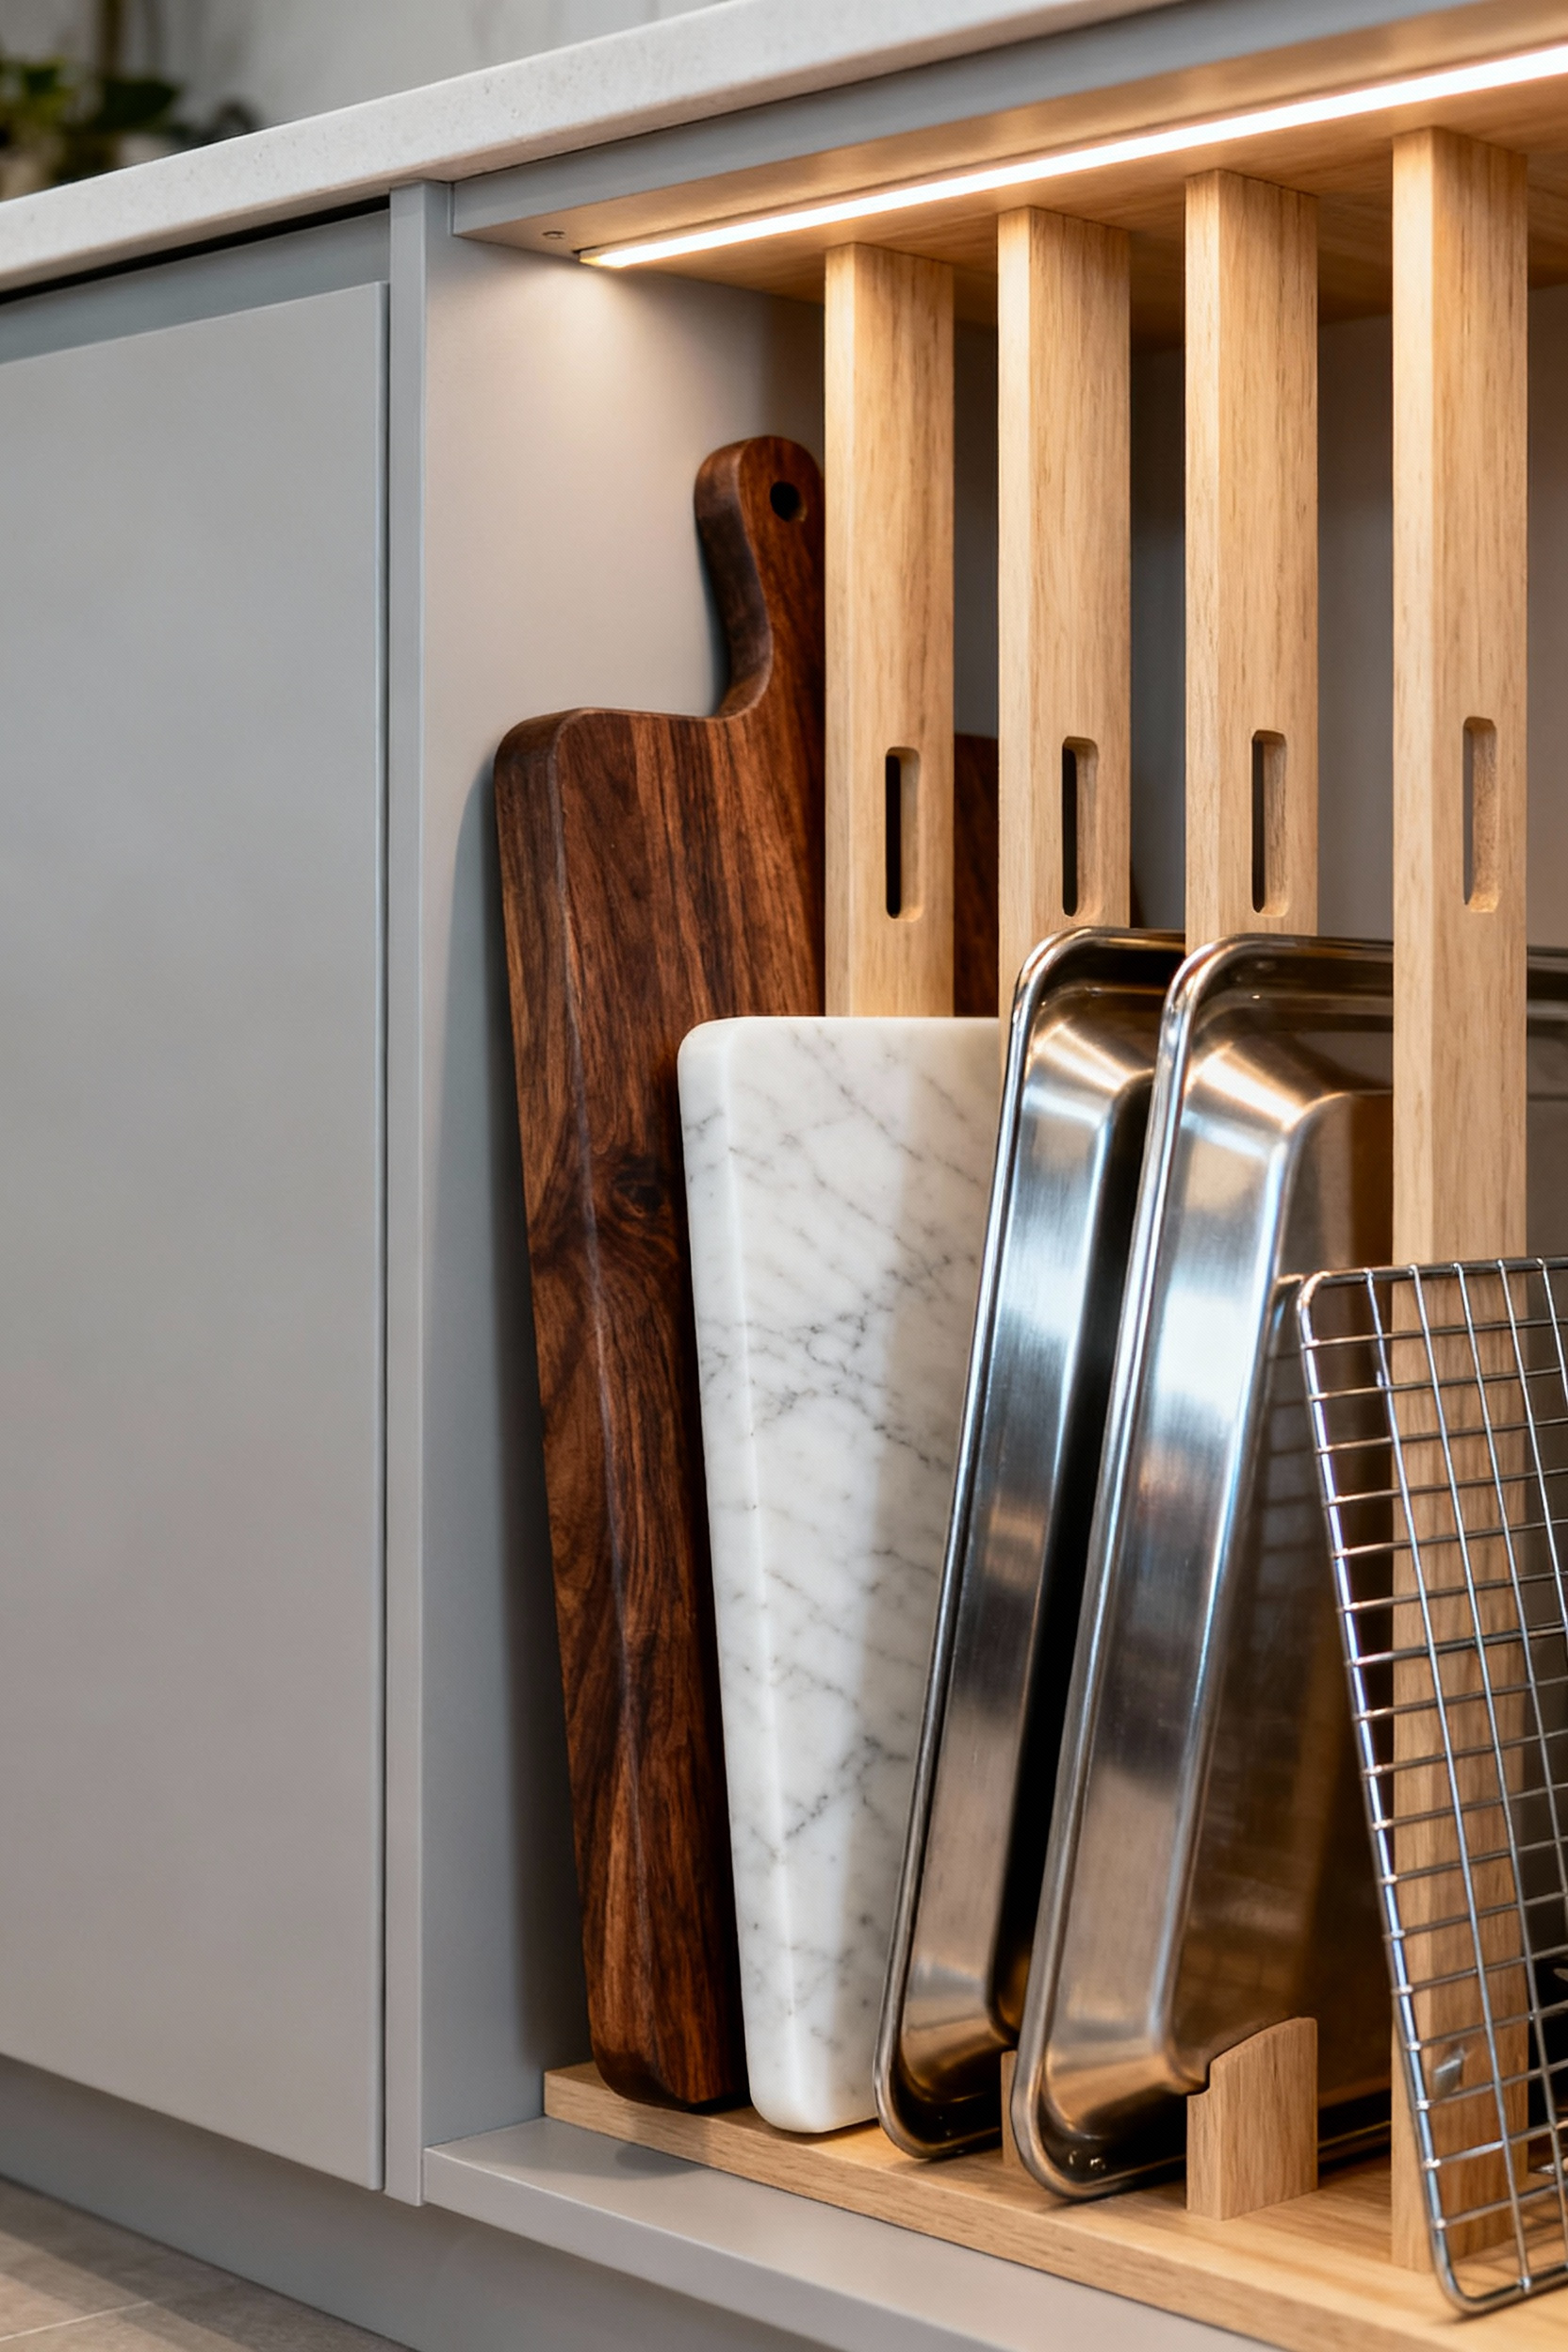
Proper implementation requires dividers tailored to your specific collection. Opt for adjustable steel racks or permanent wooden partitions to create defined zones. Before installation, measure your cabinet interior to ensure the depth and height accommodate your largest items. You should also match the slot width to the item thickness; a heavy butcher block requires a wider stance than a thin baking sheet. Beyond organization, distinct vertical slots extend the life of your cookware. This separation prevents the deep scratches and dents often caused by sliding abrasive metal pans across one another in a horizontal stack.
Conclusion: Moving from ‘Storage’ to ‘Curated Infrastructure’
Shifting from basic storage to curated infrastructure changes how you interact with your kitchen. It is no longer about simply hiding clutter but about building a dynamic system where form and function coexist. By pairing the visual lightness of open shelving with the engineered efficiency of concealed cabinetry, you transform the room into a space that works as hard as it looks. This approach demands intention; every exposed item becomes part of the room’s architecture, while hidden zones rely on specialized internal systems to ensure nothing gets lost in the dark.
This mindset elevates both your home’s value and your daily rhythm. A kitchen designed with infrastructure in mind feels permanent yet flexible, capable of evolving alongside your lifestyle. To begin this transformation, audit your current collection with a critical eye. Identify the essentials that deserve display for their beauty and utility, then retrofit your remaining cabinetry with tiered organizers or pull-outs to handle the rest. When evaluating your next set of kitchen shelving ideas, you stop managing mess and start curating your environment.
Frequently Asked Questions
How do I prevent my open kitchen shelves from looking cluttered?
To maintain a high-end, curated look, employ the 60/40 rule: keep 40% of the shelf area intentionally empty (negative space). Focus on grouping aesthetically pleasing items like matching ceramics or glassware in distinct clusters, avoiding rigid linear placement. Use color blocking to treat stacked items as architectural features rather than individual pieces of dishware.
What is the required thickness for floating kitchen shelves to prevent sagging?
To ensure structural integrity and prevent visible deflection, floating shelves spanning 30 inches or more should have a minimum thickness of 3/4-inch, utilizing solid lumber or high-grade plywood (avoid particleboard). Crucially, the concealed hardware must be securely anchored directly into the wall studs, not just drywall.
What materials are considered high-end for modern kitchen shelving in the luxury market?
Luxury kitchen shelving often features natural, durable materials known for visual warmth and structural strength. Popular options include thick rift-sawn white oak, richly figured live-edge walnut, or highly corrosion-resistant Type 304 stainless steel. For a blend of strength and transparency, heavy-gauge matte steel framing paired with tempered glass is also highly valued.
“`