Picture this: You’re standing in your kitchen. The only good light is from that one overhead fixture that casts shadows exactly where you need to chop. To get to the fridge, you have to squeeze past the open dishwasher door. And every time you open a lower cabinet, you have to get on your knees and excavate its contents just to find that one pot lid. It’s a space that works against you, not for you.
You know what people always ask me? “How do I start a Kitchen Renovation?” They think it’s about picking out pretty finishes from a magazine. It’s not. The most successful designers—the ones who create those effortlessly functional and beautiful spaces—spend a tiny fraction of their time on the pretty stuff. After 15 years of photographing and writing about architecture, I’ve seen the framework they all use. It isn’t about having some innate ‘eye for design’; it’s about systematic thinking. It’s about building a kitchen from the bones out, not from the backsplash in. These 20 points are the system. They teach you to think like a professional so your new kitchen doesn’t just look good in photos, but actually works for your life.
Strategic Planning & Smart Layout Design (Part 1)
This is the phase everyone wants to rush through to get to the fun stuff like picking countertops. Don’t. Every dollar and hour you invest here will pay you back tenfold. This is where we build the blueprint, establish the rules, and define what success actually looks like for your project. Getting this part wrong is like building a house on a shaky foundation—it doesn’t matter how beautiful the furniture is if the floors are about to collapse.
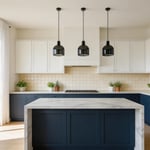
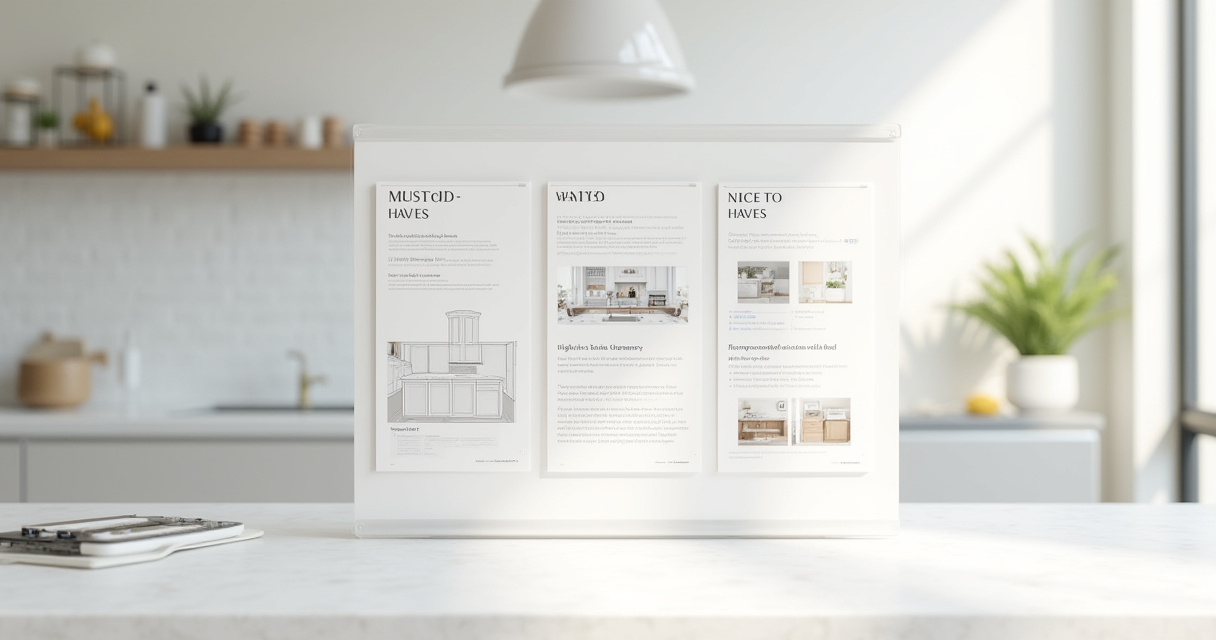
1. Define Your Renovation Goals: Needs, Wants, and Must-Haves
Before you even open Pinterest, you need to have a brutally honest conversation with yourself and everyone who uses the kitchen. Make three columns: Must-Haves, Wants, and Nice-to-Haves. A ‘must-have’ is something that solves a fundamental problem, like “I must have more Counter space” or “the dishwasher can’t block a walkway.” A ‘want’ is something like “I want an appliance garage.” And ‘nice-to-have’ is the fantasy stuff, like a built-in espresso machine.
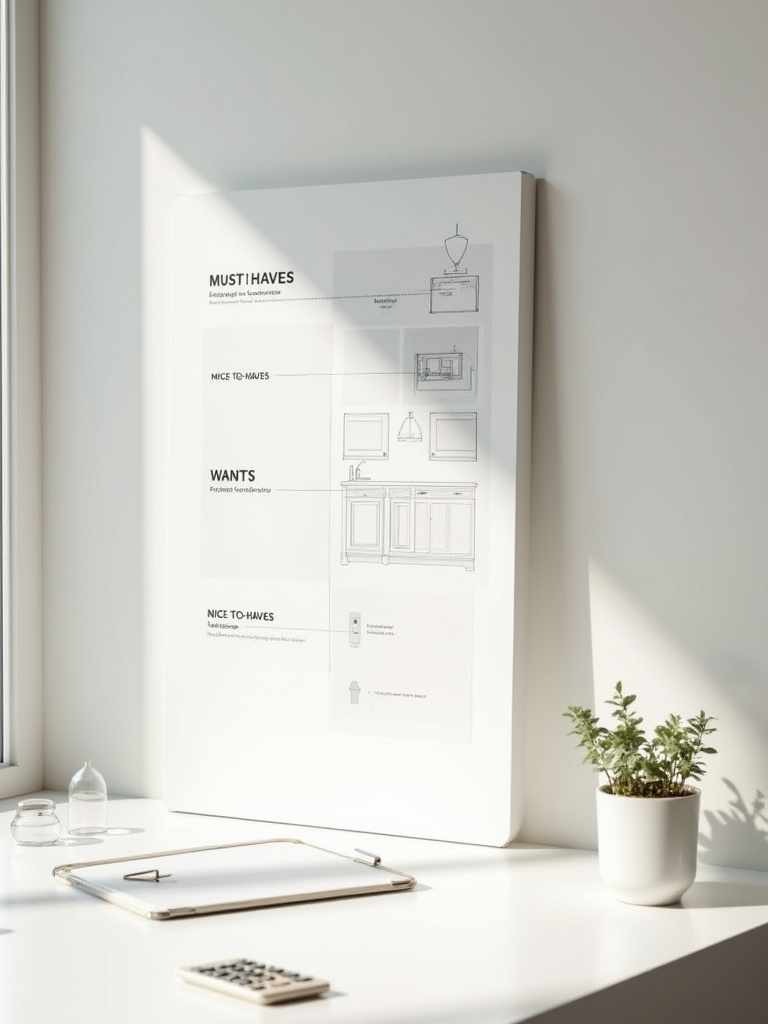
I once worked with a client who fell in love with a specific handmade tile (a ‘want’) and blew a huge chunk of their budget on it. The result? They still didn’t have enough counter space (a ‘must-have’), and every single day, that lack of function drove them crazy. The beautiful tile became a monument to their misplaced priorities. Be ruthless here. Function always comes before form in this initial stage. Solve the problems first, then make it beautiful.
This strategic ranking isn’t about limiting your dreams; it’s about directing your resources. By clearly separating non-negotiable needs from desirable wants, you create a decision-making filter that keeps your project on track and on budget, ensuring the final result isn’t just stylish, but deeply satisfying on a daily basis.
2. Establish a Realistic Budget with a Contingency Fund
Let’s be clear: a budget isn’t a number you hope to hit. It’s a detailed financial plan, and the most important part of that plan is the contingency fund. I call it the “oh crap” fund. You must, must, must set aside 15-20% of your total budget for the unexpected, especially in an older home. I can’t tell you how many times a contractor has opened a wall to find ancient knob-and-tube wiring, a hidden plumbing leak, or structural damage that absolutely has to be fixed.
That fund is what separates a stressful, project-derailing disaster from a manageable problem. A client of mine was renovating their 1960s kitchen and demolition revealed extensive asbestos behind the soffits. It was a $4,000 un-planned expense. Because they had a healthy contingency fund, it was an annoying but solvable issue. Without it, they would have had to sacrifice their new appliances to cover the cost. Your budget isn’t real until it includes a buffer for reality.
Ignoring this buffer is the single biggest financial mistake you can make in a renovation. It’s the safety net that lets you handle surprises without compromising on the critical elements of your design, ensuring you can complete the project you set out to create.
3. Optimize Workflow with the Kitchen Triangle Layout
People love to say the “work triangle” is an old-fashioned concept. They’re wrong. It’s not a style, it’s physics. The triangle connects your three main work zones—the sink, the stove, and the refrigerator. The goal is to keep the path between them short and unobstructed. A well-designed triangle means you can pivot from washing vegetables to chopping them to sautéing them with minimal effort. A bad layout means you’re walking a 5k just to make a simple dinner.
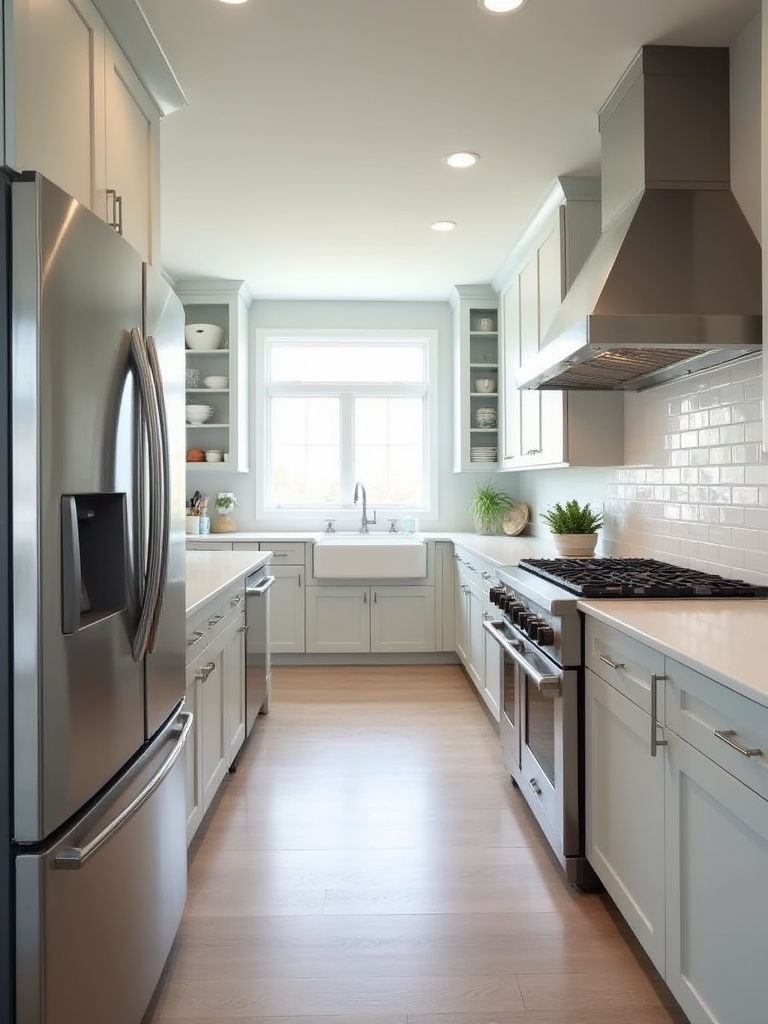
Now, in bigger, more modern kitchens, this concept evolves into “work zones.” You might have a baking zone with its own prep space and oven, or a beverage station. But the core principle remains the same: group related tasks and tools together to minimize wasted motion. Think about your personal workflow. Do you prep next to the sink or the stove? Design the layout around your actual habits, not some idealized version of how a kitchen should look. A beautiful kitchen that’s exhausting to cook in is a failed kitchen.
The efficiency gained from a properly planned layout is staggering. It transforms the daily act of cooking from a chaotic marathon into a streamlined, intuitive dance, which is a testament to why this foundational principle of design endures.
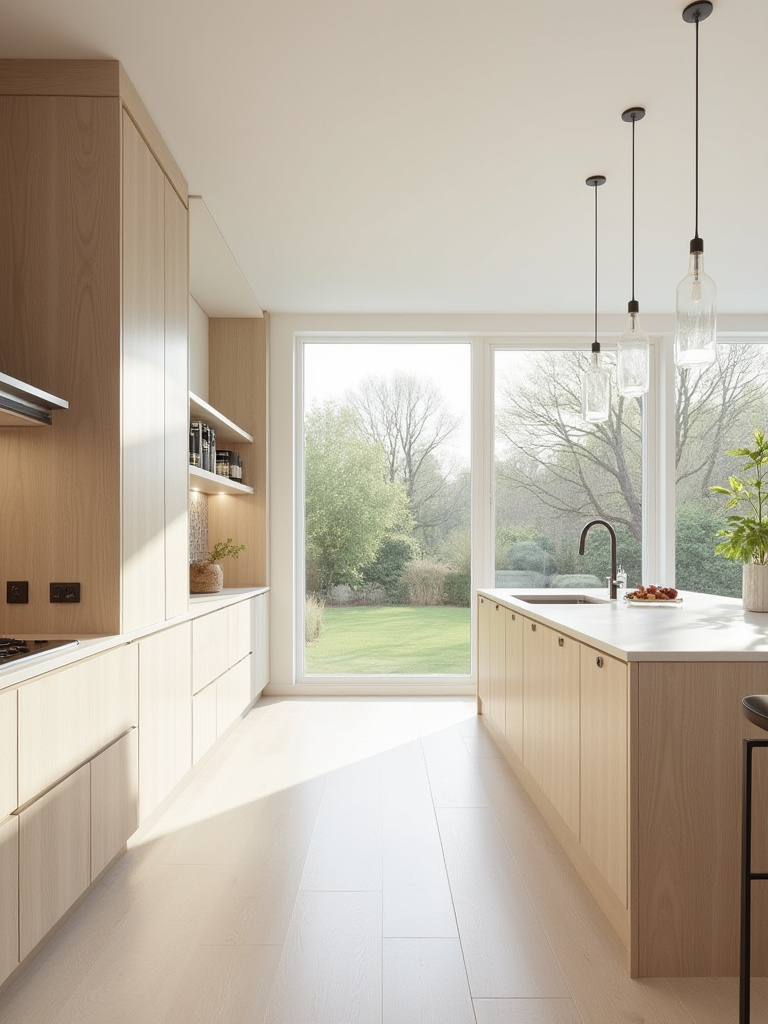
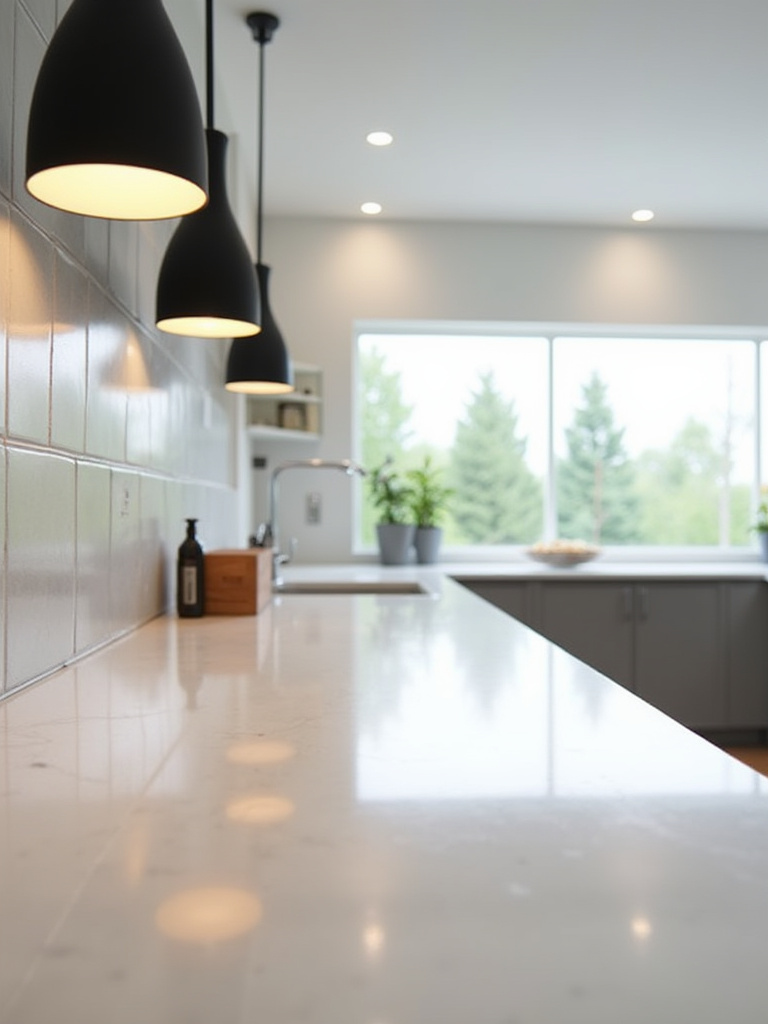
4. Embrace Open Concept Planning for Enhanced Connectivity
As a photographer, I can tell you that removing a wall is about more than just creating space—it’s about manipulating light and sightlines. An open concept can flood a formerly dark kitchen with natural light from a living room window, completely changing the feel of the home. It turns the cook from an isolated worker into the host at the center of the party, connected to everything that’s happening.
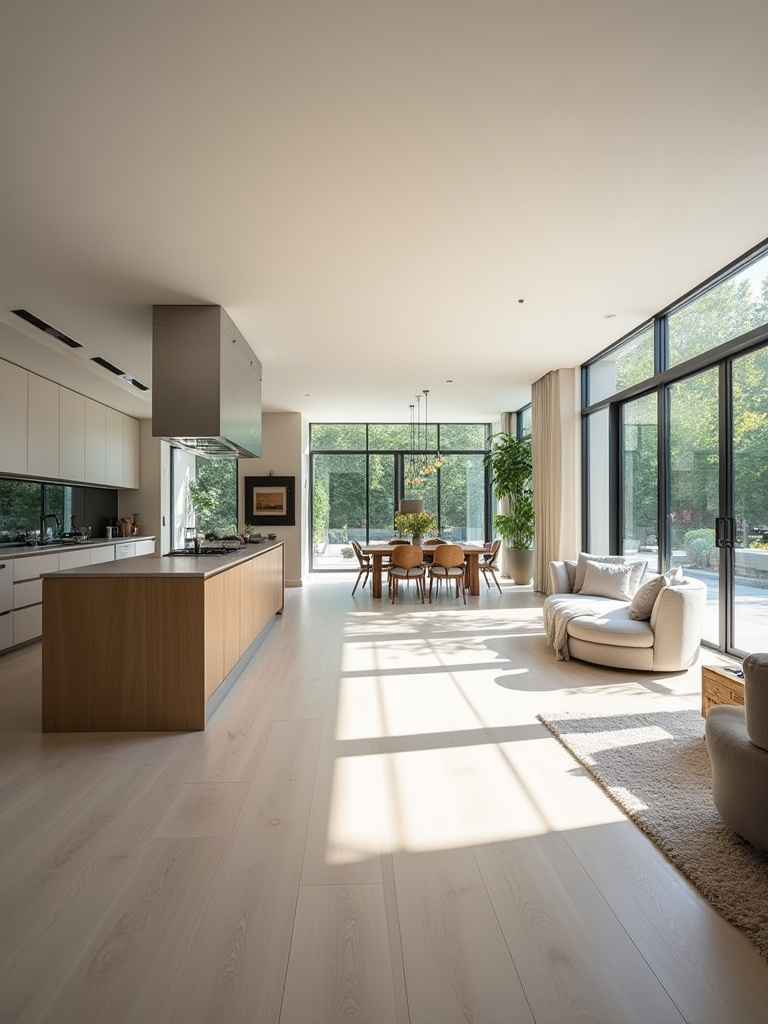
But here’s the reality check nobody talks about: there is zero separation. The noise of the blender, the smell of searing salmon, and the sight of your dirty dishes are now part of your living room experience. If you go open concept, you need to invest heavily in two things: a whisper-quiet dishwasher and a ventilation hood with some serious power (measured in CFM, or cubic feet per minute). Don’t let a designer talk you into a wimpy hood for aesthetic reasons unless you want your sofa to permanently smell like last night’s dinner.
The decision to go open-concept is a lifestyle choice as much as it is a design one. It demands a commitment to tidiness and a willingness to invest in the infrastructure needed to manage the sensory overflow that comes with barrier-free living.
Strategic Planning & Smart Layout Design (Part 2)
Once you’ve got the big picture of your layout, it’s time to zoom in on the structural details. This is the part that’s less about inspiration and more about engineering. It’s tempting to gloss over, but these decisions have the most significant and lasting impact on the final space, affecting not just aesthetics but the very integrity of your home.
5. Identify Potential Structural Changes for Greater Impact
This is where you make or break your budget and, potentially, your house. Moving a wall, widening a doorway, or adding a window are the most transformative things you can do in a renovation. These aren’t just cosmetic changes; they alter the entire composition and light of your home. A cramped, U-shaped kitchen can become the heart of the home simply by removing the wall that separates it from the dining room. It’s the highest-impact move you can make.
However, this is absolutely not a DIY consideration. Before you even fantasize about taking a sledgehammer to anything, you need a structural engineer. They are the only ones who can tell you for certain if a wall is load-bearing. Guessing wrong can lead to catastrophic failure of your home’s structure. Get a professional opinion, get the permits, and get it done right. The cost of an engineer is a tiny insurance policy against a multi-thousand-dollar disaster.
These foundational shifts are the moves that separate a simple refresh from a true transformation. They are investments in light, flow, and function that pay dividends in both daily quality of life and long-term property value.
Material Selection & Core Component Installations (Part 1)
Now that the blueprint is locked, we can start specifying the physical components. This stage is about balancing three things: aesthetics, durability, and budget. The choices you make here will dictate how your kitchen looks, how it feels to use, and how well it stands up to the abuse of daily life.
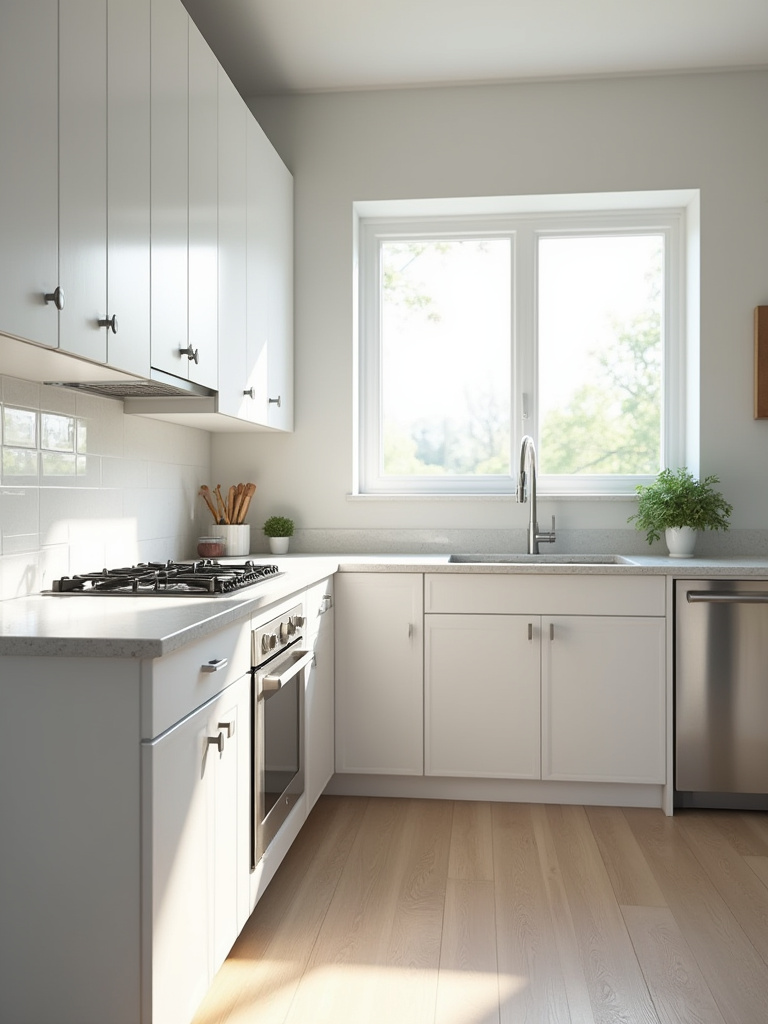
6. Select Durable, Stylish Cabinetry for Optimized Storage
Cabinets are the furniture of your kitchen. They are the single largest visual element and your primary storage workhorse. When it comes to the cabinet boxes—the part you don’t really see—don’t cheap out. Plywood construction is far superior to particle board (MDF) in its ability to hold screws and resist moisture damage over time. You want to feel that satisfying, solid “thunk” when you close a door, not a hollow rattle.
Here’s a shortcut if the budget is tight: invest in high-quality cabinet boxes and hardware (soft-close hinges and full-extension drawer glides are non-negotiable for me), but you can save money on simpler door and drawer fronts. You can always replace doors down the line far more easily and cheaply than you can replace the entire cabinet system. And think in drawers, not cupboards, for base cabinets. A drawer pulls the contents out to you; a cupboard forces you to get on the floor and dig into a dark cave.
The quality of your cabinetry defines the tactile experience of your kitchen. It’s a long-term investment in structural integrity and ergonomic ease that forms the very foundation of the room’s functionality.
7. Choose High-Performance Countertop Materials for Longevity
Your choice of countertop material should be based on a realistic assessment of your lifestyle. Are you the kind of person who wipes up a red wine spill immediately, or does it sit there overnight? If you’re the latter, natural stones like marble, with its porous nature and tendency to stain and etch, will be your nemesis. It’s beautiful, but it’s high-maintenance. For busy families and less-than-fastidious cooks, engineered quartz is king. It’s virtually non-porous, meaning it resists staining, and it’s incredibly durable.
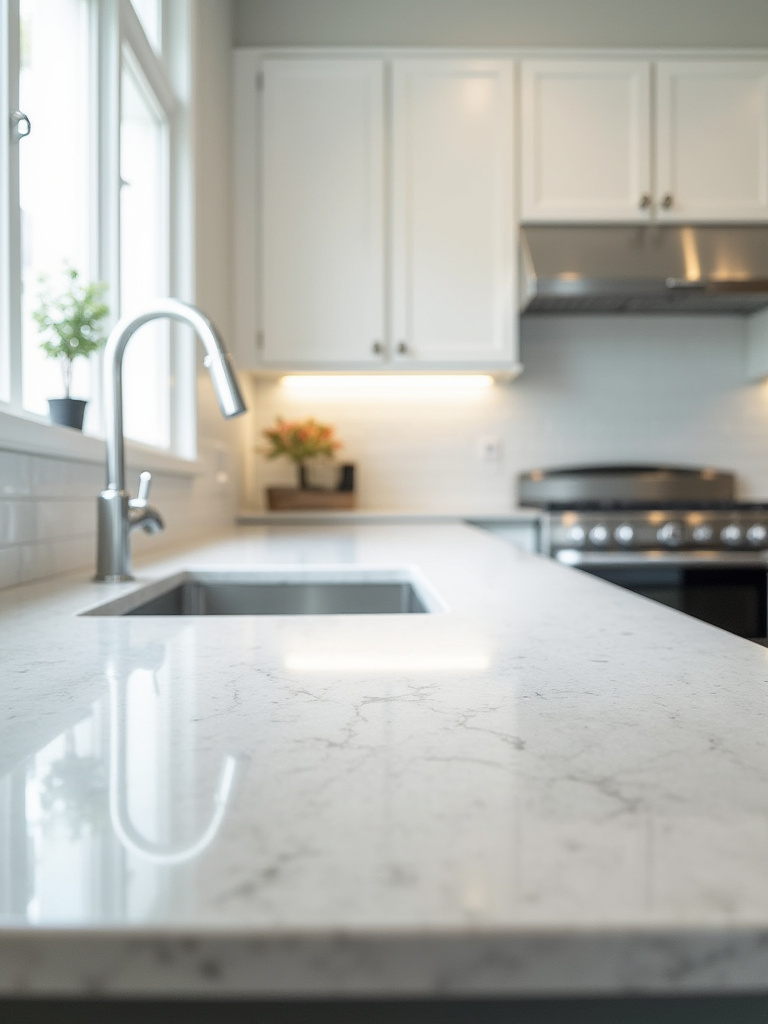
I photographed a kitchen once where the owners insisted on Carrara marble because they loved the look. Six months later, I went back for another shoot and saw faint rings from wine glasses and splotches from lemon juice etched into the surface. They were heartbroken. They had chosen the look over the reality of their lives. Get samples of your top choices. Take them home. Spill coffee on them. Scratch them with a key. See what you can actually live with every day.
The countertop is your primary work surface, and selecting the right material is a crucial intersection of aesthetic desire and practical reality. It’s a decision that will impact your kitchen’s daily maintenance and long-term appearance more than almost any other.
8. Integrate Smart, Energy-Efficient Appliances Seamlessly
Let’s cut through the hype around “smart” appliances. A refrigerator with a giant tablet on the front is not necessarily smart; often, it’s just another screen that will be technologically obsolete in three years. True intelligence in an appliance is about solving a real problem. A smart oven that you can preheat on your way home from work? Genuinely useful. A dishwasher that’s so quiet you don’t have to shout over it? A godsend in an open-concept home.
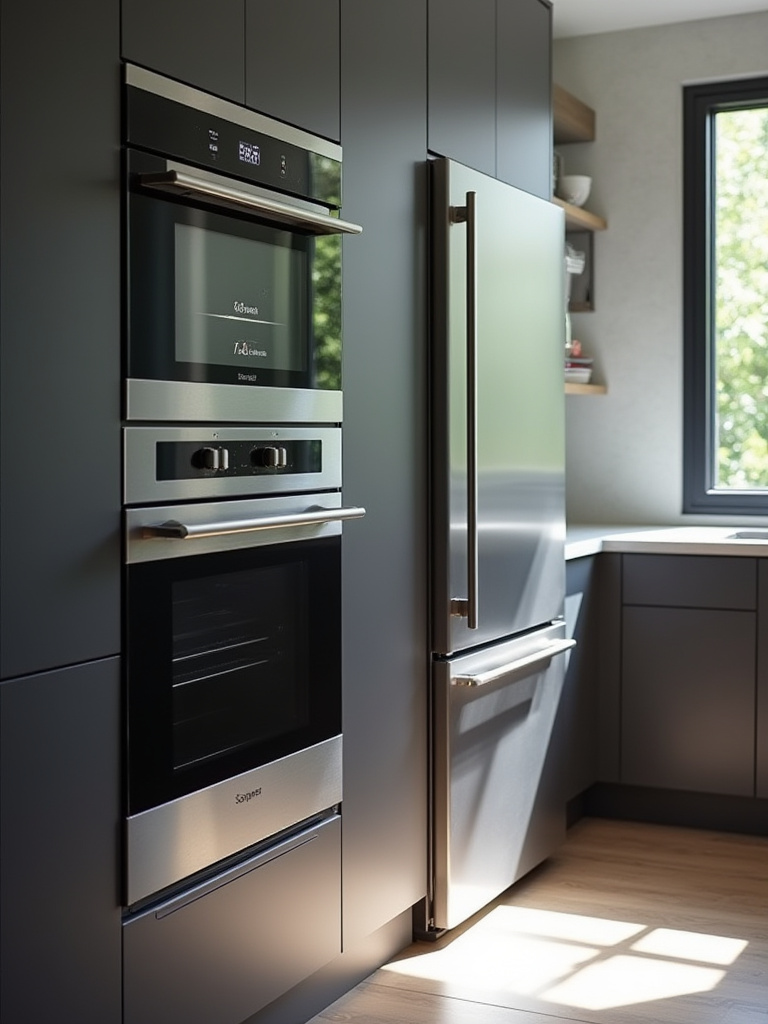
Before anything else, look for the ENERGY STAR label. This is the single most important feature, as it will save you real money on your utility bills every single month. After that, evaluate smart features with a cynical eye. Does this feature simplify my life, or does it just add a layer of technological complexity? Prioritize quiet operation (measured in decibels), proven reliability from reputable brands, and energy efficiency. That’s the trifecta of a truly smart appliance investment.
By focusing on tangible benefits like energy savings and genuine convenience over gimmicky features, you ensure your appliances are valuable assets that enhance your daily life rather than just fleeting novelties.
9. Explore Flooring Options for Style and Practicality
Your kitchen floor is the most abused surface in your home. It has to withstand constant foot traffic, dropped pans, and inevitable spills. For pure durability and Water resistance, you can’t beat porcelain tile. The downside is that it’s hard underfoot and unforgiving—drop a glass and it will shatter. Hardwood is beautiful and warm, but it’s the mortal enemy of water. A leaky dishwasher can destroy it in a day.
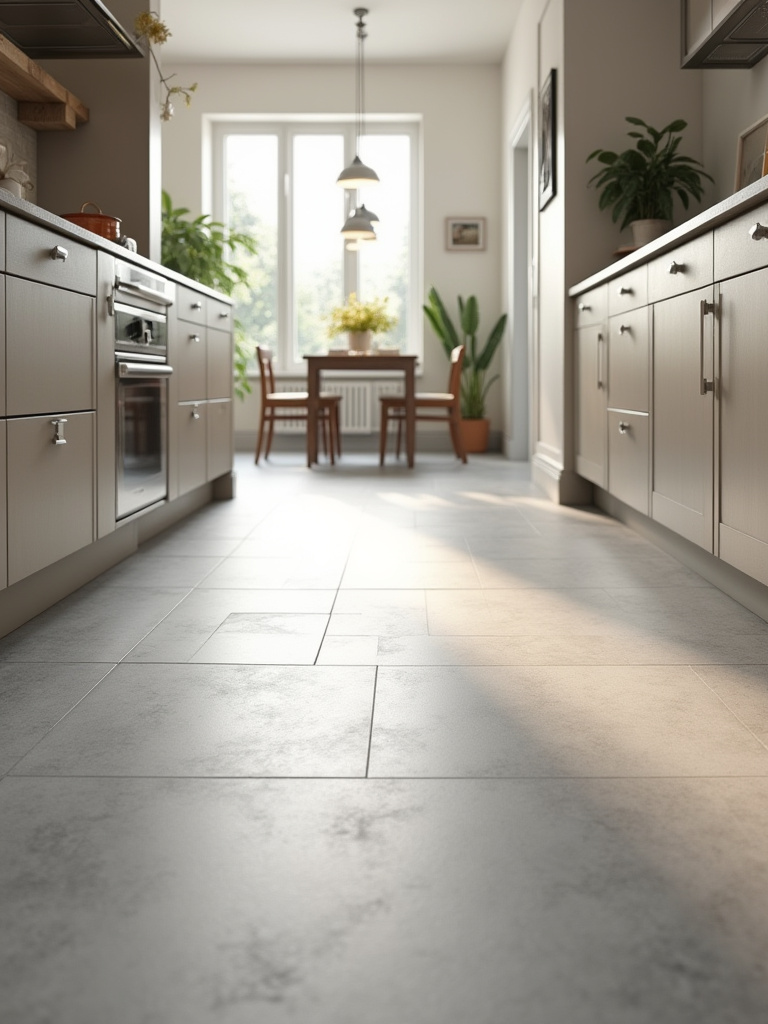
For most people, the sweet spot is Luxury Vinyl Plank (LVP). Modern LVP looks incredibly realistic, is 100% waterproof, is softer underfoot than tile, and is incredibly scratch-resistant. It’s the practical, bulletproof choice for a hard-working kitchen. From a photographer’s perspective, also consider the finish. A high-gloss floor will bounce light everywhere, which can be great in a dark space but can also create a lot of glare. A matte finish will absorb light, creating a softer, more grounded feel.
The flooring you choose sets the visual and physical foundation for the entire room. It needs to be a careful calculation of durability, comfort, water resistance, and aesthetic—a surface that’s ready for the realities of life.
Material Selection & Core Component Installations (Part 2)
We’re still in the guts of the project, focusing on the big, built-in pieces that define the room’s architecture. The next component is often the centerpiece of the modern kitchen, a multi-functional hub that dictates how the entire space flows and functions.
10. Incorporate a Functional Island or Peninsula for Versatility
A kitchen island is not a right, it’s a privilege. My biggest pet peeve is seeing a huge, clunky island crammed into a space that’s too small for it, creating awkward bottlenecks. The absolute minimum clearance you need around an island is 36 inches, but 42-48 inches is far more comfortable, especially if it’s a path people frequently walk through or if multiple people will be cooking. This is what I call the “dance space”—the room you need to move freely without bumping into things or people.
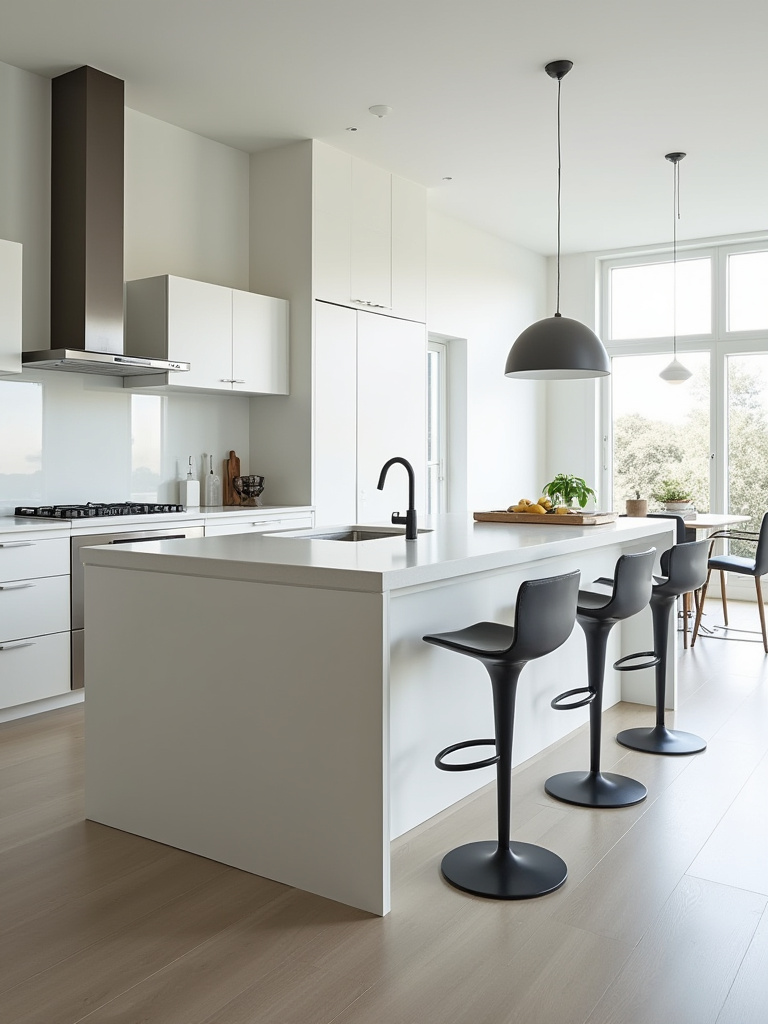
Once you’ve confirmed you have the space, define the island’s job. Is it primarily for prep, with a big, open surface? Is it a cooking hub with a cooktop? A cleanup zone with a sink? Or is it a social hub for casual meals and homework?
“A well-designed island truly becomes the nucleus of the modern kitchen… a key point for social interaction,” as one architect told me.
Its function should dictate its form. An island designed for seating needs a comfortable overhang, while one for prep work needs accessible storage for tools and bowls. Don’t just plop an island in the middle of your kitchen; design it with a clear purpose.
An island isn’t just an object; it’s a functional anchor that directs the kitchen’s traffic and workflow. Its successful integration depends entirely on a thoughtful balance of scale, clearance, and purpose.
Aesthetic Enhancement & Functional Refinements (Part 1)
With the heavy lifting done, we can finally turn our attention to the layers that bring the space to life. This is where art meets science—blending visual appeal with high-performance functionality to create a kitchen that is not only beautiful but also a joy to use.
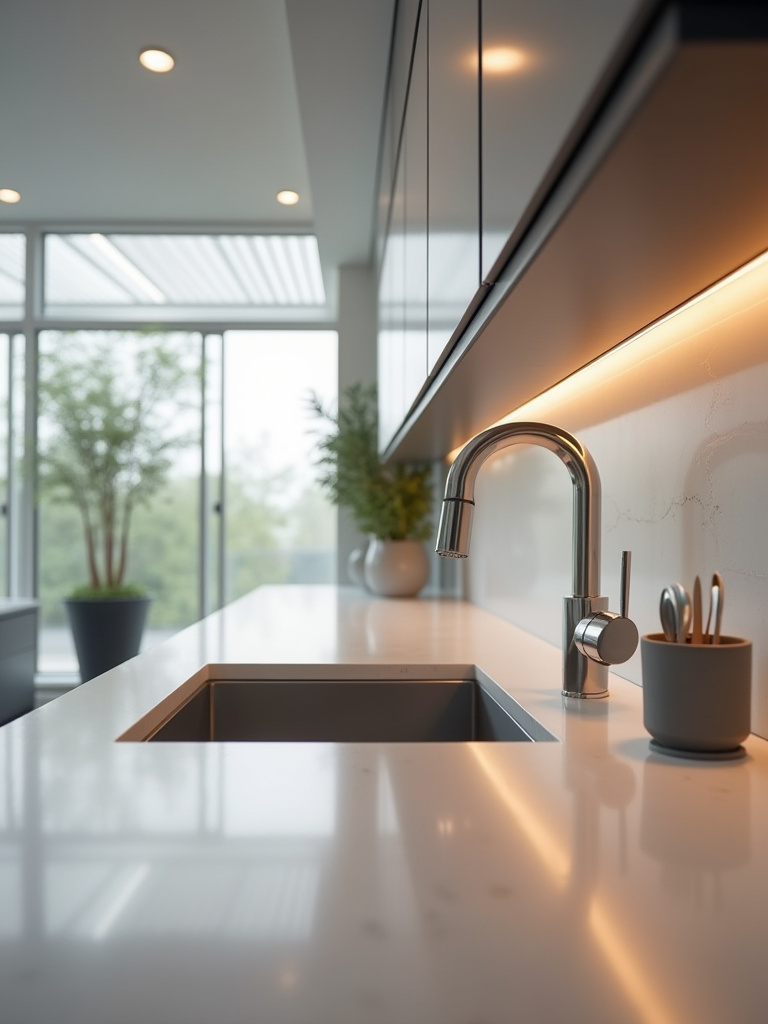
11. Illuminate Your Space with Layered Lighting Design
This is the single most important thing you can do to make your kitchen feel professional and high-end, and it’s my absolute specialty as a photographer. You cannot light a kitchen with one central fixture. I repeat: you CANNOT. It’s a design crime that creates a flat, shadowy, and uninviting space. You need layers. Three of them, to be exact.
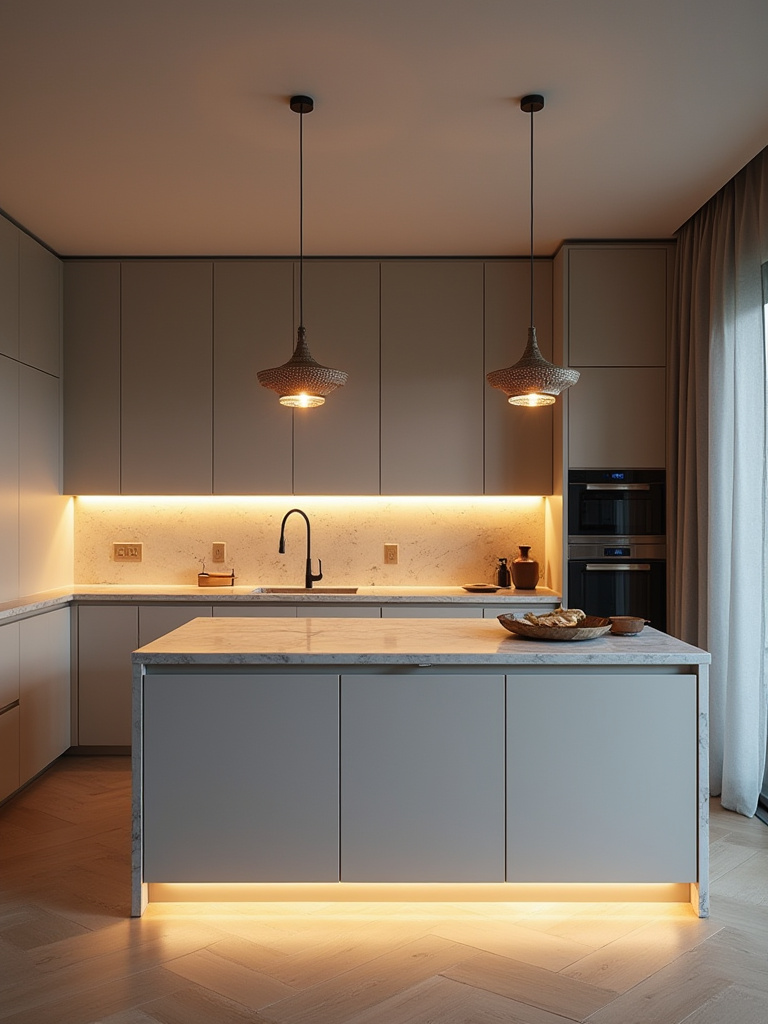
First, Ambient light: This is your general, overall illumination, like recessed can lights on a dimmer. Think of it as mimicking daylight. Second, Task light: This is focused, shadow-free light exactly where you work—under-cabinet LED strips are the undisputed champion here. They illuminate your countertops so you can actually see what you’re chopping. Third, Accent light: This is the jewelry. Pendants over the island or a spotlight on a piece of art. This layer adds mood and character. Also, pay attention to color temperature. A warm 3000K is great for ambient light, but a cleaner, whiter 4000K is better for task lighting.
Layered lighting transforms a room from a simple box into a dynamic, three-dimensional space. It is the invisible architecture that dictates mood, highlights features, and ensures a kitchen is as functional as it is beautiful.
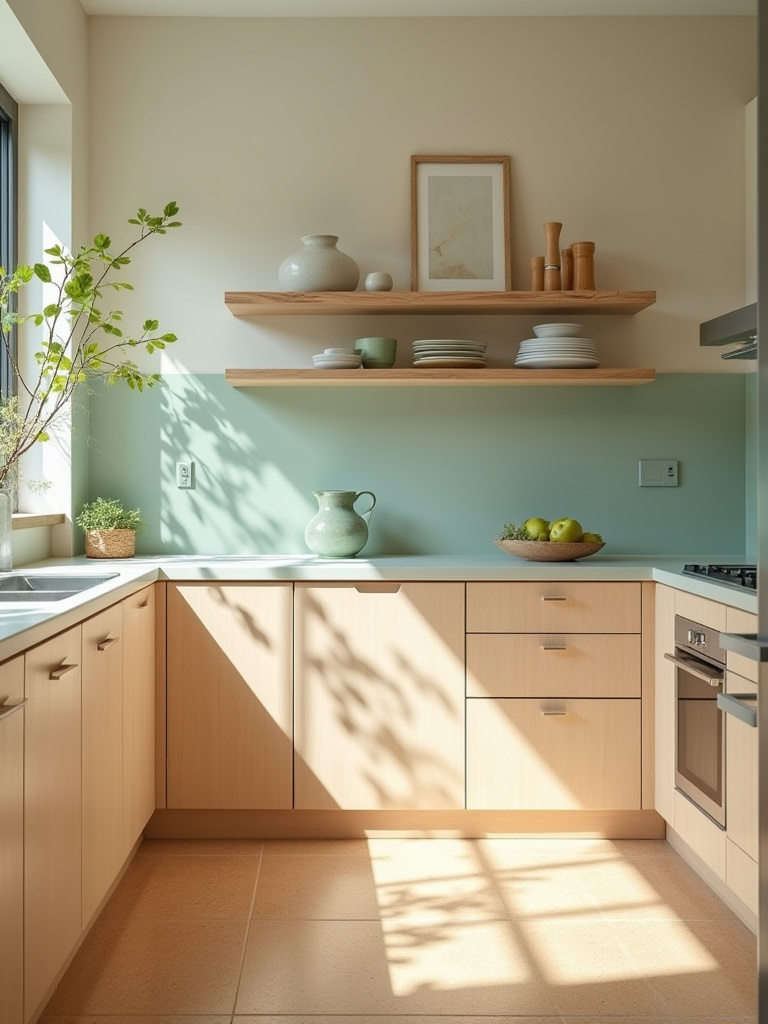
12. Choose a Backsplash That Adds Visual Interest and Protection
The backsplash is your opportunity to add a blast of personality without the long-term commitment of something like a countertop. Think of it as the artwork for your kitchen. You can go timeless with a simple subway tile, or bold with a dramatic patterned ceramic or a slab of stone that continues up from the counter.
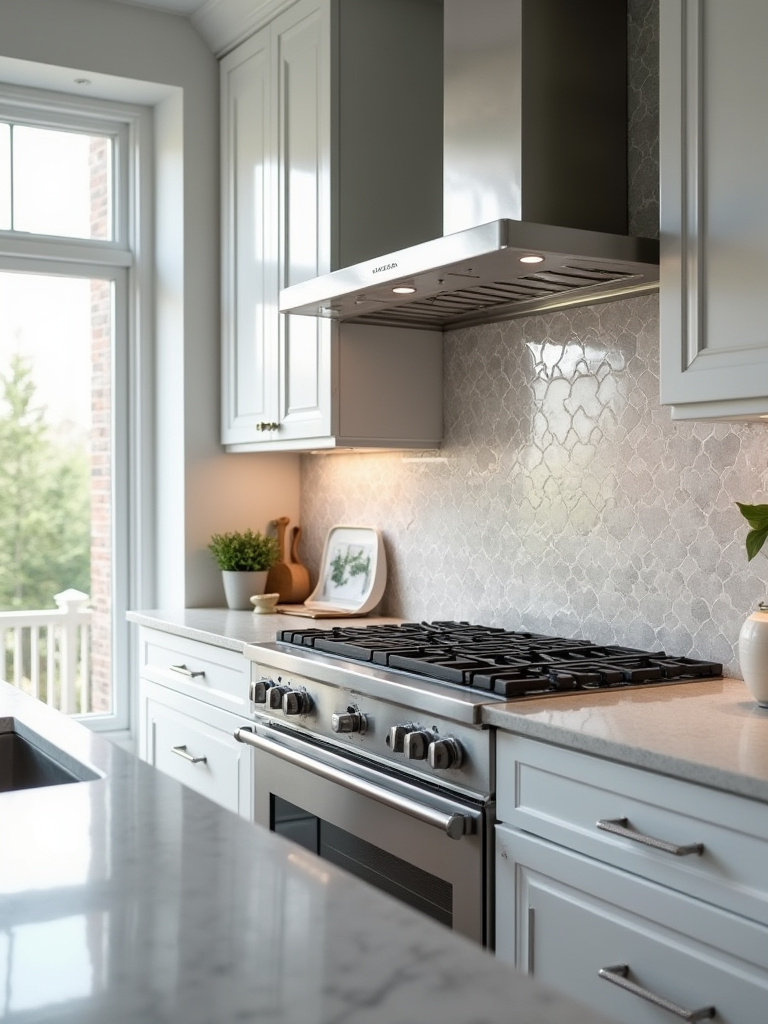
But it has a critical job to do: protect your walls from water and grease. Behind the stove, you want something smooth and easy to wipe down. I once saw a beautiful kitchen with a rough, split-face stone backsplash. It looked stunning on day one. A year later, the porous surface behind the range was permanently stained with grease spatters. It was a functional nightmare. Always balance your aesthetic choice with the practical reality of cleaning.
This element is a unique blend of decorative expression and practical defense. It’s a key opportunity to inject personal style while ensuring the longevity and ease of maintenance of your kitchen’s hardest-working walls.
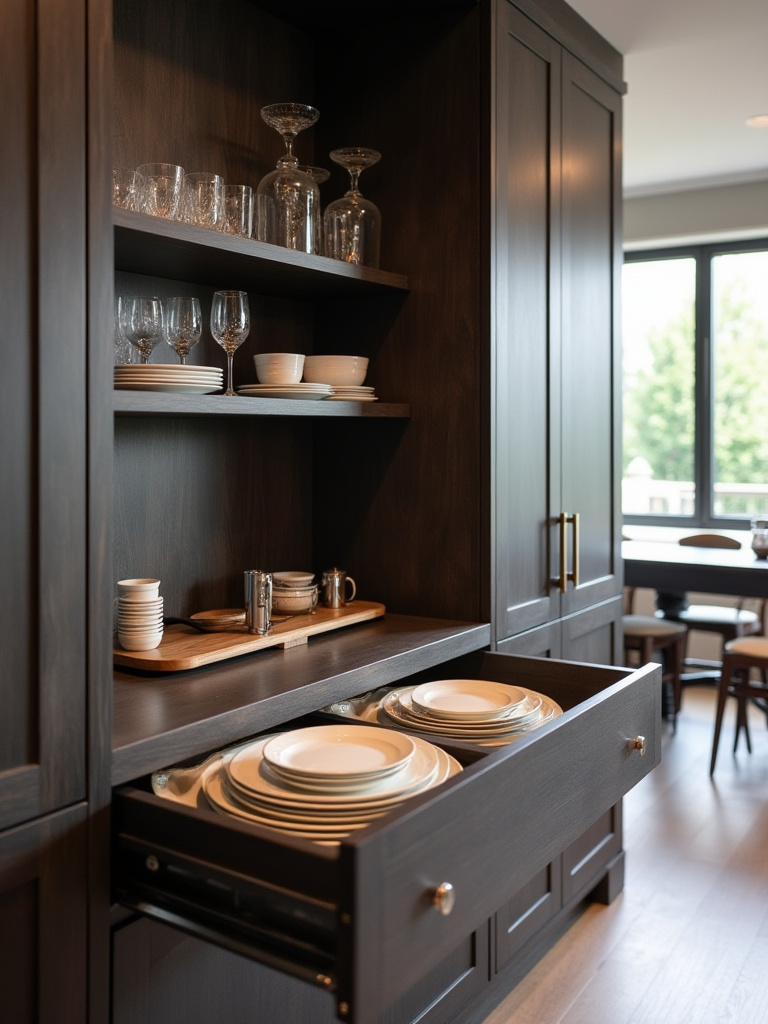
13. Optimize Storage with Integrated Pantry and Drawer Organizers
The secret to a kitchen that always looks clean and clutter-free isn’t about having more space; it’s about having smarter space. The most valuable real estate in your kitchen is inside your cabinets and drawers. This is where you invest in systems: pull-out pantry shelves, dedicated dividers for utensils and spices, and peg systems in deep drawers to stop pots and lids from becoming a jumbled mess.
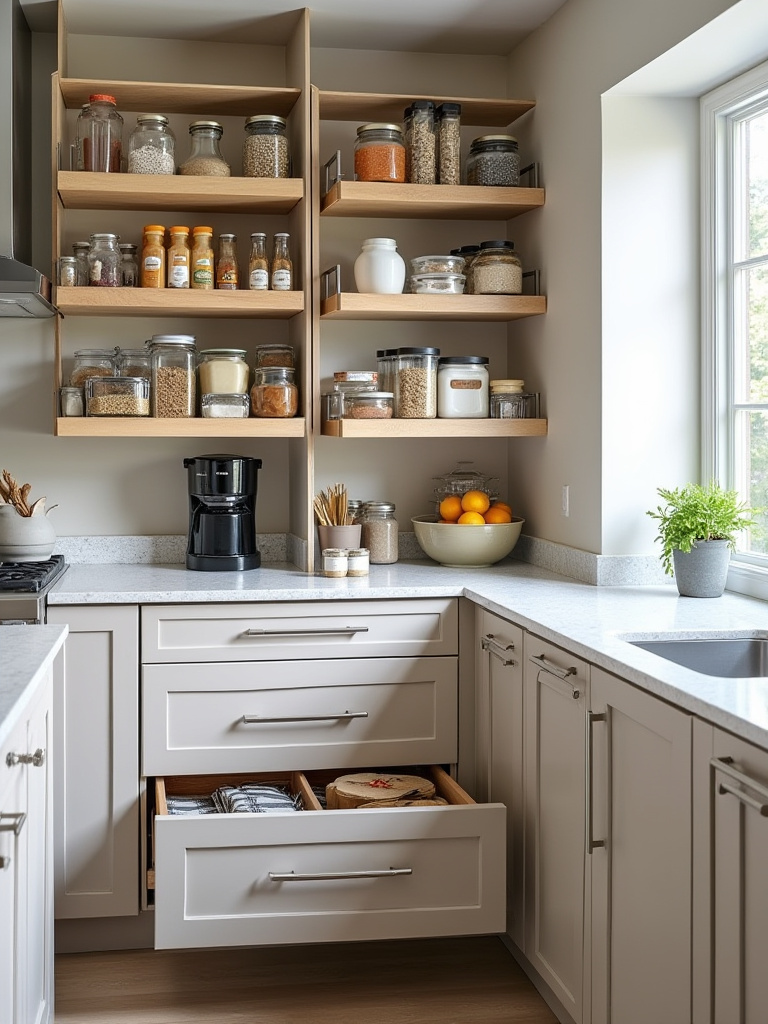
My number one piece of advice here is to prioritize full-extension, soft-close drawer glides. The ability to pull a drawer all the way out and see everything inside, even at the very back, is a game-changer. These built-in solutions are what transform a collection of boxes into a highly efficient system. They make your kitchen work twice as hard with the same amount of square footage.
Effective organization is the invisible engine of a high-functioning kitchen. It’s a strategic investment that multiplies your usable storage, reduces daily friction, and is the true foundation of a serene, uncluttered space.
14. Design a Dedicated Coffee or Beverage Bar for Convenience
In a busy household, the coffee maker can be a major source of traffic congestion in the primary work triangle. Creating a dedicated beverage station—even a small one—is a brilliant way to reroute that traffic. It gets people looking for a mug or a glass of water out of the cook’s way.
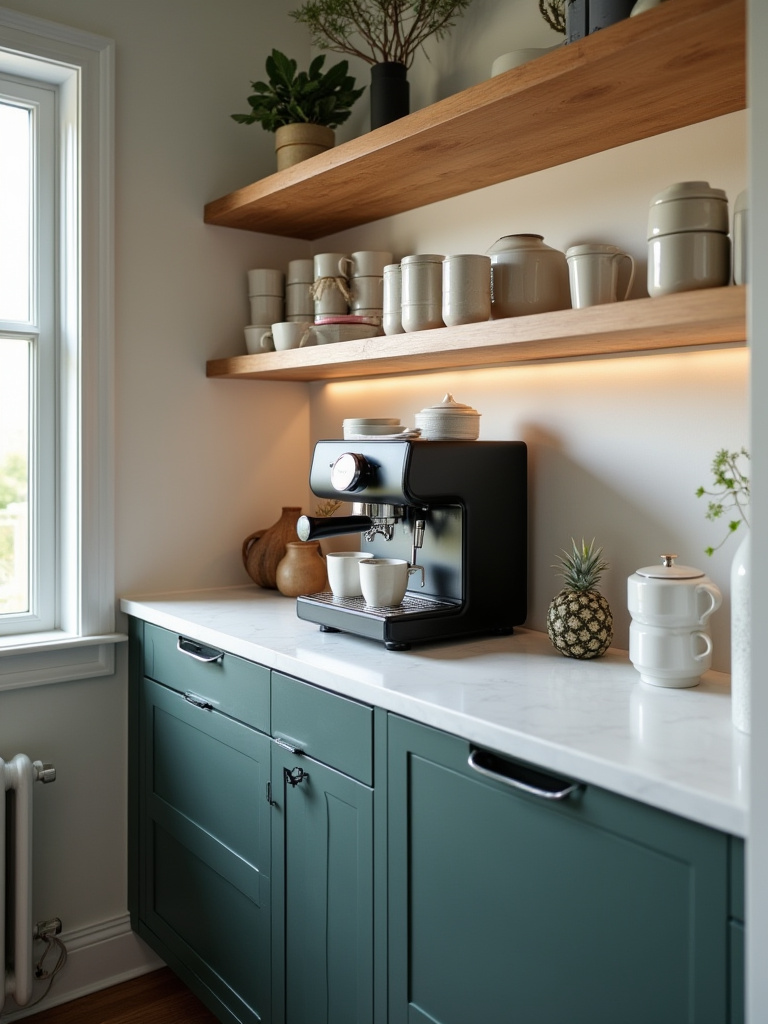
This doesn’t have to be a massive, custom built-in. It can be as simple as a designated section of countertop with a few floating shelves above for mugs and glasses. The key is to consolidate all the related items in one place: the coffee machine, the electric kettle, sugar, pods, tea bags, and mugs. If you can, place it near a small bar sink or the refrigerator for easy access to water and milk. It’s a small luxury that dramatically improves the flow of a busy kitchen.
This kind of functional zoning is a hallmark of sophisticated kitchen design. It streamlines routines and improves household traffic flow, adding a layer of thoughtful convenience to daily life.
Aesthetic Enhancement & Functional Refinements (Part 2)
As we get closer to the finish line, we’re focusing on the technology and details that elevate a kitchen from merely new to truly modern. These are the elements that refine the user experience, making the space smarter, more intuitive, and more pleasant to be in.
15. Incorporate Smart Home Technology for Modern Efficiency
Be selective with smart tech. Focus on features that provide genuine convenience, not just novelty. A voice-activated faucet is a fantastic example: when your hands are covered in raw chicken, being able to turn on the water without touching anything isn’t a gimmick; it’s a major hygiene and convenience win. Smart lighting connected to voice assistants is similarly useful.
Where I see people go wrong is by choosing appliances that lock them into a specific, proprietary ecosystem that may not be supported in five years. Instead, look for integrations with universal platforms like Google Home, Amazon Alexa, or Apple HomeKit. And always have a manual override. The last thing you want is to be unable to turn on your lights because your Wi-Fi is down. Start small with smart plugs and switches, and add integrated appliances only when they solve a specific problem you actually have.
True smart home integration is about effortless automation, not complex new interfaces. It should disappear into the background, simplifying tasks and enhancing control in a way that feels seamless and intuitive.
Personalization, Sustainability & Future-Proofing (Part 1)
This final phase is about infusing the space with your unique personality and making choices that will ensure your kitchen remains relevant, healthy, and functional for years to come. It’s about building a space with longevity, one that reflects your values and can adapt as your life changes.
16. Select Hardware and Fixtures to Reflect Your Personal Style
Hardware—the knobs, pulls, and faucets—is the jewelry of the kitchen. It’s a relatively small expense that has a massive impact on the final look. This is the easiest place to take a design risk or express your personal style. A simple, classic Shaker cabinet can be transformed into something ultra-modern with sleek matte black bar pulls, or made to feel traditional and timeless with polished nickel knobs.
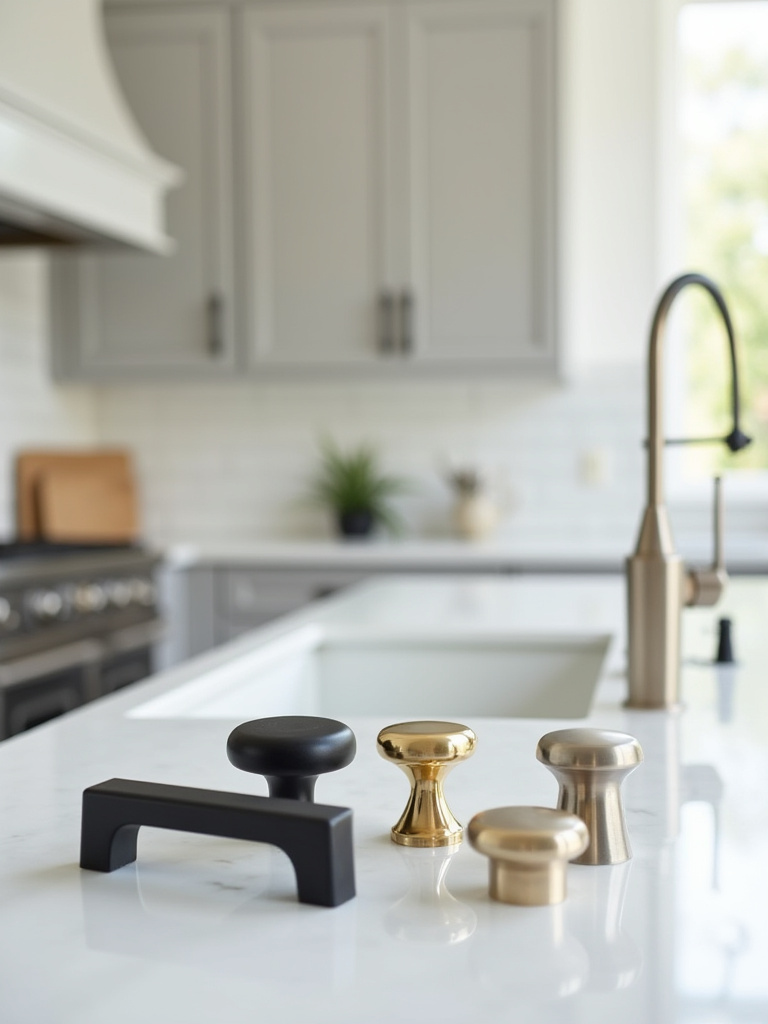
My professional tip: order a sample of your final hardware choice before you buy it for the whole kitchen. Hold it in your hand. How does it feel? Is it comfortable to grab? Does it have sharp edges? You will be touching these things dozens of times a day, so the ergonomics are just as important as the aesthetics. It’s a detail that makes a huge difference in the daily experience of using your kitchen.
These finishing touches are critical touchpoints that define the kitchen’s character. They are the most direct way to express your personal aesthetic and add a layer of custom, tactile quality to the space.
17. Integrate Sustainable Materials for an Eco-Friendly Kitchen
Thinking sustainably isn’t just about the environment; it’s about creating a healthier home for yourself. The most important thing to look for is materials with low or zero VOCs (Volatile Organic Compounds). This applies to your paint, cabinet finishes, and sealants. VOCs are chemicals that “off-gas” into your air, and reducing them is crucial for good indoor air quality.
Beyond that, look for materials made from recycled content, like some quartz countertops or floor tiles, or rapidly renewable resources like cork or bamboo flooring. But do your homework—ensure that bamboo, for instance, is made with formaldehyde-free adhesives. Even better, consider reclaimed materials. I photographed a stunning kitchen island clad in wood salvaged from an old barn. It was not only sustainable but also brought a sense of history and unique character to the space that new materials simply can’t replicate.
Sustainable design is a conscious choice to prioritize health, longevity, and environmental responsibility. It results in a kitchen that not only looks good but also feels good to live in, both physically and ethically.
18. Plan for Future Adaptability with Flexible Design Elements
Future-proofing means designing a kitchen that can evolve with you. Life changes—kids grow up and move out, or an aging parent might move in. A flexible kitchen can accommodate these shifts without needing another massive renovation. This can be as simple as ensuring you have blocking inside the walls now for future grab bars if needed, or choosing an island on casters that can be moved.
A great strategy is to keep the expensive, hard-to-change elements—like your countertops, flooring, and backsplash—in a timeless and neutral style. This gives you a solid foundation that won’t look dated in ten years. You can then inject current trends and colors with less permanent items like paint, light fixtures, bar stools, and hardware. This allows you to easily and affordably refresh your kitchen’s look as your tastes change over time.
Designing for adaptability is the ultimate form of sustainable design. It ensures the longevity and relevance of your kitchen, making it a space that can gracefully support you through different stages of life.
19. Create a Statement Piece with Custom Shelving or Artwork
In photography, we use a focal point to direct the viewer’s eye and create interest. Your kitchen needs the same thing. You need one “hero” element that draws attention and makes a statement. Everything else should play a supporting role. If you have a stunning, dramatic range hood, keep the backsplash simple. If you choose a bold, patterned tile for the floor, keep the cabinets understated.
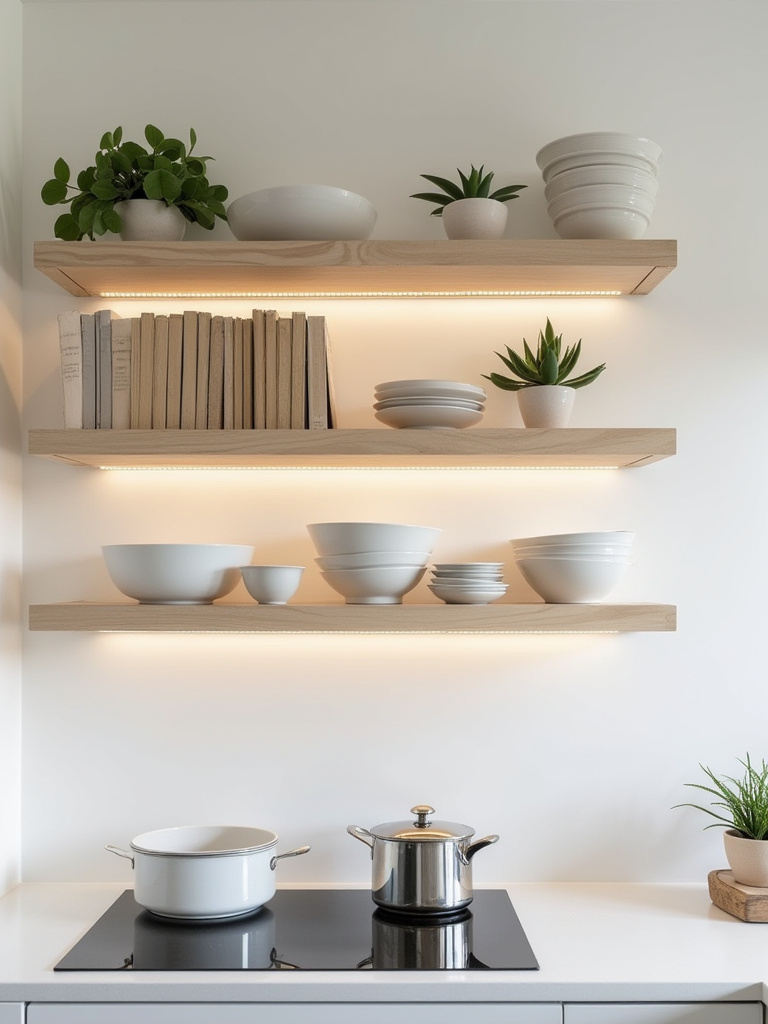
A great way to do this is with open shelving. A set of beautifully crafted floating shelves made from thick, reclaimed wood can become a piece of architectural art. It provides a curated spot to display your favorite ceramics or glassware. But the key word here is curated. Open shelves are not for your mismatched Tupperware collection. Style them intentionally with a mix of useful and beautiful objects, and leave some breathing room so they don’t look cluttered.
A well-chosen statement piece provides the narrative focus for your kitchen. It’s the anchor of your design story, a deliberate flourish that transforms the room from a collection of nice finishes into a cohesive and compelling space.
Personalization, Sustainability & Future-Proofing (Part 2)
We’ve reached the final, critical step. All the planning and installation work comes down to this moment. It’s your last chance to ensure the project you paid for is the project you received, down to the very last detail. Do not skip this.
20. Conduct a Final Walkthrough for Flawless Finishes and Function
The final walkthrough with your contractor, before you make that last payment, is your single most powerful quality-control tool. Create a punch list. Go over every single inch of the kitchen with a critical eye and a roll of blue painter’s tape. Open every door, pull out every drawer, and turn on every faucet and appliance. Look for scratches in the paint, misaligned cabinet doors, and grout lines that aren’t straight.
I once saved a client from a major headache during a walkthrough. We noticed a faint wobble in the newly installed toilet in the adjacent powder room. The contractor insisted it was fine. We pushed, they checked, and found the wax ring was improperly sealed—a slow leak that would have destroyed the new kitchen ceiling below it within a year. Be picky. Be thorough. Withhold that final 10% payment until every last item on your punch list is fixed to your satisfaction. Once they have all your money, your leverage disappears.
This final inspection is your ultimate safeguard. It’s the process that guarantees the quality of the execution matches the quality of your vision, ensuring your substantial investment is sound, functional, and flawless for years to come.
Conclusion
So, there you have it. The secret to a successful kitchen renovation isn’t a secret at all—it’s a system. It’s about making a series of deliberate, informed choices in the right order. From the foundational layout to the final piece of hardware, each decision builds upon the last to create a space that is cohesive, functional, and a true reflection of you. It’s not a shopping spree; it’s a construction project that requires precision and foresight.
Your kitchen has the potential to be the most life-enhancing room in your house. It can be a source of joy, creativity, and connection. Don’t let the options overwhelm you. Start with the first step—defining your goals—and work through the process logically. You have the framework now. Go build the kitchen that works as beautifully as it looks, the one you’ve always imagined.