Picture this: You’re standing in your kitchen. It’s 7 AM, you’re trying to make coffee, and everything is just… off. The laminate on the counter is peeling by the sink, the cabinet knobs are sticky no matter how many times you clean them, and the single overhead light casts this weird, depressing gloom over the whole room. You dream of those bright, beautiful kitchens you see online, but your bank account just laughs.
I get it. I’ve been there. After years of teaching high school art on a tight budget and helping friends with their first homes, I’ve learned the most important lesson in design: a small budget isn’t a limitation, it’s a creative puzzle waiting to be solved.
You don’t need to tear your kitchen down to the studs to make it a place you love. Forget the tens of thousands of dollars. We’re talking about smart, high-impact changes that make all the difference. Let’s talk about how to get that dream kitchen, for real.
Strategic Planning & Smart Foundations for Cost Savings
Okay, before we even think about paint colors or tile, we have to do the “boring” stuff. And I say that with love, because getting this part right is what saves you from those mid-project panic attacks when you realize you’re out of money. This is your game plan.
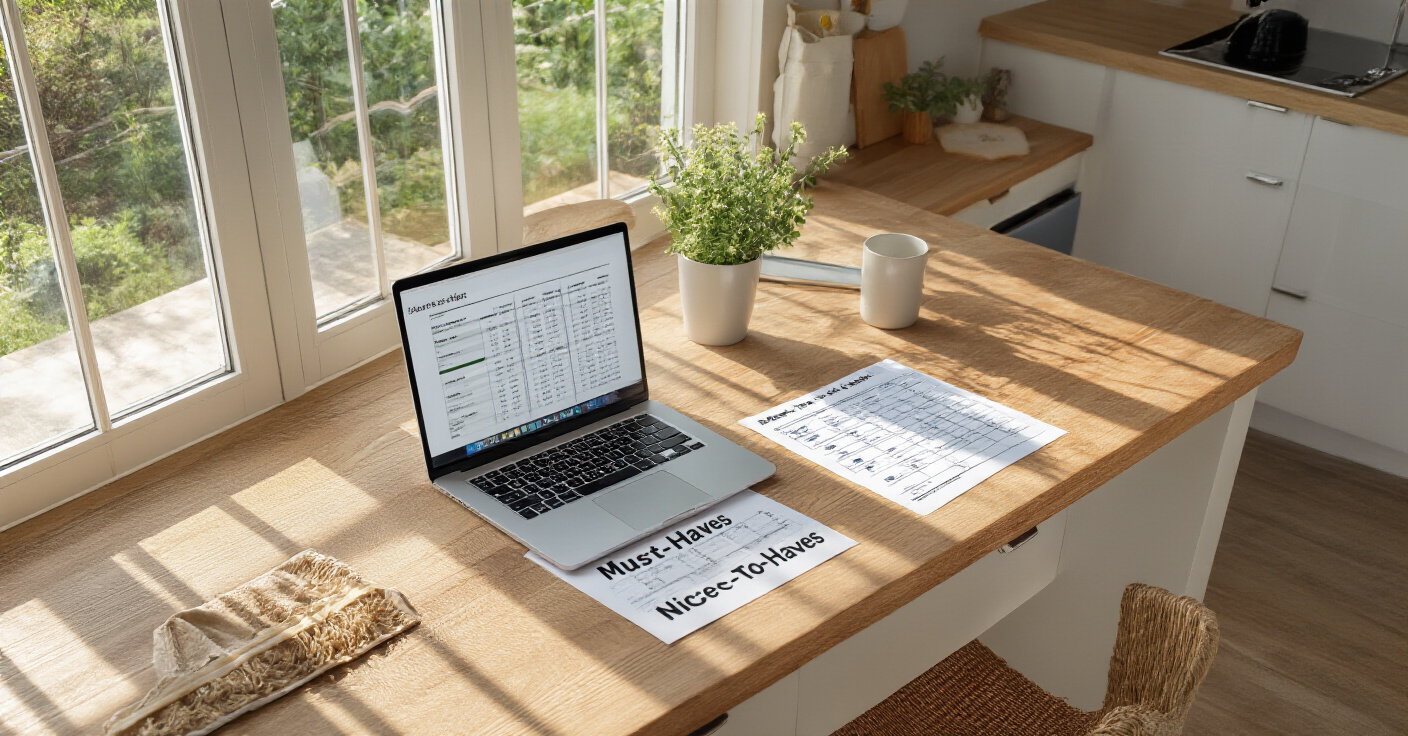
1. Define Your Must-Haves vs. Nice-to-Haves for Budget Clarity
You know what people always ask me? “Where do I even start?” They have a million ideas and a finite budget. The answer is to get brutally honest with yourself by making two lists: “Must-Haves” and “Nice-to-Haves.” A must-have is something that fixes a real problem. Is your oven broken? That’s a must-have. Is your floor a trip hazard? Must-have. Are you dealing with a plumbing leak? Definitely a must-have. These are the non-negotiables that make your kitchen safe and functional.
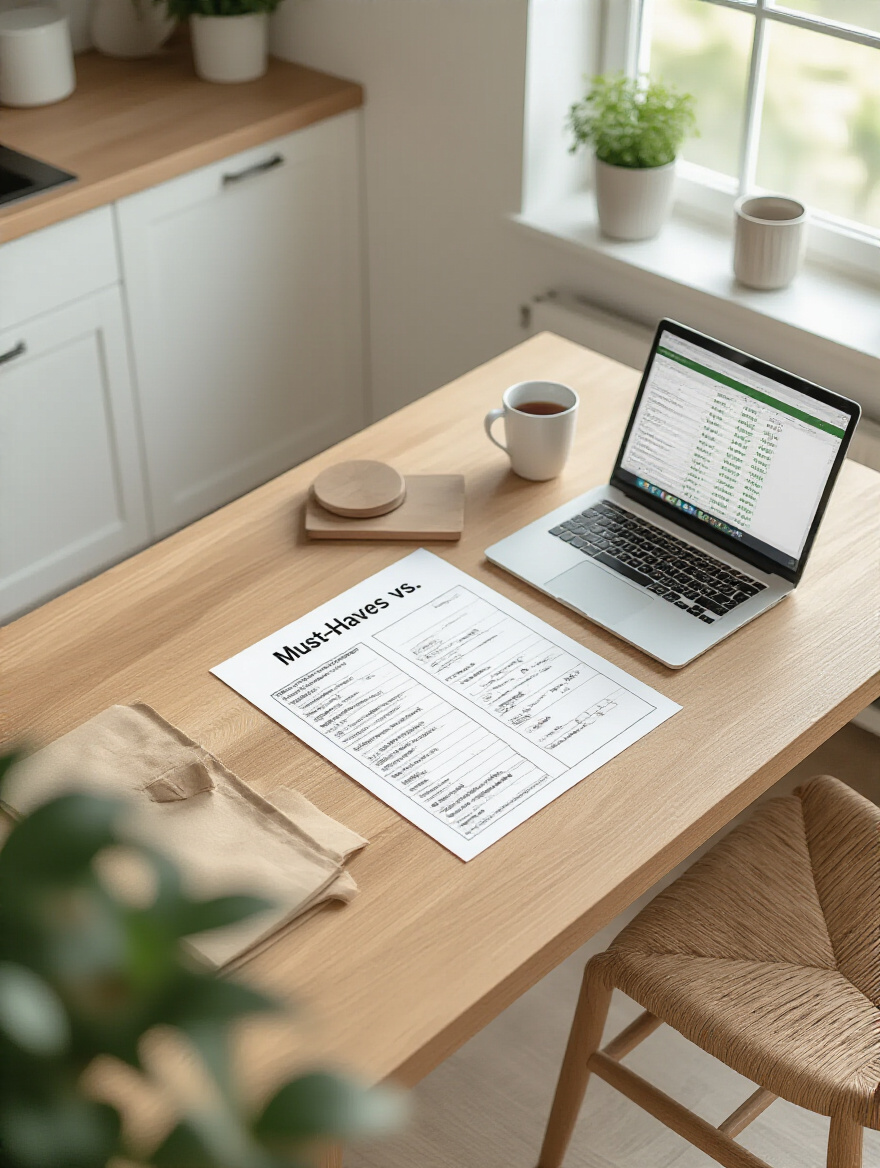
Everything else is a “nice-to-have.” Marble countertops, a fancy wine fridge, that commercial-grade faucet you saw on a cooking show. These are your dream items. The problem is, without a clear line between these two lists, the nice-to-haves start creeping into the budget and swallowing up the money you need for the essentials. I once watched a friend spend so much on a designer backsplash (a nice-to-have) that he couldn’t afford to replace his ancient, energy-sucking dishwasher (a must-have). Don’t be that guy. Price out your must-haves first. That’s your baseline budget. Whatever is left over can go toward the fun stuff.
And once you’ve sorted that out, we need to talk about protecting your budget from disaster.
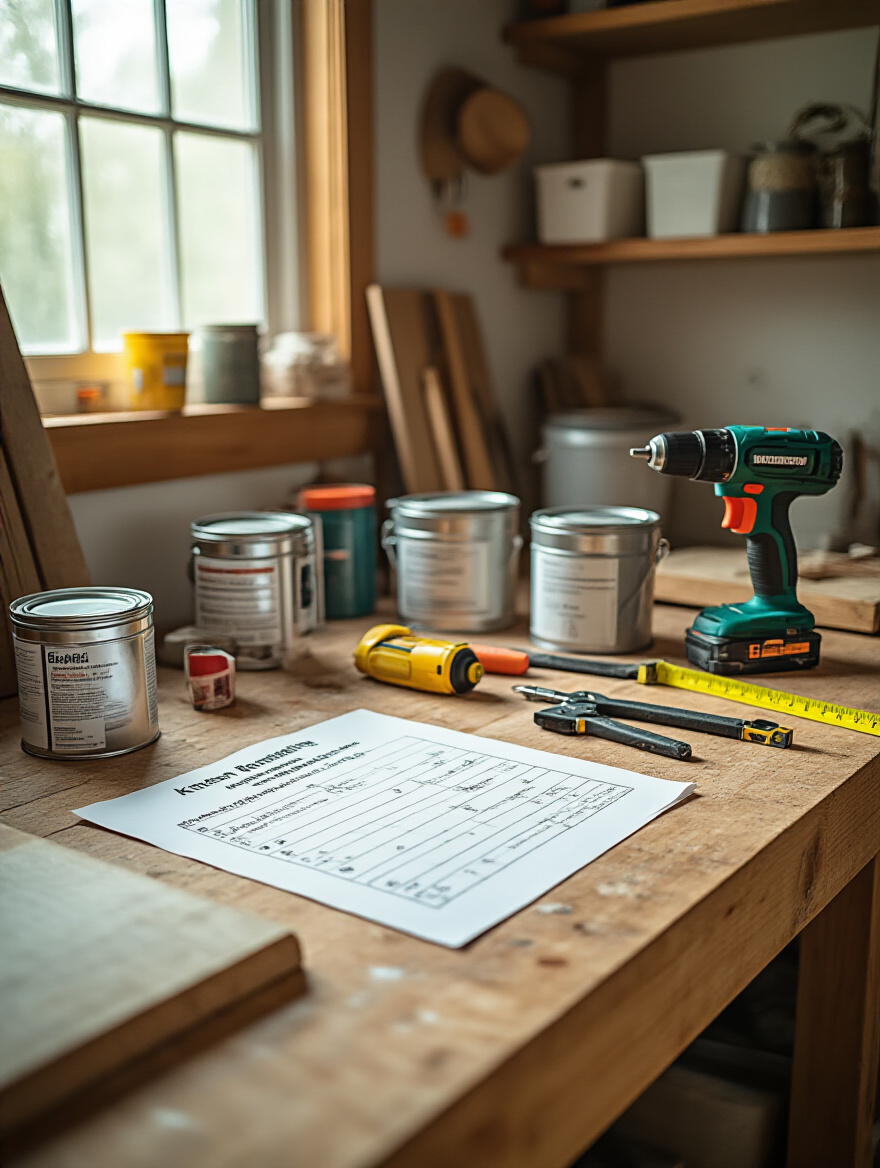
2. Set a Realistic Budget and Add a 10-15% Contingency Fund
Can I confess something? I used to think a contingency fund was optional—a little pot of gold you hoped you wouldn’t need. Then I started my first major project. We tore out the old linoleum and found a lovely patch of rotted subfloor right by the dishwasher. Surprise! That “just in case” money becomes “thank GOD I have this” money in a heartbeat. Trust me on this. Your budget isn’t just the sum of your materials and labor; it’s that total plus 10-15% for the unexpected. For older homes, I’d even push that to 20%.

This isn’t negative thinking; it’s realistic planning. Think of it as project insurance. It’s the fund that will cover the ancient wiring you didn’t know about or the plumbing that isn’t up to code. Without it, a small surprise can derail your entire project, forcing you to halt construction while you scramble for cash. Build this fund into your total budget from day one and pretend it doesn’t exist for anything else. This one simple step will save you more stress than any other tip on this list.
Now that your money is sorted, let’s talk about your most valuable tool: you.
3. Assess DIY Skills Honestly to Avoid Costly Contractor Fixes
Here’s a pet peeve of mine: those TV shows that make it seem like anyone can retile an entire shower in an afternoon. That is absolute nonsense. While doing it yourself is a fantastic way to save money, a botched DIY job is one of the most expensive mistakes you can make. Paying a professional to fix your mistake will cost you way more than it would have to just hire them in the first place. They have to undo your work, then do it correctly. It’s double the labor, sometimes more.
So, be honest. Are you patient? Do you own the right tools? Have you ever done something like this before? Painting cabinets is a great DIY project for a beginner with a lot of patience. Installing new cabinet pulls? Easy. But the moment you’re talking about moving plumbing or electrical wiring, you need to stop. A leaky pipe behind a new wall can cause thousands in water damage. Faulty wiring can be a serious fire hazard. My shortcut? Make a list of every task. Sort it into “Hell Yes I Can Do This” (painting, demo), “Maybe with Help” (tiling a backsplash), and “Absolutely Not” (electrical, plumbing). Your wallet will thank you.
From there, it’s about making smart choices on where to spend the money you do have.
4. Prioritize High-Impact Updates That Offer the Best ROI
Everyone talks about “ROI,” or Return on Investment, but that sounds so corporate. Let’s just call it what it is: getting the biggest bang for your buck. When you’re on a budget, you want to put your money where you can see it. This means focusing on things that deliver a huge visual transformation for a relatively low cost. You’re not moving walls or changing the entire layout. You’re giving your kitchen a major facelift.
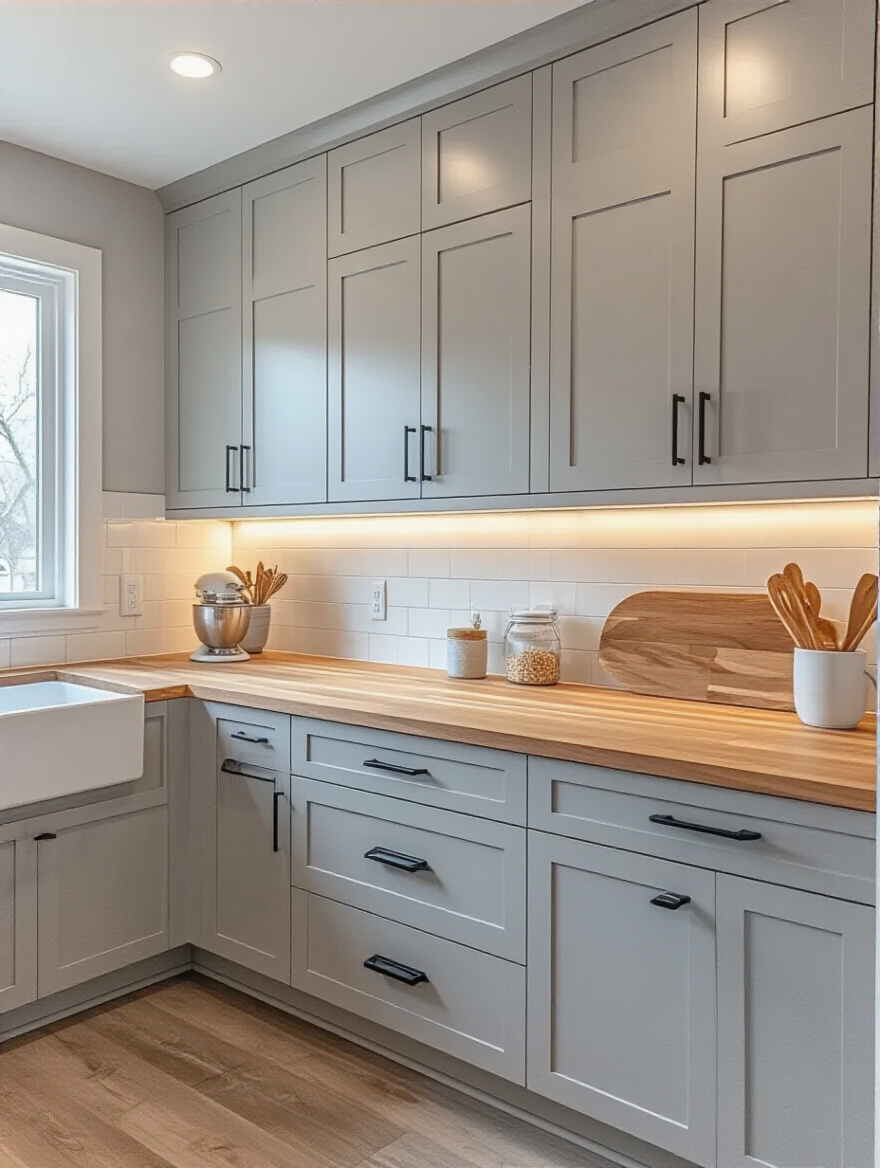
The undisputed champions of high-impact updates are: painting your cabinets, updating the hardware, changing out light fixtures, and installing a new backsplash. Think about it. These are the first things you notice when you walk into a kitchen. I had a client with a perfectly functional but dated 90s kitchen. Instead of spending $15,000 on new cabinets, we spent $700 painting the existing ones a beautiful soft gray, added modern black hardware for $200, and put in a simple new light fixture for $150. For just over $1,000, the kitchen looked 20 years newer. That’s a smart investment.
And you can make that investment even smarter by getting your materials on the cheap.
5. Shop Sales and Discount Outlets for Major Material Savings
I am the queen of the discount hunt. It’s a game, and one you can win big. You should almost never pay full price for major materials if you have a little bit of flexibility and time. Think about big-ticket items: appliances, countertops, even tile. There are entire stores dedicated to selling floor models, scratch-and-dent items, or overstock inventory for a fraction of the cost. Habitat for Humanity ReStore is a goldmine for things like cabinets, sinks, and lighting.
 Kitchen Cabinets, countertops, and appliances neatly arranged for budget kitchen remodeling savings” class=”wp-image-11194″/>
The secret here is to be prepared. Keep a list of your exact measurements and needs in your phone or in a little notebook in your car. When you find a great deal on a countertop remnant or a floor model fridge, you have to be ready to pull the trigger because it won’t be there tomorrow. And a pro tip I learned the hard way: always bring a paint chip or a sample of your cabinet door with you. It’s amazing how different colors can look under harsh showroom lighting. A little planning turns this from a random search into a successful treasure hunt.
Once you have your materials, you might need a pro to put some of it together.
6. Get Multiple Contractor Quotes for apples-to-apples Cost Comparison
Please, please, please do not go with the first contractor you talk to. And for the love of all that is holy, never go with the lowest bid just because it’s the lowest. Getting multiple quotes isn’t about haggling; it’s about understanding the true cost of your project and finding someone who you trust to do good work. When you ask for a quote, give every single contractor the exact same detailed list of what you want done. This is the only way you can compare their bids fairly.
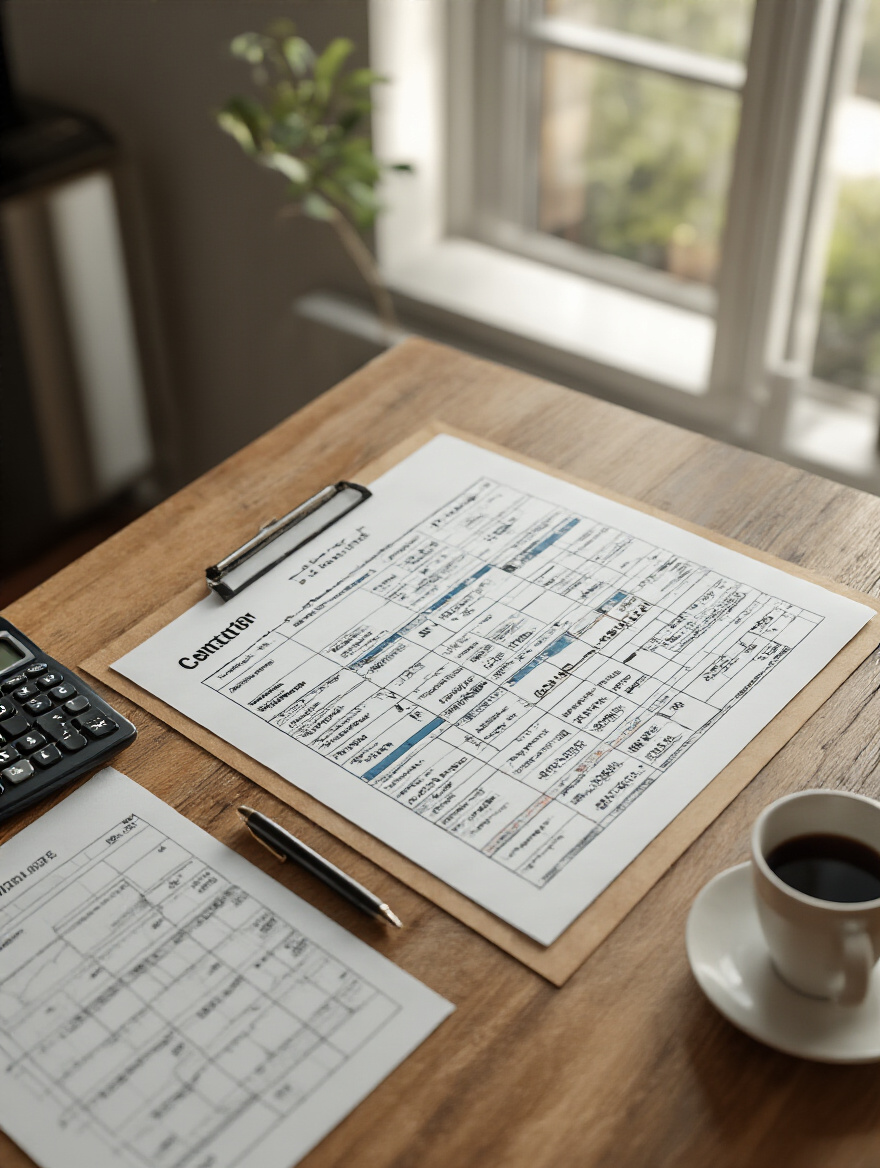
Here’s what you’re looking for: a detailed, itemized bid. If a contractor just gives you a single number for the whole project, that’s a red flag. You want to see the costs broken down—labor, materials, permits, everything. This is where you can spot if someone is cutting corners. One bid might be cheaper because they’re using lower-quality materials or they “forgot” to include the cost of hauling away the trash. A good quote is a sign of a thorough, professional contractor. The best one is often somewhere in the middle—a fair price from someone with great references who you communicate well with.
High-Impact Cabinet & Surface Upgrades That Save Money
Okay, this is where the real visual magic happens. Cabinets and countertops are the backbone of your kitchen’s style. Replacing them is wildly expensive, but refreshing them? That’s where you can get a million-dollar look on a ramen noodle budget.
7. Refinish or Paint Existing Cabinets for a Fresh Appearance
If you do only one thing on this list, make it this. Painting your existing kitchen cabinets is, without a doubt, the single most transformative thing you can do for your kitchen on a budget. It takes a dated, dark, or drab kitchen and makes it feel bright, clean, and brand new. I’m talking about a $200-$500 project that can make your kitchen look like you spent $10,000. It requires patience, but not a ton of skill.
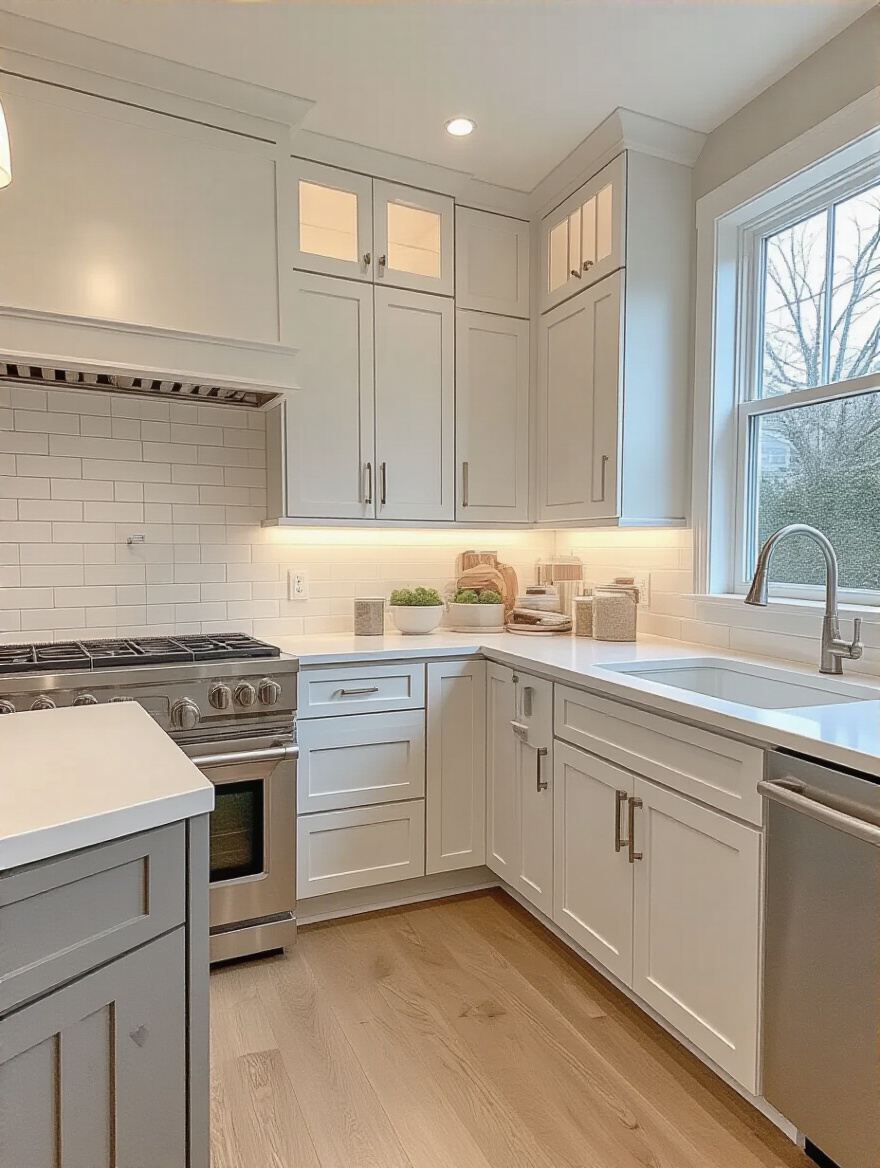
Here’s the secret no one wants to hear: it’s 90% prep, 10% painting. I learned this the hard way on my first apartment kitchen. I got impatient, skipped the heavy-duty cleaning and sanding, and my paint started chipping off in a month. You must clean every inch of your cabinets with a degreaser (TSP is great), sand them so the primer has something to grip, and use a high-quality bonding primer. Then, and only then, can you paint. Use a good cabinet paint (alkyd enamel is super durable) and do two or three thin coats. It’s a week-long project, for sure, but the payoff is absolutely massive.
And once those cabinets are painted, you need to give them a little jewelry.
8. Upgrade Cabinet Hardware for an Instant Modern Facelift
Think of cabinet hardware as the jewelry of your kitchen. It’s a small detail that has a huge impact. Swapping out dated, grimy, or just plain boring knobs and pulls for something modern and new is a project you can do in a single afternoon for under $200, and it will instantly elevate the entire space. It’s the easiest, fastest win in the whole kitchen remodel playbook.
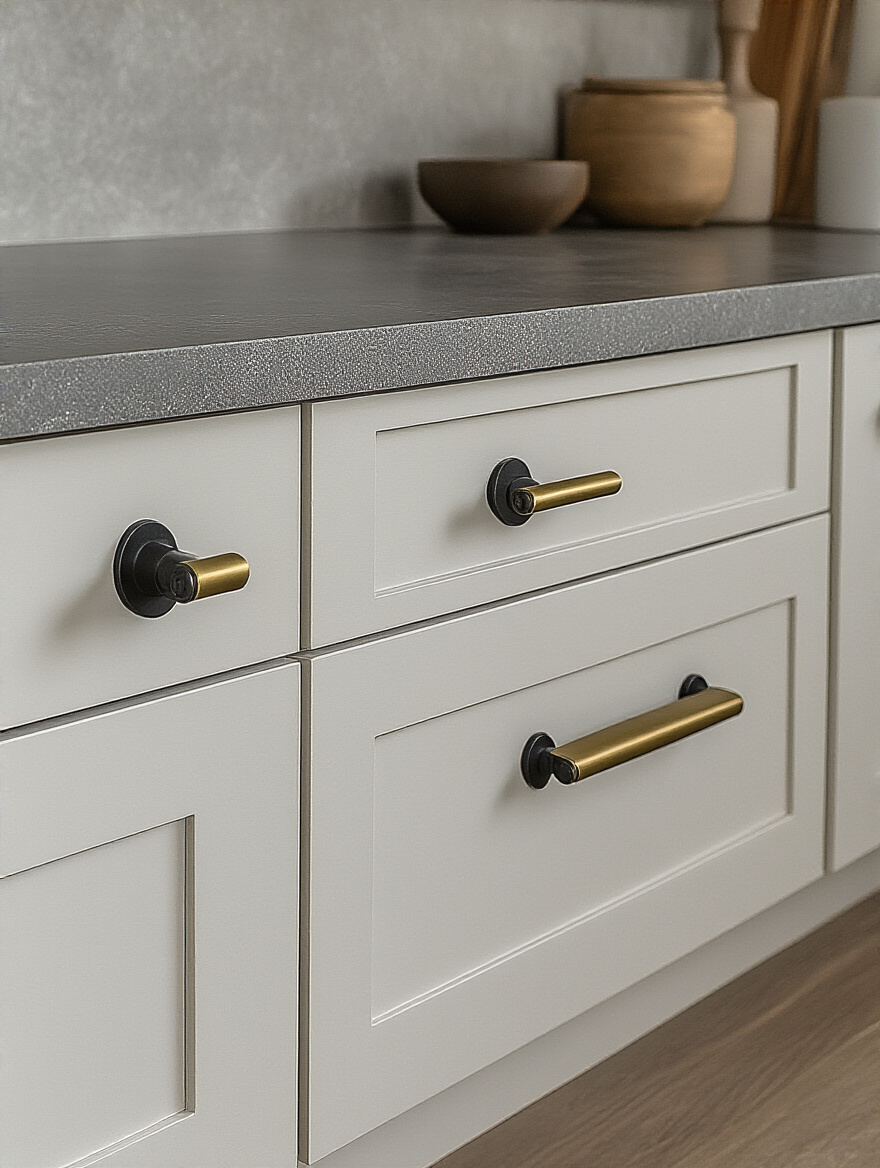
The key shortcut here is to buy hardware that has the same screw hole spacing as your existing pulls. This means you can just unscrew the old and screw in the new—no drilling or filling required. Just measure the distance between the center of the two screws on your current pulls before you go shopping. If you’re switching from knobs to pulls, you will have to drill a second hole. My pro tip? Invest in a $10 cabinet hardware jig. It’s a little plastic template that ensures all your holes are perfectly level and evenly spaced. It saves you from a ton of measuring and potential “oops” moments.
Now let’s look at the surfaces you work on every day.
9. Explore Countertop Resurfacing Kits to Update Surfaces Affordably
Got ugly laminate or tile countertops but no budget to replace them? There are resurfacing kits for that. Now, let’s be real: this is not going to look or feel exactly like real granite or marble. The BS is when companies promise a flawless stone replica. But what it can do is give you a clean, updated, and durable surface for a couple hundred bucks that looks a thousand times better than what you had before.
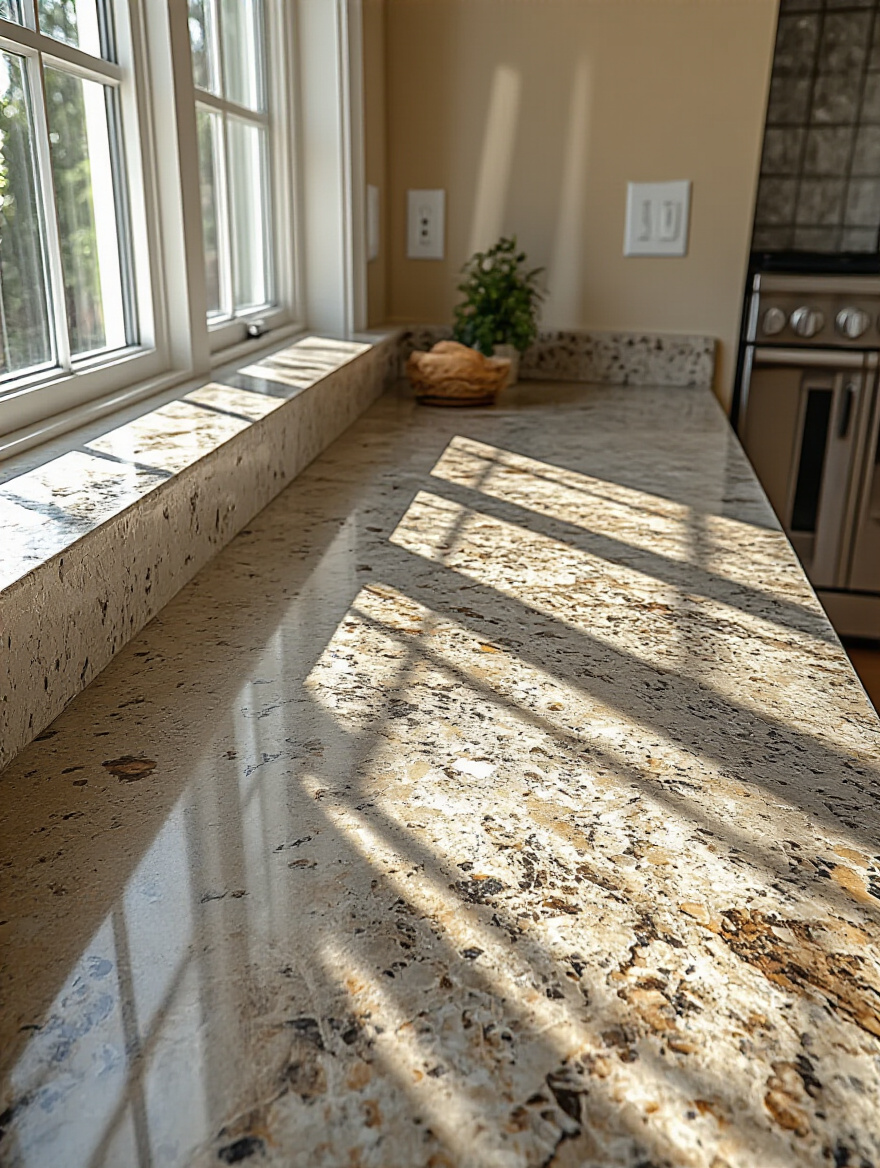
Like with cabinets, success here is all about following the instructions to the letter. These kits usually involve painting on a base coat, sprinkling on decorative mineral flakes to mimic stone, and then sealing it all with a super-tough topcoat. The biggest mistake people make is not letting it cure long enough. You can’t just paint it on Saturday and start making dinner on Sunday. It needs days—sometimes a full week—to harden completely. If you’re patient and meticulous, you can get a really impressive result that will tide you over until you can afford the real thing.
Next to your countertops is another chance for a big visual pop.
10. Install Peel-and-Stick Tile Backsplash for Quick Visual Pop
If traditional tiling seems intimidating (and expensive), peel-and-stick backsplash is your new best friend. It has gotten SO much better in recent years. We’re not talking about flimsy vinyl stickers anymore. Many modern options are made from materials that have real texture and look remarkably like stone, glass, or ceramic tile. This is a project that delivers instant gratification—you can completely transform the wall behind your sink in a single afternoon.
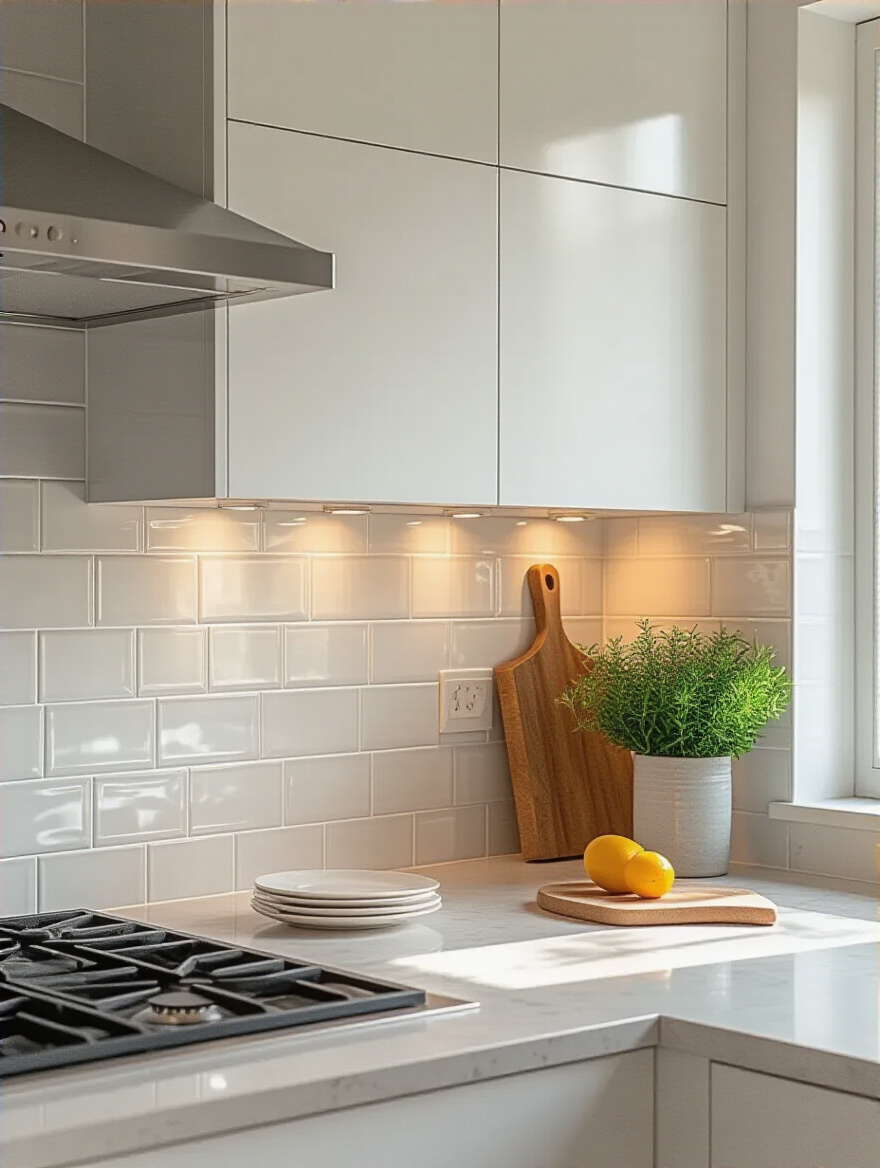
The trick to making it look good and last is twofold. First, your wall has to be perfectly clean, smooth, and dry. Any grease or dust will prevent the tiles from sticking properly. Second, buy at least 10% more than you think you need. You’ll need it for cuts and inevitable mistakes. A little pro tip: create a template out of paper or cardboard to trace for those tricky cuts around outlets. It’s much less painful to mess up a piece of paper than one of your pricey tile sheets.
Speaking of a fresh look, let’s talk about opening things up a bit.
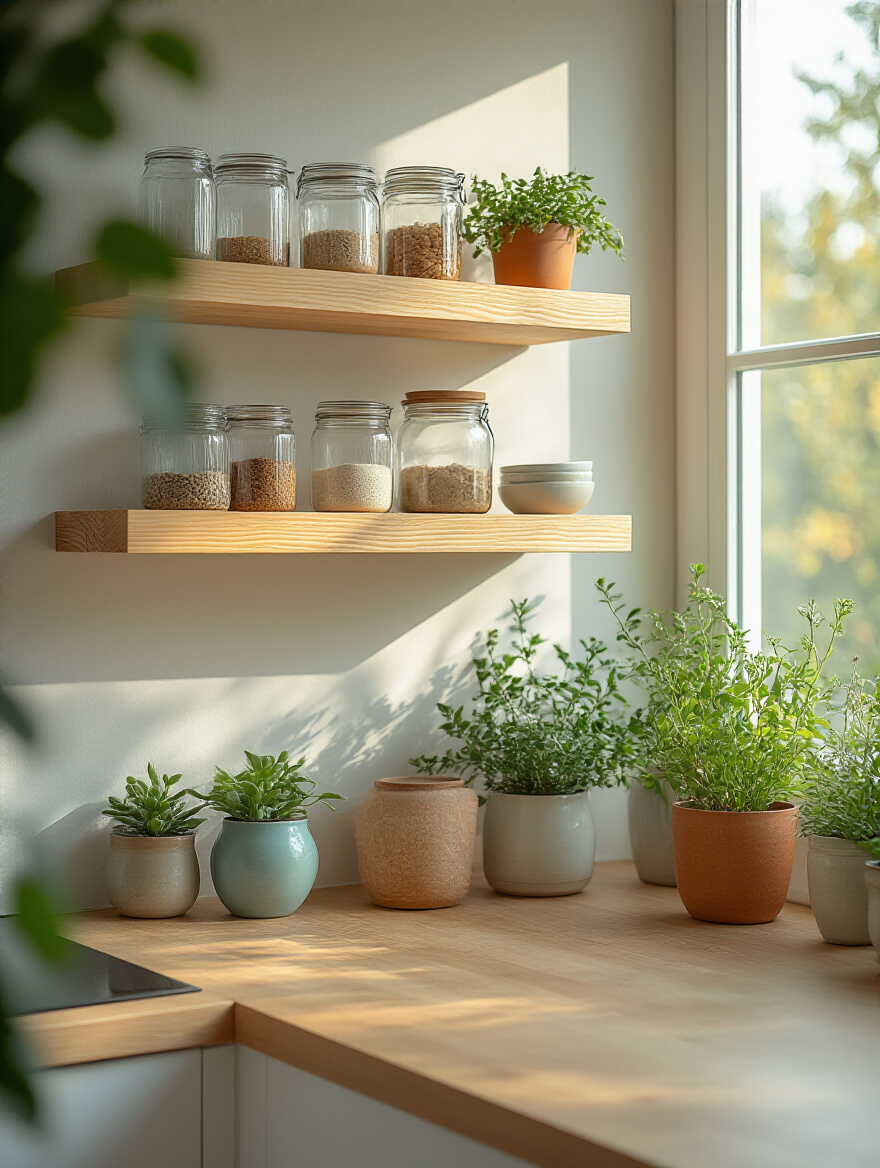
11. Incorporate Open Shelving to Reduce Cabinetry Costs
Let’s be honest, upper cabinets can be expensive and can make a small kitchen feel dark and boxed in. A fantastic, budget-friendly alternative is to take some of them down and install simple open shelving instead. It instantly makes the room feel more airy and spacious. Plus, it gives you a spot to display your favorite dishes, plants, or cookbooks, adding a dose of personality to the space.

The key to keeping this look chic and not cluttered is curation. This is not the place for your mismatched Tupperware or that chipped mug from your old job. Use open shelves for your everyday pretty things—your nice white plates, your collection of glass jars, your most-used coffee mugs. I love simple wooden shelves on minimalist metal brackets. You can get the wood from a home improvement store and have it cut to size for just a few dollars. It’s a high-end look for a very low cost.
For your countertops, there’s another natural, budget-friendly option that’s worth a look.
12. Consider Butcher Block Countertops for Natural Warmth
If you’re replacing your countertops and stone is out of the budget, you absolutely have to consider butcher block. It’s a fraction of the cost of granite or quartz and adds such an incredible warmth and character to a kitchen. It has a classic, timeless feel that works with almost any style, from modern farmhouse to industrial. Plus, it’s one of the few Countertop Materials that a confident DIYer can actually cut and install themselves, which saves a ton on labor costs.
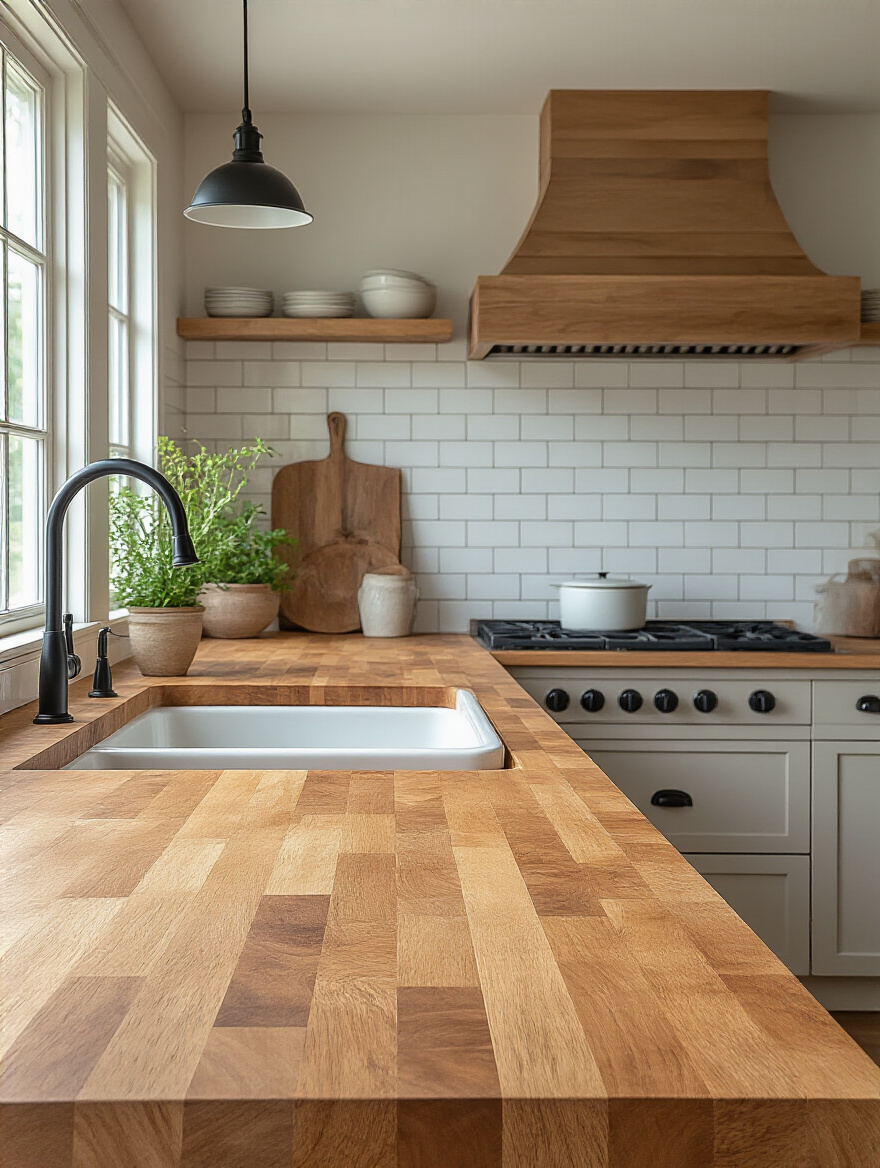
The big lesson with butcher block is that you must seal it properly, especially around the sink. Wood and water are not best friends. I recommend using a durable, water-resistant finish like a hardwax oil or marine-grade varnish around any wet areas. The rest of the counter can be maintained with simple food-grade mineral oil. The beauty of butcher block is that if it gets scratched or stained, you can just sand it down and re-oil it. It’s a forgiving and beautiful material that gets better with age.
Smart Appliance, Fixture & Flooring Choices for Budget Kitchens
Alright, let’s talk about the hard-working parts of your kitchen. New appliances and fixtures can feel like a huge expense, but with a little bit of savvy shopping, you can get high-end function and style without the shocking price tag.
13. Source Open-Box or Floor Model Appliances for Deep Discounts
Here’s one of the best-kept secrets in budget remodels: the scratch-and-dent section. When an appliance gets a tiny ding on the side that will be hidden by a cabinet anyway, or a customer returns a dishwasher without the original box, stores can’t sell it as new. Their loss is your gain. You can often find high-end appliances for 20-50% off just because of a minor cosmetic flaw.
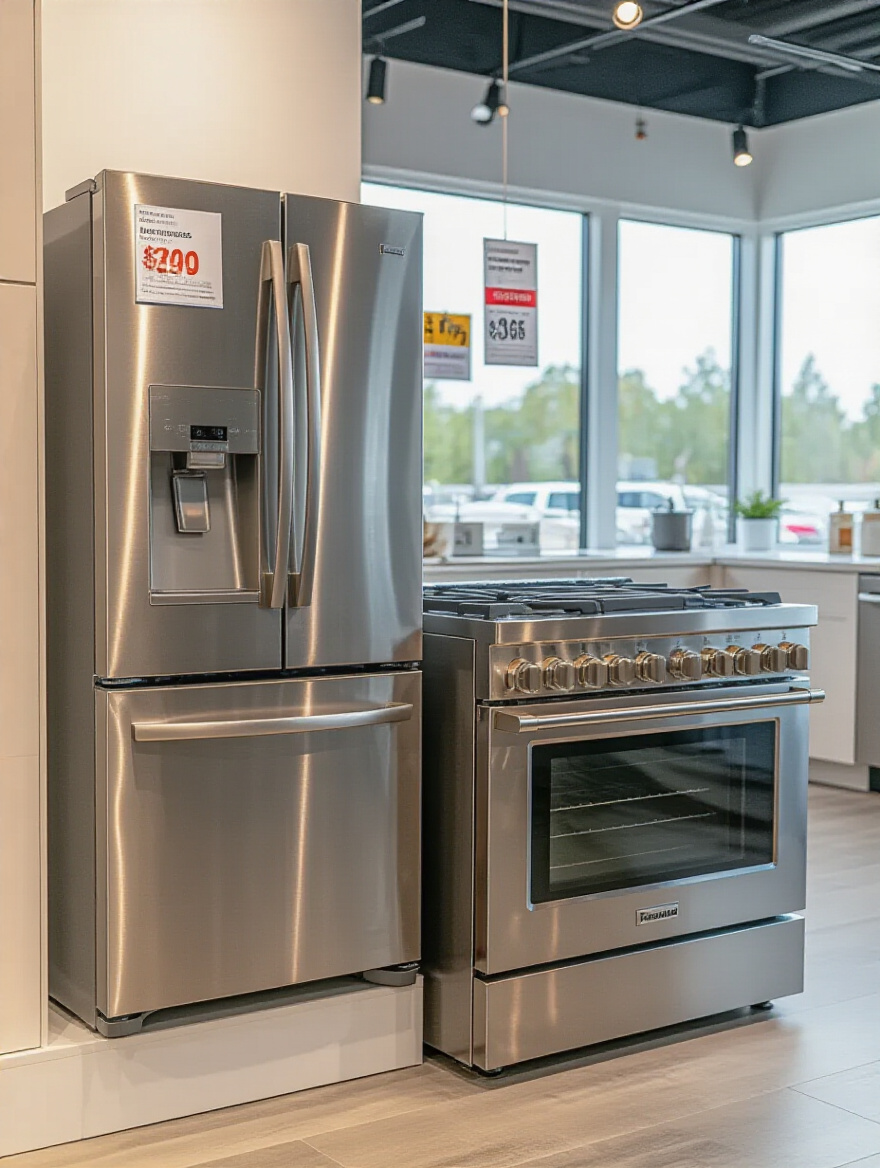
Your mission is to find the appliance outlets in your area and visit them regularly. The inventory changes constantly. When you find something, inspect it carefully. Make sure the damage is purely cosmetic. And here’s the magic phrase to use at checkout: “Is there any flexibility on this price?” Often, especially for floor models that have been there a while, they are willing to knock another 5-10% off just to get it out the door. Always, always ask. The worst they can say is no.
And it’s not just the big appliances where you can save.
14. Update Faucets and Sinks for an Elevated Utility Experience
You use your kitchen sink and faucet more than almost any other feature in your house. Upgrading them doesn’t just improve the look of your kitchen; it improves your daily life. A high-arc faucet with a pull-down sprayer makes washing big pots and rinsing vegetables so much easier. A deep, single-basin sink is a game-changer if you’re used to a shallow, divided one. This is an affordable upgrade that provides a massive boost in function and style.
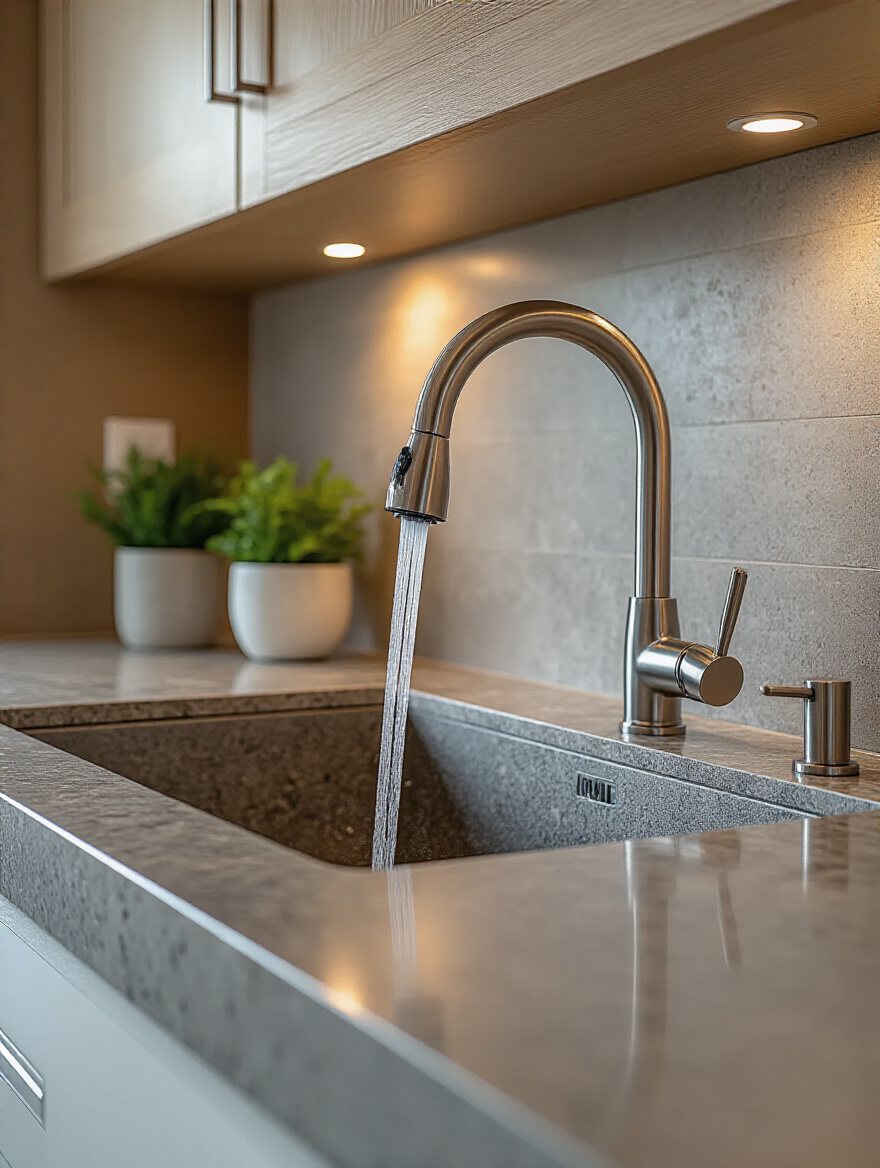
The biggest thing to watch out for is making sure your new faucet is compatible with the number of holes in your existing sink or countertop. If you have a three-hole setup and you buy a one-hole faucet, you’ll need a deck plate to cover the other holes. It’s a small detail that’s easy to overlook when you’re mesmerized by a beautiful faucet online. Take a quick picture of your current setup before you shop. It’ll save you a return trip.
Now, let’s look up.
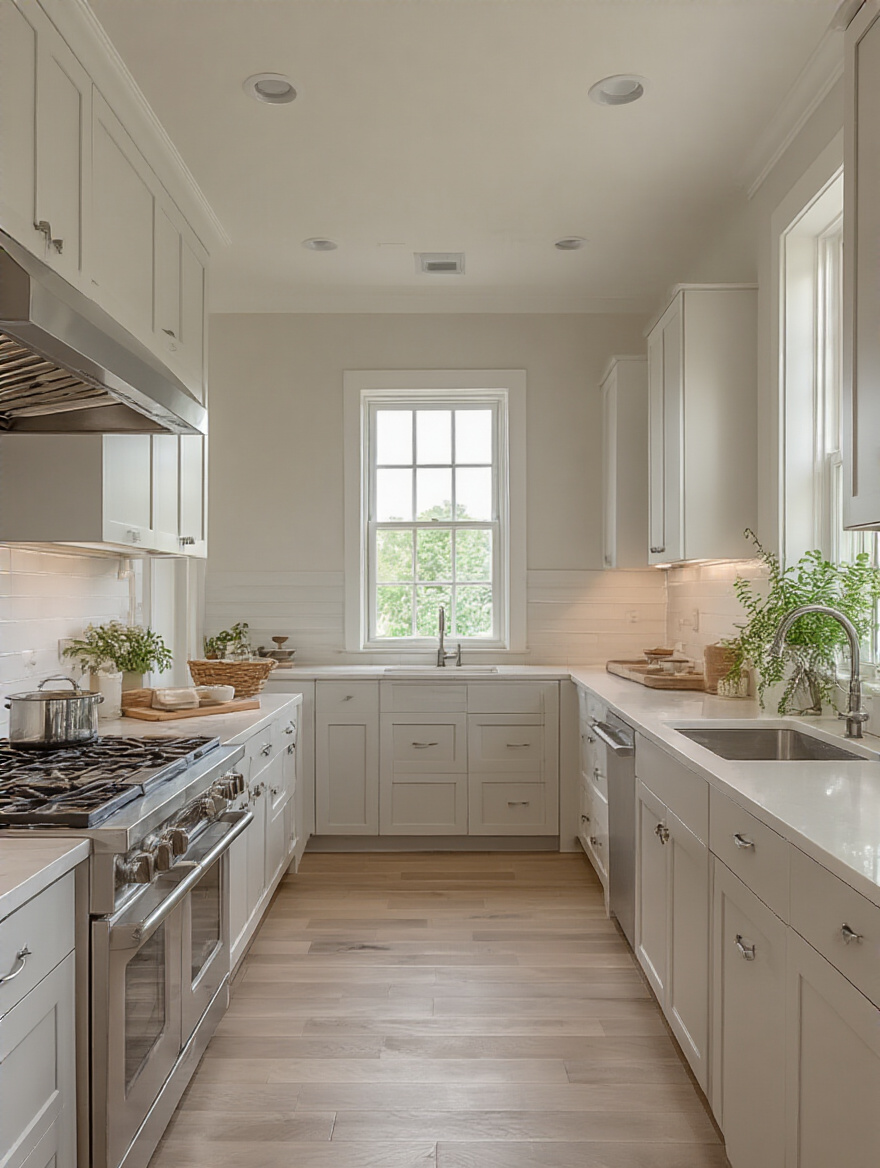
15. Replace Dated Lighting Fixtures to Drastically Improve Ambiance
Can we all just agree to banish the “light”? You know the one—that flush-mount glass dome that builders put in every single house for decades. It casts a terrible, flat light and screams “builder-grade.” Replacing a dated fixture is one of the quickest and most impactful changes you can make. Good lighting makes a room feel more inviting, helps you see what you’re doing when you’re chopping veggies, and adds a major dose of style.
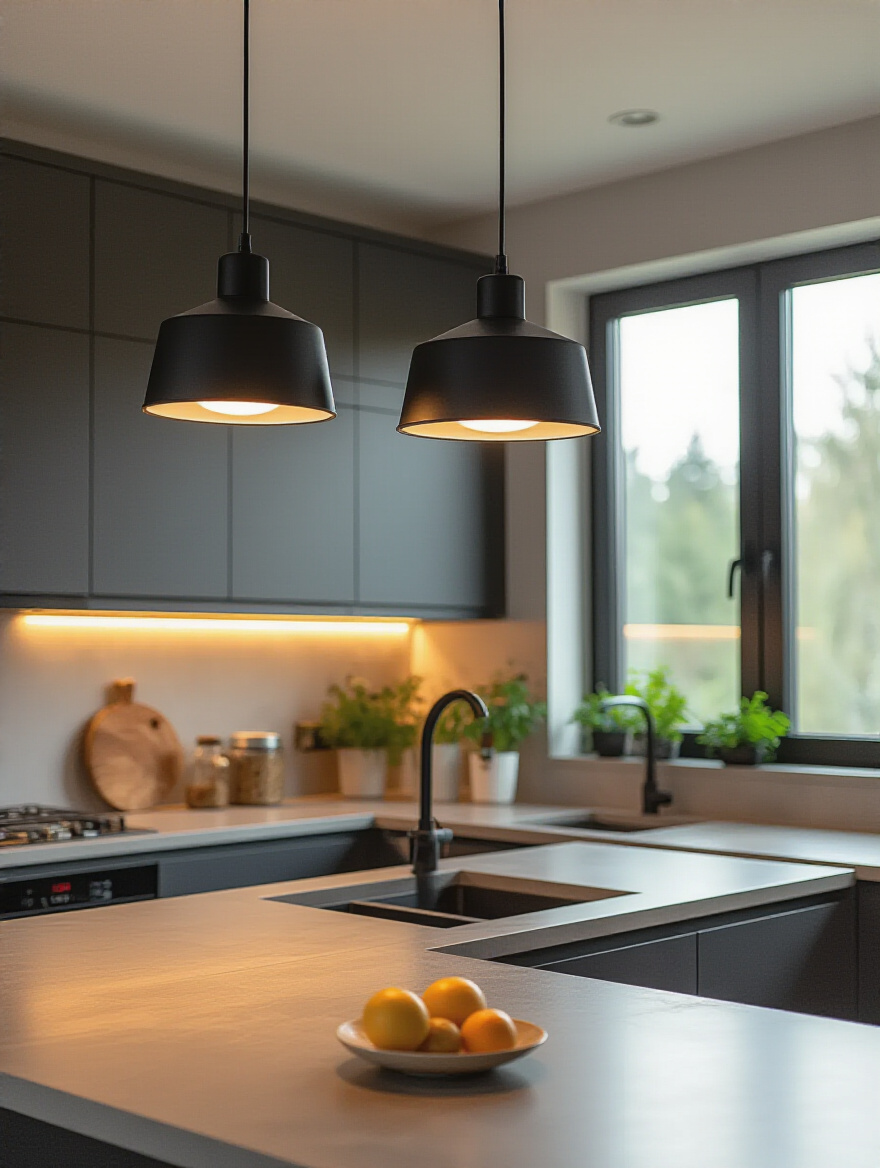
A good lighting plan has layers. You need your main overhead (ambient) light, like a cool semi-flush mount or a couple of pendants. Then you need task lighting over your work areas. And finally, you might want some accent lighting. The easiest way to get all three without an electrician is to replace your main fixture and then add some simple, plug-in LED strip lights under your cabinets for task lighting. The difference is, quite literally, night and day.
Let’s look down now, at what’s under your feet.
16. Opt for Durable Vinyl Plank or Laminate Flooring Alternatives
Hardwood floors are beautiful, but they are expensive and can be a nightmare in a kitchen where spills are a daily occurrence. The good news is that laminate and luxury vinyl plank (LVP) flooring have come a long way. They look incredibly realistic and are built to handle a ton of wear and tear, making them perfect for a busy, budget-conscious kitchen. They are water-resistant (LVP is often waterproof), scratch-resistant, and so much more affordable than wood or tile.
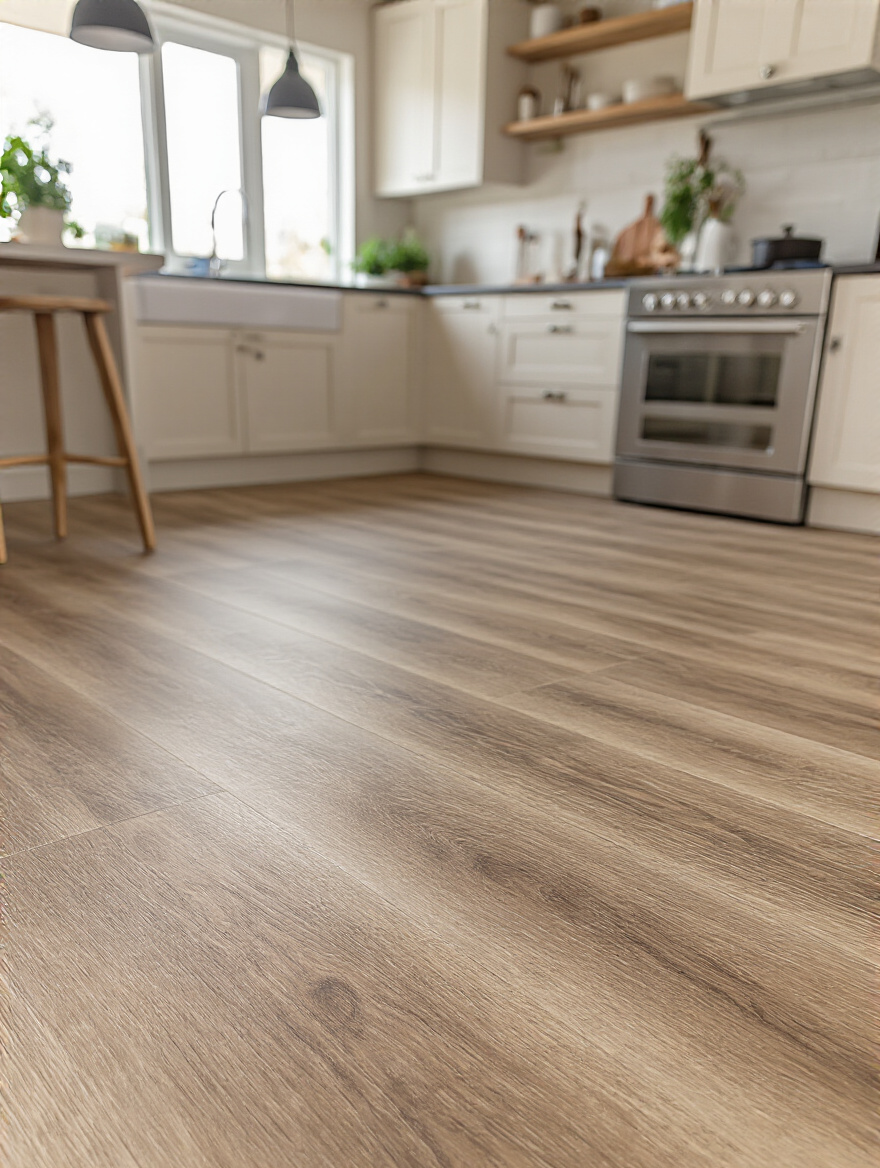
My hard-learned lesson here? Let the flooring acclimate. You have to let the boxes of planks sit in the room you’re going to install them in for at least 48-72 hours before you start. This lets the material adjust to your home’s temperature and humidity. If you skip this step, you can end up with unsightly gaps or buckling down the road. It’s a simple, free step that protects your entire investment.
Let’s combine our last two points for a truly killer upgrade.
17. Integrate Under-Cabinet Lighting for Functionality and Appeal
I’m mentioning this again because it’s just that important. Under-cabinet lighting is the secret ingredient that makes a kitchen look expensive and professionally designed. It eliminates the dark shadows that upper cabinets cast on your countertops, making your workspace brighter and safer. It also adds a beautiful, warm glow that makes your kitchen feel cozy and inviting in the evenings. It’s pure magic.
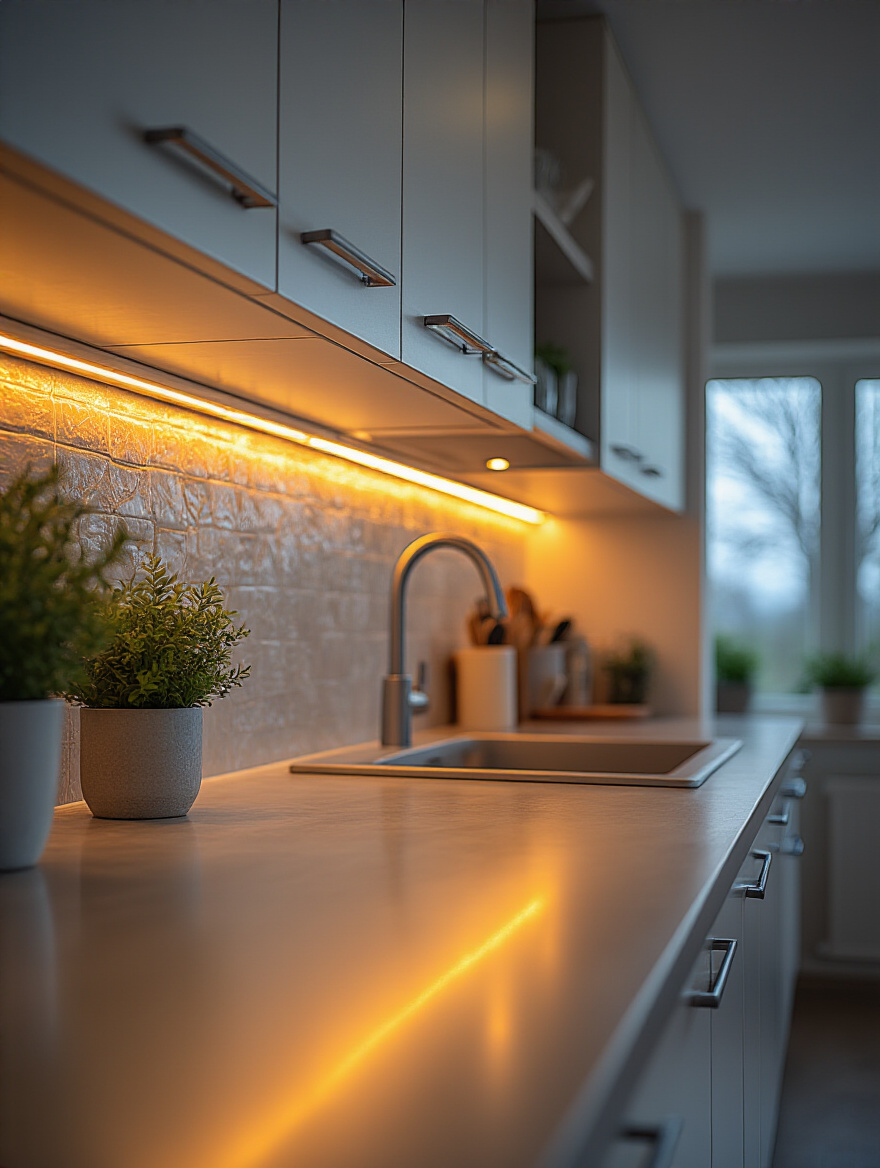
You don’t need to hire an electrician for this. There are tons of amazing, affordable plug-in or battery-operated LED light options out there. You can get thin light bars or flexible strips that stick right to the underside of your cabinets. A pro tip: install them toward the front of the cabinet, not the back. This ensures the light shines down on the middle of the counter, right where you’re working, instead of just lighting up your backsplash.
DIY Power & Aesthetic Touches for Maximized Value
We’re in the home stretch! You’ve made all the big, smart decisions. Now it’s time for the final touches—the easy, affordable details that pull everything together and make the space truly feel like yours.
18. Repaint Walls and Ceiling for an Instant Clean, Bright Refresh
Never underestimate the power of a fresh coat of paint. It’s the cheapest, easiest way to make a room feel clean, bright, and new. A new color on the walls can tie all your other updates together, and a fresh coat of white on the ceiling can make the whole room feel taller and more open. In a kitchen, you’ll want to choose a paint with a satin or eggshell finish, as it’s more durable and easier to wipe clean than a flat matte.
Here’s the shortcut you need to know: don’t skip the primer, especially if you’re painting over a dark color or kitchen grease stains. A good stain-blocking primer might feel like an annoying extra step, but it will save you from having to apply a third or even fourth coat of your expensive color paint. It covers up imperfections and gives you a perfect, even base, which means you get a professional-looking result with less work and less paint.
With your fresh new walls, you might see a blank space that’s perfect for a little extra storage.
19. Install Inexpensive Floating Shelves for Added Storage and Style
We talked about using shelving to replace cabinets, but they’re also fantastic for adding storage where there was none before. Got a small, empty wall by the doorway or above your coffee maker? That’s a perfect spot for a couple of floating shelves. They have a clean, modern look and are perfect for storing things you want to keep handy, like your favorite coffee mugs, spices, or small cookbooks.
For a super budget-friendly option, you can make your own. All you need is a piece of common pine board from a home improvement store and a set of simple brackets. You can stain the wood, paint it, or just leave it natural. The key is to make sure you mount the brackets securely. Whenever possible, screw them directly into the wall studs. If you can’t, use heavy-duty drywall anchors to make sure your shelves can handle the weight.
Now, let’s talk about organizing what’s behind closed doors.
20. Add Smart Storage Solutions to Declutter and Maximize Space
A beautiful kitchen that’s a cluttered mess is still a mess. Smart storage is all about making the space you already have work harder for you. I’m talking about simple, inexpensive organizers that can double your storage capacity and make your life so much easier. Think about drawer dividers for your utensils, tiered risers for your spices so you can actually see what’s in the back, and pull-out bins for under the sink.
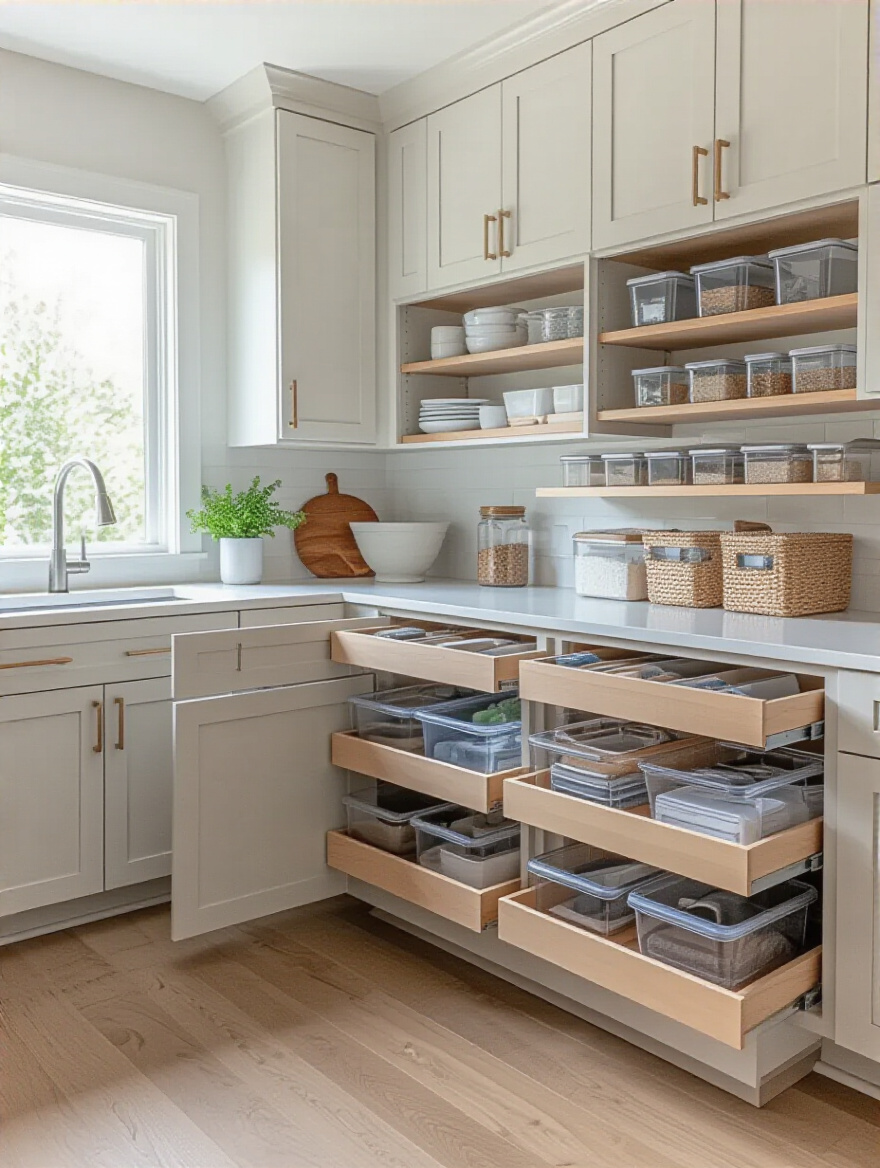
My favorite “hard lesson” story is about the dreaded pots and pans cabinet. Before I organized mine, it was a terrifying avalanche waiting to happen. I spent $40 on a simple, adjustable metal rack that holds my pans and lids vertically. It was life-changing. I can now grab any pan I need without causing a metal-on-metal catastrophe. Take an hour to assess your biggest clutter pain points and I promise there’s a cheap organizer out there that can solve it.
And finally, the best part.
21. Infuse Personality with Budget-Friendly Decorative Elements and Greenery
This is the final layer that makes your kitchen feel like home. After all the hard work, you get to add the fun stuff! A colorful runner on the floor, a beautiful bowl full of lemons on the counter, a piece of art you love propped against the backsplash—these are the things that give your kitchen soul. And you don’t need to spend a lot of money. Thrift stores are your best friend here. Look for unique pottery, cutting boards with character, or cool glass jars.
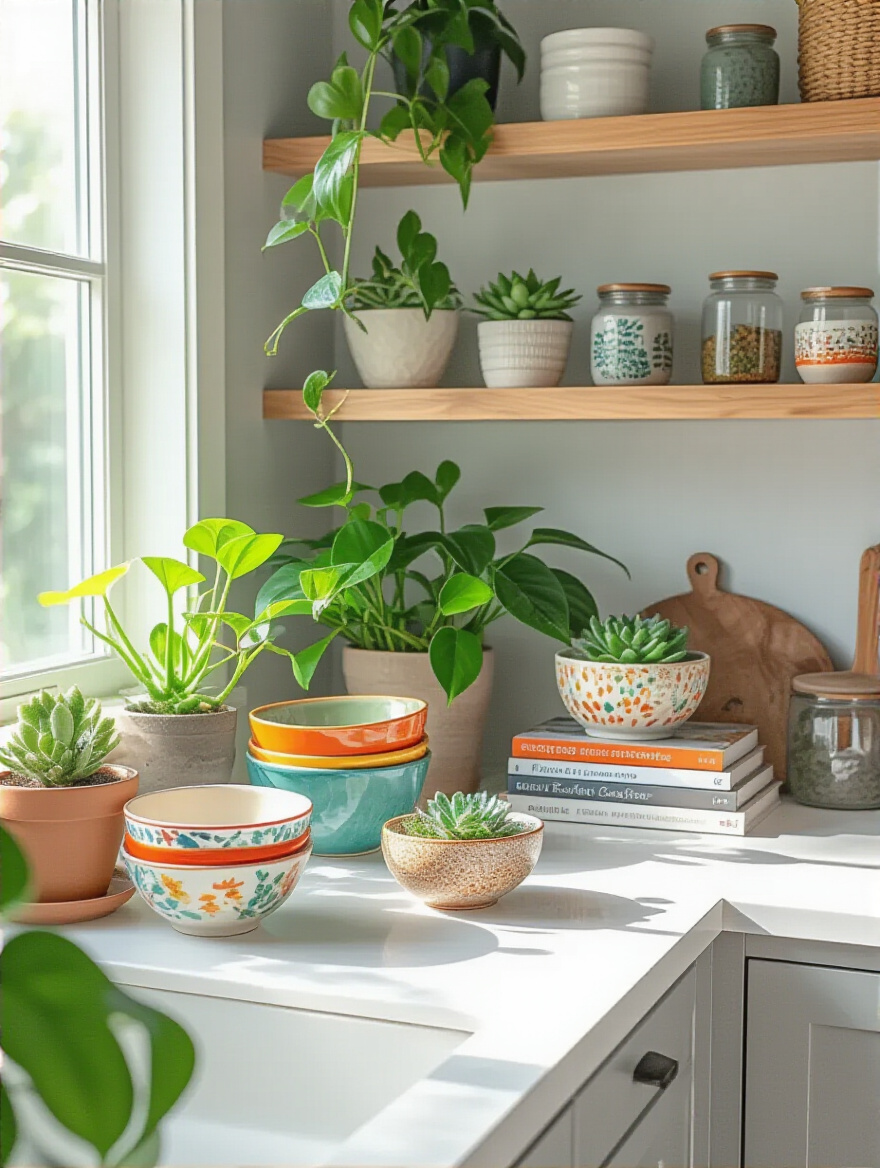
And please, add some life to the room with a plant or two. A pot of herbs on the windowsill not only looks great but is practical, too. A trailing pothos plant on top of your cabinets adds a lush, green touch. Greenery makes any space feel more alive and inviting. It’s the final, perfect touch to your beautifully and cleverly remodeled kitchen.
Conclusion
See? A kitchen remodel doesn’t have to be a terrifying, budget-draining nightmare. It’s about being strategic, a little bit scrappy, and knowing where to put your time and money to get the most impact. It’s about solving problems creatively, one smart decision at a time. From planning and painting to lighting and storage, you have the power to create a space that is not only functional but that truly makes you happy every time you walk into it.
So what’s next? Don’t get overwhelmed. Just pick one thing from this list. Just one. Maybe you’ll spend this weekend painting. Or maybe you’ll just order that cool new faucet you’ve been eyeing. Every small step forward builds momentum, and before you know it, you’ll be standing in your kitchen, sipping your coffee, and smiling because it finally feels like home. You can do this.