I used to tell my high school art students that a masterpiece doesn’t require the most expensive paint in the store; it requires imagination and the courage to start. The same rule applies to your kitchen remodel on a budget. We often buy into the discouraging myth that a beautiful renovation requires a $30,000 blank check, but that fear keeps too many of us stuck with outdated spaces. The truth is, a moderate budget frequently yields a better return on investment than a high-end overhaul. You don’t need deep pockets to create a home you love.
Instead of throwing money at the problem, we are going to use creativity to solve it. Strategies like refinishing existing cabinets can deliver a massive visual change without the structural price tag of a full demolition. Furthermore, prioritizing a little “elbow grease” for tasks like prep work allows you to shift your budget toward high-quality materials rather than costly labor fees. A smart renovation isn’t about how much you spend, but how wisely you spend it.
In this guide, I’ll walk you through the practical steps to achieve a luxury look for less. We will explore how to find hidden gems in the “scratch and dent” aisle and identify exactly which DIY tasks will keep your contractor costs below 40% of your total budget. Get your work gloves ready; we are about to prove that ingenuity outperforms a big budget every single time.
Phase 1: The Cosmetic Reset (Accessible Foundations)
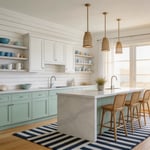
A masterpiece doesn’t always require a brand-new canvas; often, it just needs a fresh perspective. The “Cosmetic Reset” applies that same logic to your kitchen, focusing on high-impact changes with zero demolition. First, assess your cabinets. Instead of costly replacements, grab a paint roller and new hardware. A coat of semi-gloss paint paired with matte black pulls acts like jewelry for the room, instantly modernizing the space for pennies on the dollar.
Once the cabinetry shines, turn your attention to the surfaces and lighting. You can achieve a luxury look without the luxury price tag by attacking three specific areas:
- Resurface, don’t replace: Use an epoxy kit (under $250) to turn worn laminate into faux marble.
- Stick with style: Apply peel-and-stick vinyl tiles for a trendy, budget-friendly backsplash.
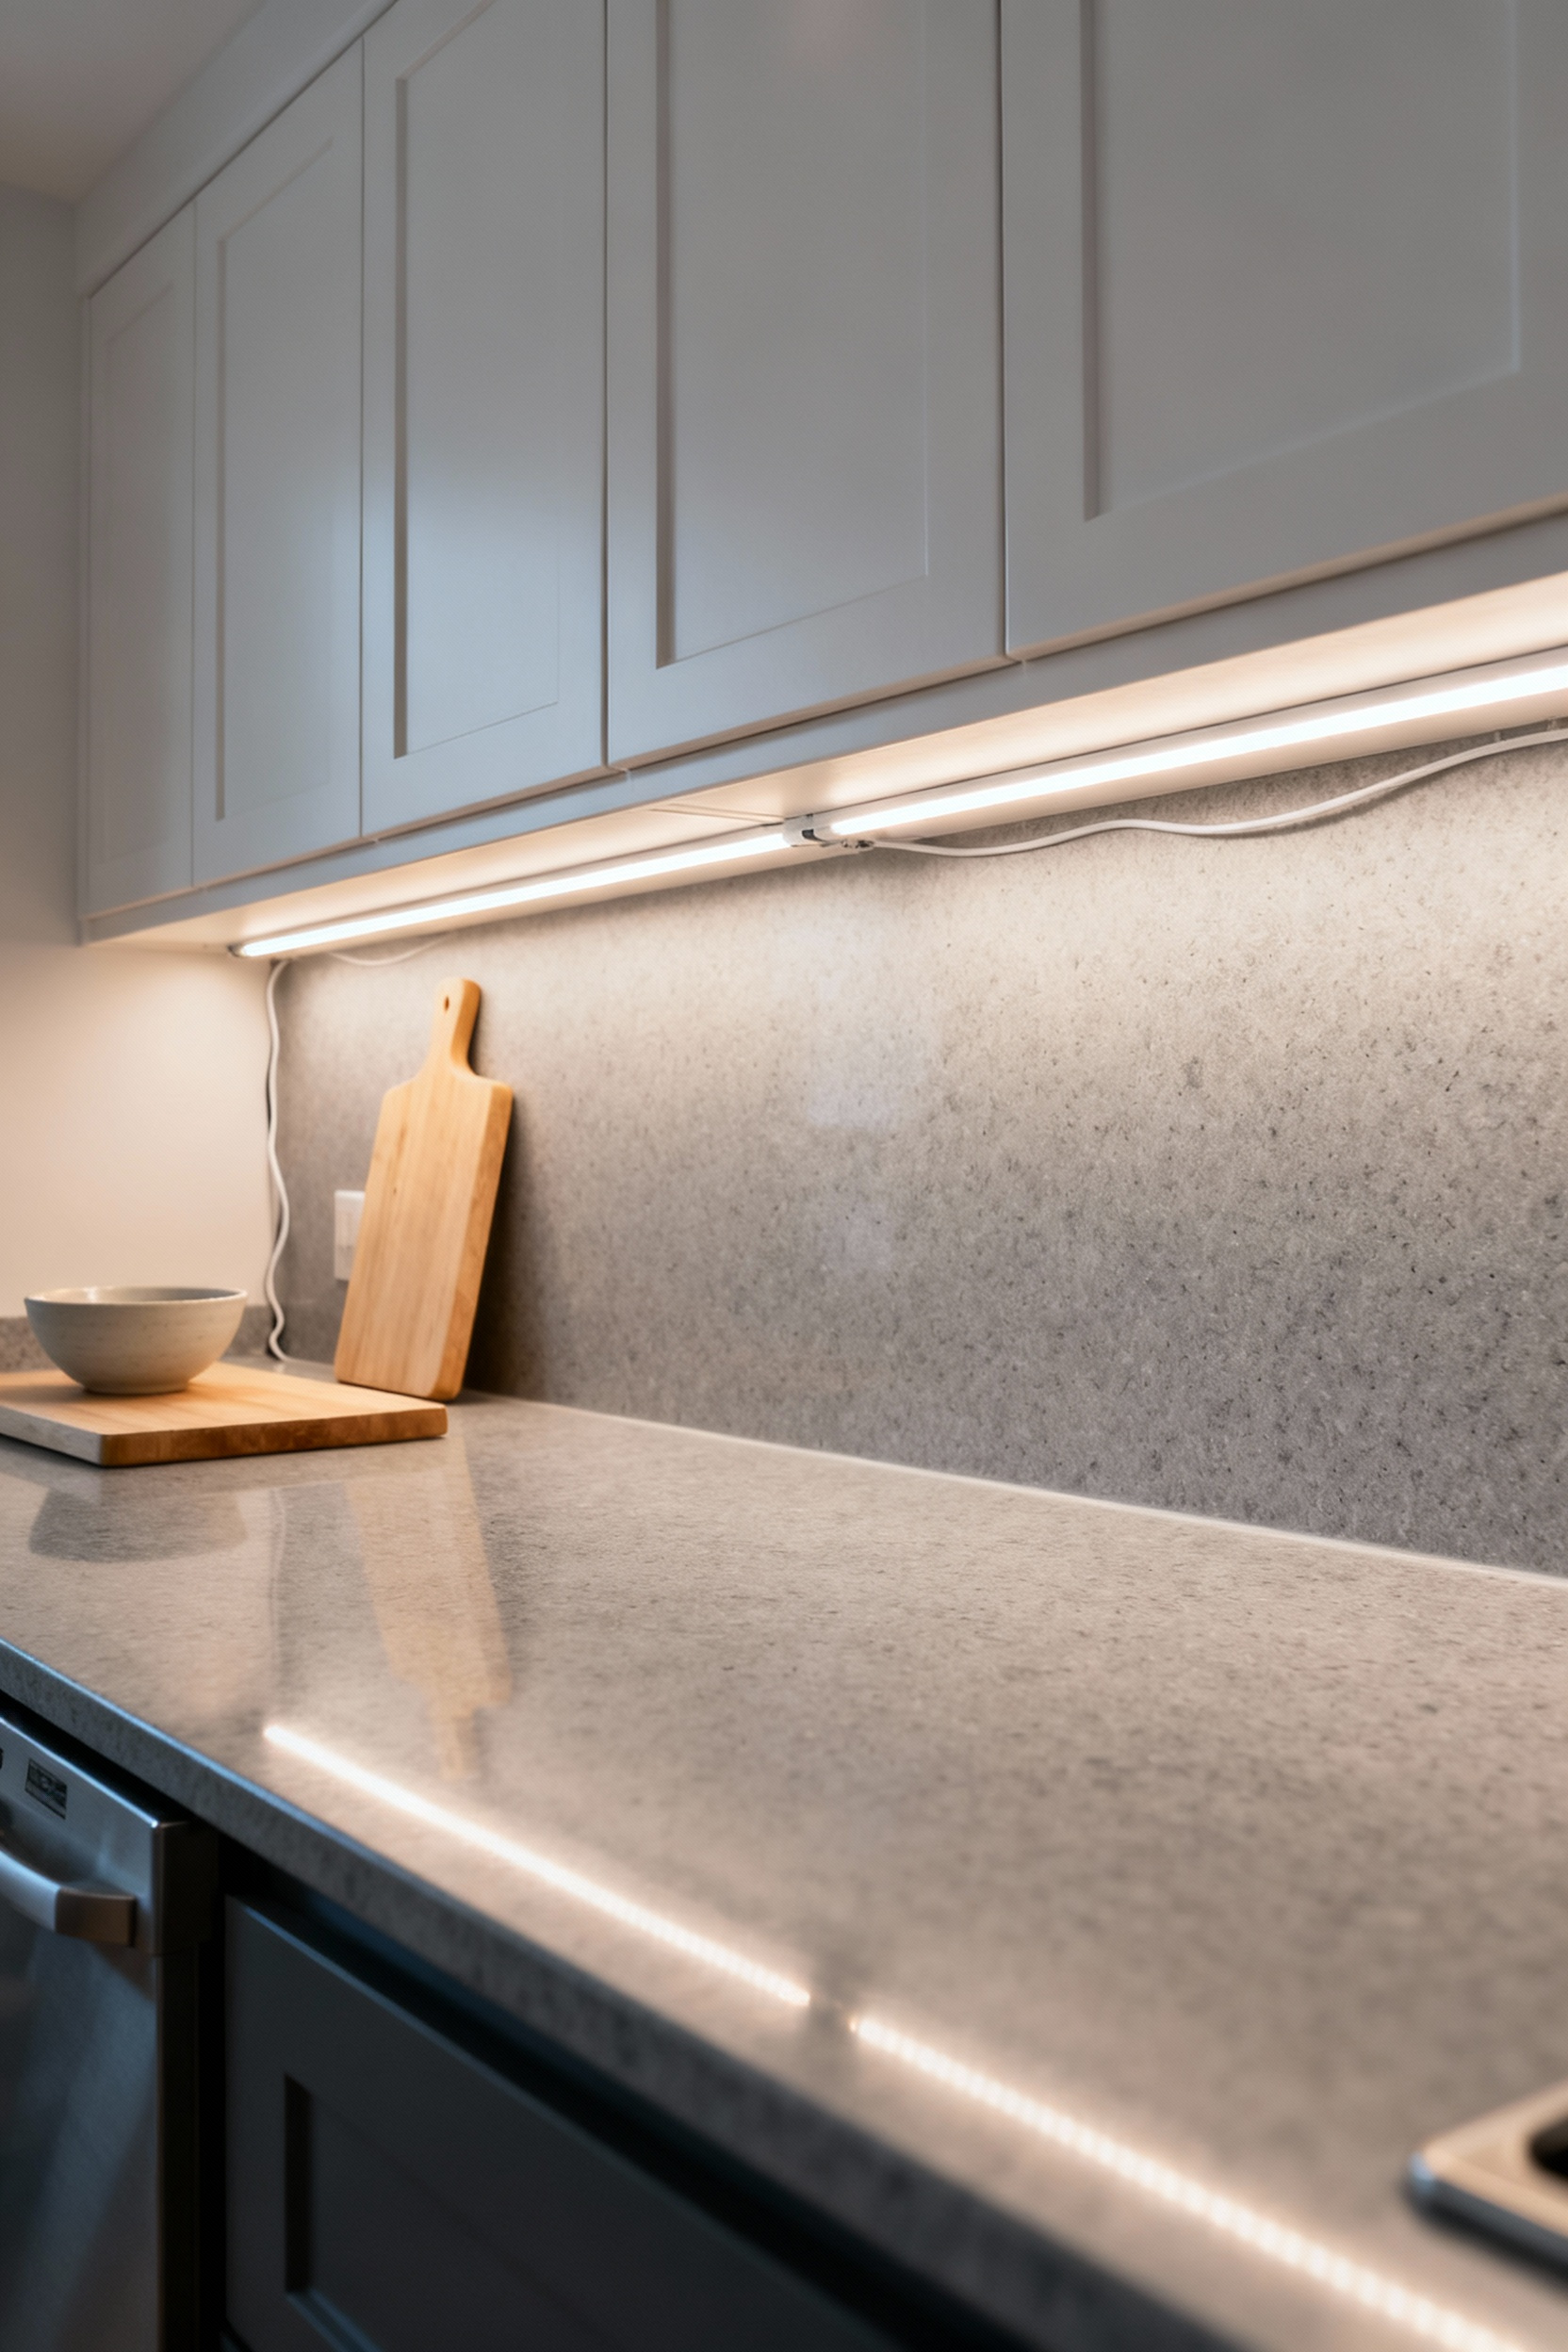
- Brighten the corners: Install battery-operated LED strips under upper cabinets to banish shadows.
Finally, ruthlessly declutter those newly finished countertops. Clear, open surfaces reflect your new lighting and make the entire room feel expansive. You absolutely have the skills to pull this off.
1. The Power of Paint: Achieving a factory-finish look on cabinets for under $200
Believe it or not, you can rival a professional installation for under $200. However, success relies on the preparation of the surface, not just the color. Consequently, you must allocate about $80 of your budget specifically to prep materials. Scrub away years of grease with a TSP substitute and sand every surface until it looks dull. This essential groundwork ensures your paint adheres perfectly and creates that covetable, smooth texture.
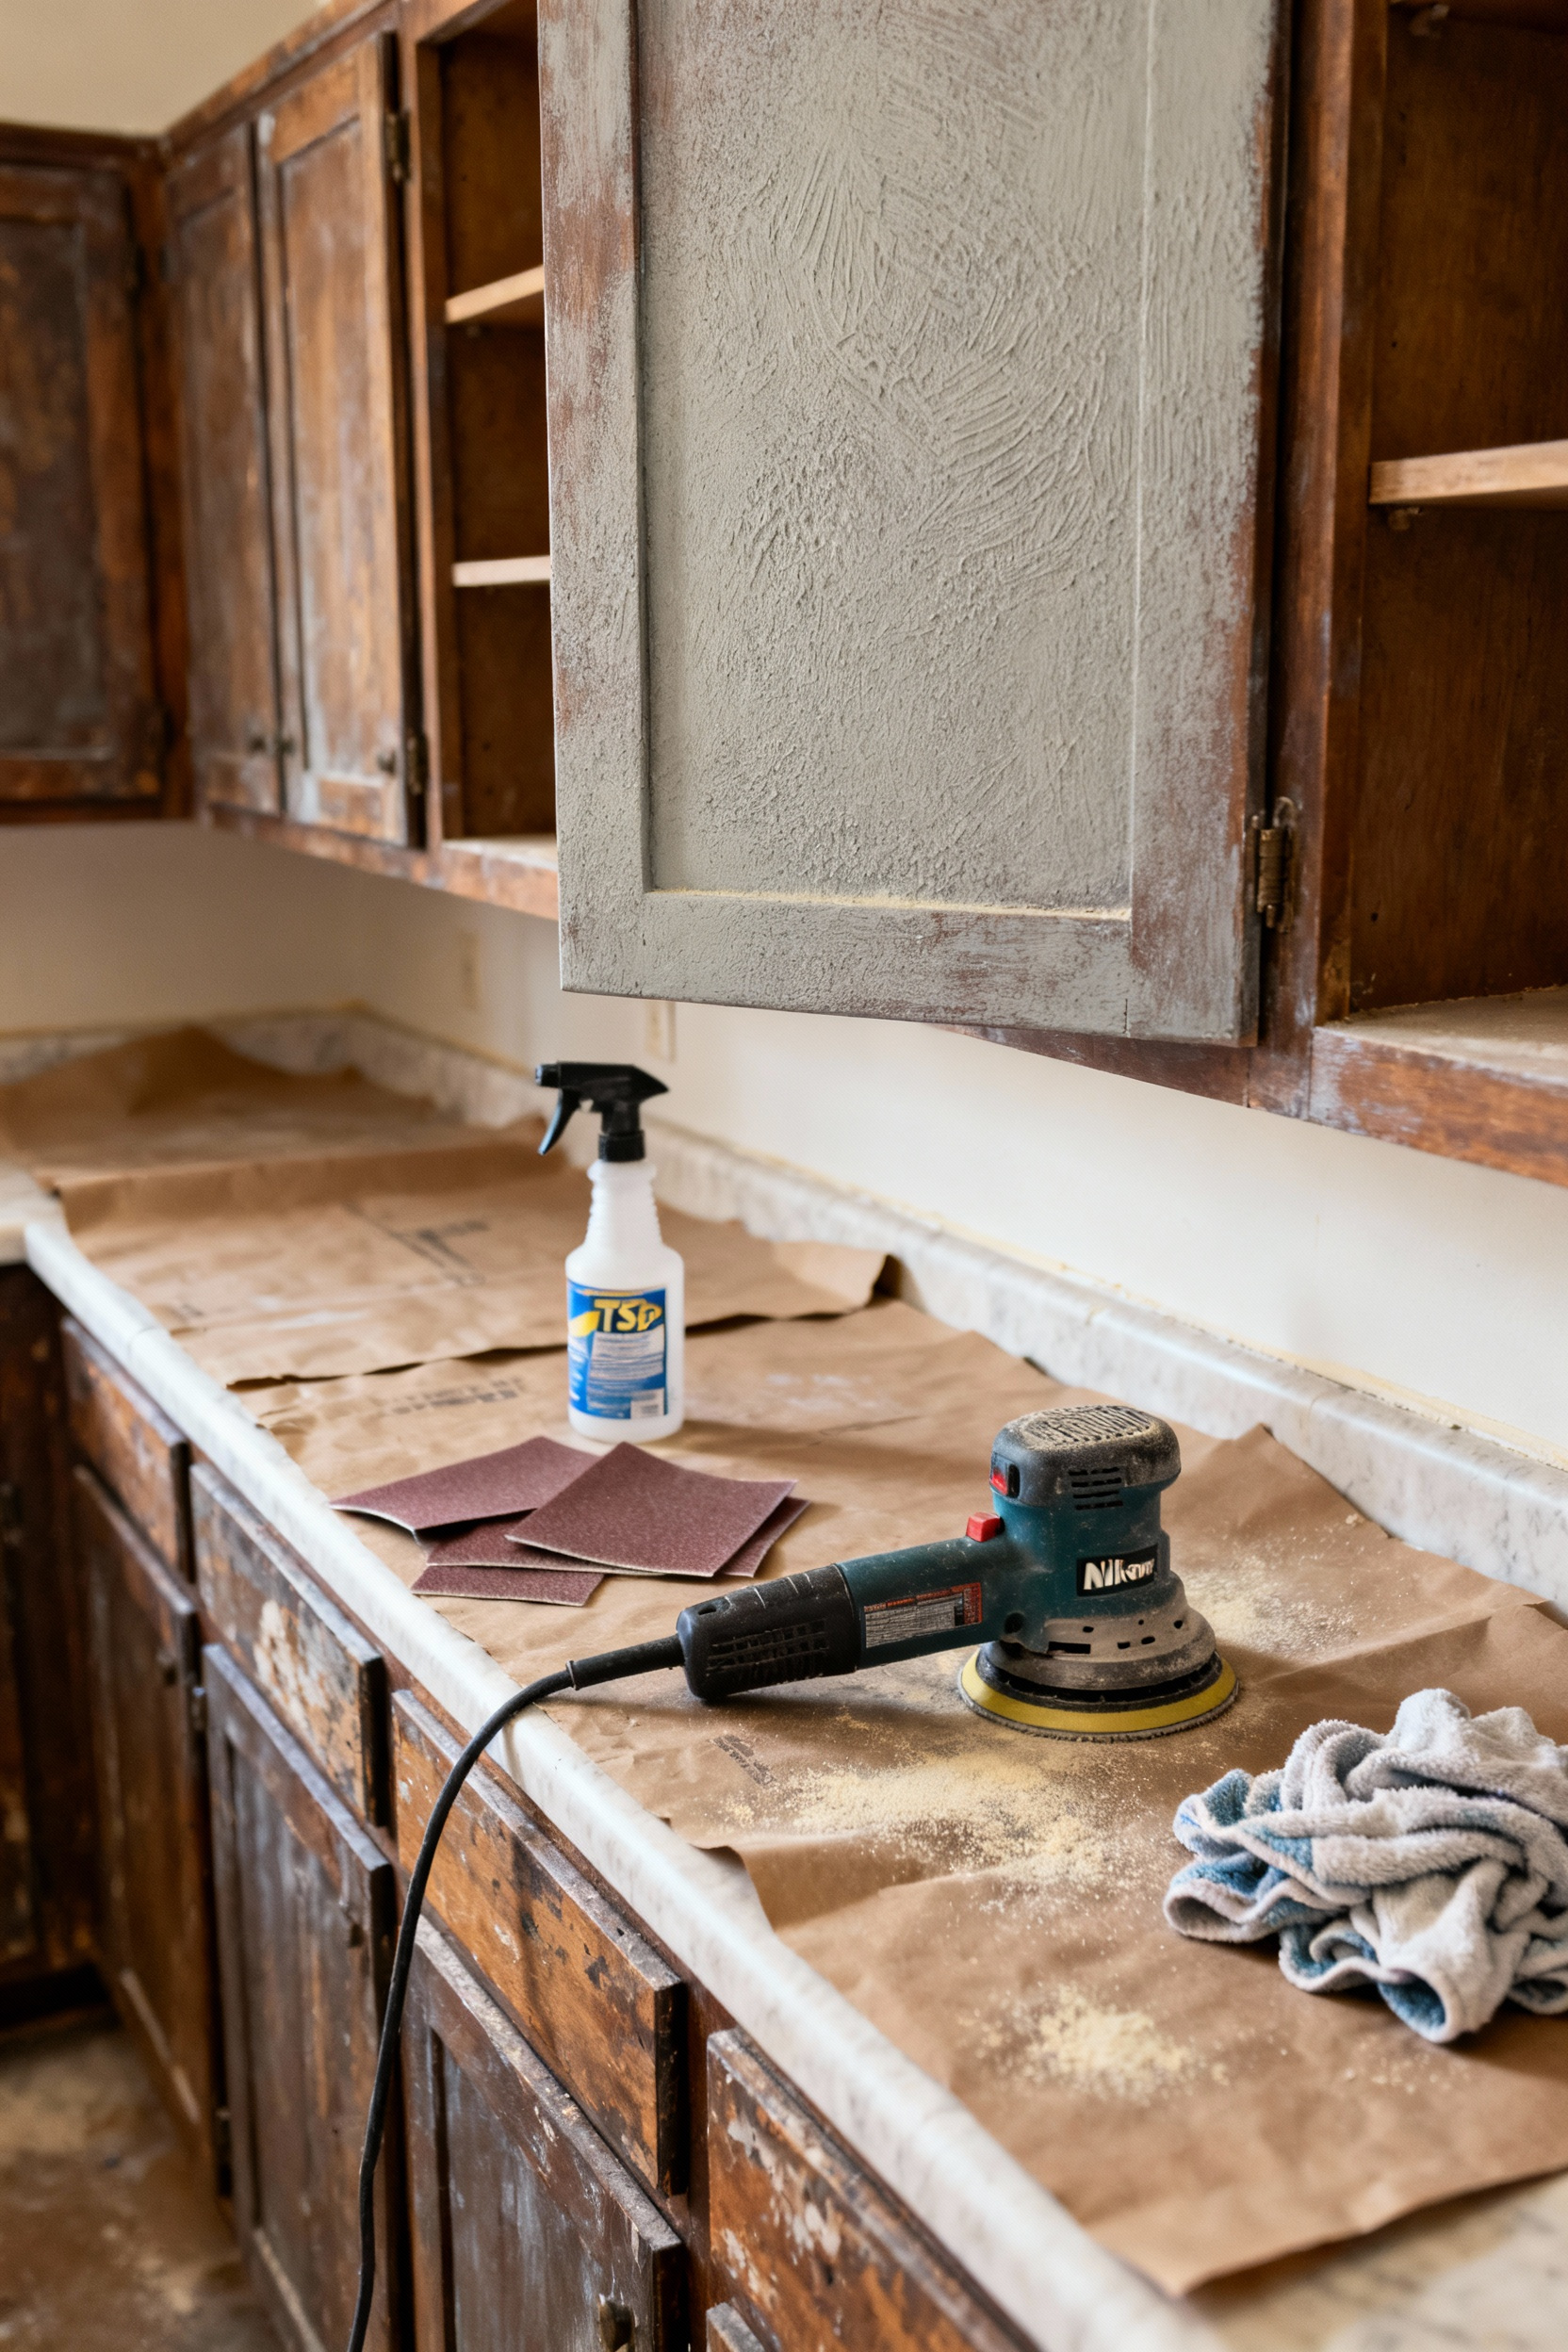
Next, select the right medium for your masterpiece. Skip standard wall latex and invest the remaining $100 in a self-leveling, water-based alkyd enamel. These specialized paints cure to a rock-hard shell that resists chips and scuffs. While a rented HVLP sprayer creates the absolute smoothest finish, you can still achieve professional results by hand. Simply follow this application trio:
- Use a high-density foam roller on flat doors for uniform coverage.
- Cut in with a high-quality angled sash brush to reach tight corners.
- Mix in a flow extender to help brush strokes level out and disappear before they dry.
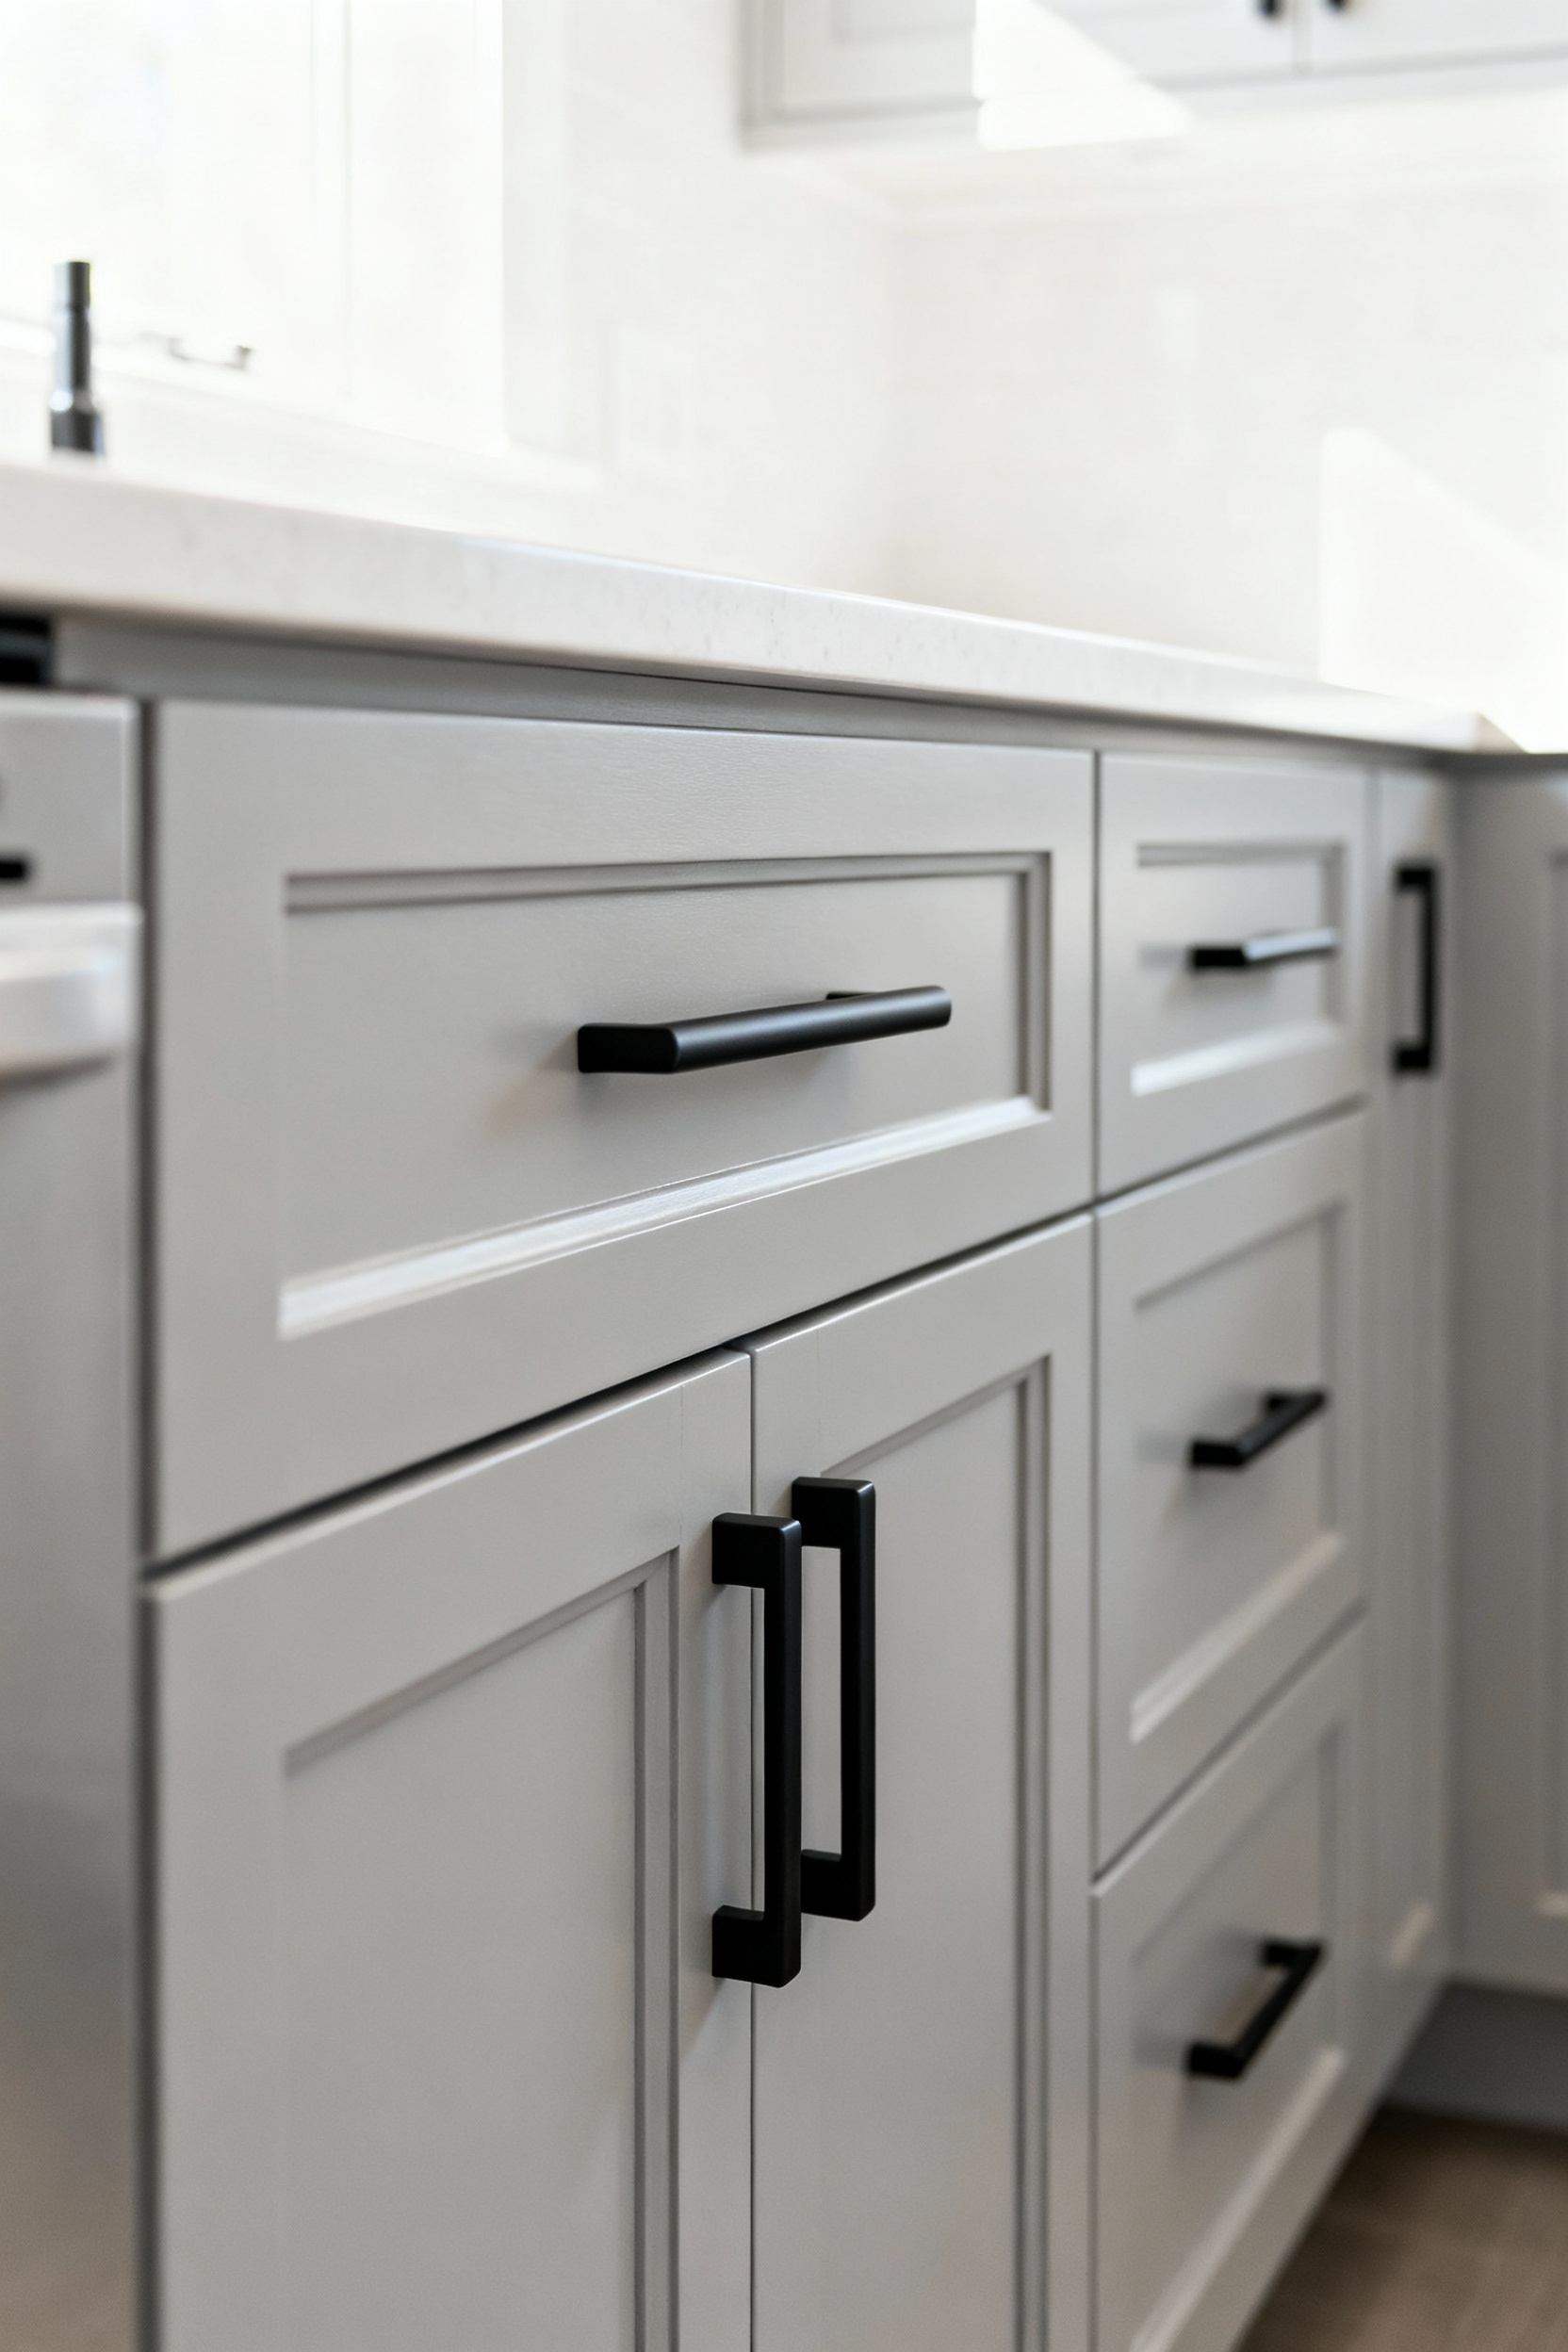
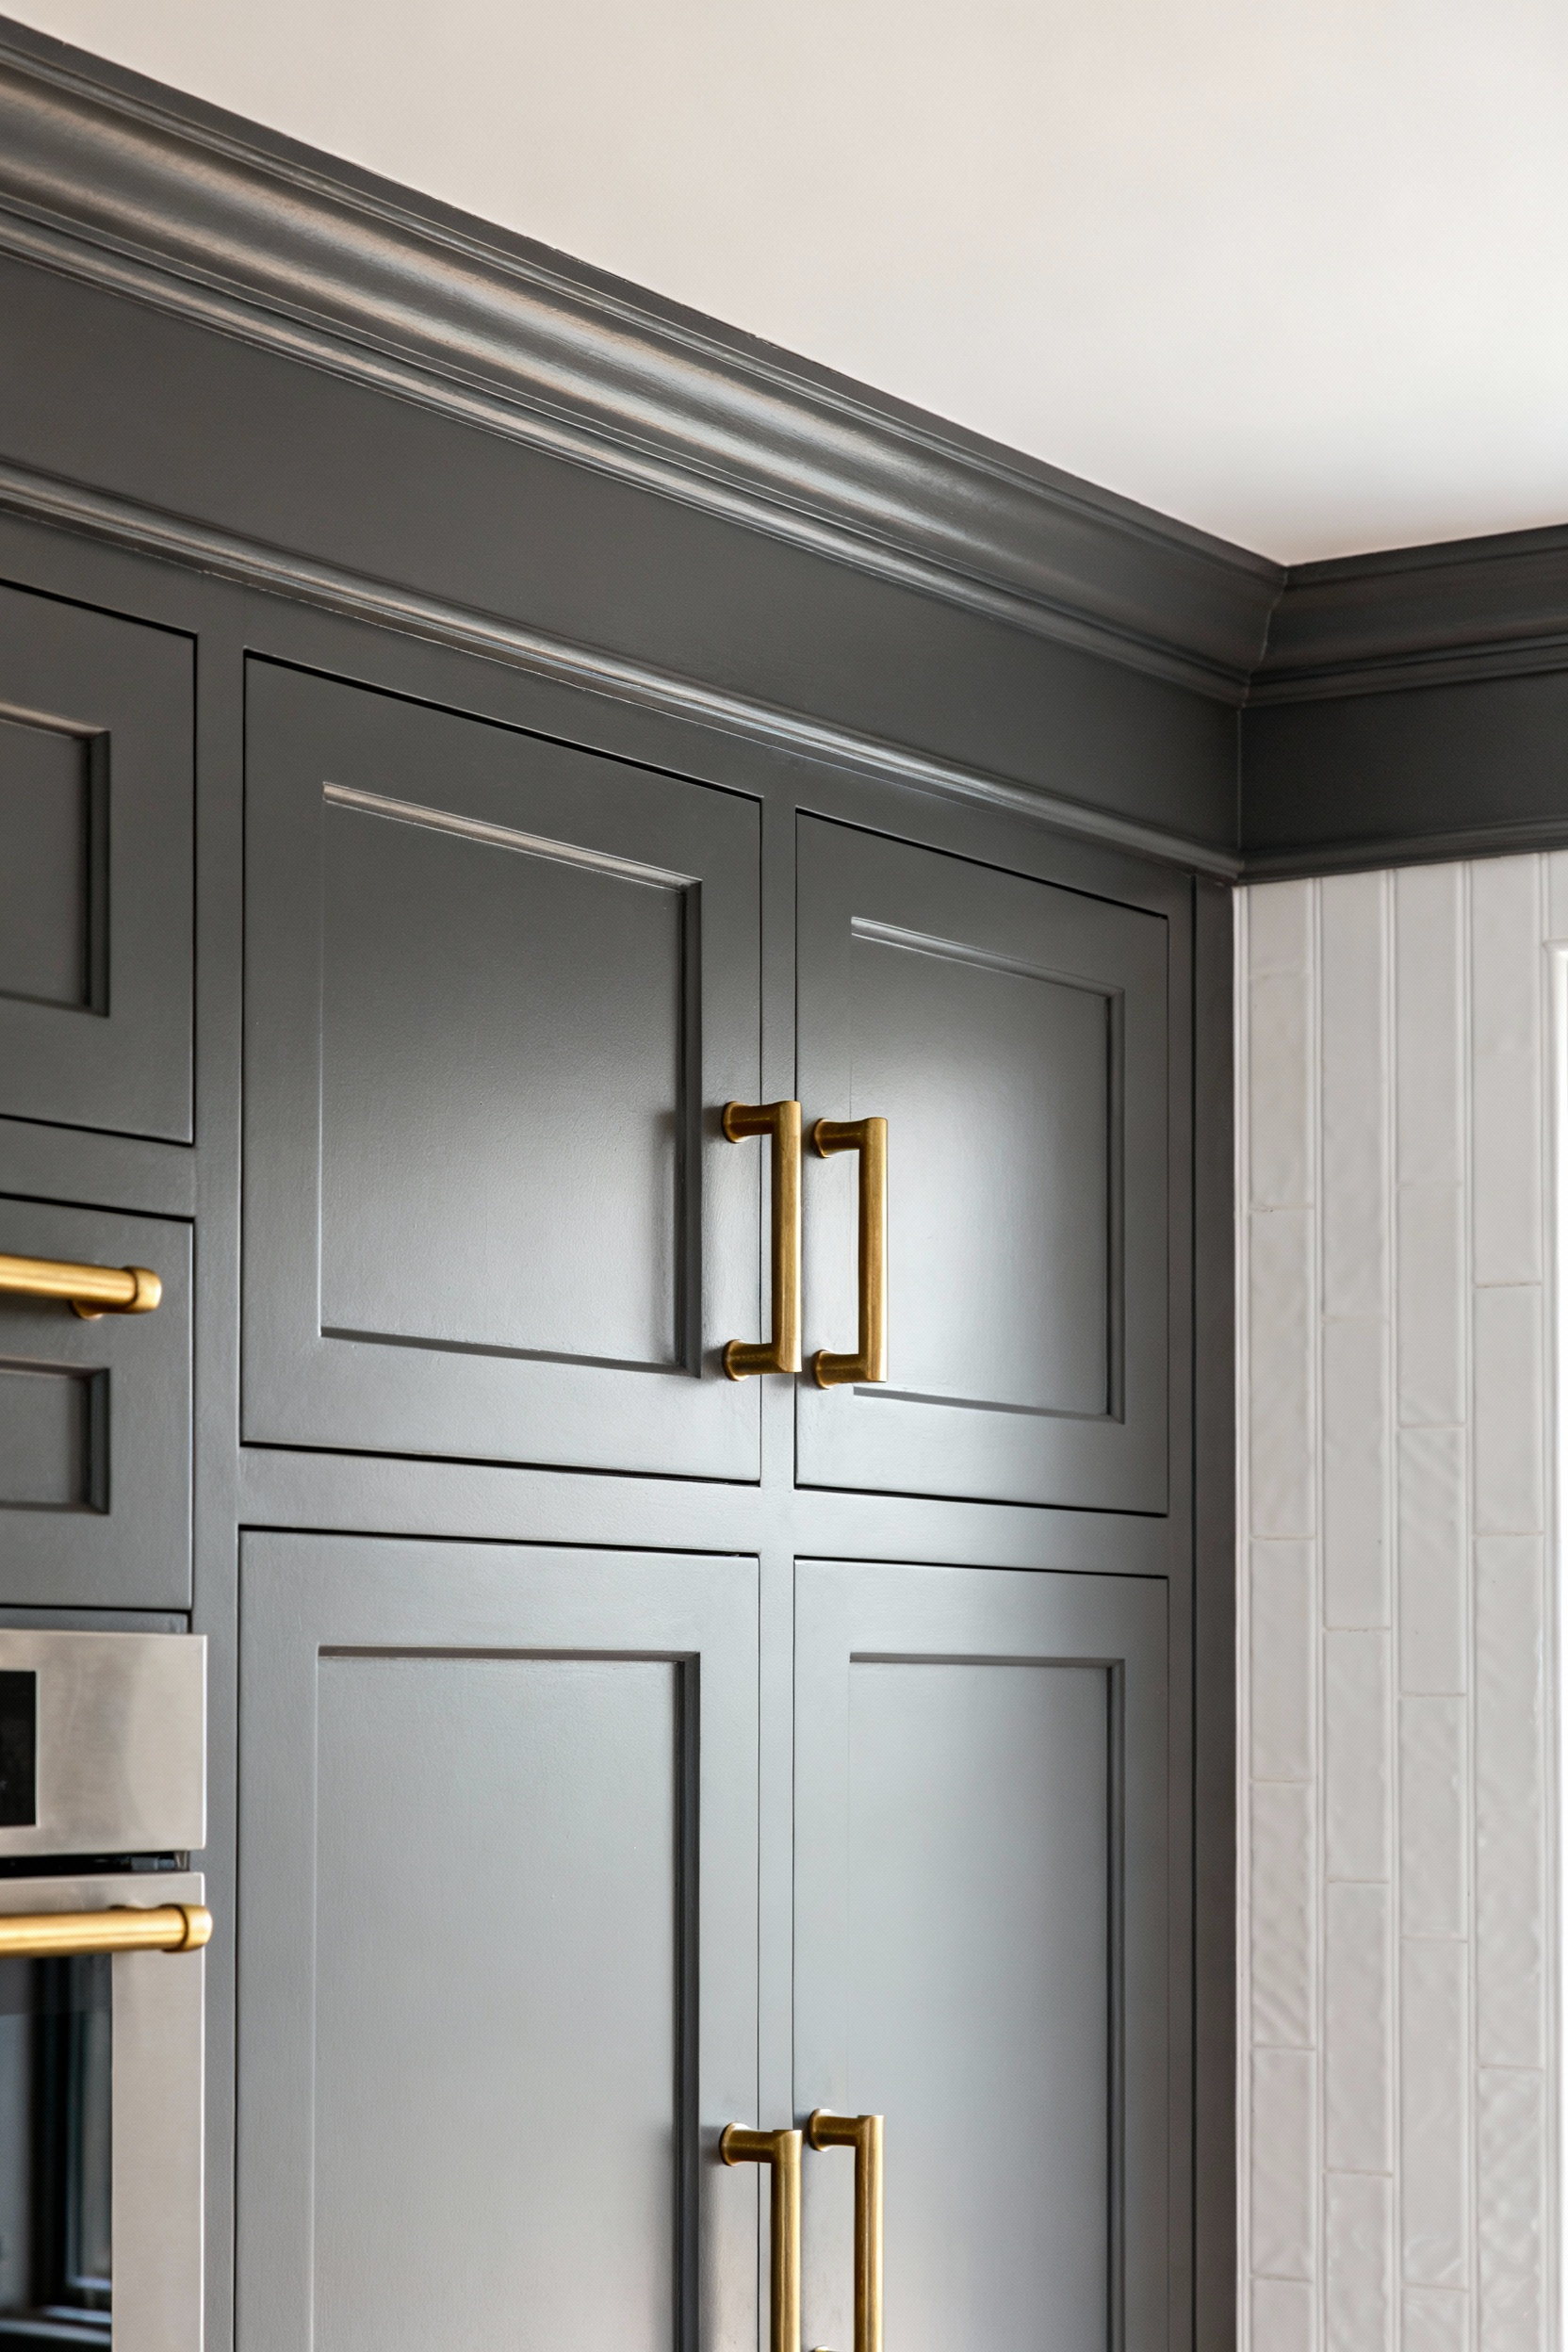
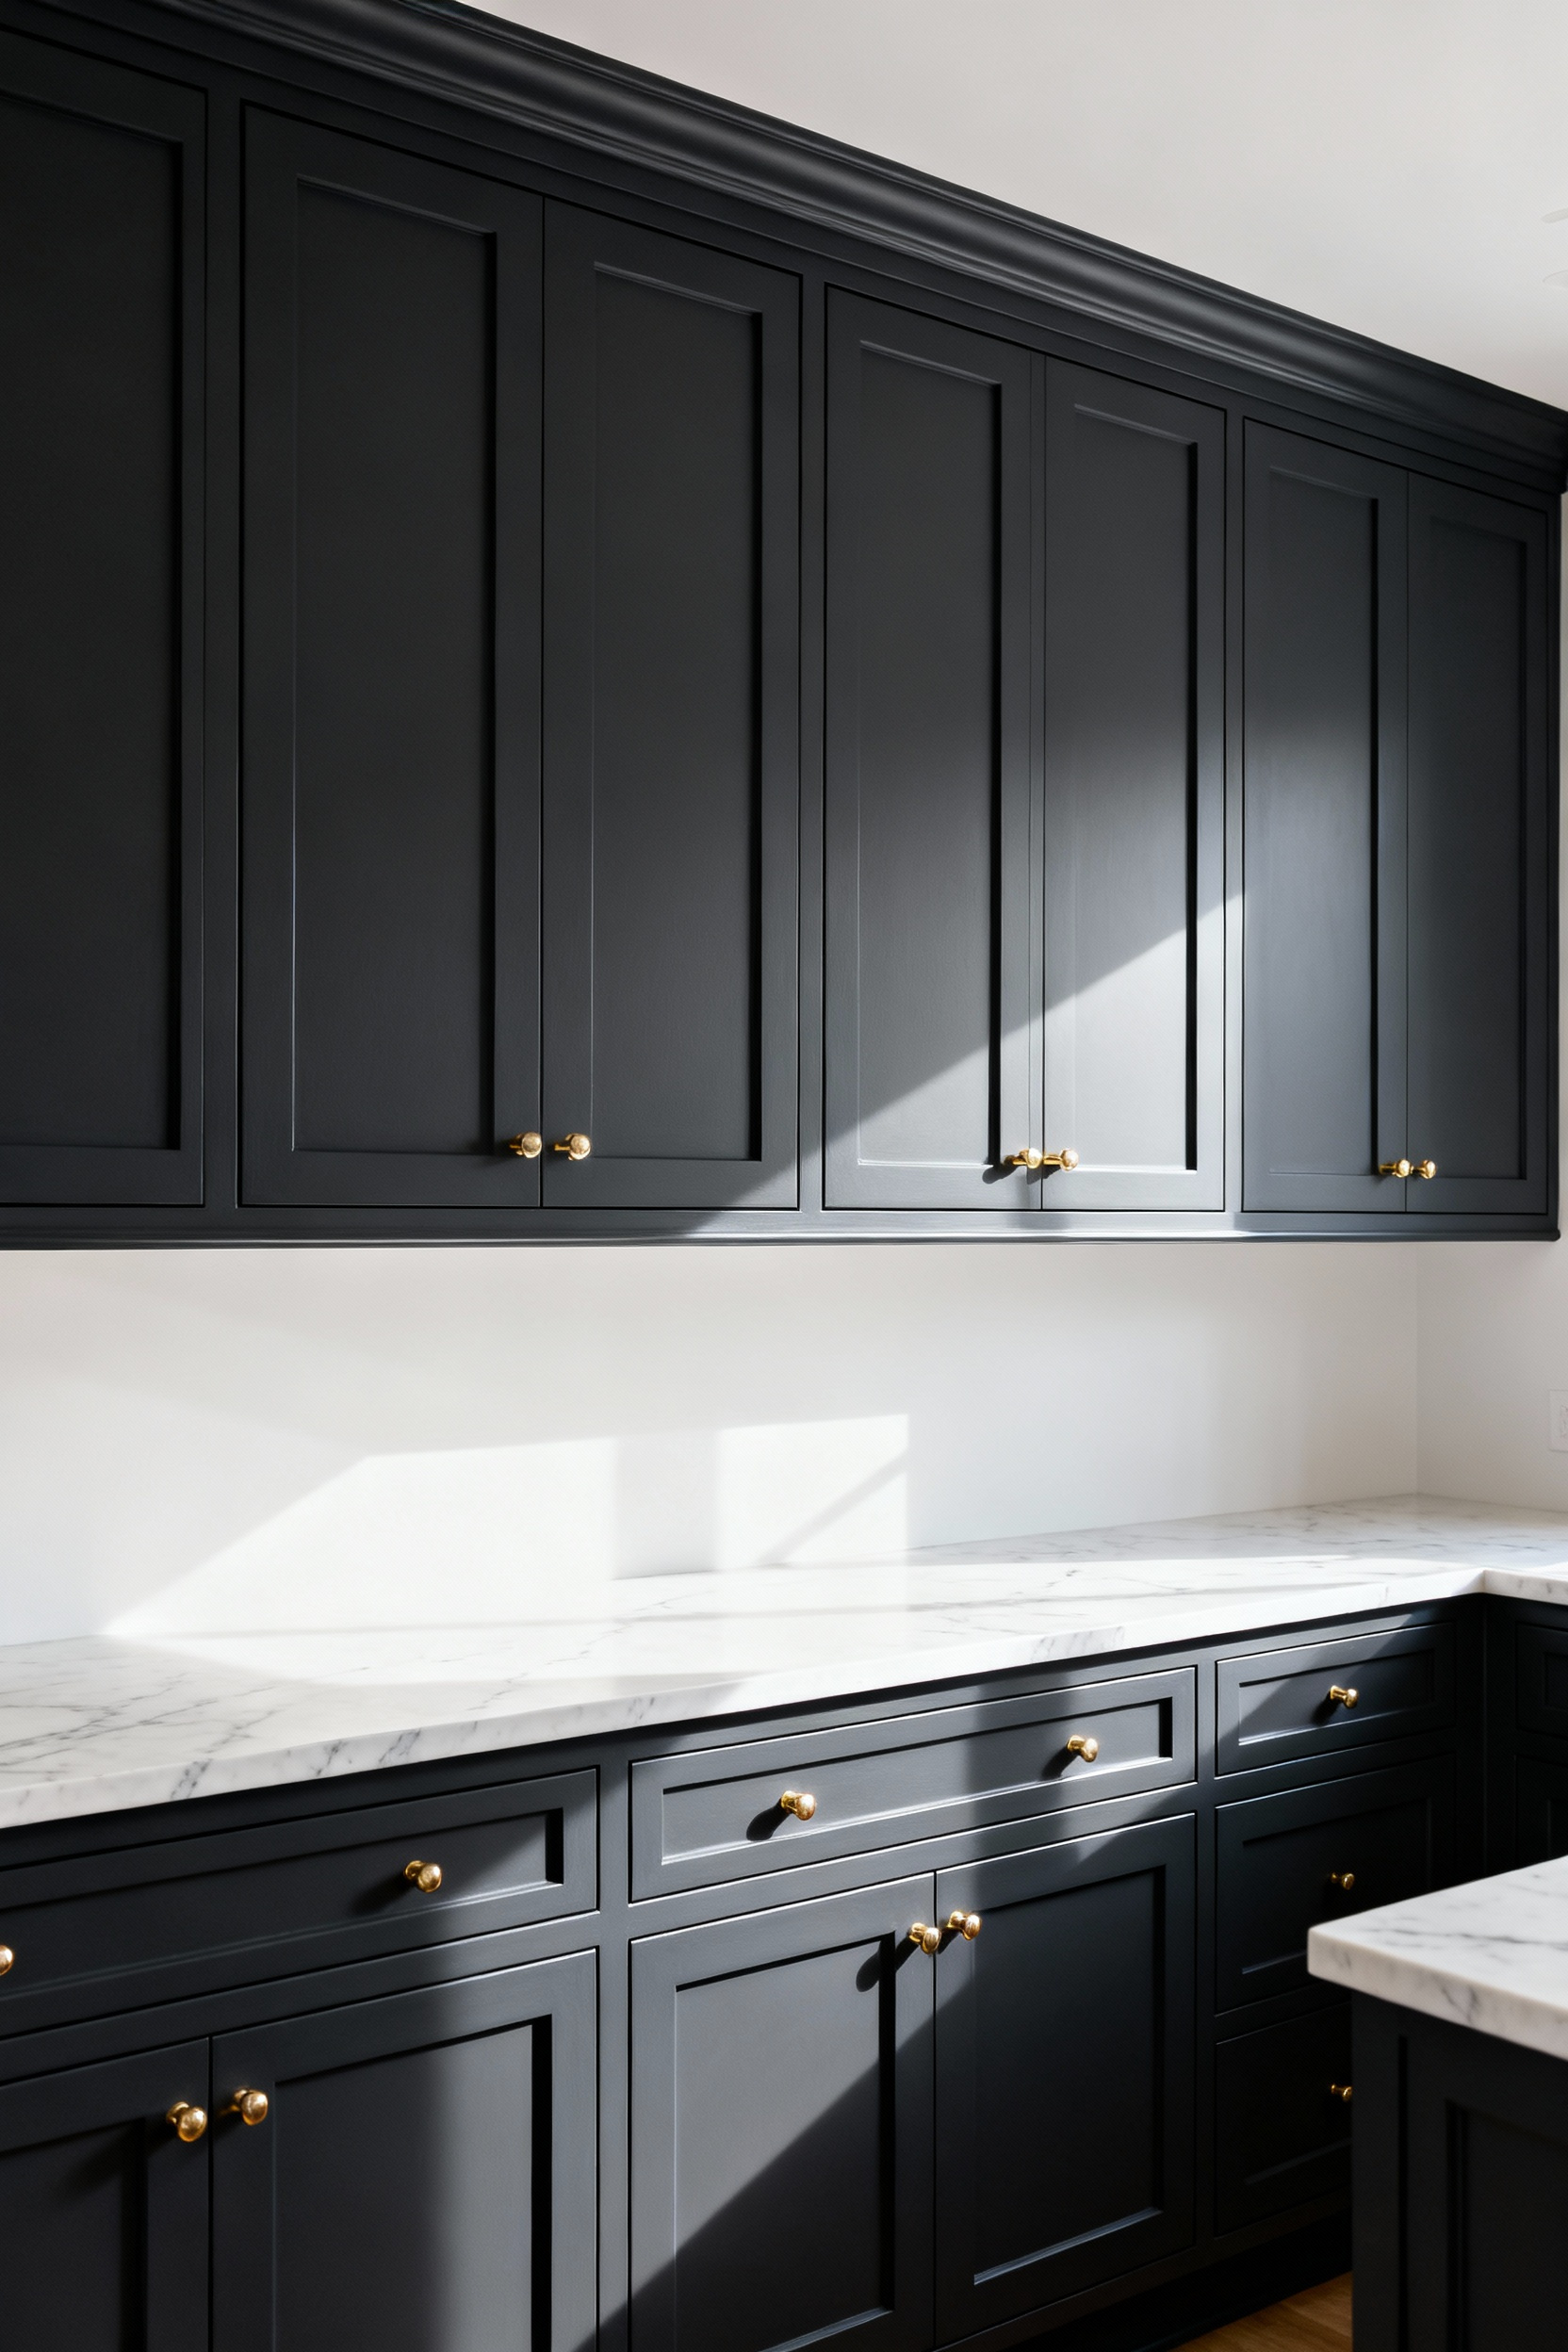
2. Architectural Hardware: Swapping dated pulls for modern brass or matte black accents
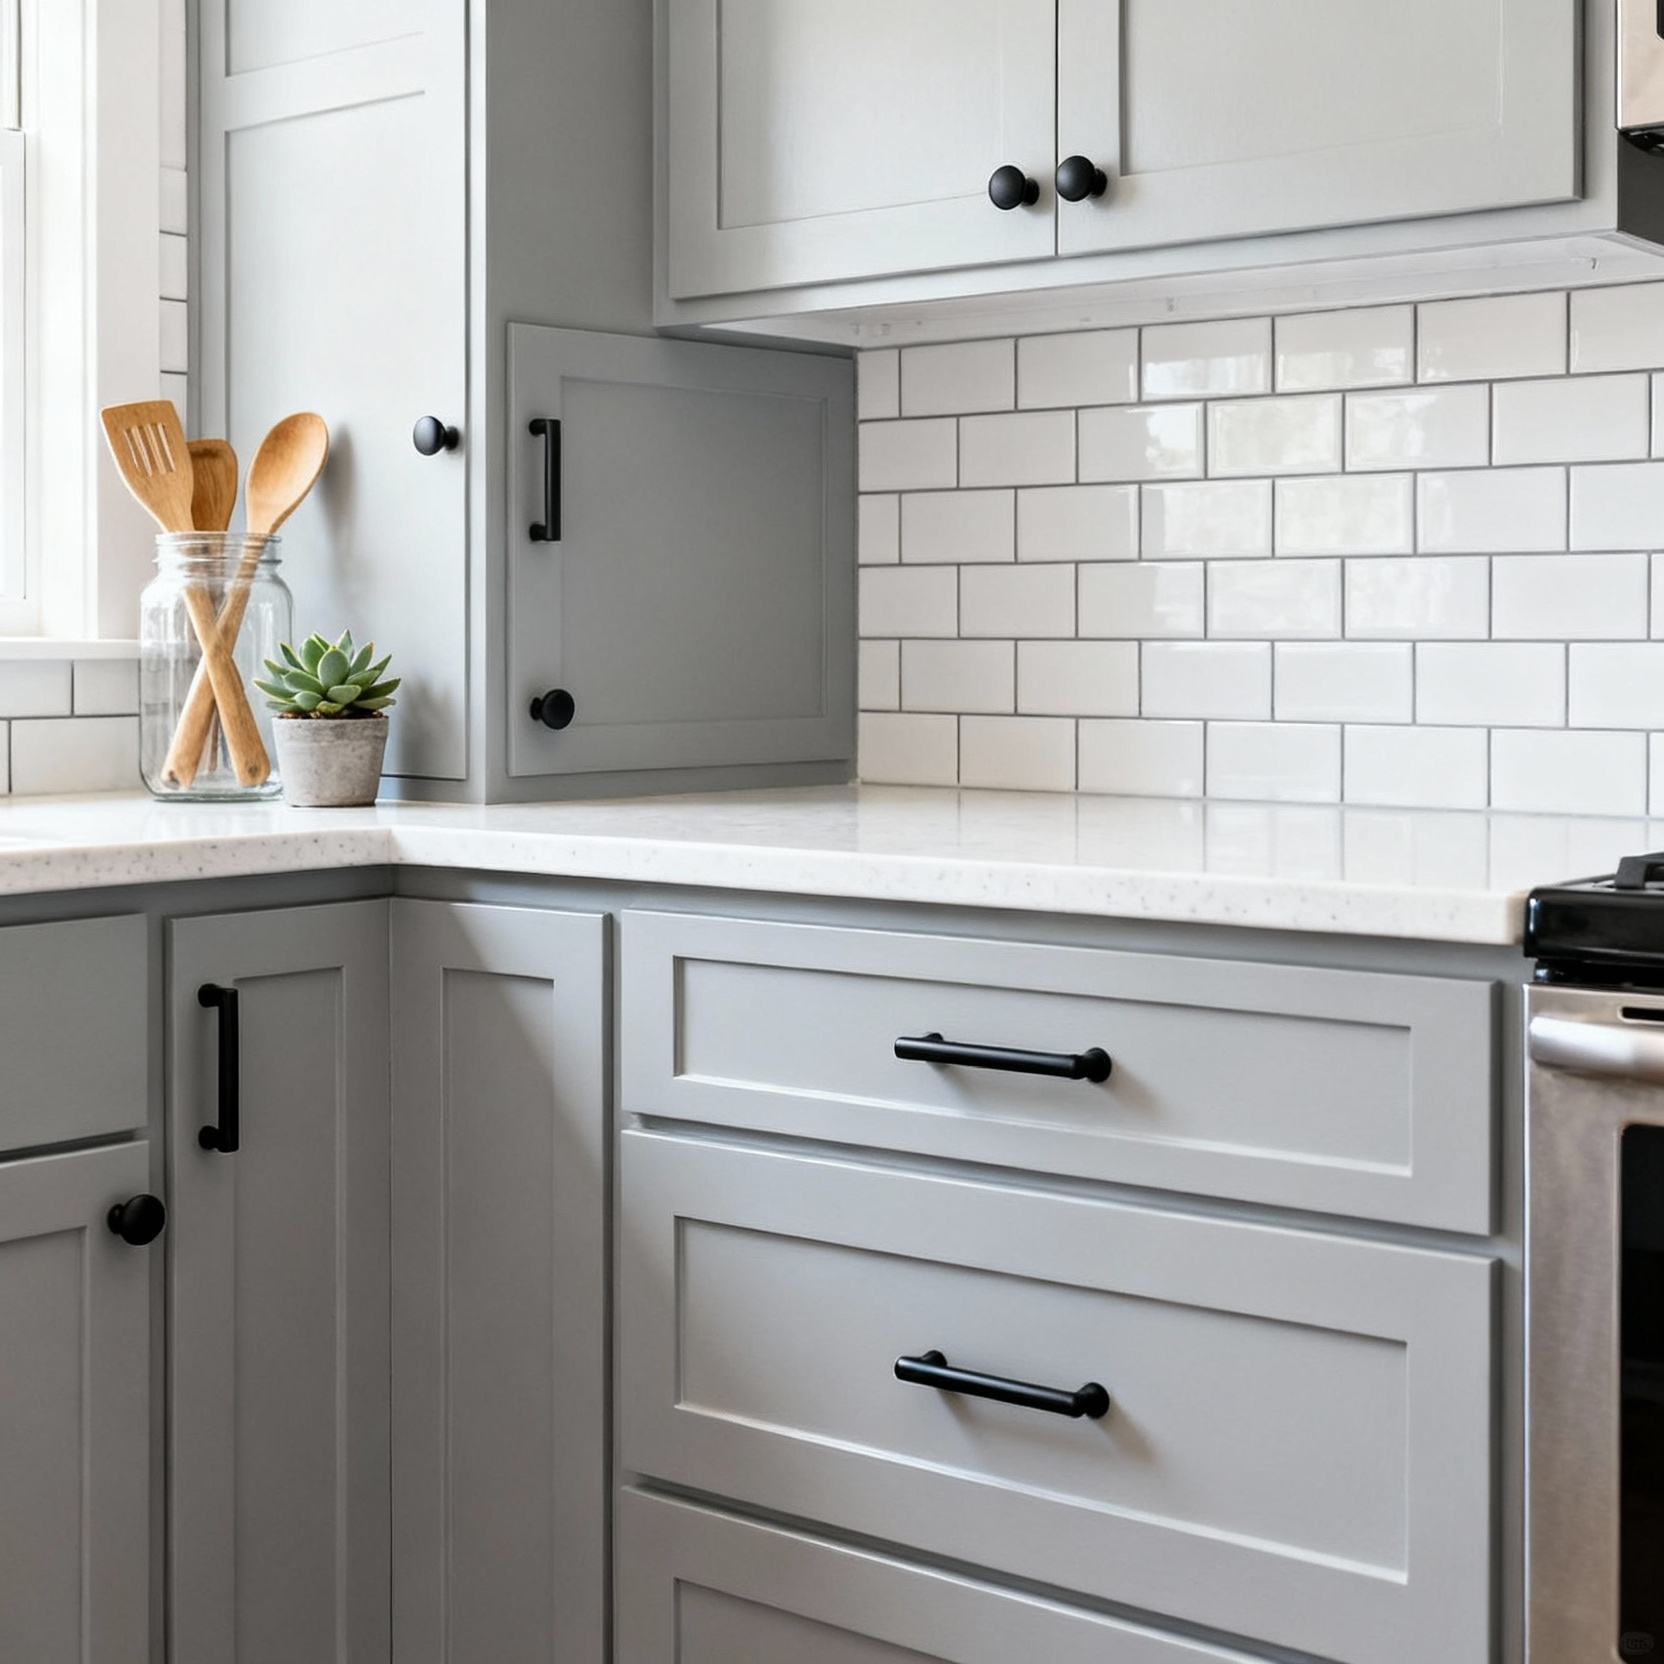
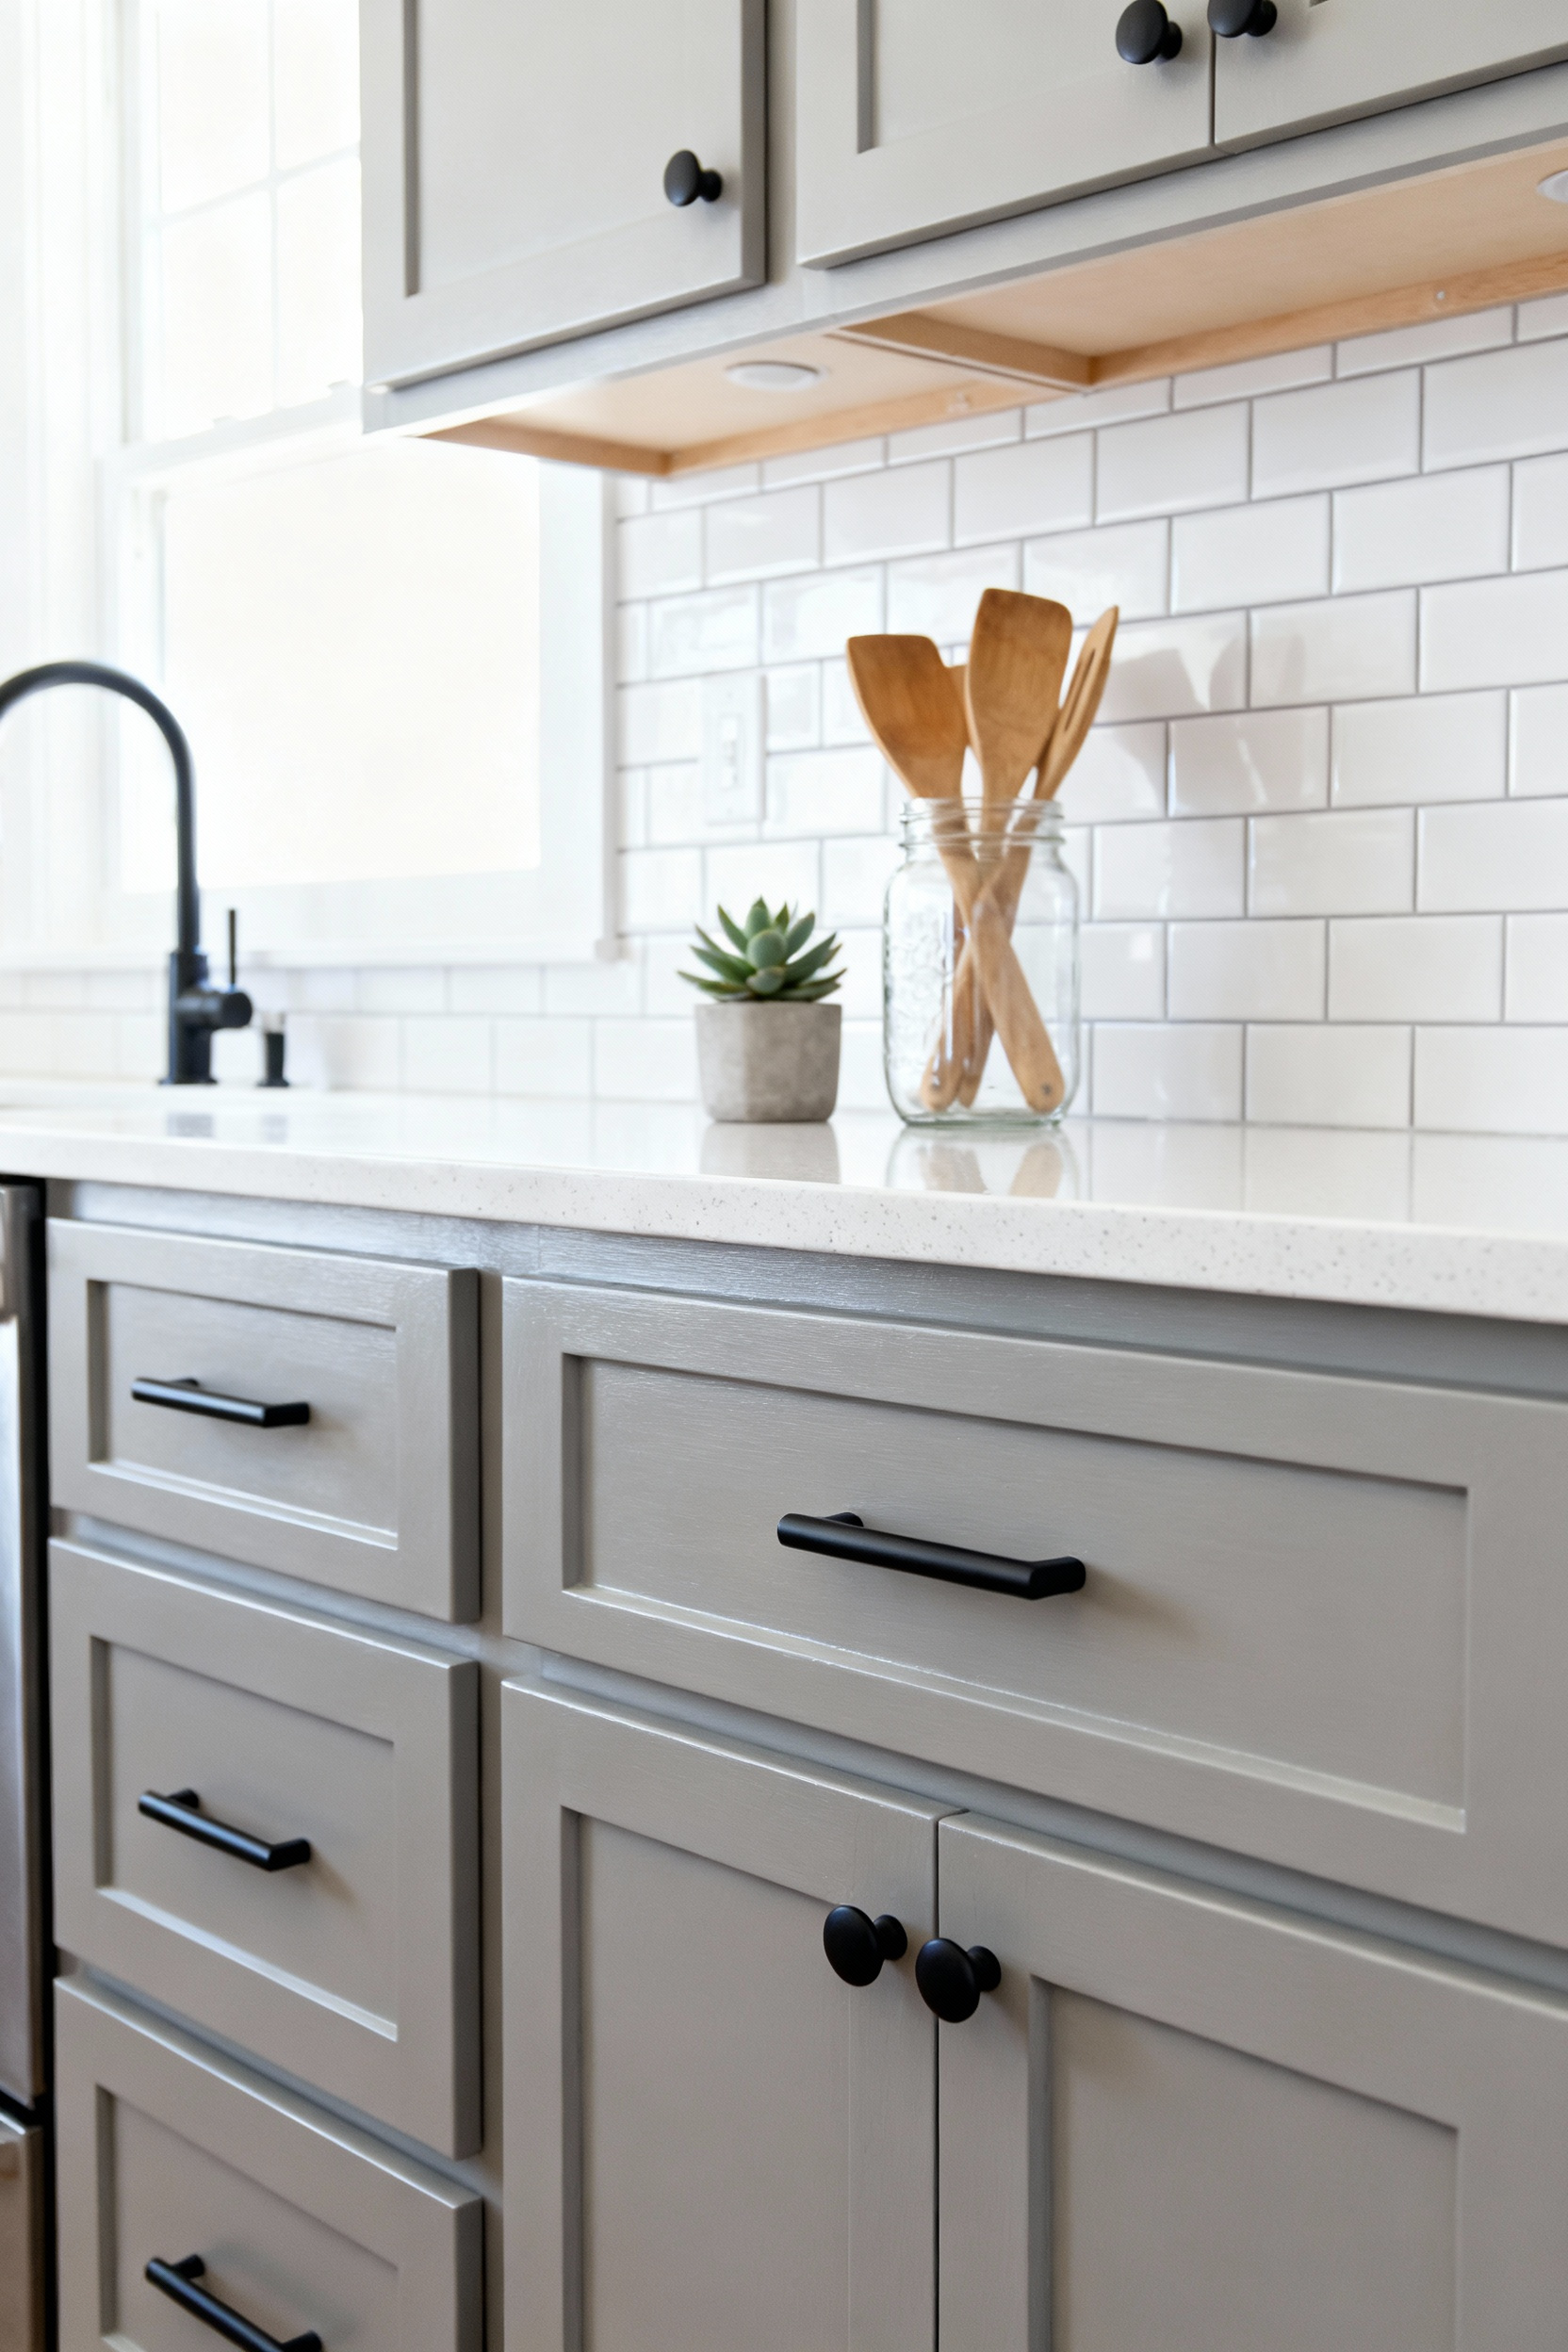
Cabinet hardware is the jewelry of your kitchen. Even a basic outfit looks stunning with the right accessories, and your cabinets are no different. Swapping rusty handles for sleek matte black pulls creates an immediate visual impact. To keep this project simple, strictly measure the “center-to-center” distance of your existing screw holes first. Sticking to this measurement—usually 3 inches or 96mm—means you simply unscrew the old and screw in the new. This strategy avoids the messy, advanced work of patching, sanding, and drilling new holes.
Once you have your measurements, stretch your dollars further with a few smart shopping tactics:
- Buy in bulk: Purchasing 25-packs online often costs 30% to 50% less than buying individual pieces at a hardware store.
- Mix and match: Use expensive, statement pulls on a focal point like your island, then use simpler, matching knobs on perimeter cabinets.
- Select affordable finishes: Look for “satin brass” or “champagne bronze” to get a warm, luxurious look without the high price tag of solid unlacquered brass.
By shopping strategically, you can achieve a custom designer look without draining your wallet.
3. The ‘Third Wall’: Using paint or wallpaper on the ceiling to draw the eye up and expand space
In art, we are taught to utilize the entire canvas, not just the center. Your kitchen works the same way, yet we often ignore the space above our heads. Treating the ceiling draws the eye upward, instantly expanding the room’s perceived height and pulling focus away from outdated cabinets. You can easily transform this surface with a few budget-friendly tricks:
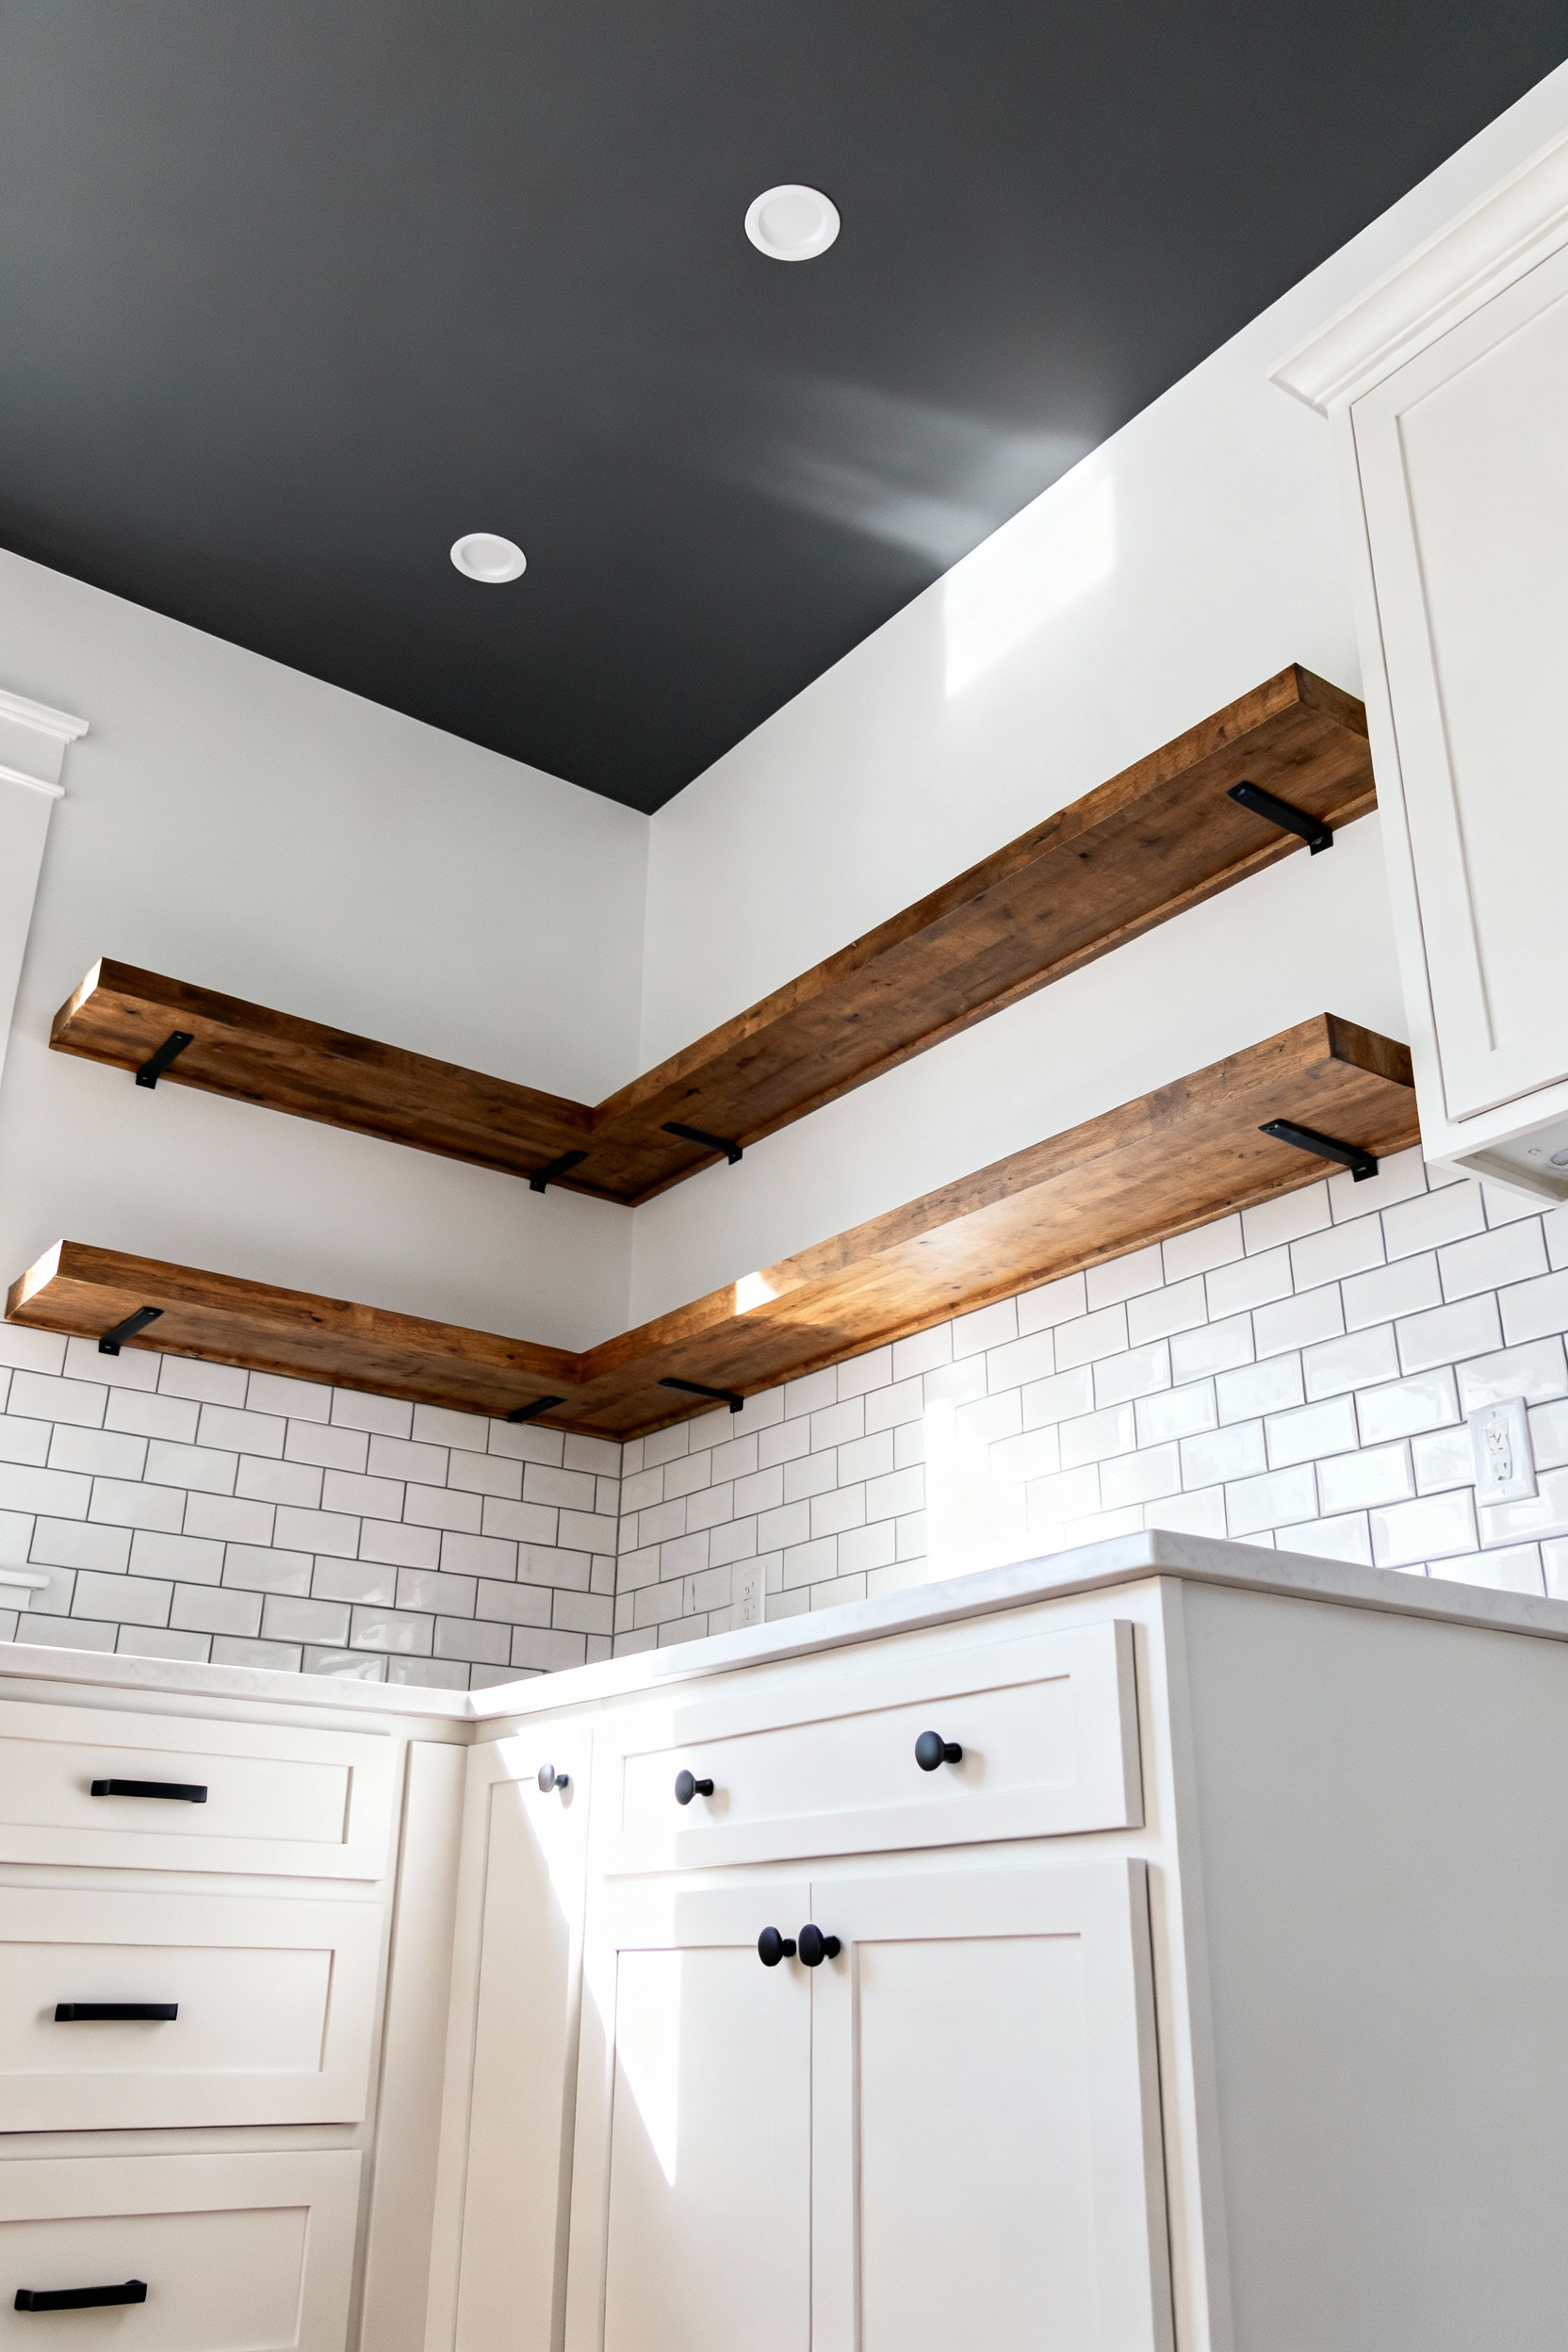
- Blur the boundaries: Paint the ceiling the same color as your walls but use a flat finish. This erases the visual break where the wall ends, making the room feel significantly taller.
- Reflect the light: Swap standard flat white for a high-gloss finish. This mimics the look of expensive lacquer and bounces light around the room.
- Limit the pattern: Apply a bold wallpaper only to the ceiling. Since the square footage is small, you get a high-end designer look without buying endless rolls.
If wallpaper feels too risky, simply paint the ceiling a soft, unexpected hue like pale blue or warm gray. This acts as a gentle distraction, keeping eyes moving upward rather than lingering on scuffed baseboards. This weekend project offers one of the highest returns on investment for your time and money.
Phase 2: High-Impact Upgrades for Your Kitchen Remodel on a Budget (Intermediate Skills)
Changing a single texture can transform an entire composition. Phase 2 targets highly visible surfaces without the dust and cost of demolition. Start with your countertops. Instead of purchasing a heavy stone slab, apply a stone-look epoxy kit. For roughly $200 and a weekend of patience, you achieve a high-end finish that rivals granite. Next, tackle the cabinets smartly. Do not exhaust yourself painting every inch of the boxes. Simply replace the old doors and drawer fronts. This strategy eliminates the grueling work of sanding boxes while delivering a fresh, modern style.
Finally, pull the room together with high-impact accents that require zero specialized skills. I always encourage homeowners to focus their remaining budget on these two quick wins:
- Peel-and-stick backsplash: Choose high-quality 3D gel tiles. You avoid messy grout completely, and installation finishes in a single afternoon.
- Statement lighting: Swap your outdated central fixture for a modern flush mount. This one change instantly resets the perceived age of the room.
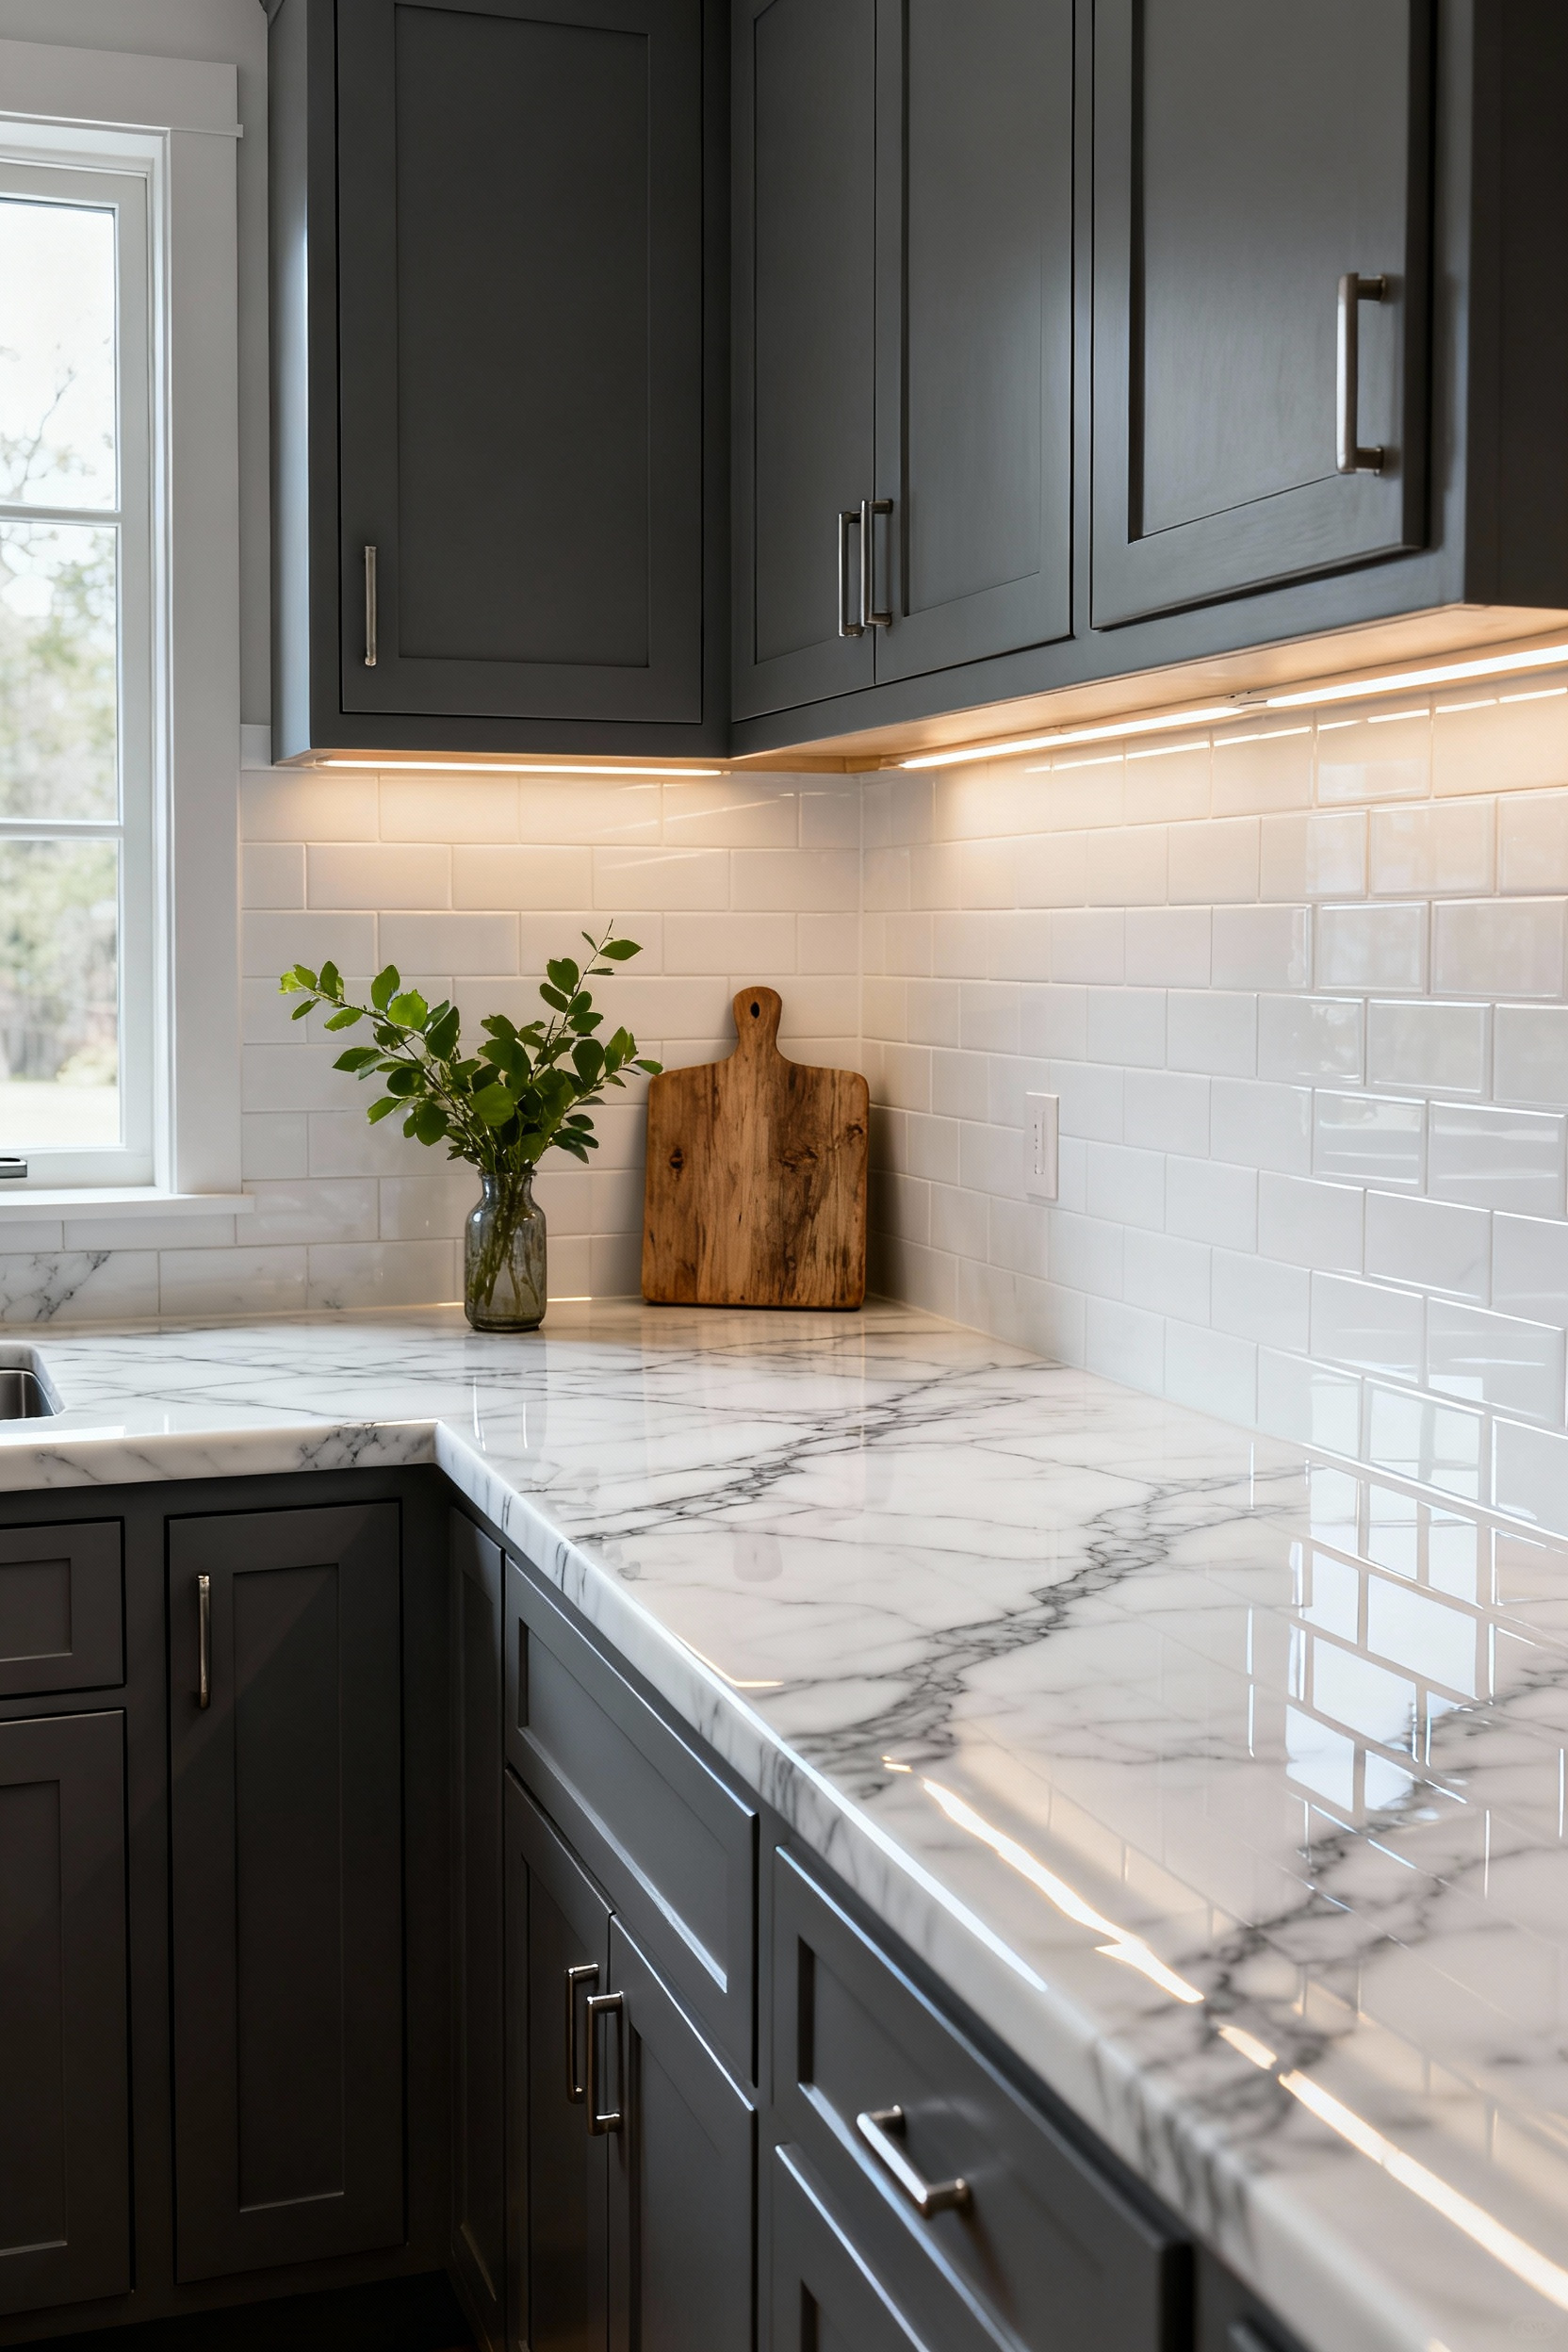
4. Backsplash Economics: High-impact visuals using subway tile or premium peel-and-stick options
Strong composition outweighs expensive supplies. The same principle applies perfectly to your backsplash; you don’t need imported marble to create a stunning focal point. Classic white subway tile remains the budget champion, often retailing for just $2 to $4 per square foot, yet it offers endless design potential. To elevate this humble material without spending extra, try these high-impact tweaks:
- Switch the layout: Trade the standard brick pattern for a herringbone or vertical stack to look instantly high-end.
- Boost the contrast: Use charcoal or black grout to highlight the geometry and add visual depth.
- Focus your efforts: Tile only the area directly behind the stove to create a purposeful feature wall while saving on materials.

If mixing mortar feels daunting, look into premium peel-and-stick options. Modern technology has improved these significantly, so focus specifically on 3D gel-coated finishes. These mimic the texture of real stone and resist moisture effectively. While the material cost sits slightly higher at $6–$12 per square foot, you completely eliminate professional labor fees, which can run up to $30 per square foot. Whether you choose ceramic or adhesive, you save hundreds by tackling this manageable DIY yourself.
5. Illumination Hierarchy: Layering budget-friendly task lighting and statement pendants
Lighting defines a masterpiece, and your kitchen is no exception. First, tackle function without the heavy electrician fees. Grab high-density LED tape strips (3000K) and stick them under your cabinets for even, professional-grade illumination. Since many of these are plug-and-play, you can easily hide the cords behind trim for a seamless, custom look at a fraction of the cost.
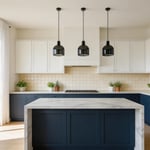
Once your work surfaces shine, spend your remaining budget strategically. Opt for basic, builder-grade recessed lights for general ceiling coverage, then splurge on one or two show-stopping pendants over the island to draw the eye. To make this high-low mix feel cohesive, I always recommend one final, inexpensive upgrade:
- Install dimmer switches on ambient cans to manage energy use.
- Add separate dimmers for your decorative pendants to instantly alter the room’s mood.
This simple addition maximizes versatility, making budget-friendly fixtures feel like a high-end design choice.
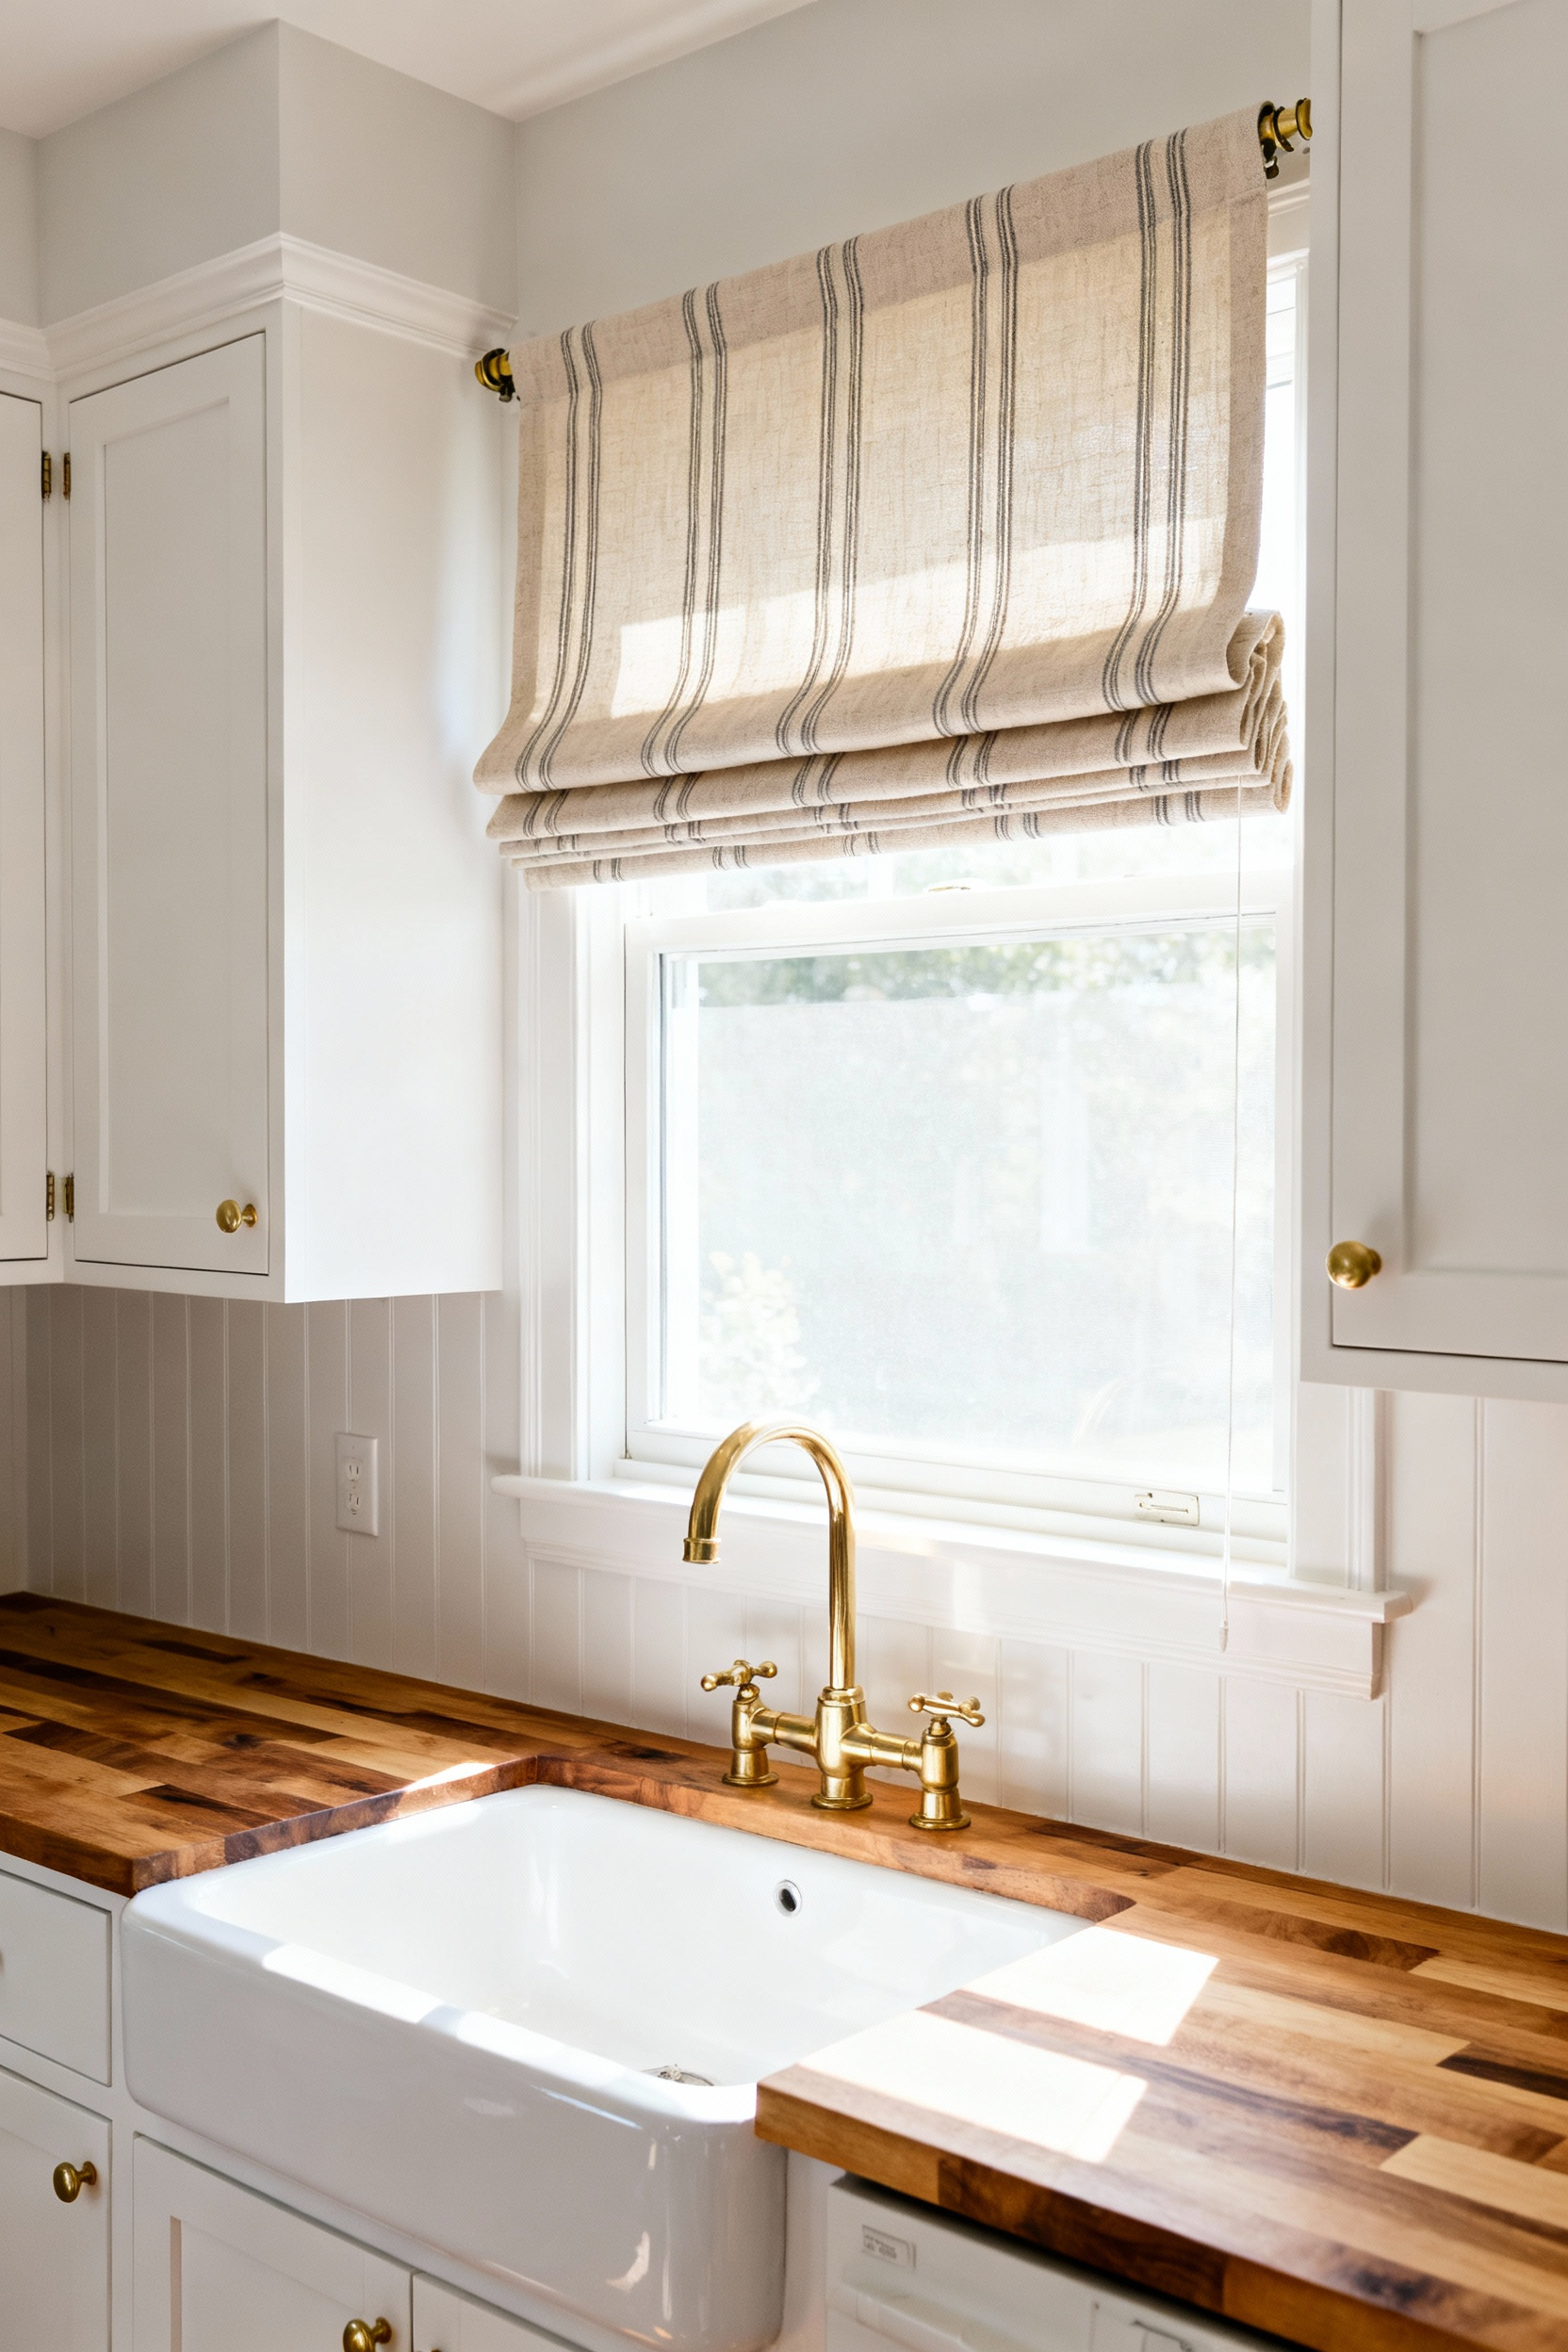
6. The Faucet Focus: Upgrading to a high-arc fixture to create a luxury focal point
One bold focal point can transform an entire composition. A high-arc faucet in matte black or brushed gold delivers that exact “wow” factor. Fortunately, you do not need a designer budget to achieve this look. Skip the big box stores where prices soar over \$200. Instead, search online for generic models featuring solid brass construction and ceramic discs; you can find high-quality options for just \$80 to \$150.
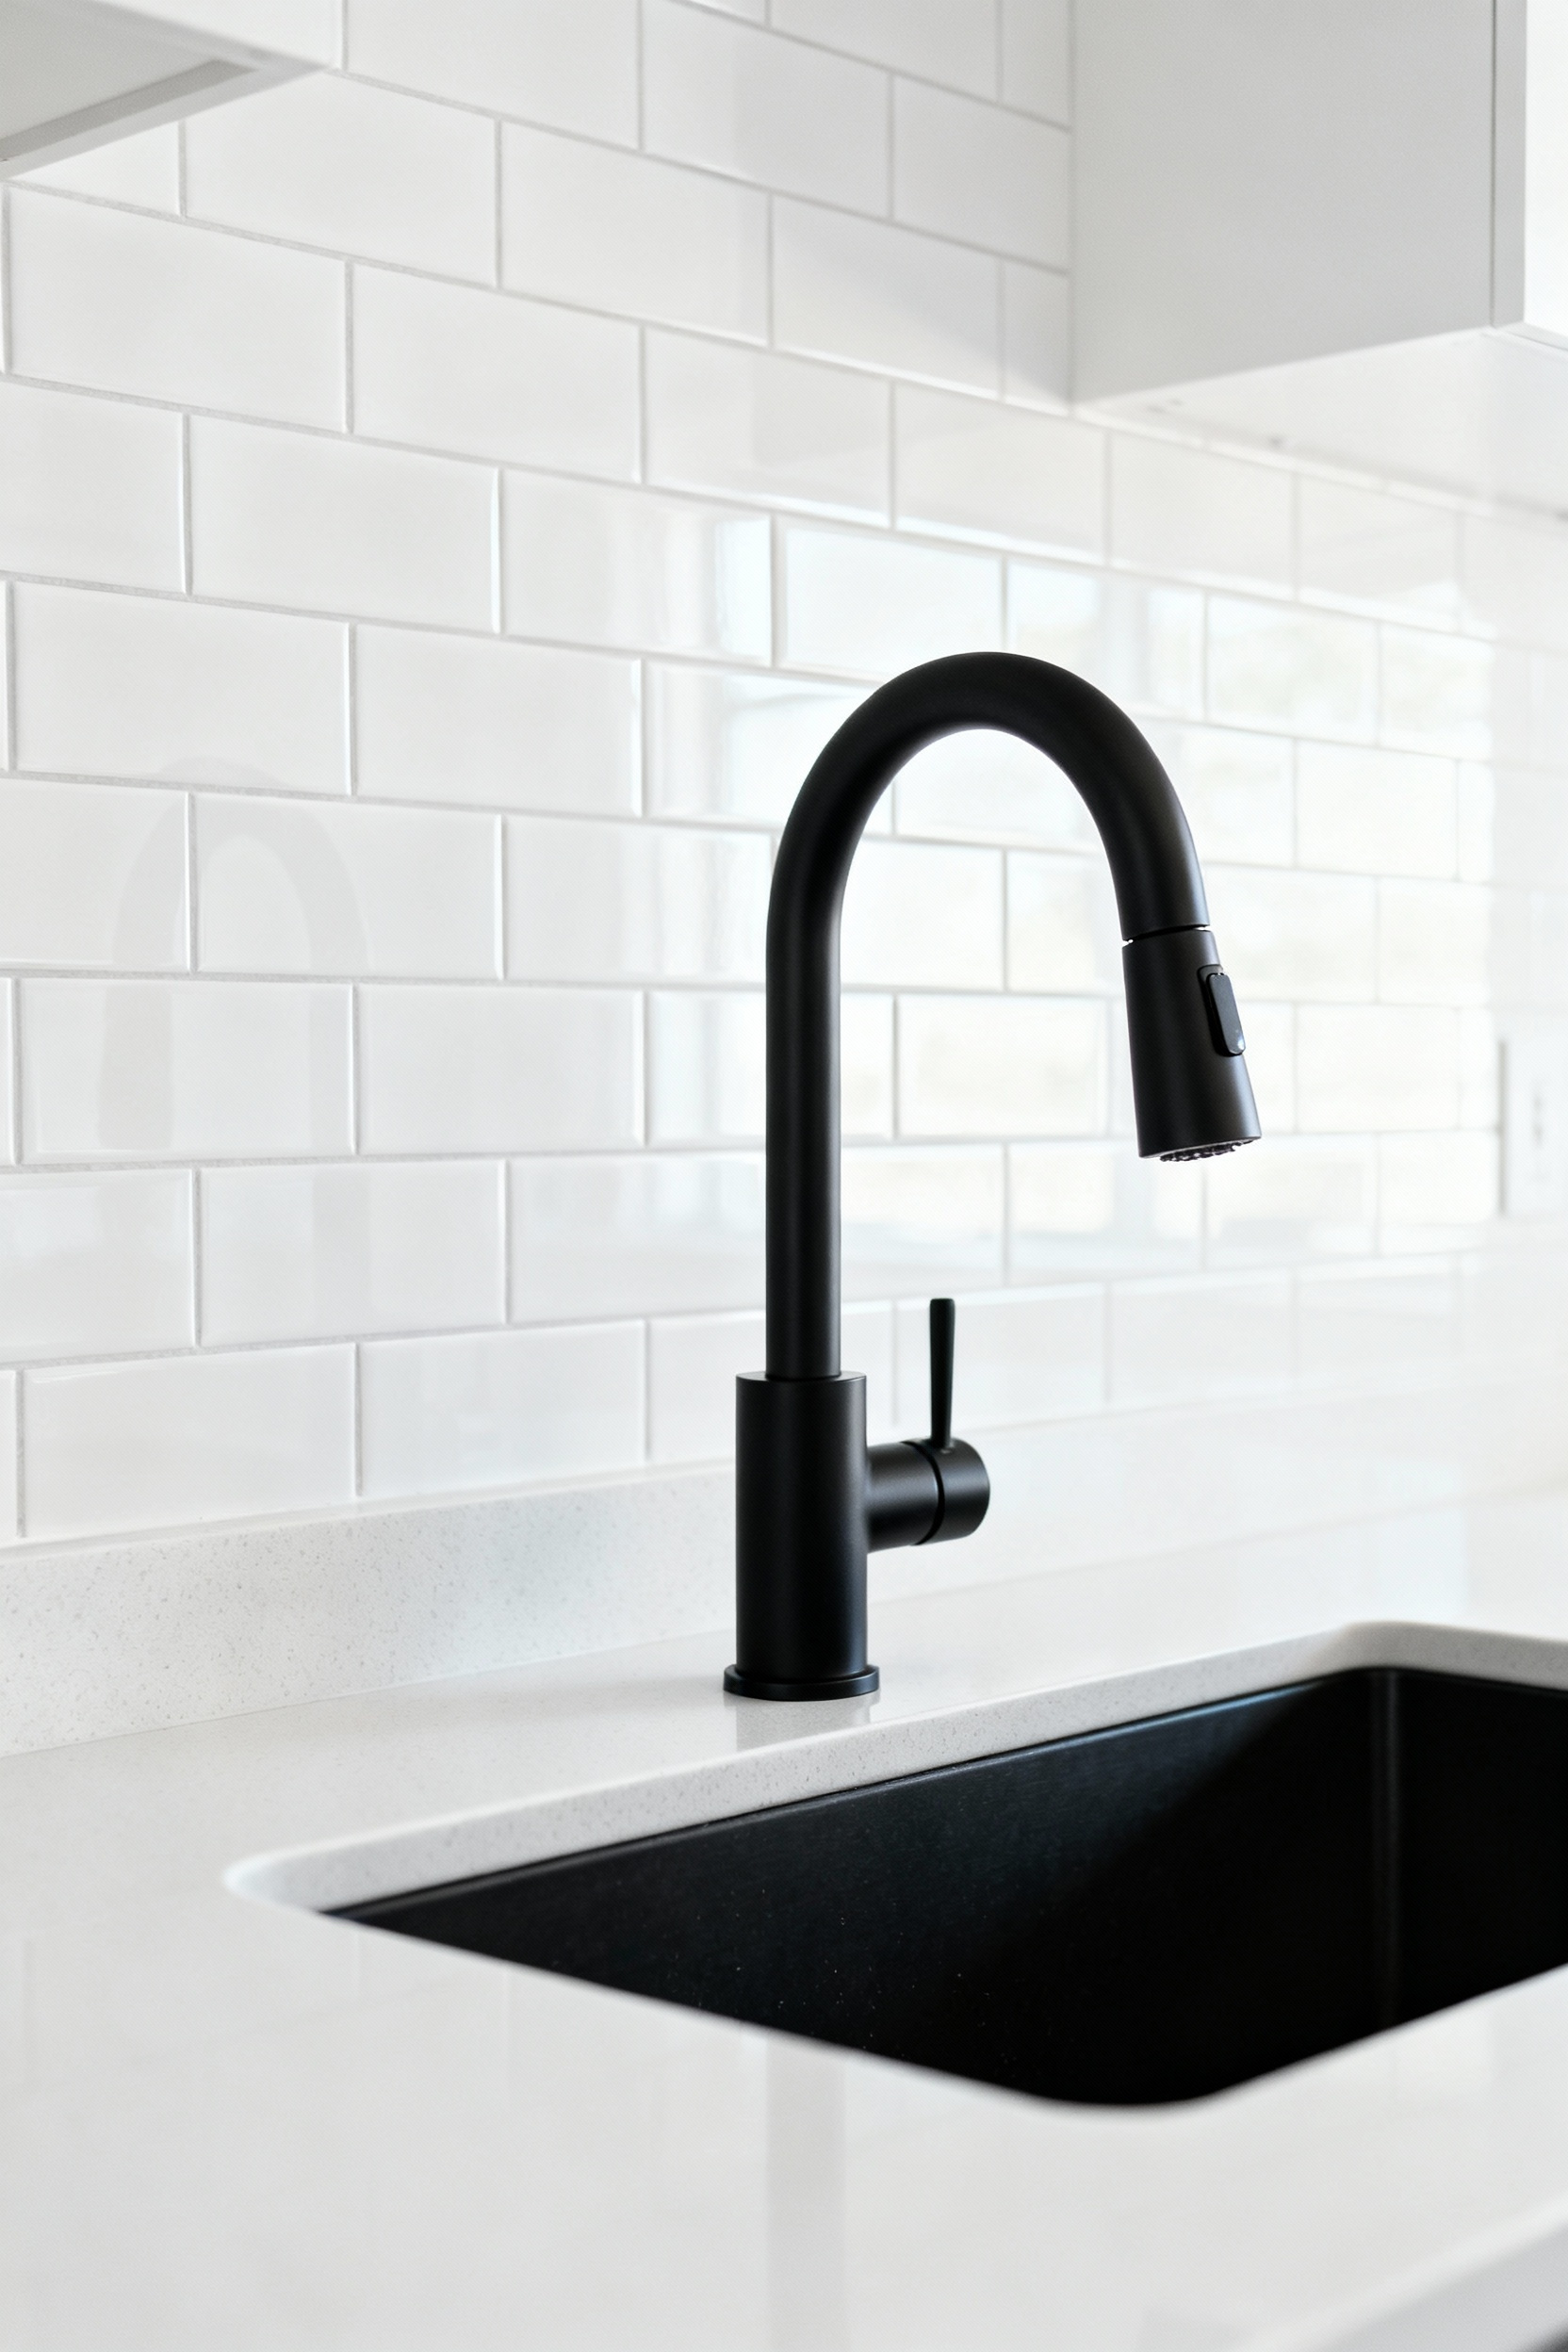
Beyond aesthetics, this upgrade dramatically improves functionality. The high arch provides ample clearance for filling tall stockpots, while the pulldown sprayer makes cleanup effortless. Since swapping a faucet is a manageable DIY task, you also pocket the \$150 to \$300 plumbing fee. To ensure a smooth installation, keep these tips in mind:
- Check the configuration: Ensure the new base plate covers your existing sink holes (usually one or three).
- Prioritize reach: Select a model with a pulldown hose for maximum cleaning efficiency.
- Turn it off: Always shut off the water supply valves under the sink before loosening any nuts.
With just a wrench and an hour of your time, you will elevate your sink area from standard to stunning.
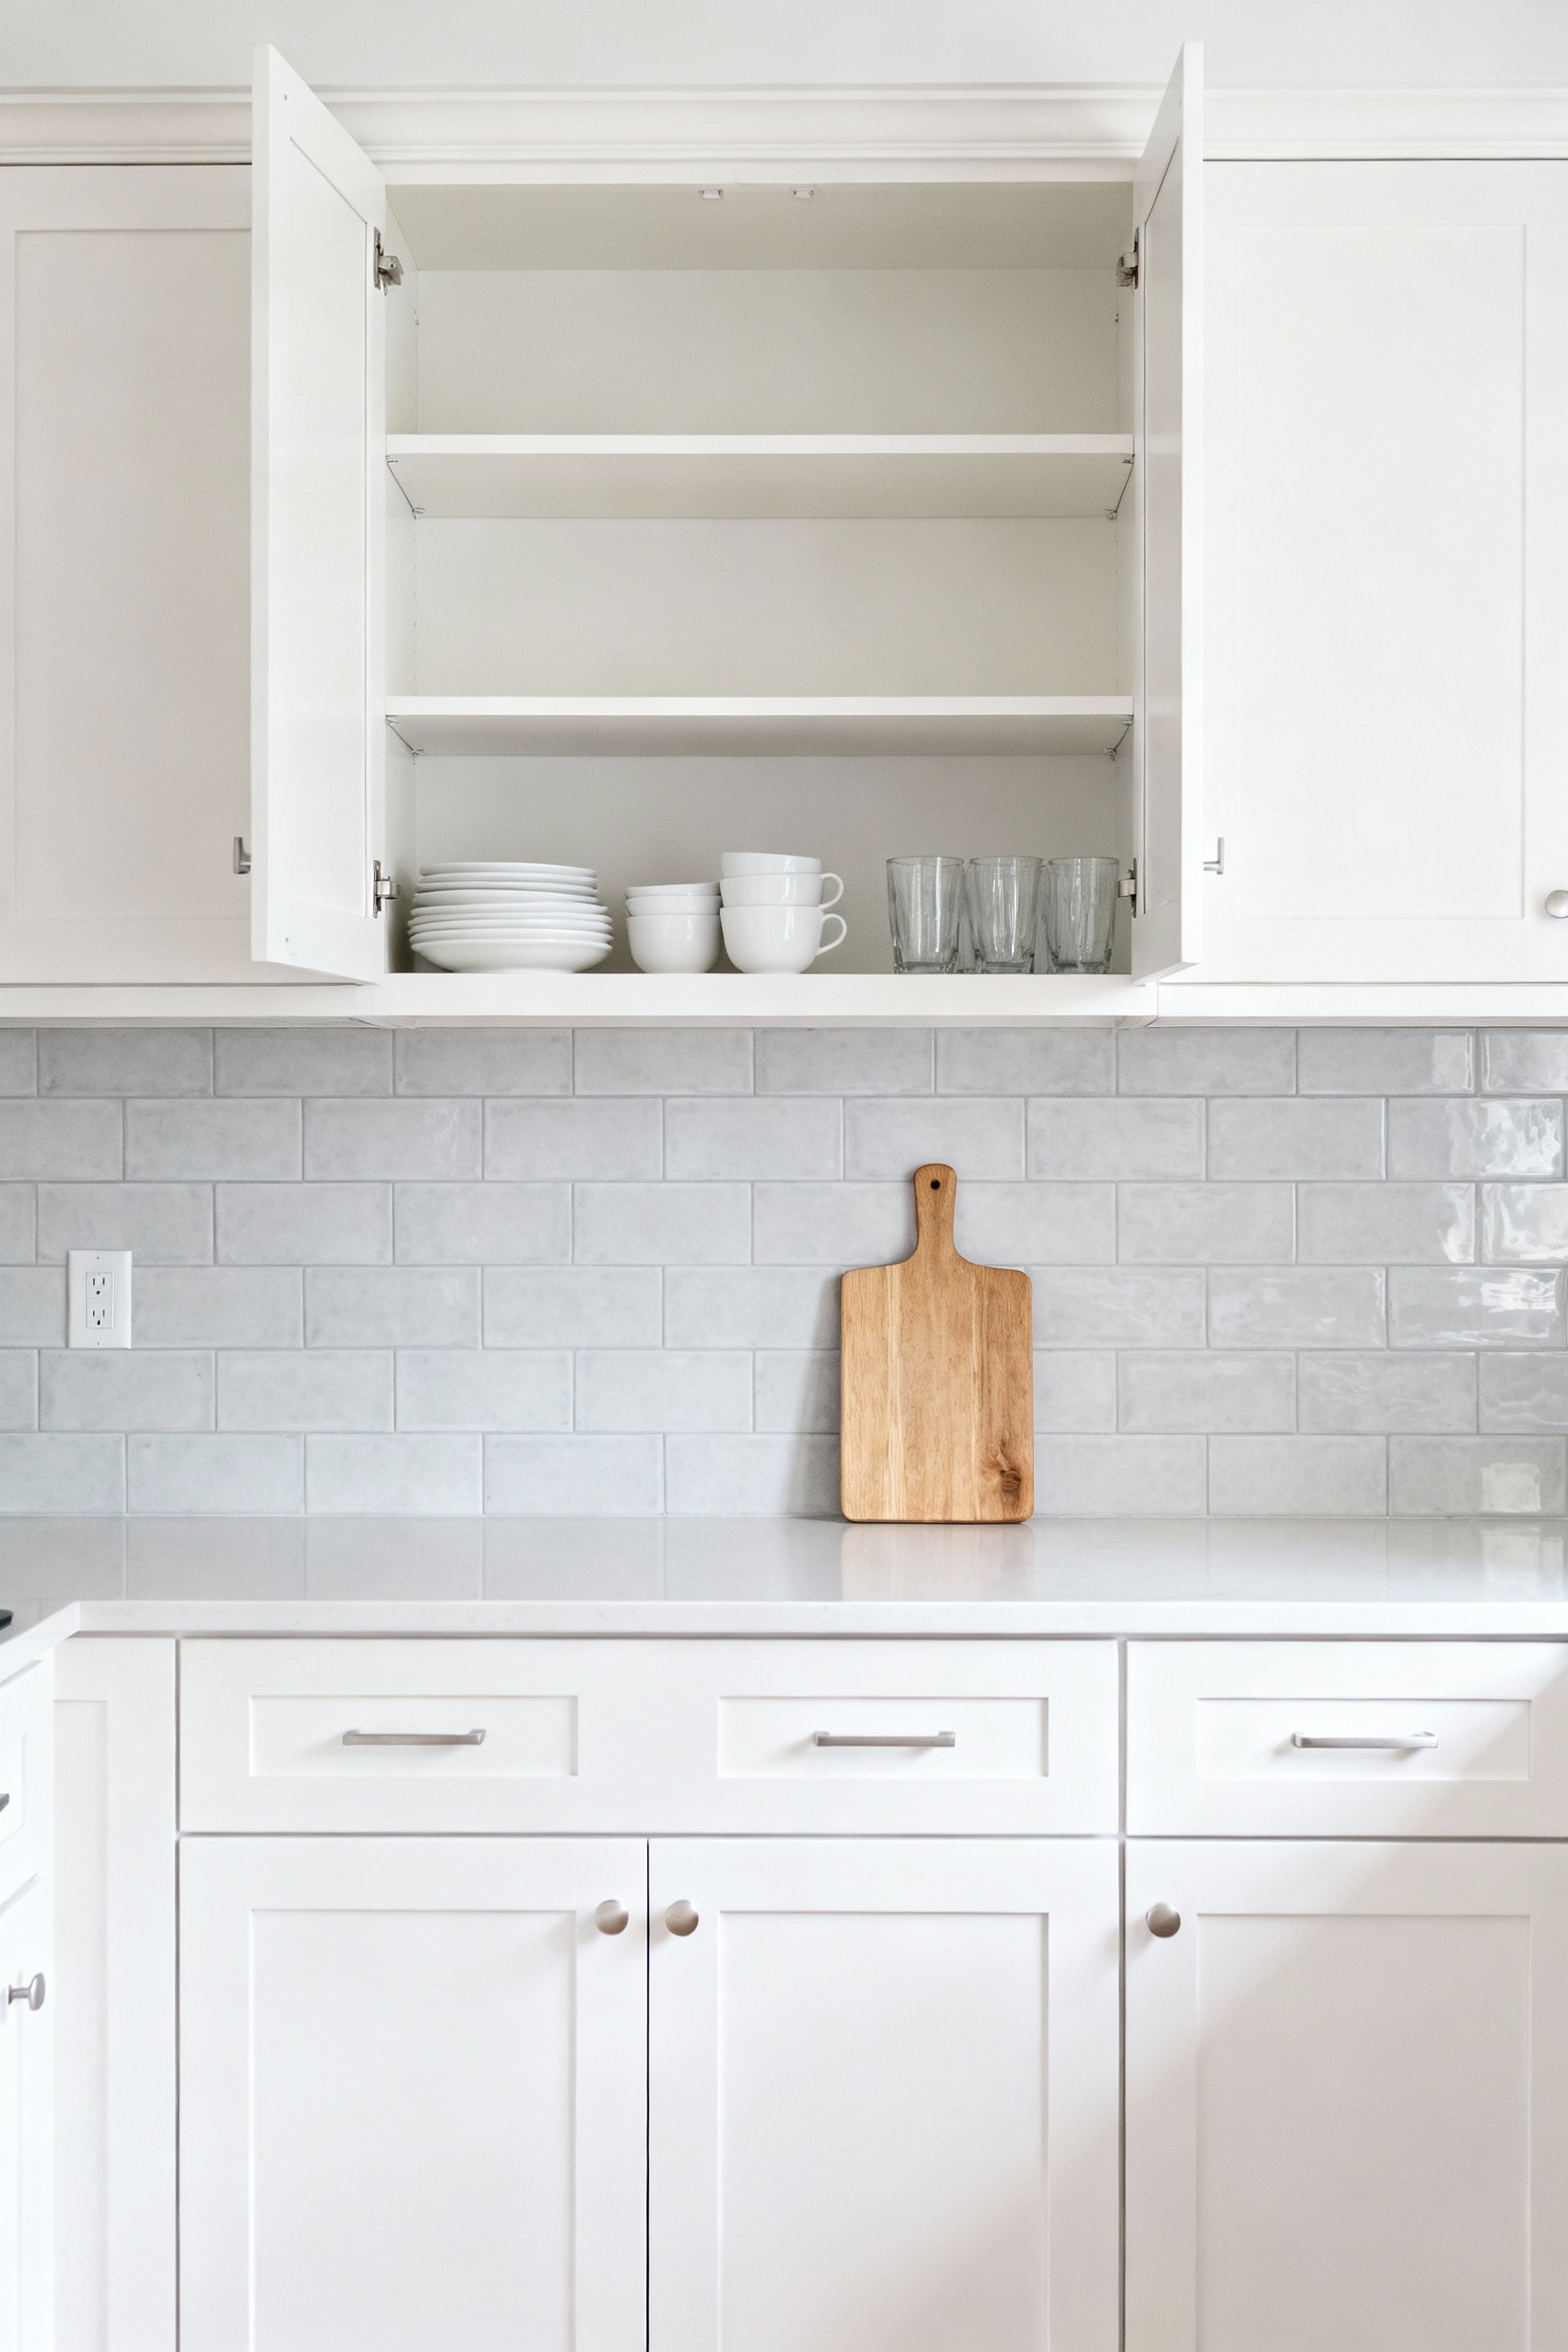
7. Open Shelving Strategy: Removing upper cabinet doors to create airiness and display capacity
In design, we often talk about “negative space”—the breathing room around objects. You can bring that concept to your kitchen for zero dollars by removing upper cabinet doors. This instantly banishes that heavy “wall of wood” feeling and creates airiness without the expense of installing new floating shelves. To achieve a polished, professional finish, try this simple workflow:
- Fill the holes: Use wood filler on exposed hinge screw holes, then sand lightly.
- Paint the back: Apply a contrasting color like charcoal or navy to the cabinet’s back wall to hide imperfections.
- Curate: Arrange your favorite dishware so it pops against the new background.
Start slowly. Remove just the doors flanking a window or sink first. This strategy lets you test the organization demands before you fully commit. If you love the look, keep going; if not, the doors go right back up. You get a high-end custom look for the price of a sample paint pot.
Phase 3: Material & Structural Changes (Advanced Application)
Let’s tackle the “heavy lifting” without the heavy price tag. You can stretch your renovation budget through strategic material selection just as an artist maximizes their supplies. Skip the expensive custom fabrication fees by choosing standard-depth butcher block or hunting for stone remnants at local yards; I once scored a beautiful marble piece for a bathroom vanity at a fraction of the full-slab price. Furthermore, prioritize Luxury Vinyl Plank (LVP) for your flooring. This material resists water and snaps together easily, protecting your subfloor from future damage while allowing you to handle the installation yourself.
To truly elevate the space, focus on visual tricks and smart finishes that save time and money:
- Install open shelving instead of upper cabinets to cut material costs and create a spacious, airy structural illusion.
- Choose large-format tiles or peel-and-stick panels for backsplashes to minimize difficult cutting and grouting.
- Apply epoxy refinishing kits to dated bathtubs or wall tiles rather than paying for costly demolition and replacement.
These specific swaps deliver a high-end, durable look but keep your wallet happy.
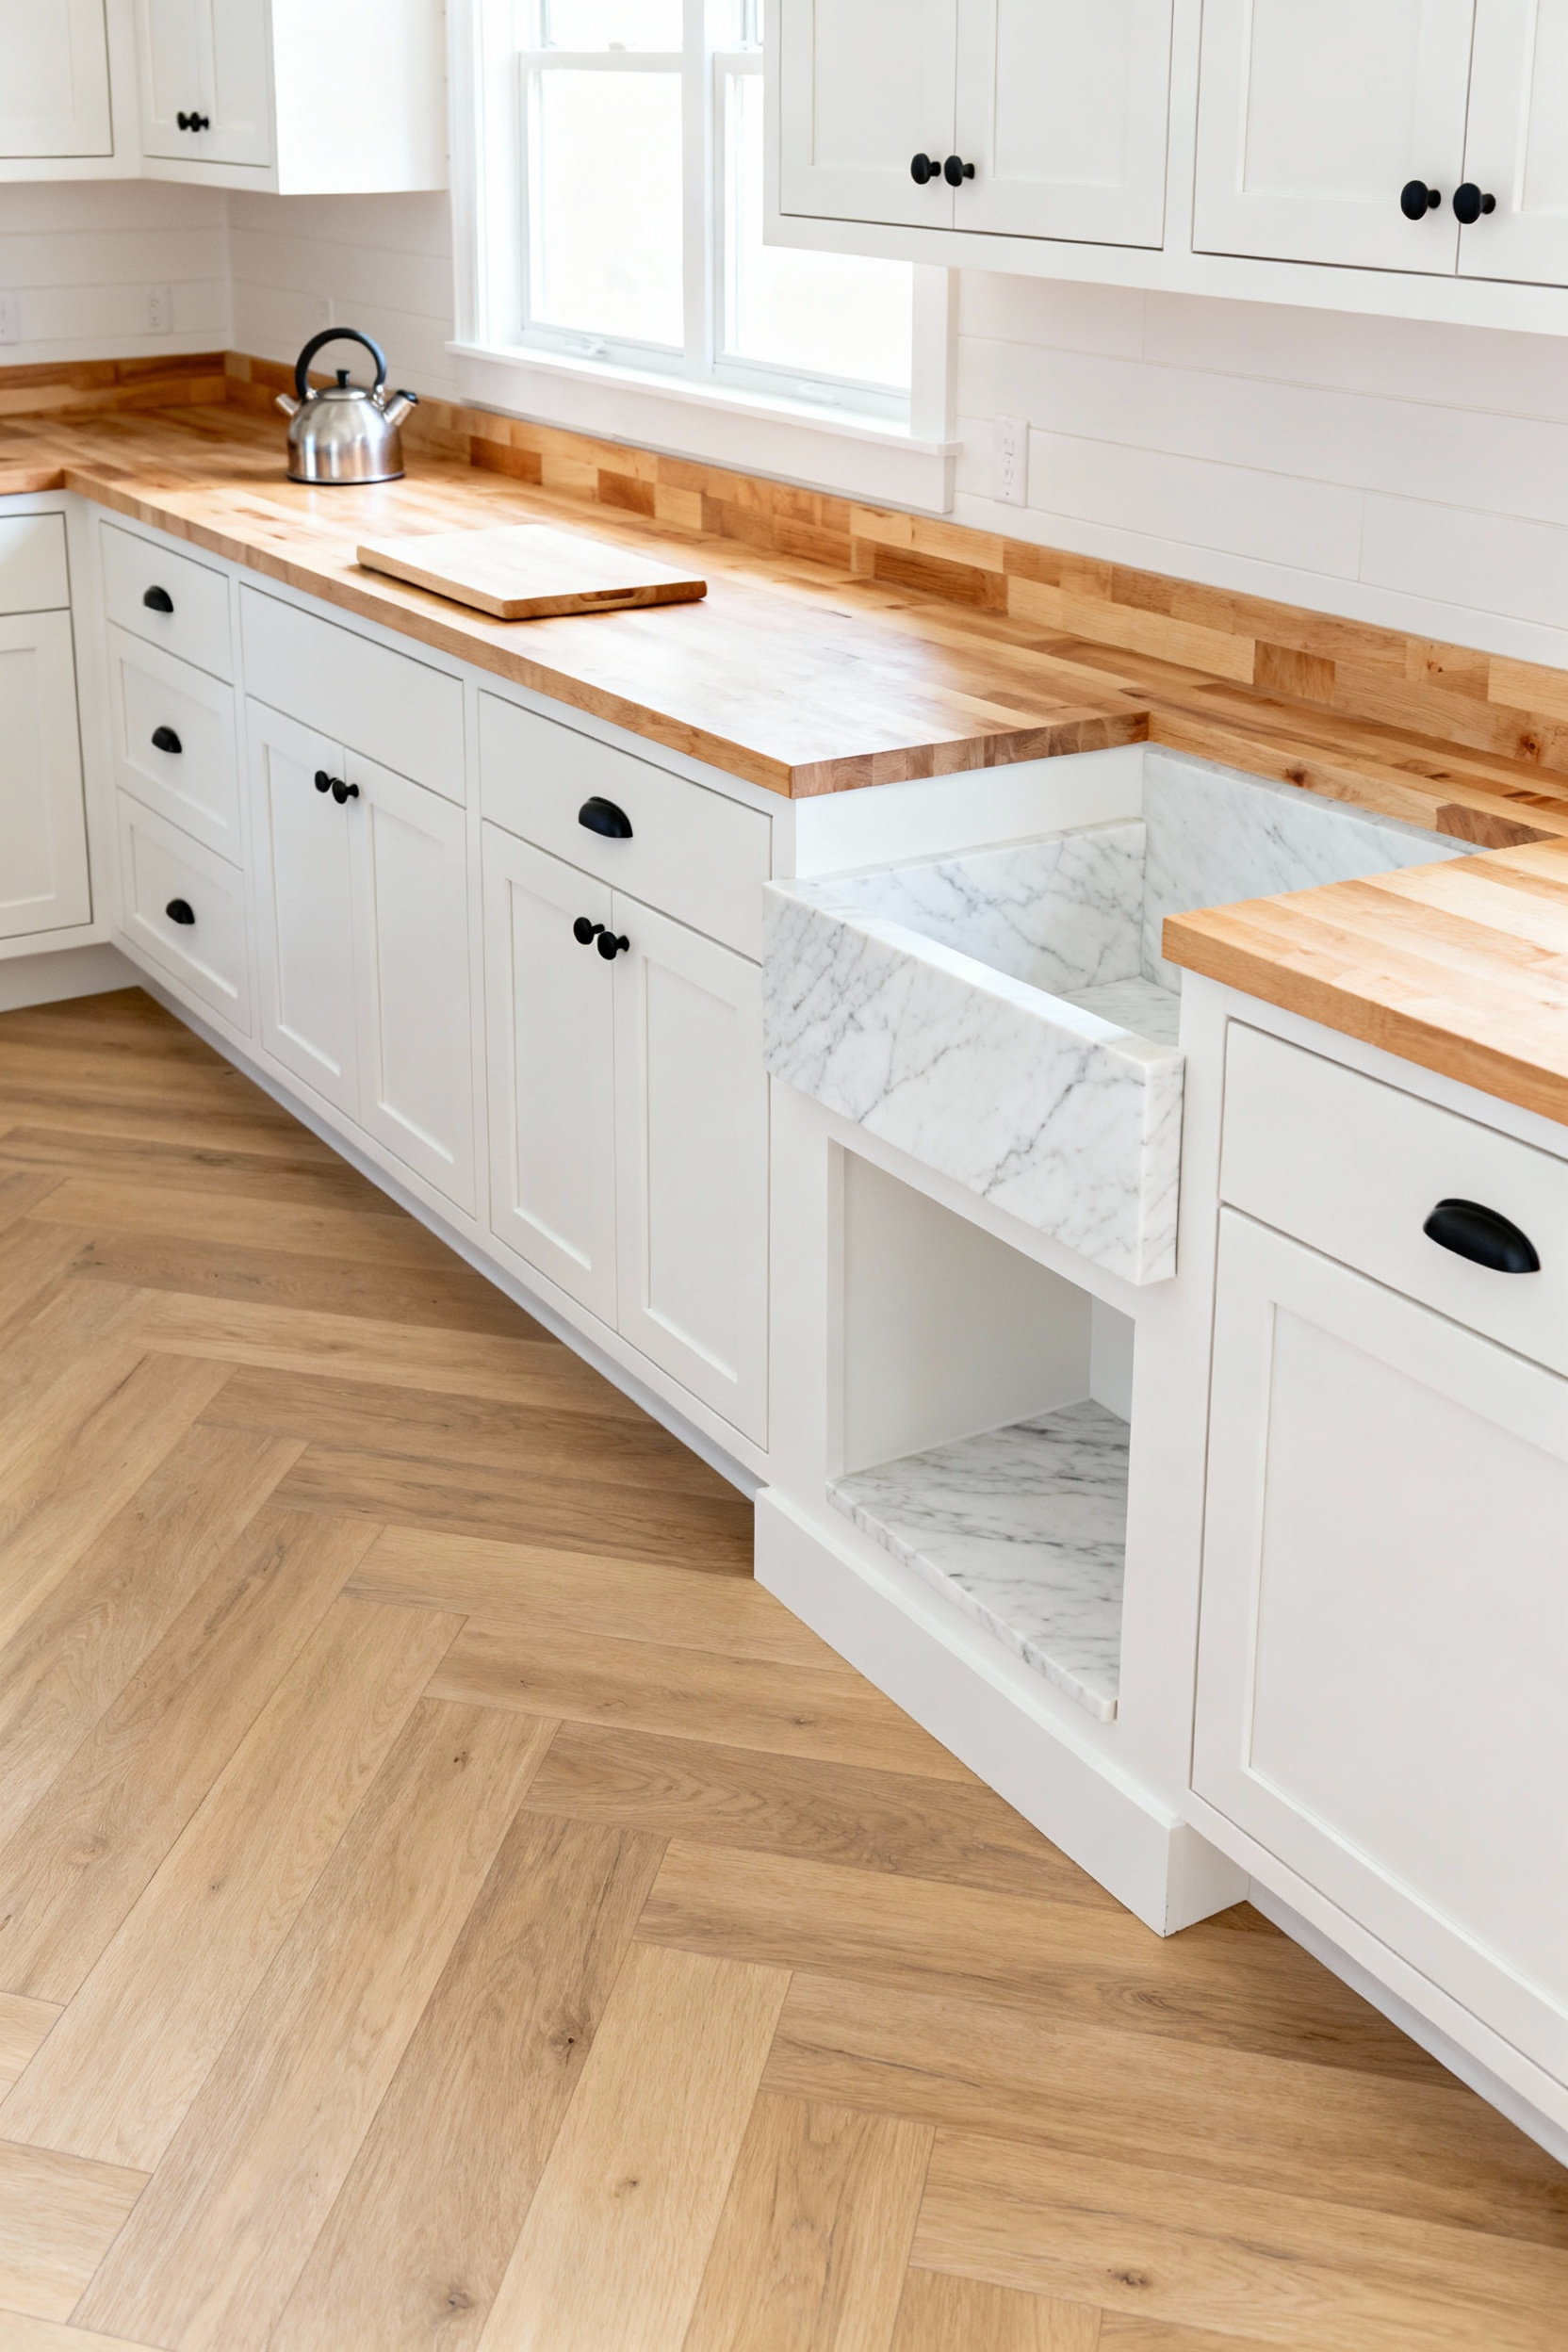
8. Countertop Intelligence: Why butcher block is the budget renovator’s secret weapon for warmth and durability
Texture brings a composition to life, and your kitchen works the same way. Butcher block is a favorite budget secret because it adds necessary organic warmth to inexpensive white cabinets that might otherwise feel sterile. Beyond aesthetics, the financial wins are undeniable. You will typically pay just $20–$50 per square foot—roughly a third of the price of entry-level quartz—freeing up cash for better appliances.
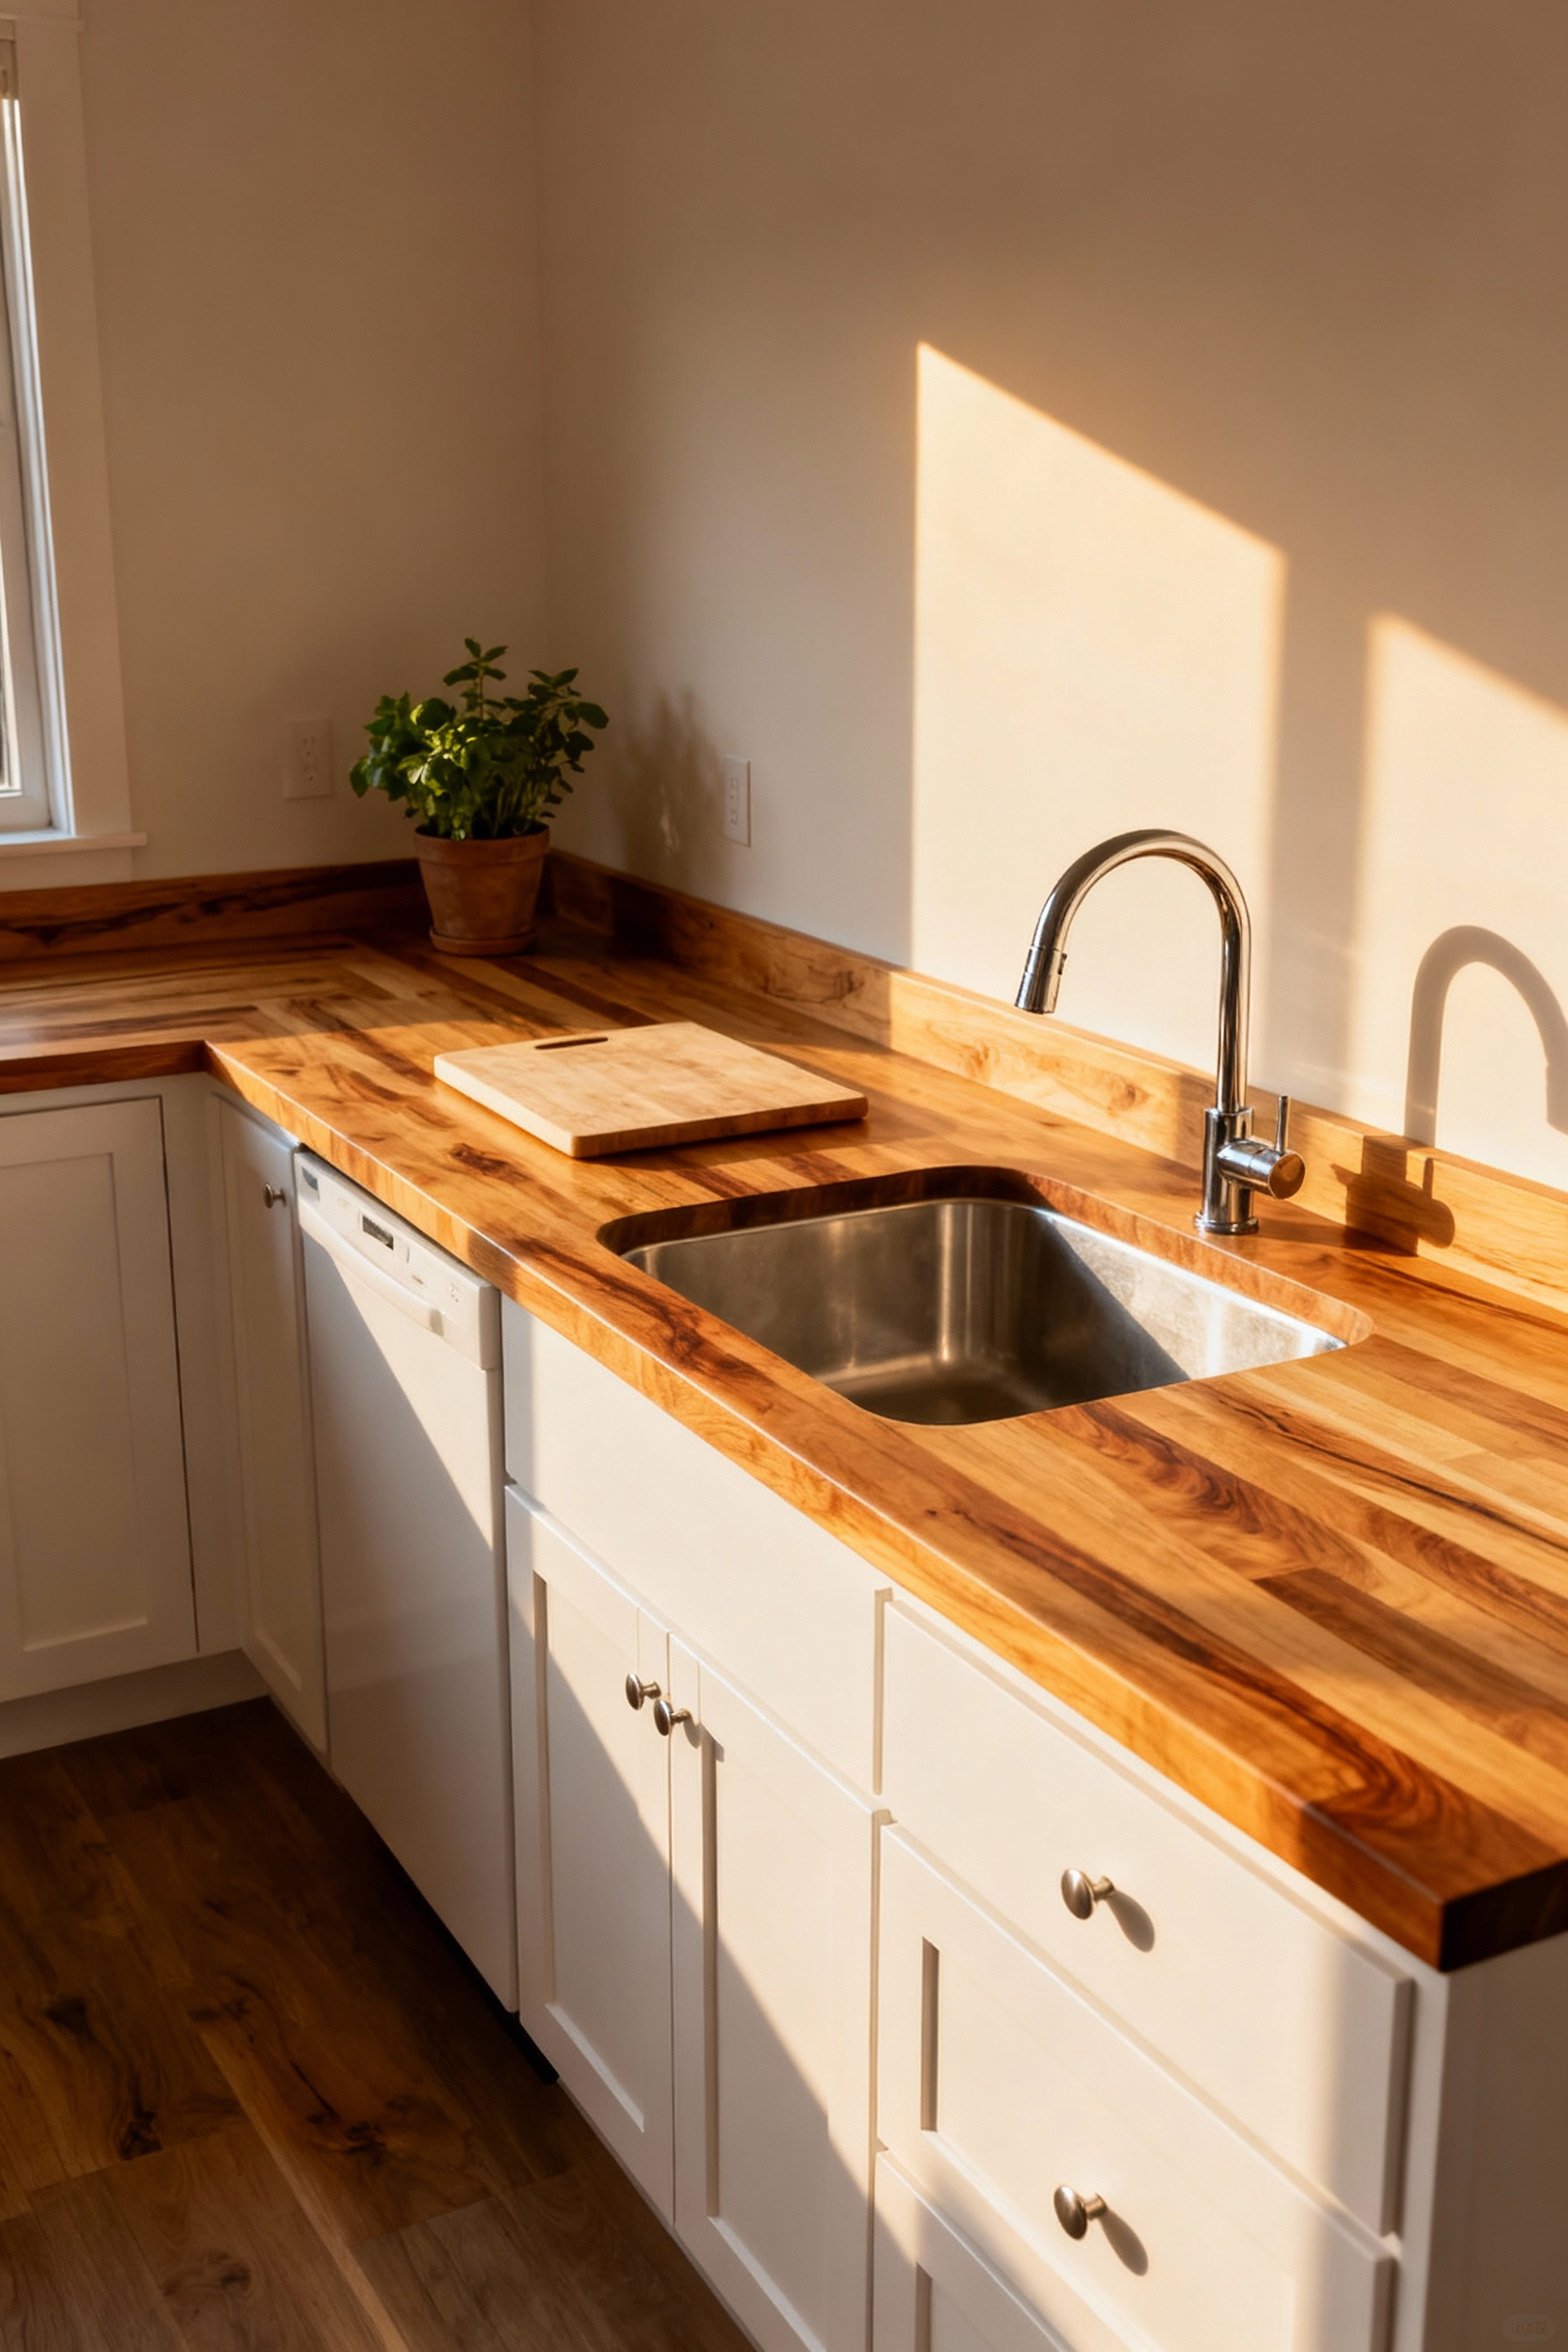
Best of all, you can install these slabs yourself with standard woodworking tools, skipping expensive professional labor. Unlike stone, wood is incredibly forgiving; if you scratch or stain it, you simply sand the imperfection away. To ensure your counters last a lifetime, treat them like a living investment:
- Seal immediately with food-grade mineral oil or beeswax.
- Re-oil monthly for the first six months to build a water-resistant barrier.
- Focus on wet zones like sink cutouts to prevent warping.
With just a little love, you get a custom, high-end look that fits perfectly within a teacher’s budget.
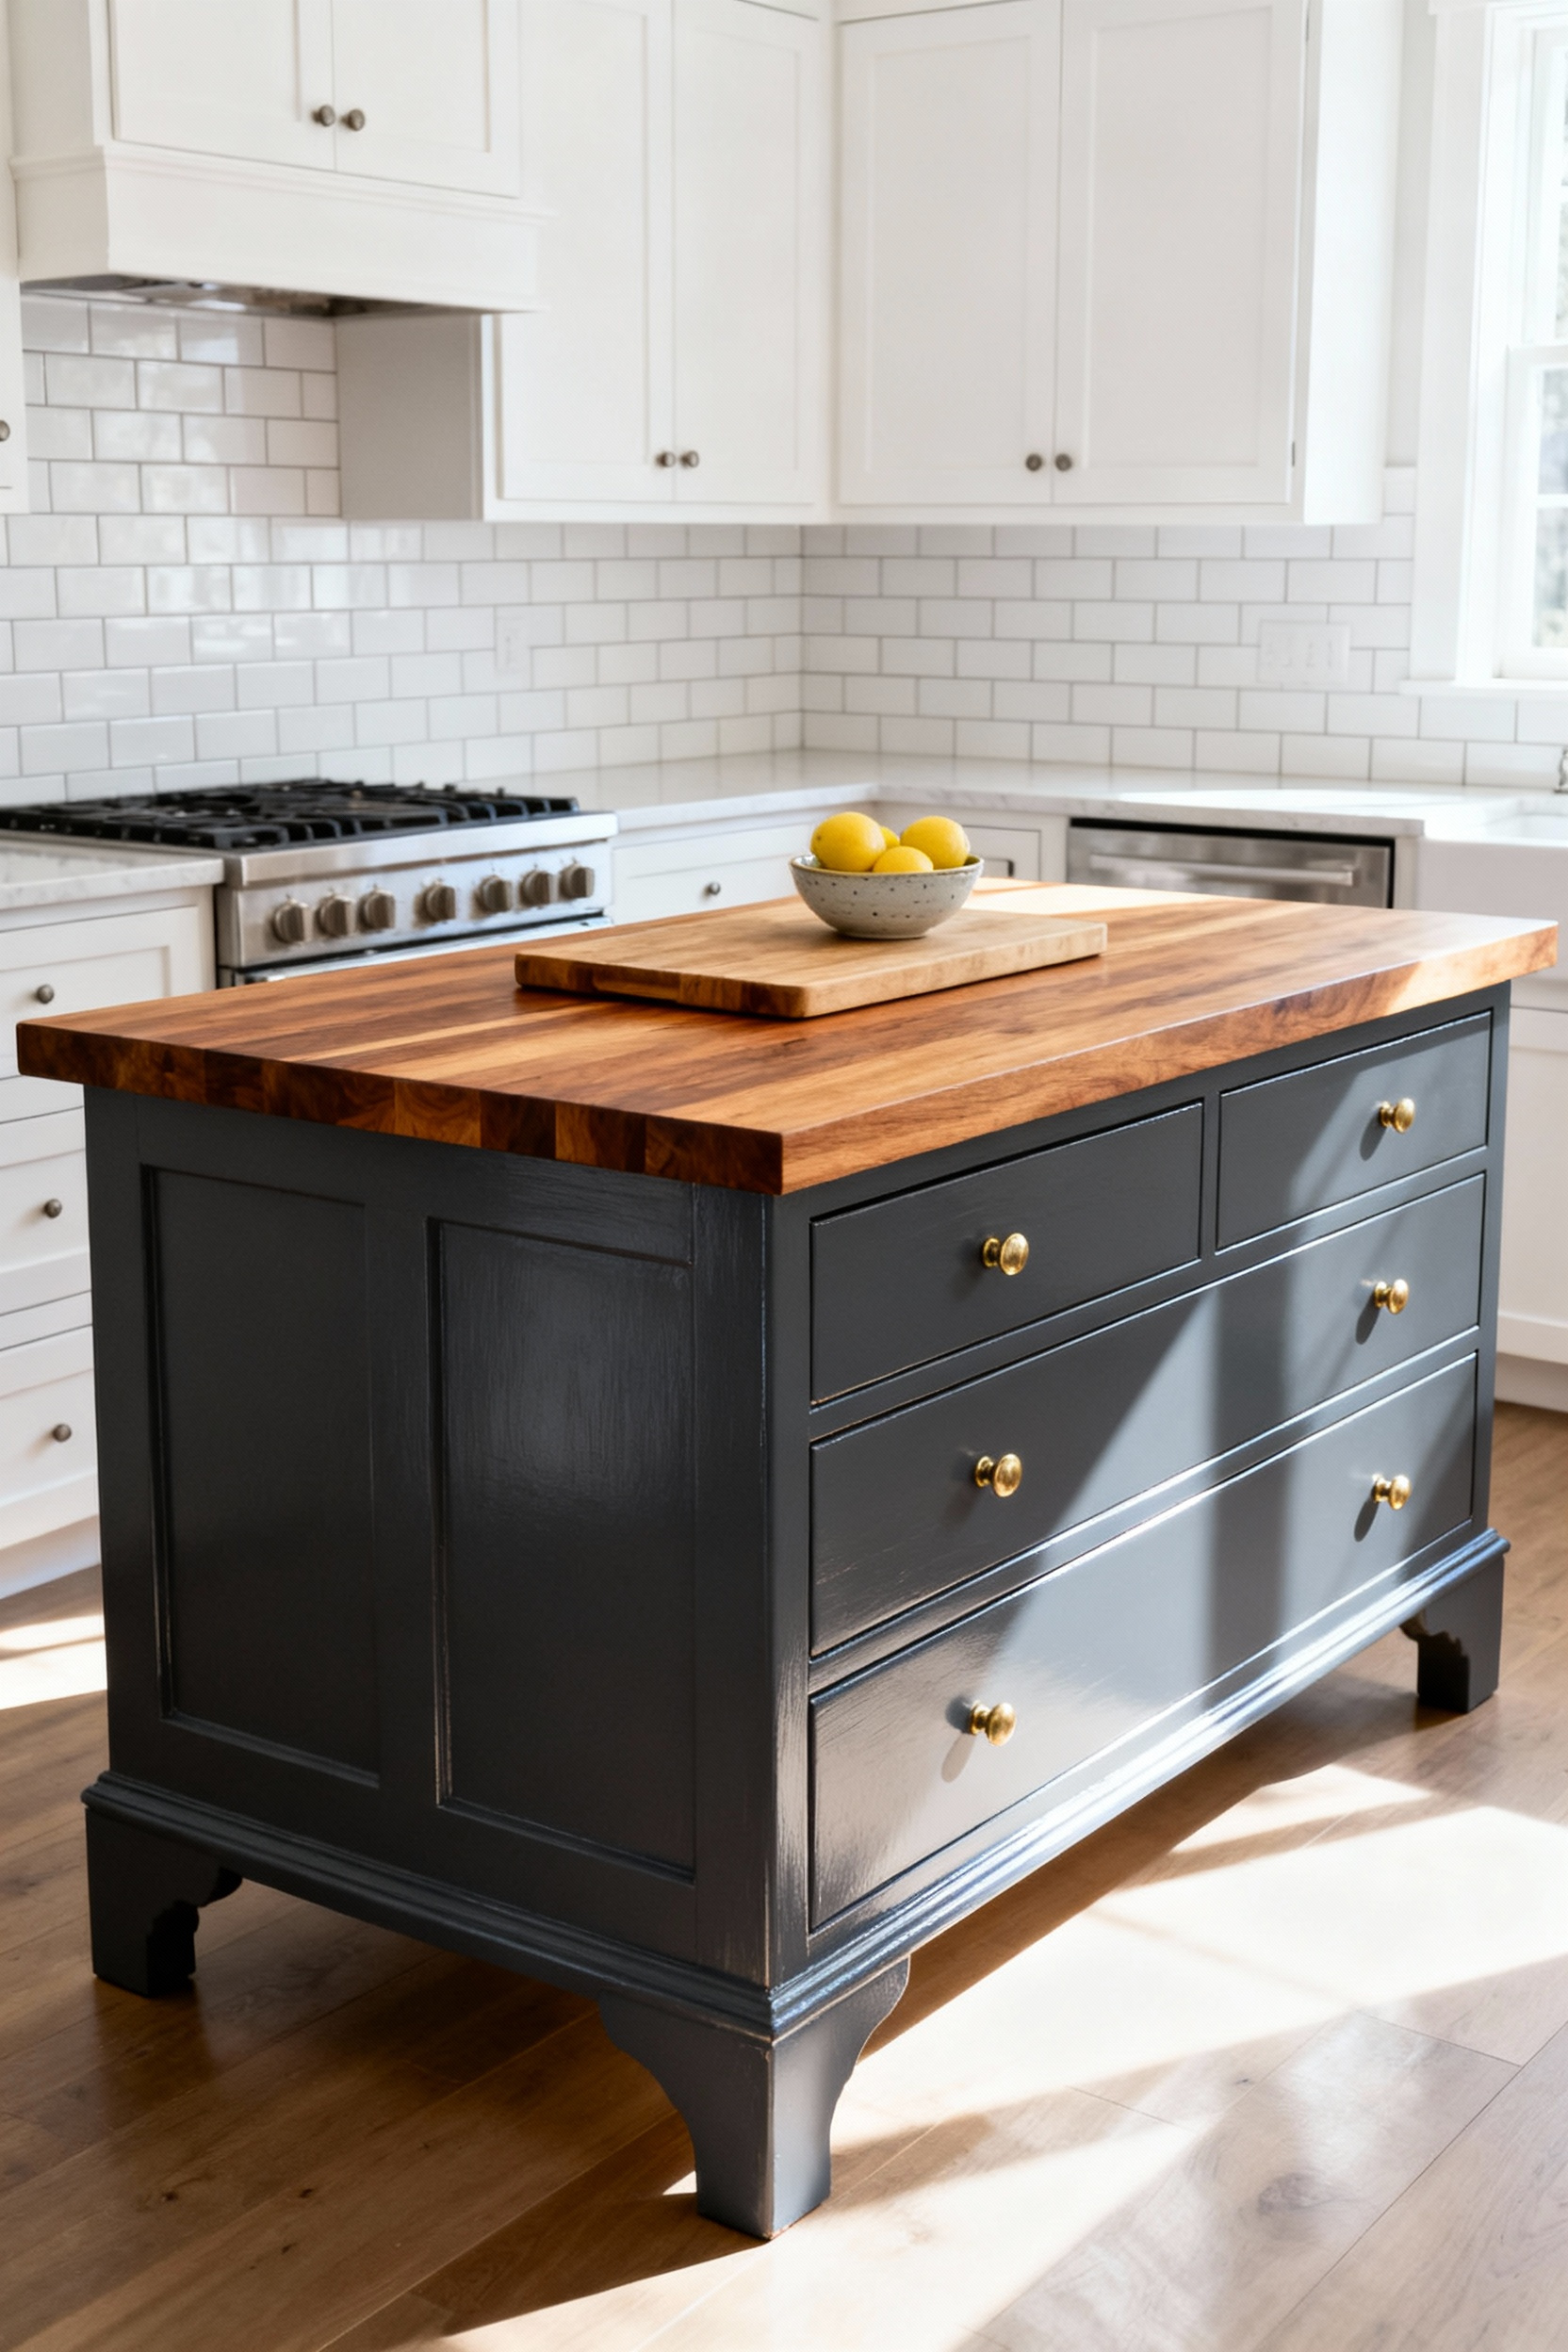
9. The Furniture Island: Repurposing a vintage dresser or thrifted table for a custom workstation
Just as an art class might repurpose old tables into drafting stations, you can bring a creative spirit to your kitchen by transforming a vintage dresser into a high-end island. First, prioritize the surface. Swap the original top for food-safe butcher block from IKEA or Lowe’s. This simple upgrade instantly converts a thrifted find into a durable workspace. Next, coat the body in semi-gloss enamel paint so it withstands the inevitable kitchen spills.
To ensure your new island works as hard as you do, focus on strategic functionality.
- Modify Storage: Remove the lower drawers and install open shelving to hold large mixing bowls or appliances.
- Add Mobility: Install heavy-duty, locking industrial casters to easily roll the station out of the way during parties.
With these tweaks, you achieve a flexible, custom look without the custom price tag.
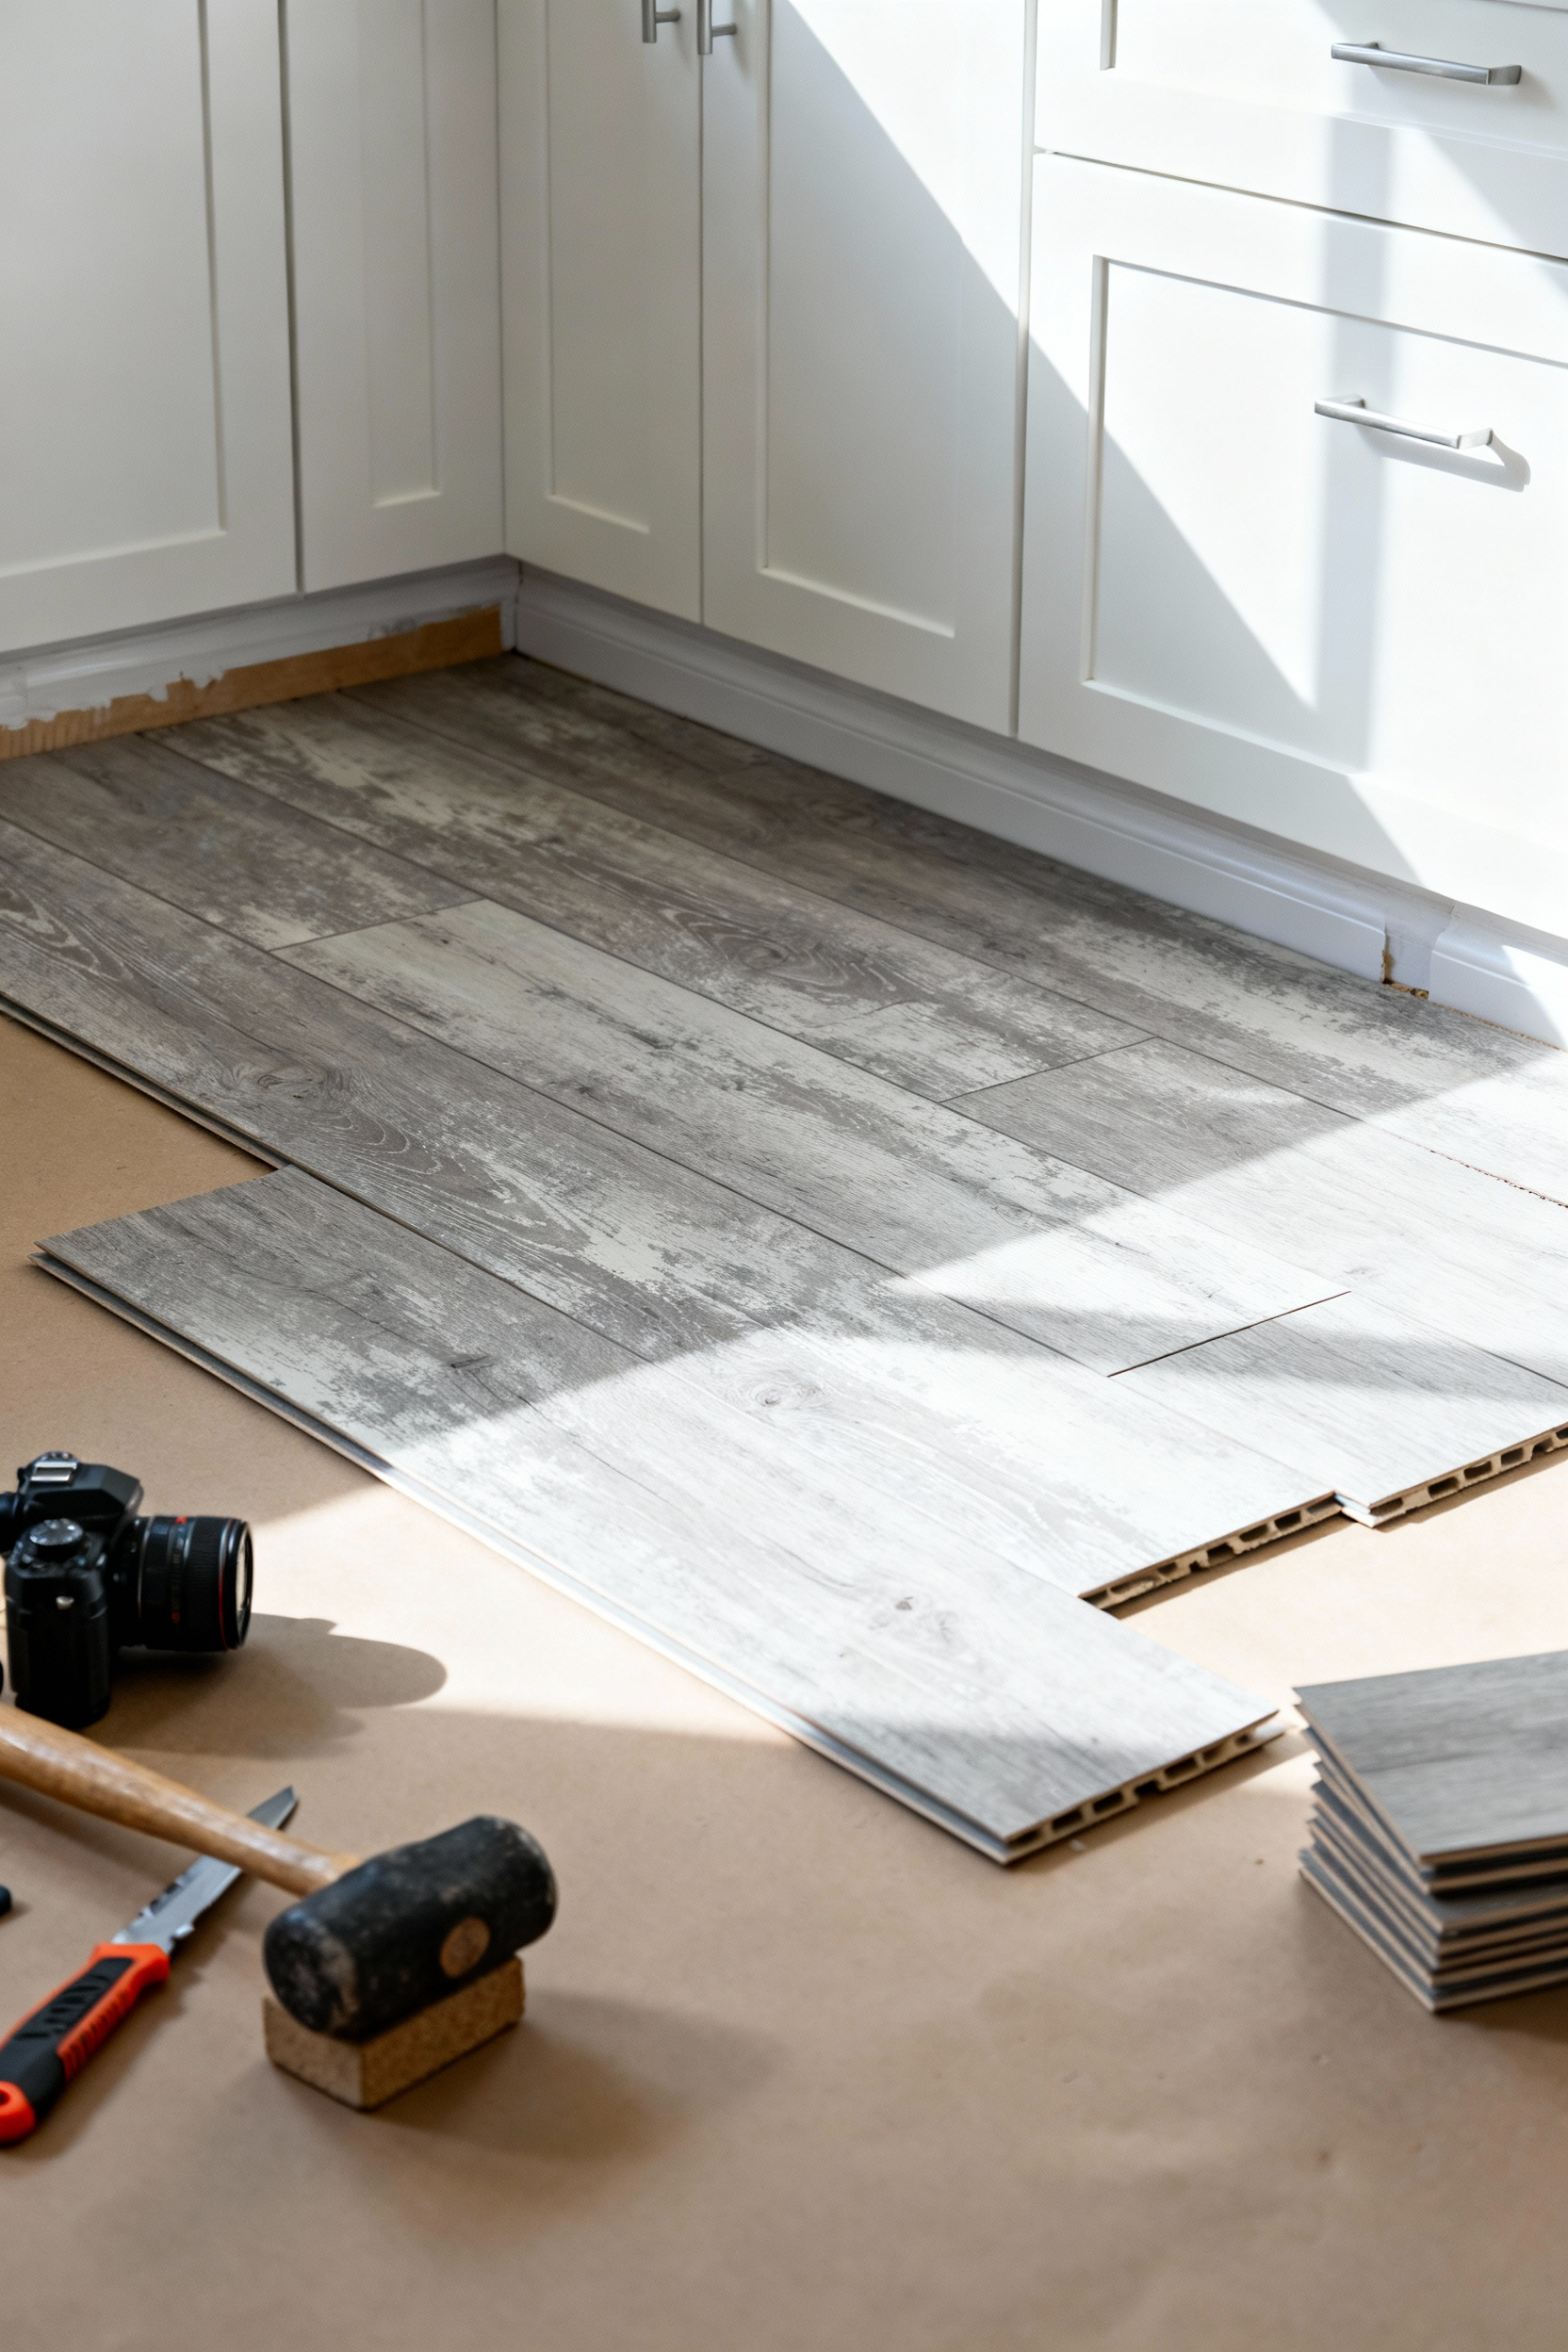
10. Flooring on a Dime: Installing Luxury Vinyl Plank (LVP) or stenciling existing ceramic tile
Don’t let flooring costs drain your renovation fund. Creativity often outshines cash, and your kitchen floor is the perfect canvas. Luxury Vinyl Plank (LVP) reigns as the budget king, offering water resistance that rivals expensive stone. Since these planks simply click together, you can skip the professional installer and instantly save 50-70% on labor costs. However, preparation ensures longevity. Always skim coat over deep grout lines or gaps before installation; this simple step prevents future sagging and keeps your new floor quiet underfoot.
If buying new material isn’t an option, refresh your existing ceramic tile with a stencil kit. This ultra-budget strategy mimics the look of high-end encaustic tile for under $100. To get a professional finish:
- Clean thoroughly: Remove all grease to ensure the paint bonds securely.
- Choose high-contrast: Black and white geometric patterns hide imperfections best.
- Use epoxy paint: Select porch and floor-rated kits for commercial-grade durability.
With just a weekend of work, you achieve a custom aesthetic that feels brand new.
11. Sink Equity: How to retrofit a farmhouse or composite granite sink into existing cabinetry
“Sink Equity” describes the massive visual impact a high-end vessel adds to your kitchen, yet you don’t need a full remodel to achieve it. The best results often come from working creatively within your existing medium. Instead of tearing out cabinets, install a “short apron” farmhouse sink. These retrofit models slide right over the existing face frame, meaning you simply remove the false drawer front rather than rebuilding the cabinet. Consequently, you save hundreds on professional carpentry while preserving the cabinet’s structural integrity.
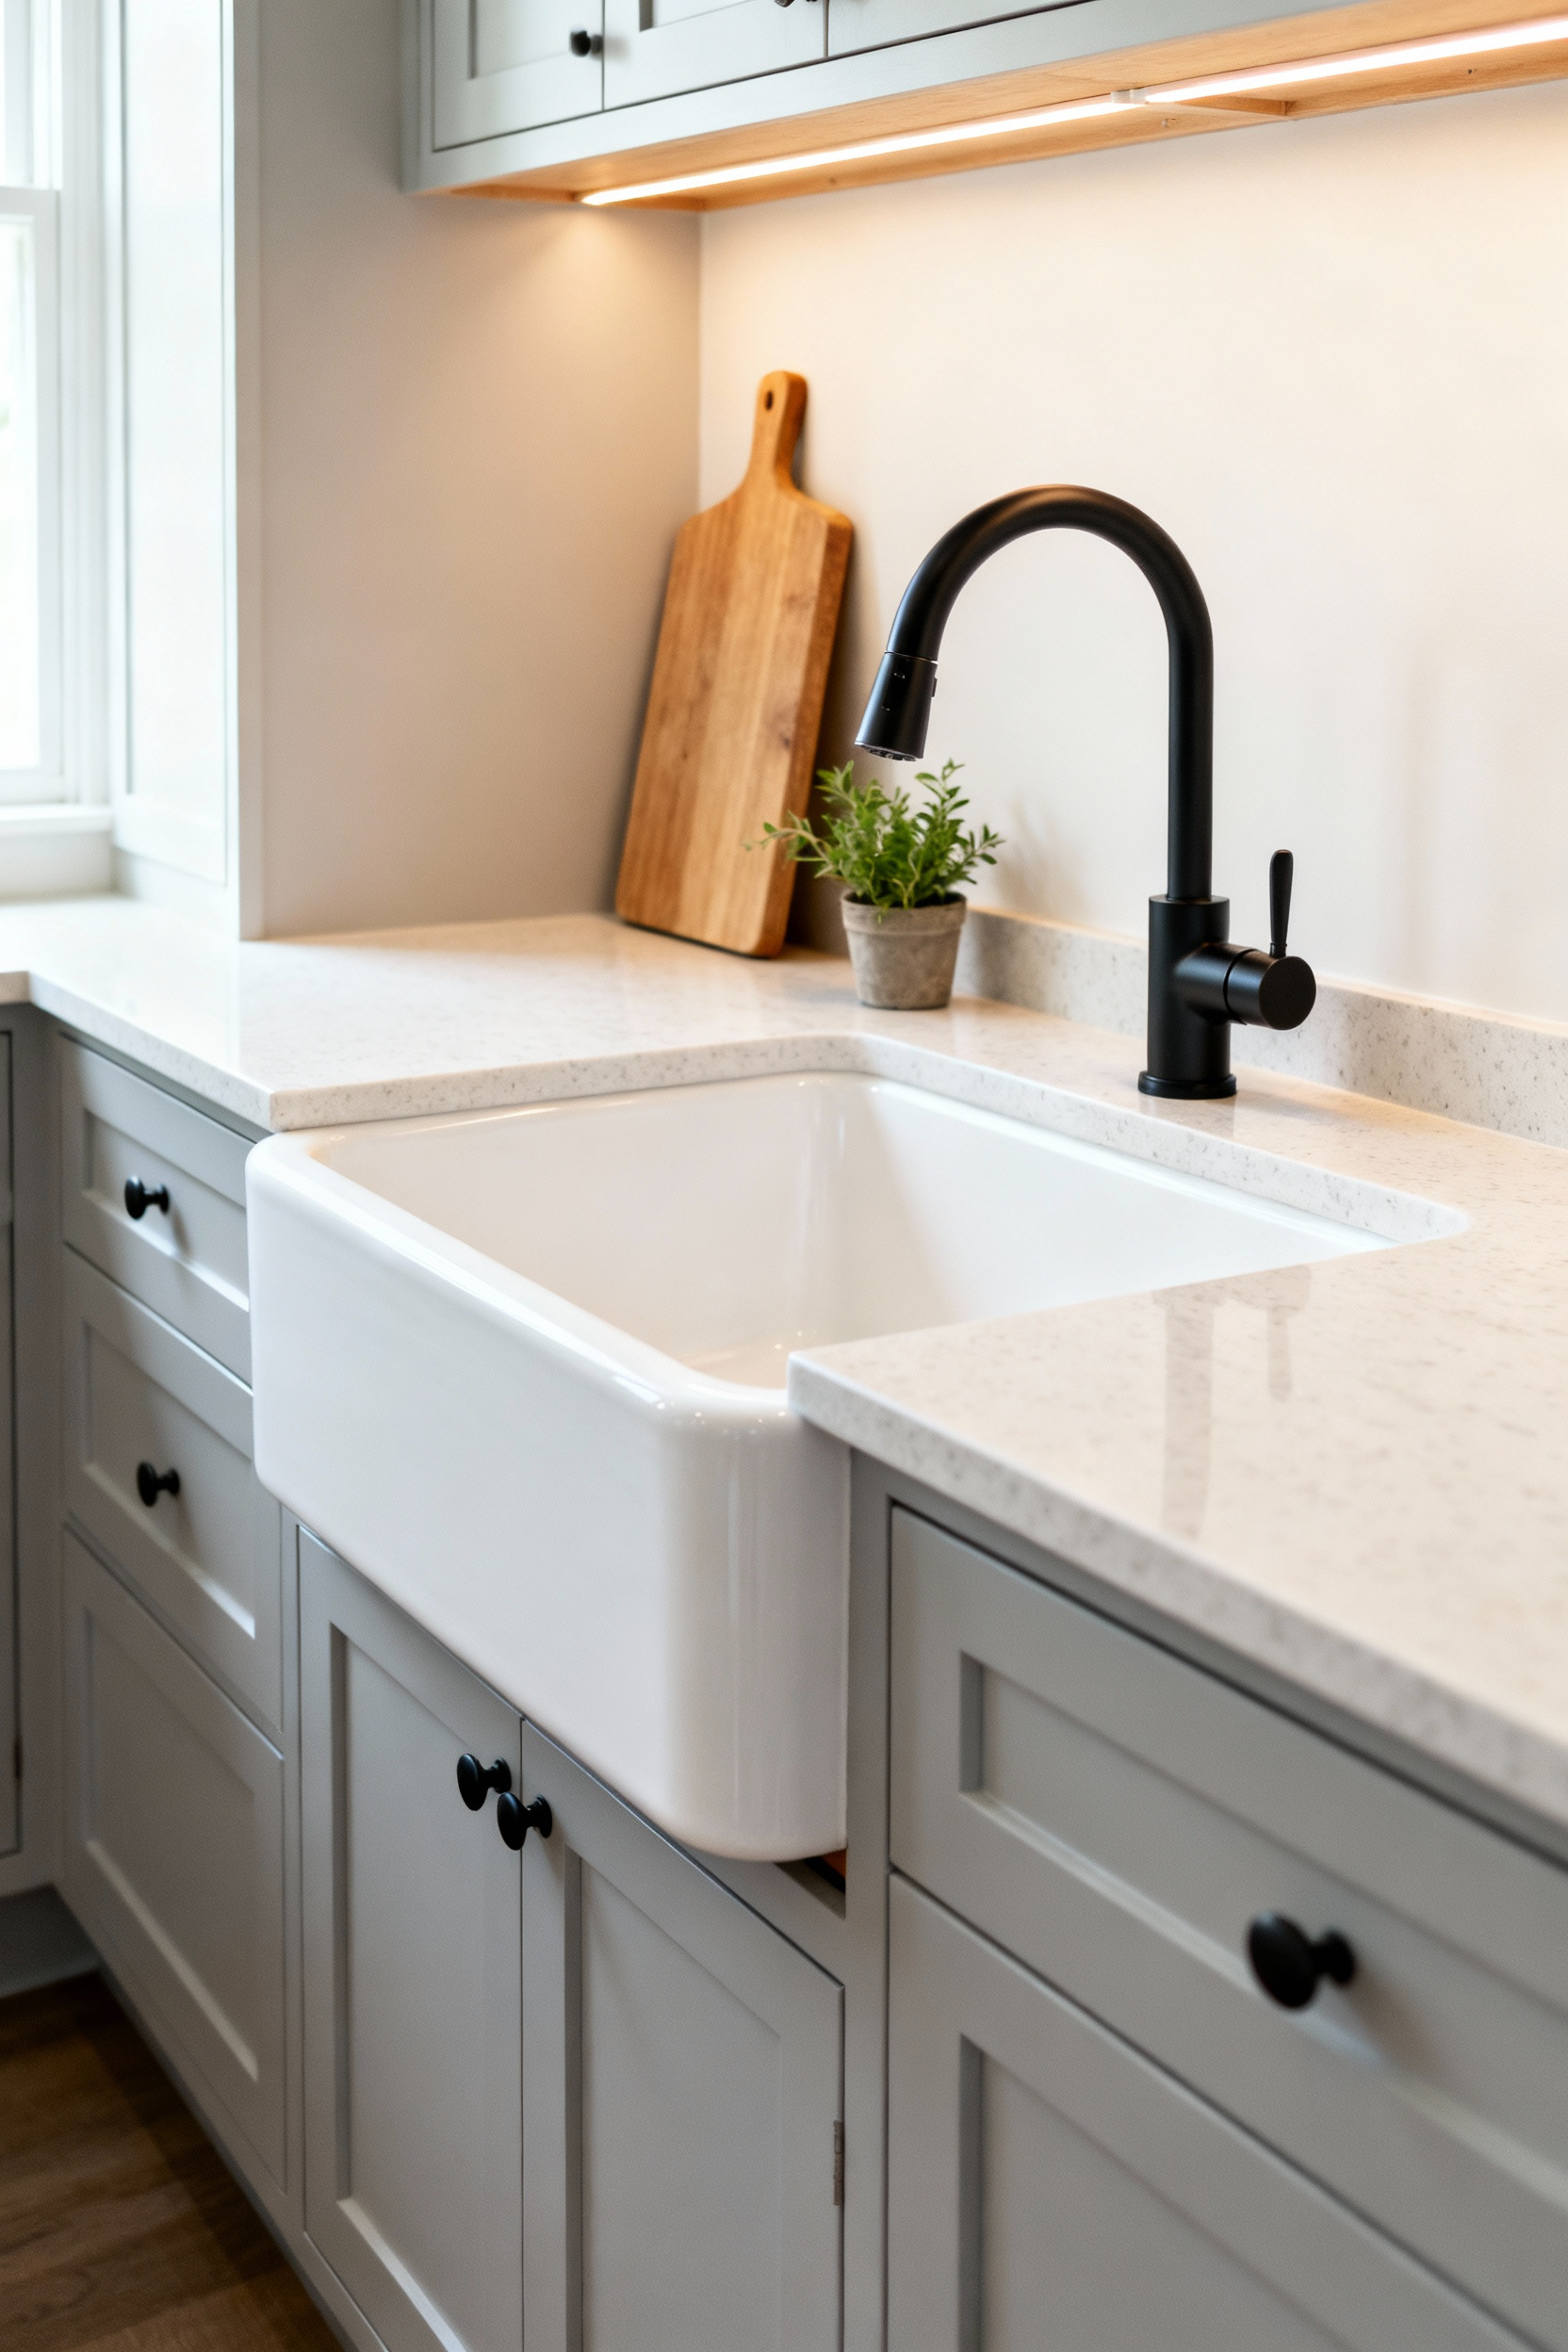
If you prefer the durable matte finish of composite granite, handle the heavy lifting with smart, budget-friendly support. Skip the expensive professional mounting clips and build a simple ledger board frame inside the cabinet using 2×4 lumber. This DIY solution anchors the weight securely to the side walls for pennies. Furthermore, follow these strategic steps to protect your wallet and your countertops:
- Cut carefully: Use a reciprocating saw to trim the horizontal rail, but never cut the vertical stiles.
- Cover gaps: Select a top-mount sink with a wide flange to hide rough edges or chips left by the previous cutout.
- Measure twice: Confirm the sink depth precisely before making that first irreversible cut.
12. Appliance Camouflage: Utilizing stainless steel film or high-heat paint to update mismatching units
Nothing disrupts visual harmony like a beige dishwasher sitting next to a white fridge. Unity pulls a composition together, and your kitchen is no different. Fortunately, you do not need to buy new units to achieve this cohesion. Simply apply a roll of self-adhesive stainless steel film. For less than $60, this instantly modernizes a standard refrigerator. Just ensure you choose automotive-grade vinyl, as it withstands scratches and daily scrubbing far better than standard contact paper.
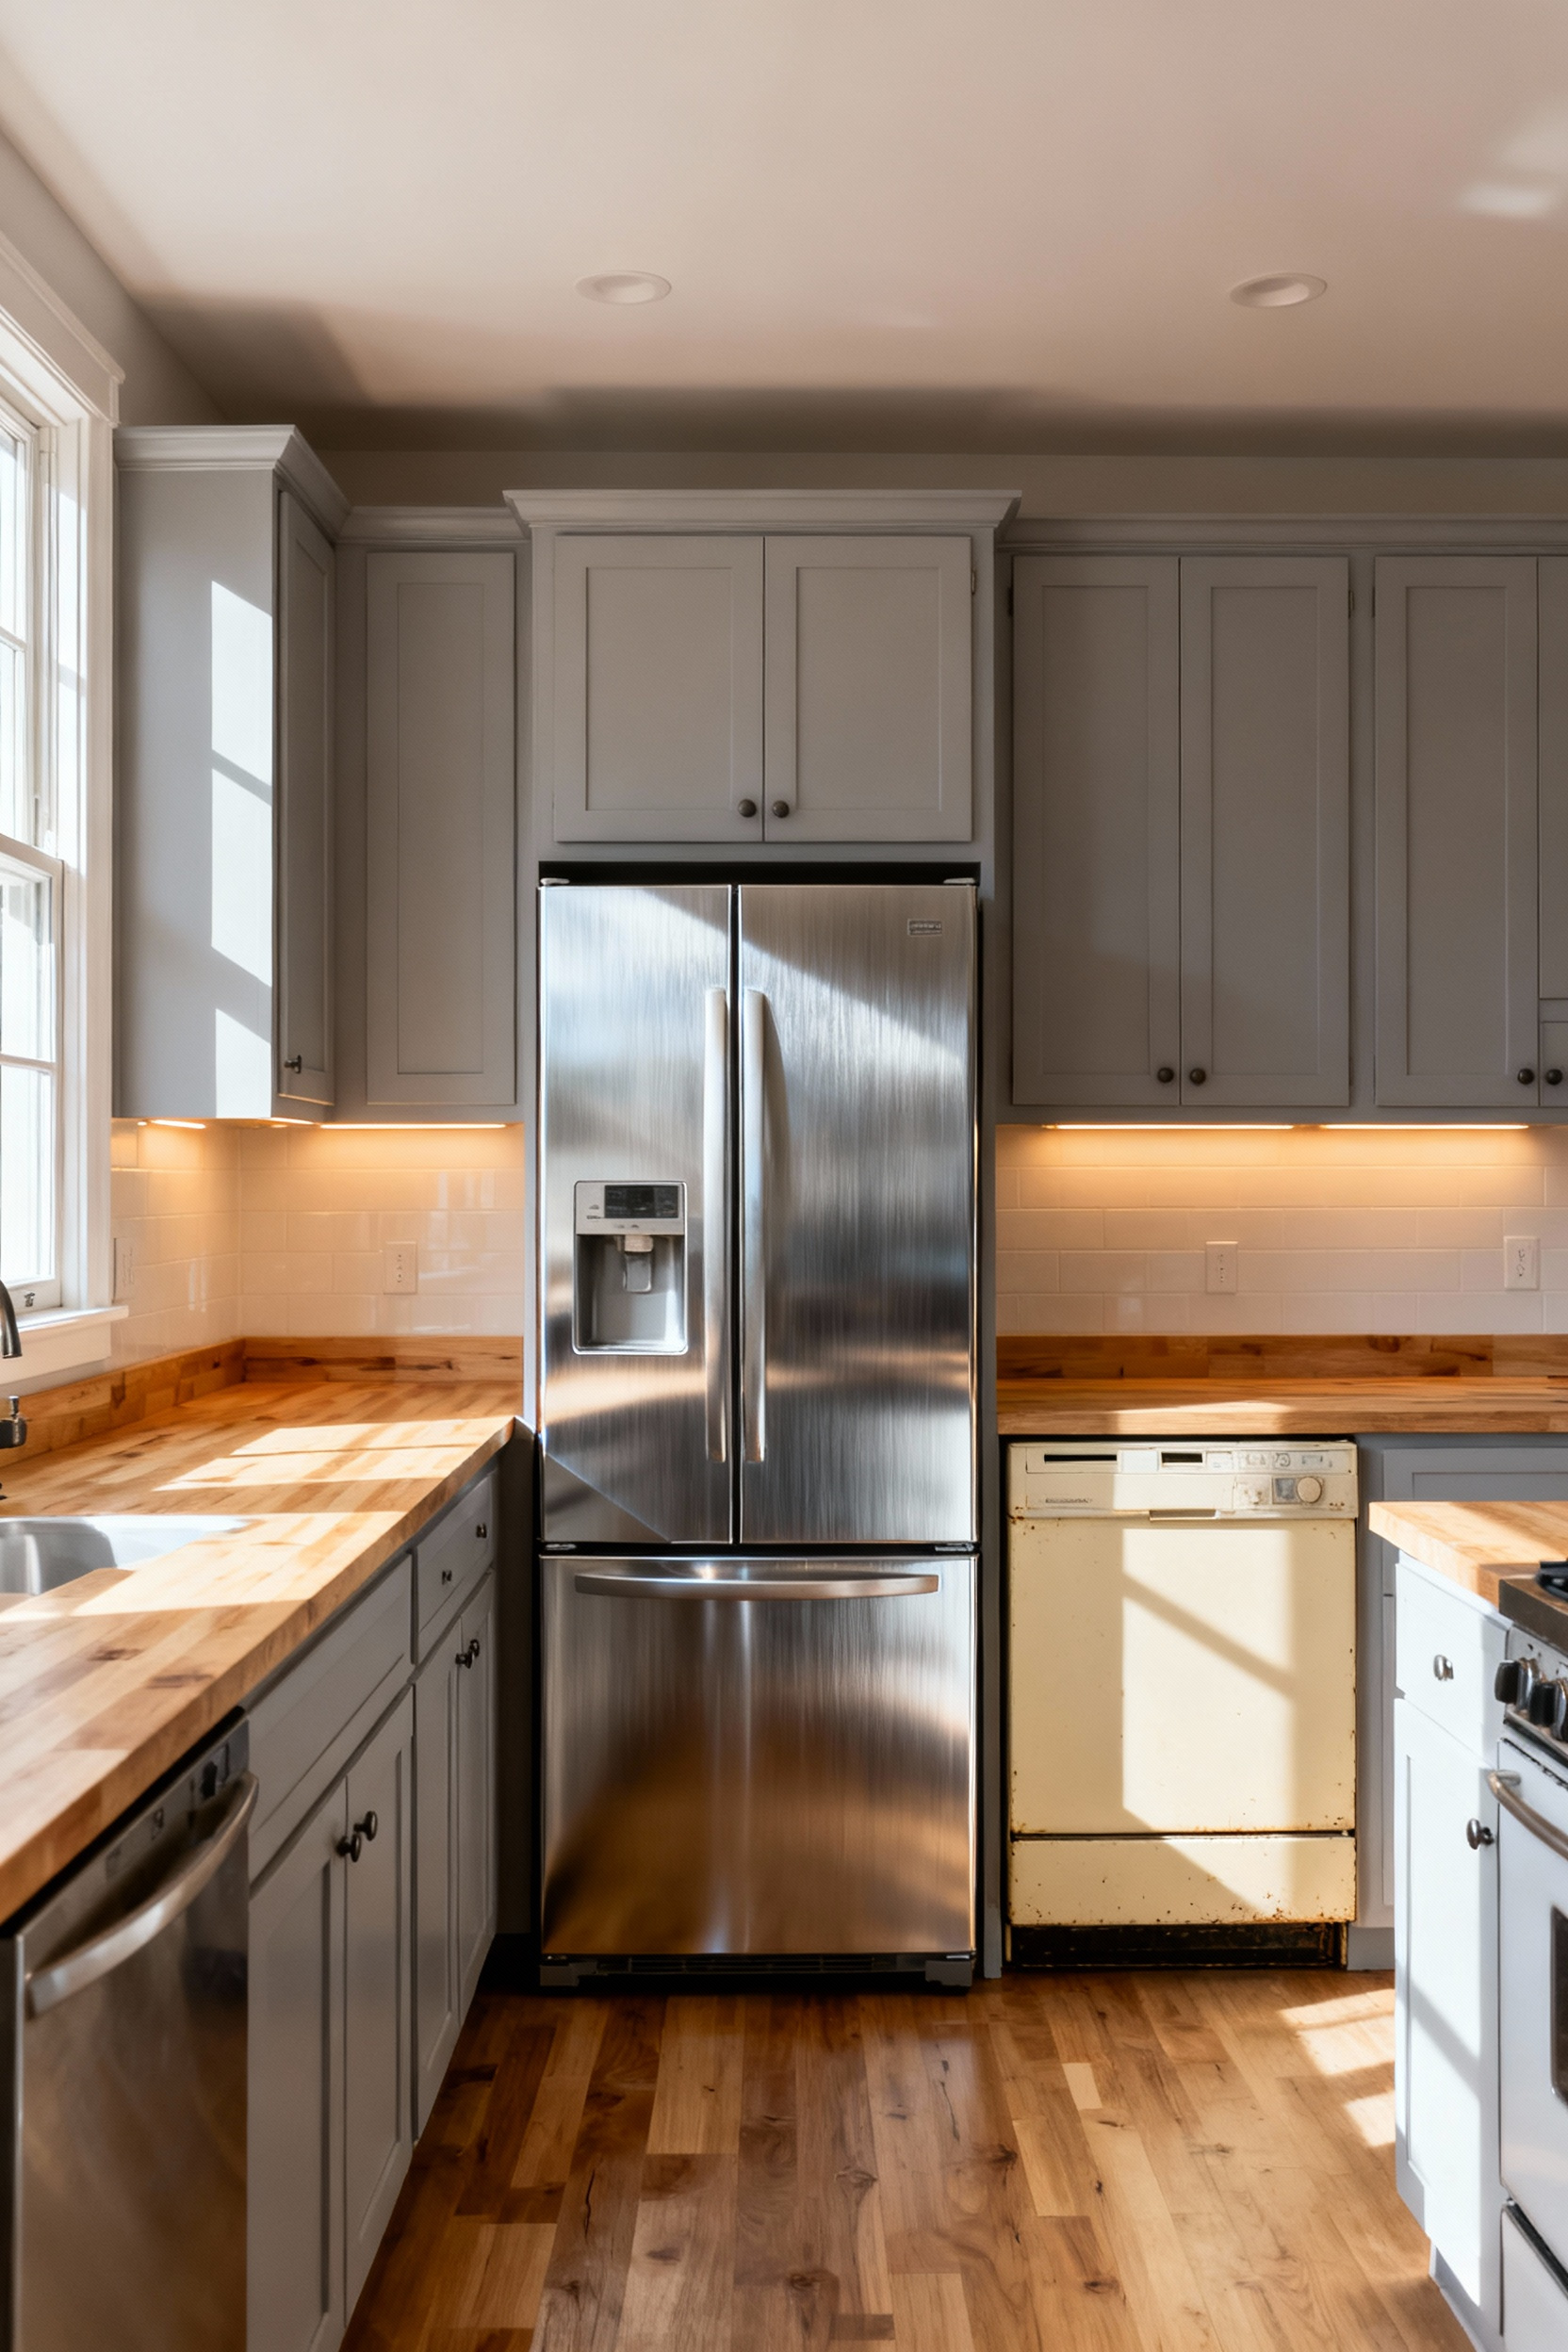
Alternatively, paint offers a sophisticated custom look. Matte black high-heat enamel is currently trending because it hides fingerprints and creates a seamless, high-end finish. However, proper preparation determines your success.
- Scrub the appliance thoroughly to remove grease.
- Lightly sand the surface to help the paint adhere.
- Apply a specialized appliance epoxy or primer before your topcoat.
Follow these steps, and you will achieve a durable finish that looks professionally done. You absolutely have the skills to make this happen.
Phase 4: Mastery & Integration (The Designer Touch)
The final details transform a simple sketch into a masterpiece. You can achieve this same designer polish in your kitchen by tricking the eye with texture and custom finishes. Start by adding simple crown molding to the tops of standard stock cabinets and painting it to match; this instantly creates a seamless, built-in look that mimics custom joinery. Furthermore, splurge strategically on hardware. Install heavy solid brass pulls or geometric matte black knobs. These touchpoints feel luxurious in your hand and effectively distract guests from budget-friendly cabinetry materials.
Lighting and styling further separate a renovation from a true transformation. Elevate inexpensive white subway tile by using contrasting charcoal grout to add architectural depth, then layer your illumination with cheap plug-in LED strips under your upper cabinets. Finally, apply the “Open Shelving Vignette” rule to bring warmth to the room. Install a single shelf, but do not use it for storage. Instead, treat it like a canvas:
- Lean a vintage wooden cutting board against the wall for organic warmth.
- Stack two or three art books to inject personality.
- Place a piece of handmade pottery to add texture.
These curated moments draw the eye and make the space feel intentionally designed rather than purely functional.
13. Custom Millwork Hacks: Adding molding to flat doors for a shaker-style elevation
Don’t tear out those solid flat-slab cabinets just yet. You can save 60-80% over custom replacements by simply dressing up what you already own. The right frame creates the art, and your kitchen doors are no different. To achieve that timeless Shaker look, cut 1/4-inch thick MDF trim into 2.5-inch wide strips. MDF is your best friend here; it costs pennies compared to solid wood, paints flawlessly, and resists warping in humid kitchen environments.
However, professional results require specific execution. First, map out your margins with painter’s tape to verify the proportions look balanced. Then, follow these rules for a durable finish:
- Glue first: Rely on heavy-duty construction adhesive for the permanent bond.
- Pin sparingly: Use an 18-gauge pin nailer only to clamp the trim while the adhesive cures.
- Caulk everything: Run a bead of paintable acrylic caulk along every internal and external seam.
This final step is non-negotiable. Caulking blends the trim into the flat panel, ensuring your “hack” looks like a solid, custom-milled door once painted.
14. Window Treatments: Creating DIY Roman shades for a tailored, soft fabric look
Expensive tools don’t make the artist; creativity does. Custom window treatments typically devour renovation budgets, but you can mimic that high-end, tailored look for pennies using the “no-sew blind hack.” Simply disassemble a cheap, functional mini-blind and utilize its existing lifting mechanism. Then, attach your chosen fabric directly to the remaining slats and header rail using heavy-duty fabric glue or fusible webbing. This clever strategy creates professional folds and completely bypasses the complex math required for traditional sewing and ring placement.
To truly stretch your dollar without sacrificing style, skip the boutique fabric store and hunt for alternative textiles. I recommend sourcing:
- Canvas drop cloths: These provide excellent structure and durability for a fraction of the price.
- Linen shower curtains: They offer a washable, high-end texture often found in designer kitchens.
- Standard drapery lining: Essential for protecting the face fabric from grease splatter and ensuring the shade stacks crisply.
Finally, install your creation using an outside mount strategy. By placing the shade 1 to 2 inches wider than the window frame, you create the illusion of a larger window and graciously hide any slight measuring imperfections.
15. The Art of Styling: Curating thrifted vintage accessories to add soul and prevent the ‘cookie-cutter’ look
Small details define a masterpiece. Avoid the sterile “showroom” feel by swapping builder-grade finishes for thrifted treasures. First, hunt for vintage hardware to dress up stock cabinetry. Mismatched antique brass or milk glass knobs add instant custom character for just a few dollars. Next, ground the space with a salvaged light fixture. I once found a dusty industrial pendant for twenty dollars, and after a simple rewiring job, it became the room’s stunning focal point.
Styling shouldn’t just look good; it must work hard. Skip the plastic organizers and use vintage finds to hold everyday essentials. Stoneware crocks make perfect utensil holders, while antique tins hide colorful sponges. Furthermore, treat your vertical space as a rotating gallery to add warmth.
- Lean weathered wooden cutting boards against the backsplash.
- Hang vintage feed sacks as simple café curtains.
- Group salvaged silver trays on open shelving.
These elements break up modern lines and inject soul. You create a designer look without the hefty price tag.
Conclusion: Calculating your ROI – How thoughtful sweat equity builds real home value
You have crunched the numbers and rolled up your sleeves, and the results speak for themselves. By tackling big-ticket labor costs like assembling RTA cabinets yourself, you aren’t just saving cash; you are building wealth. Every hour you spend installing luxury vinyl plank flooring or updating cabinet hardware represents money kept in your pocket rather than handed to a contractor. That “Realized Equity Gain” is the true trophy of a successful budget remodel.
However, the smartest renovators balance enthusiasm with honesty. Protect your hard-earned investment by sticking to high-visibility finishes where your attention to detail shines, and know when to call a pro to avoid the dreaded “DIY Discount.” There is no shame in outsourcing complex electrical or plumbing work. In fact, ensuring professional-grade quality is the best way to guarantee your sweat equity translates into actual resale value rather than a fix-it list for the next buyer.
Now, look around your kitchen with fresh eyes and confidence. You possess the tools and the knowledge to create a high-end look without the high-end price tag. So, grab your calculator, pick up that paintbrush, and watch your home’s value grow with every intentional step. You have got this.