You know the one thing that trips people up the most in a kitchen refresh? It’s not the countertops or even the cabinet color. It’s the backsplash. People always ask me about it. They stand there, completely paralyzed by a two-foot-tall strip of wall. And I get it! It feels so permanent, and it’s right at eye level, so you have to look at it every single day.
But here’s the secret: that backsplash is your kitchen’s secret weapon. It’s your chance to add a huge dose of personality without spending a fortune. It’s the piece that ties everything together. When I was teaching art, I used to tell my students that the background is just as important as the subject. The same goes for your kitchen. So, let’s push aside all that overwhelming “inspirational” clutter online and talk about what really works. I’ll walk you through it, step-by-step, just like we’re picking out tiles together.
Laying the Groundwork: Essential Backsplash Planning
Okay, before we get to the fun part—the gorgeous tiles and fun patterns—we have to do a little prep work. I know, I know, it’s the boring part. But trust me, spending an hour on this now will save you a world of headaches and money later. This is the stuff that makes the difference between a project you love and one you regret.
1. Determine Your Kitchen Style for a Perfect Match
Before you even think about pinning another Subway Tile photo, take a long, hard look at your kitchen. What’s already there? Are your cabinets modern and flat, or are they traditional with lots of detail? Is your countertop a busy granite or a quiet, solid quartz? This isn’t just about liking a tile; it’s about making sure the tile likes your kitchen back. It needs to look like it belongs, not like it crash-landed from another design universe.
I once had a friend who fell in love with a super rustic, handmade terracotta tile. It was beautiful! But she had a very sleek, minimalist kitchen with high-gloss white cabinets and chrome fixtures. She put it in anyway, and it just… fought with everything. It looked completely out of place, and she ended up tearing it out six months later. Don’t make that mistake. Grab physical samples of your top choices—big ones, not those dinky 2-inch squares—and prop them up in your kitchen. Live with them for a few days. See how they look in the morning light and under your kitchen lights at night. Your kitchen will tell you which one is right.
Finding that harmony with your countertops and cabinets is the real goal. Once you know your style, picking the actual material becomes so much easier.
2. Budgeting Your Backsplash: How to Get a High-End Look for Less
Let’s talk money. A backsplash can cost anywhere from a couple hundred dollars to many thousands. The key is to figure out your number first, and then find the best-looking thing you can for that price. Don’t forget the hidden costs! The price on the tile box is just the beginning. You also need to account for thin-set (the glue), grout, sealer, and any tools you have to buy or rent. Oh, and always buy 10-15% extra tile for mistakes, weird cuts, or future repairs. Running out mid-project is a total nightmare.
Here’s my favorite budget-saving trick: the “high-low” method. If you’ve fallen for a super expensive, gorgeous tile, you don’t have to use it everywhere. Create a “feature frame” of it behind your stove—the area that gets the most attention anyway—and then surround it with a much more affordable, complementary tile. You get all the wow-factor for a fraction of the cost. I did this in my own kitchen with a beautiful-but-pricey hand-painted tile. I used just one box for a small square behind the range and then finished the rest with a simple, cheap ceramic tile that picked up one of the colors. Everyone comments on the “designer” tile, and no one knows my little secret.
Thinking smart about where you spend and where you save is how you’ll make the biggest impact without emptying your wallet.
3. Choosing the Right Backsplash Height for Your Space
How high should your backsplash go? It’s a surprisingly important question. The standard is a 4-inch strip that matches the countertop, but can we all just agree that look is a little dated? And honestly, it’s not very practical. You and I both know that spaghetti sauce can splash a lot higher than four inches. The most common height these days is to go all the way from the countertop to the bottom of your upper cabinets. It looks intentional and protects the whole wall.
But if you want to add a little drama, consider taking it higher. In areas without upper cabinets, like around a window or behind the stove, taking the tile all the way to the ceiling looks incredible. It makes the ceilings feel taller and the whole kitchen look more custom and expensive. It’s a designer trick that you can totally steal. Don’t feel like you have to stick to one height, either. You can have a full-height backsplash behind the stove and a shorter one everywhere else. It’s all about what makes sense for your space and your budget.
Once you nail the height, it’s time to think about how much of a beating this wall is going to take.
4. Evaluate Kitchen Needs: Let’s Be Real About Mess
Before you fall in love with a beautiful, porous, unsealed marble tile, you need to have an honest conversation with yourself. Are you a takeout person who mostly uses the microwave, or are you frying bacon and simmering tomato sauce every night? Do you have kids who treat the kitchen like a Jackson Pollock-inspired splash zone? A backsplash has to be more than just pretty; it has to stand up to your life. The biggest complaint I hear is from people who chose a beautiful material that became a cleaning nightmare.
I had a client who just had to have a gorgeous, rustic, unsealed tumbled travertine. She loved the old-world look. But her family cooks a lot of splattery, oily food. Within a year, the backsplash behind her stove was a permanent, blotchy mess of grease stains that she just couldn’t scrub out. She hated it. The easiest surfaces to clean are non-porous ones like porcelain, ceramic, and glass. And pay attention to the grout! The more grout lines you have, the more there is to scrub. If you’re a messy cook, big tiles with skinny grout lines are your best friend.
Now that we’ve covered the practical stuff, let’s get back to making things pretty by matching what you already have.
5. Match Existing Elements: Create Harmony with What You’ve Got
Your backsplash needs to be friends with your countertops and cabinets. They don’t have to match exactly, but they do need to get along. The biggest mistake people make here is ignoring undertones. You might have white cabinets and a “gray” countertop, but is that gray a cool, blue-ish gray or a warm, beige-ish gray (we call that “greige”)? It makes a huge difference. If you pair a cool-toned backsplash with warm-toned counters, something will just feel… off.
The best way to figure this out is, again, samples. Bring them home. Lay your tile sample right on top of your counter, next to your cabinet door. If your countertop has a lot of busy pattern and movement, a simple, quiet backsplash is usually the way to go. You don’t want them competing for attention. If your counters and cabinets are very plain, that’s your chance to go wild with a fun, patterned backsplash! Think of it like an outfit: if you’re wearing a wild patterned shirt, you wear plain pants. It’s all about balance.
Selecting Your Style & Materials: A Design Deep Dive
Alright, the groundwork is done! Now for the fun stuff. This is where we get to explore all the different personalities that materials can bring into your kitchen. Let’s dive into some of my favorite looks, from the timeless classics to the bold showstoppers.
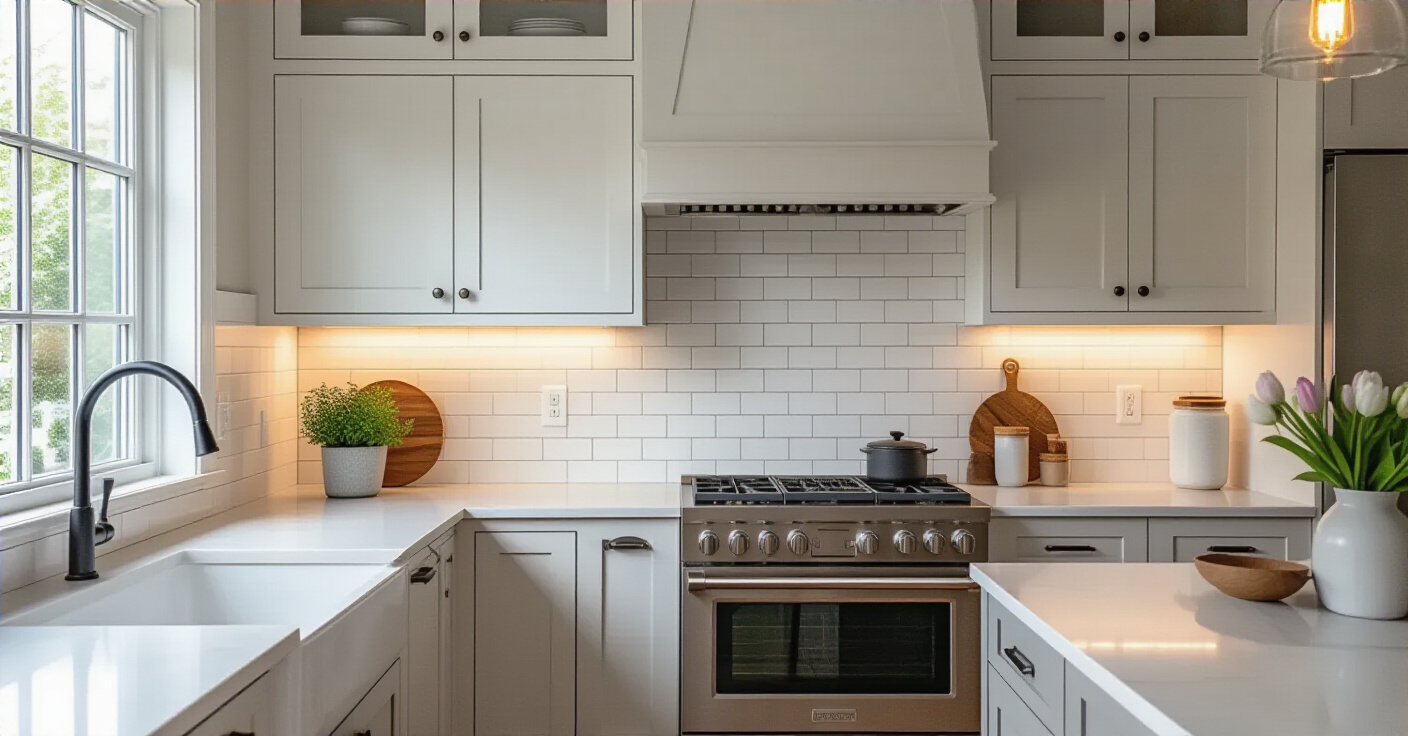
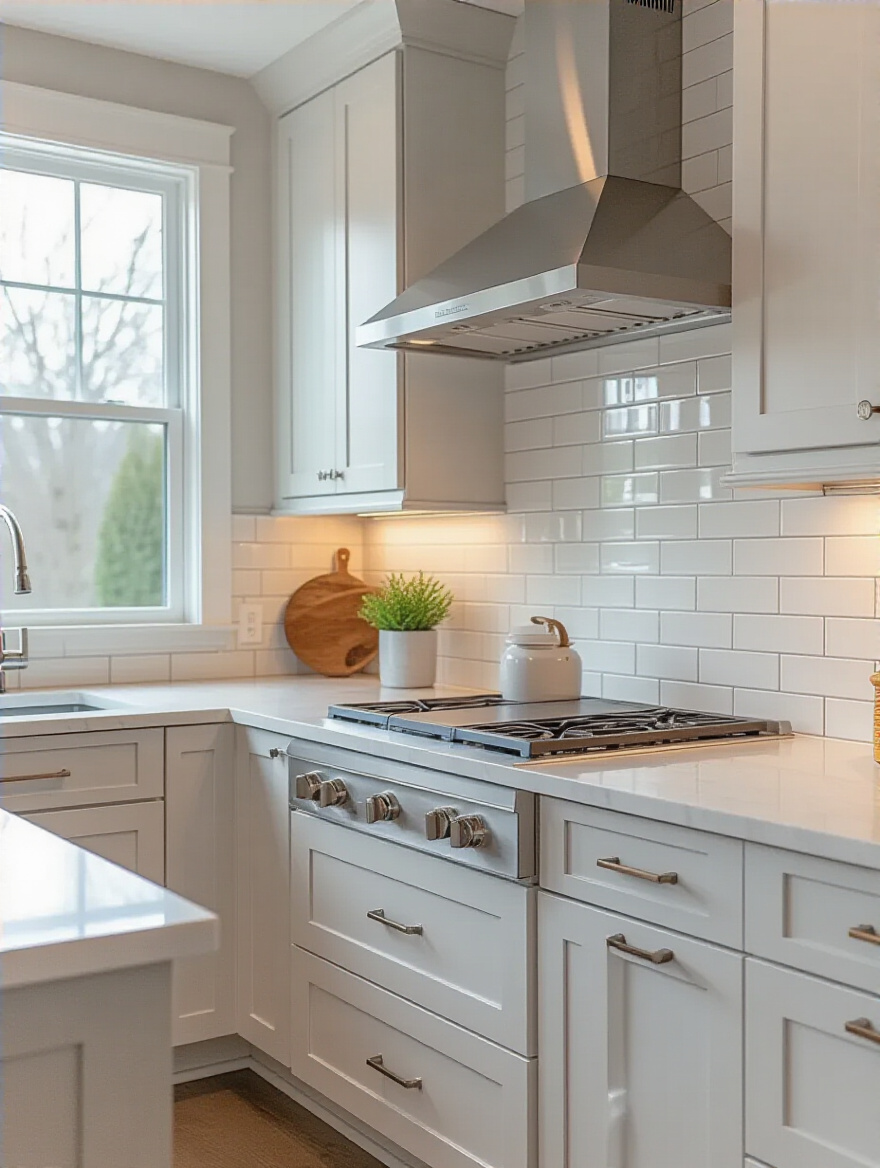
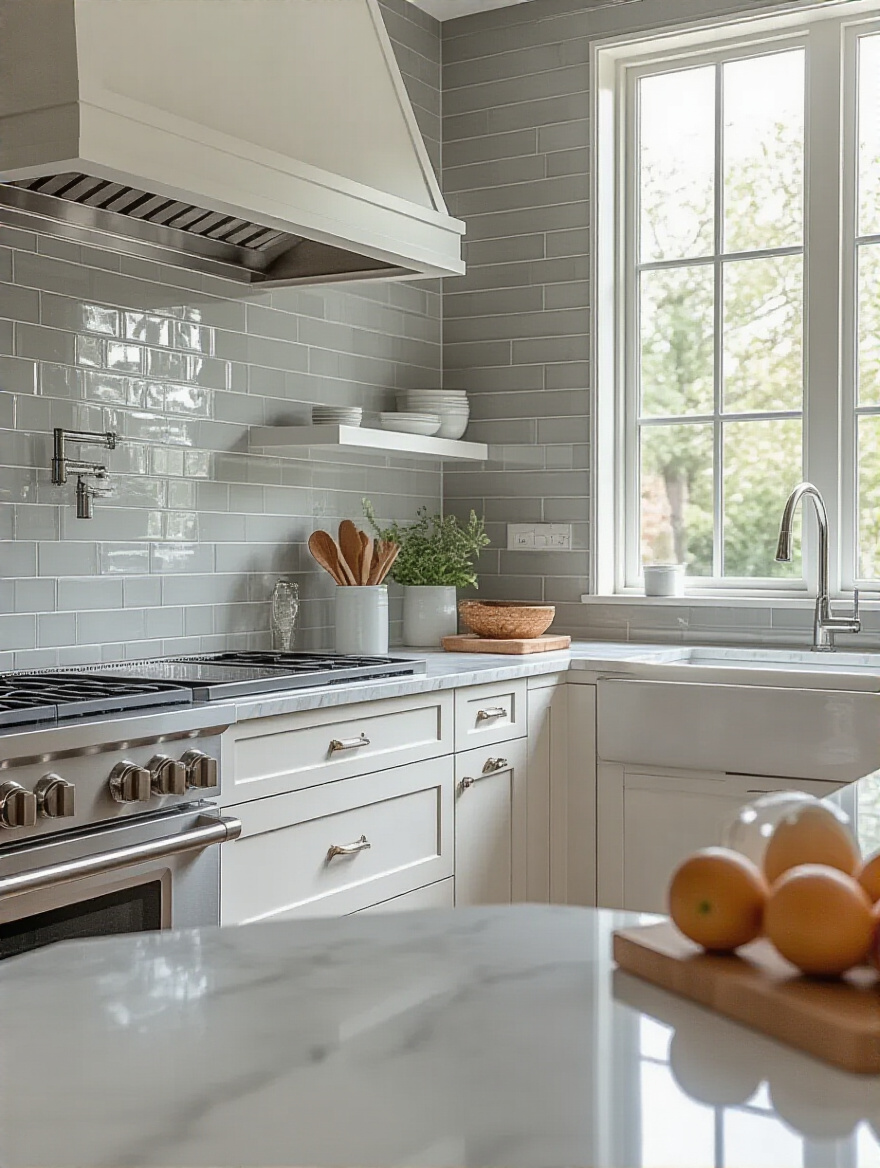
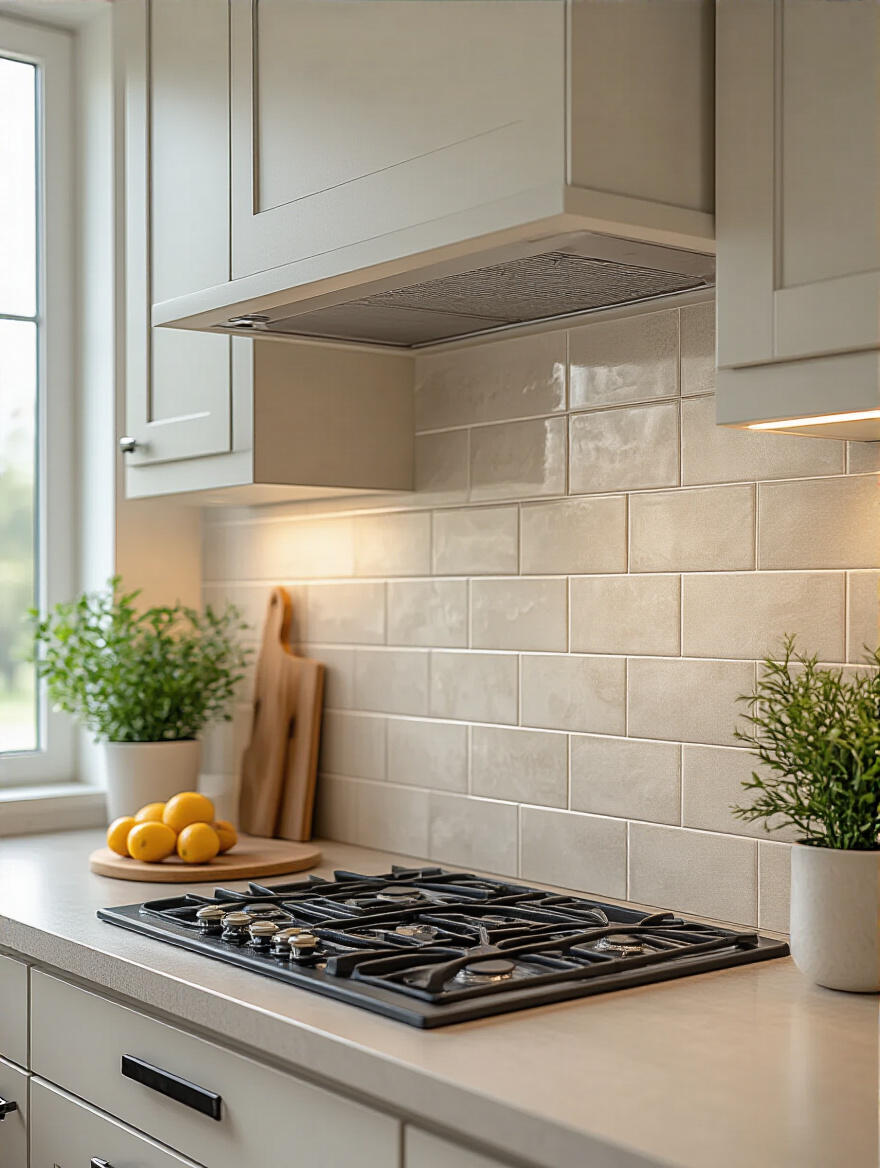
6. Classic Appeal: You Can’t Go Wrong with Subway Tile
Subway tile is like the perfect white t-shirt of the design world. It goes with everything, it never goes out of style, and you can dress it up or down. It’s affordable, it’s durable, and it works in literally any style of kitchen, from a rustic farmhouse to a super modern loft. If you’re ever feeling completely stuck, subway tile is always a safe and beautiful bet.
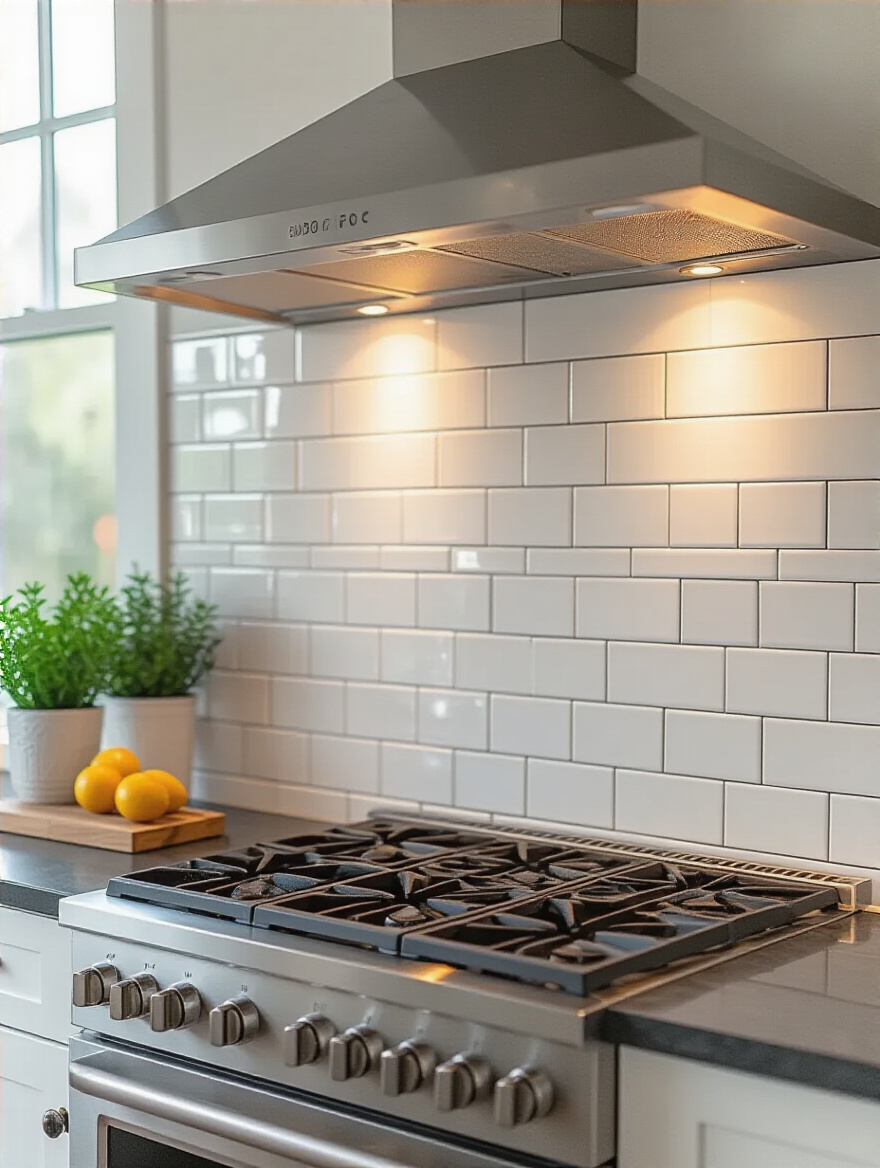
But “safe” doesn’t have to mean boring! You can make subway tile your own by playing with three things: pattern, grout, and finish. Instead of the standard brick-like pattern, try stacking the tiles in a neat, straight grid for a modern look, or even turn them vertically to make your walls feel taller. The grout color changes everything, too. White tile with white grout is classic and clean. But white tile with dark gray or black grout gives you a bold, graphic look that really pops. It’s an instant style upgrade.
From classic to completely custom, there are so many ways to make this simple tile your own personal statement.
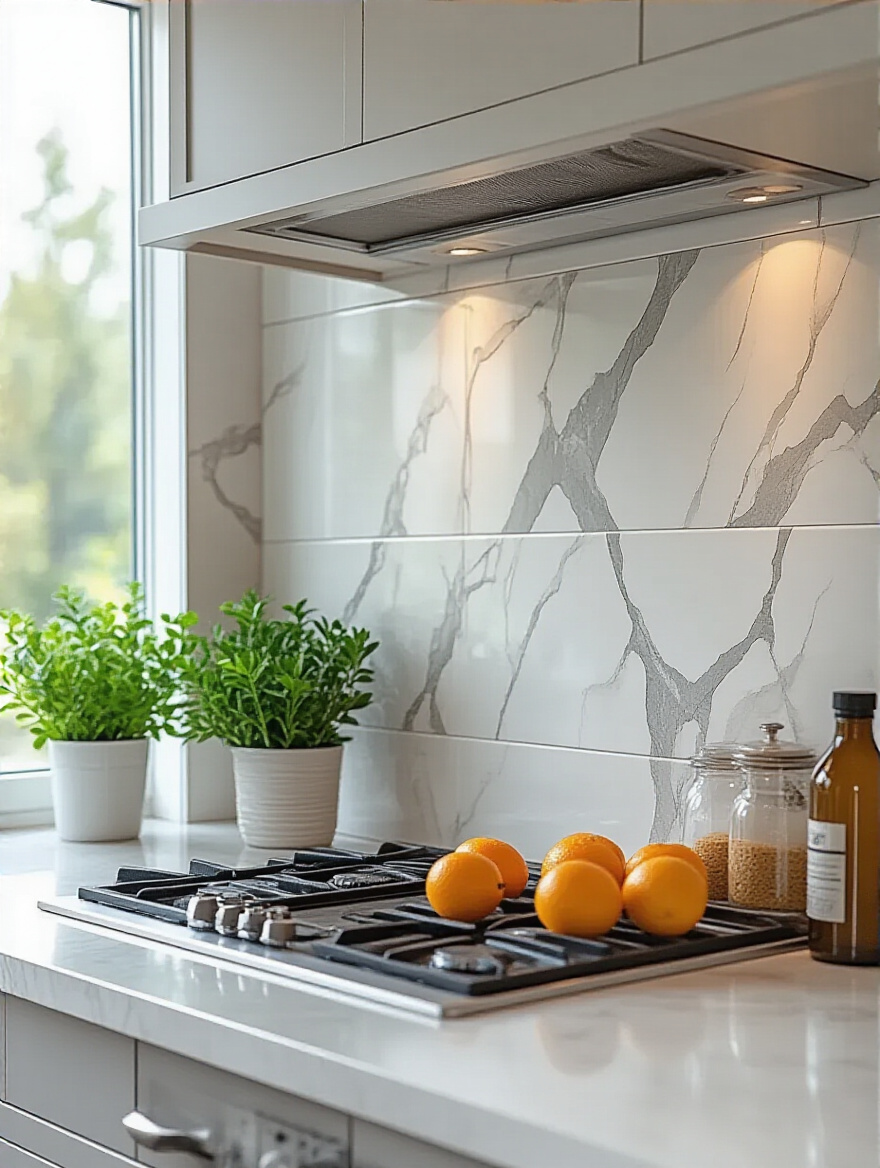
7. Luxury Defined: The Elegance of Natural Stone
If you want a look that feels incredibly high-end and unique, natural stone like marble, granite, or quartzite is a showstopper. Every single slab is a one-of-a-kind piece of art created by nature, so your kitchen will be unlike anyone else’s. Going to a stone yard and picking out your actual slab is a really fun experience—it feels like choosing a giant painting for your wall.
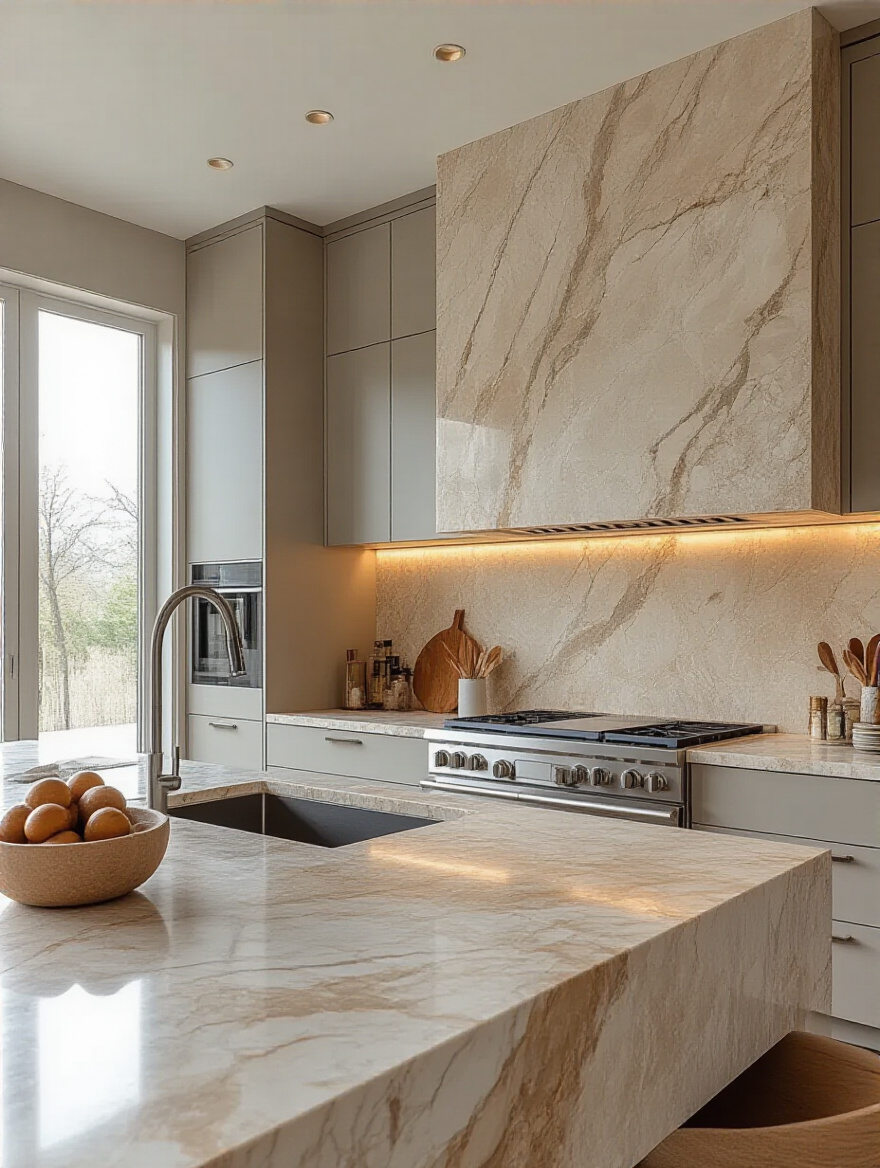
But natural stone is a bit high-maintenance. It’s like that stunningly beautiful friend who is also a little bit needy. Most stones are porous, which means they can stain or etch if you spill things like wine, lemon juice, or tomato sauce on them. The secret to living with stone is sealing it. A good quality sealer will protect it, but you have to re-apply it every year or so. If you’re willing to commit to that tiny bit of upkeep, the payoff is a kitchen that looks and feels like pure luxury for decades.
The earthy elegance of natural stone is timeless, but if you’re craving something a bit more modern, let’s talk about patterns.
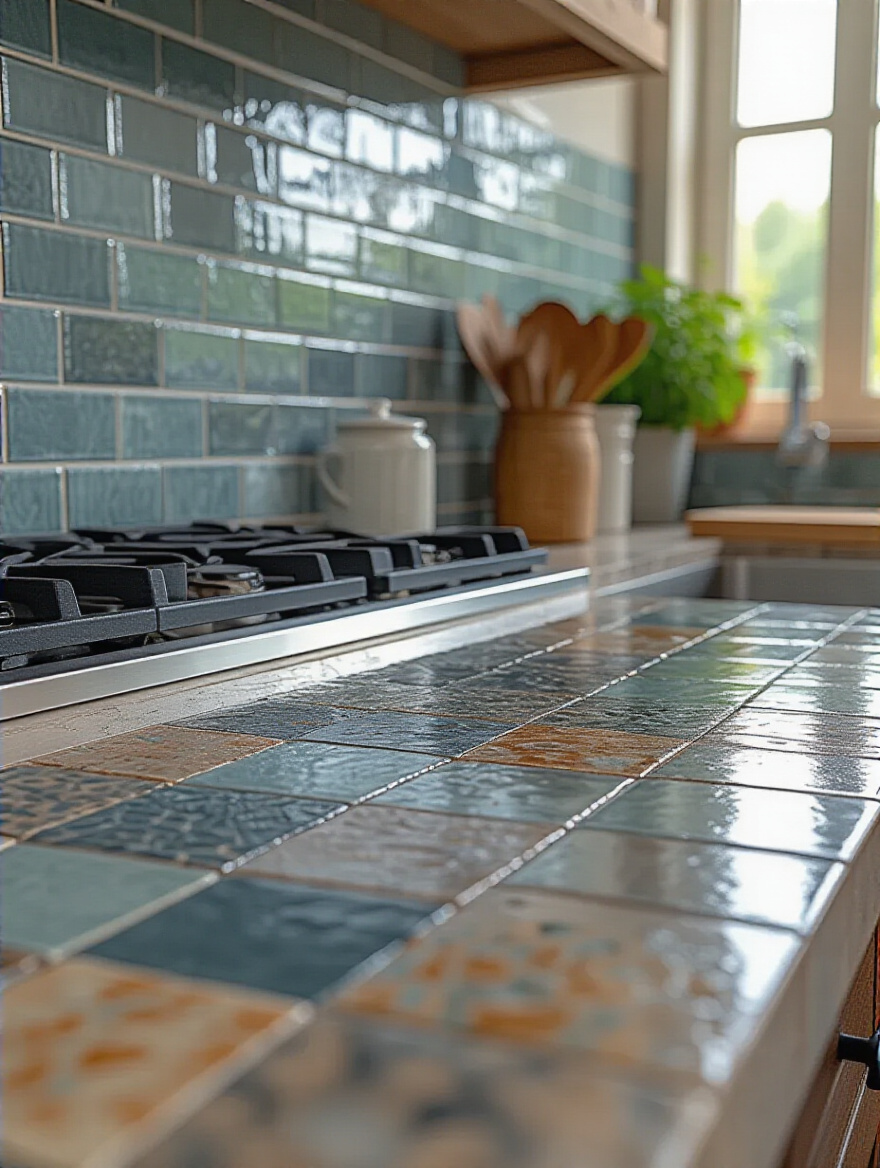
8. Modern Edge: Playing with Geometry and Pattern
Ready to have some fun? Ditching the traditional squares and rectangles for geometric shapes is one of my favorite ways to inject instant energy and personality into a kitchen. Think hexagons (honeycomb), chevrons (zig-zags), fish scales, or cool diamond shapes. These patterns turn your backsplash from a background element into the star of the show.
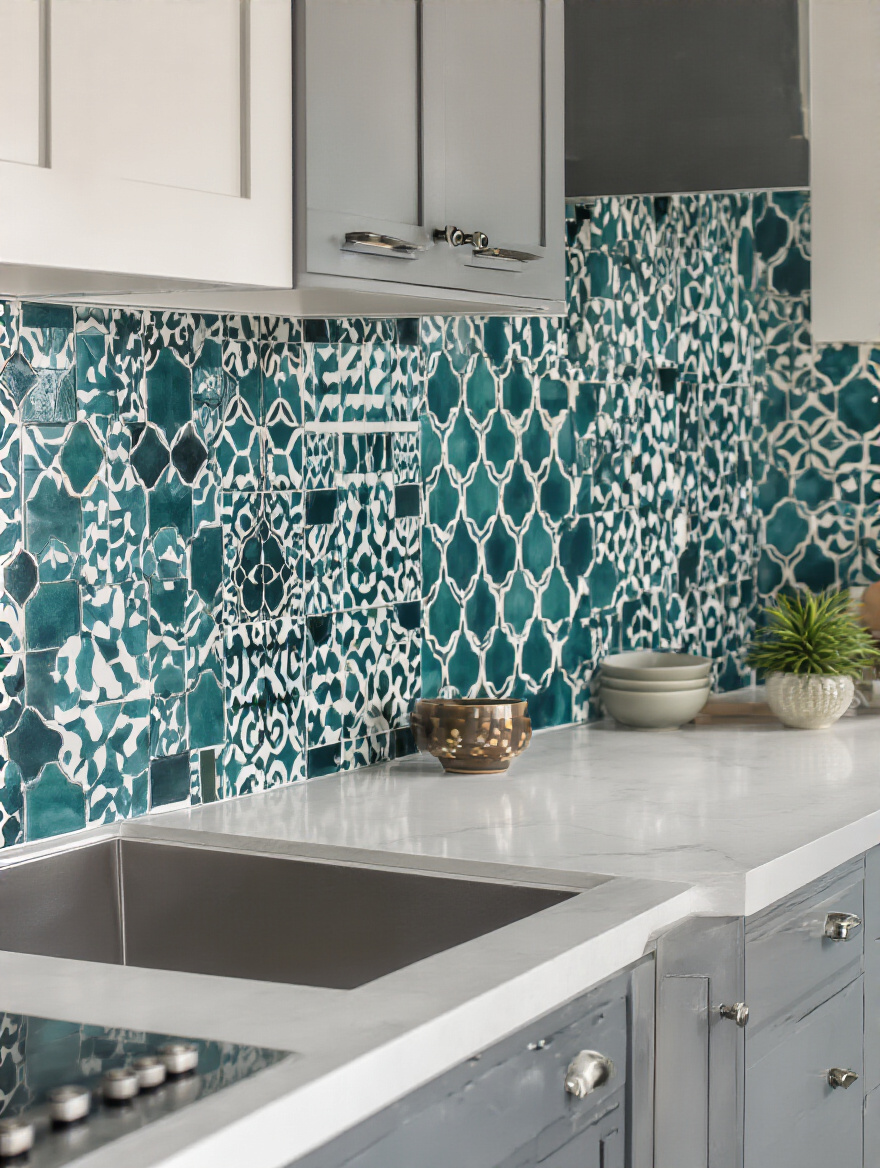
The key to making geometric tile work is balance. If you choose a really bold, busy pattern, it’s often best to stick to a simple color palette, like all white or shades of gray. This lets the shape of the tile be the hero without overwhelming the room. I recently saw a kitchen with simple white cabinets that used a deep teal fish scale tile, and it was breathtaking. It felt like a piece of functional art and gave the whole space a unique, sophisticated vibe that you just can’t get with a standard tile.
Playing with pattern is fun, but if your kitchen is on the darker side, your best bet might be a material that brings its own light.
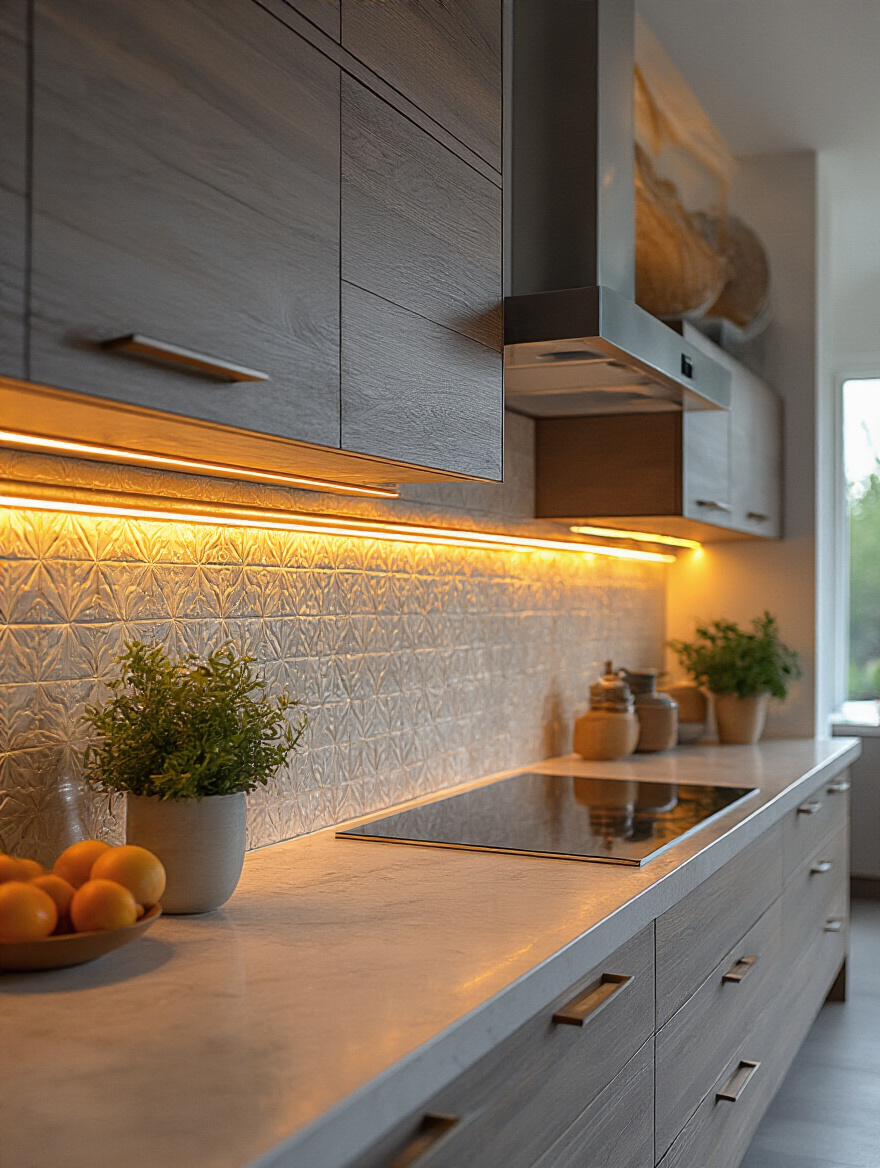
9. Brighten Your Space: The Magic of Reflective Glass Tiles
If your kitchen is small, dark, or doesn’t get a lot of natural light, glass tile is your best friend. It acts like a hundred tiny mirrors, bouncing light all around the room and making the whole space feel brighter and bigger. It comes in every color imaginable and can have a super glossy finish or a beautiful, subtle iridescence that shimmers as you move around the room.
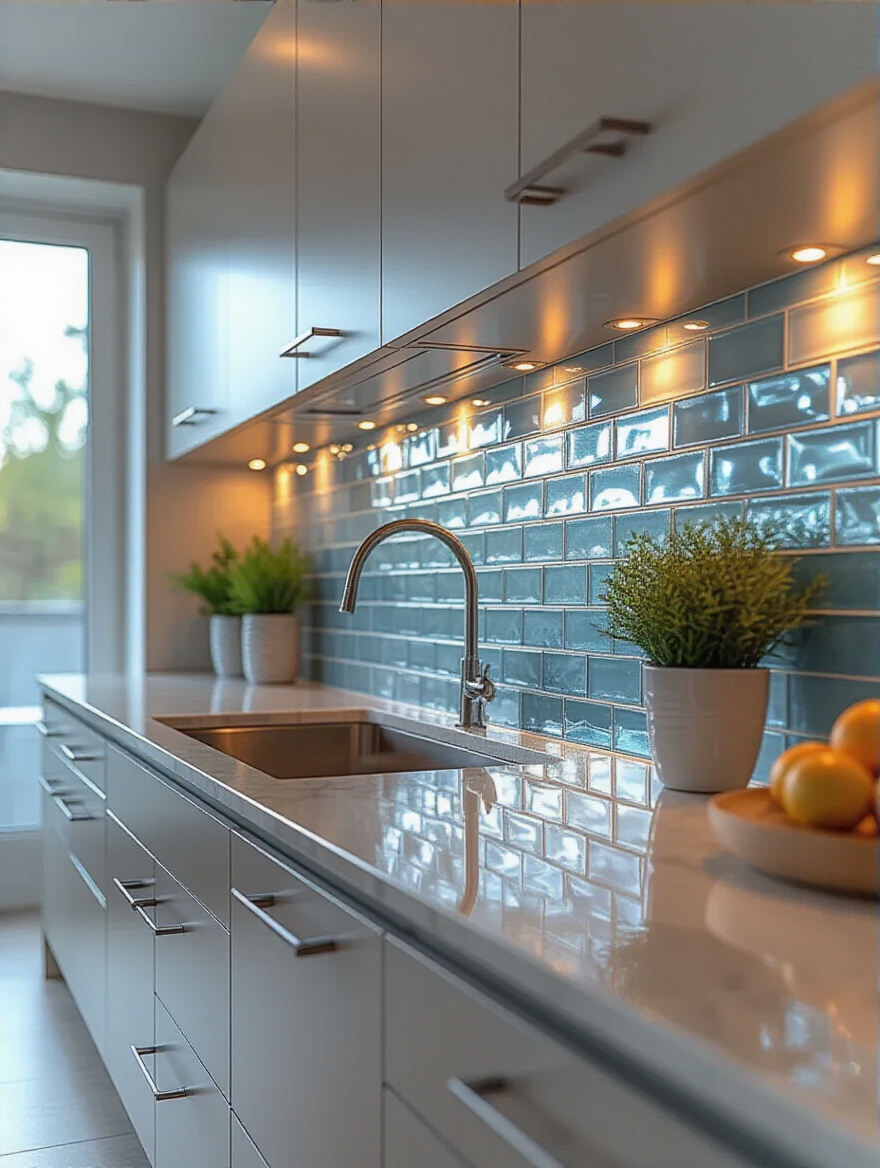
The trick to getting the most out of glass tile is to pair it with great lighting. Installing under-cabinet lighting is a non-negotiable here. When the light hits the glass, it creates this incredible glow that just makes the whole kitchen feel warm and alive. A client of mine had a tiny, windowless galley kitchen in a condo that felt like a cave. We installed large, light blue glass tiles and put in under-cabinet LED strips. The transformation was instant. The kitchen felt twice as big and so much more inviting. It was proof that you don’t always need a sledgehammer to make a huge impact.
Glass can brighten a space, but if you really want to go for glam, let’s explore its shiny cousins.
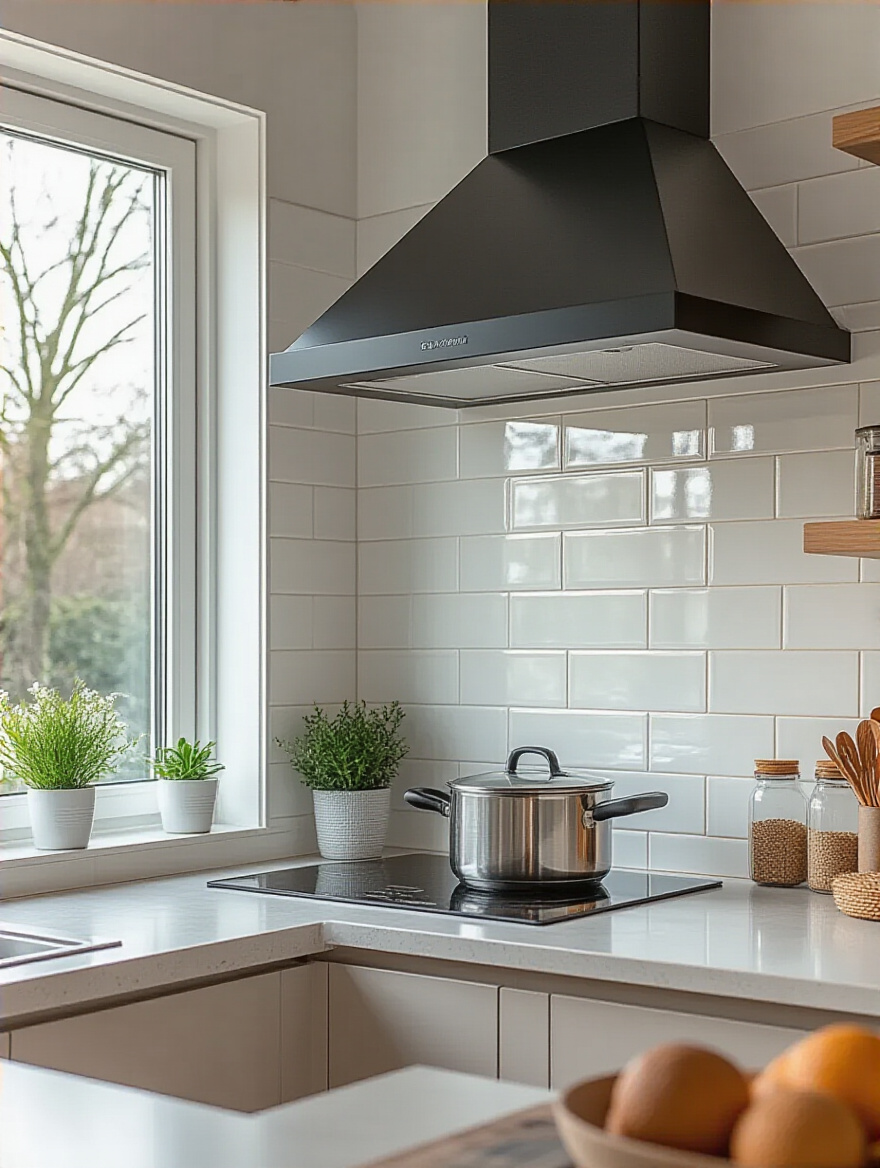
10. Bold Statement: Go Glam with Metallic and Mirrored Finishes
If your style is more “bold and glamorous” than “quiet and subtle,” then a metallic or mirrored backsplash is for you. Think stainless steel for an industrial, professional-chef look, warm copper or brass for a trendy, luxe vibe, or even an antiqued mirror for a touch of vintage Hollywood glam. These surfaces are the ultimate in light-bouncing and can make even the tiniest kitchen feel more open and dramatic.
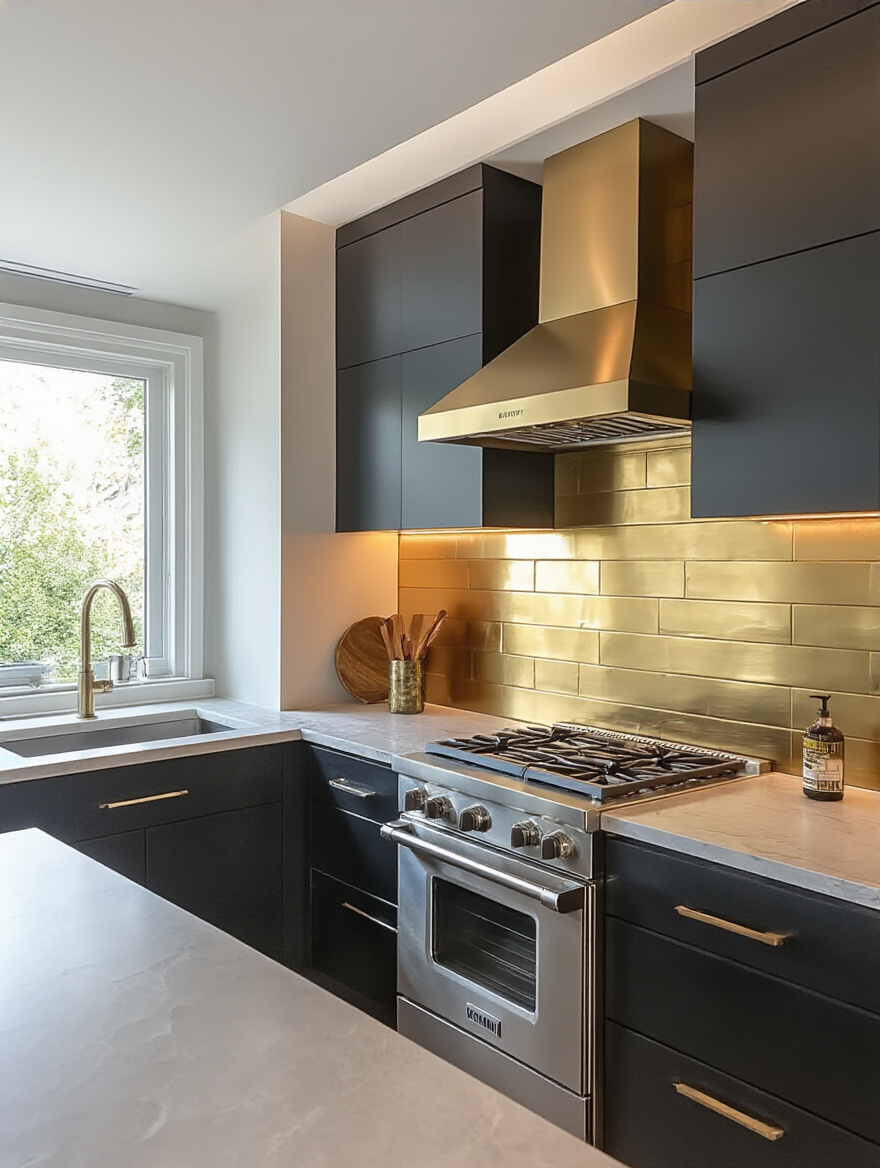
Now, a little goes a long way here. A whole kitchen of mirrored tile might feel more like a disco than a dining space. A great way to use these finishes is as that feature panel behind the stove. Pair it with more subdued, matte finishes on your cabinets and countertops to create a beautiful contrast and let the backsplash be the undisputed star. A full-height panel of antiqued mirror behind a range in a narrow galley kitchen is one of my favorite tricks—it literally makes the room look twice as wide.
For those who lean away from glam and more toward earthy, soulful design, our next option is a perfect fit.
11. Artisan Charm: The Soul of Handmade Zellige or Terracotta
If you crave a kitchen that feels warm, soulful, and perfectly imperfect, then handmade tiles like Zellige from Morocco or classic terracotta are for you. These aren’t machine-made, identical tiles. Each one is shaped and glazed by hand, so they all have slight variations in color, texture, and shape. When you put them all together on a wall, they create this stunning, shimmery, organic surface that feels like it has a story to tell.
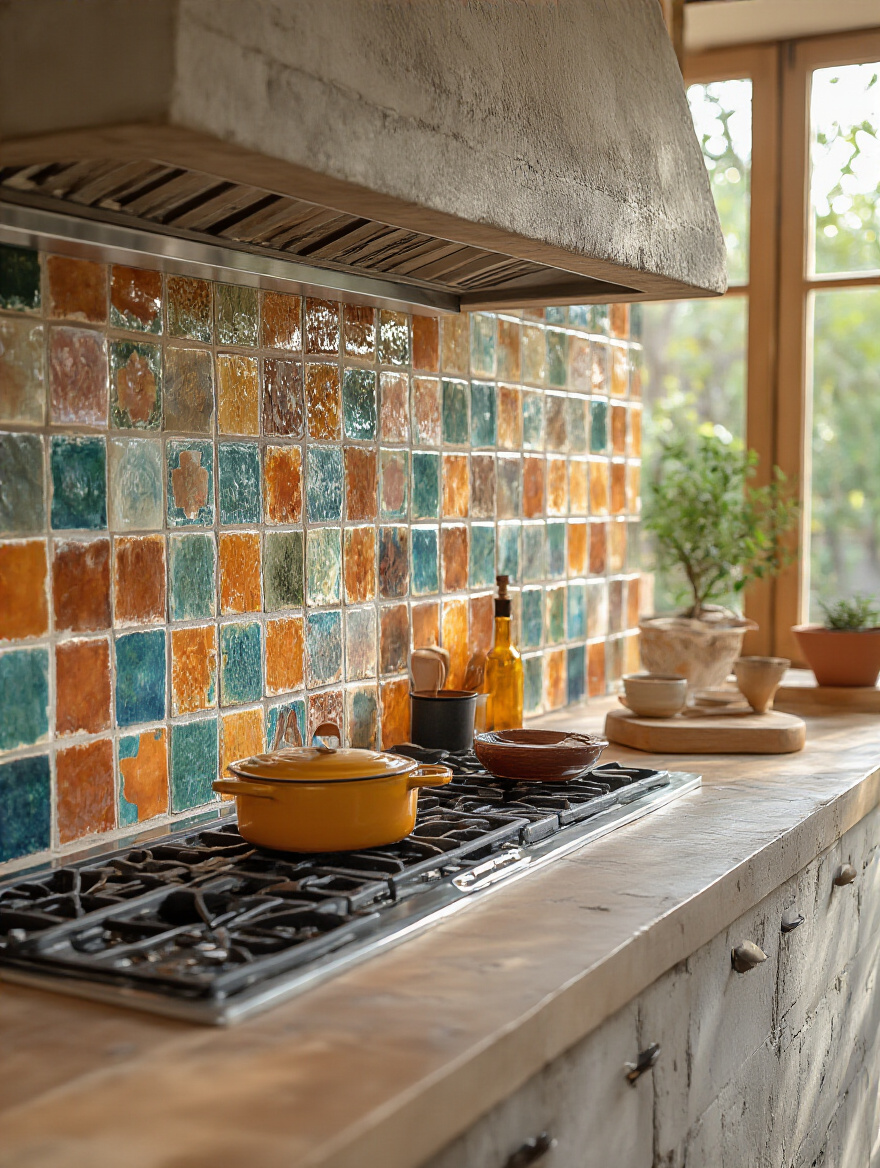
The beauty of these tiles is their imperfection, so you have to embrace it. I tell my clients to open all the boxes of tile before they start and mix them all up to ensure the variations are spread out beautifully. And a word to the wise: these tiles are porous. They absolutely must be sealed—once before you grout, and once after—to protect them from stains and water. It’s a bit of extra work, but the result is a kitchen with a level of character and warmth that mass-produced tile just can’t touch.
Elevating Design: Creative Backsplash Concepts
Okay, we’ve covered the materials. Now let’s talk about how you use them. Sometimes, the most creative backsplash isn’t about the tile itself, but about thinking outside the box with the application. Here are a few of my favorite ways to take a backsplash from good to great.
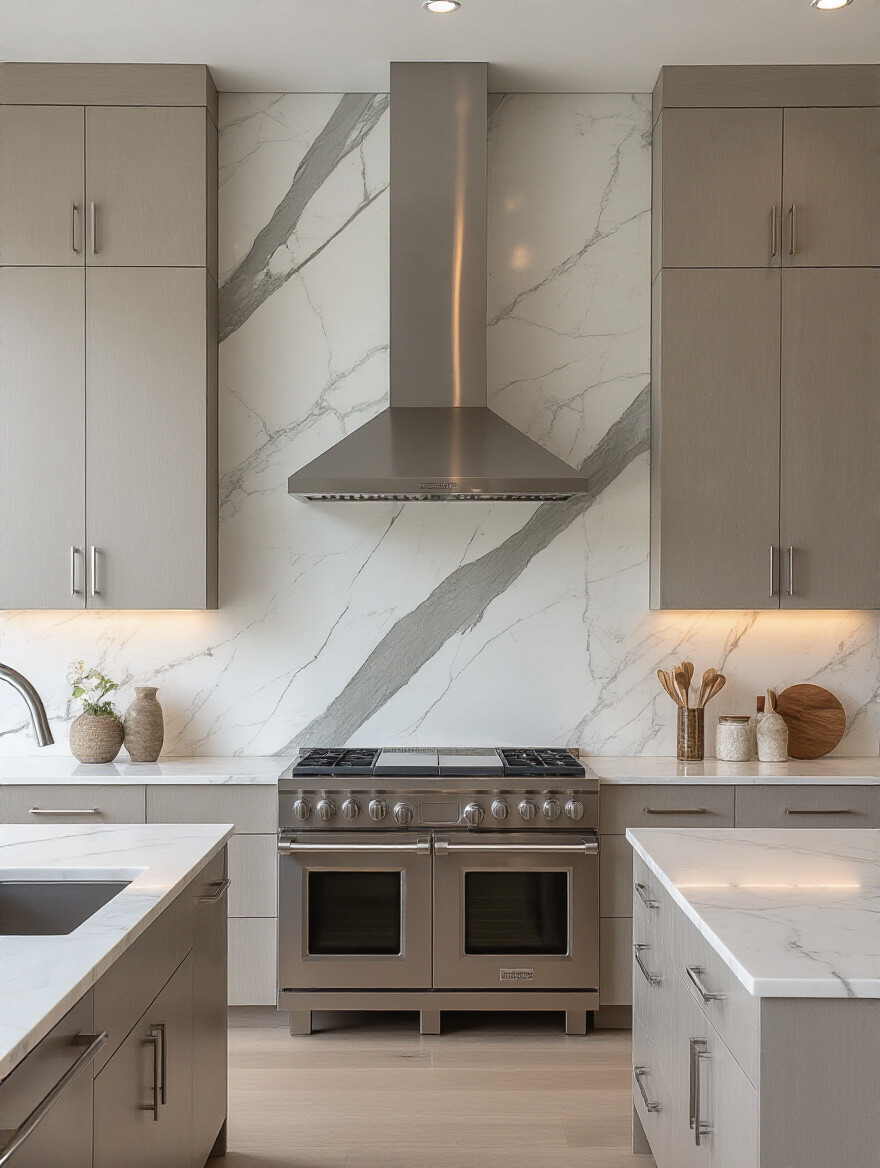
12. Ceiling-High Backsplash: For Major Drama and Height
This is one of my all-time favorite design moves for an instant “wow” factor. Instead of stopping at the cabinets, you just keep going. Take that tile all the way up to the ceiling. This works especially well on a wall with no upper cabinets, like around a window or behind a range hood. The uninterrupted vertical lines draw your eye upward, making the room feel so much taller and grander.
This trick is particularly powerful with a tile that has some pattern or texture, like a beautiful marble-look porcelain or a handmade Zellige. It turns an entire wall into a feature piece of art. It used to be a very high-end, custom look, but now that there are so many amazing large-format tiles available, it’s a totally achievable way to make your kitchen look like it was professionally designed. It feels luxurious, intentional, and incredibly chic.
And speaking of a focal point, let’s zero in on the most natural one in the room.
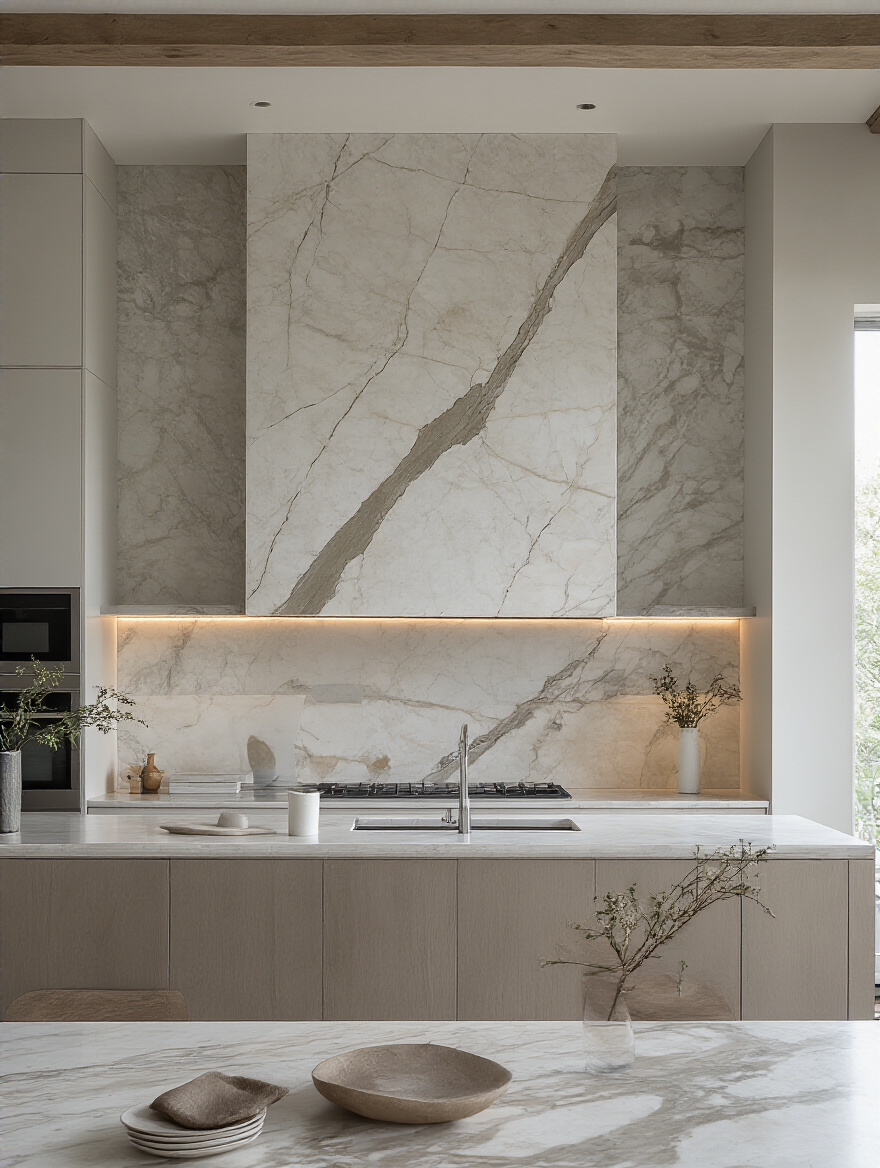
13. Range Hood Focal Point: Frame Your “Art”
Your stove and range hood area is the natural center of your kitchen. Your eyes just go there. So why not make it spectacular? Using a different, more dramatic material just in this one spot is a brilliant way to create a powerful focal point without having to splurge on tiling the entire kitchen in an expensive material. It’s the perfect place for that slab of marble you’ve been dreaming of or that intricate mosaic tile you fell in love with.
Think of it like hanging a big, beautiful painting right in the middle of your kitchen. It anchors the whole space. You can frame the area with a simple tile border or let a gorgeous slab of stone stand on its own. It’s a fantastic way to add a concentrated dose of luxury and personality exactly where it will have the most impact. This is the spot to be a little extra.
If one showstopping material is good, sometimes two can be even better.
14. Mix and Match Materials: Create a Layered, Custom Look
Who says you have to pick just one? Mixing two different backsplash materials is a surefire way to create a kitchen that feels completely custom and unique. This is where your inner art teacher can really come out to play! You can combine different textures, colors, and sheens to create a look that’s full of depth and interest. Imagine a smooth, polished slab behind the stove flanked by a more textured, matte tile on the sides.
The key to making this work without it looking chaotic is to follow the 80/20 rule. Let one material be the main star (about 80% of the area) and use the second material as an accent (the other 20%). I love seeing classic subway tile paired with a small section of patterned cement tile, or sleek modern tile warmed up with panels of rustic wood. It’s an opportunity to be really creative and design something that is 100% you.
Another great way to break up a large wall of tile is to add some functional beauty.
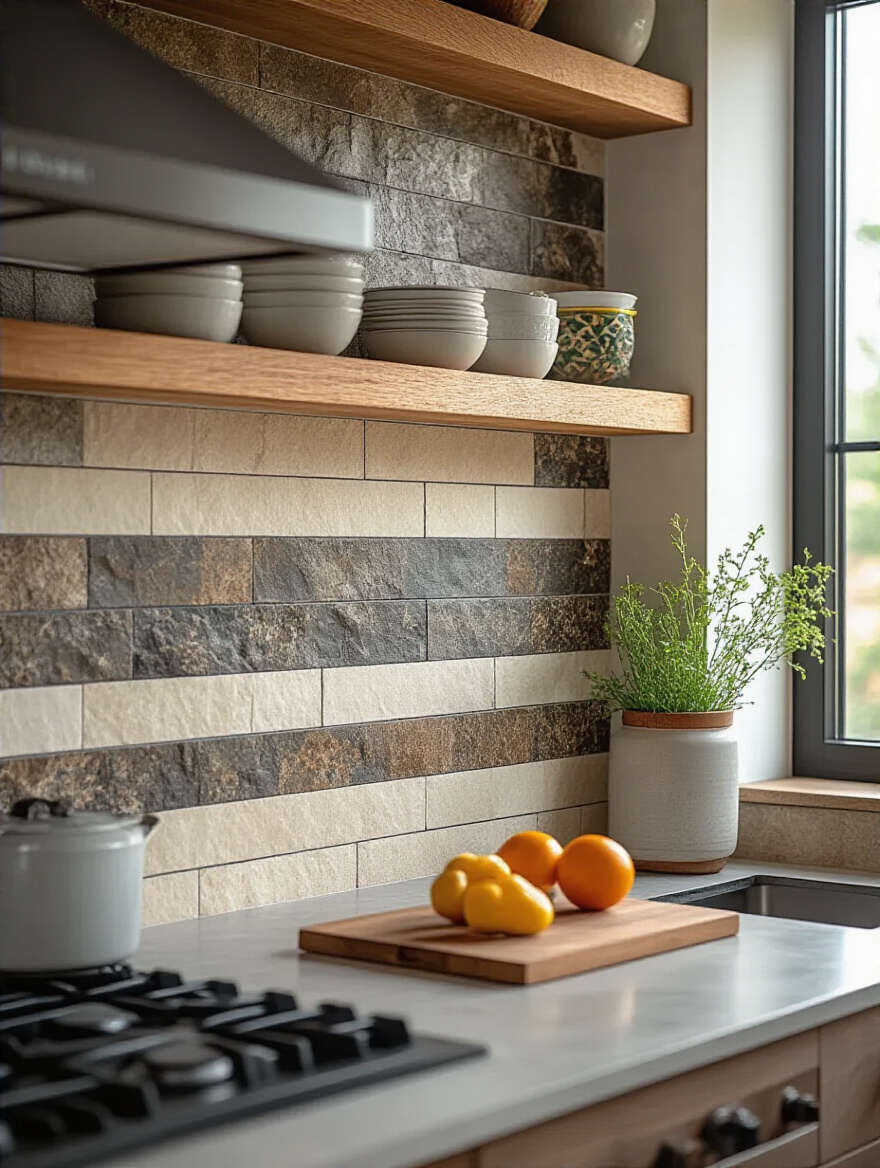
15. Incorporate Open Shelving: Break It Up and Show It Off
Sometimes a solid wall of tile, especially from counter to ceiling, can feel a little… massive. A great way to break up that big surface and add some warmth and personality is by incorporating open shelving right on top of your backsplash. This is both beautiful and practical! You get to break up the visual monotony while also gaining a perfect spot to display your favorite coffee mugs, cookbooks, or a few pretty plants.
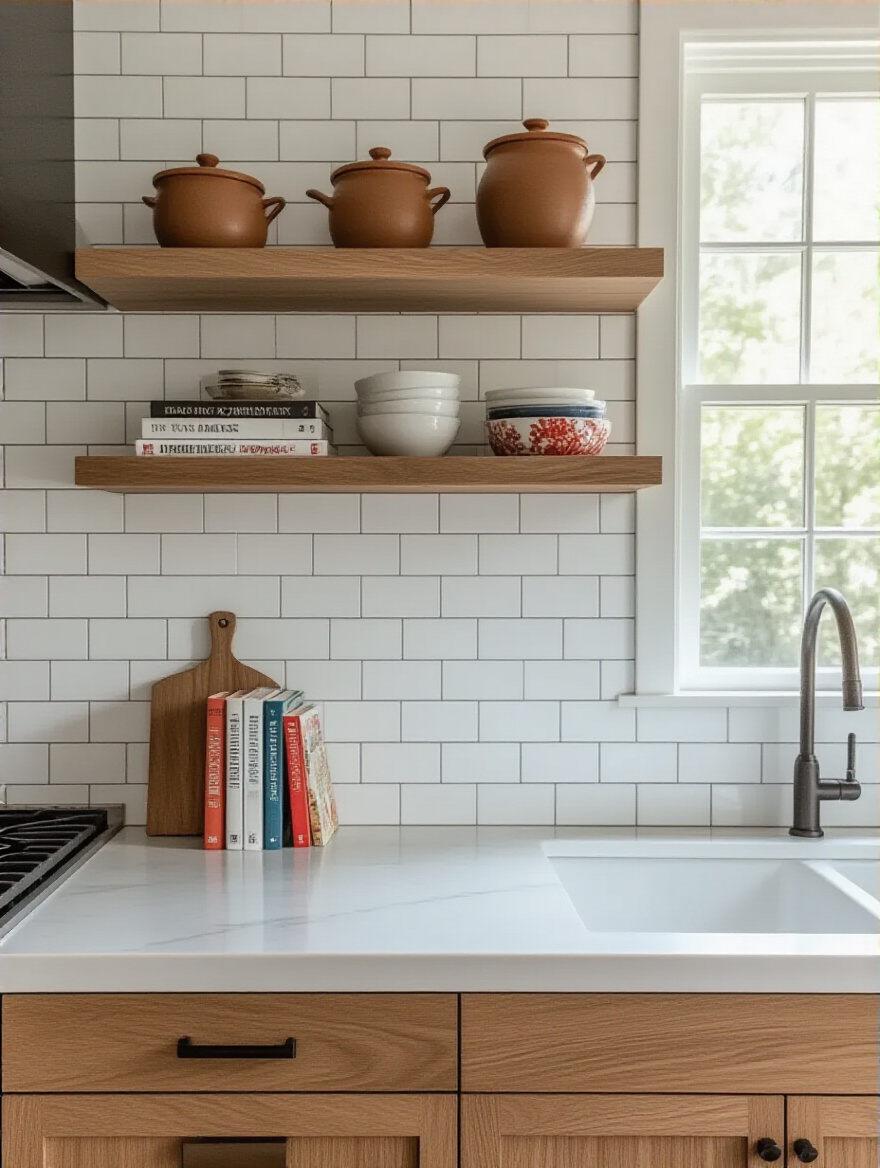
I love using warm wood shelves against a cool tile like marble or a crisp white ceramic. The contrast is beautiful. The shelves add a layer of texture and dimension, making the whole wall feel more curated and less clinical. It makes the kitchen feel more lived-in and inviting. Plus, it’s a great way to keep your most-used items close at hand. It’s that perfect blend of form and function.
Practicalities & Future-Proofing: Finishing Touches
We’re almost there! You’ve picked your tile and have a creative plan. Now, let’s talk about the finishing touches that will protect your investment and make sure it looks amazing for years to come. These are the little details that make a huge difference.
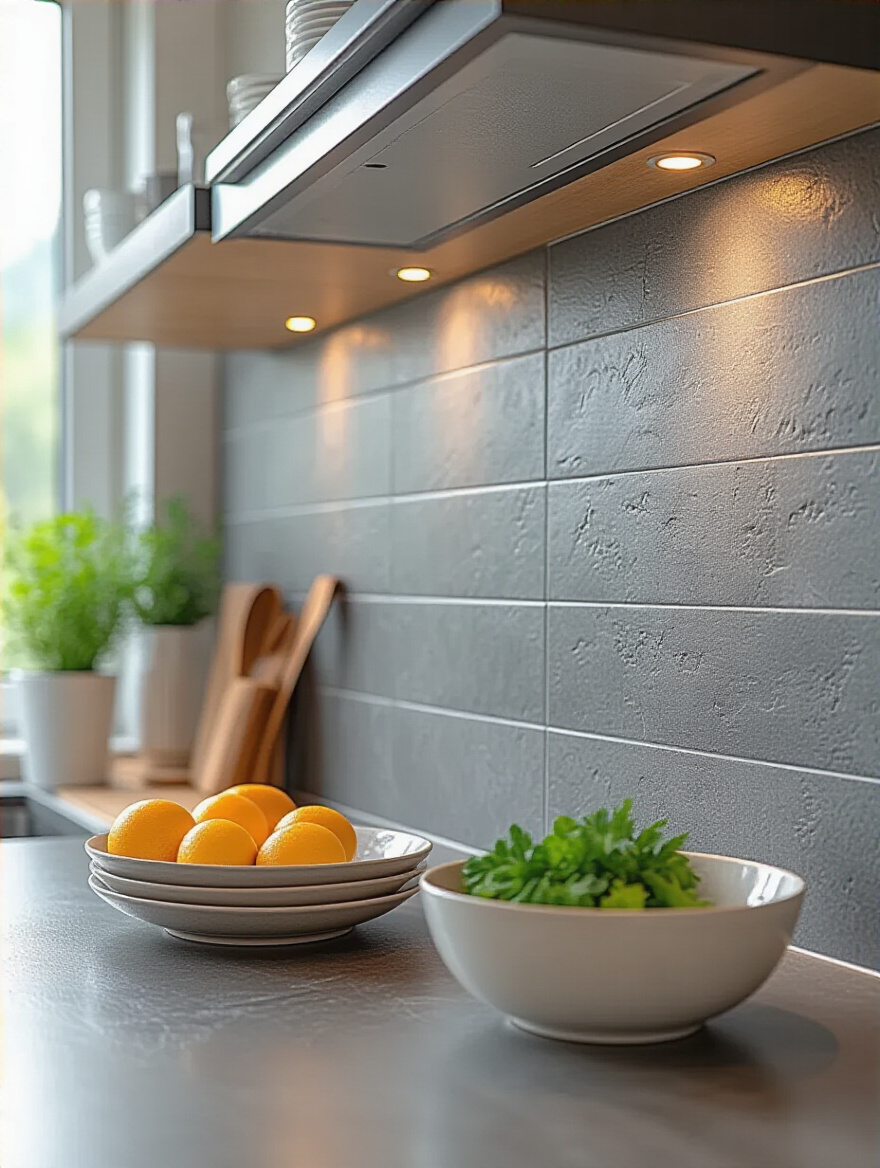
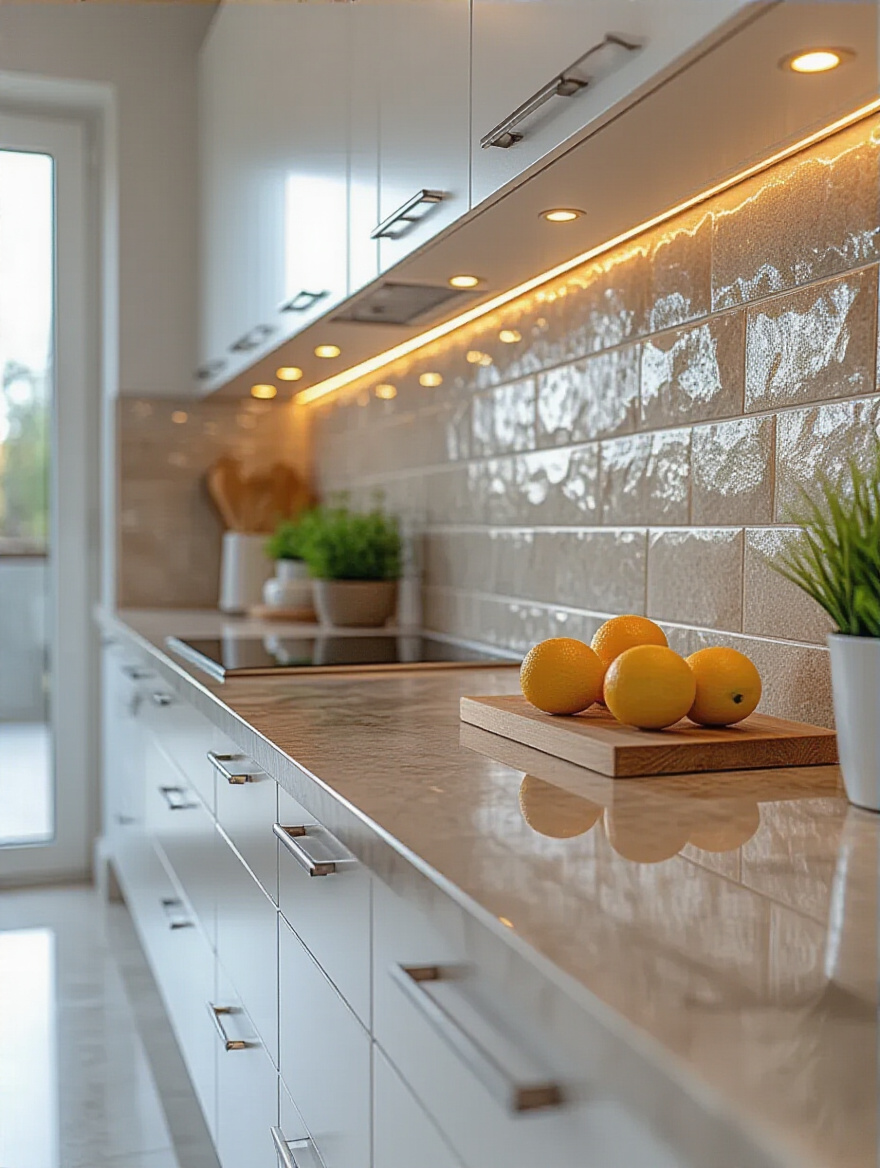
16. Enhance Glow: Why Lighting is Your Backsplash’s Best Friend
You can install the most beautiful, expensive backsplash in the world, but if you have bad lighting, nobody will be able to appreciate it. Under-cabinet lighting is not a luxury; it is an absolute essential. It illuminates your workspace, eliminating shadows from your upper cabinets, but more importantly, it makes your backsplash glow. It’s what we call “grazing light,” and it highlights all the beautiful texture and detail of your tile.
LED strips are easy to install and give a beautiful, even wash of light. Just make sure you get a warm white (around 2700K-3000K) for a cozy, inviting feel, unless you have a very stark, modern kitchen, in which case a cooler white might work. And put it on a dimmer! That way you can have bright light when you’re chopping veggies and a soft, ambient glow when you’re just relaxing with a glass of wine in the evening. It completely changes the mood of the room.
Great lighting can make any material look more expensive, which is especially true for our next tip.
17. Budget DIY: The Magic of Modern Peel-and-Stick
Okay, let’s address the elephant in the room. Peel-and-stick tile used to be… well, pretty terrible. It looked cheap, felt like plastic, and would start peeling off in a month. But things have changed! The peel-and-stick options available today are a world away from what they used to be. They come in gorgeous, realistic patterns that mimic everything from subway tile to marble to intricate mosaics. For renters, or anyone on a tight budget or timeline, they are a game-changer.
The secret to success with peel-and-stick is all in the prep work. Your wall has to be spotlessly clean, smooth, and completely dry. Any grease or grime will keep the tiles from sticking properly. But if you take the time to prep the surface right, you can get a beautiful, durable backsplash in a single afternoon for under $100. I helped my niece do this in her first apartment, covering a truly hideous 1980s laminate backsplash. It took us three hours, and it completely transformed the feel of her kitchen. It’s the ultimate instant gratification project.
Whether you’re using real tile or peel-and-stick, the next secret weapon is something most people overlook.
18. Grout Color Secrets: The Unsung Hero of Tile Design
Please, I’m begging you, do not treat grout as an afterthought. Grout color is one of the most powerful design tools you have, and it can completely change the look of your tile. It’s the difference between a backsplash that looks meh and one that looks amazing. The rule is simple: if you want to highlight the pattern of your tile (like in a classic subway or hexagon layout), use a contrasting grout color. If you want to highlight the tile itself and make the grout lines disappear, use a color that matches the tile as closely as possible.
And a friendly word of advice from someone who has made this mistake: stay away from pure white grout in a kitchen. Just don’t do it. It looks beautiful for about five minutes, and then it becomes a magnet for every speck of grease and spaghetti sauce. Within a year, it will be dingy and stained. Instead, opt for a light gray, beige, or greige. It will still give you a light, clean look but will be infinitely more forgiving and easier to keep clean. Or better yet, invest in an epoxy or urethane grout—it’s pricier upfront, but it’s stain-proof and waterproof, making it worth its weight in gold in a kitchen.
Now that it’s beautiful, let’s make sure it stays that way.
19. Easy Care Guide: How to Keep Your Backsplash Looking New
You did it! Your beautiful new backsplash is installed. Now, how do you keep it looking that way? It’s simple, really. The number one rule is to wipe up splatters as they happen. Don’t let that tomato sauce sit there overnight. A quick wipe with a soft cloth and a little mild dish soap is all you need for daily maintenance.
For a deeper weekly clean, use a pH-neutral cleaner that’s safe for your specific material (never use vinegar or harsh abrasives on natural stone!). My secret weapon is a small handheld steam cleaner. It blasts grime and gunk out of grout lines using just hot water—no chemicals needed. And finally, if you have natural stone or cement-based grout, remember to seal it! It’s like putting sunscreen on your skin. A quick sealing job every year or two will keep your backsplash protected and looking pristine for a long, long time.
It’s Your Turn to Create!
See? Not so scary after all. A new backsplash is one of the most rewarding DIY projects you can tackle. It’s a chance to roll up your sleeves, get a little creative, and make a massive impact on the look and feel of your home’s most-used room. It doesn’t have to be perfect, and it certainly doesn’t have to be expensive. It just has to be you.
So grab some samples, sketch out a few ideas, and have fun with it. Your kitchen is the heart of your home, and it deserves to be a place that makes you happy every single time you walk into it. You’ve got this!