Picture this: you’re standing in your kitchen. It’s a small space, and it feels like every design magazine’s advice is failing you. You painted it white, but it still feels cramped. You bought “clever” storage containers, but the counters are still cluttered. You’re told it’s about making it look bigger, but that’s just noise. Can we talk about why everyone gets this wrong? It’s not about visual tricks alone. It’s about physics. It’s about manipulating light, volume, and workflow with surgical precision.
I used to think this was simple, too. Then I spent years as an architectural photographer, tasked with making tiny, million-dollar Manhattan kitchens look expansive and functional on the page. I learned the hard way that you can’t fake it. A cluttered, inefficient space photographs poorly because it is a poor space. The secret isn’t in Photoshop; it’s in the fundamental design decisions that precede the camera. The real BS is the idea that a single trick will solve your problems. It won’t. What actually matters is a methodical system of choices, from the studs to the spices.
Forget the superficial tips. I’m going to give you the framework I learned from watching world-class designers solve these impossible spaces. We’re going on a guided tour, from laying the non-negotiable groundwork to implementing the sophisticated details that create an illusion of space so powerful, you can feel it.
Strategic Planning & Foundation (Part 1)
Before you buy a single organizer or pick a paint chip, we have to talk about the foundation. This is the unsexy but critical work that separates a kitchen that looks tidy from one that is genuinely efficient. Think of this as framing the shot. We’re establishing the composition, clearing the noise, and defining the primary focal points so everything else we do has maximum impact.
1. Conduct a “Declutter & Discard” Inventory for Instant Space Gains
The first step isn’t to organize; it’s to eliminate. Everyone says to declutter, but they treat it like a chore. I see it as a surgical procedure. You are carving out raw, usable volume from the clutter that’s consuming it. Take every single item out of a cabinet or drawer. Not one at a time—all of it. The visual shock of seeing that mountain of stuff on your counter forces you to be ruthless. Is that melon baller you haven’t used in three years worth 20 cubic inches of precious drawer real estate? Absolutely not.
Here’s the shortcut: The “one-year rule” is your scalpel. If you haven’t touched it in a year, it’s gone. No exceptions for “maybe someday.” For duplicates—how many spatulas do you actually need?—keep the best one and donate the rest. I once watched a client liberate an entire base cabinet by just getting rid of novelty mugs and a bread maker they used twice. The goal isn’t just tidiness; it’s a quantifiable gain in usable space that you can then design with purpose.
This brutal audit is the bedrock. Without it, every other idea on this list is just putting a bandage on a broken bone.
2. Master the “Triangle Rule” with Compact Appliance Placement
You know what people always ask me? “How can my kitchen feel more efficient?” The answer has been around for nearly a century: the work triangle. It’s the ergonomic pathway between your three most critical zones—the sink (cleaning), the stove (cooking), and the refrigerator (storage). In a small kitchen, this isn’t a vague guideline; it’s the law. A broken triangle means wasted steps, constant backtracking, and a workflow that feels like walking through mud. The distance between each point should be between 4 and 9 feet.

Now, here’s what the textbooks don’t tell you about small spaces: compact appliances are your key to making this work. Don’t just place them—integrate them. Think about a 24-inch counter-depth fridge instead of a bulky standard one that juts out and breaks the visual line of your cabinetry. Consider an 18-inch dishwasher or a slimmer 24-inch range. The goal is to create a tight, functional triangle that leaves you with uninterrupted counter space, the most valuable currency in a small kitchen. Use painter’s tape on the floor to map out appliance locations and door swings before you buy. This simple step can save you thousands in mistakes.
Once your core workflow is set, you can build everything else around it with confidence.
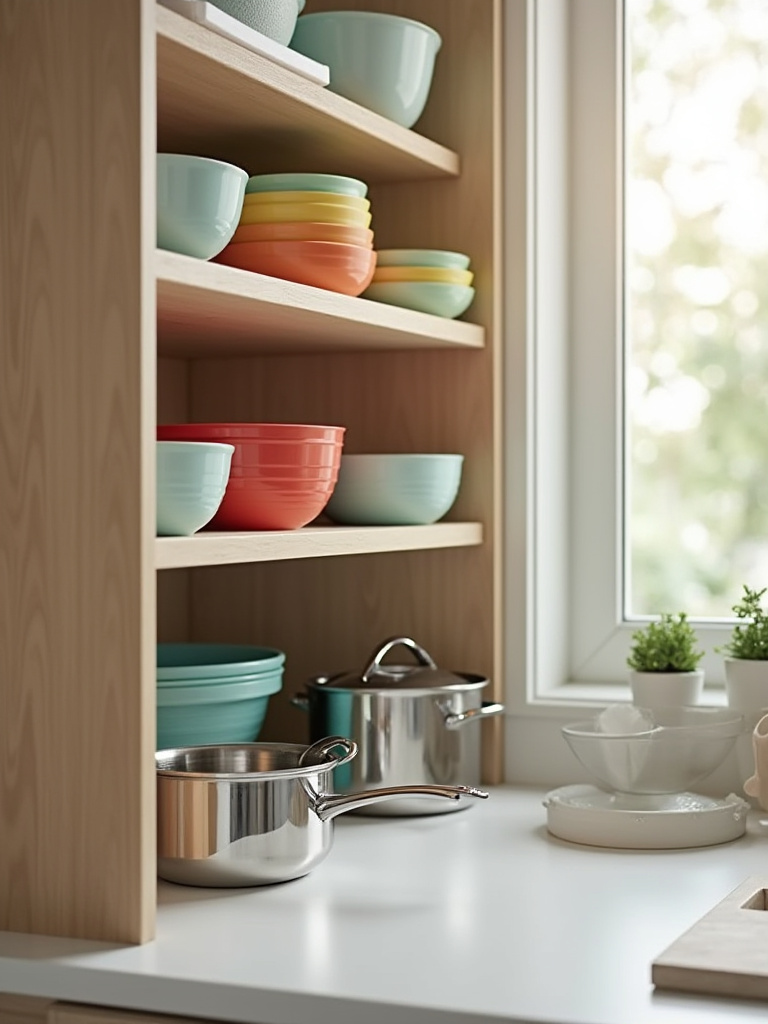
3. Embrace Vertical Storage with Floor-to-Ceiling Shelving
Look up. That space between the top of your cabinets and the ceiling? It’s wasted potential. Most people ignore it, but I see it as prime real estate. Taking your cabinets or shelving all the way to the ceiling is the single most dramatic way to increase storage volume and visually elongate the room. It draws the eye upward, creating an illusion of height and grandeur, much like a vertical photograph of a skyscraper makes it seem even taller.
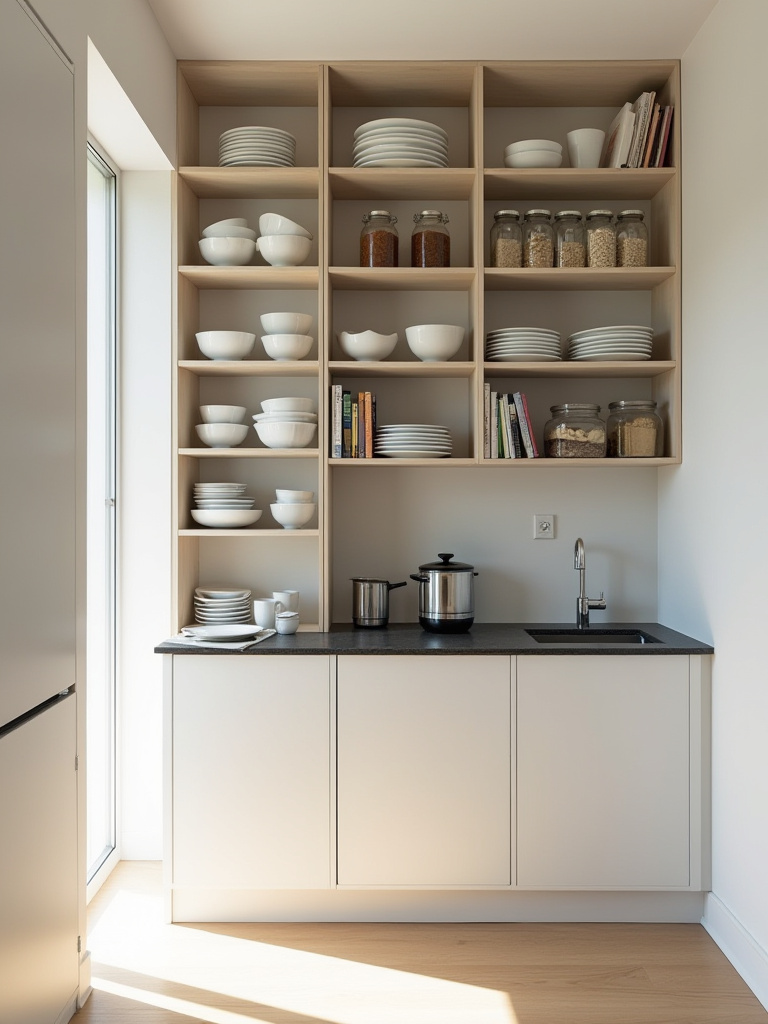
Don’t just stick any old cabinet up there. This has to be intentional. For items you use infrequently—holiday platters, seasonal appliances—a closed cabinet up high is perfect. For a more open, airy look, run floating shelves all the way up. It forces you to curate your collection of dishes and glassware, turning everyday objects into a design element. Just be honest with yourself: if you’re not obsessively tidy, closed doors are your friend. And buy a slim, elegant step stool; it’s a non-negotiable tool, not clutter.
By capturing that vertical space, you free up the lower, more accessible areas for the daily essentials, keeping your counters blissfully clear.
4. Utilize Undersink and Cabinet Door Organizers Effectively
Can we talk about the black hole under the sink? It’s usually a chaotic jumble of pipes, cleaning bottles, and a garbage disposal. Everyone gets this space wrong. They either ignore it or throw in a flimsy plastic bin. The solution is to think in three dimensions. The pipes are an obstacle, yes, but you can build around them. Specialized pull-out organizers are designed with cutouts to accommodate plumbing, transforming that dead space into a two-tiered, highly functional caddy.
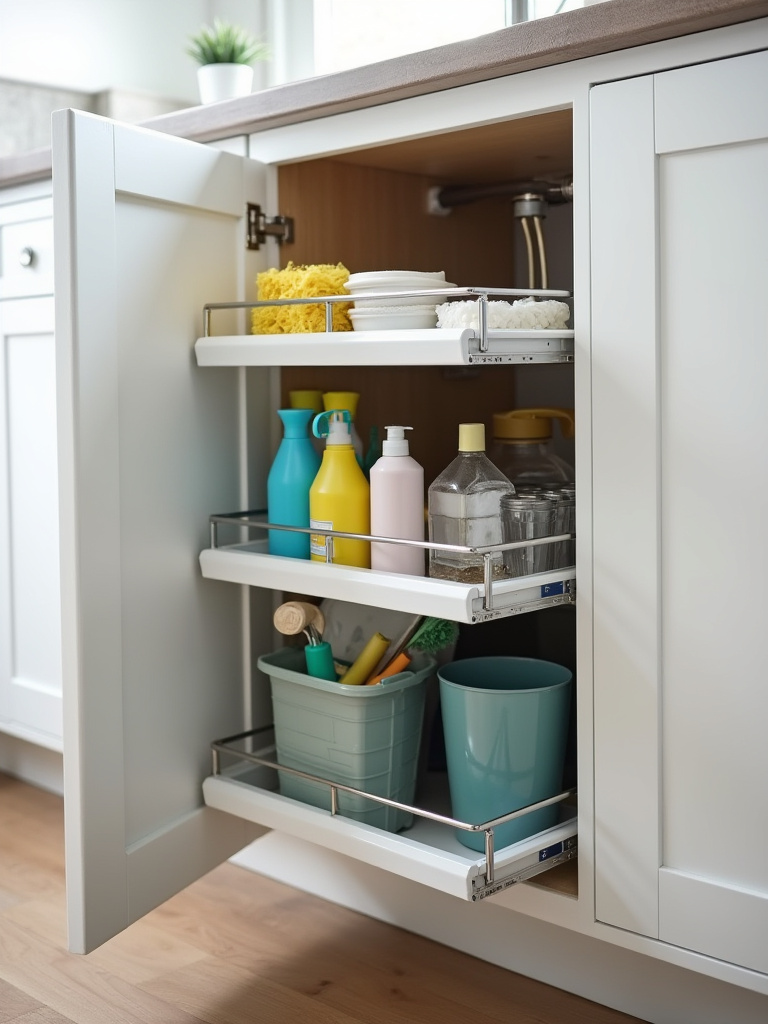
And don’t forget the inside of your cabinet doors. They are the most underutilized surfaces in the entire kitchen. A simple over-the-door rack can hold your cutting boards, foil, and cleaning supplies. I once worked on a project where the designer installed a magnetic panel on the inside of a door for spices. It was brilliant—it cleared an entire drawer and made every spice instantly visible. This isn’t just about adding storage; it’s about making things more accessible, which in turn makes the kitchen more efficient.
This level of detailed optimization is what separates a truly well-designed small kitchen from one that just looks okay on the surface.
Strategic Planning & Foundation (Part 2)
We’ve established the structural logic—the bones of your kitchen. Now we apply the skin. This phase is about using color as a strategic tool, not just a decorative choice. Light and color are inextricably linked, and mastering them is how you can manipulate perception to make your space feel boundless.
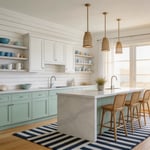
5. Choose a Monochromatic or Light Color Palette for Walls and Cabinets
Painting a small room a light color isn’t a groundbreaking idea. The BS part is that people think “white” is the only answer, and they stop there. The real technique is about creating a seamless visual envelope. By painting the walls, trim, and cabinetry in the same light color—or very similar shades—you erase the hard lines and corners that define the room’s boundaries. The eye glides over the surfaces without interruption, tricking the brain into perceiving a larger, more continuous space.
Think of it from a photographer’s perspective. Shadows define form and create separation. By drenching a space in light colors, you’re bouncing light into every corner, effectively erasing the shadows that make a room feel small. This is where your choice of finish matters, too. A satin or semi-gloss finish on cabinets will reflect more light than a flat matte one, subtly amplifying the effect. Introduce texture through a backsplash or countertop to keep the space from feeling sterile, but keep the core color palette unified. That’s the shortcut to a space that feels expansive, not just painted white.
With the foundation set and the palette chosen, we can now start adding the intelligent, hard-working elements that bring the space to life.
Smart Furnishings & Storage Solutions (Part 1)
Now we move from the shell of the room to the machinery within it. This is about choosing components that are smarter, more efficient, and often serve multiple purposes. Every piece of furniture and every storage unit must justify its existence and its footprint. We’re looking for clever engineering and multi-functional design.
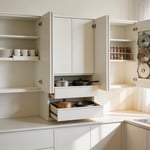
6. Integrate Pull-Out Pantries for Accessible Storage
Deep, dark base cabinets are where kitchen tools go to die. You know the drill: you have to get on your hands and knees to find that one pot lid that fell to the back. A pull-out pantry or pull-out shelves within a base cabinet solves this problem instantly. Instead of you reaching into the cabinet, the contents of the cabinet slide out to greet you. It’s a simple change in mechanics with a profound impact on usability.
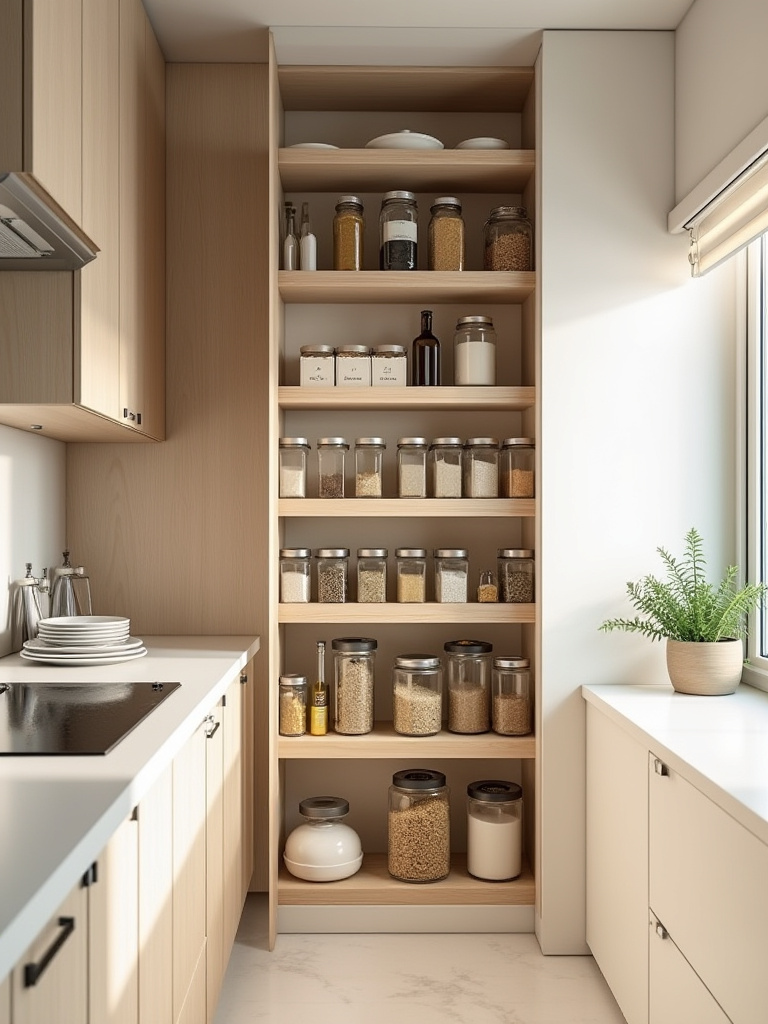
The best application of this is in those awkward, narrow spaces. That useless 6-inch gap next to your refrigerator? That’s not dead space; it’s a perfect home for a full-height pull-out pantry for spices, oils, and canned goods. By converting a standard deep cabinet into a full-extension drawer system, you can increase the usable, accessible storage by nearly 50%. You see everything at a glance, nothing gets lost, and food waste is reduced. It’s pure efficiency.
This one upgrade will fundamentally change how you interact with your kitchen storage every single day.
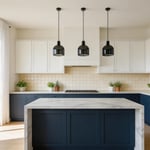
7. Opt for Slim-Profile or Counter-Depth Appliances
Here’s a hard truth: a standard-depth refrigerator is the biggest space-killer in a small kitchen. It juts out 6 to 8 inches past your counters, visually and physically chopping up the room. Opting for a counter-depth model is non-negotiable. It creates a seamless, integrated line with your cabinetry that makes the entire wall feel cleaner and more expansive. Yes, they can be a bit more expensive and may have slightly less cubic footage, but the visual and ergonomic payoff is immense.
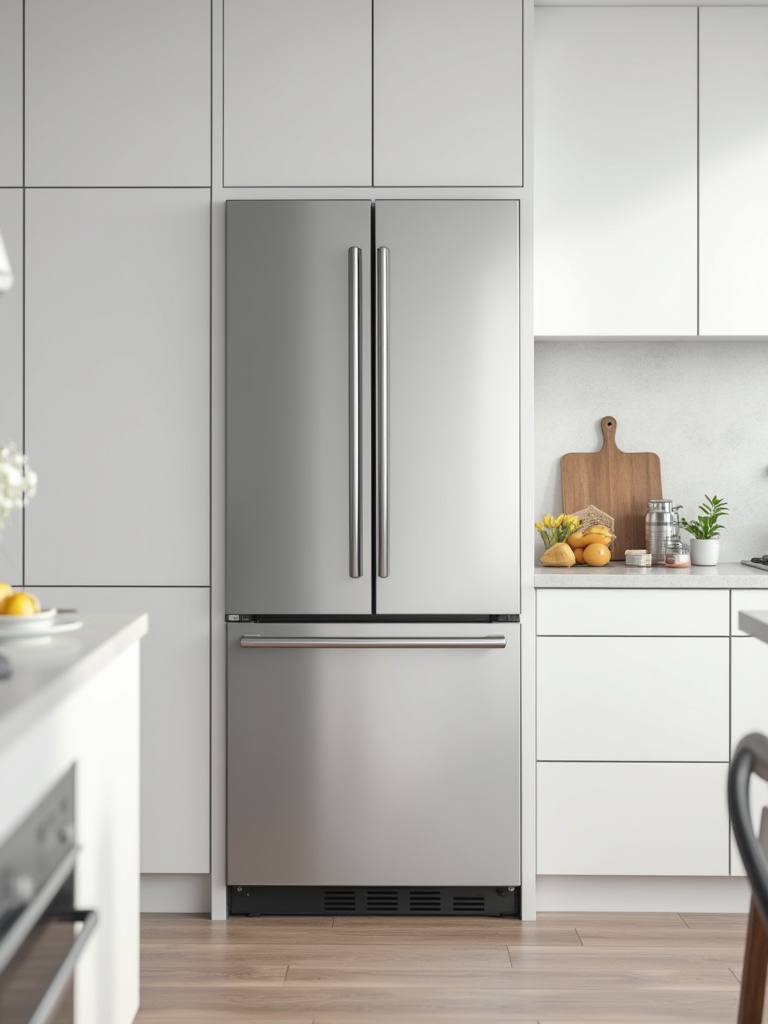
This principle extends to other appliances, too. A slimline dishwasher (18 inches instead of 24) or a 24-inch oven can free up precious inches for more cabinet space. It’s about a total system approach. Before you commit, I can’t stress this enough: get the spec sheets. Read them. Then read them again. You need to account for ventilation clearances and door swing. A beautiful counter-depth fridge is useless if you can’t open the door all the way because it hits a wall. Measure everything three times.
Getting the scale of your major appliances right is foundational. It sets the tone for the entire kitchen’s geometry.
8. Select Drop-Leaf Tables or Fold-Down Islands for Dining Flexibility
In many small kitchens, a permanent table or island is a luxury you simply can’t afford. It becomes a constant obstacle you have to navigate around. The solution is furniture that appears when you need it and vanishes when you don’t. A wall-mounted drop-leaf table can serve as a prep space during cooking and then fold down to create a dining spot for two. When it’s not in use, it folds flat against the wall, reclaiming that floor space for better traffic flow.
This isn’t about compromise; it’s about adaptability. I once photographed a brilliant little studio where the designer had built a small kitchen island on heavy-duty casters. It served as a prep station, but when guests were over, it could be rolled into the living area as a bar cart or serving station. This kind of flexibility is paramount. The key is to invest in quality hardware. A flimsy fold-down mechanism will just become a source of frustration. Look for pieces with sturdy, reliable hinges and a solid locking mechanism.
This approach allows your kitchen to have multiple identities: a functional workspace, a cozy dining nook, and an open, uncluttered room.
9. Incorporate a Pegboard System for Customizable Wall Storage
I have a confession: I’m obsessed with pegboards in kitchens. Forget the dusty garage workshop image. A modern pegboard—whether it’s wood, metal, or a bold color—is a hyper-functional, endlessly customizable piece of wall art. It transforms a blank wall into a vertical toolkit. You can hang pots, pans, utensils, baskets for fresh herbs, and small shelves for spices. Everything is visible, within reach, and off your countertops.
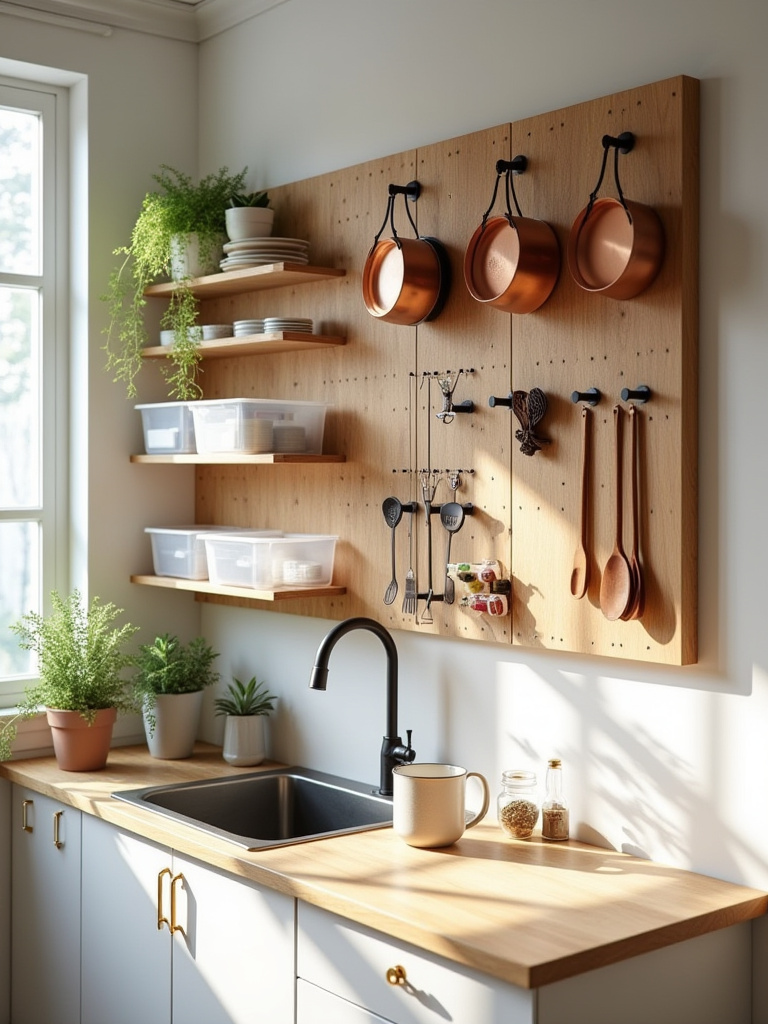
The genius of a pegboard lies in its adaptability. Your needs change? Reconfigure the hooks. Get a new set of pans? Adjust the layout. It’s a living storage system that evolves with you, unlike fixed shelves or cabinets. I photographed a chef’s tiny apartment kitchen where a massive pegboard behind the stove held his entire collection of copper pans. It wasn’t just storage; it was a stunning focal point that told a story about who lived there. The shortcut here is to install it correctly: use spacers to create a gap between the board and the wall so the hooks can engage properly, and anchor it directly into studs.
This single element provides more flexible, accessible storage per square inch than almost any other solution.
Smart Furnishings & Storage Solutions (Part 2)
We’ve tackled the big pieces and the wall space. Now, we zoom in on the details inside the cabinets. This is about wringing every last drop of functionality from the most awkward and overlooked corners of your kitchen, transforming them from frustrating dead zones into storage powerhouses.
10. Maximize Corner Cabinets with Lazy Susans or Blind Corner Organizers
Corner cabinets are the Bermuda Triangle of the kitchen. They are deep, dark, and notoriously difficult to access. Without a proper system, this massive amount of space goes completely to waste. The classic solution is a Lazy Susan, which works well for spices or canned goods. But for pots and pans, the real game-changer is a blind corner organizer. These are marvels of engineering.
These systems consist of shelves that pivot and slide out in sequence, bringing the entire contents of that deep, dark corner right out into the open for you. It feels like magic, but it’s just brilliant design. Installing one retroactively can be a bit of a project, but the payoff in reclaiming that dead space is monumental. You’re essentially adding an entire cabinet’s worth of usable storage to your kitchen. Before you buy, measure the cabinet opening and interior dimensions with meticulous precision. These systems have tight tolerances.
Don’t let your corners defeat you. They hold some of the greatest storage potential in your entire kitchen if you have the right hardware.
11. Deploy Nested Mixing Bowls and Stackable Cookware
This one seems obvious, but the execution is what matters. Everyone says to buy nesting bowls, but they fail to mention the real criteria. A good nesting set shouldn’t just fit inside one another; they should form a compact, stable, and easily stored single unit. The same goes for stackable cookware. Look for sets specifically designed with low-profile handles and interlocking bases that allow them to stack vertically without wobbling or scratching.
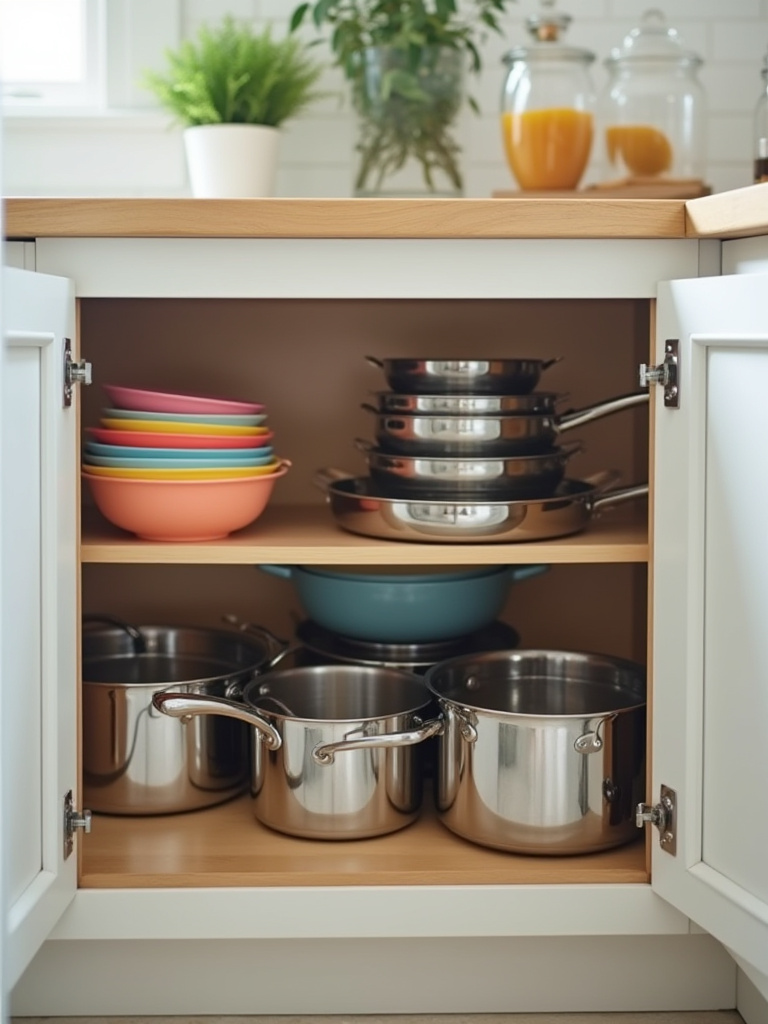
I learned this the hard way after buying a “stackable” set that turned into a precarious Jenga tower in my cabinet. The best systems, like those from Calphalon or Joseph Joseph, are engineered for this. You’re not just buying pots and bowls; you’re buying a storage system. One well-designed set of stackable pots and pans can take up the same footprint as a single large stockpot, effectively freeing up 60-70% of that shelf space. Combine this with pan protectors to keep the non-stick surfaces pristine, and you have a solution that is both space-efficient and built to last.
This isn’t about having less; it’s about having smarter items that demand less of your valuable space.
Visual Expansion & Functional Enhancements (Part 1)
Now we get into my favorite part: the light and the lines. This is where my background as a photographer really comes into play. We’re moving beyond physical storage and into the realm of perceptual psychology. These techniques are about manipulating the eye to create a sense of depth, height, and openness that defies the room’s actual dimensions.
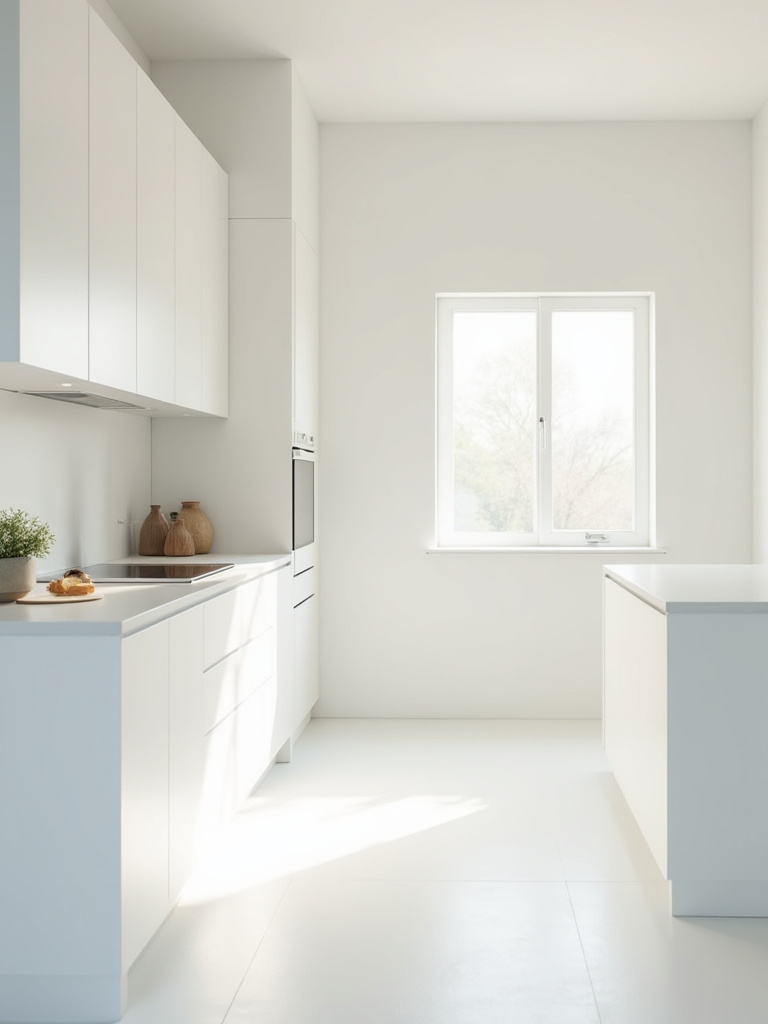
12. Install Brighter Lighting to Visually Expand the Room
A single, sad ceiling fixture is a crime in a small kitchen. It casts harsh shadows, makes corners recede into darkness, and flattens the entire space. The solution is a layered lighting scheme. You need three types of light: ambient (overall illumination), task (focused light for work areas), and accent (to highlight features). For a small kitchen, the most critical is task lighting, but you need all three to create a sense of depth.
Start with bright, even ambient light from recessed cans or a slim-profile flush mount. Then, and this is non-negotiable, install undercabinet lighting. LED strips are perfect for this. They wash your countertops and backsplash in light, eliminating the dark caverns under your upper cabinets. This simple addition immediately makes the kitchen feel wider and more open. Finally, use a pendant or a small track light as an accent over the sink or a small peninsula. Use dimmer switches on everything. This gives you the flexibility to go from bright, functional light for cooking to a soft, ambient glow for relaxing. Light is the cheapest and most effective way to remodel a room.
Fix your lighting first. Every other design choice you make will look a hundred times better.
13. Consider Open Shelving to Create a Sense of Airiness
Traditional upper cabinets are big, heavy boxes that visually crowd a room. Replacing a bank of them with open shelving is like taking a deep breath. It instantly reduces visual weight and creates a sense of airiness and depth. The wall behind the shelves becomes visible, making the room feel larger. It’s a classic move for a reason.
But—and this is a big but—you must be ruthlessly curated. Open shelves are not for your mismatched Tupperware or that chipped mug collection. They are for your most beautiful, uniform dishes and glassware. Think of them as a gallery wall for your everyday objects. If you’re not disciplined, open shelving will backfire and become a monument to your own clutter. A good compromise is to replace just one or two cabinet doors with glass fronts, giving you a similar effect with a bit more protection from dust.
When done right, open shelving turns storage into a design statement that visually expands your space.
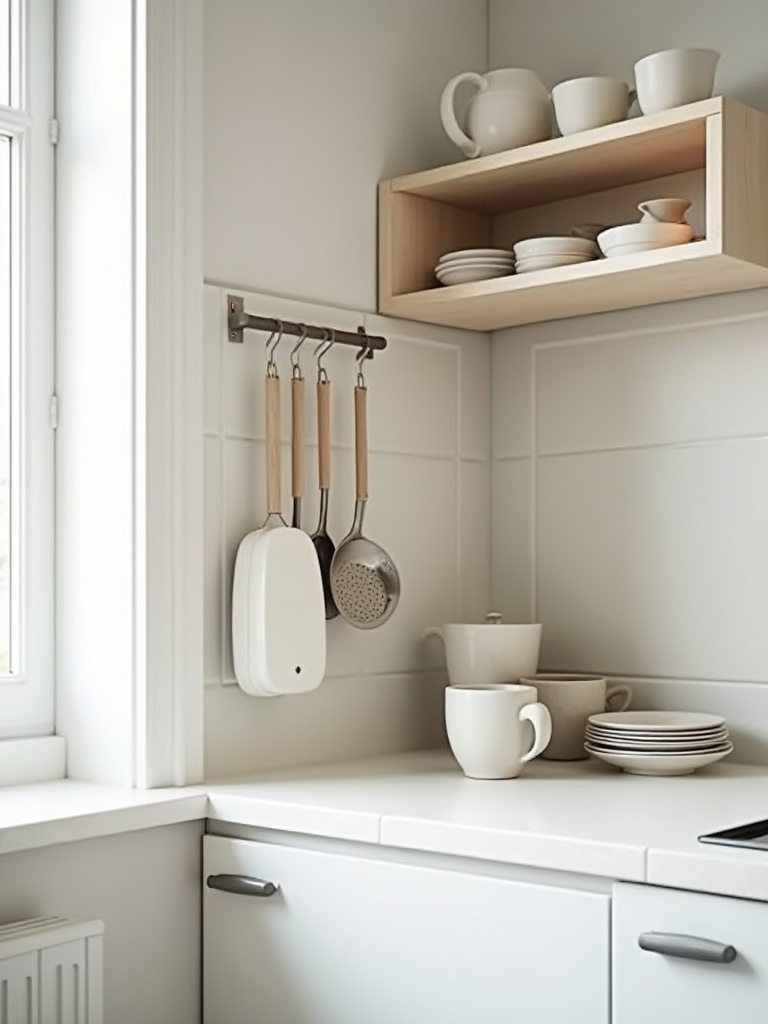
14. Utilize Wall Space with Magnetic Knife Strips and Spice Racks
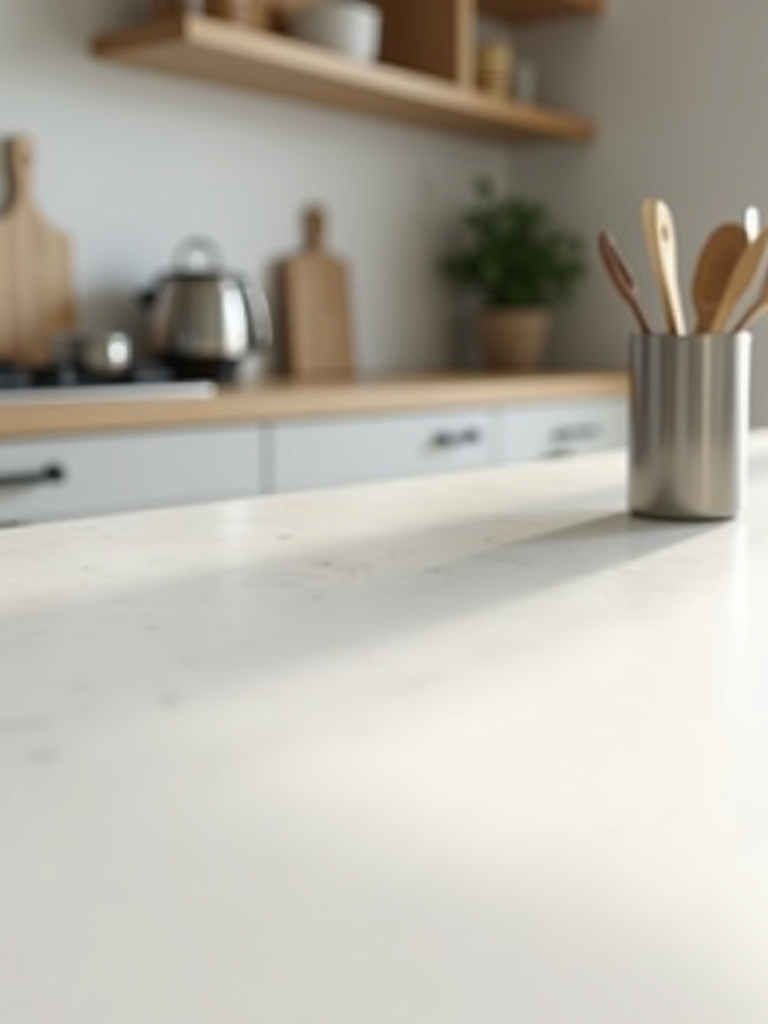
Counter space is gold. Don’t waste it on a clunky knife block. A wall-mounted magnetic knife strip is the superior solution in every way. It gets the knives off the counter, keeps the blades from dulling by knocking against each other in a drawer, and makes it incredibly easy to grab the exact knife you need. It’s what professional chefs use for a reason: it’s efficient, sanitary, and space-saving.
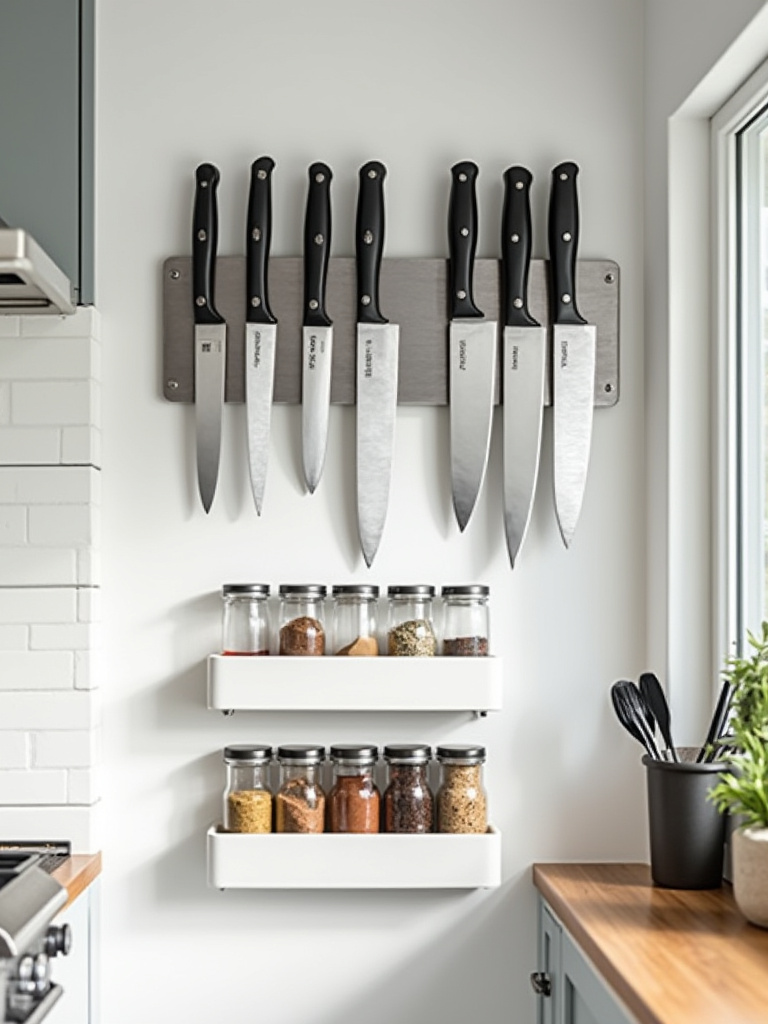
The same logic applies to spices. A simple, wall-mounted rack or a set of magnetic tins stuck to your fridge or a metal panel gets all those little jars out of your cabinet or drawer. Not only does this free up space, but it also allows you to see your entire collection at a glance. I’ve seen this done beautifully where an entire wall section was dedicated to neatly organized spices, becoming a colorful, functional art piece. The key is to mount these securely into studs or with heavy-duty drywall anchors.
These small, tactical additions can reclaim several square feet of your most valuable kitchen real estate—your countertops.
15. Employ Sliding Doors or Pocket Doors Instead of Swing Doors
A standard swing door is a space thief. The arc of its swing consumes around 9 square feet of floor space that you can’t use for anything else. In a tiny kitchen, that’s a massive sacrifice. Replacing a swing door with a pocket door (which disappears into the wall) or a sliding barn door (which runs along the outside of the wall) is a game-changer.
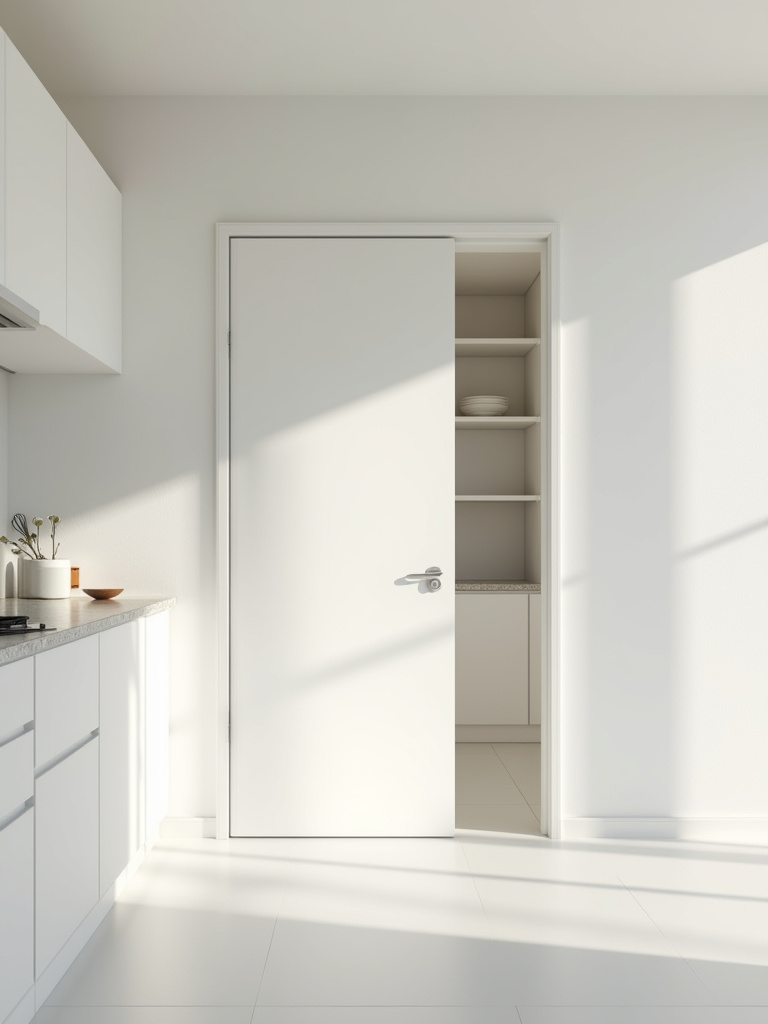
This instantly reclaims that dead floor space, allowing for more flexible layouts. Suddenly, you might have room for a slim utility cart or a small bench where the door used to swing open. Pocket doors require a bit more construction as the wall cavity needs to be framed to accept the door, so they’re best planned for during a renovation. Barn doors are an easier retrofit. Both options create a much cleaner, more open transition between rooms, which is especially important in small homes where the kitchen might open directly into a living area.
Eliminating the door swing is one of those invisible design moves that has a huge impact on the daily usability of the space.
Visual Expansion & Functional Enhancements (Part 2)
We’ve mastered light and opened up the floor plan. Now, let’s refine the surfaces. This part is about choosing materials that work harder for you—materials that reflect light, create depth, and add a layer of sophistication. These are the finishing touches that elevate the space from simply functional to truly well-designed.
16. Choose See-Through or Glass-Front Cabinet Doors for Visual Depth
Like open shelving, glass-front cabinets are a powerful tool for reducing the visual mass of your upper cabinetry. But they offer a key advantage: protection from dust and grease. By allowing the eye to see through the cabinet to the back wall, you create an illusion of depth that makes the entire kitchen feel larger. It’s a simple but effective perceptual trick.
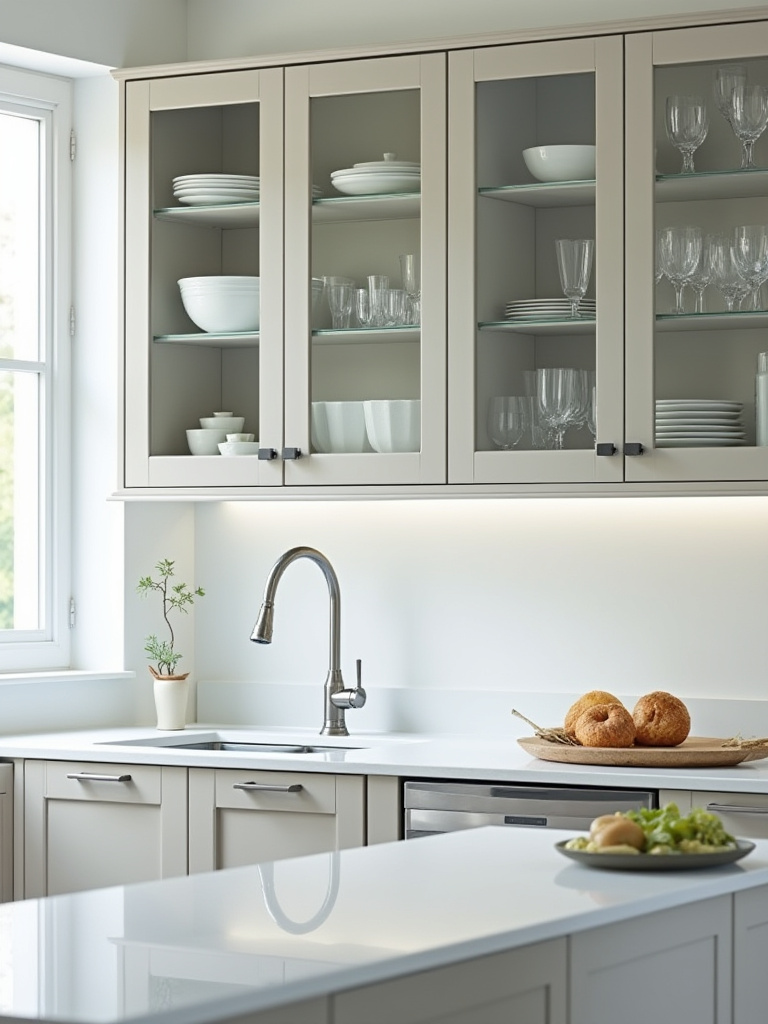
Again, this requires curation. The items inside become part of your décor, so you’ll want to store your matching dinnerware or glassware here. If the idea of perfectly organized cabinets makes you anxious, consider frosted, reeded, or seeded glass. These options still allow light to pass through and create a sense of depth, but they obscure the contents just enough to provide some visual forgiveness. I often recommend adding a small LED strip light inside the cabinet; it turns the contents into a beautiful, glowing display in the evenings and adds another layer of ambient light to the room.
This is an elegant compromise between the full exposure of open shelves and the solid visual block of traditional cabinets.
17. Reflect Light with Mirrors or Glossy Backsplashes
This is my favorite trick from the photographer’s playbook. Light is your best friend in a small space, and reflective surfaces are your amplifiers. A mirrored or high-gloss backsplash will capture and bounce light all around the room, making it feel brighter, larger, and more alive. It can visually double the space. You don’t have to go full 80s mirrored wall; it can be subtle.
Consider a backsplash made of glossy subway tiles, back-painted glass, or polished metal. These surfaces do the heavy lifting of light reflection. If you have a wall that doesn’t get much direct light, a strategically placed antique mirror panel can work wonders. It will reflect the light and views from the other side of the room, adding depth and visual interest. A word of caution: mirrors reflect everything, including clutter. So, place them where they’ll reflect a window or a clean, open space, not your sink full of dirty dishes.
This technique is the closest thing to architectural magic you can perform in a small kitchen.
Optimized Living & Lasting Efficiency
You can have the most beautifully designed kitchen in the world, but if you don’t maintain it, it will quickly descend into chaos. This final section is about building the systems and habits that ensure your small kitchen remains a highly efficient, enjoyable space for the long haul. This is about making the design last.
18. Add Undercabinet Lighting for Task Illumination and Ambiance
I know I mentioned this under general lighting, but undercabinet lighting deserves its own focus because it’s a two-for-one powerhouse. Functionally, it provides the best possible task lighting for your countertops, illuminating your work surface without casting shadows from your body like an overhead light would. This makes prep work safer, easier, and more enjoyable. It is, without question, the most critical layer of light in any kitchen.
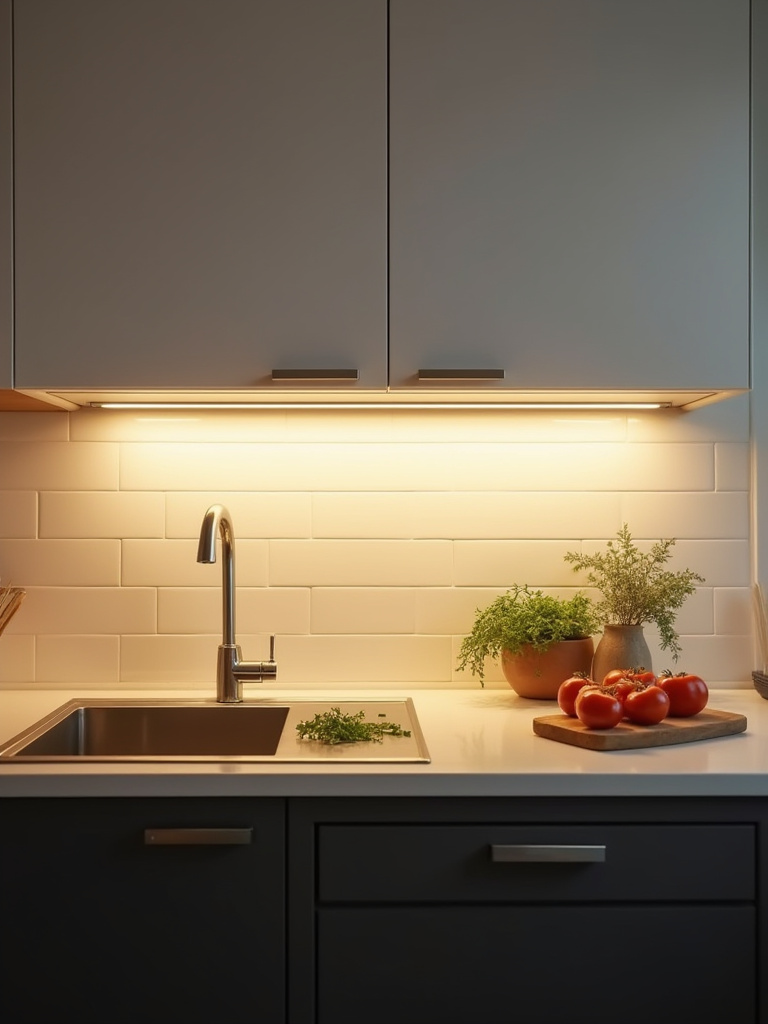
Aesthetically, it creates a gorgeous ambient glow. When you’re not cooking, you can turn off the bright overheads and just leave the undercabinet lights on. They highlight your backsplash, create a sense of depth, and give the kitchen a sophisticated, high-end feel. It’s a simple, relatively inexpensive addition that delivers an enormous return in both functionality and atmosphere. If you do only one electrical upgrade to your kitchen, make it this one.
This single feature elevates a kitchen from a basic utility space to a thoughtfully designed environment.
19. Implement a Rotating Inventory System for Pantry Items
A small pantry requires military discipline. The “First-In, First-Out” (FIFO) system is your new drill sergeant. It’s a simple concept: when you buy new groceries, you place them at the back of the shelf, moving the older items to the front. This ensures that you’re always using up the older items first, which drastically reduces food waste and prevents you from finding a can of beans from 2012 in the back corner.
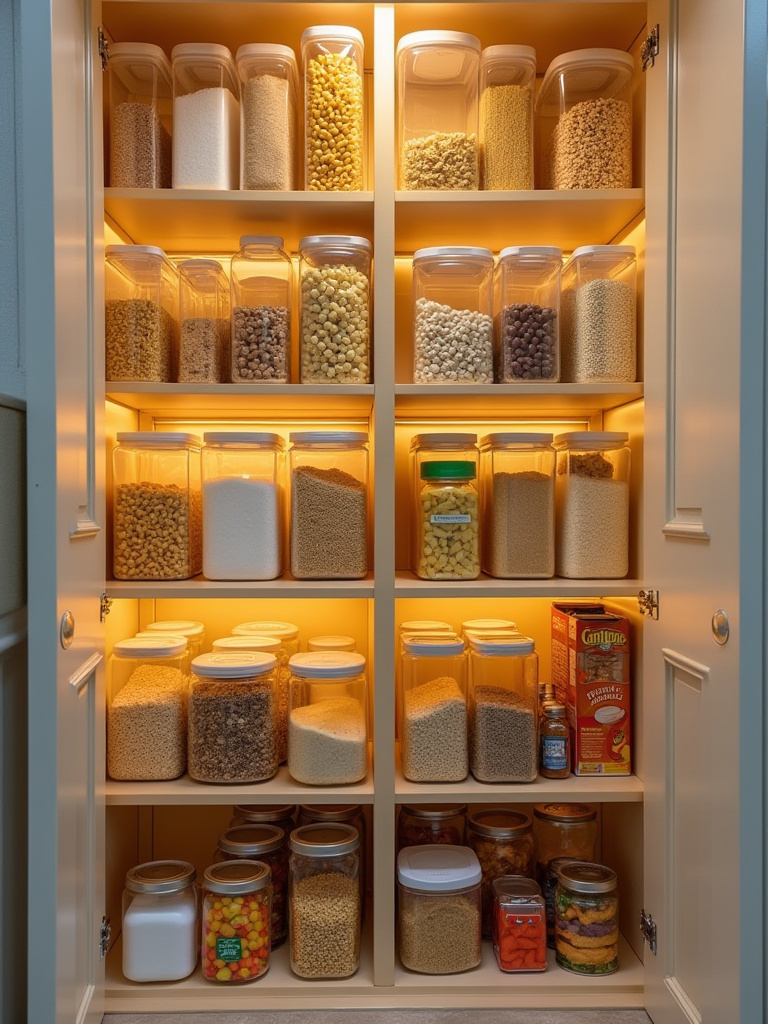
To make this work, you need clear containers for dry goods so you can see inventory levels at a glance. Label everything with the purchase or expiration date. I also recommend a “Use First” bin in your fridge or pantry. This is for produce that’s about to turn or items nearing their expiration date. It’s a visual cue that forces you to plan meals around what needs to be used, saving you money and preventing waste. This system isn’t just about tidiness; it’s an economic and logistical strategy for your home.
An organized pantry is the engine of an efficient kitchen. Mastering it will save you time, money, and stress.
20. Invest in Smart Small Appliances for Efficiency
In a small kitchen, an appliance that only does one thing is a waste of space. The key is to invest in multi-functional workhorses. An Instant Pot can be a pressure cooker, slow cooker, rice cooker, and yogurt maker all in one. A high-quality convection toaster oven can often replace your full-sized oven for smaller meals, saving energy and pre-heating time, while also functioning as an air fryer.
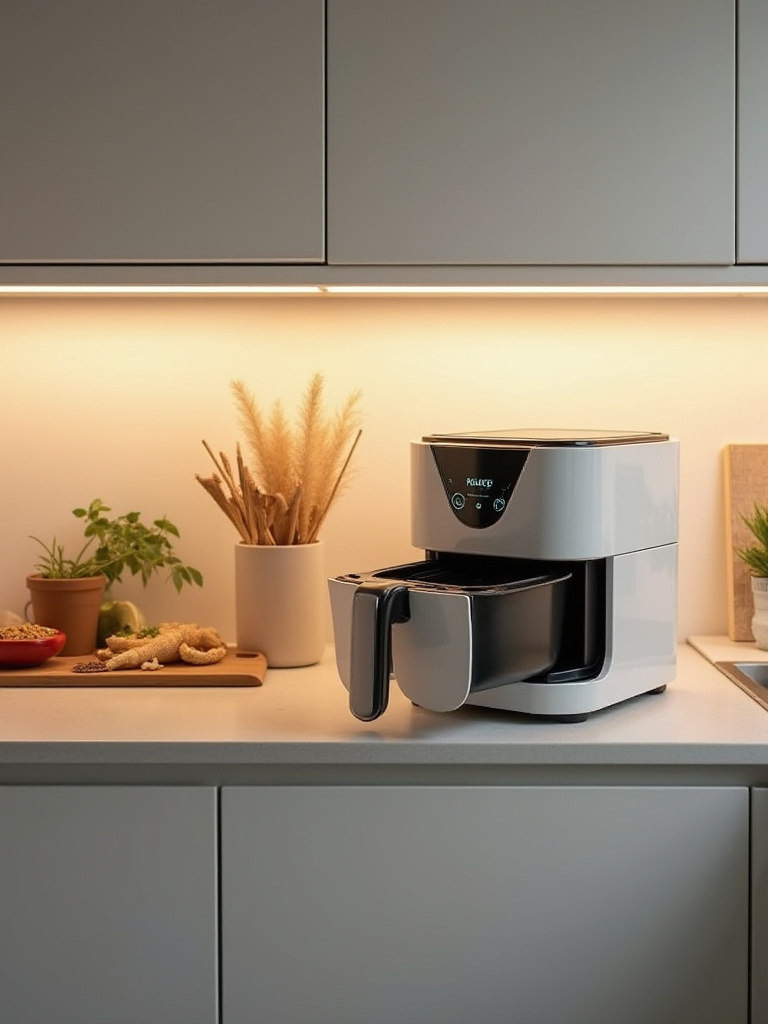
The goal is to consolidate. Take an inventory of your cooking habits and identify which single-use gadgets you can replace with a single, harder-working appliance. This not only frees up immense amounts of counter and cabinet space but also streamlines your cooking process. Look for compact models with sleek designs that will complement your kitchen’s aesthetic. Before buying, read reviews from sources like Wirecutter or America’s Test Kitchen—they focus on performance, which is crucial for multi-function devices.
It’s about choosing fewer, better things. A curated toolkit of powerful appliances will serve you far better than a drawer full of one-trick ponies.
21. Schedule Regular Decluttering Sessions to Prevent Overwhelm
Finally, a small kitchen is like a small boat: it needs to be kept in order constantly, or it will quickly become unmanageable. The work you did in step one wasn’t a one-time event; it’s a new habit. Schedule a 15-minute “kitchen reset” every week. This isn’t deep cleaning. It’s a quick tactical sweep.
During this time, put things back where they belong, go through the fridge for leftovers that need to be tossed, and check your pantry for anything that needs to go in the “Use First” bin. By tackling this in small, regular intervals, you prevent clutter from ever building up to an overwhelming point. This constant state of readiness makes your kitchen always feel inviting and functional, rather than a project you have to psych yourself up for.
This final habit is what locks in all the benefits of the previous 20 ideas, ensuring your beautifully efficient kitchen stays that way.
Conclusion
So, there you have it. The real story on small kitchens isn’t about finding one magic bullet. It’s about a systematic, multi-layered approach that addresses physics, workflow, and psychology all at once. From the foundational logic of your layout to the final, light-amplifying details, each of these ideas is a piece of a larger puzzle. When you put them together, the result is a space that feels smarter, larger, and profoundly more functional. You now have the professional framework to move beyond the generic advice and start making precise, impactful decisions.