You know what I hear all the time? “Craig, I saw this bathroom on Pinterest, and I want that.” And they show me a photo of some gorgeous, moody bathroom with wall-to-wall charcoal tiles. It looks incredible, I get it. But what the photo doesn’t show you is the giant, south-facing window just off-camera, drenching the space in light. Try to replicate that look in a standard 5×8 bathroom with one tiny window, and you’ve just built yourself a beautiful, expensive, and permanently depressing cave.
The truth is, choosing tile isn’t about picking the prettiest square in the showroom. It’s about creating a system. A system where the tile works with your light, your space, your lifestyle, and your budget. For fifteen years, I photographed architecture, and I can tell you, the best designs—the ones that feel effortlessly right—are the ones where someone thought about the why just as much as the what. They didn’t just pick a tile; they made a series of smart, deliberate choices.
So, here’s the real story, not the brochure-speak. Here’s what actually matters.
Foundations & Planning for Modern Tiles
Before you even think about hexagon vs. subway, you have to get your foundation right. This is the boring part, I know. It’s also the part that separates a bathroom that looks good for a year from one that looks and performs great for twenty. Skip this, and you’re just throwing money away.
1. Assess Your Bathroom’s Style for Cohesive Tile Choices
Look, this isn’t about following some rigid style guide. It’s about preventing visual chaos. I once photographed a beautiful 1920s Craftsman home where the owners had dropped in an ultra-minimalist, glossy white bathroom. It felt like a surgical suite had crash-landed in the middle of a warm, historic house. Each was fine on its own, but together, it was just jarring. Your bathroom tile is the backdrop for everything else; it has to make sense with the rest of your home’s character and its permanent fixtures—the window trim, the vanity, the tub.
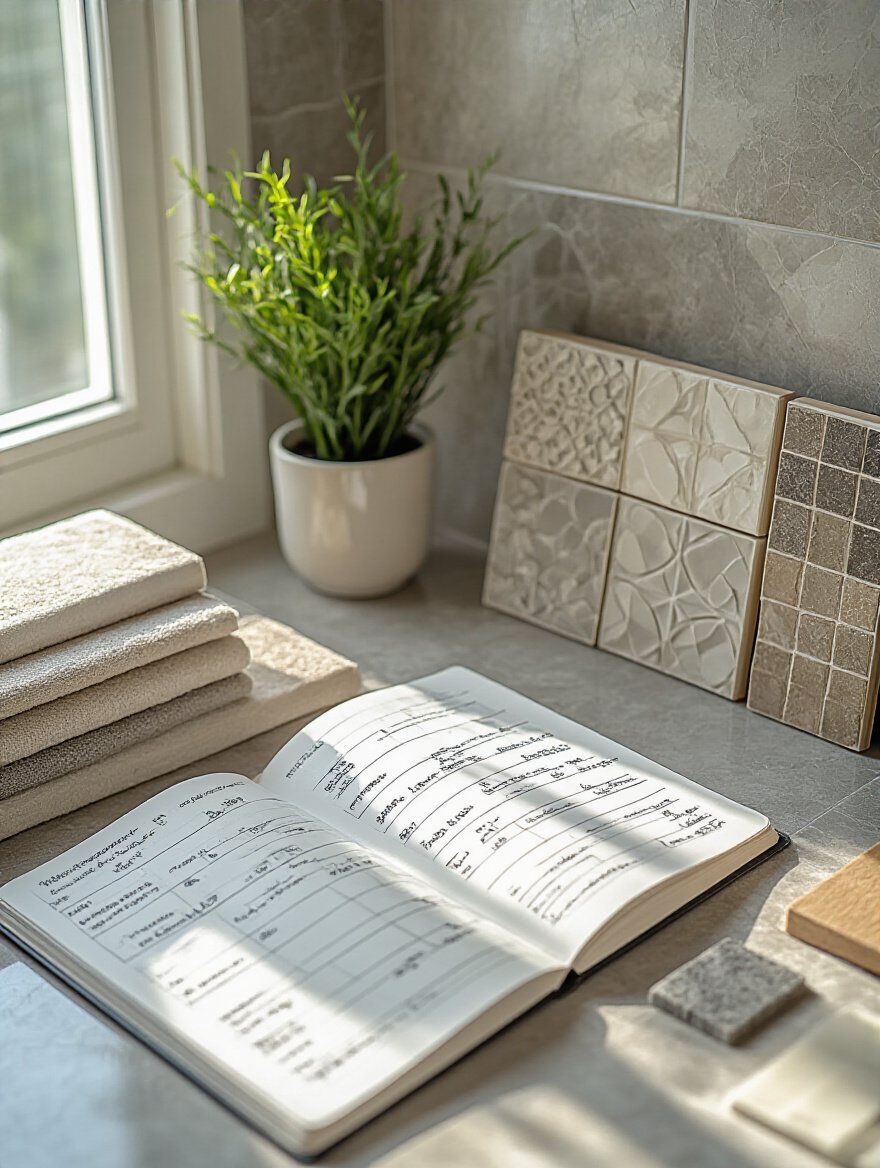
Don’t shop for tile in a vacuum. The single biggest mistake people make is falling in love with a tile without considering what it will live next to. The shortcut is to create what I call a “Design Triangle.” Pick your three non-negotiables—say, a specific tile, a vanity, and your metal finish (e.g., matte black). Every single other choice you make has to serve and support those three. This forces cohesion and stops you from getting distracted by shiny things that don’t belong.
This initial planning isn’t just about looking good; it’s about protecting your investment and your sanity. Let’s talk about another non-negotiable: not falling on your butt.
2. Prioritize Slip Resistance Ratings for Wet Areas
This one’s not sexy, but it’s the most important tip in this entire article. Glossy, polished floors look incredible in hotel lobbies. In your wet bathroom, they are a lawsuit waiting to happen. You need to pay attention to a tile’s DCOF (Dynamic Coefficient of Friction) rating. Think of it as a standardized grip test for a wet surface. Anything less than 0.42 for a floor is a no-go, and for a shower floor, you should be looking for something even higher.

The BS everyone tells you is that a textured tile is automatically a safe tile. Not true. It has to be tested and rated. I learned this the hard way on a project where a client insisted on a beautiful, slightly-rippled tile for the main floor that felt grippy. But its DCOF rating was abysmal. After his elderly mother nearly had a serious fall, they had to rip it all out. A costly, completely avoidable mistake. Ask your supplier for the spec sheet. If they can’t provide a DCOF rating, walk away. It’s that simple.
Once you’ve confirmed the tile is safe, you need to be honest about how much you’re willing to spend to make it last.
3. Determine Budget & Tile Lifespan Expectations Upfront
“What’s your budget?” is a question people hate, but it’s crucial. More importantly, you need to pair it with this question: “How long do you need this to last?” If you’re flipping a house or planning to move in five years, a cheaper ceramic tile might be fine. But if this is your forever home, investing in a high-quality porcelain tile is the smarter financial move. Porcelain is denser, more water-resistant, and tougher than ceramic. It costs more upfront, but it’ll outlive you.
The trap people fall into is only budgeting for the tile itself. That’s like budgeting for a car and forgetting to include tax, title, license, and insurance. The real cost includes demolition, subfloor prep (which can reveal nasty surprises), waterproofing materials, mortar, grout, and professional labor, which can easily double or triple the material cost. And the biggest shortcut I can give you is this: always buy at least 15% extra tile. You will have cuts, breaks, and you’ll want some spares down the line for repairs when that specific tile is inevitably discontinued.
Now, let’s talk about the one thing that can completely change how your expensive, perfectly budgeted tile looks once it’s installed.
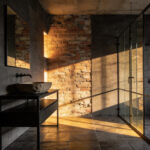
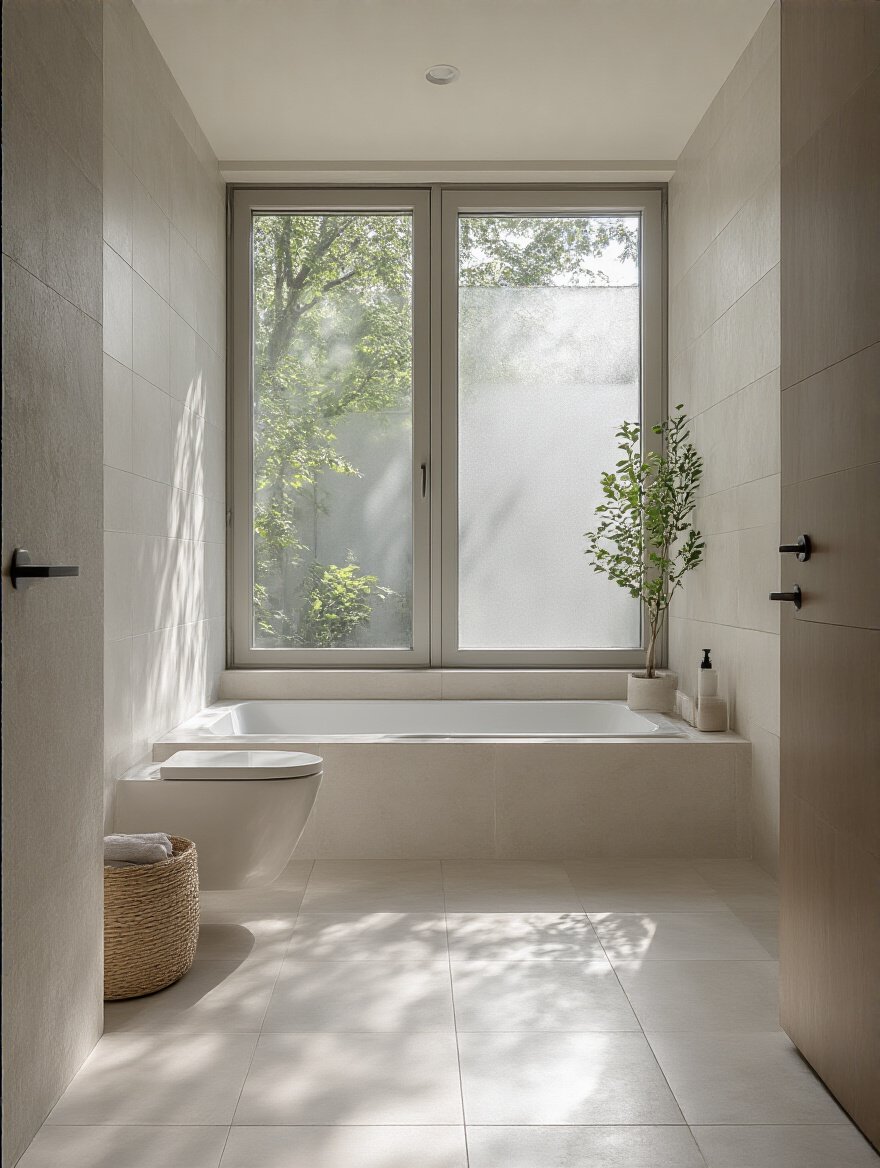
4. Consider Lighting Impact on Tile Finish & Color
As a photographer, this is my ultimate pet peeve. Showrooms are lit with bright, cool, commercial-grade fluorescents designed to make every tile look amazing. Your bathroom is not a showroom. It probably has one overhead light and maybe some vanity sconces, which are likely much warmer in color temperature. That serene, light-gray matte tile you loved in the store can suddenly look flat, muddy, and drab in your bathroom’s warm, limited light.
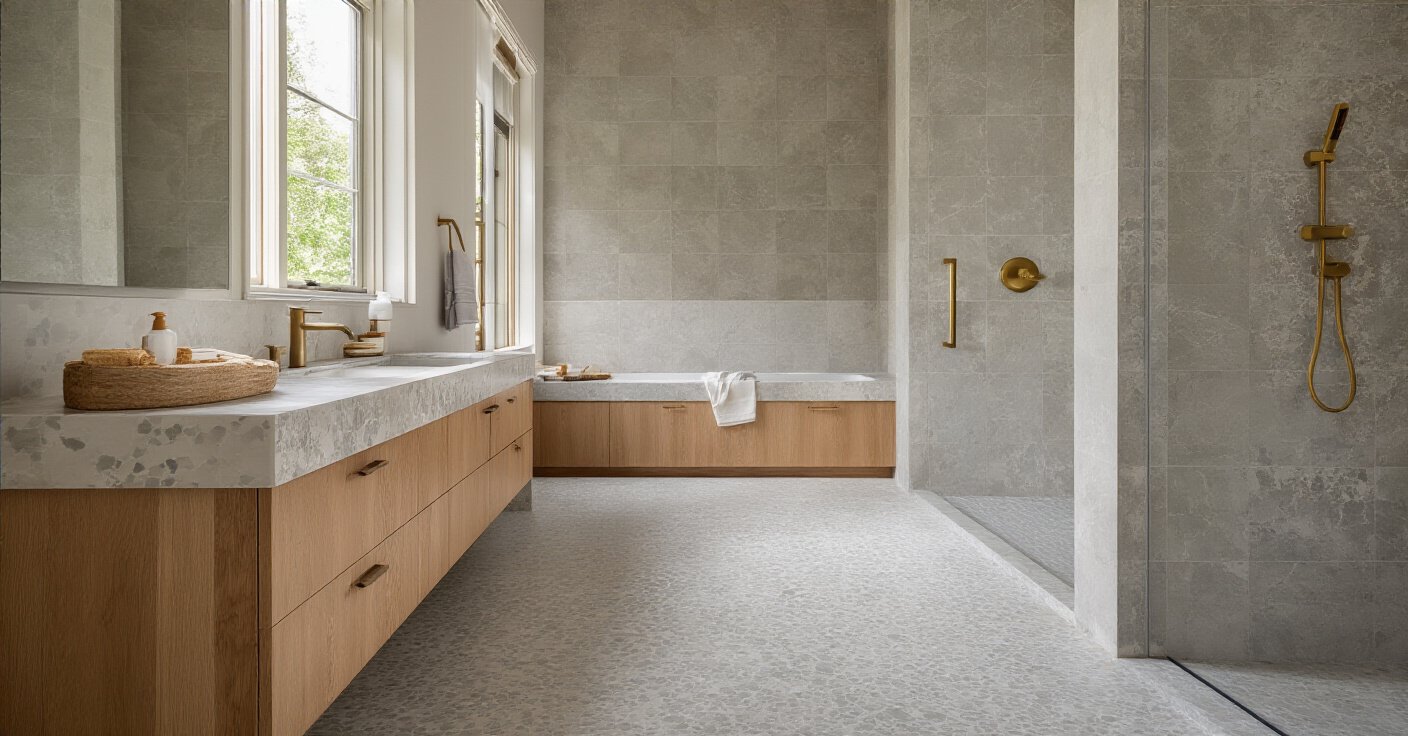
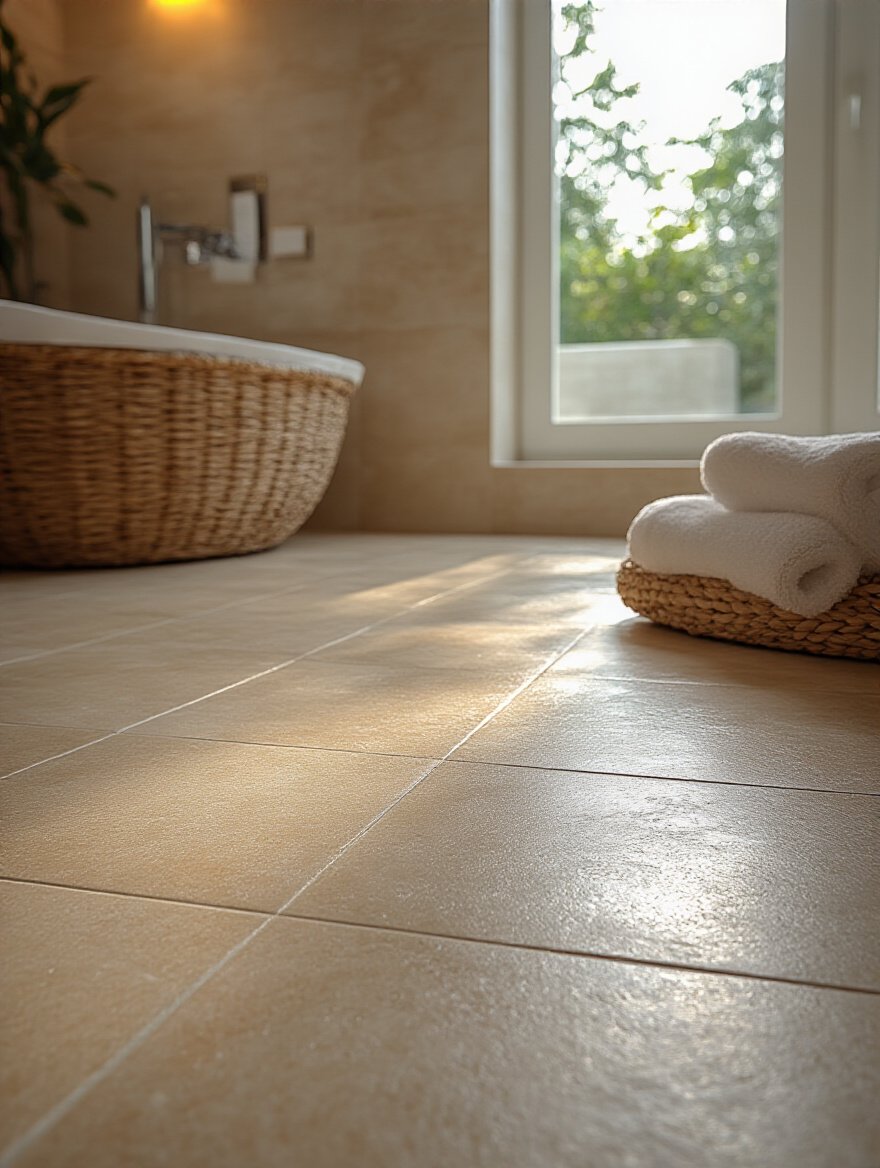
 Layered Lighting with ambient, task, and accent lights highlighting textures and reflections” class=”wp-image-11131″/>
Here’s my non-negotiable rule: you must test samples in the actual space. Get at least three or four of the exact tiles you’re considering. Don’t just lay them on the floor. Prop them up against the wall where they will be installed. Look at them in the morning with natural light, at midday, and at night with your artificial lights on. A client of mine once picked a gorgeous charcoal porcelain. In their north-facing bathroom, it looked jet black. We had to spend a fortune adding extra lighting just to make the tile’s texture and color visible. It was a five-figure mistake that a $20 sample test could have prevented.
Just as important as how the light hits the tile is how the tile holds up to everyday life, which varies wildly from the floor to the walls.
5. Match Tile Durability to Bathroom Traffic Zones
Not all areas in your bathroom are created equal. Your shower floor gets blasted with water and foot traffic daily. The wall behind your toilet? Not so much. So why would you use the same exact tile everywhere? You need to zone your bathroom and match the tile’s durability—its PEI rating—to the zone. PEI stands for Porcelain Enamel Institute, and it’s a simple 1-to-5 scale for how well a tile’s glaze resists wear and tear.
Think of it this way: a Class 1 tile is like a silk blouse; it’s beautiful for a decorative wall but will fall apart on a floor. A Class 4 or 5 is like a pair of work boots; it can take a beating. For any bathroom floor, you should be looking at PEI Class 3 or higher. For high-traffic family bathrooms or shower floors, stick to Class 4 or 5 porcelain. This is a place where you can be smart with your budget—splurge on the durable, high-traffic-rated porcelain for the floor, and save money with a less-durable (and cheaper) ceramic on the walls.
With the groundwork laid, we can finally get into the more exciting part: choosing the materials and styles that bring your modern bathroom to life.
Exploring Modern Tile Materials & Styles
This is where you get to define the look and feel of your space. Modern design offers a huge palette, from hyper-minimalist to warm and organic. Here’s a breakdown of the heavy hitters and how to use them correctly.
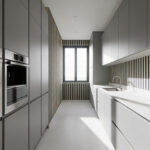
6. Embrace Large-Format Porcelain for Minimalist Flow
If you want that clean, seamless, spa-like feel, large-format tiles are your best friend. We’re talking tiles that are 24×24 inches, 24×48 inches, or even bigger. The magic isn’t just the size of the tile; it’s the lack of grout lines. Fewer grout lines mean less visual clutter, which tricks your brain into seeing the space as bigger and more serene. It also means way less grout to scrub, which is a win for everyone.
But here’s the critical part that salesmen often forget to mention: your subfloor and walls must be perfectly flat. I mean, dead flat. Large tiles are rigid and unforgiving. If there’s a dip or a bow in your floor, you’ll get lippage—where one edge of a tile is higher than its neighbor—and you’ll eventually get cracks. For a pro install, insist on the use of a tile leveling system (those little clips and wedges). It’s the single best way to ensure a perfectly flat surface and avoid a result that looks amateurish.
From the seamless look of big tiles, let’s move to a finish that’s all about understated elegance.
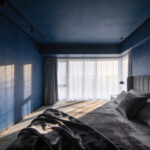
7. Choose Matte Finishes for a Sophisticated, Non-Reflective Look
Glossy tile is a classic, but matte finishes have surged in popularity for a reason. They don’t reflect light; they absorb it, which creates a soft, calming, and incredibly sophisticated vibe. It’s the visual equivalent of a cashmere sweater. Matte finishes are also heroes of practicality. They are far better at hiding water spots, smudges, and fingerprints than their shiny counterparts, which means you’re not constantly wiping them down.
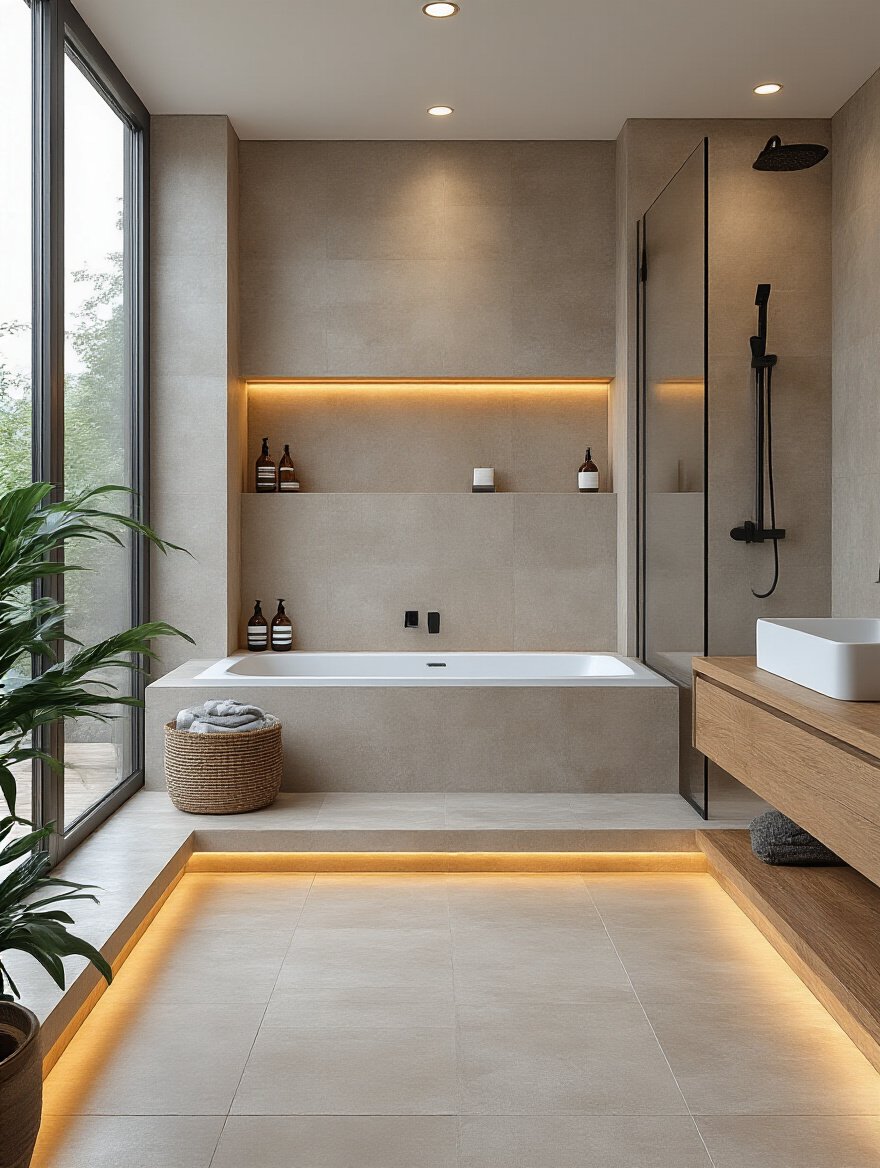
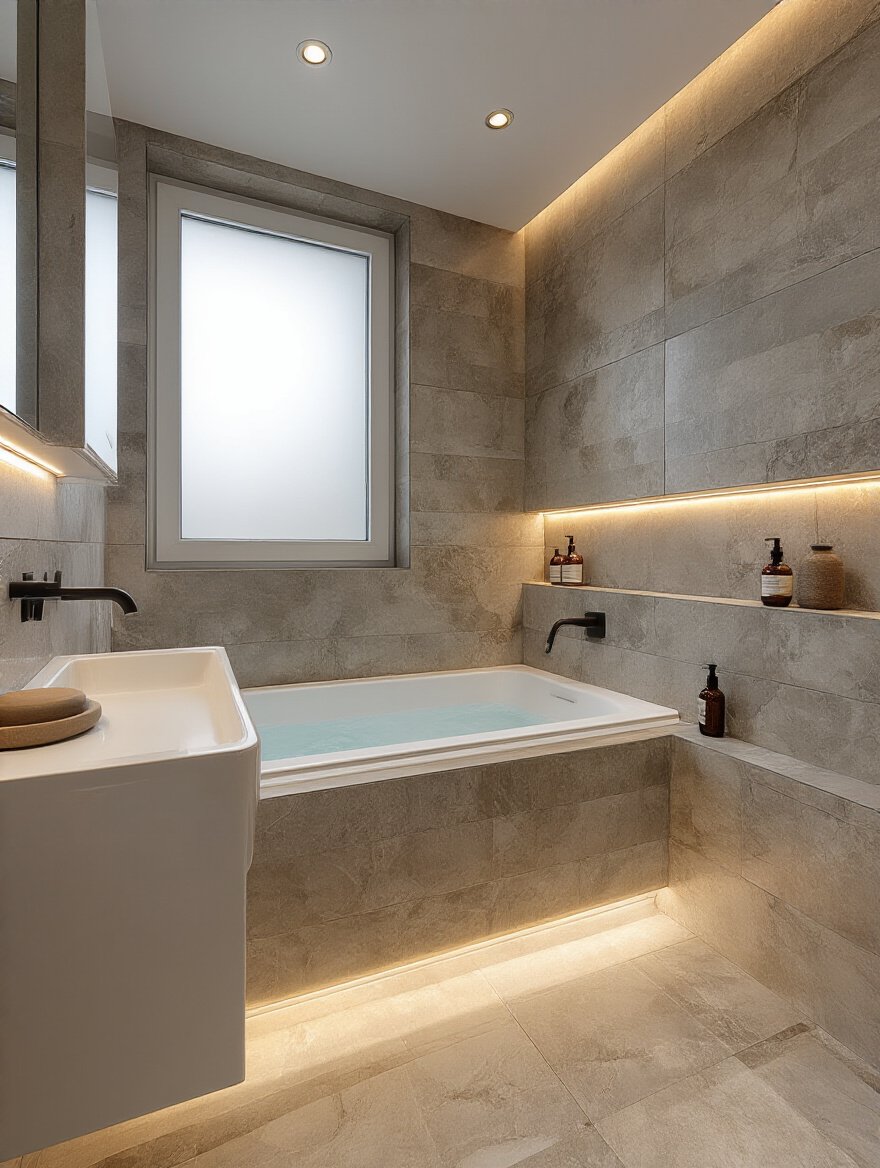
The key to making matte work, especially in a small or dark bathroom, is texture and lighting. To prevent a matte tile from looking flat or dull, pair it with other textures. Think about a matte floor with a slightly textured wall tile, or bringing in natural wood and brushed metal fixtures. And make sure your lighting plan is solid. You’ll want layered lighting—overhead, vanity, and maybe an accent light in the shower—to create depth and shadow, which is what makes a matte surface come alive.
While matte brings a cool sophistication, another popular choice delivers organic warmth without the headaches of natural materials.
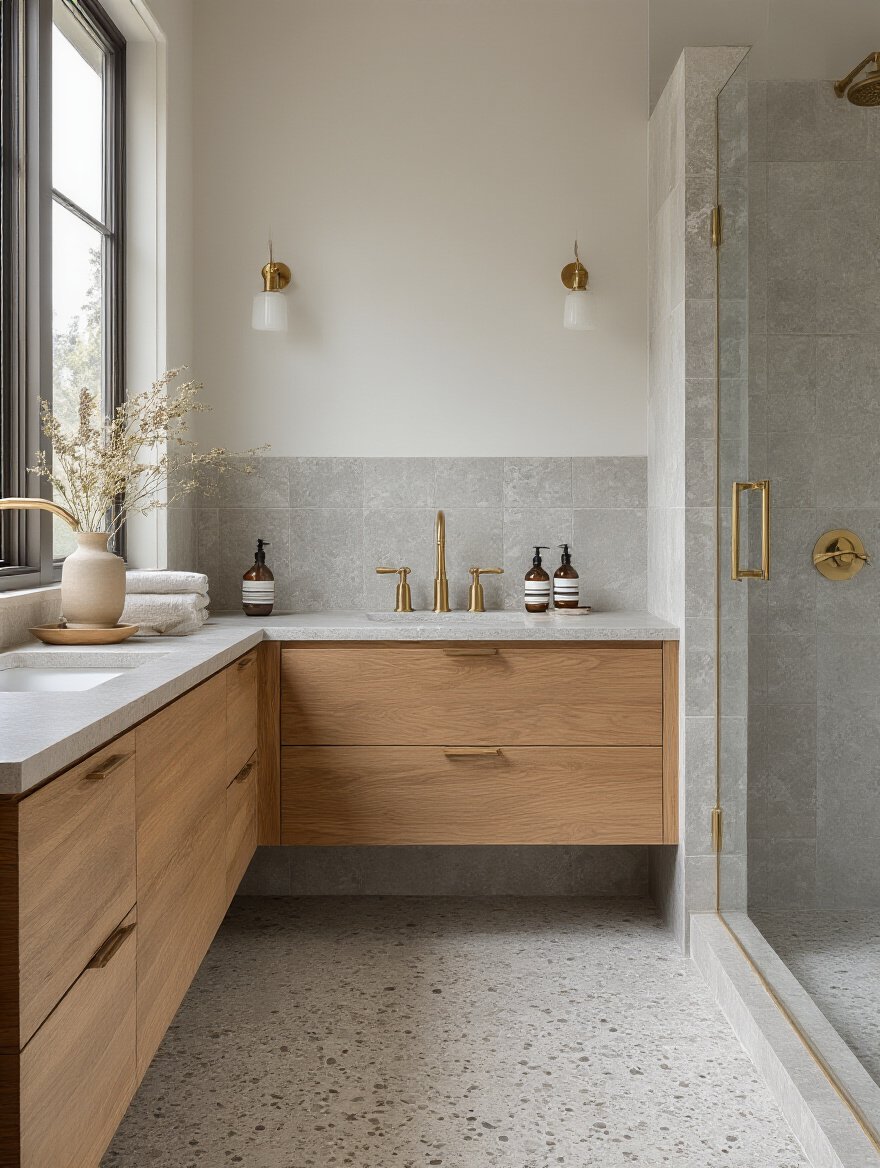
8. Incorporate Wood-Look Tiles for Warmth and Durability
Everyone loves the look of natural wood, but putting it in a wet, humid bathroom is asking for trouble—warping, rot, and maintenance nightmares. Wood-look porcelain tile gives you the best of both worlds: the visual warmth and texture of wood with the bomb-proof durability of porcelain. It’s basically indestructible and completely waterproof, making it a perfect choice for bringing an organic feel to a modern space.
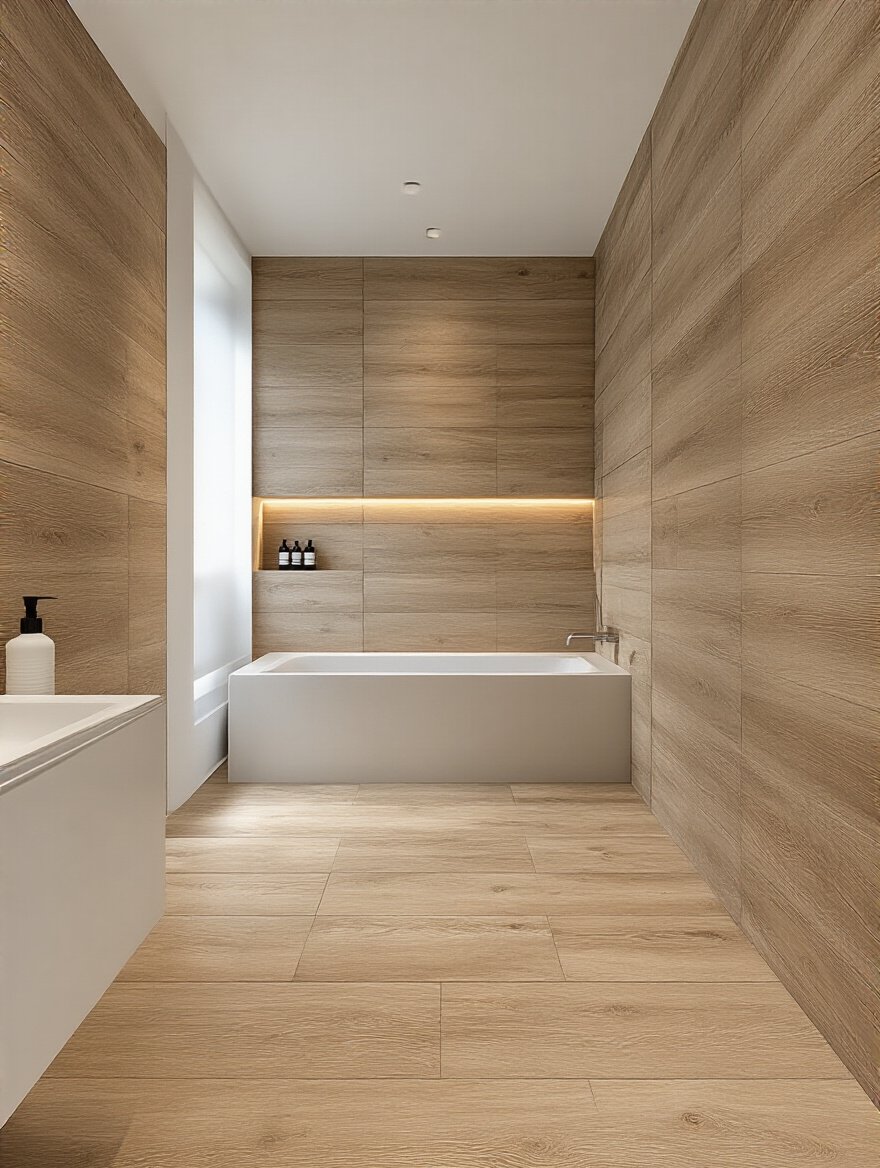
The secret to making wood-look tile look convincing and not like cheap vinyl flooring from the ‘80s is twofold. First, look for high pattern variation. Cheaper tiles might only have 4 or 5 different “plank” patterns, so the repetition becomes obvious and looks fake. Good quality tile will have 20 or more unique faces. Second, grout is critical. Choose a grout color that matches the darkest tone in the tile’s grain, and keep the grout lines as thin as possible (1/16″ is ideal). This helps the individual tiles blend into a more believable “wood” surface.
Shifting from organic warmth, we can go in the opposite direction for a raw, urban aesthetic.
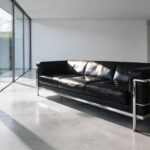
9. Select Concrete-Look Tiles for Urban Industrial Edge
Concrete-look porcelain offers the raw, minimalist vibe of poured concrete without any of the real-world problems. Real concrete is heavy, porous, prone to cracking, and needs to be sealed constantly. Concrete-look tile gives you that same edgy, industrial feel but is lightweight, waterproof, and maintenance-free. It’s an incredible base layer for a modern design, pairing beautifully with matte black fixtures, raw wood, and metal accents.
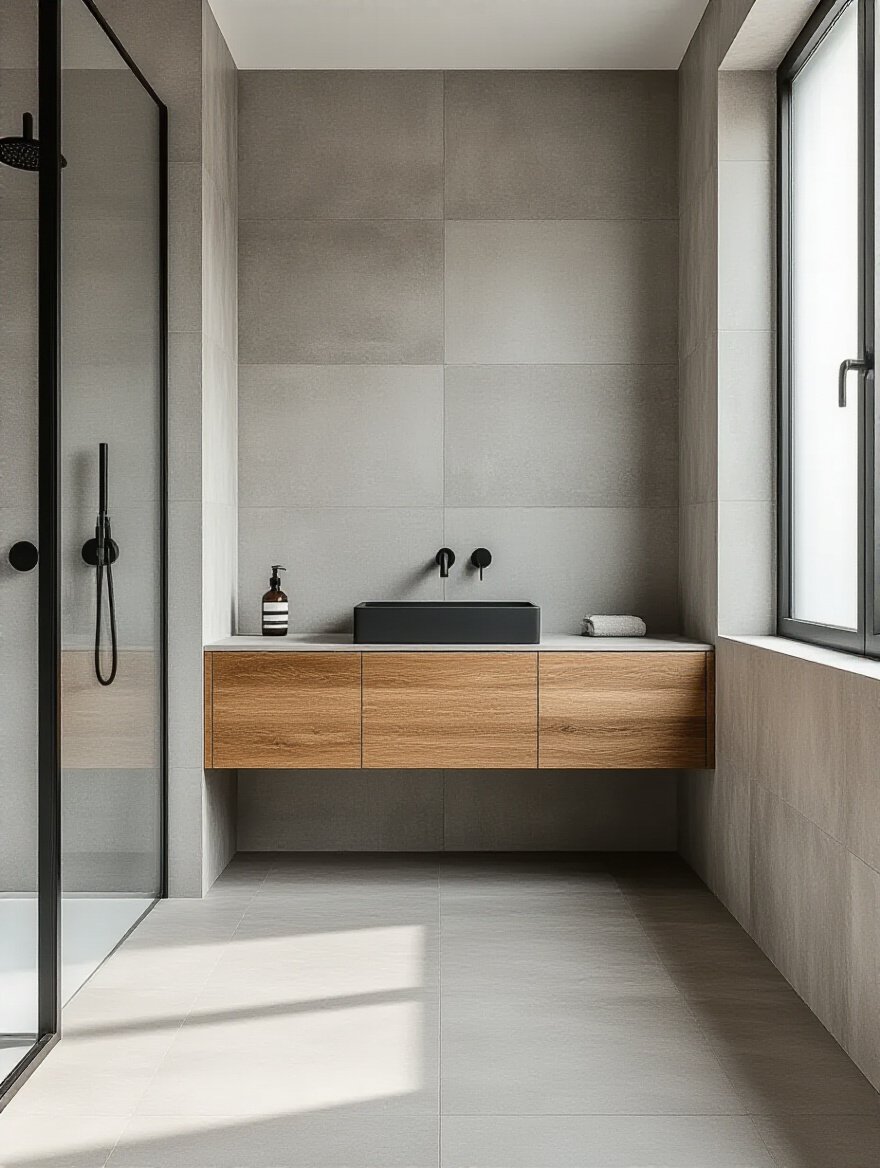
The biggest mistake I see with this style is going too sterile. A room with all gray concrete-look tile, gray walls, and chrome fixtures can feel like a parking garage. The key is to balance the cool, hard texture of the tile with warmth and softness. Bring in a reclaimed wood vanity, some plush towels in a warm color, or even a couple of plants. That contrast is what makes the industrial look feel intentional and sophisticated rather than just cold and unfinished.
To add another layer of sophistication, we can literally add another layer—with dimension.
10. Add Subtle Texture with Dimensional or 3D Tiles
This is one of my favorite trends because it relies on the fundamentals of photography: light and shadow. Dimensional tiles—with raised patterns, fluted lines, or subtle waves—are all about adding tactile and visual depth. In a minimalist or monochromatic bathroom, texture is what keeps the space from feeling boring. As light moves across the wall during the day, the shadows shift, and the wall feels alive.

The rule with 3D tiles is that less is more. Tiling an entire bathroom with a deep, wavy pattern would be overwhelming and probably induce vertigo. Instead, use them strategically as a feature. The wall behind your vanity is a perfect spot. So is the back wall of a shower niche. This creates a focal point and a touch of luxury without screaming for attention. It’s a sophisticated, architectural move that adds a ton of perceived value.
If subtle texture isn’t your thing and you want to make a bolder statement, geometry is your friend.
11. Feature Geometric Patterns like Hexagons or Chevrons
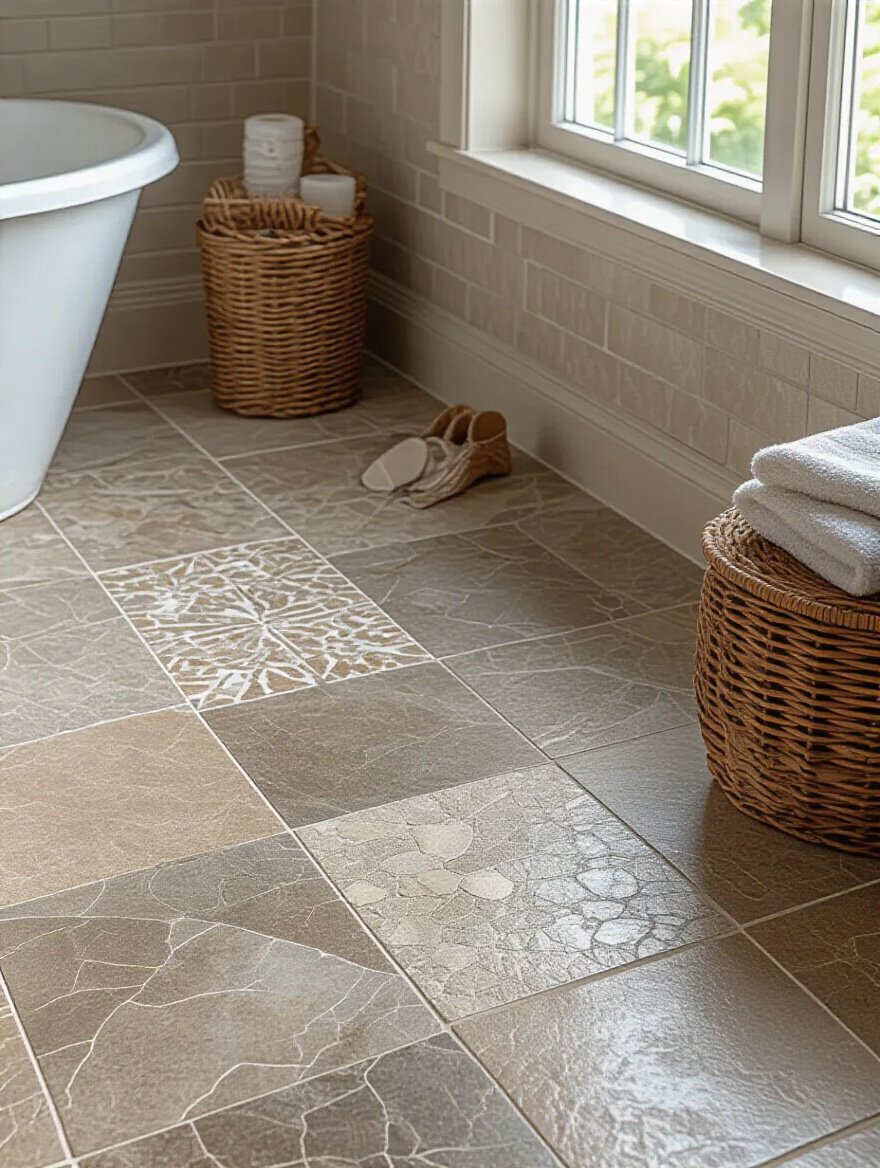
Geometric tiles like hexagons, chevrons, and basketweaves are a fantastic way to inject energy and graphic interest into a modern bathroom. They create movement and can be used to make a space feel more dynamic. A small hex mosaic on a shower floor adds visual texture and, as a bonus, the extra grout lines provide excellent slip resistance. A chevron or Herringbone pattern on a long wall can draw the eye and make a narrow room feel wider.
But be careful. Pattern can quickly become chaos. The most common mistake is pattern overload—using a busy geometric on the floor and a different one in the shower. It’s visually exhausting. Pick one spot for your pattern to be the star, and let the rest of the surfaces be quiet supporters. And remember, your grout color will completely change the effect. A contrasting grout (like dark gray on a white hex tile) will make the pattern pop and feel very graphic. A matching grout will make the pattern more subtle, reading as an overall texture.
Finally, for that last bit of high-end sparkle, a little bit of metal can go a long way.
12. Integrate Metallic Accent Tiles for Glamorous Shine
Think of metallic tiles as the jewelry for your bathroom. A little bit adds sparkle, glamour, and a bespoke, high-end feel. Used judiciously, they can elevate an entire design. They’re fantastic at reflecting light, which can help brighten up a darker space. A metallic tile in a warm finish like brass or bronze adds warmth, while cooler tones like chrome or stainless steel feel sleek and futuristic.
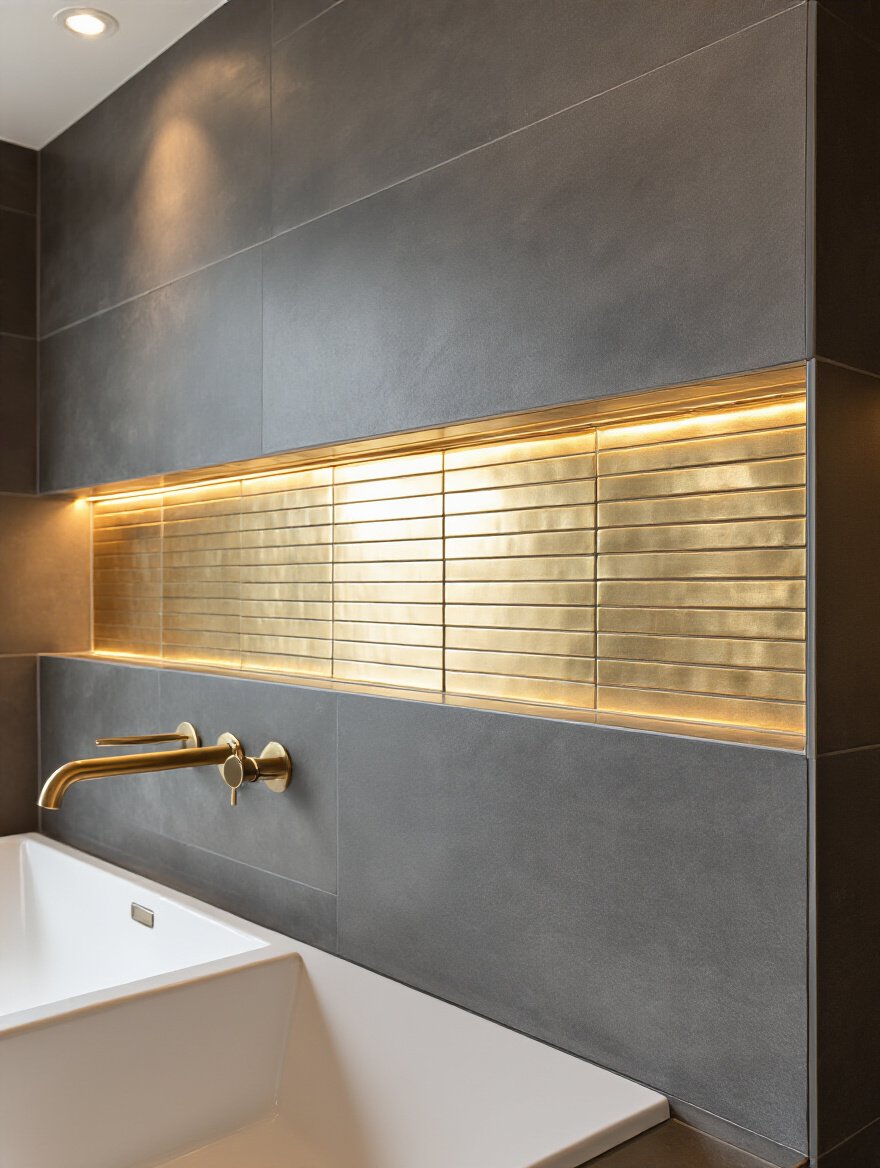
The key word here is accent. This is not a tile you use wall-to-wall unless you want your bathroom to look like a disco ball from 1978. A single horizontal strip running behind the vanity, or tiling the back of a shower niche in metallic tile, is all you need to make a powerful statement. The goal is a flash of luxury, not an overwhelming glare. Pairing a metallic tile with a matte finish on the main field tile is a classic pro move, as the contrast makes the metallic accent pop even more.
Strategic Design & Layout Applications
Okay, you’ve picked your tile. The job’s not done. How you lay the tile is just as important as what tile you chose. This is where you can use clever techniques to manipulate the perception of space and create a truly custom look.
13. Optimize Small Spaces Using Clever Tile Sizing & Layouts
If you’re working with a small bathroom, tile is your secret weapon for making it feel bigger. The biggest and most counterintuitive trick is to use large-format tiles. People think you should use small tiles in small rooms, but that just creates a busy grid of grout lines that makes the space feel chopped up and even smaller. Large tiles with minimal, color-matched grout create a seamless surface that visually expands the room.

Another classic trick is to lay rectangular floor tiles on a diagonal. This forces your eye to follow the longer diagonal lines, which makes the floor plan feel larger and more dynamic. For walls, stacking rectangular tiles vertically draws the eye upward, creating the illusion of height, which is a lifesaver in rooms with low ceilings. Running the same tile from the floor right into a curbless shower is the ultimate move—it erases the visual boundary of the shower, making the entire room feel like one continuous, larger space.
As you can see, the secret to many of these layout tricks comes down to one often-overlooked detail.
14. Select Grout Color Wisely to Define or Blend Tiles
Grout is not just the glue that holds everything together; it’s a powerful design tool. You have two choices: you can make it blend, or you can make it pop. To create a seamless, monolithic look—perfect for making small spaces feel bigger—you should choose a grout color that matches your tile as closely as possible. This makes the individual tiles disappear into one continuous surface.

On the other hand, if you’re using a classic shape like a subway or a hexagon tile and you want to celebrate that pattern, use a contrasting grout. The classic white subway tile with dark gray grout is a perfect example. The dark lines highlight the shape of each tile and the iconic running bond pattern. Just know that this is a bold, graphic look. There’s no right or wrong answer, but you must make a conscious choice. Treating grout as an afterthought is a recipe for regret.
From the small detail of grout, let’s zoom out to making a big statement.
15. Create Striking Feature Walls with Contrasting Tile Patterns
A feature wall is a fantastic way to add a “wow” factor without breaking the bank. The idea is to pick one wall—usually the one behind the vanity or the back wall of the shower—and make it the star of the show. This is where you can use that bold, expensive, or highly textured tile that might be too much for the whole room.

The trick to a successful feature wall is contrast with cohesion. You want the wall to stand out, but it still needs to feel like it belongs in the same room. You can achieve this by pairing a large-format, neutral tile on the main walls with a small, intricate mosaic on the feature wall. Or a smooth, matte tile with a glossy, 3D tile. The key is to make sure there’s a common thread—maybe they share a similar color undertone—that ties the two together so the look is dramatic but still harmonious.
A feature wall is a design element, but some features need to be both beautiful and practical.
16. Design Functional Niches with Seamless Tile Integration
A recessed shower niche is one of the single biggest indicators of a well-planned, high-quality tile job. It provides sleek, built-in storage and eliminates the need for those ugly plastic shower caddies. But the difference between a pro niche and an amateur one is all in the tile layout. An amateur job will have awkward, skinny slivers of tile around the niche edges.

A true professional plans the niche’s size and location around the tile size before the walls even go up. They’ll adjust the framing so that the niche is framed perfectly by full tiles, with no weird cuts. For the ultimate high-end look, insist on mitered edges. This is where the tiles on the inside and outside of the niche are cut at a 45-degree angle to form a clean, sharp corner with no need for a clunky trim piece. It’s a detail that screams quality and craftsmanship.
Just as layout affects small features like niches, it can also affect the perception of the entire room.
17. Achieve Height or Width with Vertical or Horizontal Laying
This is another simple but incredibly effective optical illusion you can create with tile layout. If you have a room with a standard 8-foot ceiling that you want to feel taller, install your rectangular tiles in a vertical stack. Your eye is naturally drawn along the long lines of the tiles, creating a powerful sense of upward movement and height. This is especially effective in a shower stall.

Conversely, if you have a narrow room like a powder room or a galley-style bathroom, laying those same tiles horizontally will make the space feel wider and more expansive. Your eye follows the horizontal lines, visually stretching the walls. This is a classic designer trick that uses the most basic materials to fundamentally change the feel of a space. It costs nothing extra but has a huge impact on the final result.
Building on the power of orientation, layering different surfaces creates a whole new level of design sophistication.
18. Combine Different Tile Textures for Rich Visual Interest
In modern design, especially when you’re working with a quiet, monochromatic color palette, texture is everything. Combining different textures is what prevents a minimalist bathroom from feeling flat and sterile. It adds a layer of richness and sensory detail that feels incredibly luxurious. Think about the way light interacts with different surfaces.

A great strategy is to pair a large, smooth, matte tile on the floor and main walls with something highly textured as an accent. For example, you could use a fluted or ribbed tile on the vanity wall. In a single color, this combination is incredibly chic. The interplay between the smooth and textured surfaces creates depth and shadow, adding a subtle complexity that is sophisticated and timeless. It’s a design that you feel as much as you see.
Advanced Concepts & Longevity
If you really want to create a bathroom that is a step above, you need to think beyond the visuals. These concepts are about enhancing comfort, ensuring your investment lasts, and making smarter choices for both your health and the environment.
19. Consider Underfloor Heating Compatibility for Ultimate Comfort
There are few things in life as luxurious as stepping out of a shower onto a warm tile floor. Installing an underfloor heating (UFH) system is a game-changer for bathroom comfort, especially with naturally cold materials like porcelain or stone. It provides a gentle, consistent radiant heat that is far more pleasant than being blasted with hot air from a vent. It also helps dry out the floor faster, which is a great benefit in a wet environment.

If you’re considering UFH, porcelain and Ceramic tiles are excellent choices because they are fantastic heat conductors. The most important thing to remember is that you absolutely must install a thermal insulation board directly underneath the heating system. If you skip this step, a significant amount of your heat (and your money) will be lost downward into the subfloor or foundation. It’s a critical component for an efficient and effective system.
Heating your floor is great, but protecting your entire investment is even more critical.
20. Protect Grout Lines with Quality Sealants for Longevity
Grout is the weak link in any tile system. Most standard cement-based grout is porous, meaning it acts like a tiny sponge for dirt, soap scum, and moisture, leading to stains and mildew. A beautiful, expensive tile job can look grimy and old in just a couple of years if the grout isn’t protected. Sealing your grout is not an optional upsell; it’s essential maintenance.
After your new grout has fully cured (wait at least 72 hours), you need to apply a high-quality penetrating sealer. This soaks into the grout and creates an invisible barrier that repels water and stains, making it drastically easier to clean and keeping it looking new for years. You’ll need to reapply it every couple of years, but it’s a small price to pay to protect your investment. The shortcut? For the ultimate protection, ask your installer to use an epoxy or urethane grout from the start. They are more expensive but are virtually stain-proof and don’t require sealing.
Beyond protecting the tile itself, a truly high-end bathroom considers the comfort of those outside it.
21. Implement Soundproofing Solutions Behind Wall Tiles
Ever been in a house where you can hear every sound from the bathroom in the adjacent bedroom? It’s not great. True luxury is privacy and peace, and that means thinking about soundproofing. The time to do this is when the walls are open, before the backer board and tile go on. It’s a relatively low-cost addition that has a massive impact on quality of life.

There are a few ways to tackle this. The first is to fill the wall cavities with acoustic insulation like mineral wool, which is denser than standard fiberglass. For a bigger impact, you can add a layer of Mass Loaded Vinyl (MLV) directly to the studs before the drywall. For the best result, you can use resilient channels, which are metal strips that “decouple” the drywall from the studs, preventing vibrations (sound) from traveling through the wall structure. Sealing every single gap around pipes and electrical boxes with acoustic sealant is the final, crucial step.
Finally, a truly modern approach considers not just your home, but the larger environment.
22. Plan Sustainable Tile Choices for Eco-Friendly Designs
Being eco-friendly in design has moved beyond a trend to become a standard for thoughtful construction. When it comes to tile, sustainability means looking at the whole lifecycle. How was it made? What is it made of? How far did it have to travel? Many manufacturers now produce beautiful tiles with high recycled content—some are made from post-consumer glass, others from industrial waste.

To cut through the “greenwashing,” look for third-party certifications like Cradle to Cradle or Green Squared, which verify a company’s environmental claims. Also, consider where the tile is made. Choosing a tile made regionally reduces the carbon footprint associated with transportation. And don’t forget the installation materials—low-VOC (Volatile Organic Compound) adhesives and grouts are essential for maintaining healthy indoor air quality. It’s about making a choice that looks good, performs well, and that you can feel good about.
Conclusion
So there you have it. Choosing modern bathroom tile is less about a single decision and more about a series of intentional, informed choices. It’s a process of balancing aesthetics with hard-nosed practicality. It’s about understanding that light, scale, and layout are just as powerful as color and pattern. It’s knowing that the things you can’t see—the waterproofing, the subfloor prep, the sound insulation—are what make the beautiful things you can see last.
Don’t just replicate a photo you saw online. Take these principles and use them to create a space that is uniquely yours—a space that is not only visually stunning but also hyper-functional, durable, and a genuine pleasure to be in every single day. You have the knowledge now. Go build something incredible.