Of course. Let’s pour a glass of wine and talk about this properly. It’s one of my biggest pet peeves.
Can we please talk about why everyone gets Kitchen organization so terribly wrong? People think the answer is to rush out and buy dozens of clear plastic bins. They see a picture on social media of a pantry lined with perfect containers and think, “That’s the solution!”
It’s not. That’s like buying a new wardrobe without knowing your size or the occasion. Last year, a new client called me in despair. She’d spent thousands on a matching set of containers for her pantry, but it was still a disaster. Why? Because she never addressed the root of the issue. She was just decanting chaos into more expensive boxes. True organization—the kind that brings a sense of calm and lasts for years—isn’t about buying more stuff. It’s a strategic process of editing, planning, and investing in systems that create effortless flow. It’s about designing your kitchen to serve you, not the other way around.
So let’s set the corporate speak aside. Here is the real story on how to create a kitchen that is not just organized, but enduringly elegant and functional.
Foundation First: Plan Your Space & Declutter Smartly
Before you even think about buying a single basket, we must lay the groundwork. This is the unglamorous but most critical phase. It’s the difference between a temporary fix and a permanent solution.
1. Conduct a Complete Kitchen Inventory Audit First
Think of this as a couture fitting for your kitchen. You simply cannot design a functional space until you understand precisely what it needs to hold. An audit means pulling every single item out—yes, everything—and facing what you actually own. It’s the only way to get an honest assessment and stop shuffling clutter from one cabinet to another.
I once worked with a client in a beautiful Belgravia townhouse who was convinced she needed a larger pantry. During our audit, we found no fewer than seven half-used bottles of premium olive oil, three boxes of the same Arborio rice, and a collection of spices that had expired two years prior. By simply taking stock, we freed up an entire shelf and realized her pantry was perfectly adequate; it was just poorly managed. An audit isn’t about restriction; it’s about clarity.
After this initial assessment, you’re ready to create a floor plan for your items.
2. Define Clear Kitchen Storage Zones Early
A well-designed kitchen is choreographed. Every movement is intuitive. This is achieved by creating zones based on activity. You don’t store your knives across the room from your cutting board, so why would you store your coffee filters five steps away from your coffee machine? Grouping items by their point of use is the most profound change you can make for day-to-day efficiency.
Think in terms of stations: a baking zone with flour, sugar, mixers, and pans all together. A coffee and tea station. A prep zone near the sink and stove with oils, spices, cutting boards, and knives. This isn’t just about tidiness; it’s about the luxury of effortless movement. When everything has a logical home, your body knows exactly where to go, which reduces the mental load of cooking and turns it into a more fluid, enjoyable process.
Now that you have a map, it’s time to edit your collection.
3. Master the “Empty and Sort” Method Effectively
This is where the real work begins. The only way to properly assess a space is to make it a blank slate. Choose one area—a single cabinet or a set of drawers—and empty it completely. Wipe it down. Give it a fresh start. This act alone is incredibly cleansing and allows you to see the space with new eyes.
As you handle each item you removed, be decisive. Use three simple categories: Keep, Donate/Discard, and Relocate. Forget the “maybe” pile; that’s just procrastination. If you haven’t used that specialty bundt pan in two years, you won’t use it next year. Be a ruthless editor. The goal isn’t to get rid of everything, but to ensure that what remains is useful, beautiful, and worthy of the real estate it occupies in your home.
With a clear, edited inventory, we can finally take the most crucial step before any purchase.
4. Measure Kitchen Spaces Accurately Before Buying
This should be non-negotiable, yet it’s the step everyone wants to skip. “Measure twice, buy once” isn’t just a clever saying; it’s a financial and sanity-saving mandate. You must measure the usable interior space of every cabinet and drawer—width, depth, and height. And don’t forget to account for obstructions like pipes under the sink or the interior lip of a cabinet frame.
A client once fell in love with a gorgeous walnut drawer divider system online. He measured the drawer front, ordered it, and it arrived…too wide to fit past the drawer slides. That single mistake cost him weeks in delays and return fees. The difference between a high-end, integrated look and a cheap, clumsy one often comes down to millimeters. Precision is a form of luxury.
Optimizing Cabinet & Drawer Real Estate
Your existing cabinetry is your most valuable asset. Our goal now is to make every square inch work harder and smarter for you, transforming frustrating spaces into models of accessibility.
5. Install Pull-out shelves for Easy Cabinet Access
Deep base cabinets are essentially black holes where small appliances and forgotten wedding gifts go to die. Installing high-quality pull-out shelves is one of the single best investments you can make in your kitchen’s functionality. Suddenly, the entire contents of your cabinet glide out to meet you. Nothing gets lost in the back.
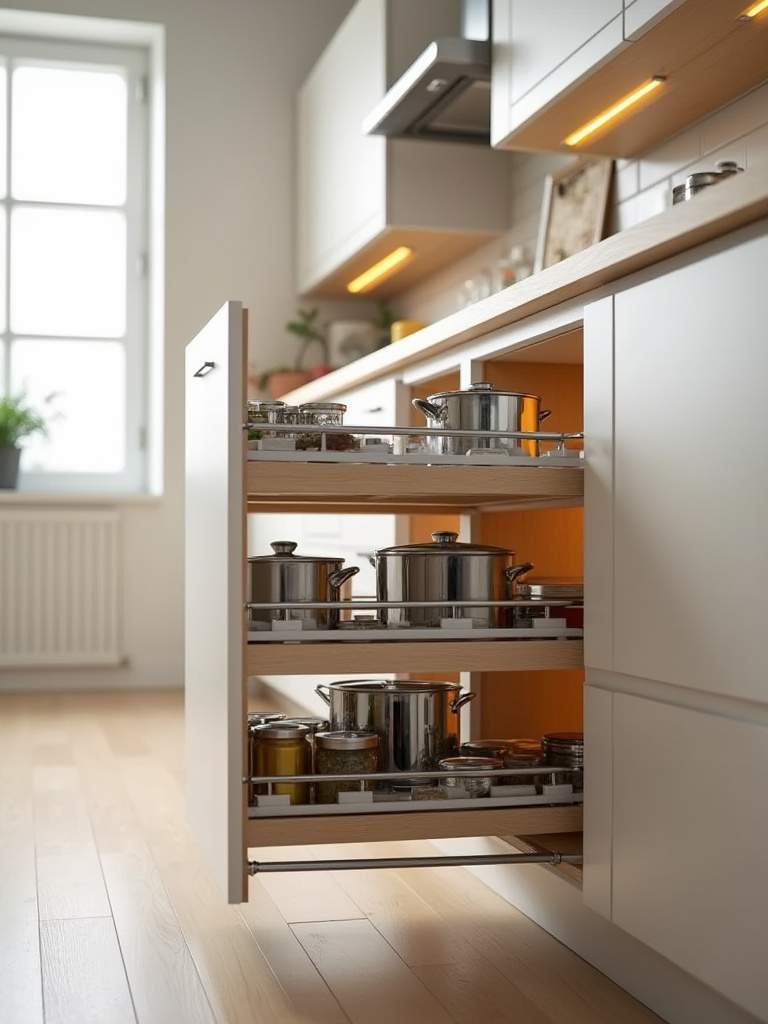
But please, don’t skimp here. The real luxury lies in the hardware. Look for full-extension glides that are rated for at least 100 pounds and, ideally, have a soft-close mechanism. The smooth, silent, and sturdy glide of a well-made pull-out is a small daily pleasure that makes a world of difference. This isn’t just adding a shelf; it’s a permanent upgrade to your cabinetry.
Once the large items are accessible, let’s bring order to the small ones.
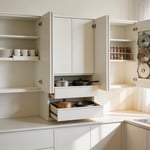
6. Utilize Custom Drawer Dividers for Tidy Tools
Opening a drawer should be a serene experience, not a clattering, chaotic jumble. Generic plastic trays often fit poorly and allow items to slide around. The truly sophisticated solution is custom or highly configurable dividers. These transform your drawers into perfectly partitioned homes for every single tool.
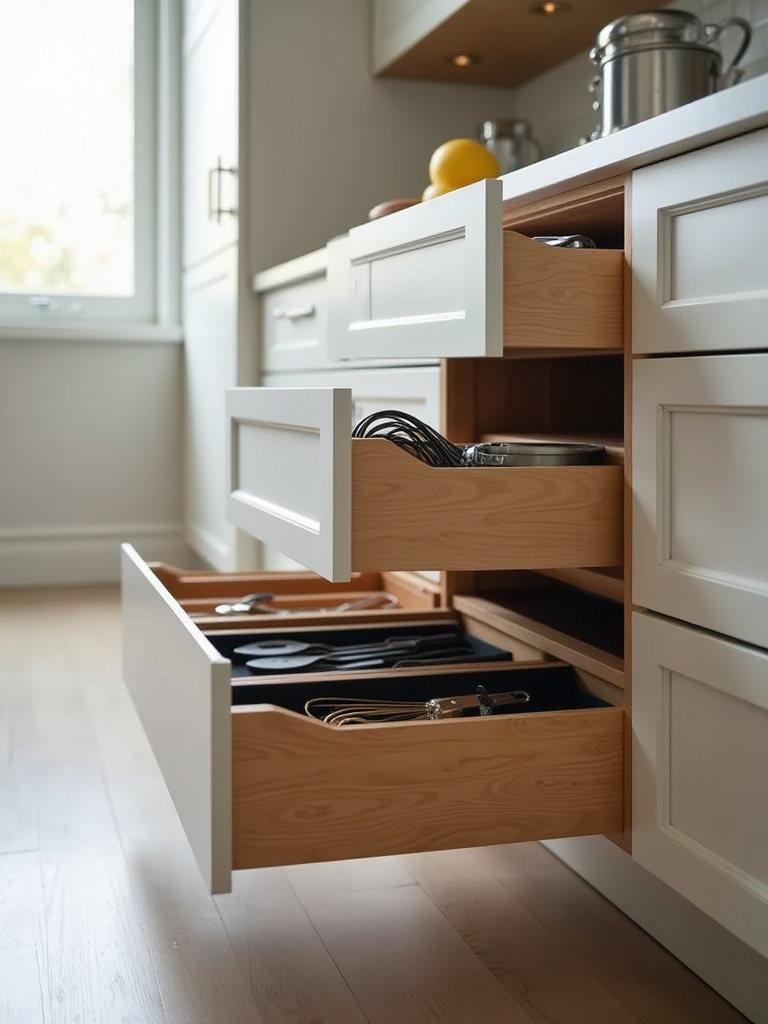
For a truly high-end finish, consider custom-cut wood inserts, especially for your cutlery and knife drawers. For other tools, look for quality modular systems made of bamboo or thick, clear acrylic with non-slip feet. The goal is to give every item a snug, designated spot. This not only makes things easy to find but also protects your silver from scratching and your knife blades from dulling.
Now, let’s look up and harness that wasted vertical space.
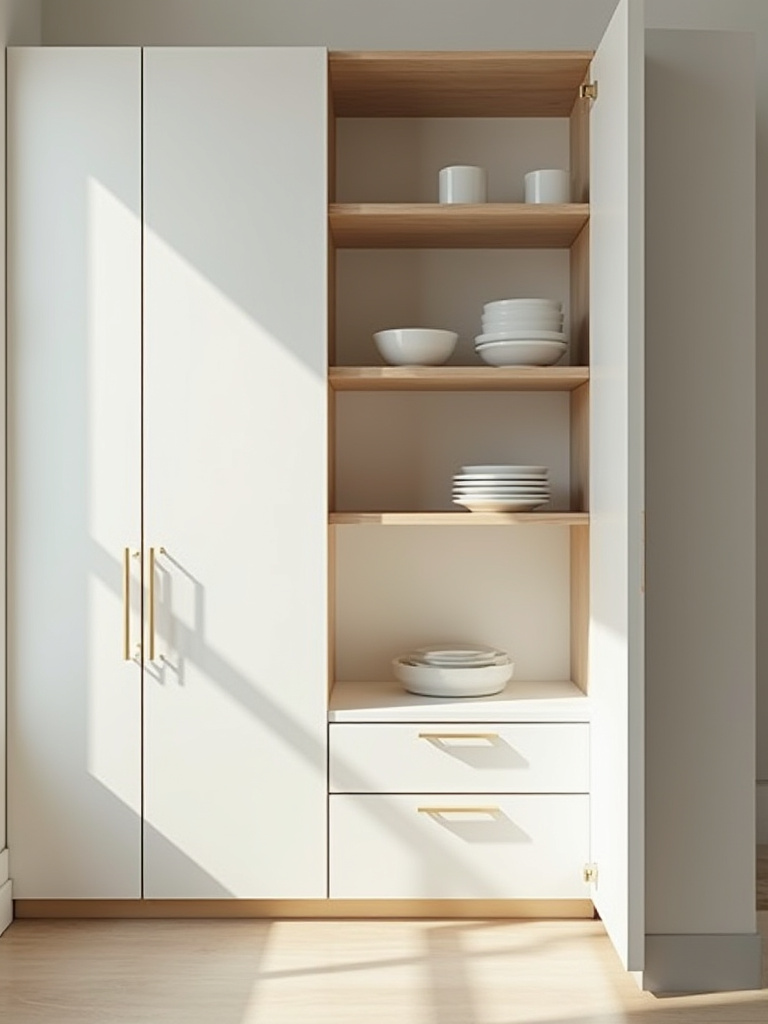
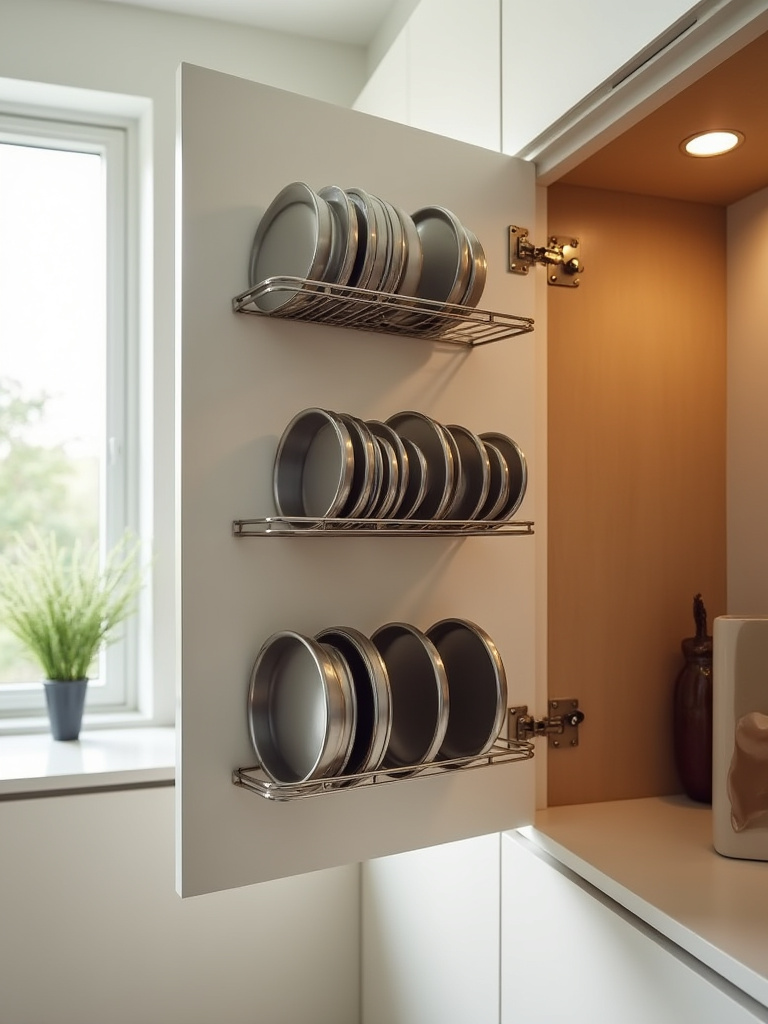
7. Implement Stackable Cabinet Organizers to Double Space
Most cabinets leave a vast amount of “dead air” above a single layer of mugs or bowls. Stackable organizers are the answer, but choose them with a discerning eye. Avoid the flimsy, plastic-coated wire shelves that bend under the weight of a few plates. They look cheap and feel unstable.
Instead, invest in sturdy, free-standing shelves made of metal, bamboo, or solid wood. Clear acrylic is also a wonderful choice as it disappears visually, making your cabinets feel less cluttered. By adding a second or even a third tier, you instantly double or triple your storage for plates, bowls, and pantry items, creating an orderly system that feels both intentional and robust.
From there, we can tackle the most challenging cabinet of all.
8. Employ Smart Under-Sink Solutions for Cleaning Supplies
The cabinet under the sink is often a damp, chaotic mess of plumbing and cleaning supplies. Taming this space is a mark of a truly organized home. The first step is always a waterproof liner—this is non-negotiable to protect your cabinetry from inevitable drips and spills.
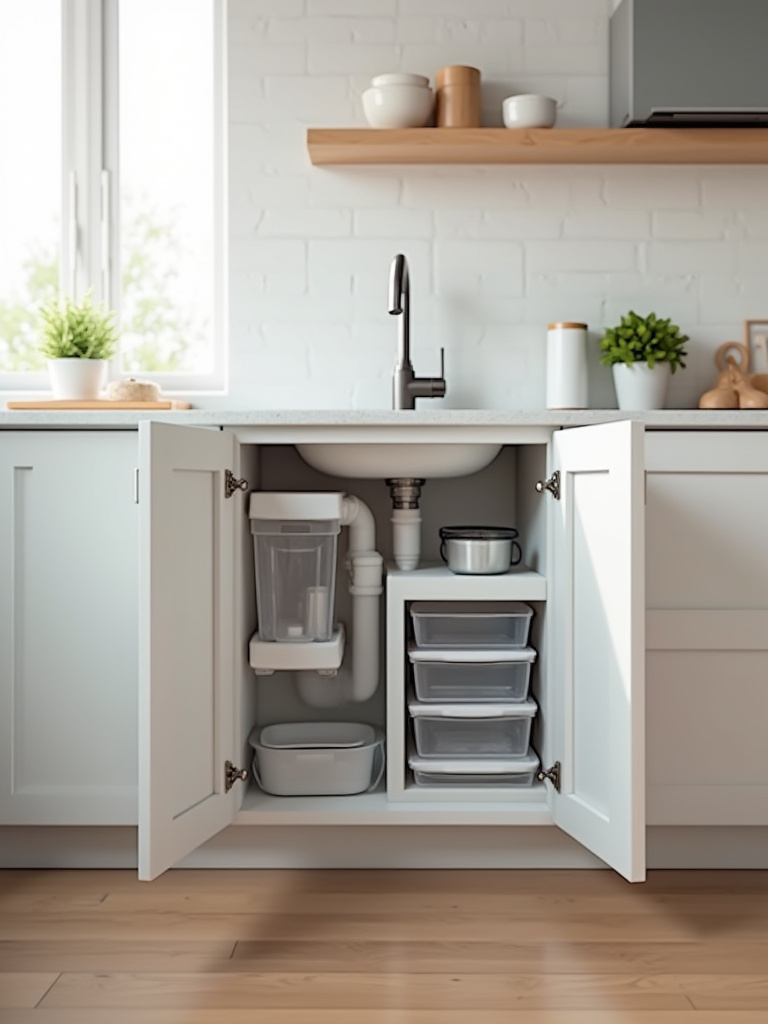
Next, look for organizers designed to work around the plumbing. A two-tier pull-out shelf with a U-shaped top tier is brilliant. The bottom can hold bulk refills, while the top provides easy access to daily-use sponges and sprays. An over-the-door caddy on the inside of the cabinet door is perfect for holding extra dish towels or brushes. Containing the unglamorous essentials gracefully is a quiet but powerful luxury.
Harnessing Vertical Space & Specialty Organizers
Once your cabinets and drawers are optimized, we look to the walls and doors. This is where you can reclaim a surprising amount of storage without sacrificing an inch of counter space.
9. Hang Pot Lids Inside Cabinet Doors Efficiently
Pot lids are impossibly awkward. They slide, they fall, they never stack neatly. Using the inside of a cabinet door to store them is one of the most effective kitchen hacks I know. It takes them out of the cabinet, freeing up that prime real estate for the pots themselves.
Again, quality matters. Instead of flimsy adhesive hooks that will fail when the steam from the dishwasher hits them, invest in a sturdy, screw-mounted metal rack designed specifically for lids. It’s a small detail, but knowing your heavy glass lid is secure and exactly where you need it brings a level of functional peace to the cooking process.
Next, let’s give your most important tools the display they deserve.
10. Install Magnetic Knife Strips Safely and Visibly
A bulky knife block is a countertop hog and can be a breeding ground for bacteria. A magnetic knife strip, on the other hand, is the professional’s choice for a reason. It’s hygienic, saves space, and keeps your most essential tools visible and within immediate reach.
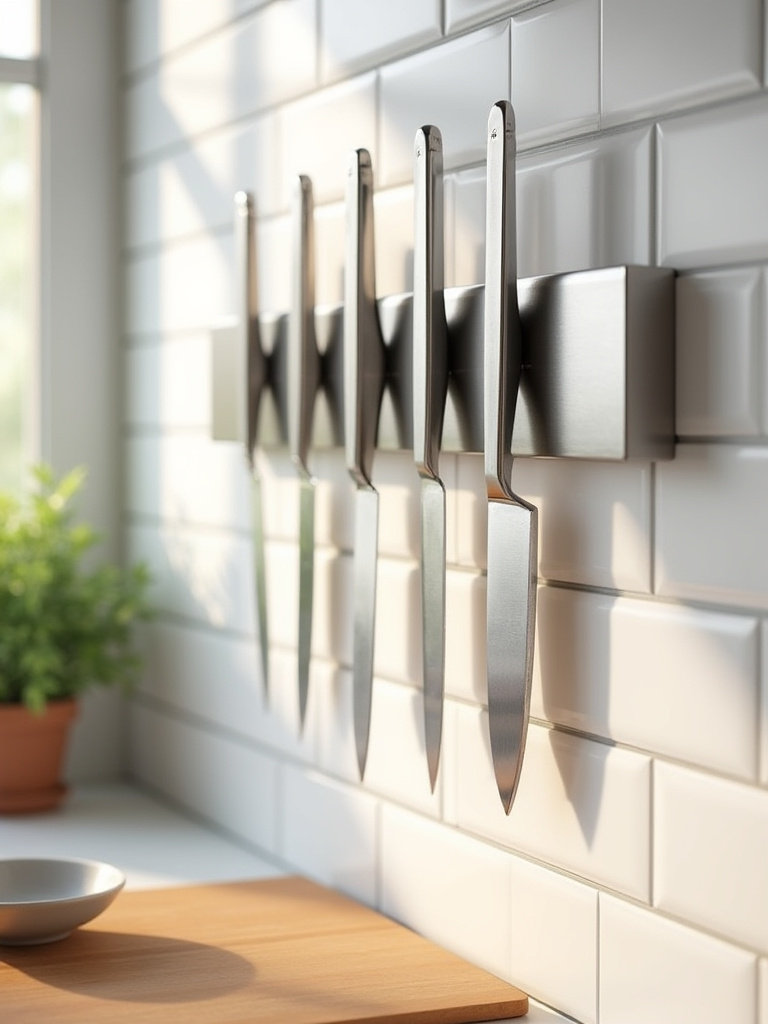
This can also be a design element. Choose a material that complements your kitchen—a warm walnut for a classic space, or sleek stainless steel for a modern one. Ensure it has a powerful magnet and is mounted securely to a wall stud. It turns your beautiful cutlery into a piece of functional art while protecting the finely honed edges of your blades.
Let’s apply that same logic of visibility and beauty to your spices.
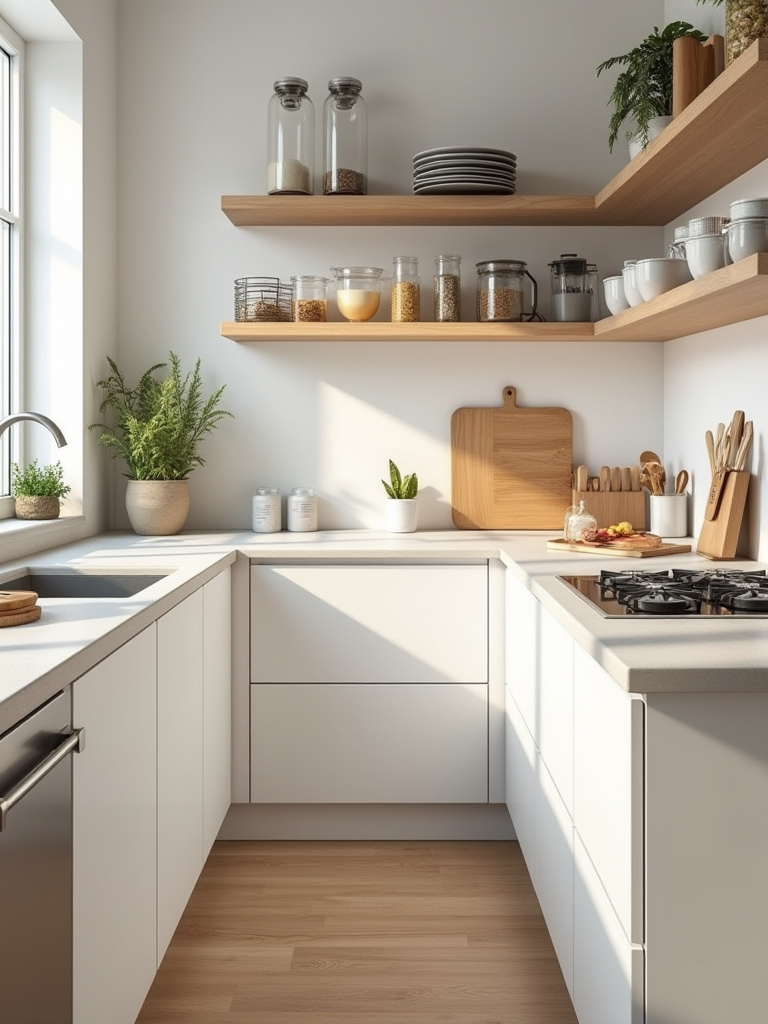
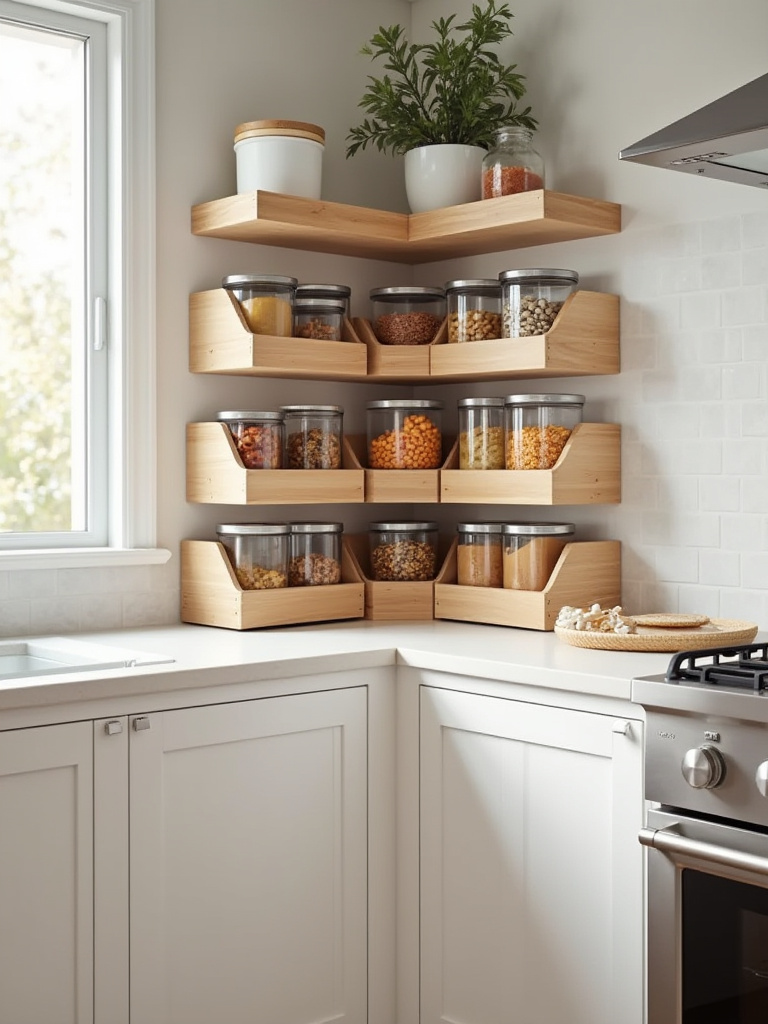
11. Mount Wall-Mounted Spice Racks for Quick Access
Rummaging through a deep cabinet for a tiny jar of cumin is a maddening waste of time. A wall-mounted spice rack transforms your collection into an accessible, culinary library. But the real key to making this look elegant rather than cluttered is uniformity.
Decant your spices into a set of matching glass jars. I cannot stress this enough. This simple act creates an incredible sense of visual calm. Label them with a high-quality label maker or by hand for a bespoke touch. Arranged alphabetically or by cuisine, a neat row of spices near the stove is not just practical—it’s a statement about your passion for cooking.
Now, for storage you want to keep out of sight.
12. Integrate Over-Door Organizers for Hidden Storage
The back of a pantry door is some of the most underutilized real estate in a kitchen. A full-length, over-door organizer can be transformative, creating an entire “shallow pantry” for jars, wraps, foils, and other slim items.
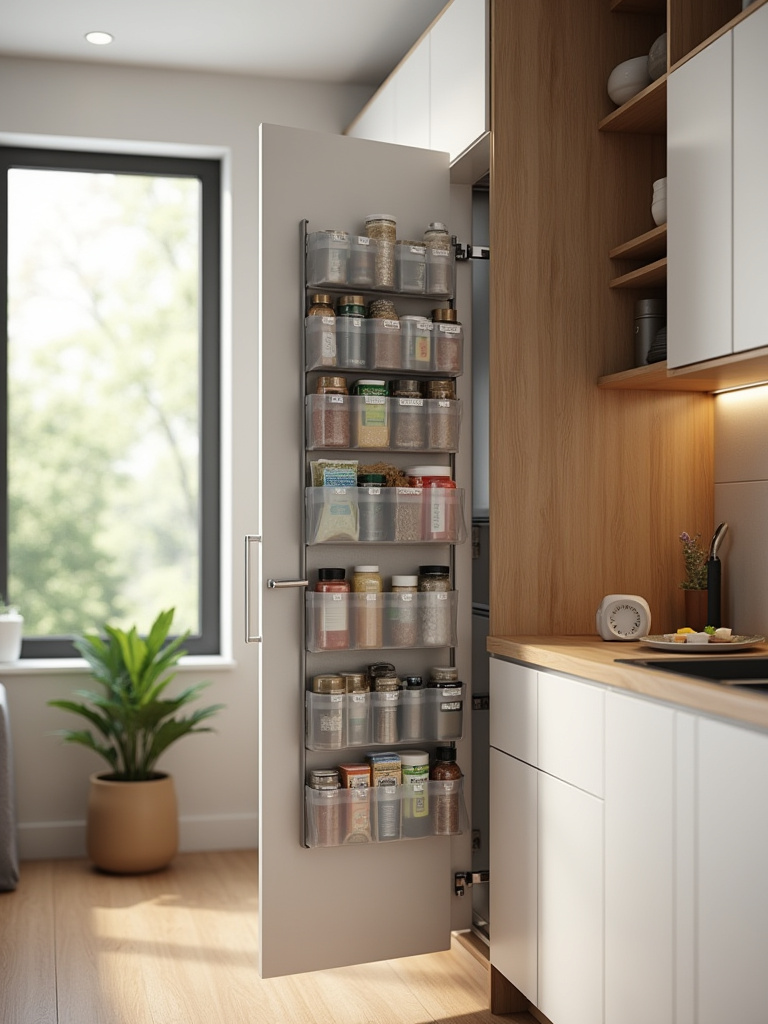
Be discerning in your choice. Avoid the cheap, clear plastic shoe organizers that sag and look untidy. Opt for a sturdy wire-grid system or one made of heavy canvas with reinforced pockets. This is for utility, not display, so it should feel robust and discreet, a hidden powerhouse of organization that makes your main pantry shelves feel spacious and airy.
Streamlining Your Pantry & Food Storage
A well-ordered pantry is the heart of an efficient kitchen. It’s where meal planning begins and where smart shopping habits pay dividends. These principles are about making your food supply work for you.
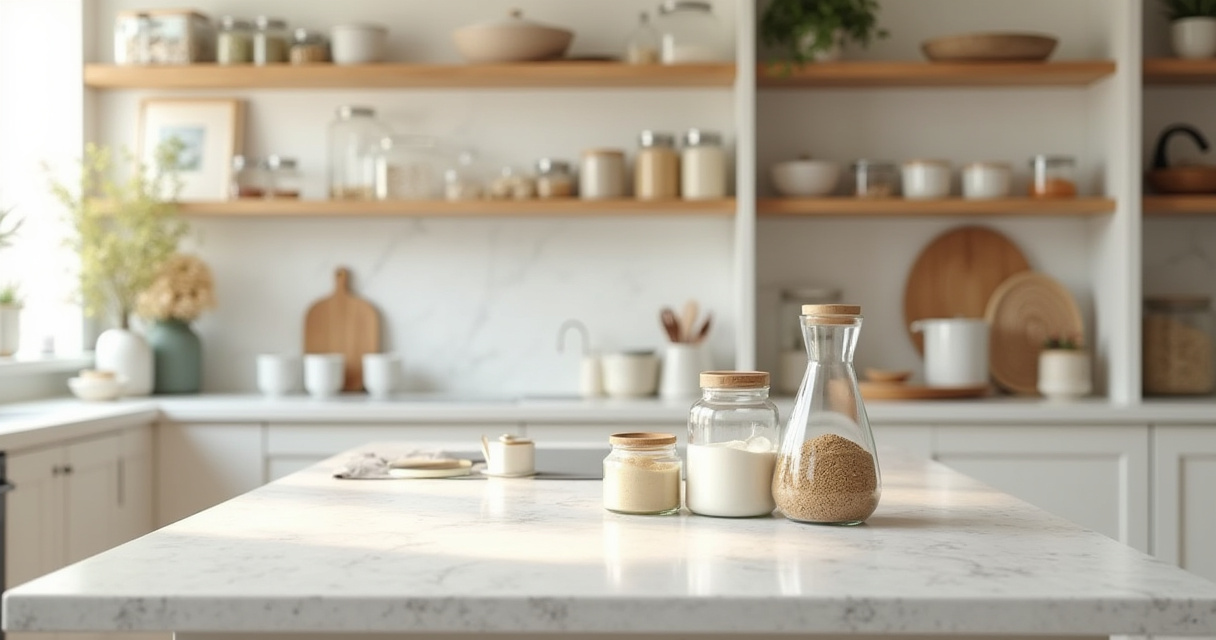
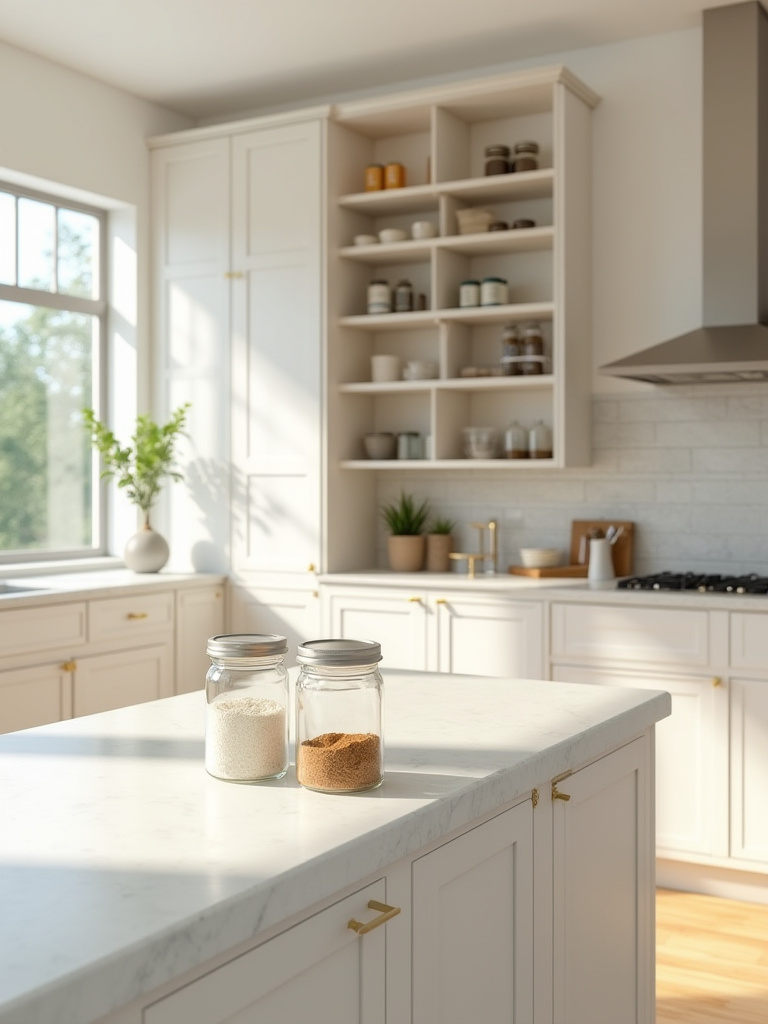
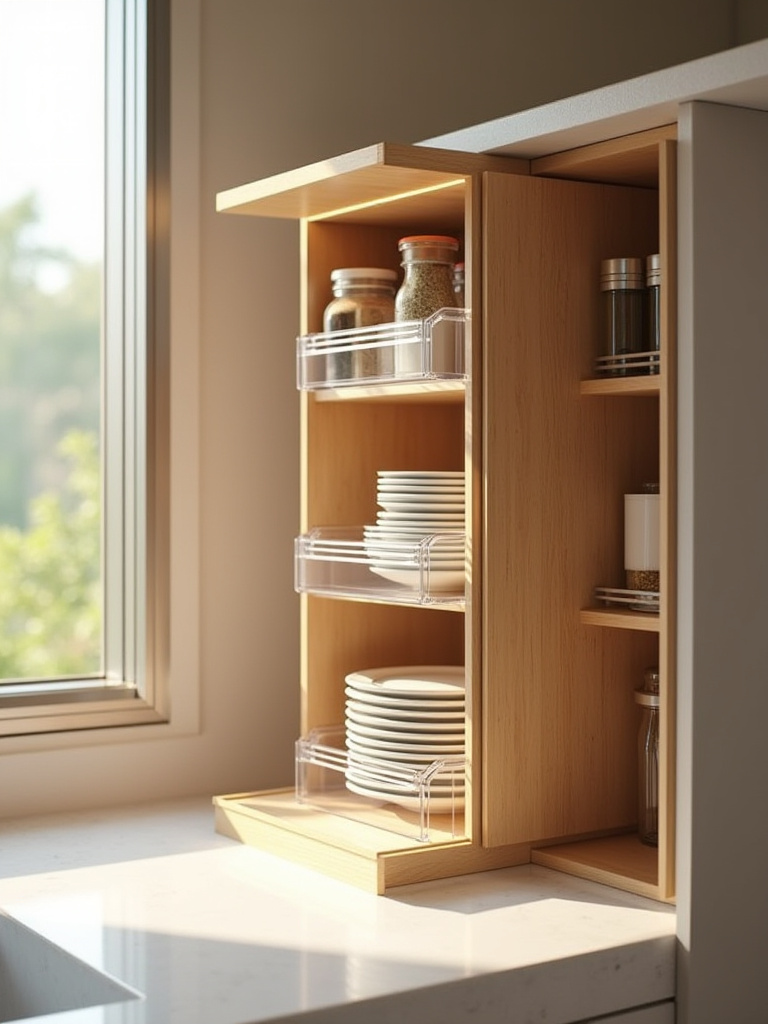
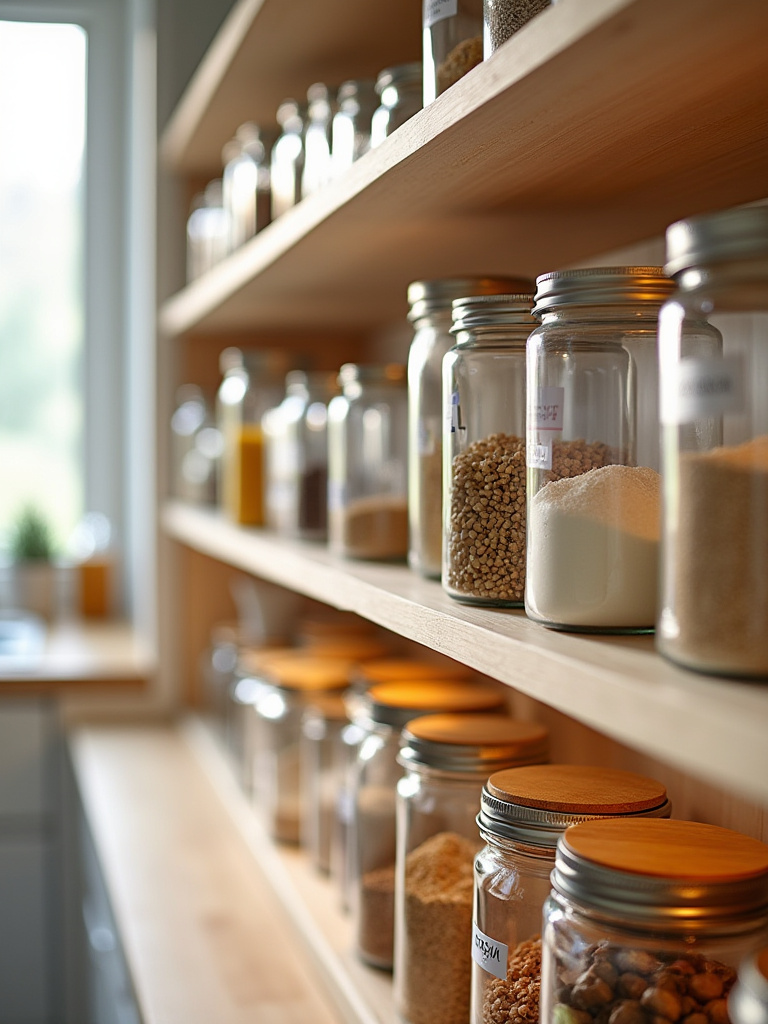
13. Decant Dry Goods into Airtight Uniform Containers
This is the principle that creates that “wow” factor in a pantry, but its purpose is far more functional than aesthetic. Transferring items like flour, pasta, and cereal out of their bulky, mismatched packaging and into clear, airtight containers is game-changing. It makes your inventory instantly visible, so you never buy a fifth box of spaghetti by mistake.
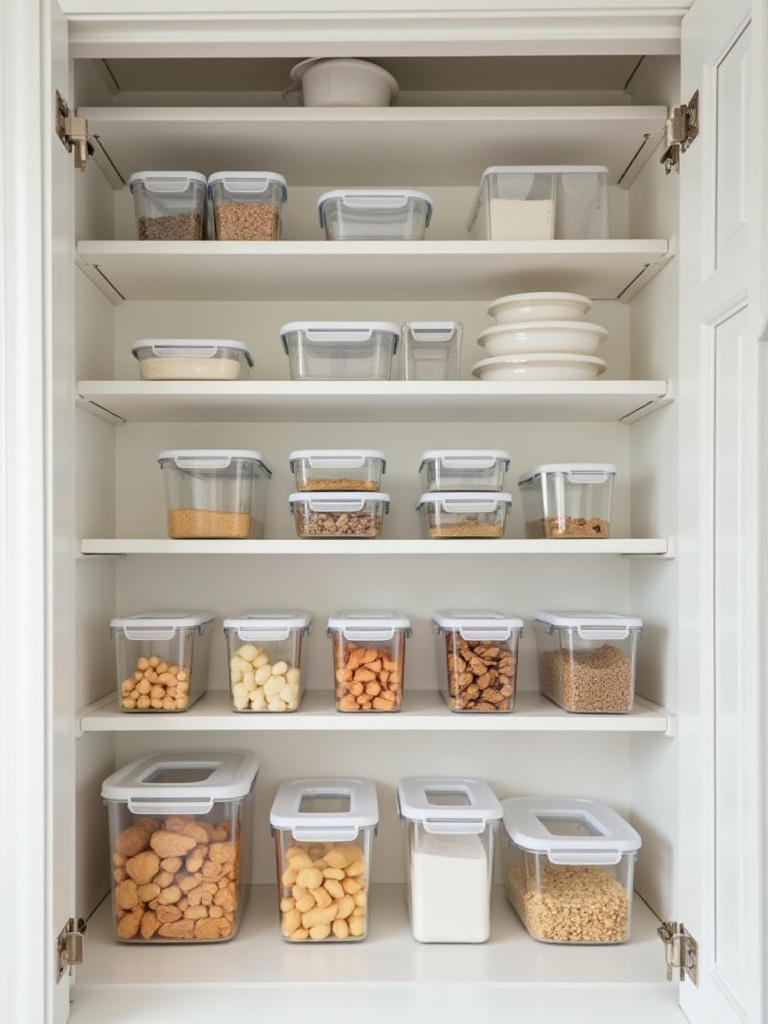
Most importantly, it protects your investment. High-quality airtight containers—I prefer glass or BPA-free acrylic with a silicone seal, like those from OXO—keep food fresher for far longer and provide an impenetrable barrier against pantry pests. It’s a system that saves you money by reducing food waste and looks absolutely stunning.
Once decanted, your items need a logical flow.
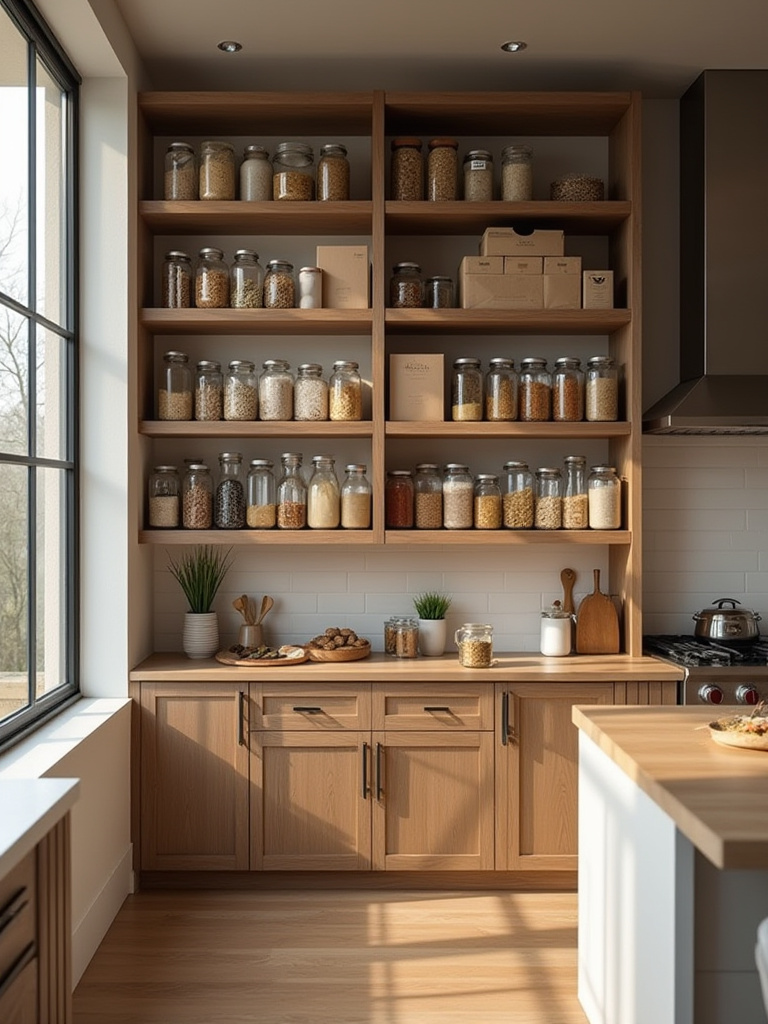
14. Categorize Pantry Shelves Logically for Faster Meal Prep
A beautifully organized but illogical pantry is useless. Think like a chef and create zones on your shelves. All baking supplies together. Grains and pastas in one area. Canned goods in another. Place your most-used categories at eye level, heavy items on lower shelves, and backstock or less-frequently used items up high.
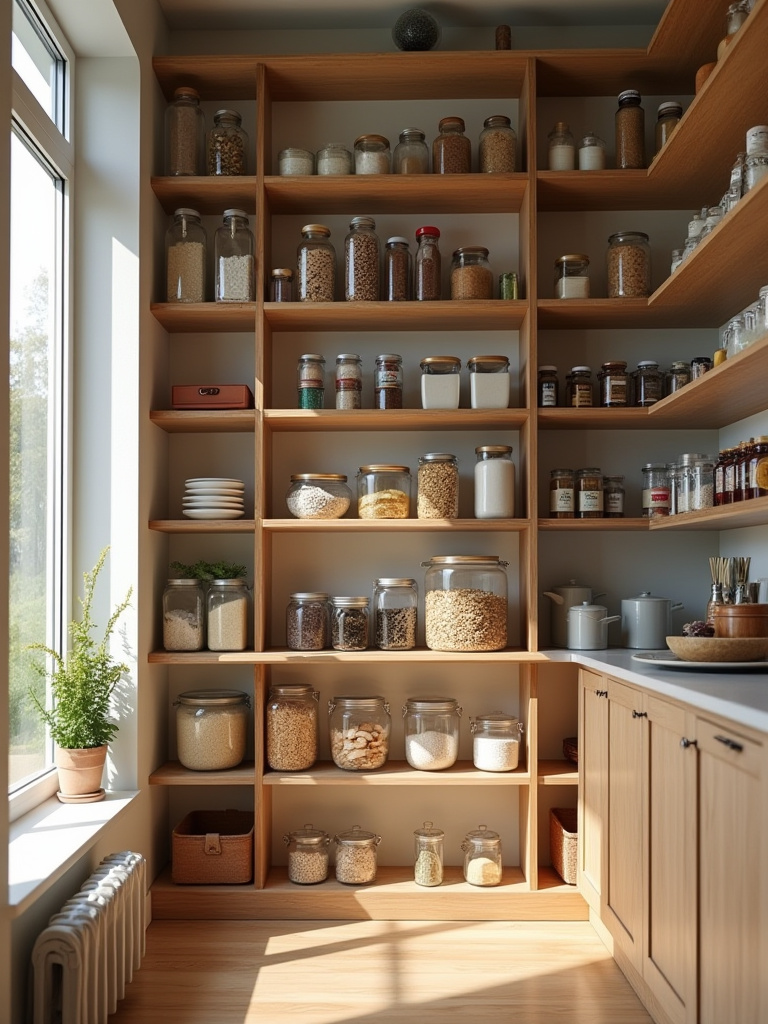
To elevate the system and prevent items from getting lost, use baskets and bins to corral smaller, like-items. A beautiful wicker or wire basket for “Breakfast” items or a bin for “Taco Night” ingredients not only looks chic but makes grabbing everything you need for a meal a single, simple action. Don’t forget to label the shelves themselves or the fronts of the bins.
Next comes the habit that saves the most money.
15. Implement First-In, First-Out (FIFO) Rotation Strictly
FIFO is a simple concept: use the oldest items first. This is the cardinal rule for preventing food waste. When you bring new groceries home, don’t just shove them in the front. Take the 30 extra seconds to pull the older items forward and place the new ones behind them. It’s the most powerful habit you can adopt for managing your food budget.
For this to work, you must be able to see expiration dates. When you decant items, use a small piece of painter’s tape on the bottom of the container or a dissolvable label to note the date. Being a good steward of your resources is a sophisticated practice, and FIFO is its most practical application in the kitchen.
Finally, let’s address the chaos of daily snacking.
16. Create a Dedicated Snack Station for Easy Access
For households with children—or just hungry adults—a designated snack station can be a lifesaver. This contains the chaos of half-eaten bags and constant requests. Designate a low drawer or a specific shelf in the pantry for this purpose.
Use clear, open-topped bins or beautiful baskets to separate different types of snacks—crunchy, sweet, healthy options. Pre-portioning items from bulk bags into smaller, reusable containers is an excellent strategy for both portion control and convenience. This system empowers family members to help themselves while keeping the rest of your beautifully organized pantry untouched.
Maintaining Your Organized Kitchen for the Long-Term
An organized kitchen isn’t a one-time project; it’s a practice. The final principles are about building simple habits that ensure your hard work endures, making order an effortless part of your daily life.
17. Label All Containers Clearly for Instant Identification
An unlabeled container is just a mystery box. Labeling is the final, crucial step that makes your entire system functional. It eliminates guesswork and allows anyone in your household to find what they need and, just as importantly, put it back in the right place.
Your labeling system should match the aesthetic of your kitchen. A high-quality label maker with a clean, sans-serif font offers a sleek, uniform look. For a more classic or farmhouse style, elegant, hand-written chalkboard labels can be beautiful. Whatever you choose, be consistent. And always label with the specific contents and, if appropriate, the expiration or “opened on” date.
This is the final touch that makes the whole system sing.
18. Schedule Regular Mini-Declutter Sessions for Lasting Order
Perfection is not the goal; maintenance is. The secret to a perpetually organized kitchen is not a massive annual clean-out. It’s the “five-minute reset.” Build small organizational habits into your existing routines to prevent clutter from ever building up.
While your coffee brews, quickly wipe down one shelf. After you unload the dishwasher, take two minutes to tidy the utensil drawer. Set a timer for 10 minutes every Sunday evening and just tackle one “hot spot”—the mail pile on the counter, the junk drawer. These small, consistent efforts are far more powerful than sporadic, Herculean purges. They make order feel easy, automatic, and sustainable.
A Kitchen That Serves You
You see? Creating an impeccably organized kitchen has very little to do with buying more bins. It’s an exercise in strategy, discipline, and investing in quality systems that create a foundation for lasting order. It’s about designing a space that brings you a sense of calm and control every time you walk into it. An organized kitchen is not just aesthetically pleasing; it is the ultimate everyday luxury—a space that works seamlessly to support you, your family, and your life. Start with one cabinet. Just one. And you’ll find the clarity it brings is addictive.