Picture this: You’re standing in a brand-new, six-figure kitchen. The cabinets are a perfect shade of deep navy, the Quartz countertops have this subtle, gorgeous veining, and the brass hardware is gleaming. But you put a red onion on the cutting board, and you can’t see what you’re doing because your own head is casting a giant shadow right where you need to chop. The whole stunning space is ruined by one single, terrible overhead light.
As an architectural photographer, I spent a decade and a half learning one thing: light is everything. It’s not an accessory; it’s a building material. It sculpts space, dictates mood, and makes or breaks how you experience a room. And nowhere is that truer than in the kitchen. People spend a fortune on finishes and then treat the lighting like an afterthought, and it kills me every time. So let’s talk about how to get it right. Not the corporate blog post version, but the real story.
Foundations: Planning Your Kitchen Lighting Strategy
Before you even think about that cool pendant you saw on Instagram, you have to lay the groundwork. This is the boring-but-critical phase that separates a beautifully lit kitchen from a mess of expensive mistakes. Get this right, and everything else falls into place.
1. Define Key Zones
You don’t use your entire kitchen for one single thing, so why would you light it that way? You need to think like a photographer setting up a shoot and map your space. Where do you do the real prep work with sharp knives? That’s your Prep Zone. Where’s the stove? That’s the Cooking Zone. The sink is the Clean-Up Zone, and the island is likely a multi-purpose Hub Zone for everything from eating to homework.
Mapping these out on a simple sketch of your floor plan is the single most important first step. It stops you from just scattering lights randomly across the ceiling—a move that guarantees shadows and frustration. It forces you to think about function first. This isn’t just noise; it’s the blueprint for your entire lighting plan. Each zone has a different job, and each job needs a different kind of light.
From here, we can start assigning the right types of light to each zone, which is where the real magic begins.
2. Master Layered Lighting
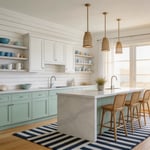
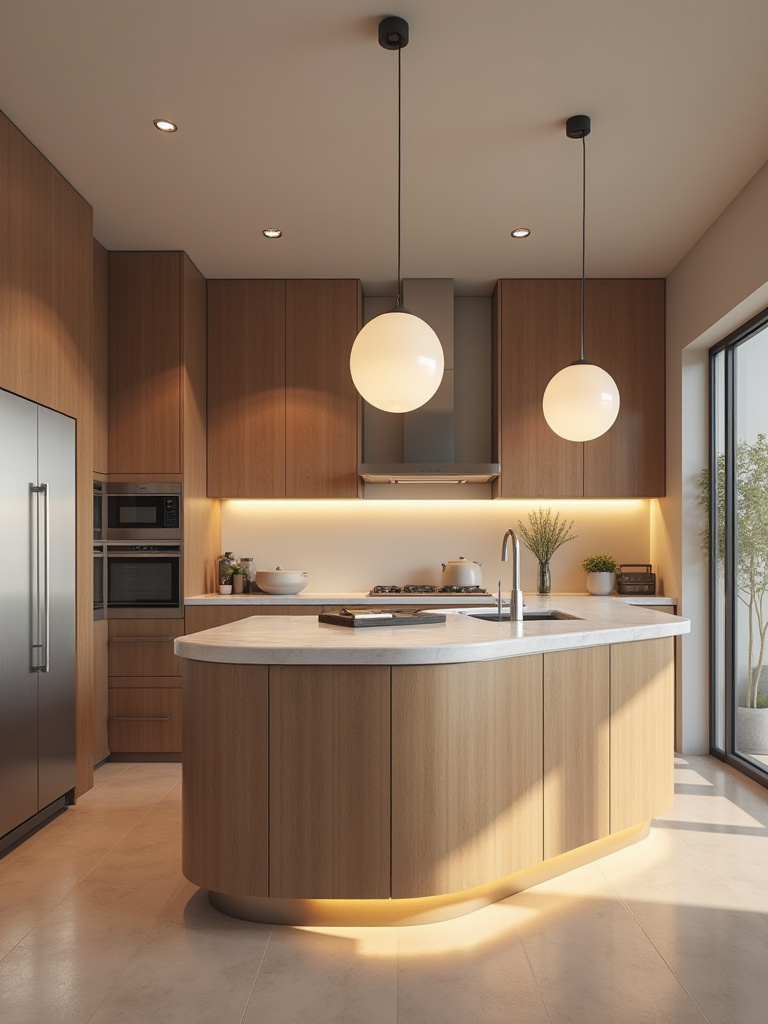
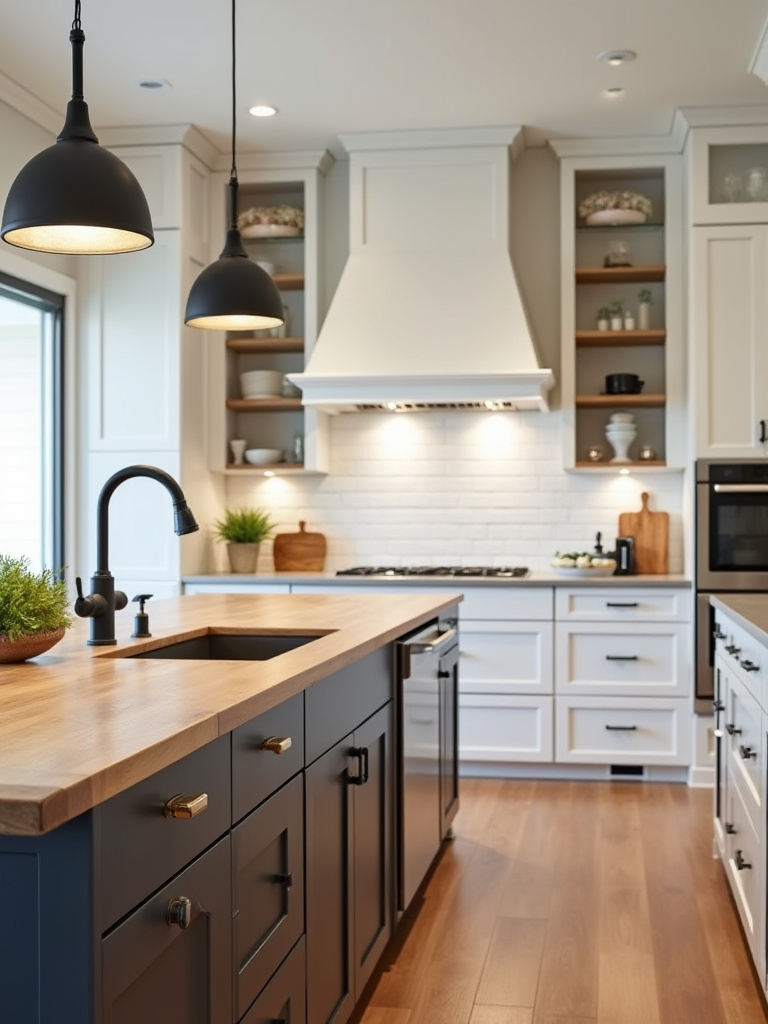
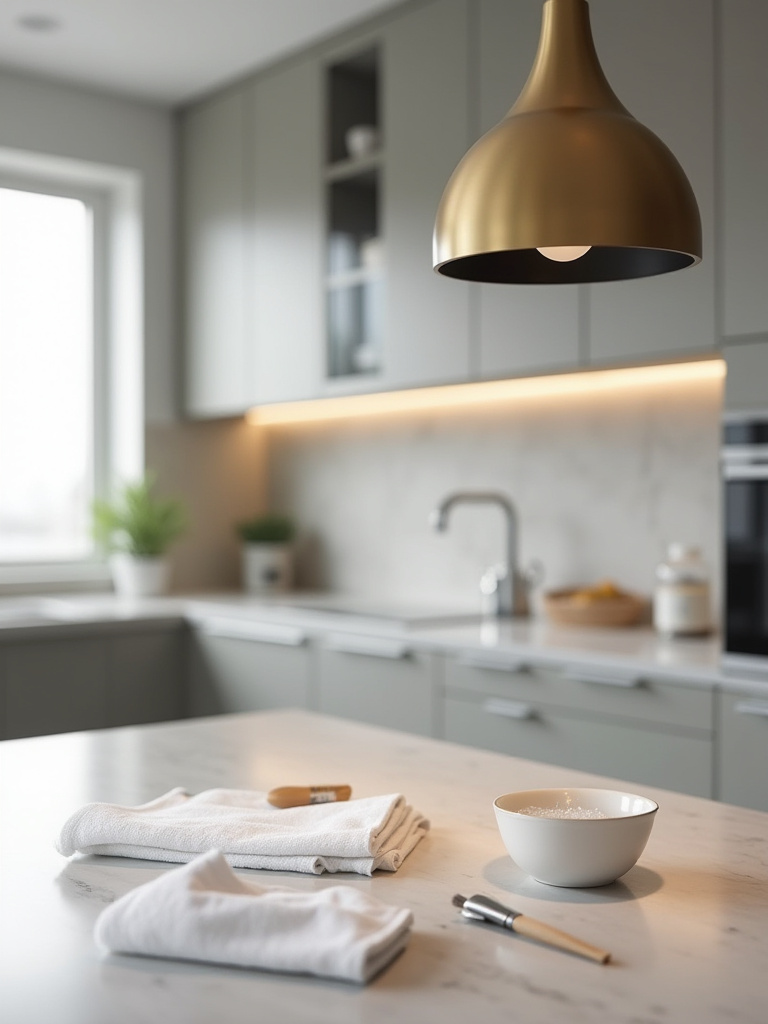
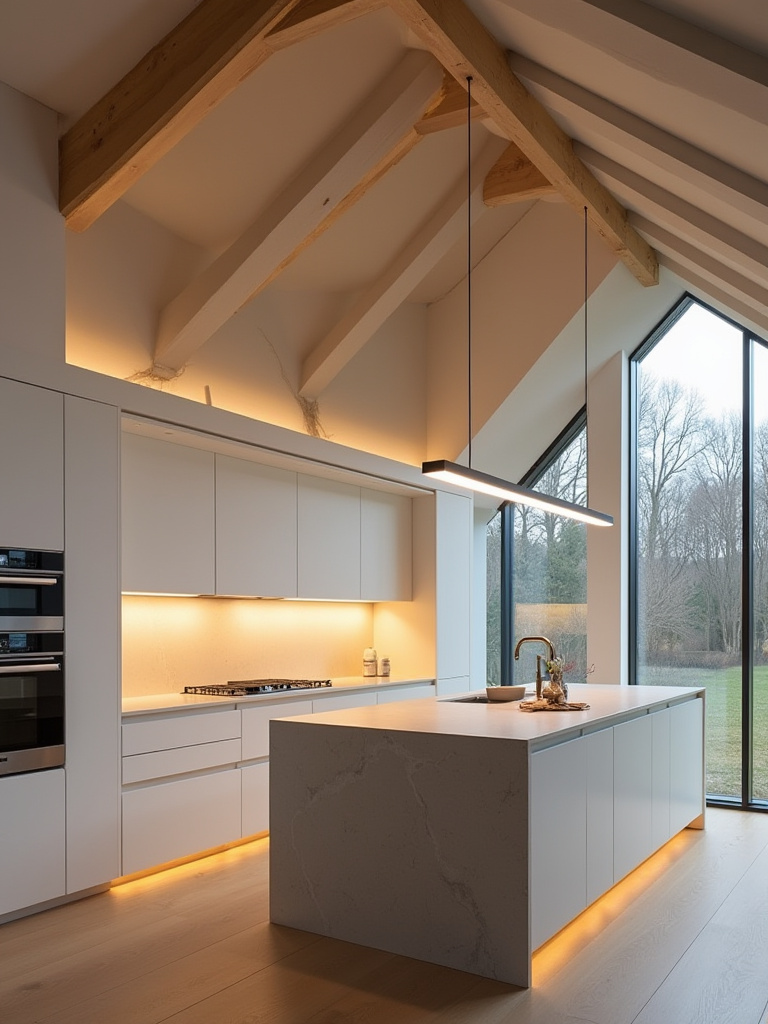
Okay, “layered lighting” is a term that gets thrown around a lot, but most people don’t actually get what it means. It’s simple: you need three different types of light working together. Ambient is your general, overall illumination—the light that lets you walk into the room without tripping. Think of it as the fill light in a photo. Task is your workhorse light, aimed directly at your zones for chopping, cooking, and cleaning. And Accent is the pretty stuff—the light that highlights a piece of art or the inside of a glass cabinet.
 Accent Lighting working together.” class=”wp-image-11586″/>
I once worked with a client who had only one layer: a massive, super-bright chandelier in the middle of the kitchen. It was beautiful, but it was a disaster. It created harsh glare and deep shadows everywhere you actually needed to see. The solution wasn’t to get rid of the chandelier; it was to add the other layers. We put focused task lighting under the cabinets and a few accent lights to create depth. By using all three layers, you create a space that’s balanced, functional, and feels incredible to be in.
Once you understand layering, the most important (and cheapest) layer to consider is the one that’s already there.
3. Maximize Natural Light
Before you spend a single dollar on a light fixture, you have to work with what you have. Natural light is the gold standard. It has a perfect Color Rendering Index (we’ll get to that) and makes everything look better. As a photographer, my entire day was spent chasing it. In your kitchen, you need to harness it. This means keeping window treatments minimal, using light-colored paints and backsplashes to bounce light around the room, and maybe even adding a skylight or a solar tube if you’re doing a major renovation.
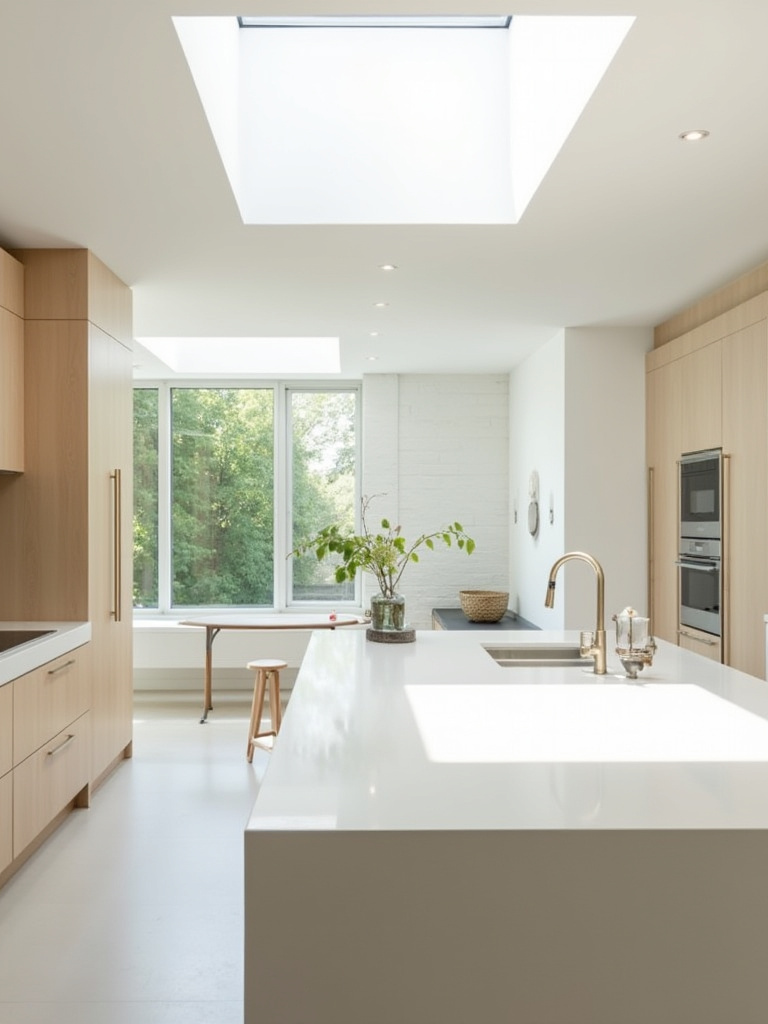
But here’s the pro move: you also have to control it. A huge, west-facing window is great for brightness, but at 4 p.m., the glare will be so blinding you can’t work. You’re not just maximizing light; you’re managing it. That might mean installing smart shades that close during the hottest part of the day or using low-emissivity glass to cut down on heat and glare. Don’t just think about letting light in; think about how you’ll live with it all day.
As light floods in, it’s going to hit the biggest objects in your room first: your cabinets.
4. Assess Cabinetry Impact
Here’s something people get wrong all the time: they don’t account for how their cabinets affect light. Think of it this way: high-gloss white cabinets are like giant mirrors, bouncing light all over the place. Dark, matte-finish cabinets are like black holes; they just swallow light whole. If you’re installing those sexy, dark walnut or matte black cabinets, you need to budget for 20-30% more light output to get the same level of brightness as you would in a white kitchen.
The height and depth matter, too. Tall, pantry-style cabinets create huge vertical shadows, and deep upper cabinets mean your countertops will be even darker. This isn’t a problem; it’s just a factor you have to plan for. It tells you exactly how critical your under-cabinet task lighting is going to be and might even influence where you place your overhead ambient lights to avoid having them blocked. Your cabinetry isn’t just storage; it’s the primary architectural surface that light interacts with.
This brings us to the most crucial, can’t-mess-it-up part of the plan.
5. Plan Wiring Early
Can we talk about my biggest pet peeve? It’s when someone has a brilliant lighting plan, but they waited until after the drywall was up to talk to an electrician. I watched a client lose thousands of dollars because they had to cut open pristine walls to run one extra wire for island pendants they decided on late in the game. Do not be that person. Your electrical plan should happen at the framing stage, period.
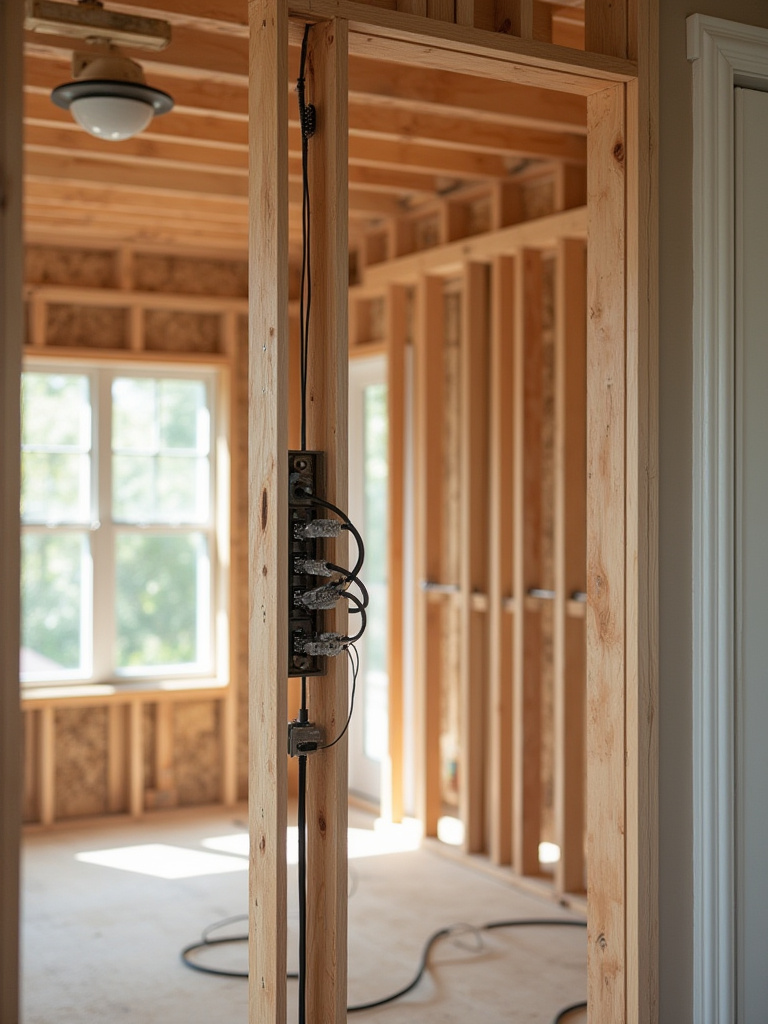
Here’s the shortcut you wish you’d known: when the walls are open, run more wire than you think you need. Seriously. Run an extra circuit to the island. Run conduit (the plastic tubing that holds wires) to a spot where you might want an accent light someday. The cost of running an empty conduit during a remodel is a few bucks. The cost of doing it after the fact is thousands. This is about future-proofing. You might not want smart-home-controlled toe-kick lighting now, but you might in five years. Give your future self that option.
With the wiring planned, it’s time to talk money.
6. Establish a Budget
Everyone hates this part, but it’s non-negotiable. And the BS everyone tells you is to budget for “fixtures.” Wrong. That’s only half the story. A realistic lighting budget is about 50-60% for fixtures, 30-40% for the electrician’s labor, and about 10% for the controls—the dimmers, smart switches, and hubs. People get sticker shock when they realize the installation costs almost as much as the pretty lights themselves.
A good rule of thumb is to allocate 5-10% of your total Kitchen Renovation budget just for lighting. So on a $70,000 reno, that’s $3,500 to $7,000. And please, do not blow your whole budget on one spectacular statement pendant over the island and then have nothing left for the crucial under-cabinet task lighting. Budget by layer: allocate funds for your ambient, your task, and your accent lighting separately to make sure no single layer gets left behind.
Now for the fun part: actually picking out the lights.
Implementing Layered Lighting: Fixture Selection & Purpose
Okay, the plan is solid. Now we get to the part that feels more like decorating. We’re going to pick the right hardware to execute each of our lighting layers, making sure every fixture has a clear and distinct purpose.
7. Select Ambient Fixtures
This is your foundational, workhorse light. It’s the general illumination that fills the room and says, “This space is open.” For most kitchens, this means recessed lights (what people mistakenly call “can lights”). You could also use flush-mount fixtures if your ceiling is low, or even large pendants that throw diffuse light. The goal here is an even, shadow-free wash of light. Don’t think about drama; think about function.
To get technical for a second, you’ll want to calculate the lumens needed. A simple formula is to multiply your kitchen’s square footage by about 50-70. So for a 200-square-foot kitchen, you’ll need 10,000-14,000 total lumens for your ambient layer. If you pick recessed lights that are 800 lumens each, you know you’ll need around 12-16 of them. This simple math prevents you from under-lighting the space and creating a kitchen that feels like a cave.
This ambient layer provides the base, but the most important light for actually using your kitchen comes next.
8. Illuminate Prep Areas
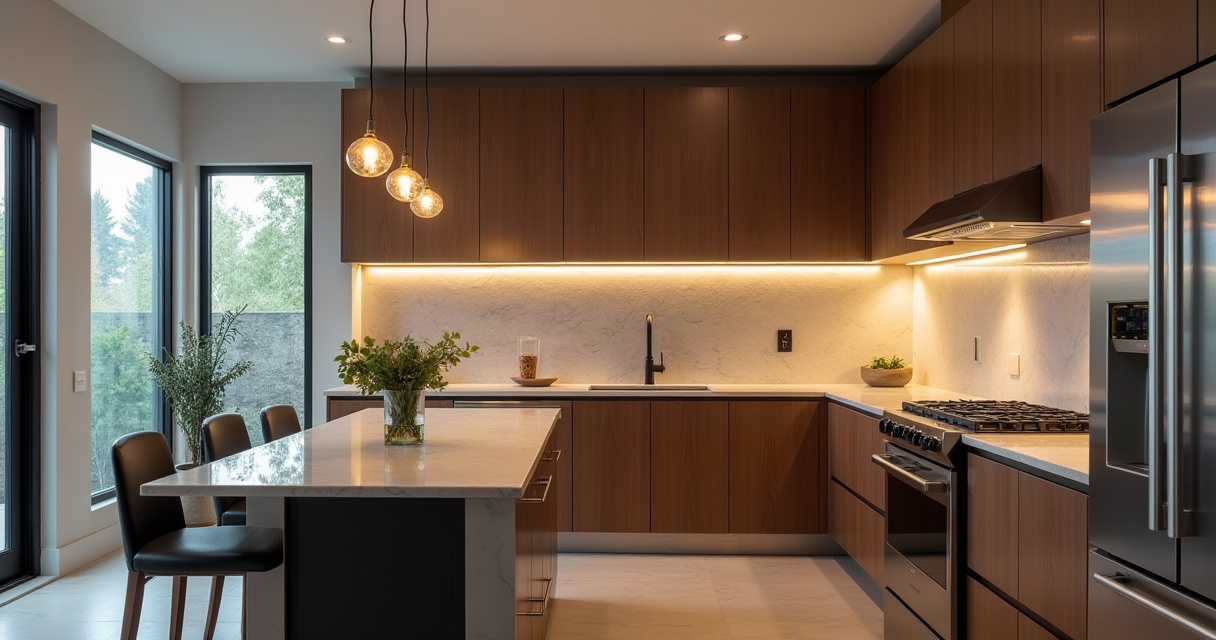
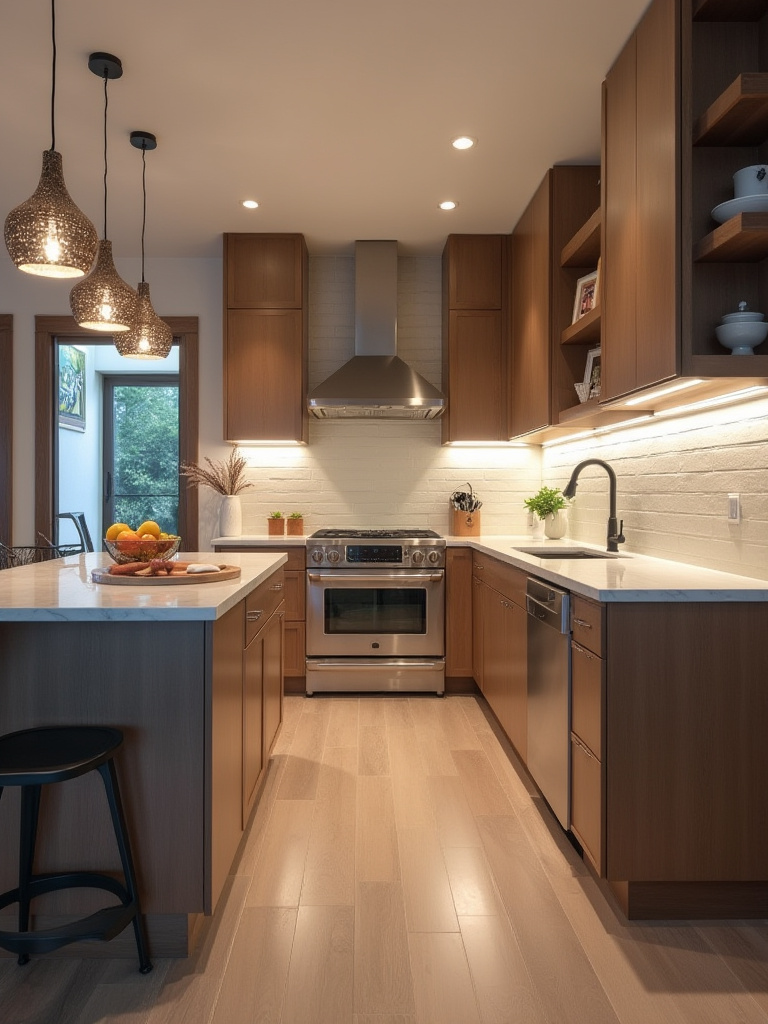
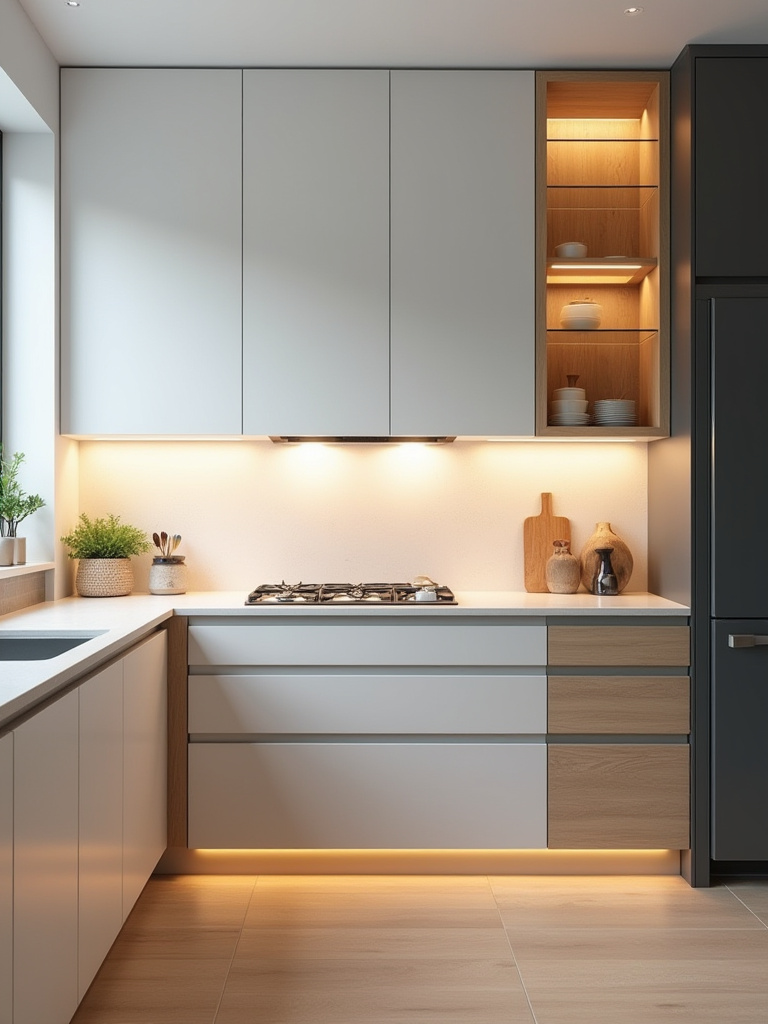
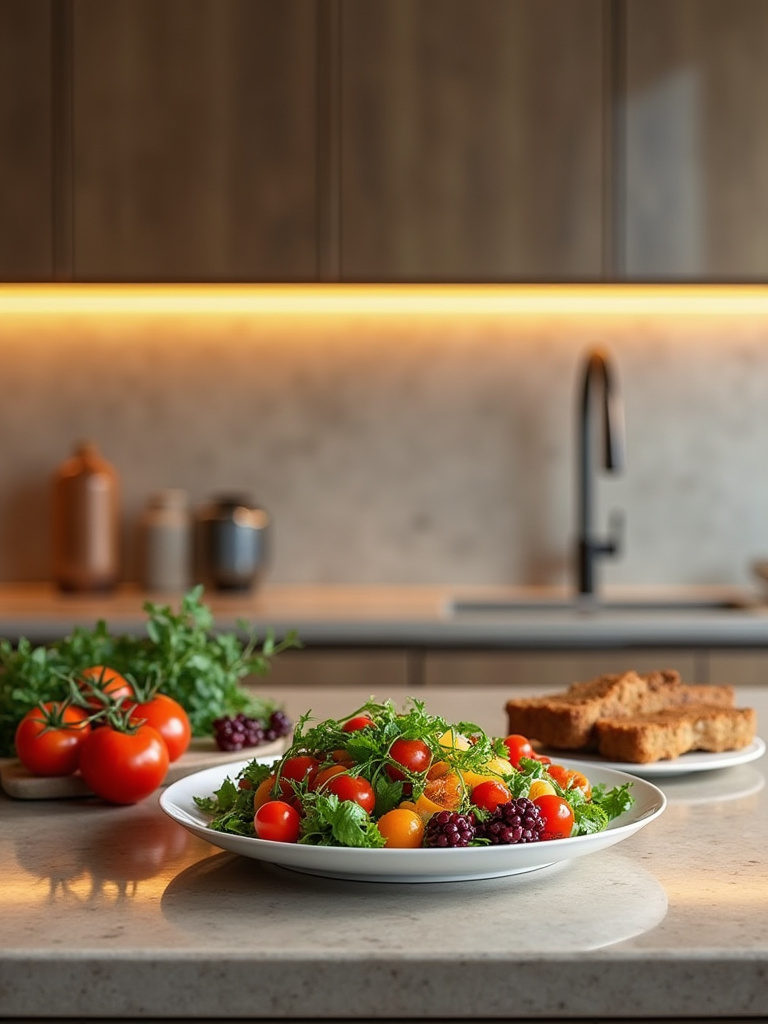
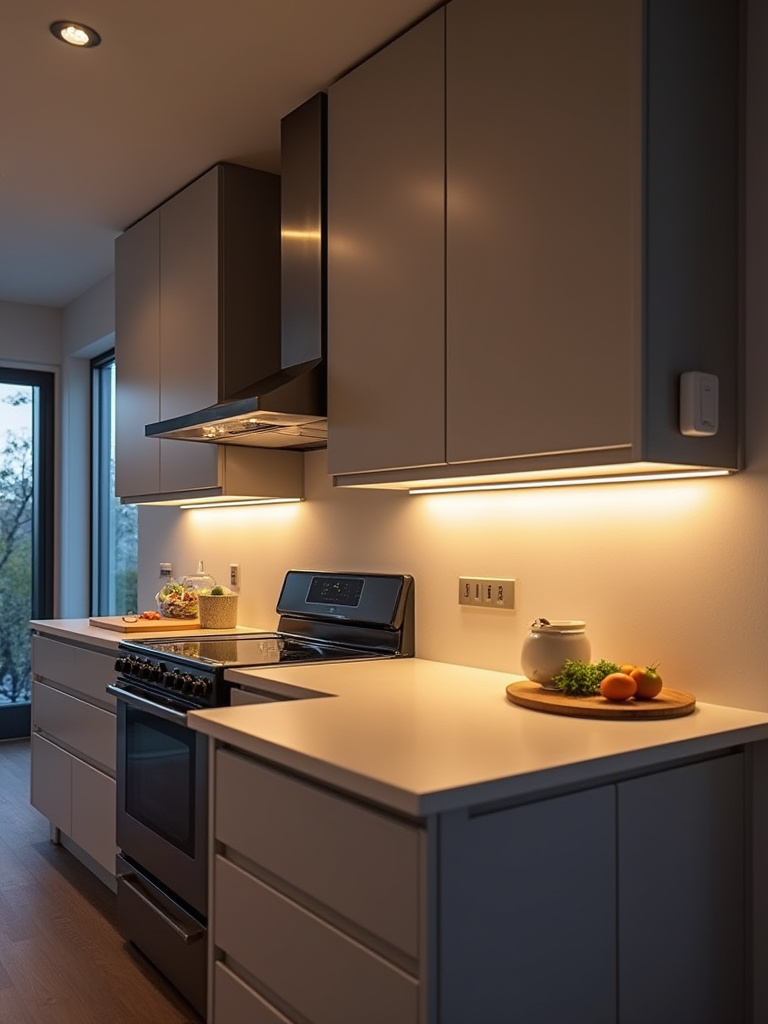
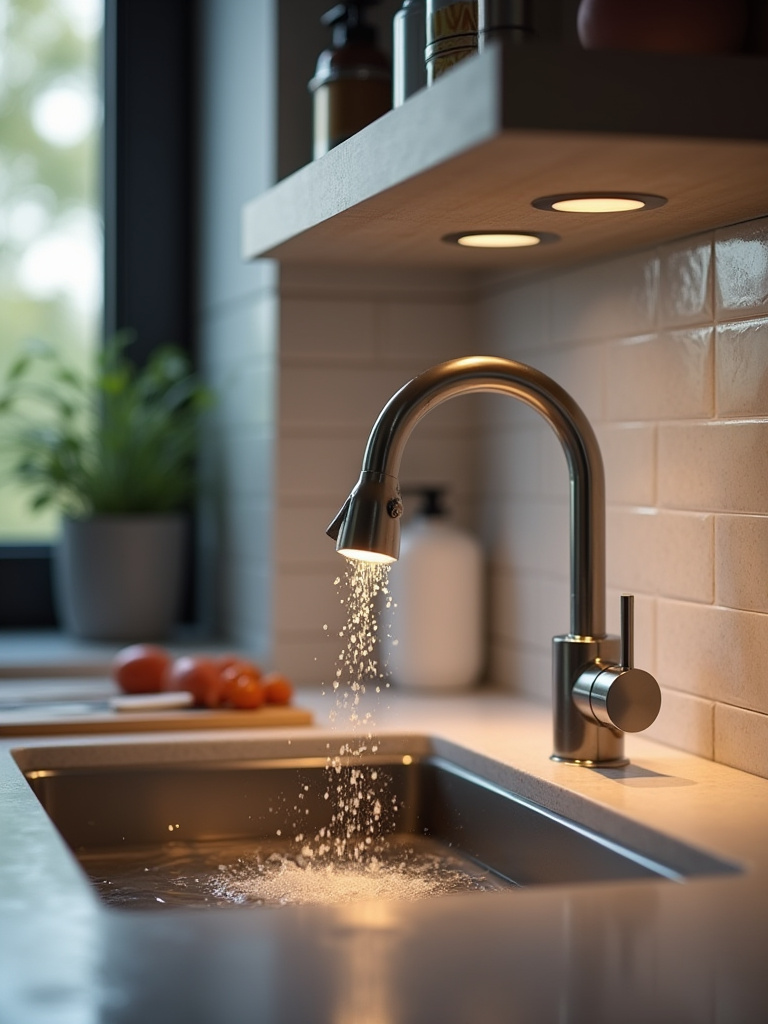
This is the MVP of kitchen lighting, and it’s non-negotiable: under-cabinet lighting. Your ambient overhead lights will always be blocked by your own body when you’re standing at the counter, creating a shadow exactly where you’re working with sharp knives. Under-cabinet fixtures solve this perfectly by putting the light source between you and your work surface. No more shadows.
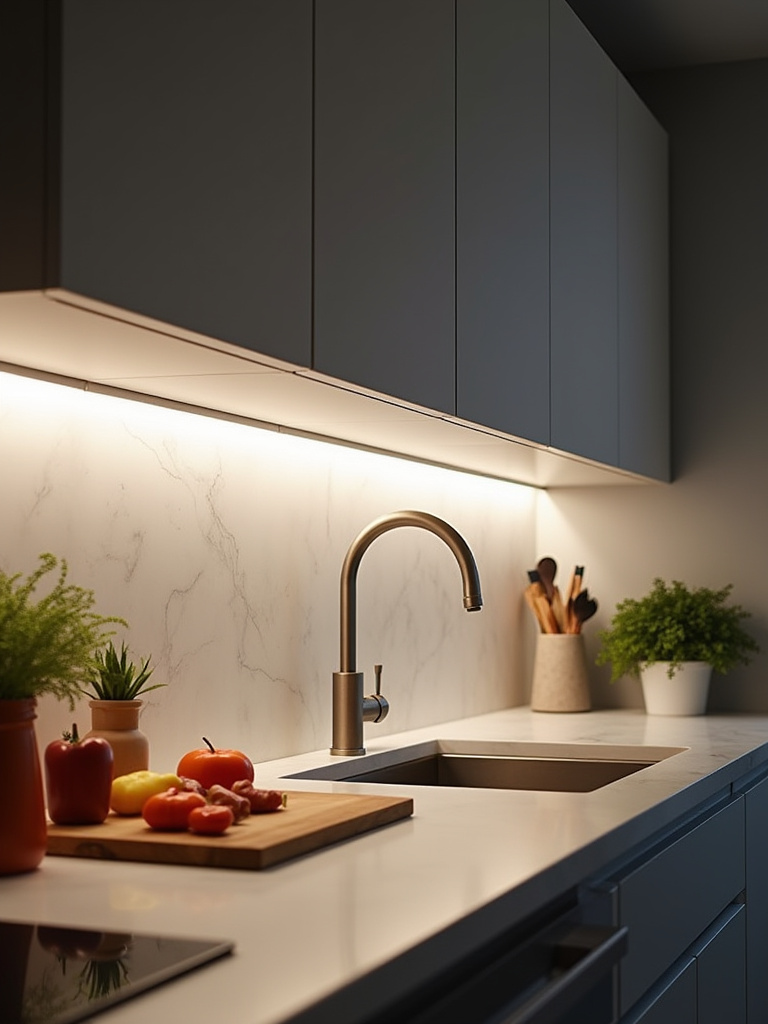
The best choice here, hands down, is a continuous LED strip. Don’t use the little round “puck” lights; they create pools of light and dark spots. You want a seamless, even glow. And here’s the placement trick everyone gets wrong: install the strip toward the front of the cabinet, not pushed back against the backsplash. This illuminates the entire counter evenly and prevents glare from bouncing off a glossy backsplash right into your eyes.
Once your main counters are lit, it’s time to tackle the centerpiece of the modern kitchen.
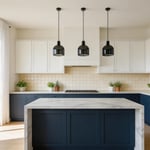
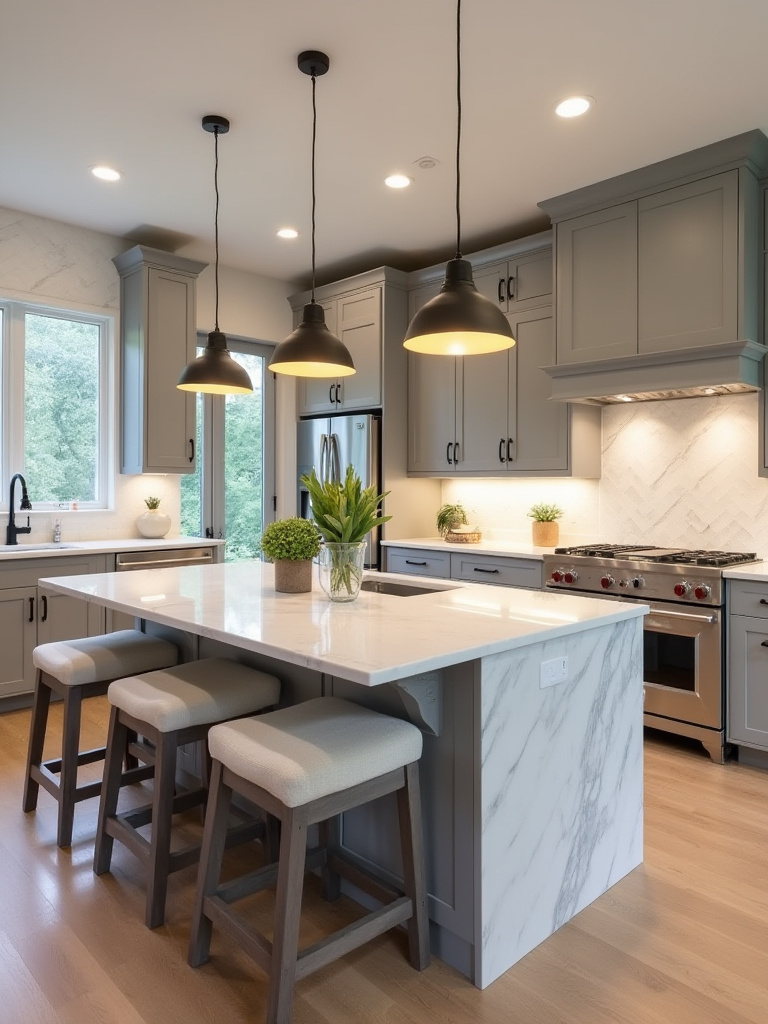
9. Brighten the Island
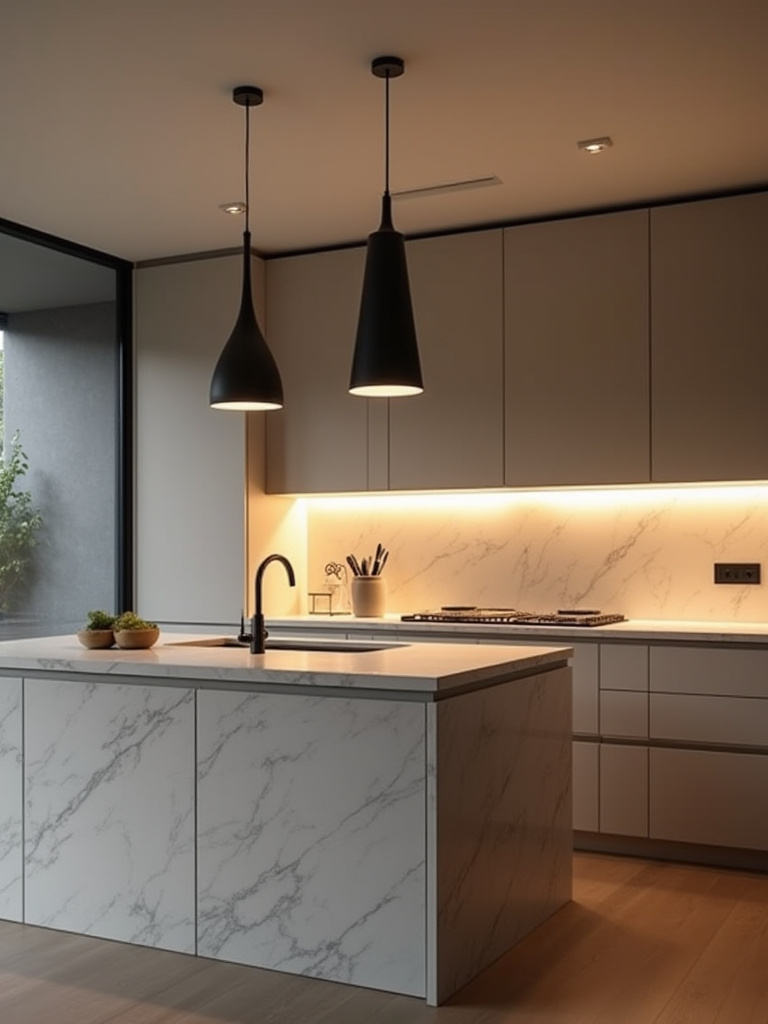
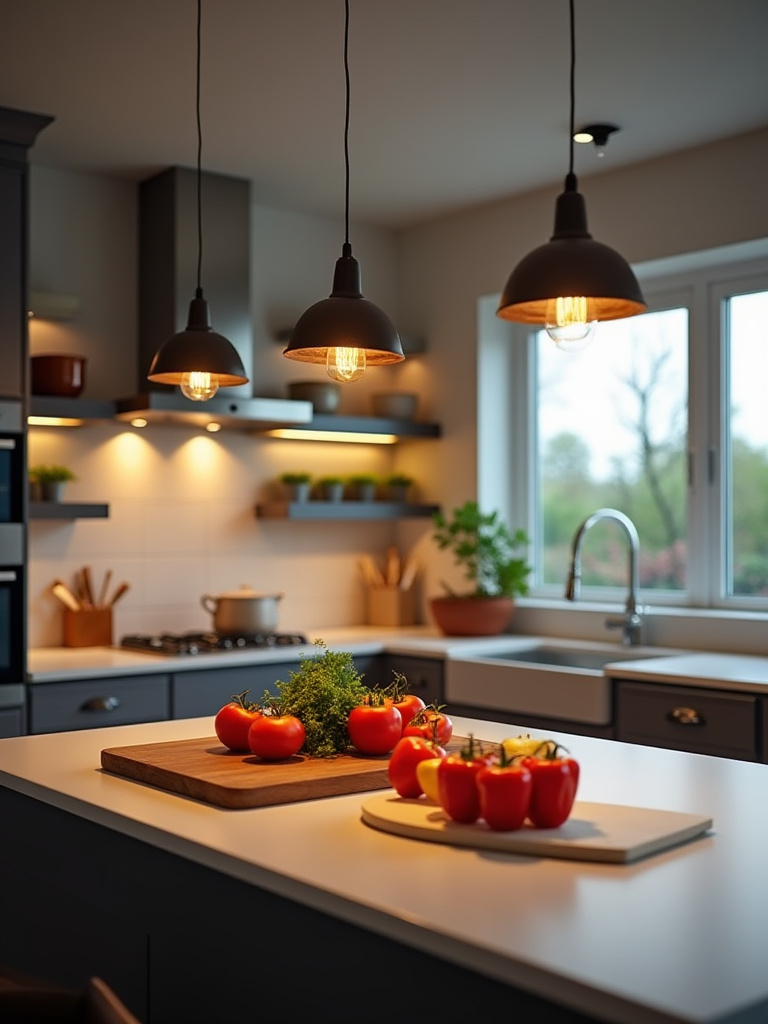
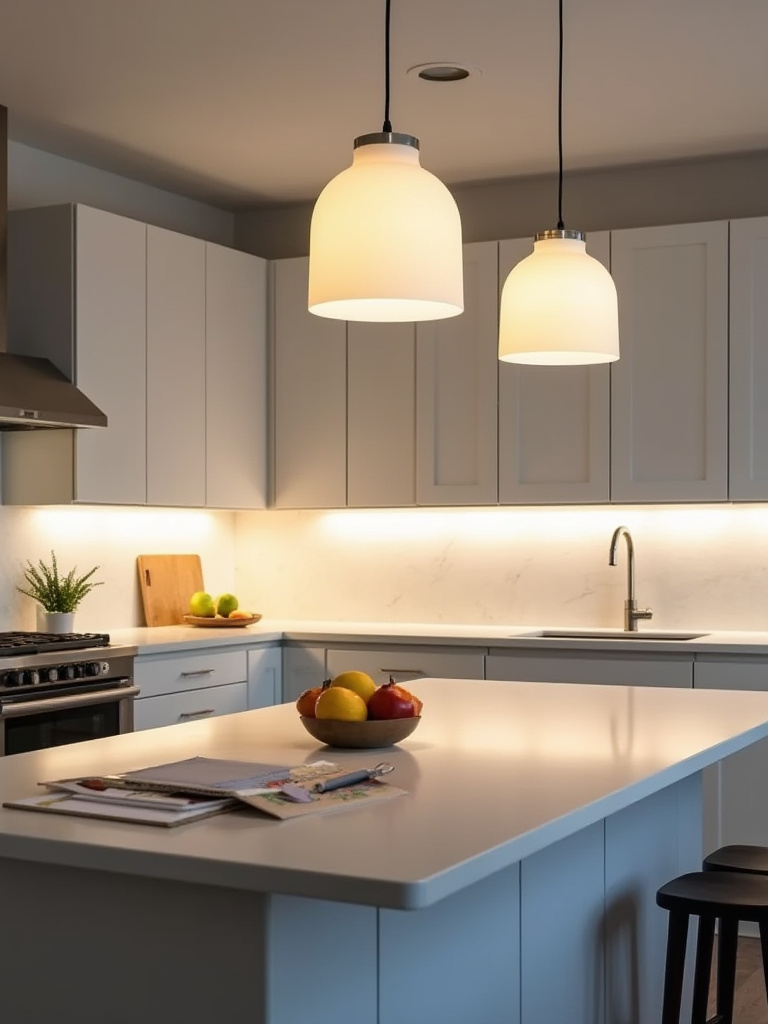
The island is the heart of the kitchen, and it needs its own dedicated lighting. This is usually where you put your statement pieces, like pendants. But they can’t just be for looks. They are also critical task lights. The bottom of the pendants should hang about 30-36 inches from the countertop. This is low enough to light your workspace without shining directly in your eyes, and high enough that it doesn’t block your view across the kitchen.
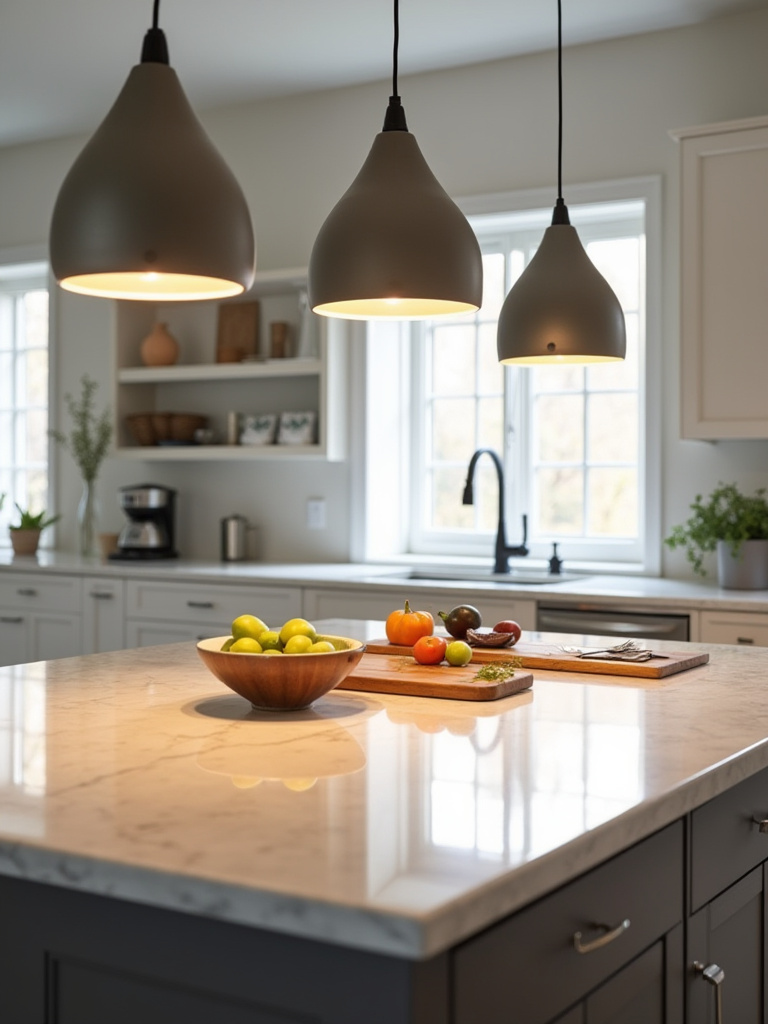
If you have a long island (say, 7-8 feet), use two or three smaller pendants spaced evenly. If you just have one big pendant, make sure it’s large enough in scale to not look dwarfed by the island. And for the love of all that is holy, put them on a dimmer. You need bright light for chopping and meal prep, but you want to dial it way down for a soft, ambient glow when you’re having a glass of wine with friends.
Now that the functional lighting is sorted, we can add some drama.
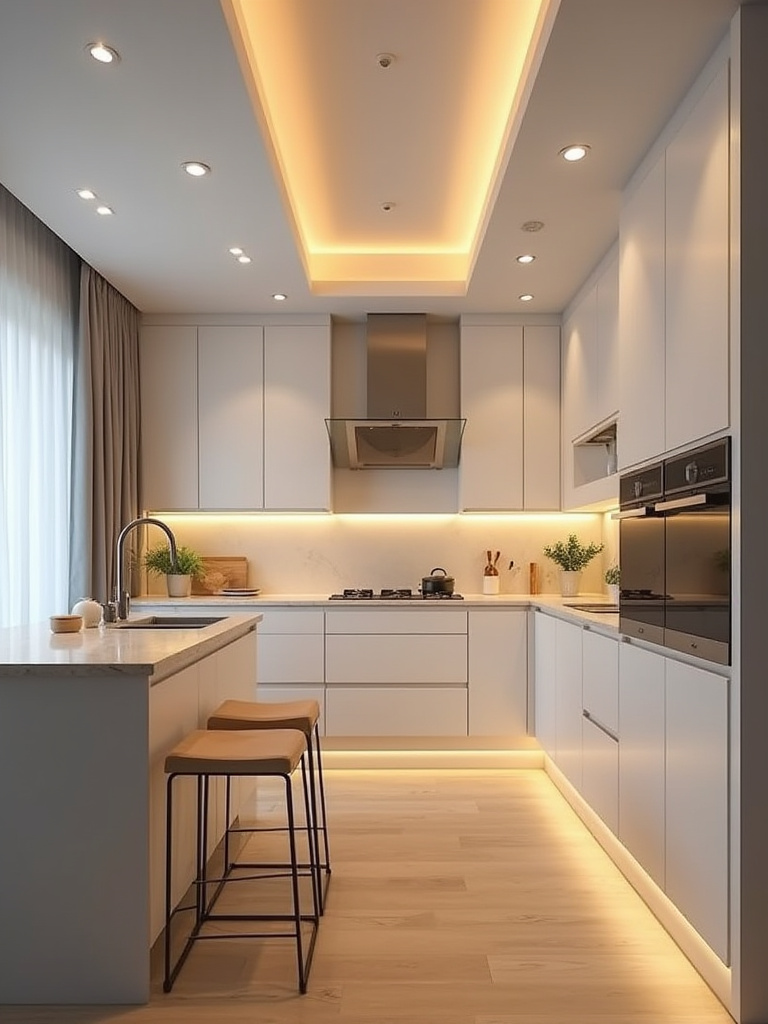
10. Highlight Architectural Features
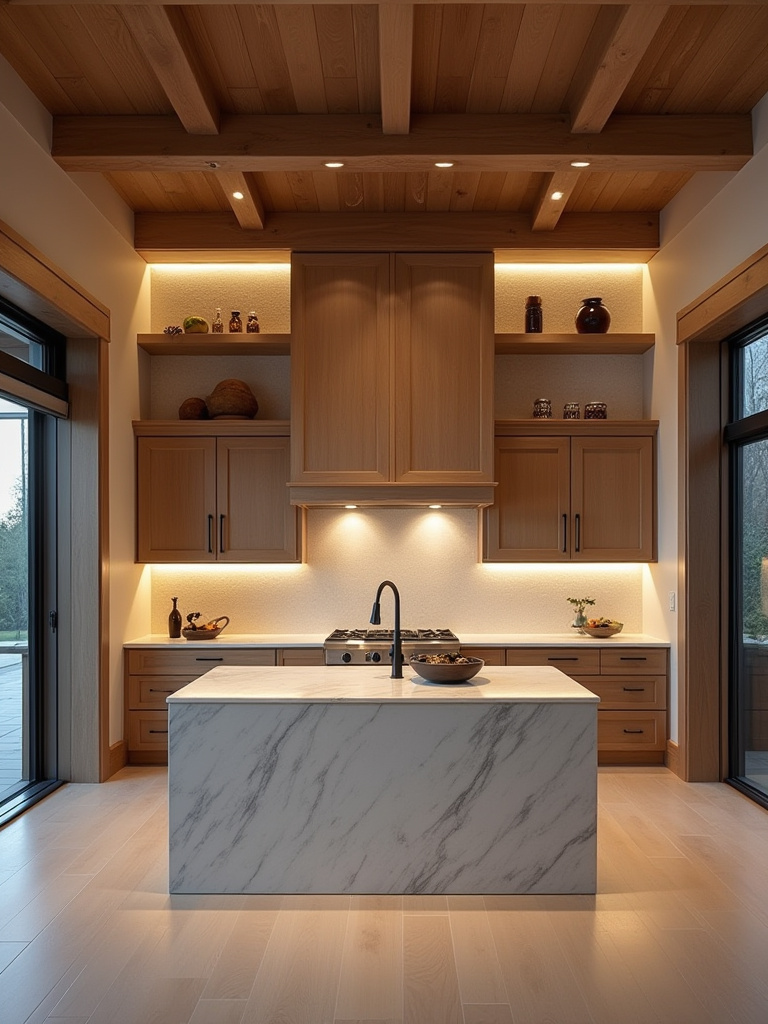
For example, you can run an LED strip along the top of your cabinets, washing the ceiling with a soft glow that makes the room feel taller and more expansive. Or you can place a small spotlight on the floor to graze up a stone feature wall, bringing out all its texture. The key is that you see the effect of the light, not the bulb. This adds a layer of sophistication and depth that makes a kitchen feel custom and luxurious.
Speaking of making things look luxurious, let’s shine a light on your prized possessions.
11. Showcase Cabinet Interiors
If you have glass-front cabinets, lighting them from the inside is one of the most effective ways to add depth and a “wow” factor to your kitchen. It turns your everyday glassware or favorite ceramics into a curated display. This is a classic high-end move that’s become incredibly affordable with LED technology.
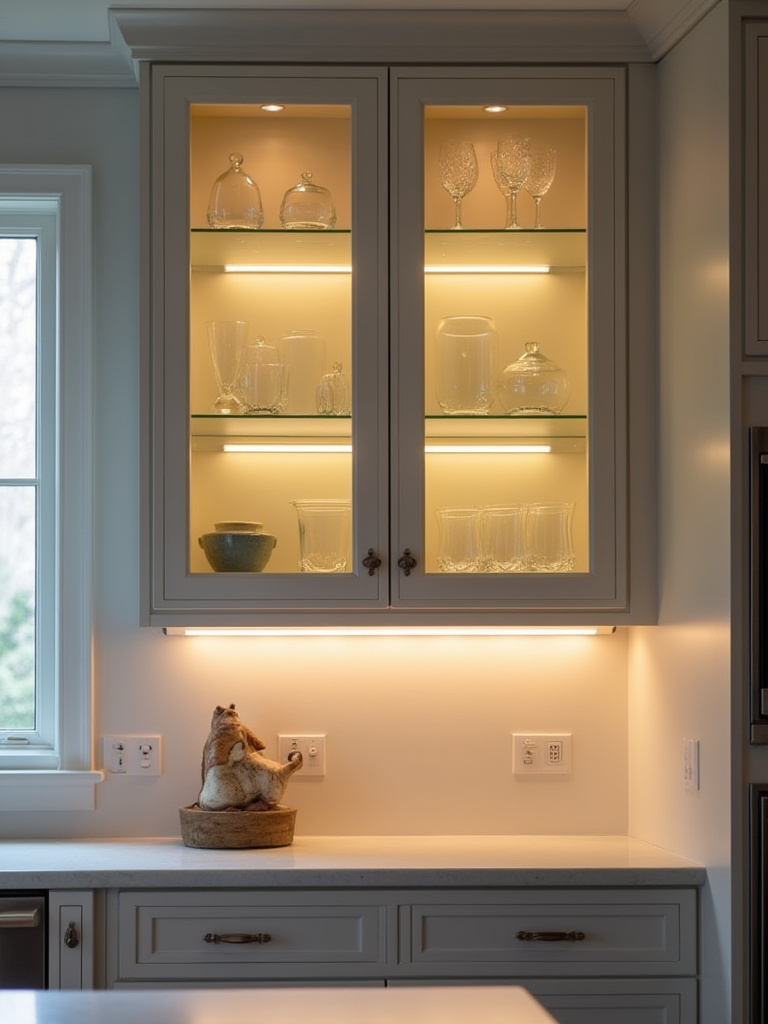
The pro tip here is to think about your shelves. If you have solid wood shelves, you can only really light the top shelf effectively. But if you have glass shelves, you can run a single LED strip down the side or along the front, and it will illuminate the entire cabinet stack. This creates an absolutely beautiful, glowing column of light that adds a warm, ambient layer to the room, especially in the evening.
From glowing cabinets, let’s move down to the floor for our next trick.
12. Guide Evening Movement
Toe-kick lighting is one of those details that feels like a luxury until you have it, and then you can’t live without it. It’s a low-wattage LED strip installed in the recessed space at the bottom of your base cabinets. Its main job is to serve as a safety or pathway light for late-night trips to the fridge. It provides just enough of a soft glow to see where you’re going without the blinding shock of turning on the main overhead lights.
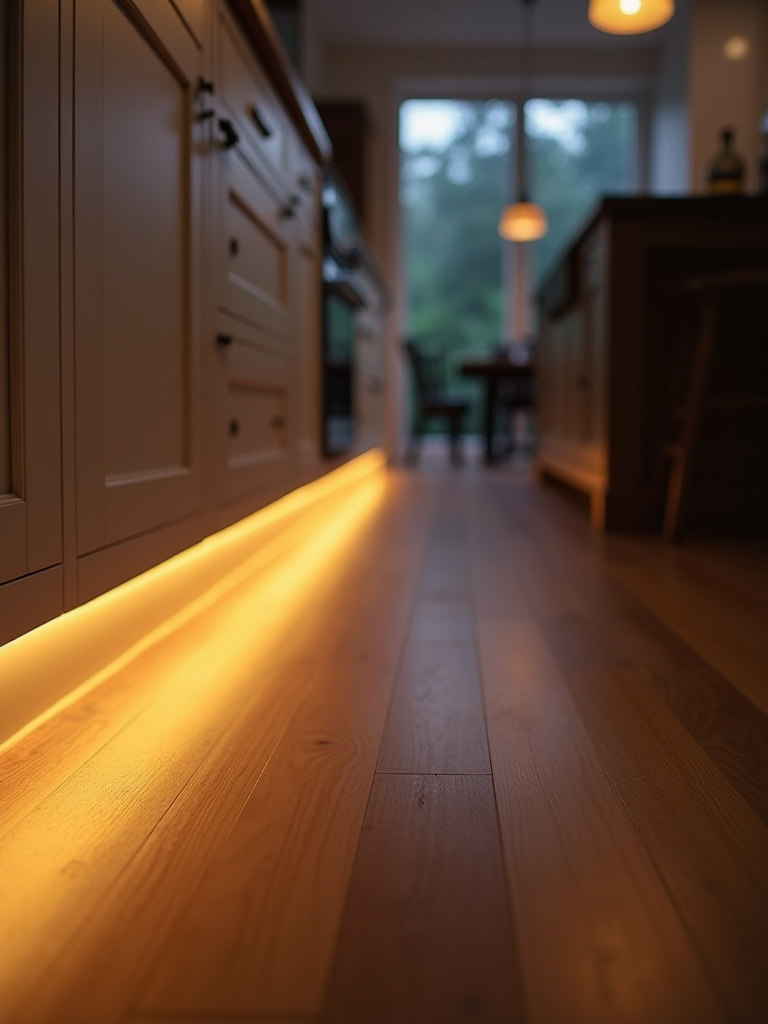
The bonus effect is that it makes your cabinets look like they’re floating, which adds a really cool, modern architectural detail to the space. For the ultimate setup, hook it up to a motion sensor. That way, it only turns on when someone walks into the kitchen, providing light exactly when it’s needed and saving energy the rest of the time. It’s a small detail that has a huge impact on both safety and style.
Now let’s get into the more technical details that the pros obsess over.
Advanced Considerations: Aesthetics, Control & Efficiency
You’ve got the plan and the fixtures. Now we dial in the fine-tuning. These are the details that elevate a kitchen from “well-lit” to professionally designed.
13. Calibrate Color Temperature
This is a big one that people mess up all the time. Color temperature, measured in Kelvin (K), is essentially the color of the light itself—from warm to cool. A low Kelvin number (around 2700K) produces a warm, yellowish, cozy light, like a traditional incandescent bulb. A mid-range number (3500K-4000K) produces a neutral, crisp white light. And a high number (5000K+) produces a cool, bluish light that feels like a hospital or a commercial space.
There is no single “right” answer, but consistency is key. Don’t mix different color temperatures in the same space—a warm 2700K pendant over an island with cool 5000K recessed lights looks like a chaotic mess. My advice? For most modern kitchens, something in the 3000K-3500K range is a great sweet spot. It’s clean and bright enough for tasks but still has a hint of warmth. Or, for ultimate control, invest in “tunable white” LEDs that let you change the color temperature with an app.
But the color of the light is only half the battle; how that light renders other colors is even more important.
14. Prioritize High CRI
This is my secret weapon. Color Rendering Index (CRI) is a scale from 0 to 100 that measures how accurately a light source shows the true colors of objects. Natural sunlight is 100. Cheap, builder-grade LEDs can have a CRI as low as 70-80. This is why your beautiful green cabinets look muddy gray, your steak looks unappetizingly brown, and the colors of your backsplash look “off.” The light is literally lying to your eyes.
In a kitchen, where you judge the ripeness of an avocado or the doneness of a salmon fillet by its color, a high CRI is not a luxury—it’s a necessity. Look for a CRI of 90 or higher on every single bulb and fixture you buy. Reputable brands list this on the spec sheet. It might cost a few extra bucks, but it’s the difference between a kitchen that looks vibrant and true-to-life and one that looks dull and flat. I’d take a 95 CRI bulb over a slightly brighter 80 CRI bulb every single day.
Once your light quality is perfect, it’s time to control it.
15. Incorporate Dimmer Switches
If you ignore every other piece of advice I give you, please listen to this: put every single light in your kitchen on a dimmer. Every single one. Dimmers are the single most important tool for controlling the mood and function of your space. Full brightness for cooking and cleanup, dialed down to 50% for casual dining, and maybe 20% for a soft, ambient glow while you’re entertaining.
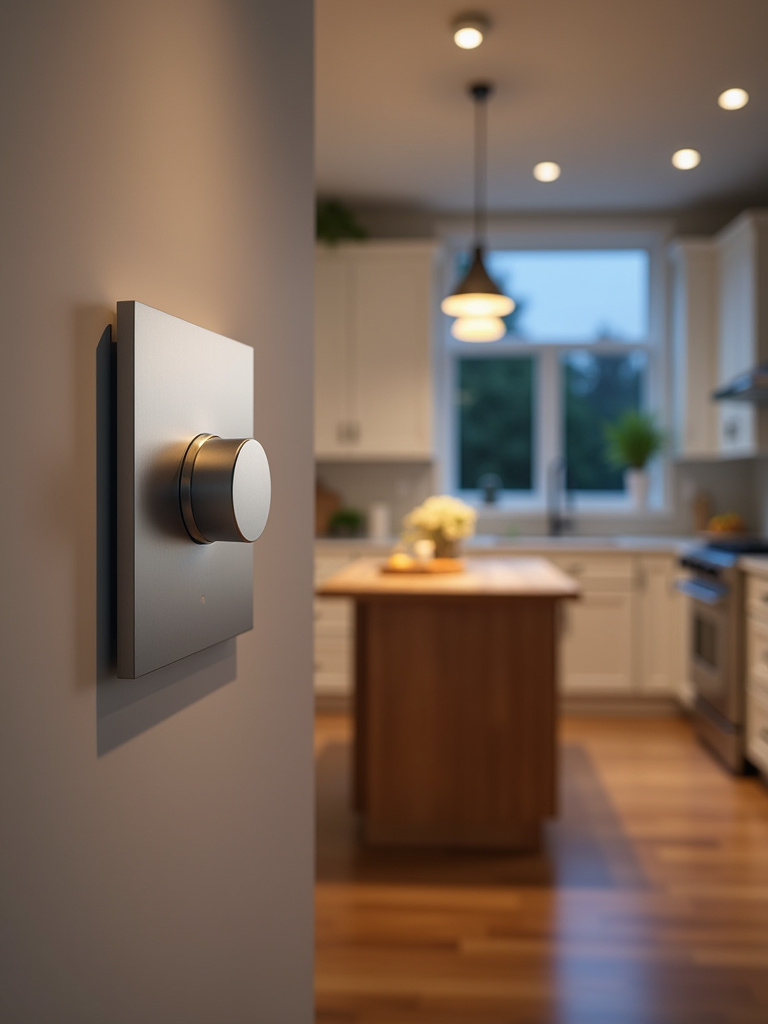
The big catch here is compatibility. Not all dimmers work with all LED bulbs. Using the wrong pairing will result in that annoying flickering, buzzing, or the light just not dimming properly. Always buy dimmers that are specifically rated for LEDs (look for “LED+” or similar branding), and make sure the bulbs you buy are explicitly marked as “dimmable.” It’s an easy detail to get right, and it unlocks the full potential of your layered lighting plan.
Taking control to the next level brings us to a fully automated space.
16. Explore Smart Lighting Systems
Smart lighting used to be a complicated, expensive luxury. Now, it’s incredibly accessible and practical, especially in a kitchen. Imagine walking into the kitchen with your hands full of groceries and just saying, “Alexa, turn on the kitchen lights.” Or creating “scenes” with a single tap: a “Prep Mode” that turns task lights to 100% and a cool temperature, and a “Dinner Party” mode that dims everything and warms up the color.
This isn’t just about convenience. Smart systems are brilliant for energy savings. You can schedule lights to turn off automatically at midnight, so you never accidentally leave them on. You can use sensors so lights only come on when someone is in the room. You don’t have to go all-in at once. You can start with a few smart bulbs or a smart dimmer switch and build from there. It’s the easiest way to make your kitchen work harder for you.
To make sure all this tech looks good, we need to get the placement perfect.
17. Optimize Fixture Spacing
There’s a science to this. Bad fixture spacing creates hot spots and ugly, scalloped shadows on your walls. Good spacing creates an even, seamless blanket of light. For recessed ambient lights, a general rule of thumb is to space them about half the distance of your ceiling height. So, for an 8-foot ceiling, you’d space them about 4 feet apart. But that’s just a starting point.
The real goal isn’t just to light the floor; it’s to light the vertical surfaces and workspaces. I like to place recessed lights about 18-24 inches away from the wall. This creates a “wall wash” effect that illuminates the cabinetry and makes the room feel brighter and bigger. For the island, center your pendants over the workspace, not just the geometric center of the island slab. Don’t be afraid to break a perfect grid pattern if it means getting light exactly where you need it.
Finally, let’s make sure all these perfectly placed lights are also working efficiently.
18. Choose Energy-Efficient LEDs
This should be a no-brainer by now, but it’s worth saying explicitly: every single light source in your kitchen should be an LED. They use up to 80% less energy than old-school incandescents, last for 25,000-50,000 hours (we’re talking years, not months), and produce very little heat, which is a nice bonus in a room that already gets hot from cooking.
The key when shopping is to look for two things. First, look for the ENERGY STAR logo, which certifies that the bulb has passed rigorous testing for both efficiency and quality. Second, shop for lumens, not watts. Lumens measure brightness; watts measure energy use. An old 60-watt incandescent bulb is about 800 lumens. A modern LED that produces 800 lumens might only use 9 watts. Comparing watts is meaningless now; lumens are what tell you how bright the light will actually be.
Now for the final touches that tie everything together.
Finessing Your Design: Specifics, Safety & Style Integration
The technical work is done. This last phase is all about the details that ensure your lighting not only works perfectly but also looks beautiful and stays safe for years to come.
19. Select Finish and Style
They say lighting is the jewelry of a room, and it’s true. The finish and style of your fixtures are a huge part of your kitchen’s aesthetic. A matte black pendant can reinforce a modern farmhouse look, while a polished chrome fixture feels clean and contemporary. Try to create harmony between your light fixtures and other metal finishes in the room, like your cabinet hardware and faucet. They don’t have to be an exact match, but they should feel like they’re in the same family.
The most common mistake I see is a failure of scale. A giant, heavy-looking pendant will overwhelm a small island, while tiny little pendants will look silly and lost in a large, open-concept space. Before you buy, mock it up. Cut out a cardboard template of the fixture’s size and have someone hold it up in the space. It’s a simple trick that can save you from a very expensive and awkward-looking mistake.
Beyond looks, some fixtures have a much more serious job: keeping you safe.
20. Consider Splash Zones
Water and electricity do not mix. This is critically important for any light fixture near your sink. You can’t just install any old light there. You need a fixture that is officially rated for damp or wet locations. This is indicated by its IP (Ingress Protection) rating.
Here’s the simple breakdown: For a light that’s in the general vicinity of the sink but not likely to get directly sprayed, a damp-rated fixture (like IP44) is usually fine. But for a light that’s directly over the sink where it could get splashed, you need a wet-rated fixture (IP65 or higher). This isn’t a suggestion; it’s a major safety and electrical code requirement. Using the wrong fixture can lead to short circuits, corrosion, and a serious hazard.
Another critical task zone is right over your stove.
21. Incorporate Vent Hood Lighting
Don’t overlook the light that’s built into your range hood. This is some of the most important task lighting in your entire kitchen. Unfortunately, the lights that come with many hoods are often an afterthought—dim, low-CRI halogen bulbs that get incredibly hot.
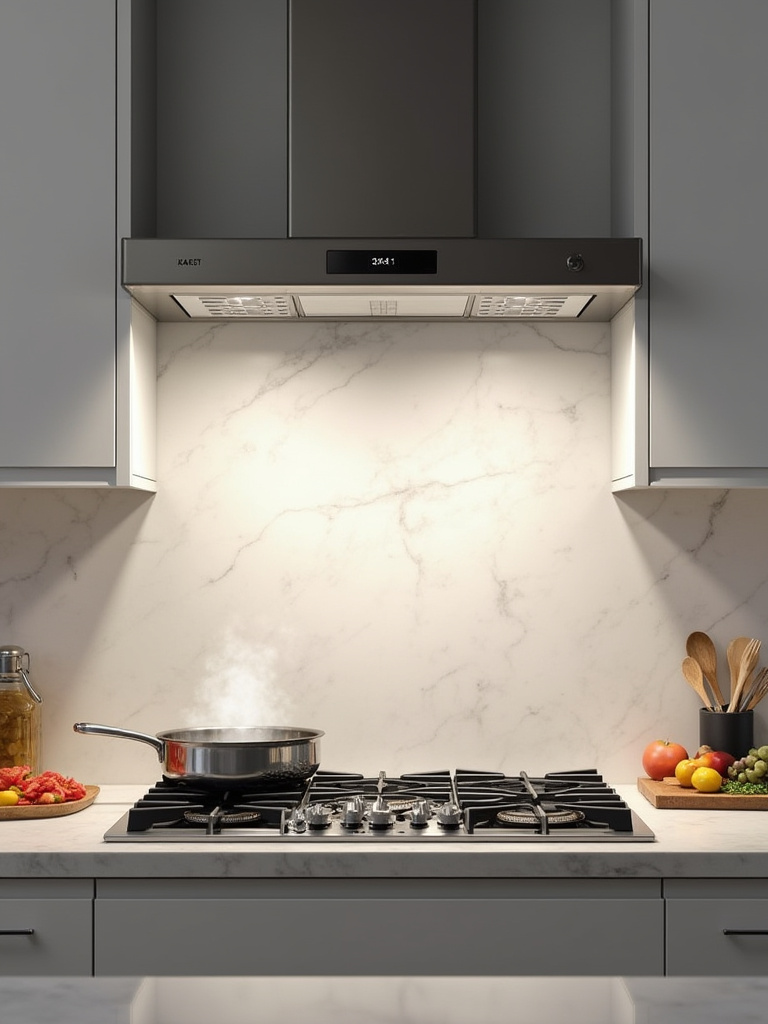
When you’re shopping for a vent hood, pay as much attention to the quality of its lighting as you do to its CFM (airflow). Look for hoods with bright, integrated LED lighting. Ideally, you want multiple light sources to illuminate the entire cooktop evenly, not just one bulb in the middle. If you have an older hood, see if you can swap out the old bulbs for high-quality LED replacements. It’s a small upgrade that makes a massive difference when you’re trying to see if your sauce is simmering or scorching.
While we’re talking about quality light, let’s talk about comfort.
22. Manage Glare Effectively
A bright kitchen is good. A kitchen with blinding glare is a nightmare. Glare happens when a light source is too intense or is reflected directly into your eyes off a shiny surface, like a polished countertop or a stainless steel appliance. It causes eye strain and makes it uncomfortable to work. The solution is diffusion.
Look for fixtures that have frosted lenses or diffusers. These scatter the light, turning a harsh pinpoint of light into a soft, even glow. This is especially important for under-cabinet lighting and recessed lights. It’s the difference between staring at a bare light bulb and looking at a bright but comfortable overcast sky. The goal isn’t just to make the kitchen bright; it’s to make it visually comfortable.
To keep it that way, you have one final job.
23. Schedule Regular Maintenance
This is the easiest tip to follow, and the one most people forget. Kitchens are greasy, dusty places. A fine layer of cooking grime and dust will build up on your light fixtures, and it can cut their light output by as much as 30%. Your kitchen literally gets dimmer over time without you realizing it.
Create a simple maintenance routine. Once a season, turn off the power at the breaker, let the bulbs cool, and give everything a good cleaning. Use a soft, lint-free cloth and a mild degreasing cleaner. You’ll be shocked at how much brighter your kitchen feels. This not only restores your light quality but also helps the fixtures run cooler, extending the life of the internal components.
Finally, know when to ask for help.
24. Consult a Lighting Professional
Look, you can do this. For 90% of kitchens, following these tips will give you a fantastic result. But if you have a really tricky space—double-height ceilings, a weird L-shaped layout, a historic home with electrical challenges, or a desire for a complex smart-home setup—don’t be afraid to call a professional. A certified lighting designer isn’t just a decorator; they are experts in physics, optics, and electrical engineering.
They can save you from monumentally expensive mistakes and design a system that is perfectly tailored to your space in a way that goes beyond general rules of thumb. I’ve learned tons from working with them. Sometimes, the smartest DIY move is knowing when not to do it yourself.
Conclusion
In the end, lighting your kitchen isn’t just about screwing in some bulbs. It’s about crafting an environment. It’s about using light as a tool to make your daily tasks easier, safer, and more enjoyable. It’s about taking the most important room in your house and making it feel as good as it looks.
By layering ambient, task, and accent lighting, by paying attention to the technical details like color temperature and CRI, and by controlling it all with dimmers and smart technology, you can create a space that’s truly exceptional. Don’t let lighting be the afterthought that diminishes your beautiful design. Let it be the thoughtful, foundational element that makes your kitchen truly shine.