I still vividly remember my very first potted basil plant. I had grand visions of snipping fresh leaves for pasta sauce right from my sunny kitchen windowsill. But despite my best efforts, it just… wilted. Slowly. Sadly. It’s a feeling I think a lot of us know well—that mix of hope and confusion when a plant doesn’t thrive. That little moment of realization, when you see a sad plant and wonder, “What did I do wrong?” is exactly what separates simply putting a plant in a pot from intentionally creating a beautiful, thriving container garden.
Believe me, it’s not about having some magical “green thumb.” It’s about learning a few simple, practical tricks—the kind of stuff you’d learn in a fun art class, but for plants! As someone who went from teaching high school art to helping people design beautiful spaces on a dime, I’ve learned that the best results come from a little bit of know-how and a whole lot of creative problem-solving. So, let’s get our hands dirty together! I’ve gathered my 20 favorite tips and ideas to guide you, step-by-step, from a complete beginner to a confident container gardener who can make any balcony, patio, or windowsill burst with life.
Getting Started with Container Gardens: Essential Fundamentals (Part 1)
Alright, let’s start at the very beginning! Think of this as laying the foundation for your beautiful garden masterpiece. Getting these first few steps right makes everything that comes after so much easier and more successful. This is where we build your confidence.
1. Selecting Your First Perfect Pot: Understanding Material and Drainage
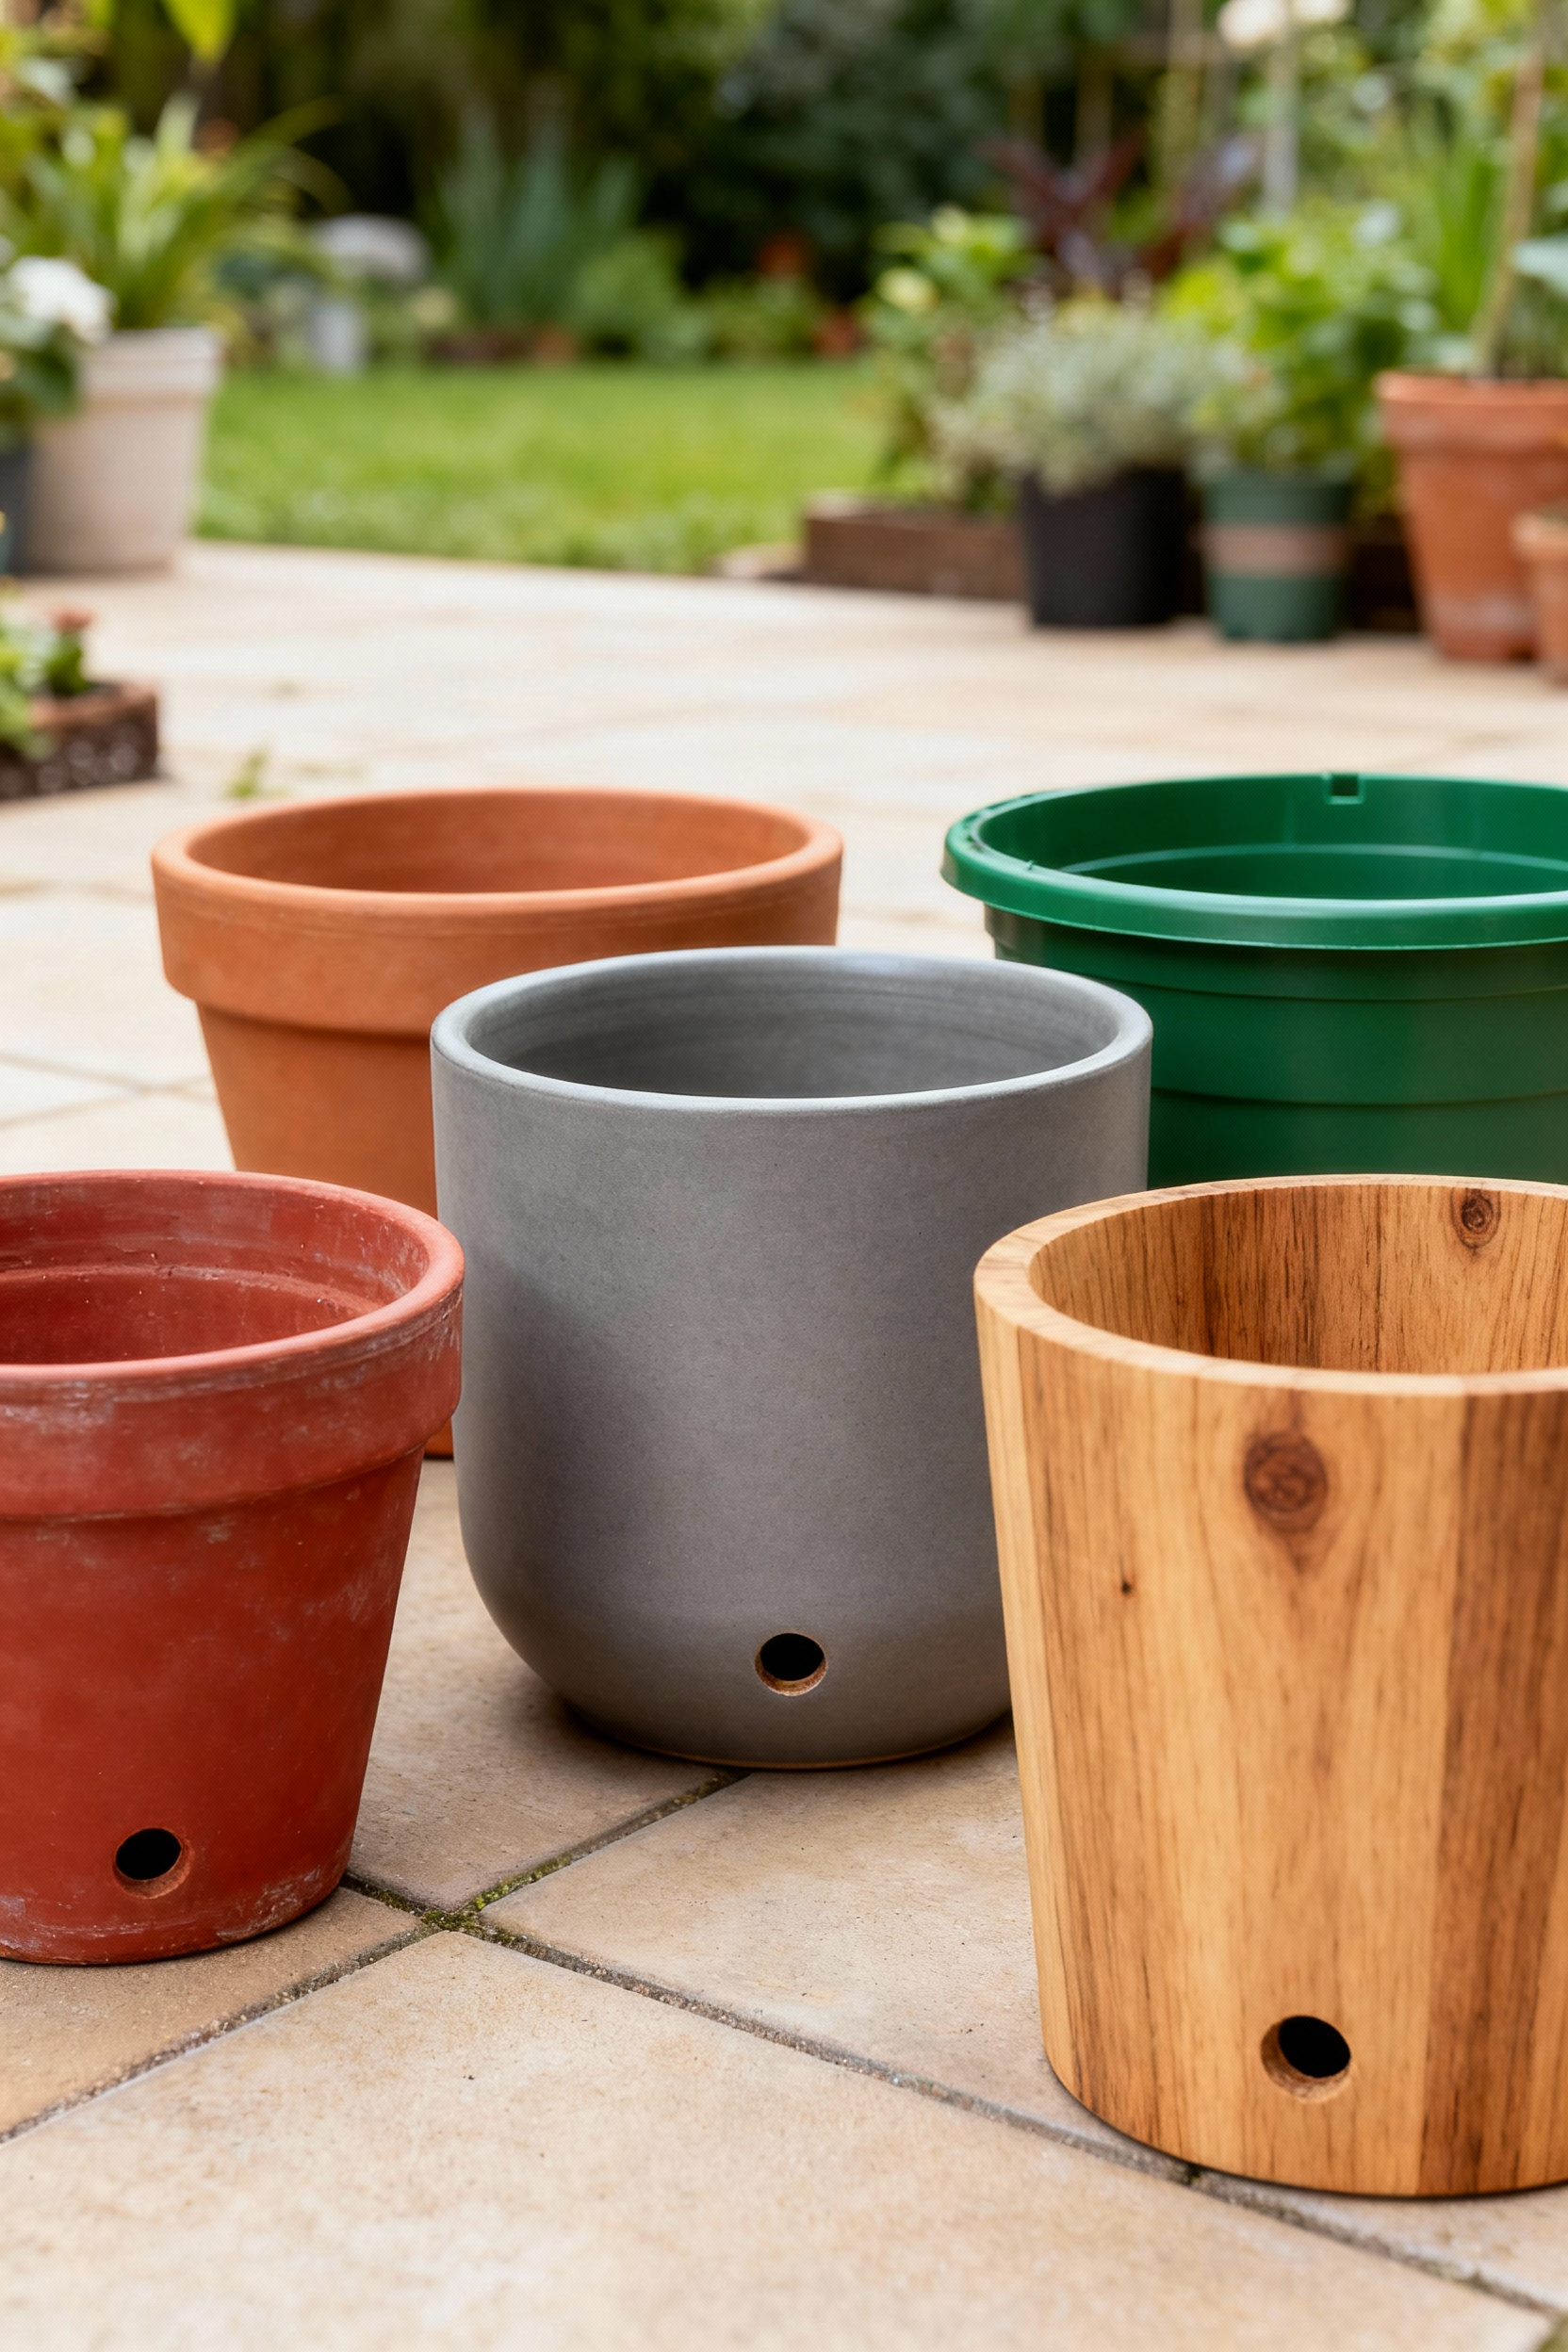
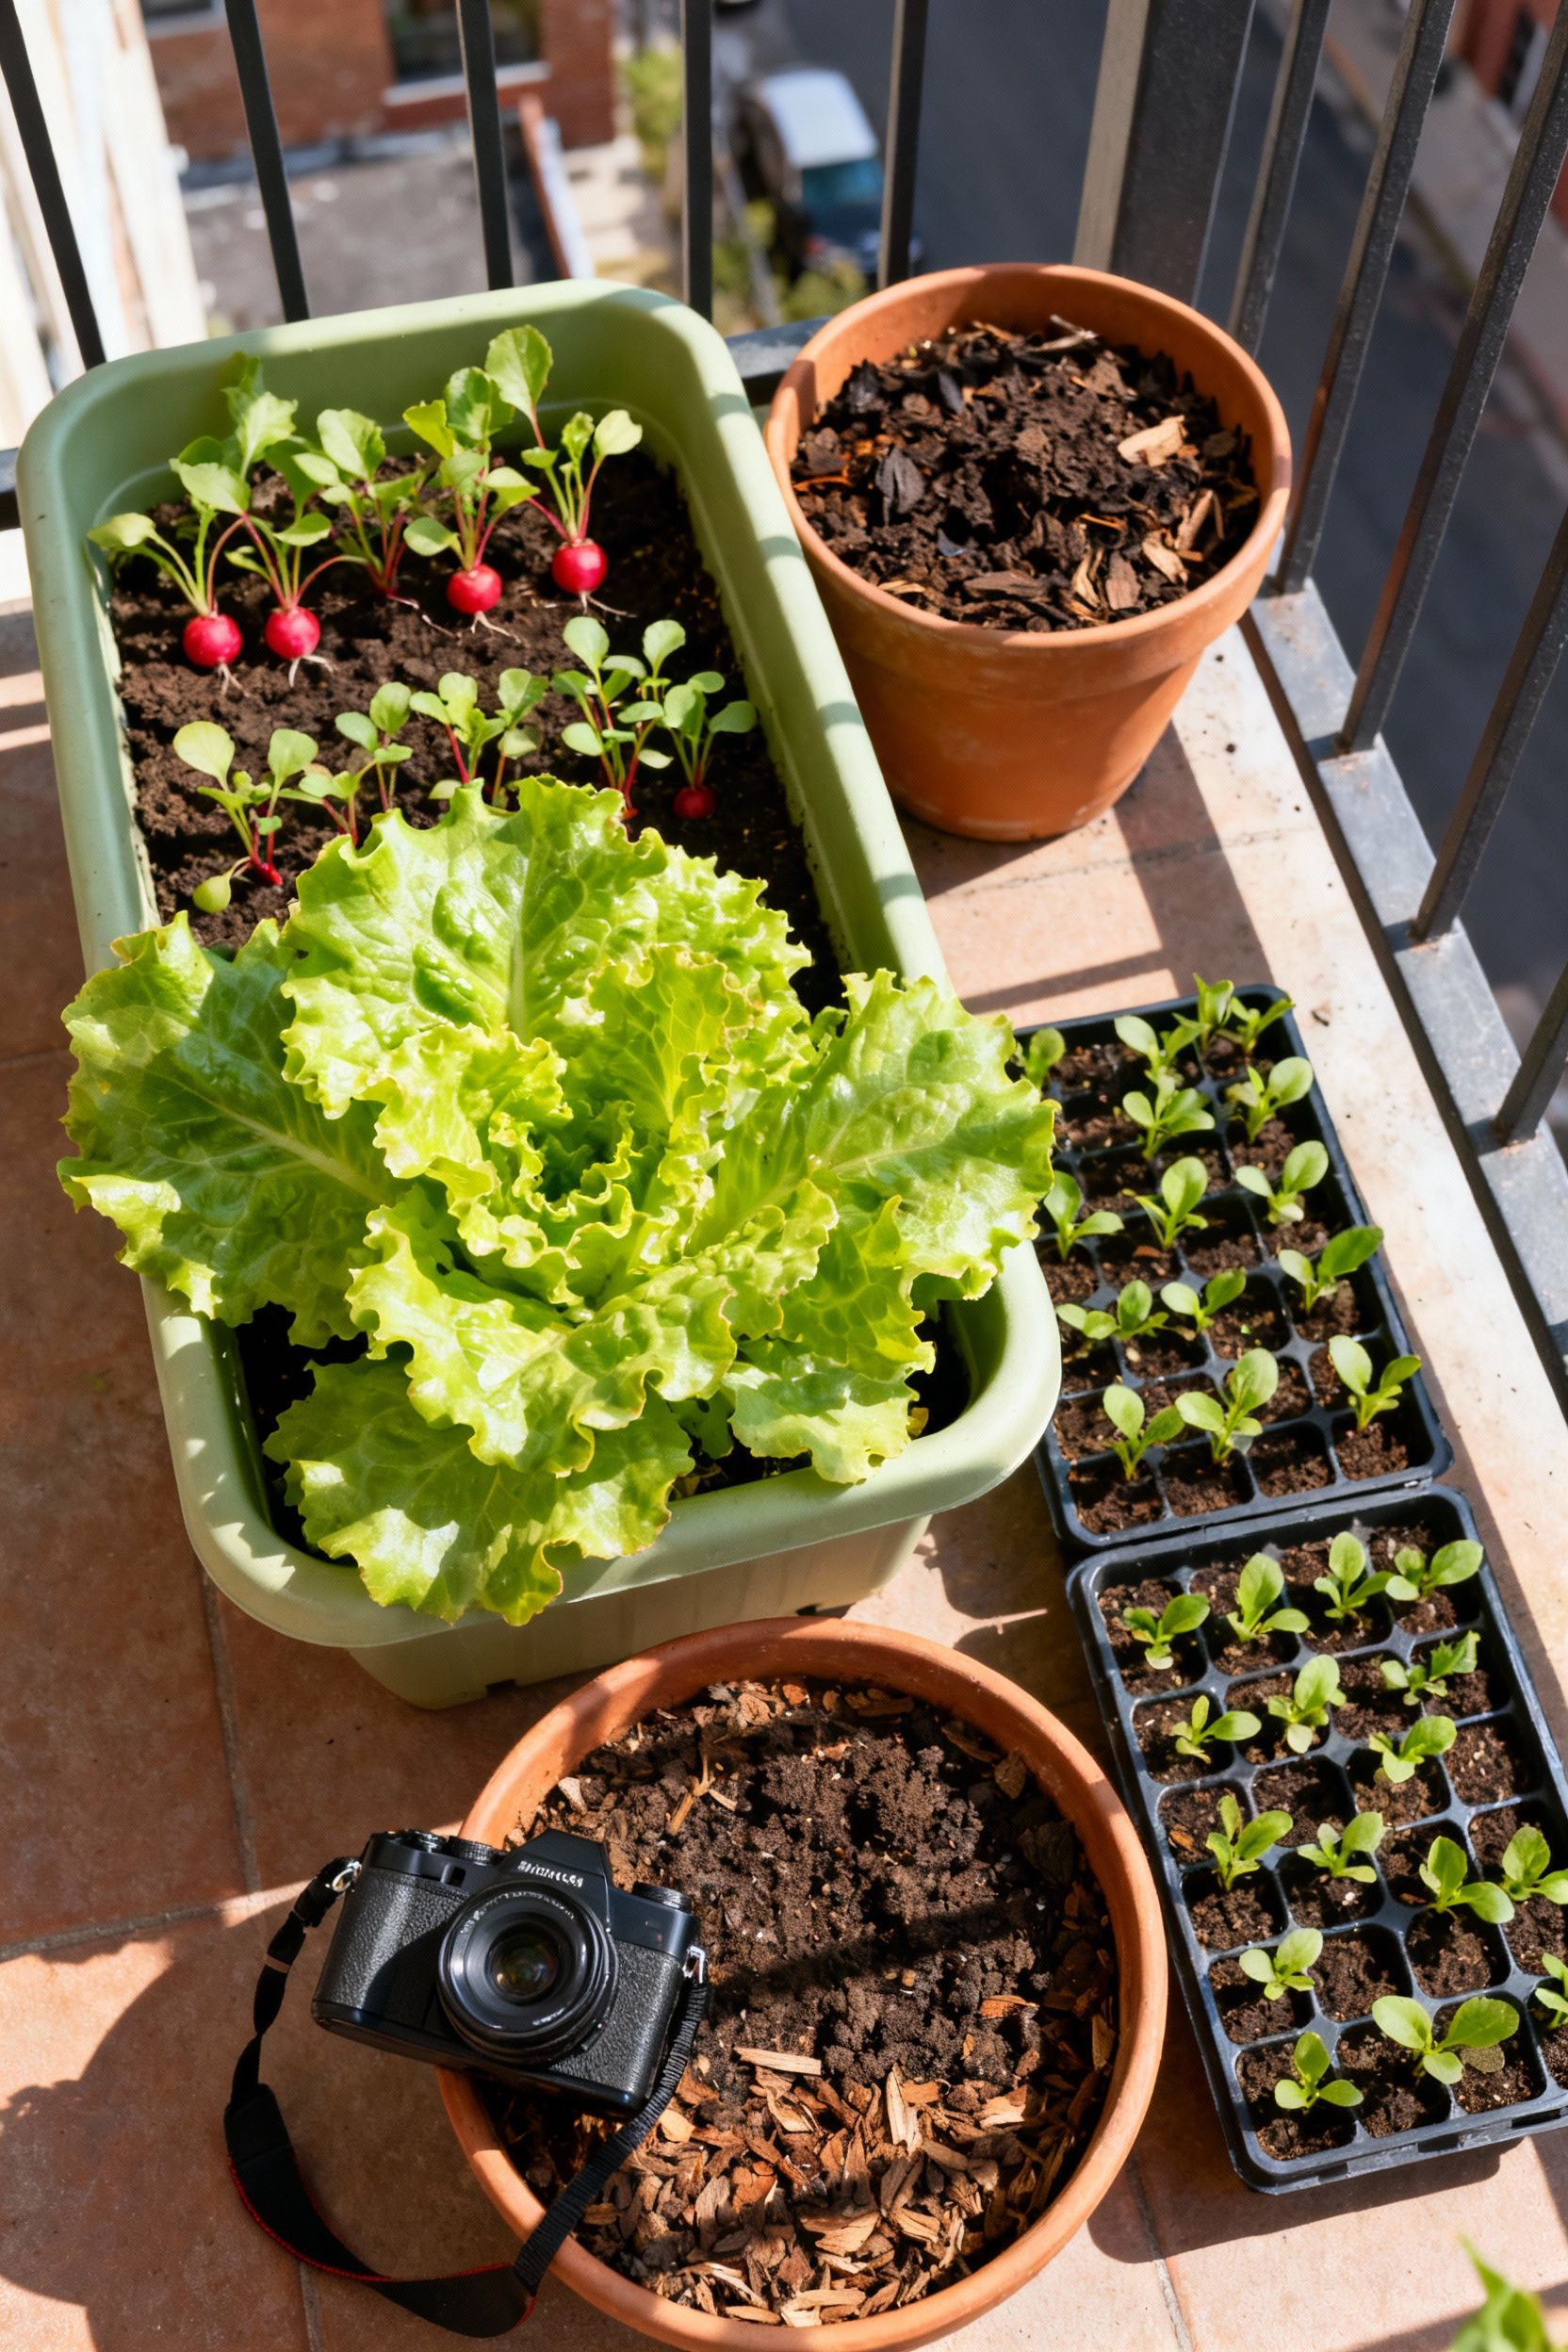
Your journey starts with choosing a home for your plant, and the pot you pick is more than just decoration—it’s its entire world. The two most important things to look for are size and drainage. No exceptions! Look underneath any pot you’re considering; it absolutely must have holes in the bottom. This lets extra water escape, preventing the roots from drowning, which is probably the number one mistake I see beginners make. As for size, a good rule of thumb is to choose a pot that gives the roots a little room to grow but isn’t enormous, which can cause the soil to stay wet for too long.
 Container gardening.” class=”wp-image-13096″/>
Once you’ve got drainage covered, you can think about the material. Lightweight plastic pots are fantastic for beginners. They’re affordable, come in tons of colors, and are great at holding onto moisture, which means you won’t have to water quite as often. On the other hand, classic terracotta (the reddish-brown clay pots) is porous, so it breathes. This is great for plants that hate having “wet feet,” like succulents and herbs such as rosemary. Just know you’ll need to water them more frequently, especially on hot days. From my years of budget-friendly design, I’ve noticed that starting with simple, affordable pots lets you focus on learning about your plants without a big initial investment. You can always “re-pot” into a fancier home later!
2. Unlocking Success with Quality Potting Mix for Thriving Plants
Now that you have a pot, we need to fill it with the right stuff. Here’s a secret that will save you so much heartache: never use soil from your garden bed in a container. It’s too heavy, gets compacted, and can carry little pests or weed seeds you don’t want. What you need is a bag labeled “potting mix” or “potting soil.” It’s specially designed to be light and fluffy, giving plant roots the perfect balance of air, water, and nutrients to thrive in a small space.
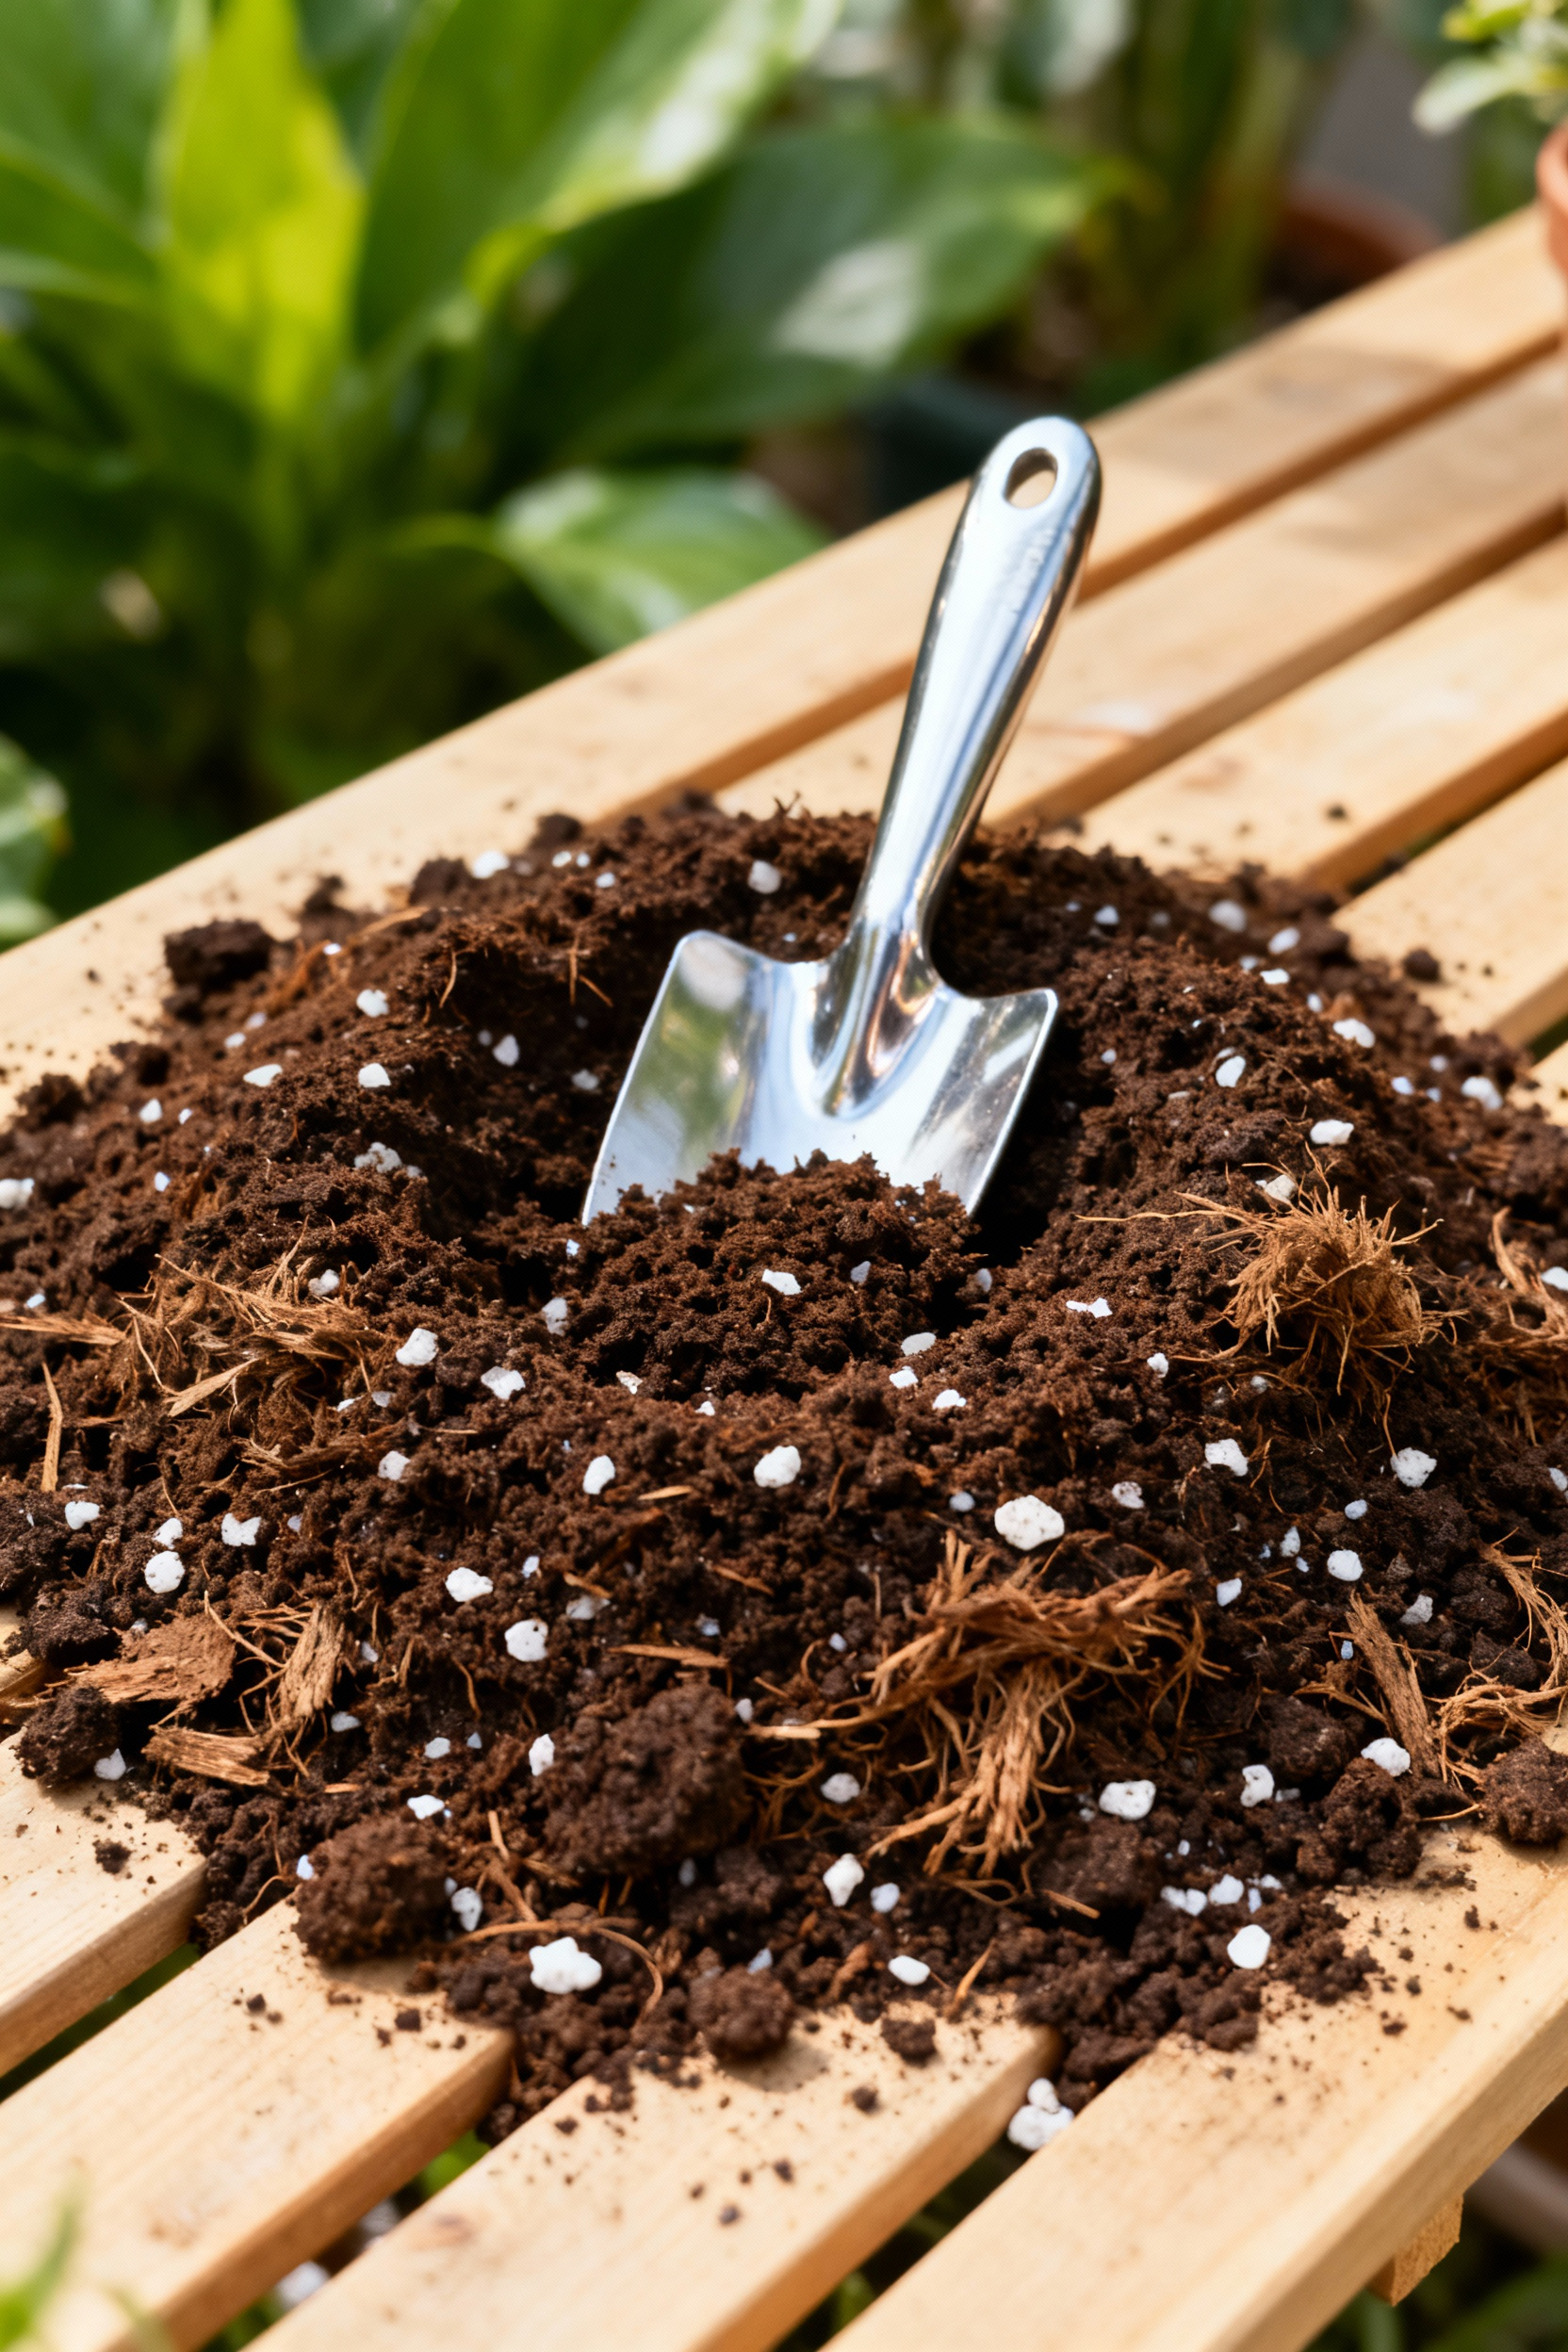
You’ll see different kinds of mixes at the store, like ones for cactuses or African violets. If you’re just starting, a good all-purpose potting mix is perfect. What I’ve learned from countless DIY projects is that you don’t want to skimp here; a quality mix is the single best investment you can make for your container garden. Later on, you can even get creative and start customizing your own mix by adding things like compost for extra nutrients or perlite (those little white rocky things) for better drainage. But for now, a good bag of all-purpose mix is your ticket to happy, healthy plants.
3. Decoding Sun Exposure: Placing Containers for Optimal Growth
Okay, you’ve got your pot and your soil. Now, where do you put it? The next step is to become a “sun detective.” Before you even plant anything, take a day to watch how the sun moves across your patio, balcony, or through your windows. Where is it sunny in the morning? Where does the strong afternoon sun hit? This little bit of observation is a total game-changer. Most plant tags will give you a clue about what they need: “full sun” usually means at least 6 hours of direct sunlight, which is what most vegetables and bright flowers like petunias crave.
“Partial sun” or “partial shade” means a gentler 3-6 hours of sun, often in the morning, which is perfect for plants like impatiens or many leafy greens. “Full shade” doesn’t mean a dark closet; it means a spot that gets bright, indirect light but less than 3 hours of direct sun. I learned this when I tried to grow a sun-loving tomato plant on a mostly shady balcony—it grew tall and spindly but gave me exactly three sad little tomatoes. The best part about container gardening is that if you get the spot wrong, you can just pick up the pot and move it! Your plants will tell you if they’re happy—bright, strong growth means you got it right.
4. Smart Watering Techniques: Preventing Over and Under-Hydration Disasters
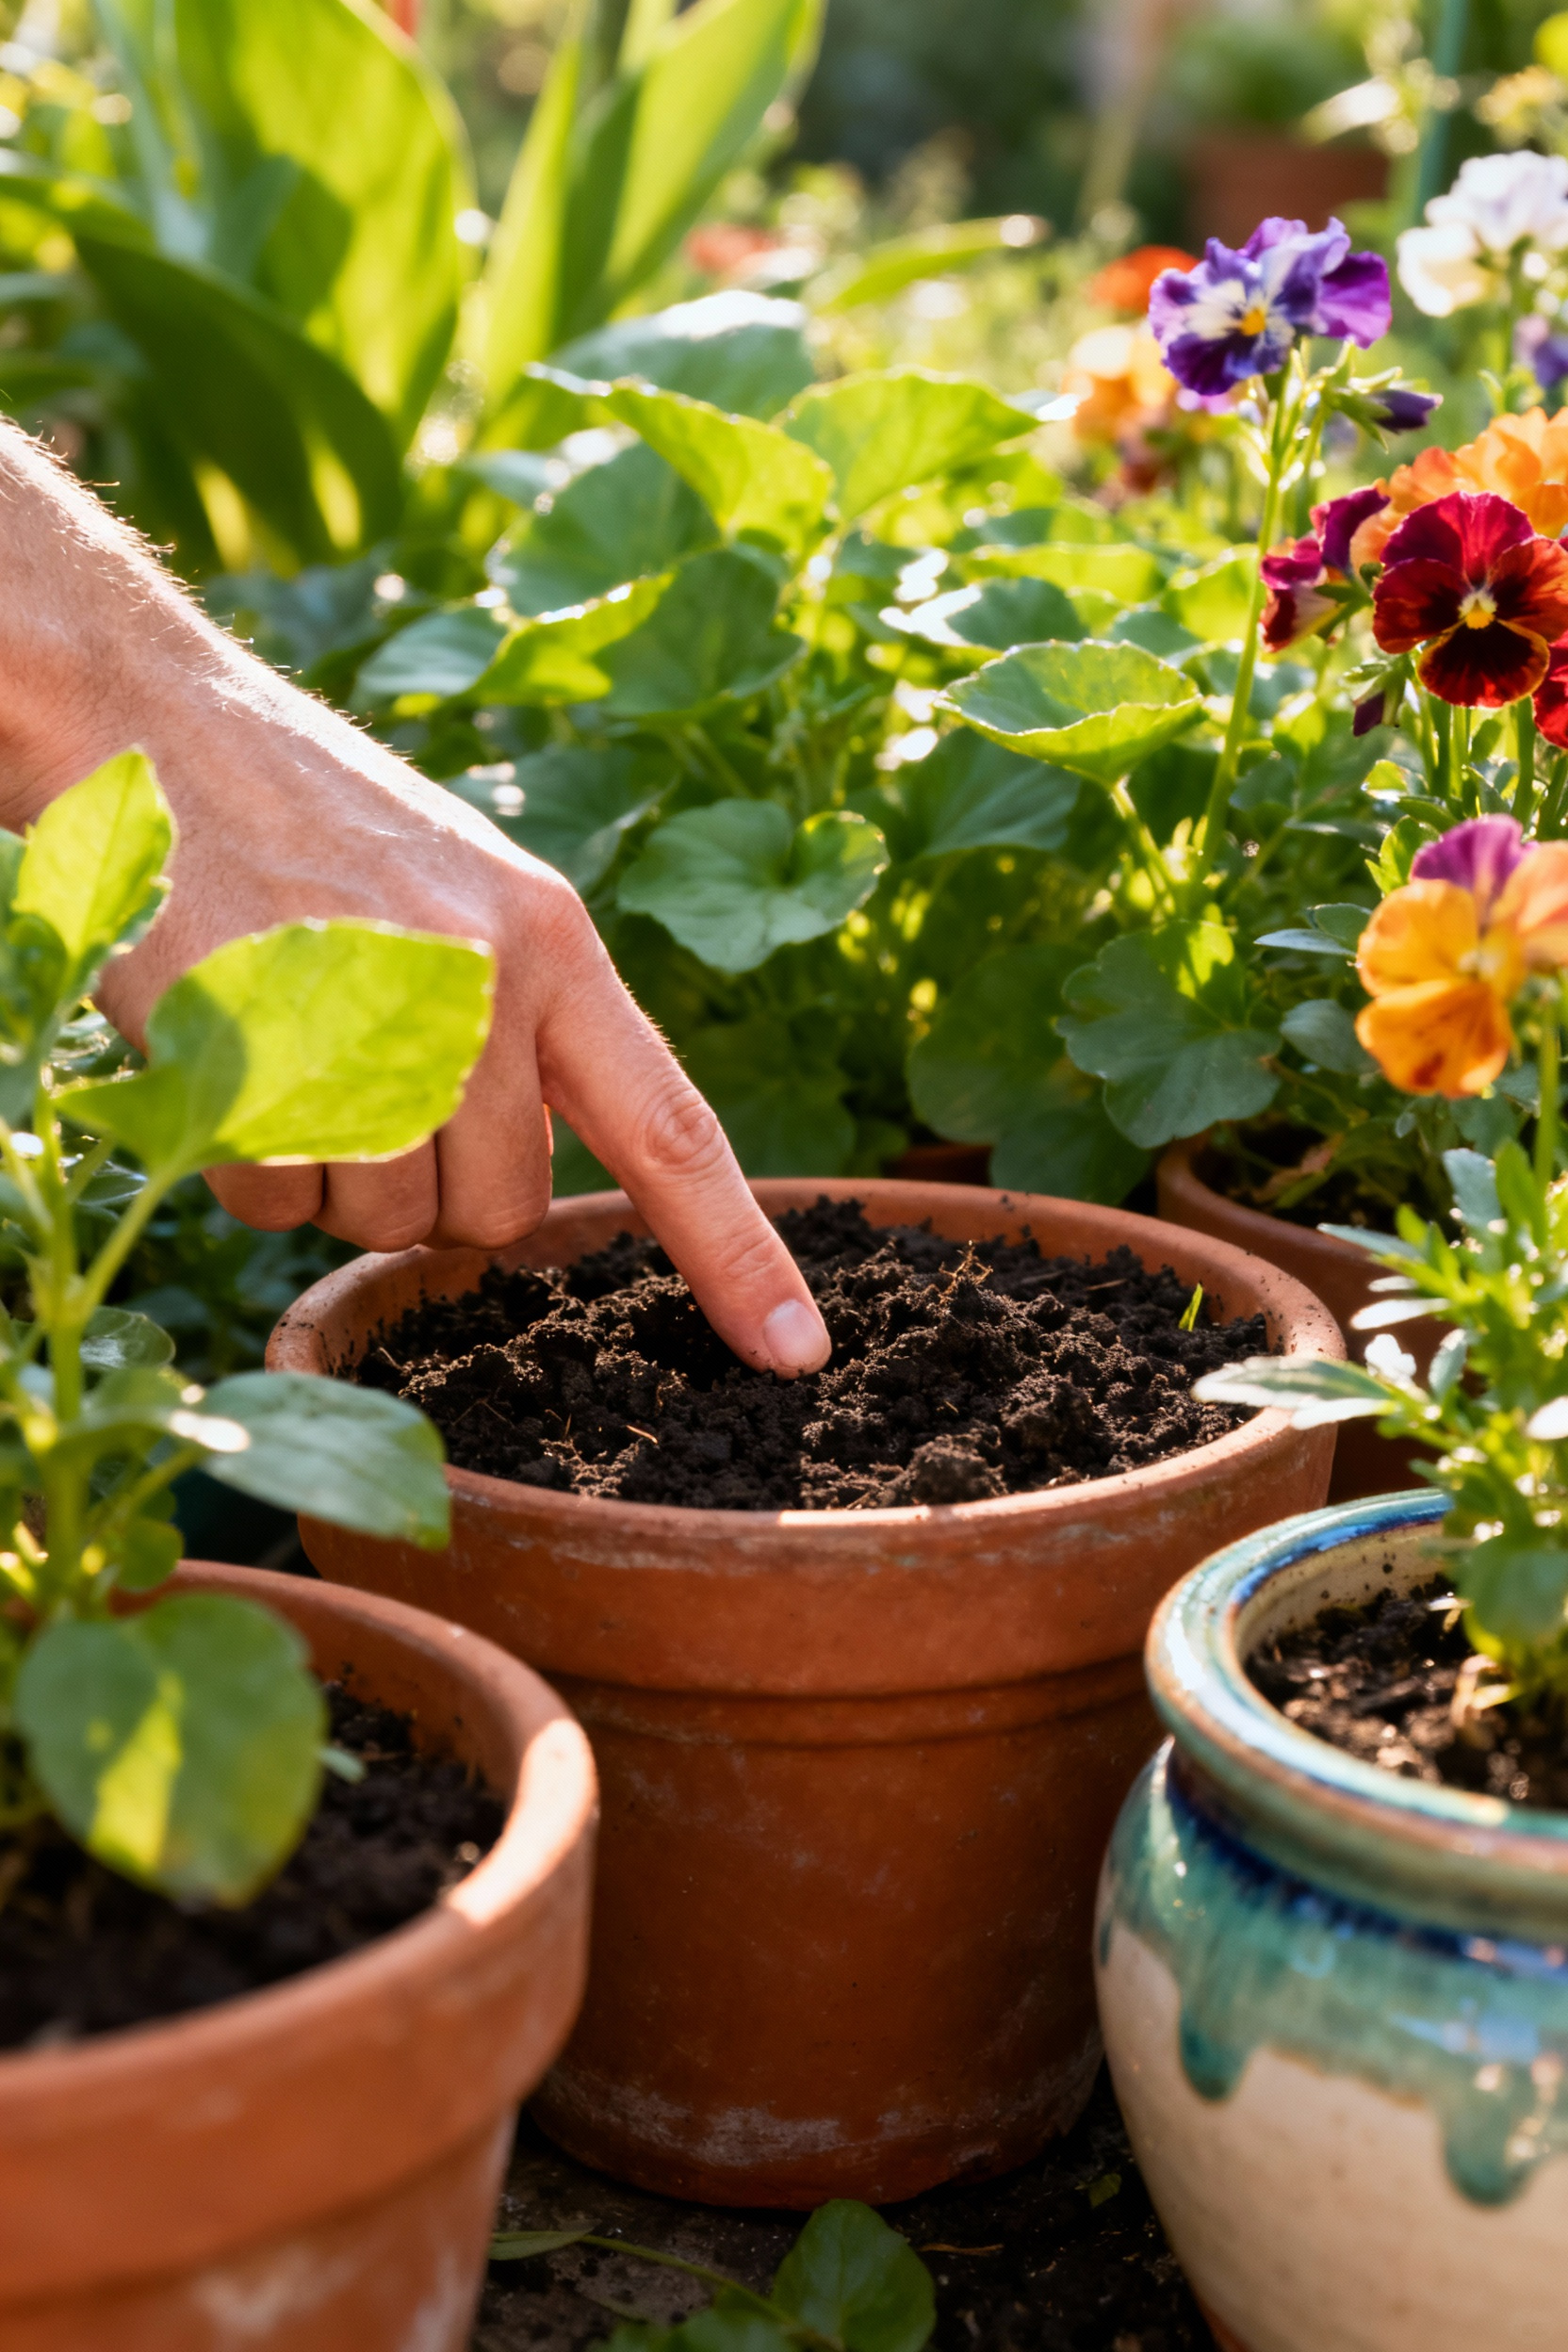
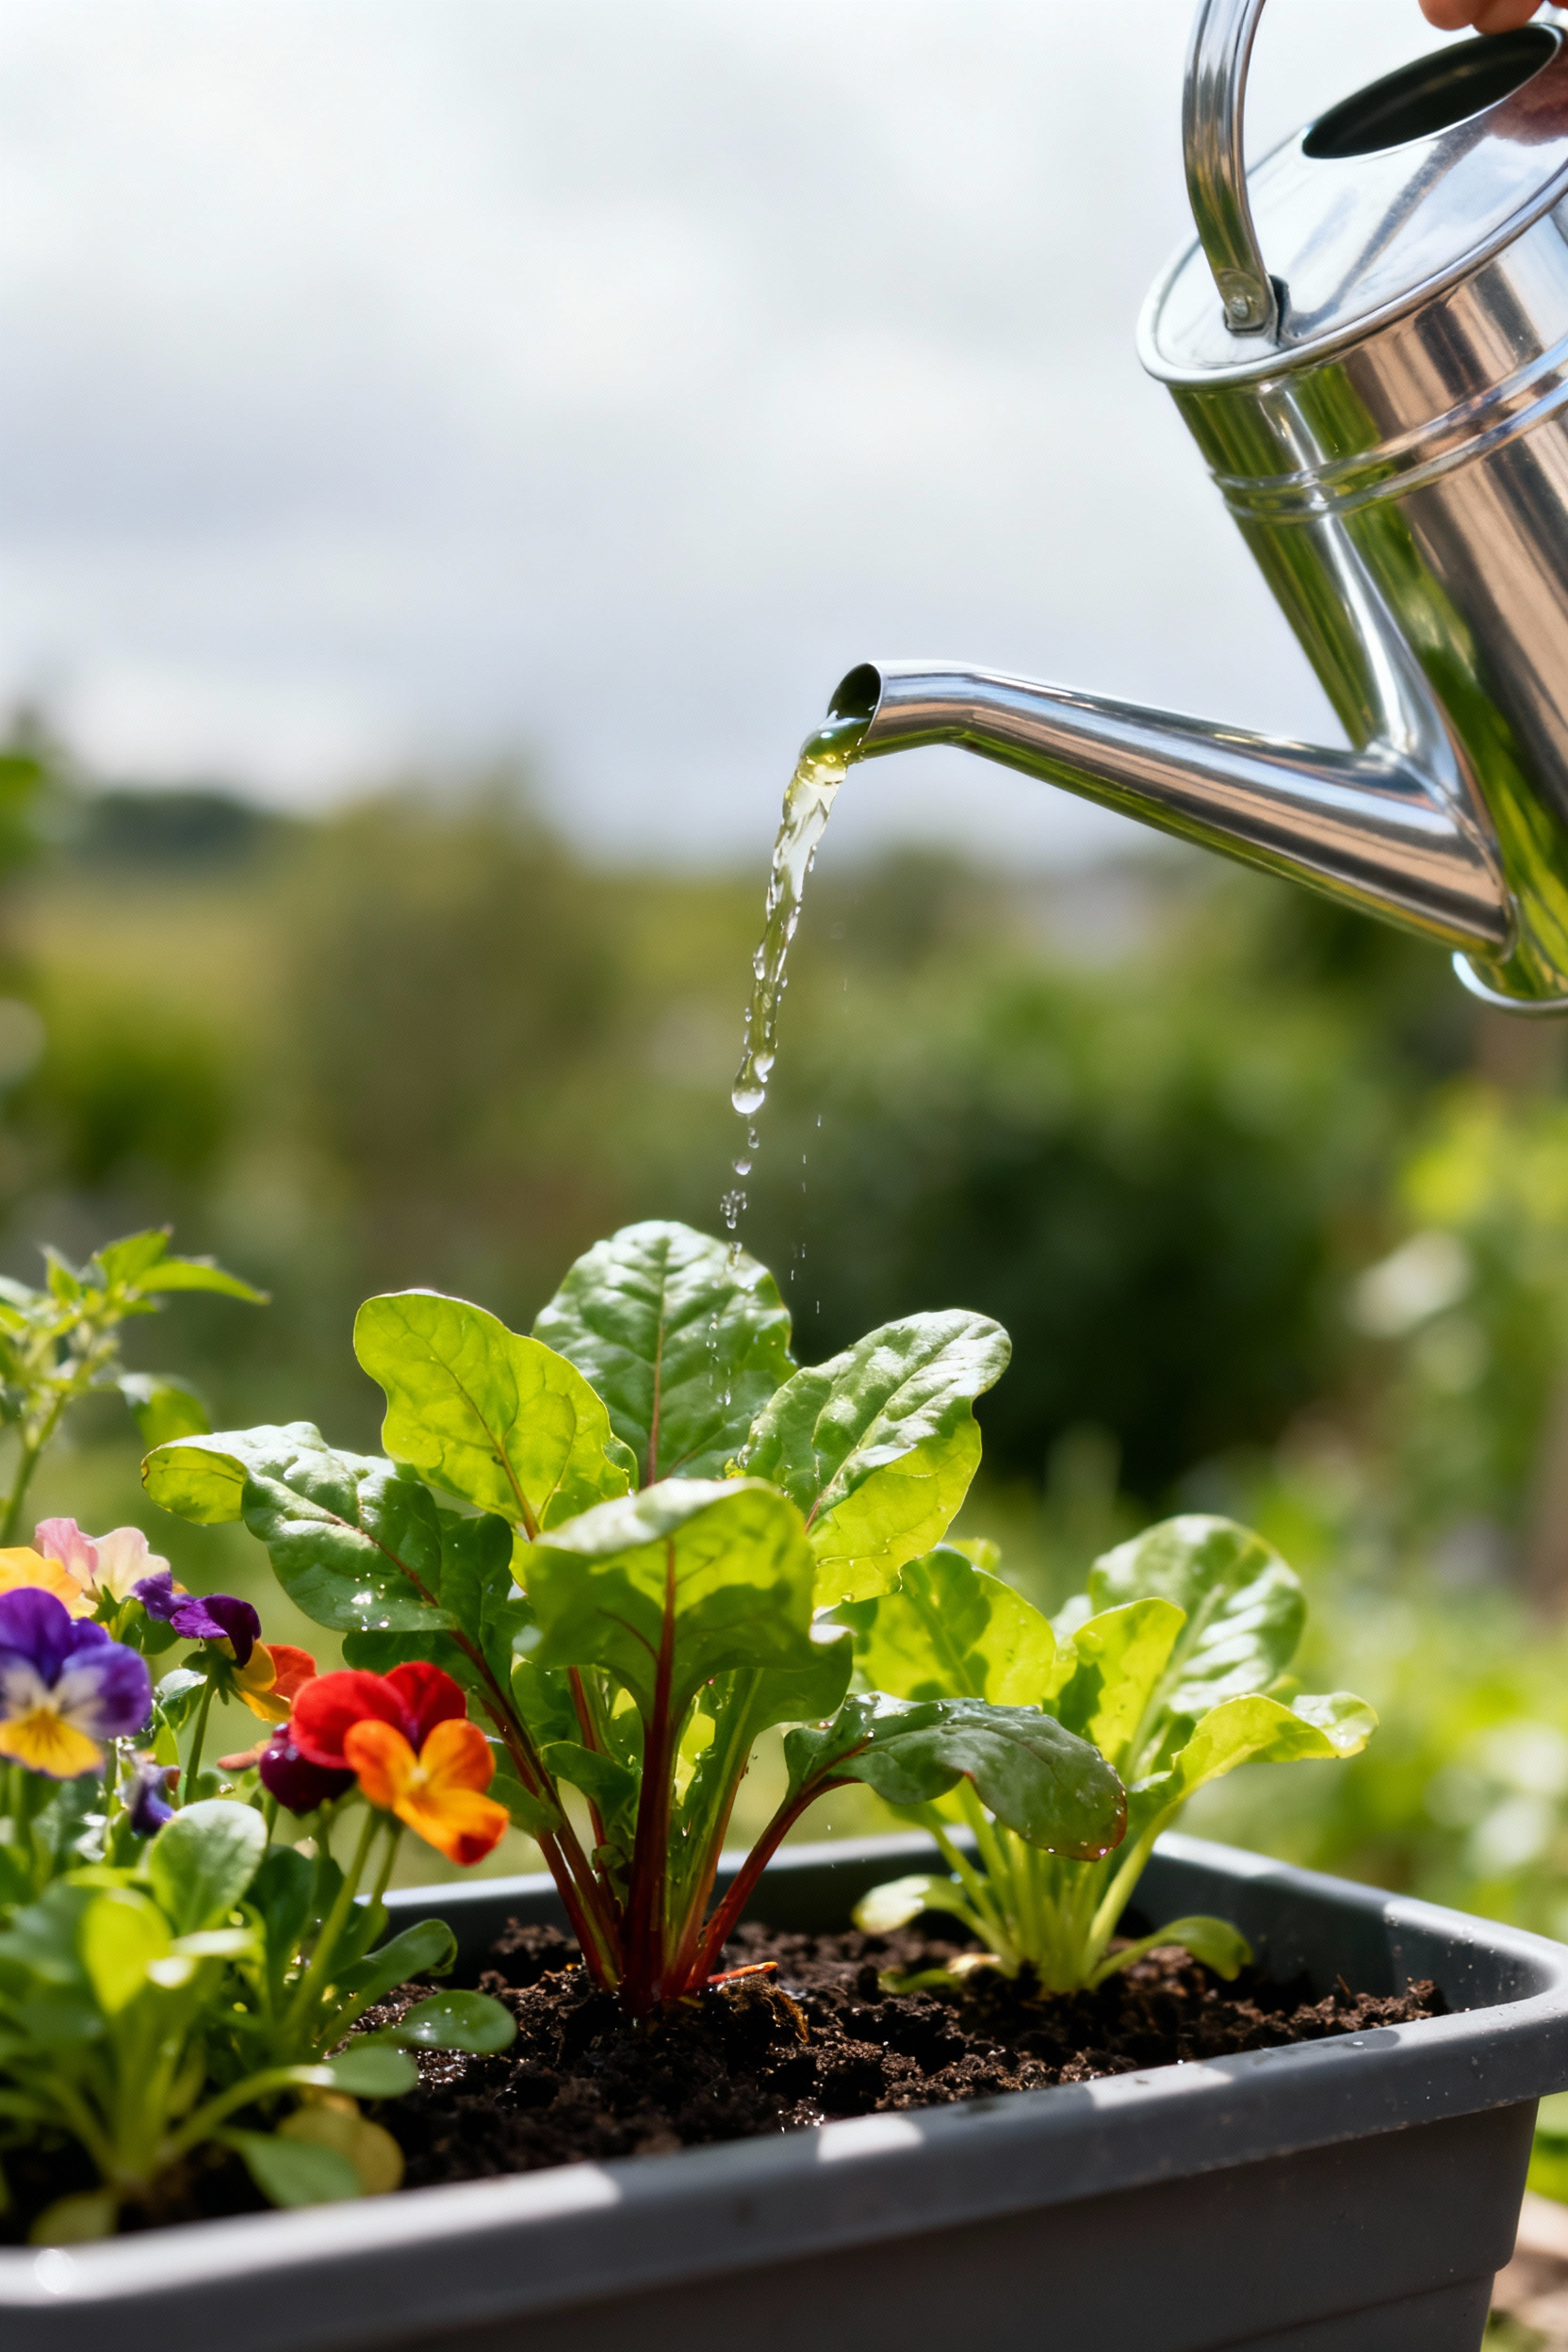
Watering can feel tricky at first, but I promise there’s a super simple, foolproof method to get it right. It’s called the “finger test.” Just stick your finger about an inch or two into the soil. If it feels dry, it’s time to water. If it feels damp, wait another day. That’s it! This little trick helps you avoid both underwatering (wilty, crispy plants) and overwatering (soggy, rotting roots), which is far more common. When you do water, do it slowly and deeply until you see water coming out of the drainage holes at the bottom. This encourages the roots to grow down deep into the pot.
As you get more experience, you’ll start to notice other cues. Small pots and terracotta pots dry out much faster than large plastic ones. A hot, windy day will also dry your soil out in a flash. My professional experience has taught me that there’s no magic schedule—checking your plants daily is the best habit you can build. You’ll start to develop an intuition for it, and you’ll even learn how heavy a pot feels right after you’ve watered it versus when it’s dry. It’s one of those things that becomes second nature, I promise.
Getting Started with Container Gardens: Essential Fundamentals (Part 2)
With the basics down, it’s time for the most exciting part: picking your plants! It can be a little overwhelming walking into a garden center, but don’t worry. We’re going to focus on a few tried-and-true winners that are forgiving, rewarding, and perfect for getting your confidence soaring.
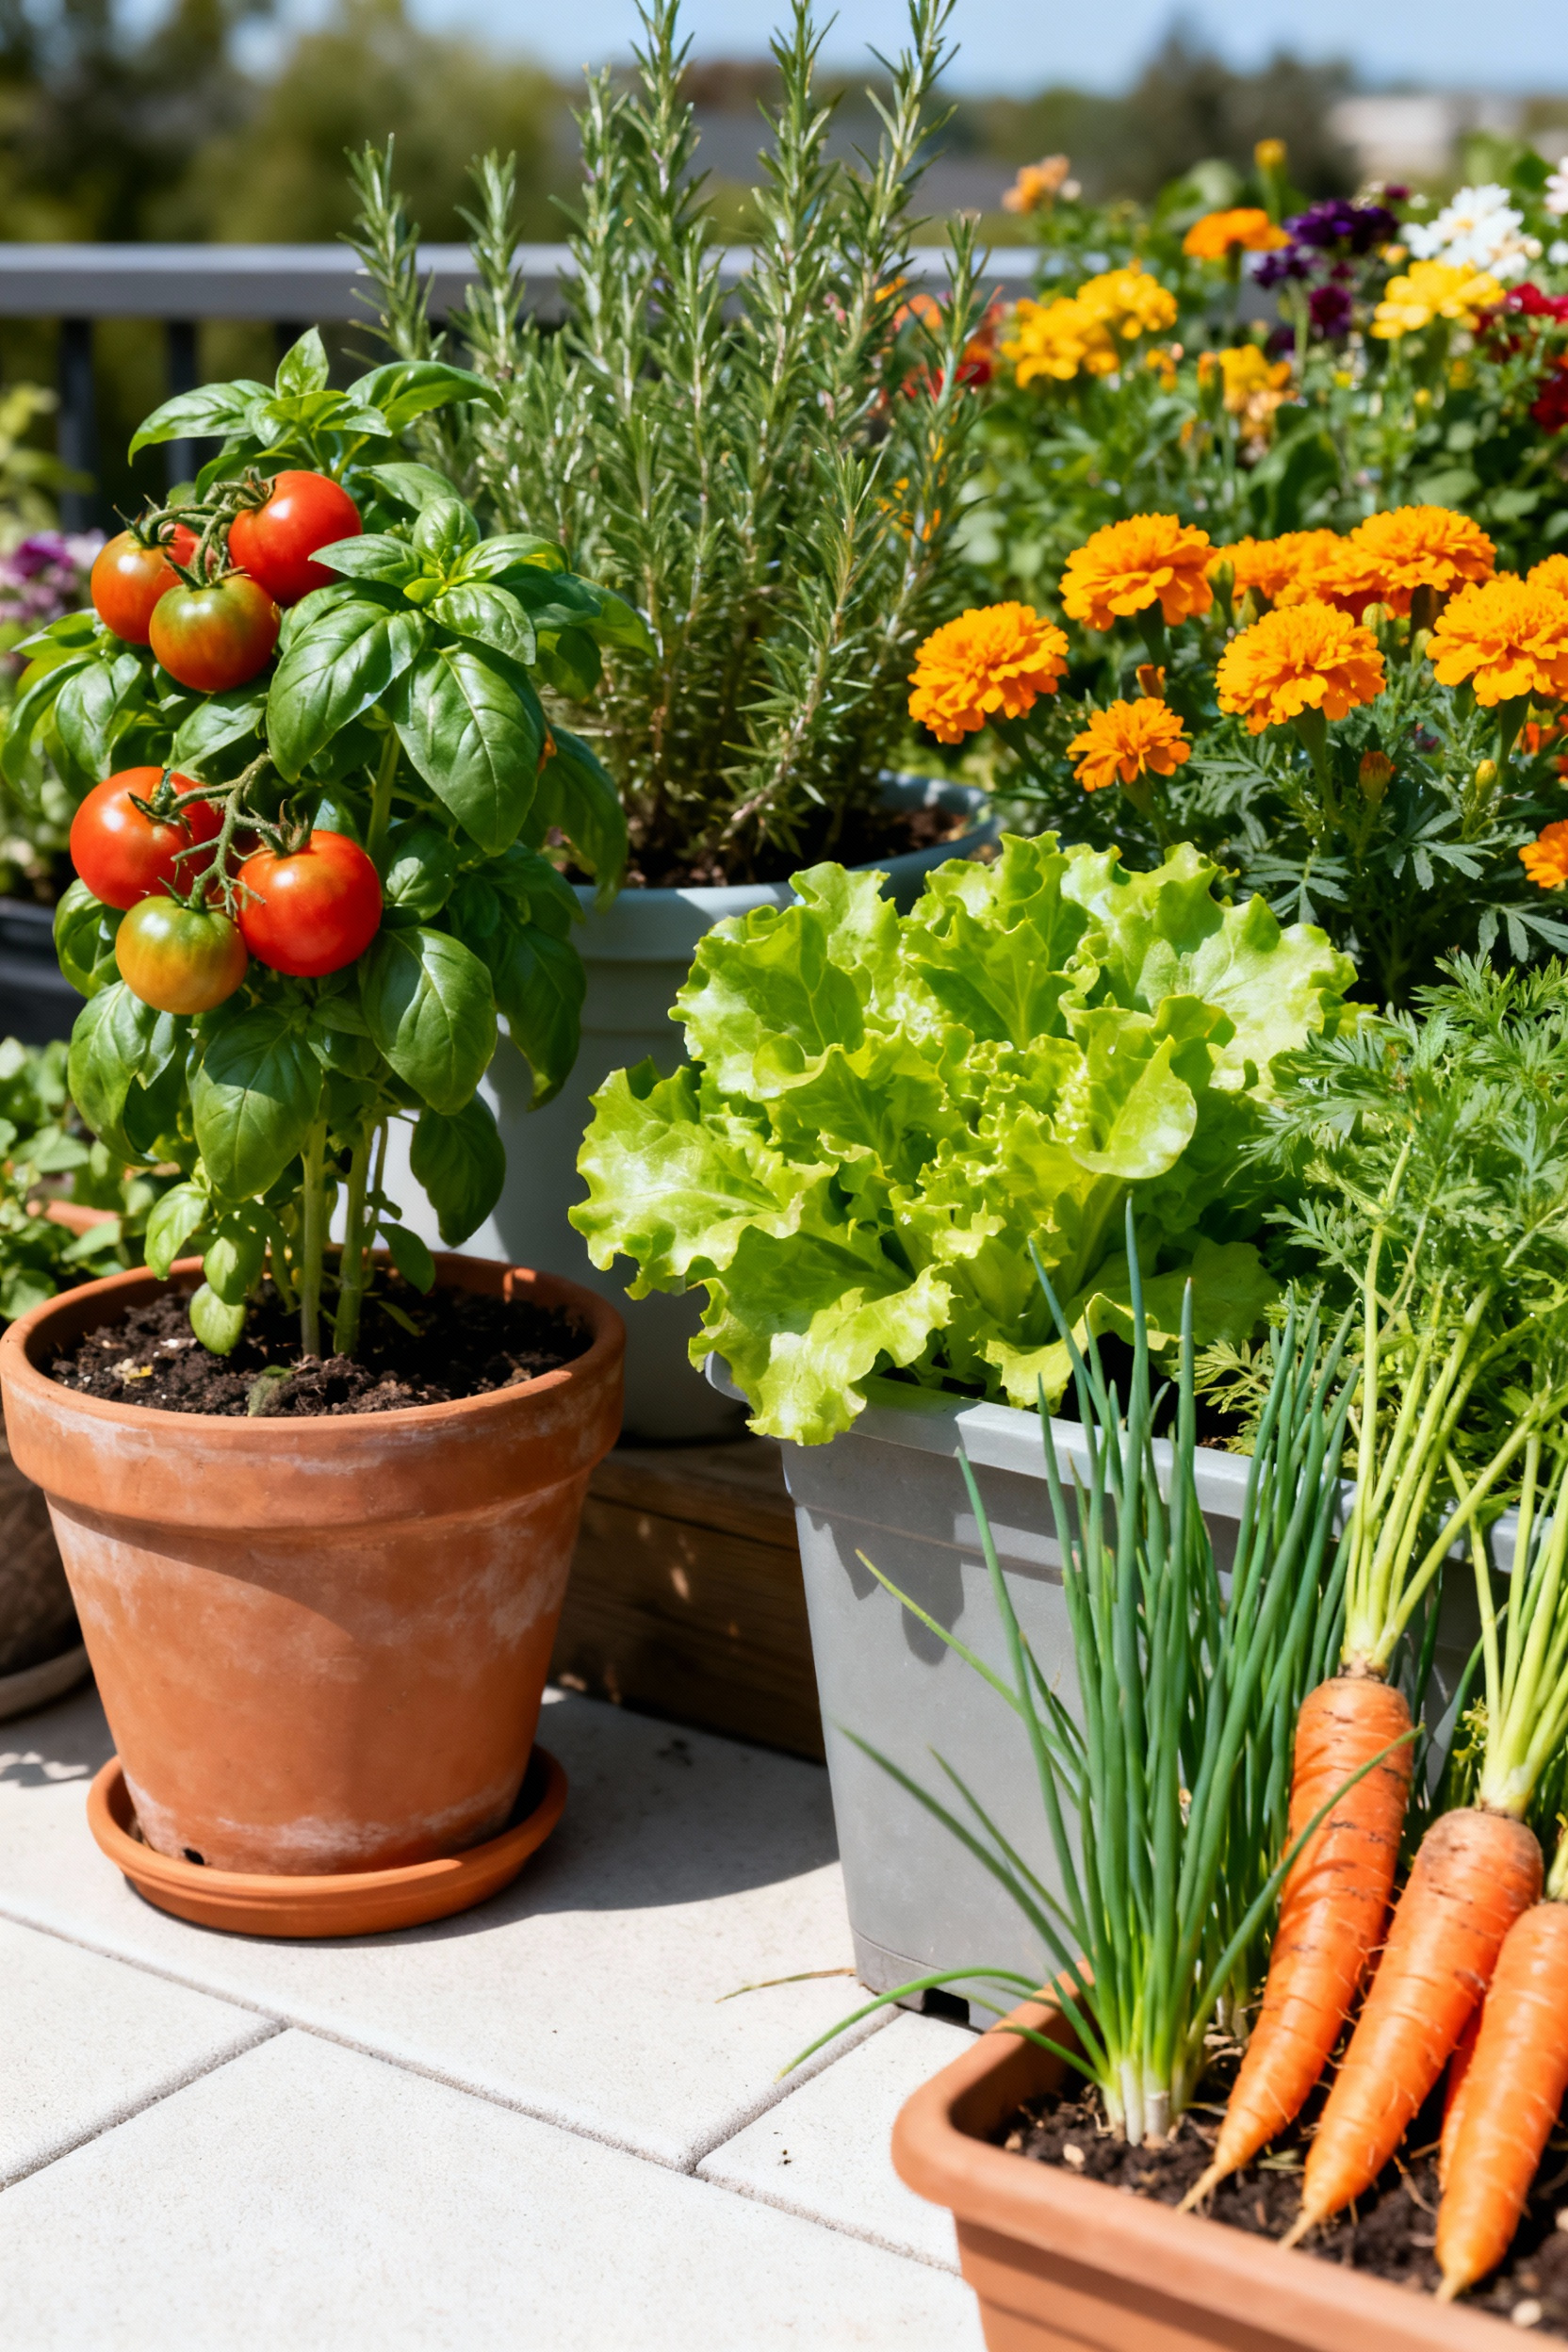
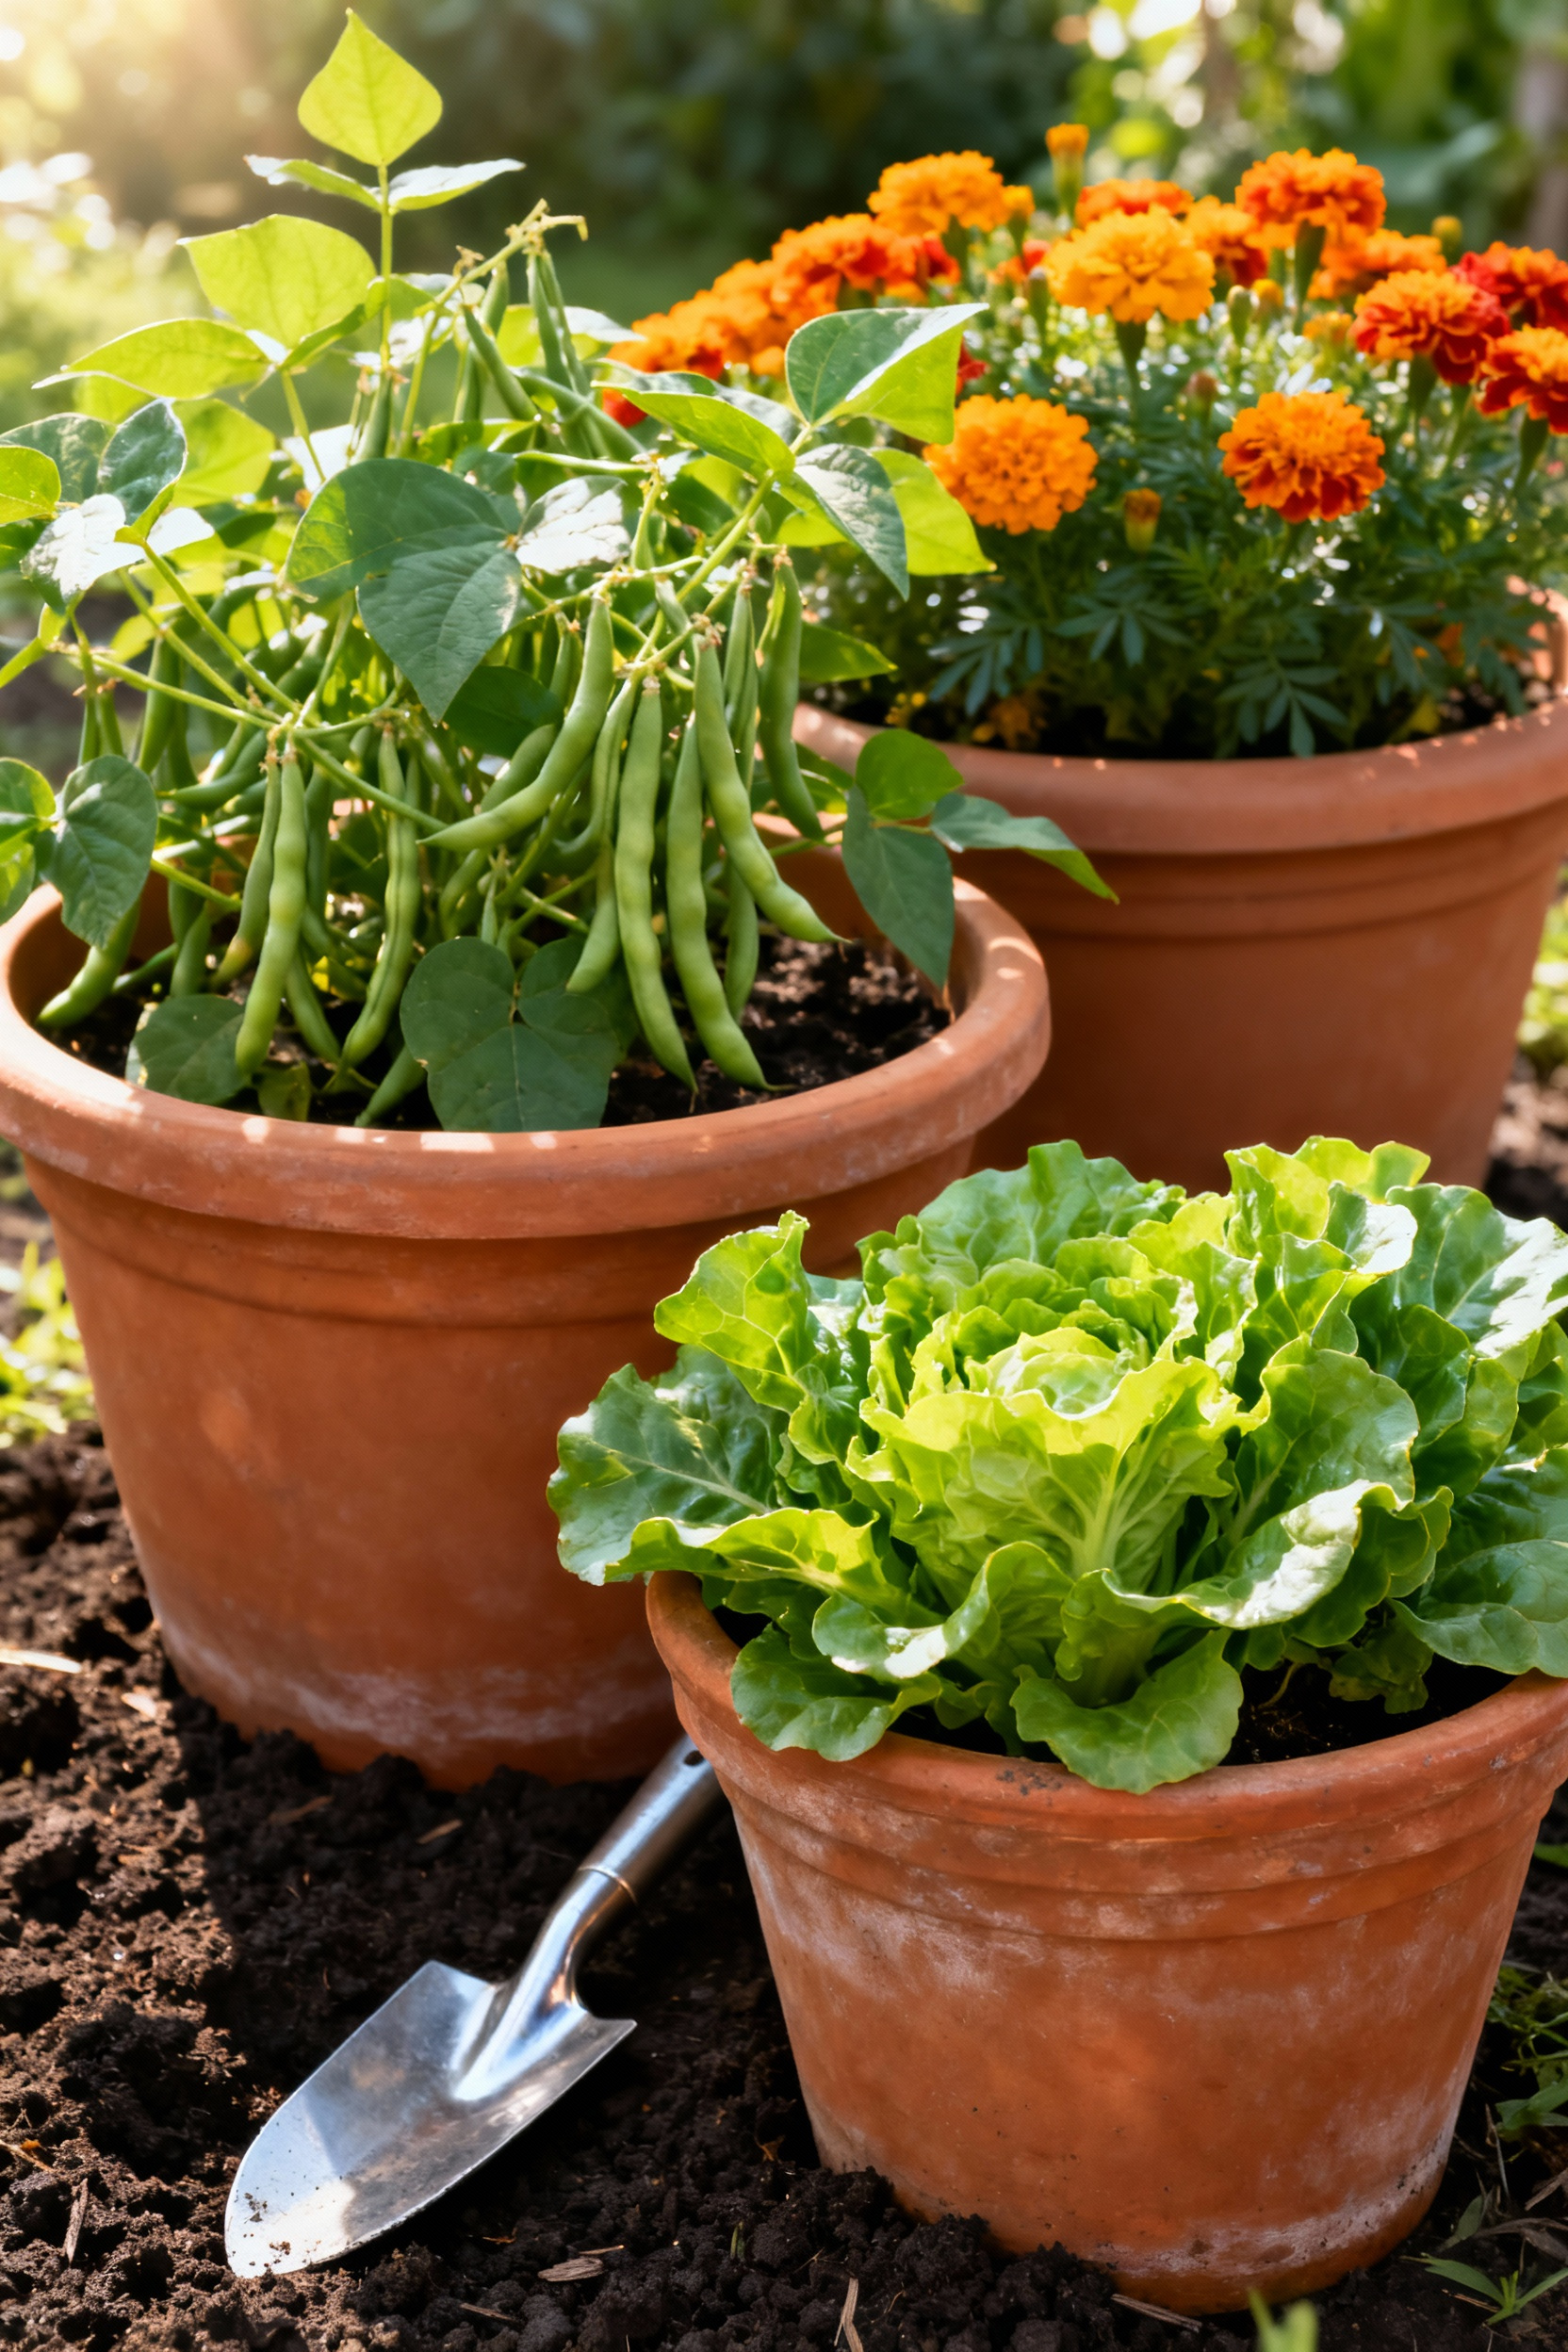
5. Choosing Your First Five: Easy Edibles and Ornamentals for Beginners
Let’s make this simple and fun. We’re going to pick five plants that are practically guaranteed to make you feel like a gardening superstar. First up, for edibles, you can’t go wrong with mint and basil. Just a heads-up: mint is a super enthusiastic grower, so it’s best to give it its own pot so it doesn’t take over! Basil loves sunshine and gives you that amazing reward of snipping leaves for your dinner. For a pop of instant color, grab some petunias. They are bloom machines and will cascade beautifully over the side of a pot with very little fuss.
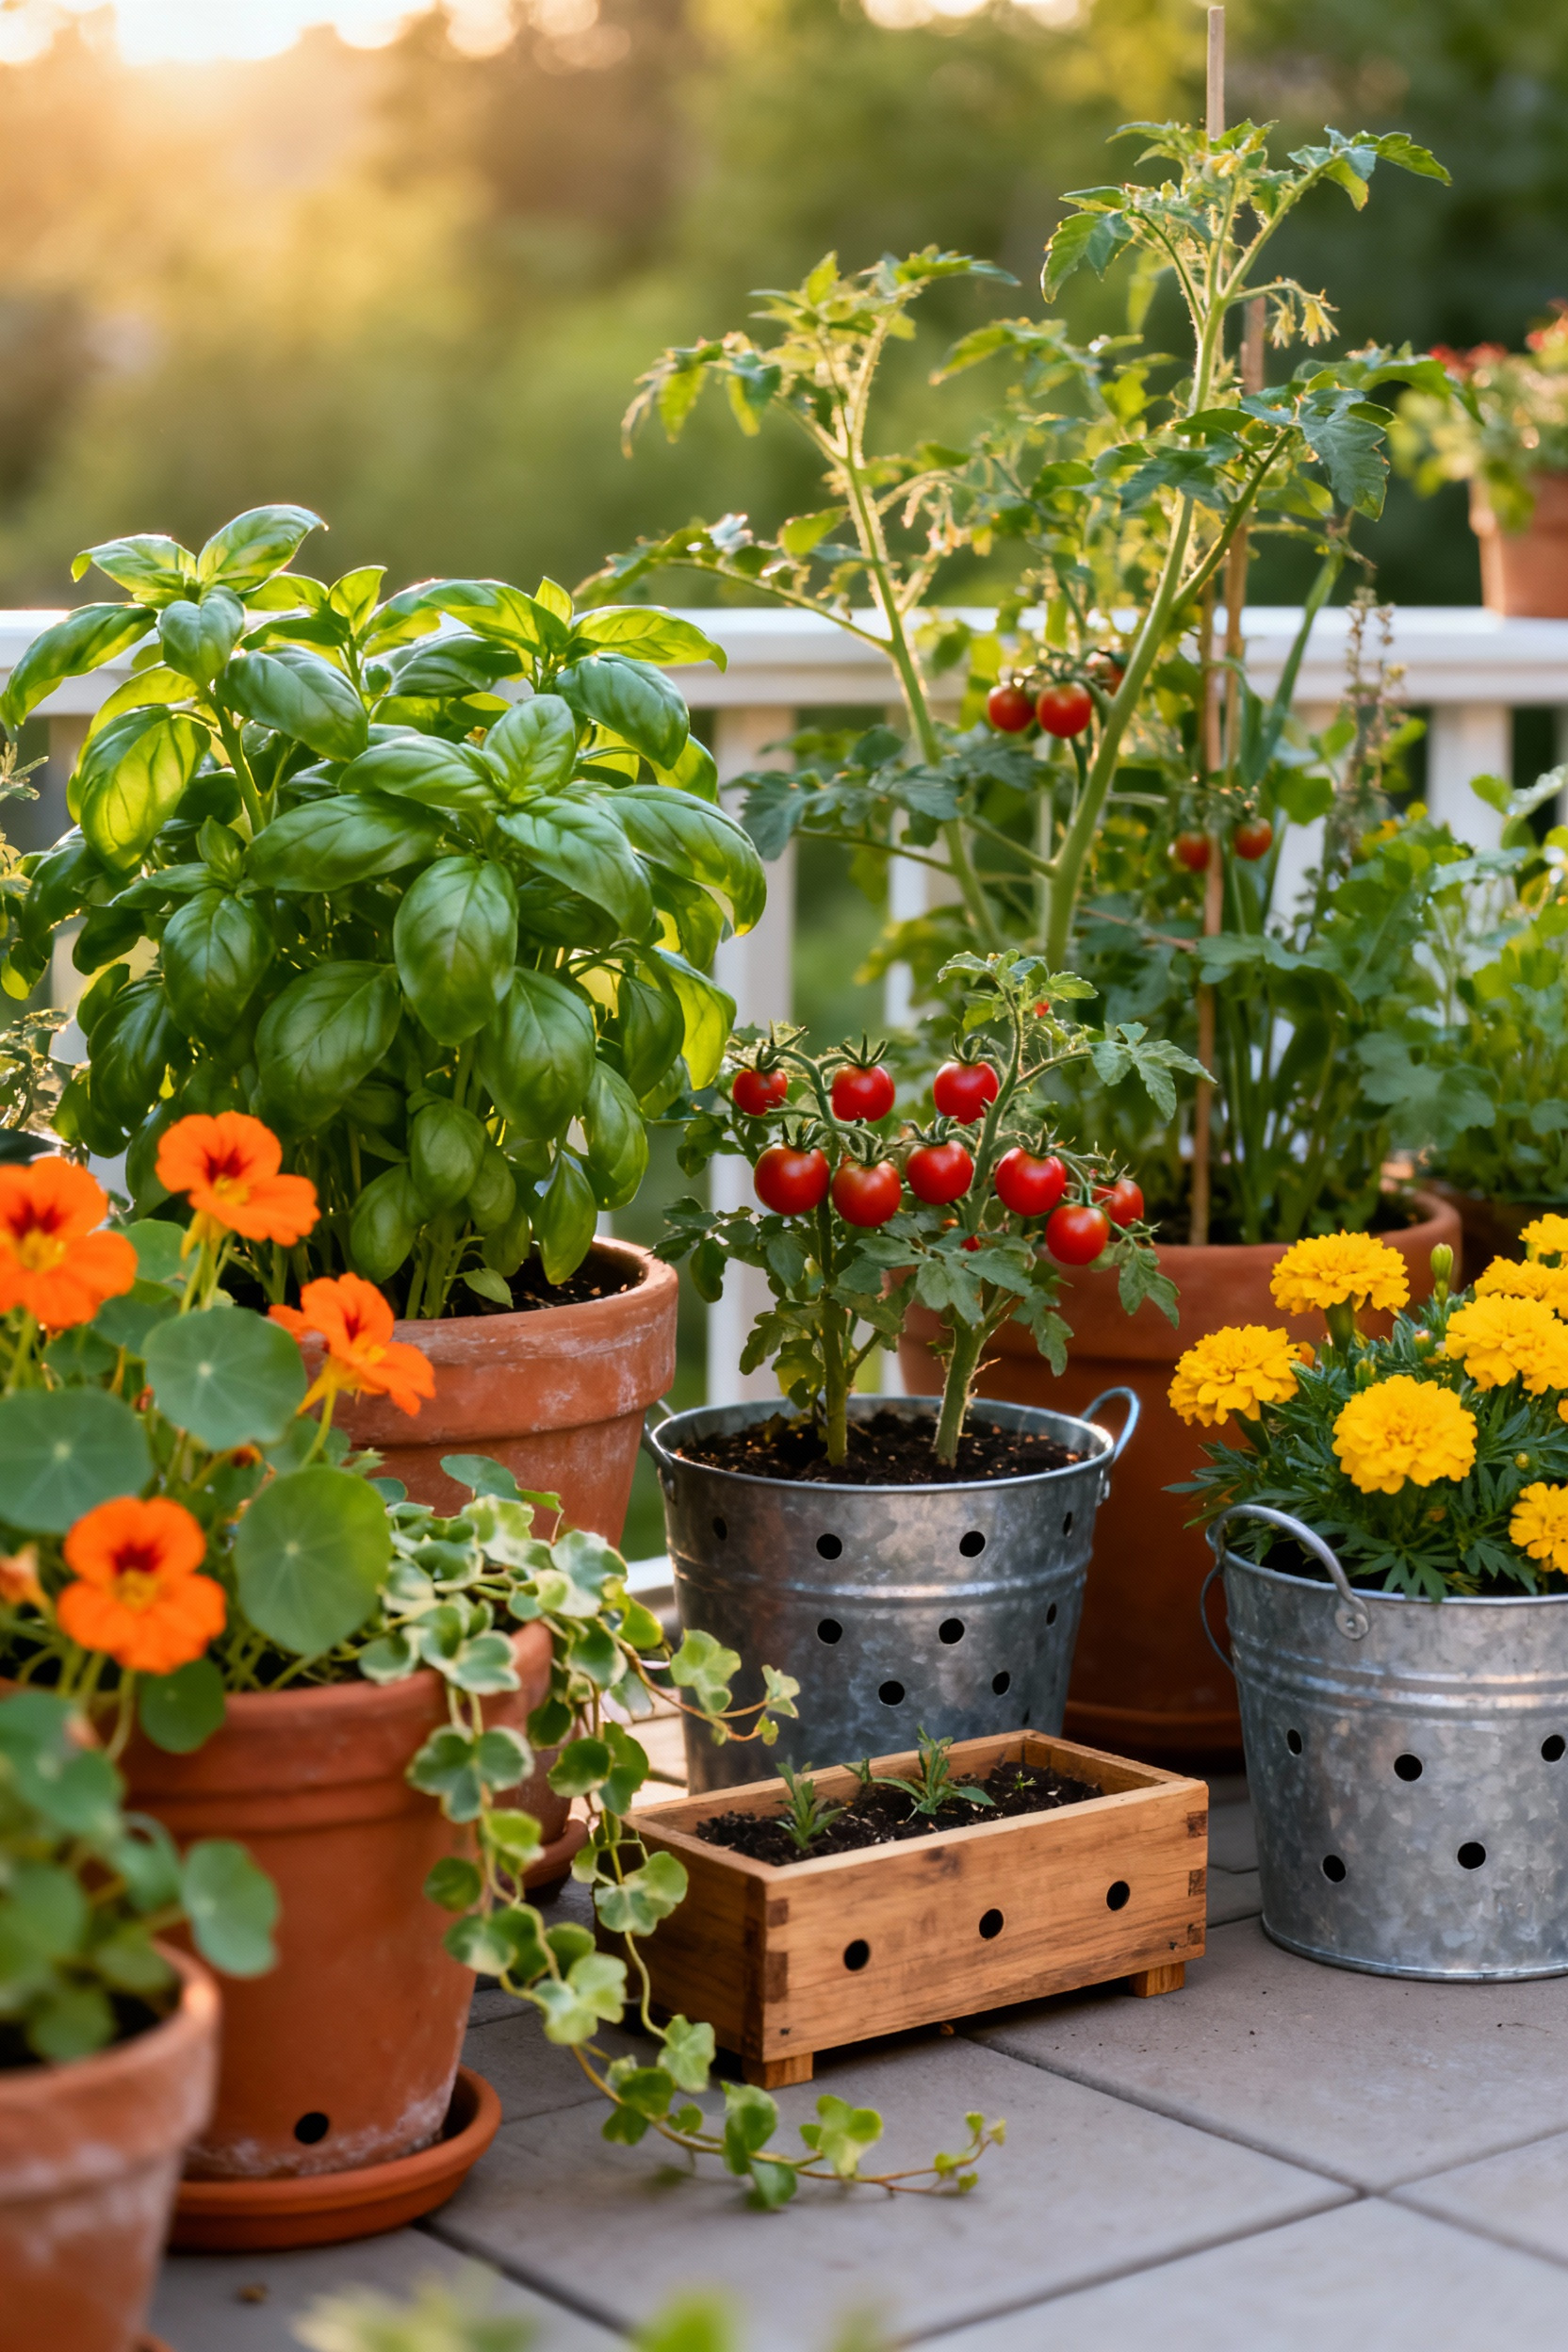
Next, let’s get you a vegetable. A cherry tomato plant, especially a “patio” or “bush” variety, is perfect for a container and will give you handfuls of sweet, sun-ripened tomatoes. Finally, for something fast and satisfying, get a packet of leaf lettuce seeds. You can sow them directly into a pot, and within weeks you can start harvesting the outer leaves for salads. Years of budget-friendly design taught me that starting with a few carefully chosen, high-impact plants is way more satisfying than trying to grow everything at once. This fantastic five will give you a taste of everything container gardening has to offer: fragrance, color, and fresh food!
Elevating Your Container Gardening Approach: Beyond the Basics (Part 1)
So, you’ve got the basics down and your plants are thriving. Awesome! Now we get to play. This is where we bring in a little design know-how—just like composing a painting—to make your containers look truly spectacular. These next few tips are about taking your garden from a collection of pots to a beautifully designed space.
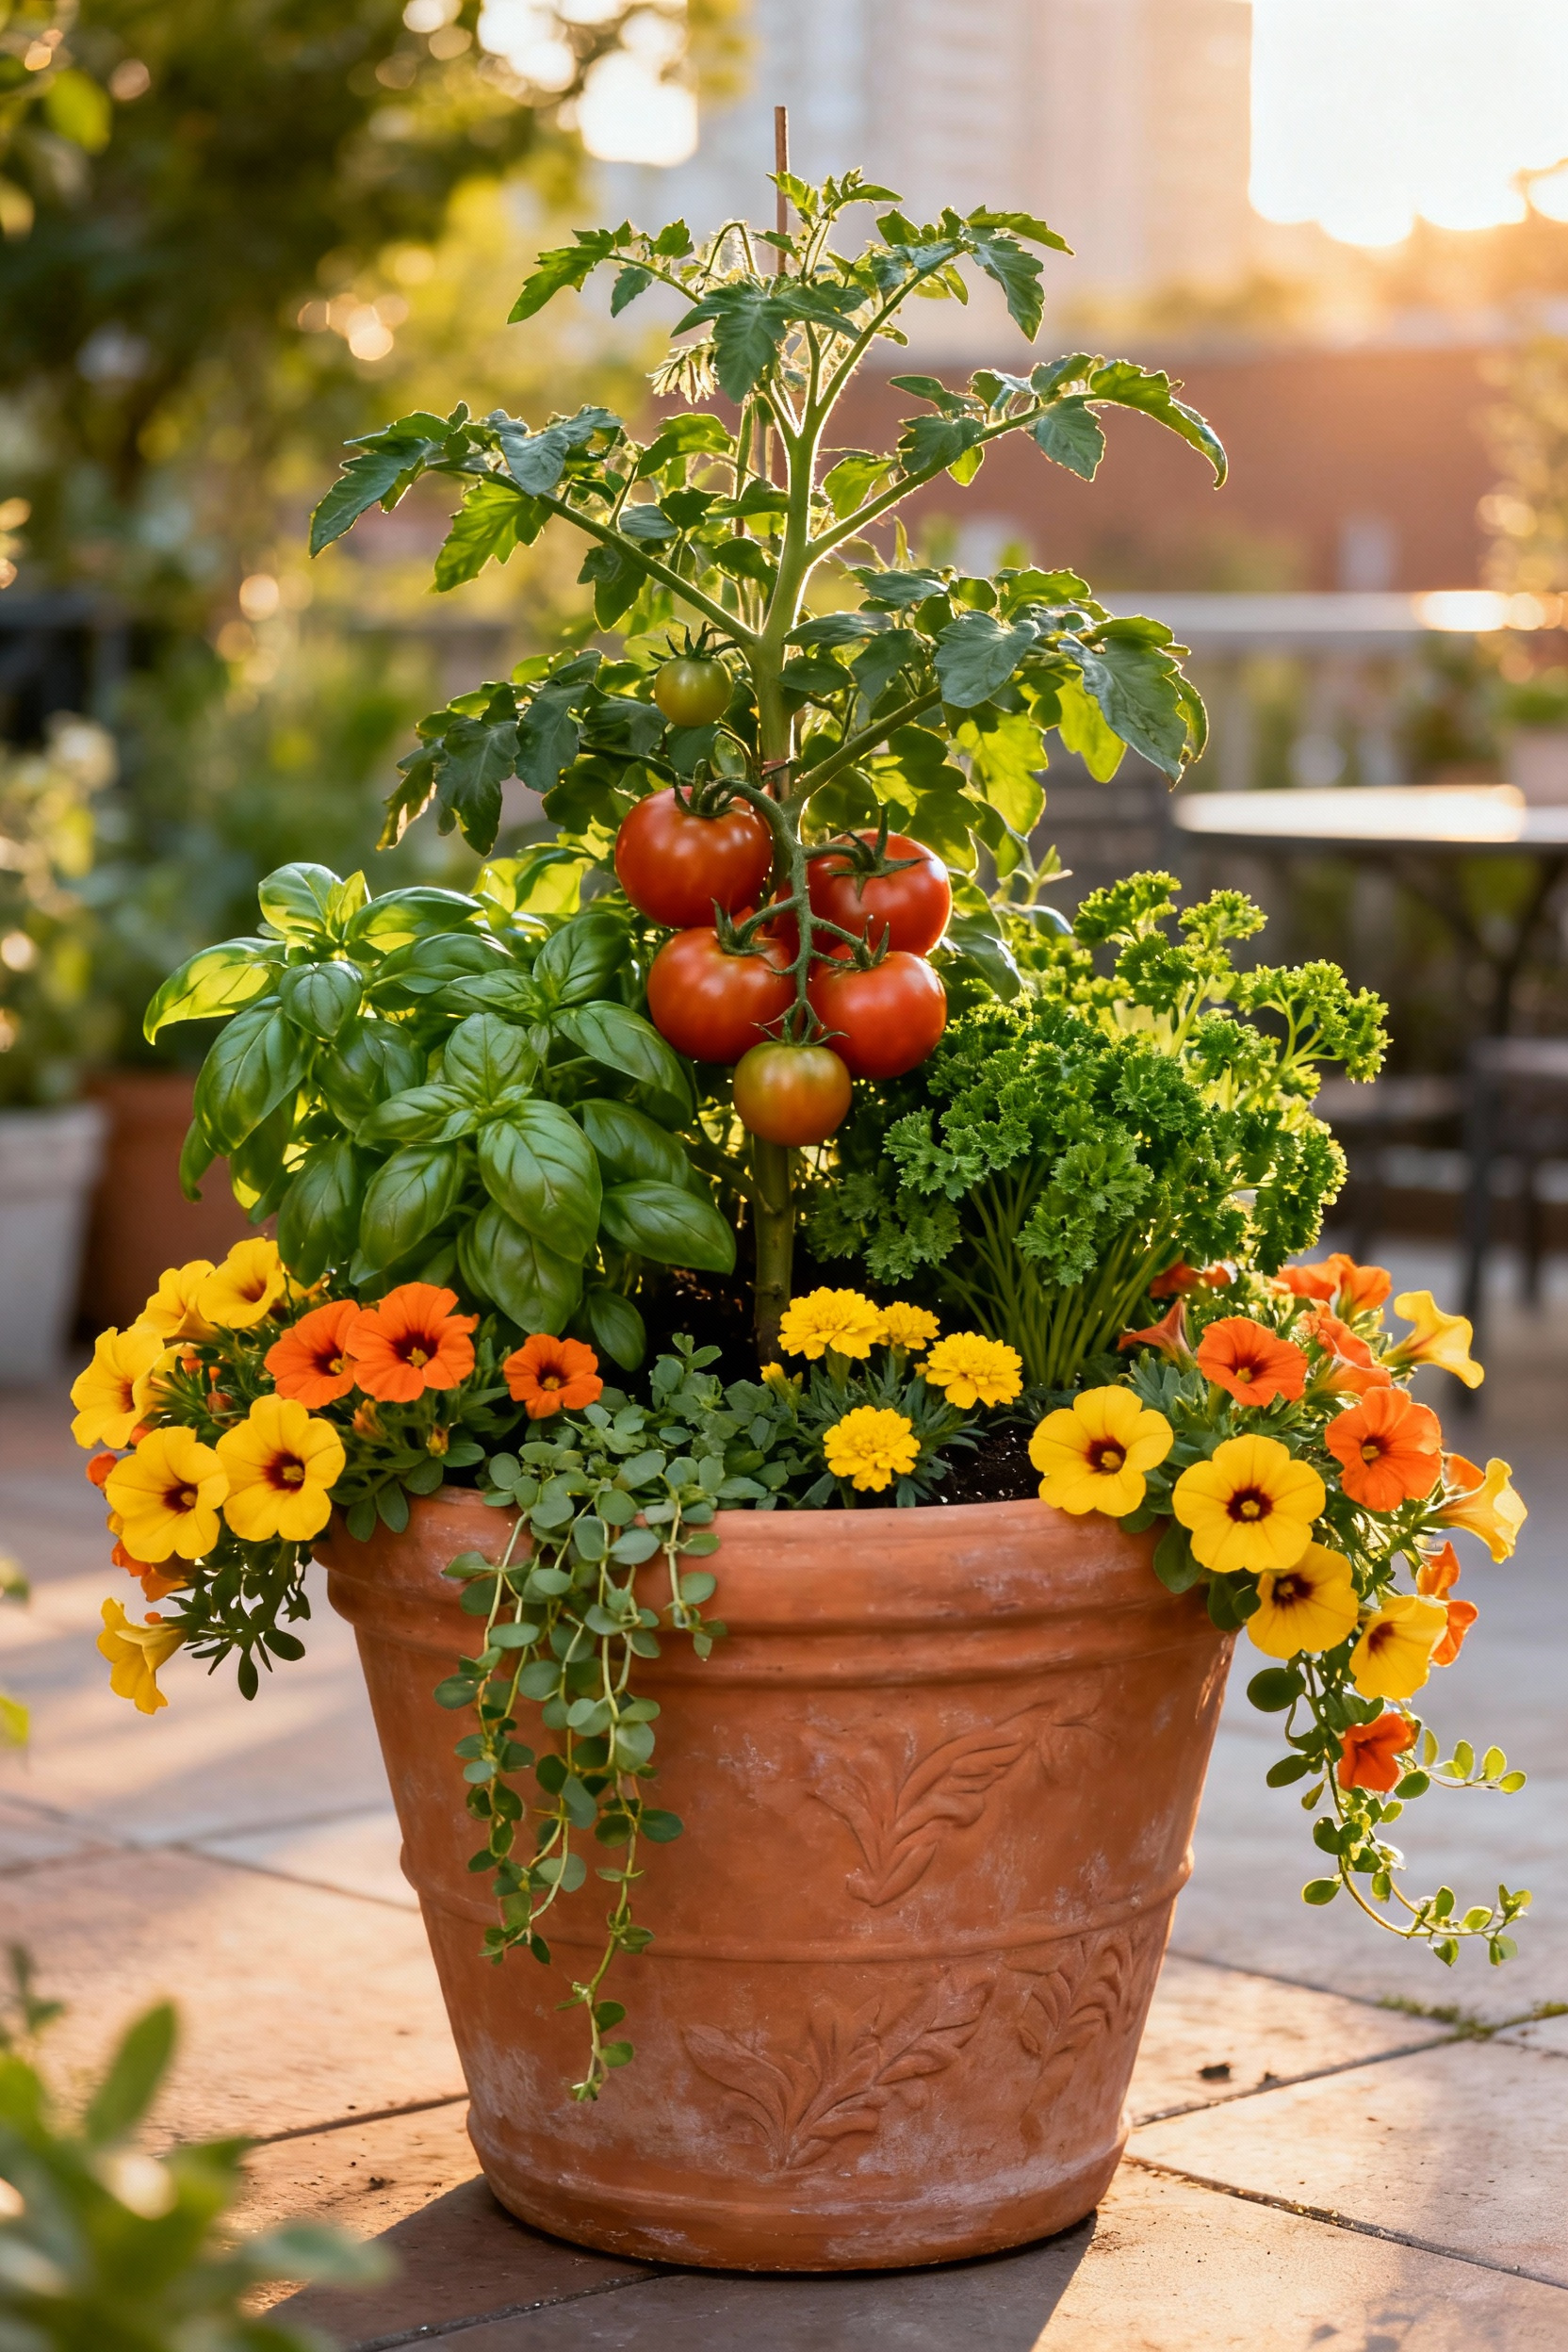
6. Crafting Stunning Combinations: The “Thriller, Filler, Spiller” Design Principle
This is my all-time favorite design trick, and it’s as easy as one-two-three. To create a pot that looks like a professional designed it, just remember: “Thriller, Filler, and Spiller.” Your Thriller is your show-stopper—a tall, eye-catching plant in the center like a spiky dracaena, a vibrant grass, or even a beautiful stalk of Swiss chard. Next, you add your Fillers. These are mounding plants that fill in the middle ground and complement your thriller, like coleus, pansies, or bushy herbs like parsley.
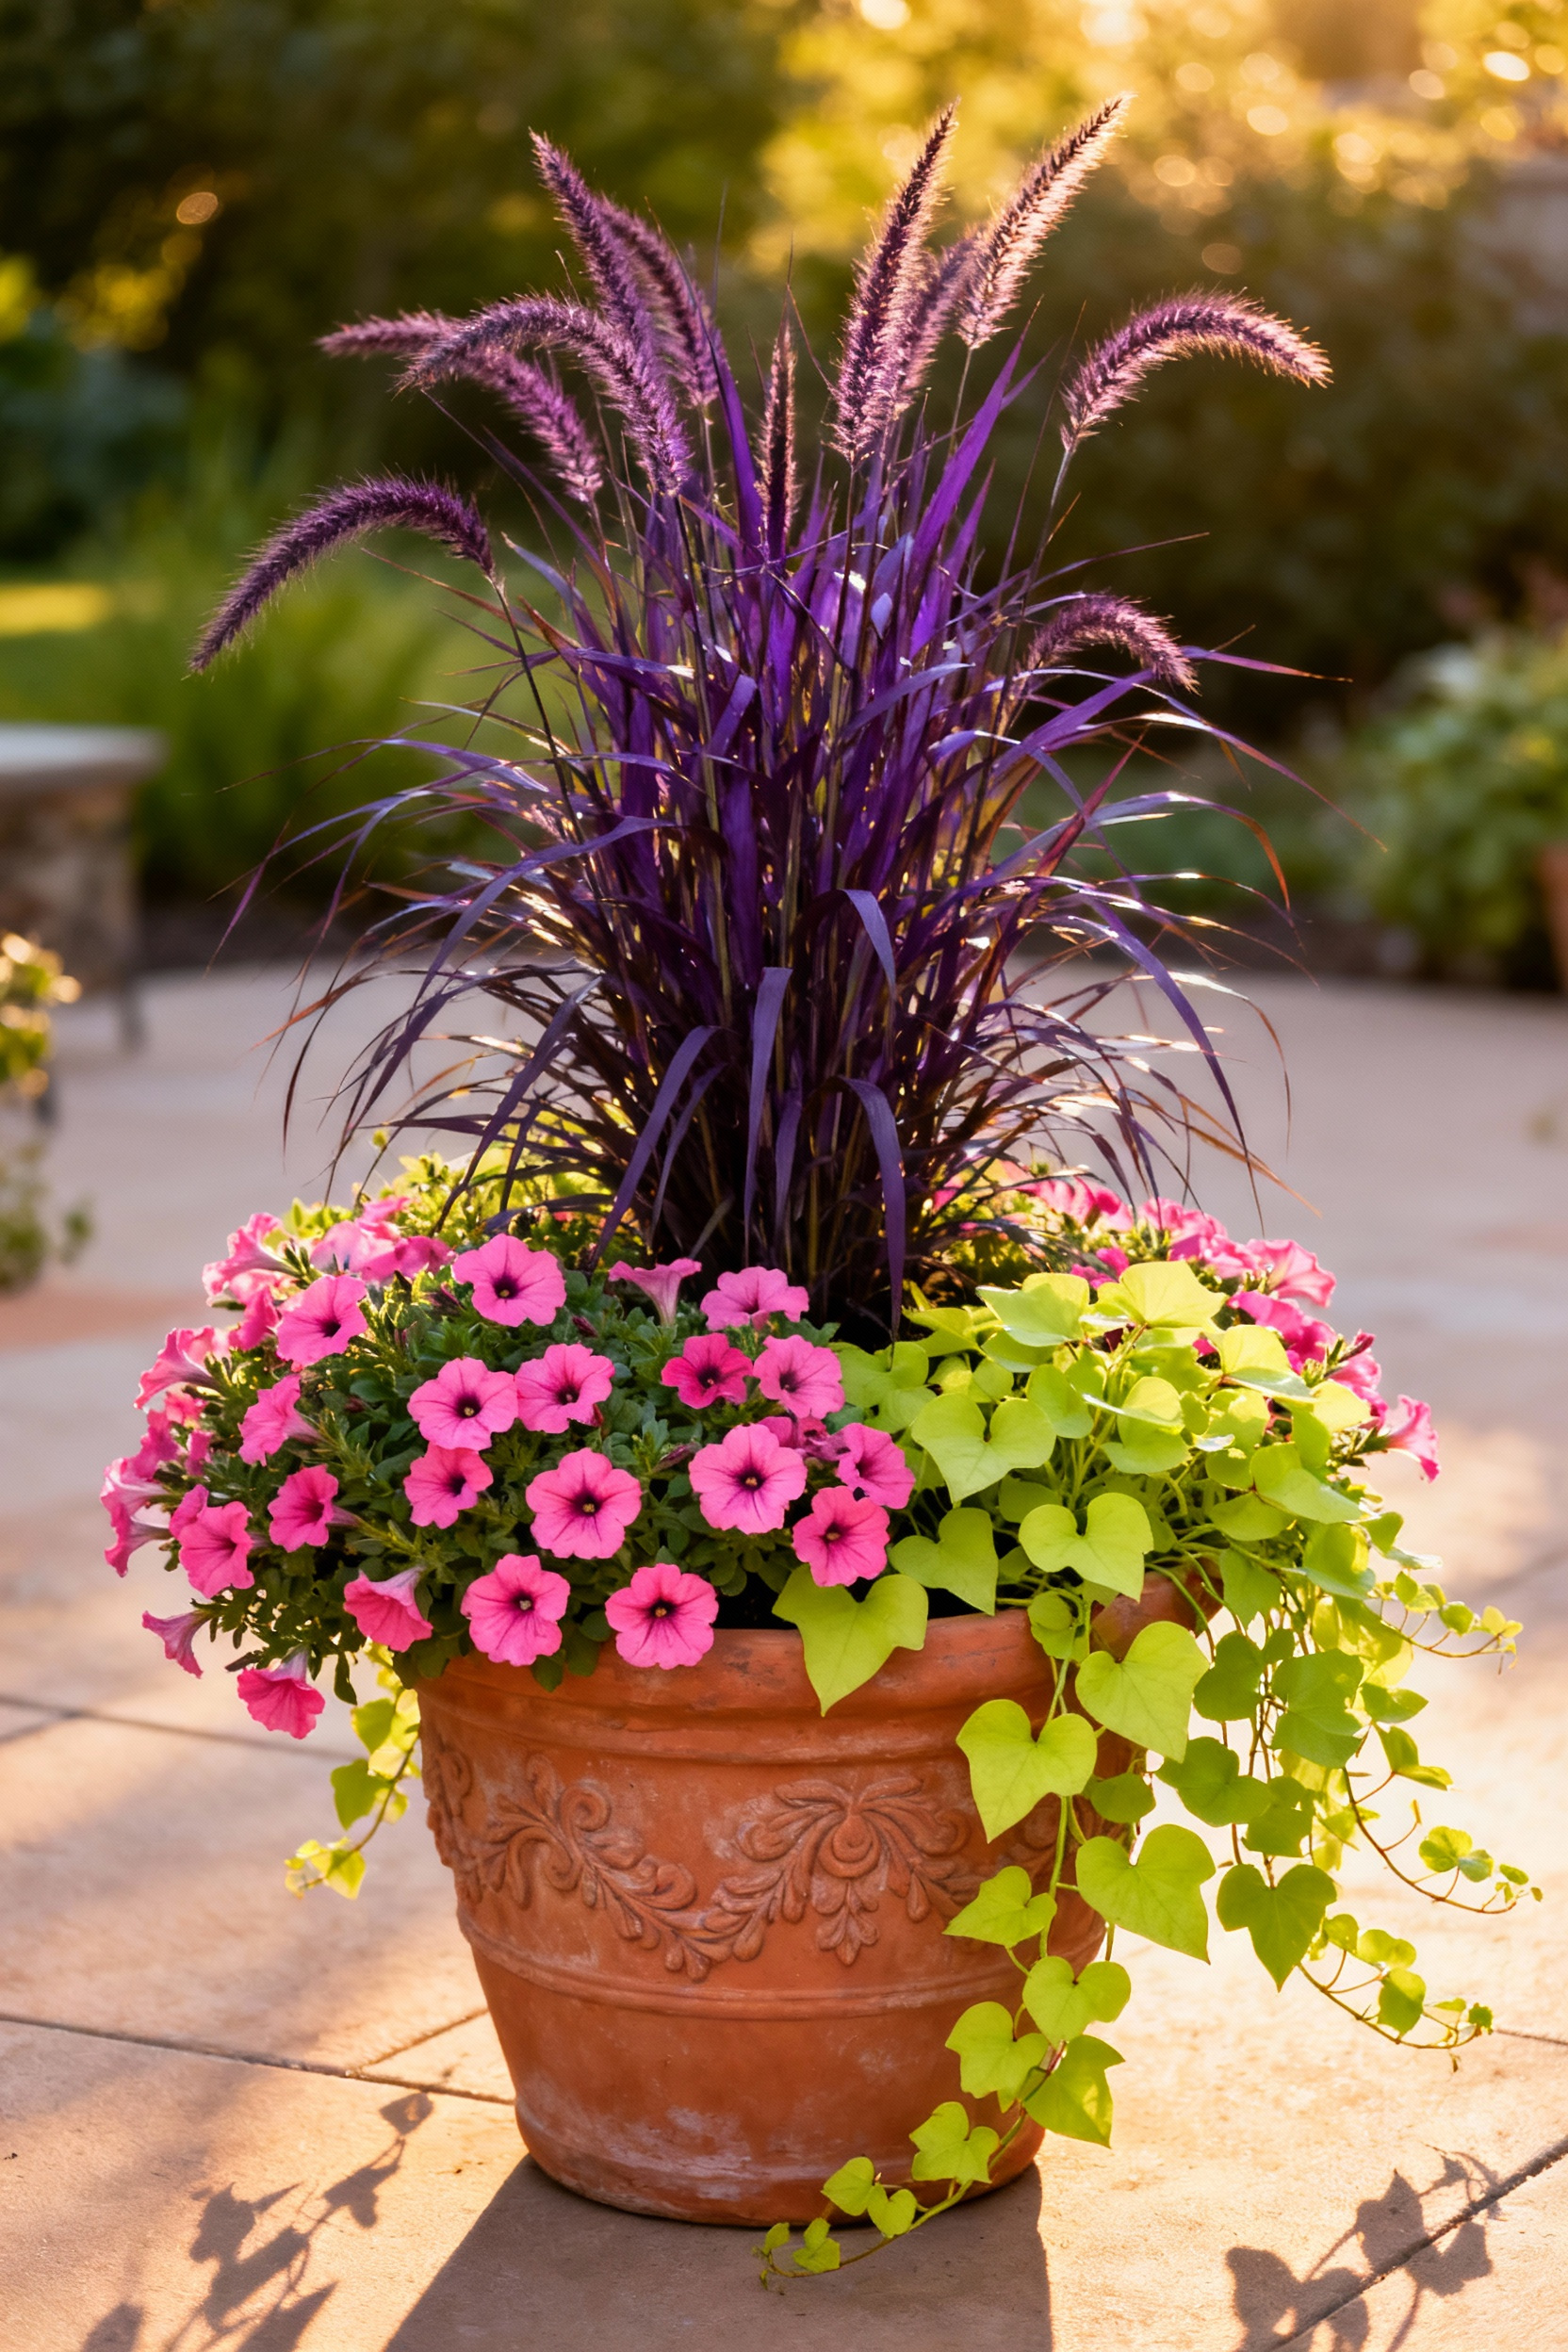
Finally, you add your Spillers—plants that trail and cascade over the edge of the pot, softening the look and making it feel lush. Think sweet potato vine, ivy, or trailing petunias. I often tell my readers this is just like creating a great outfit: you have your statement piece (the thriller), your main ensemble (the filler), and the perfect accessory (the spiller). It’s a simple recipe that gives you a balanced, dynamic, and beautiful container every single time. Have fun playing with different color and texture combinations!
7. Maximizing Small Spaces: Ingenious Vertical and Stackable Container Solutions
Don’t have a lot of floor space? Look up! Vertical gardening is a brilliant way to create a lush garden on a small balcony or patio. The simplest way to start is with a tiered or stacking planter, which lets you grow multiple plants in the same small footprint. You can buy these ready-made, or even get creative and make your own. I once used an old hanging shoe organizer on a sunny wall to create an incredible vertical herb garden—it worked like a charm!
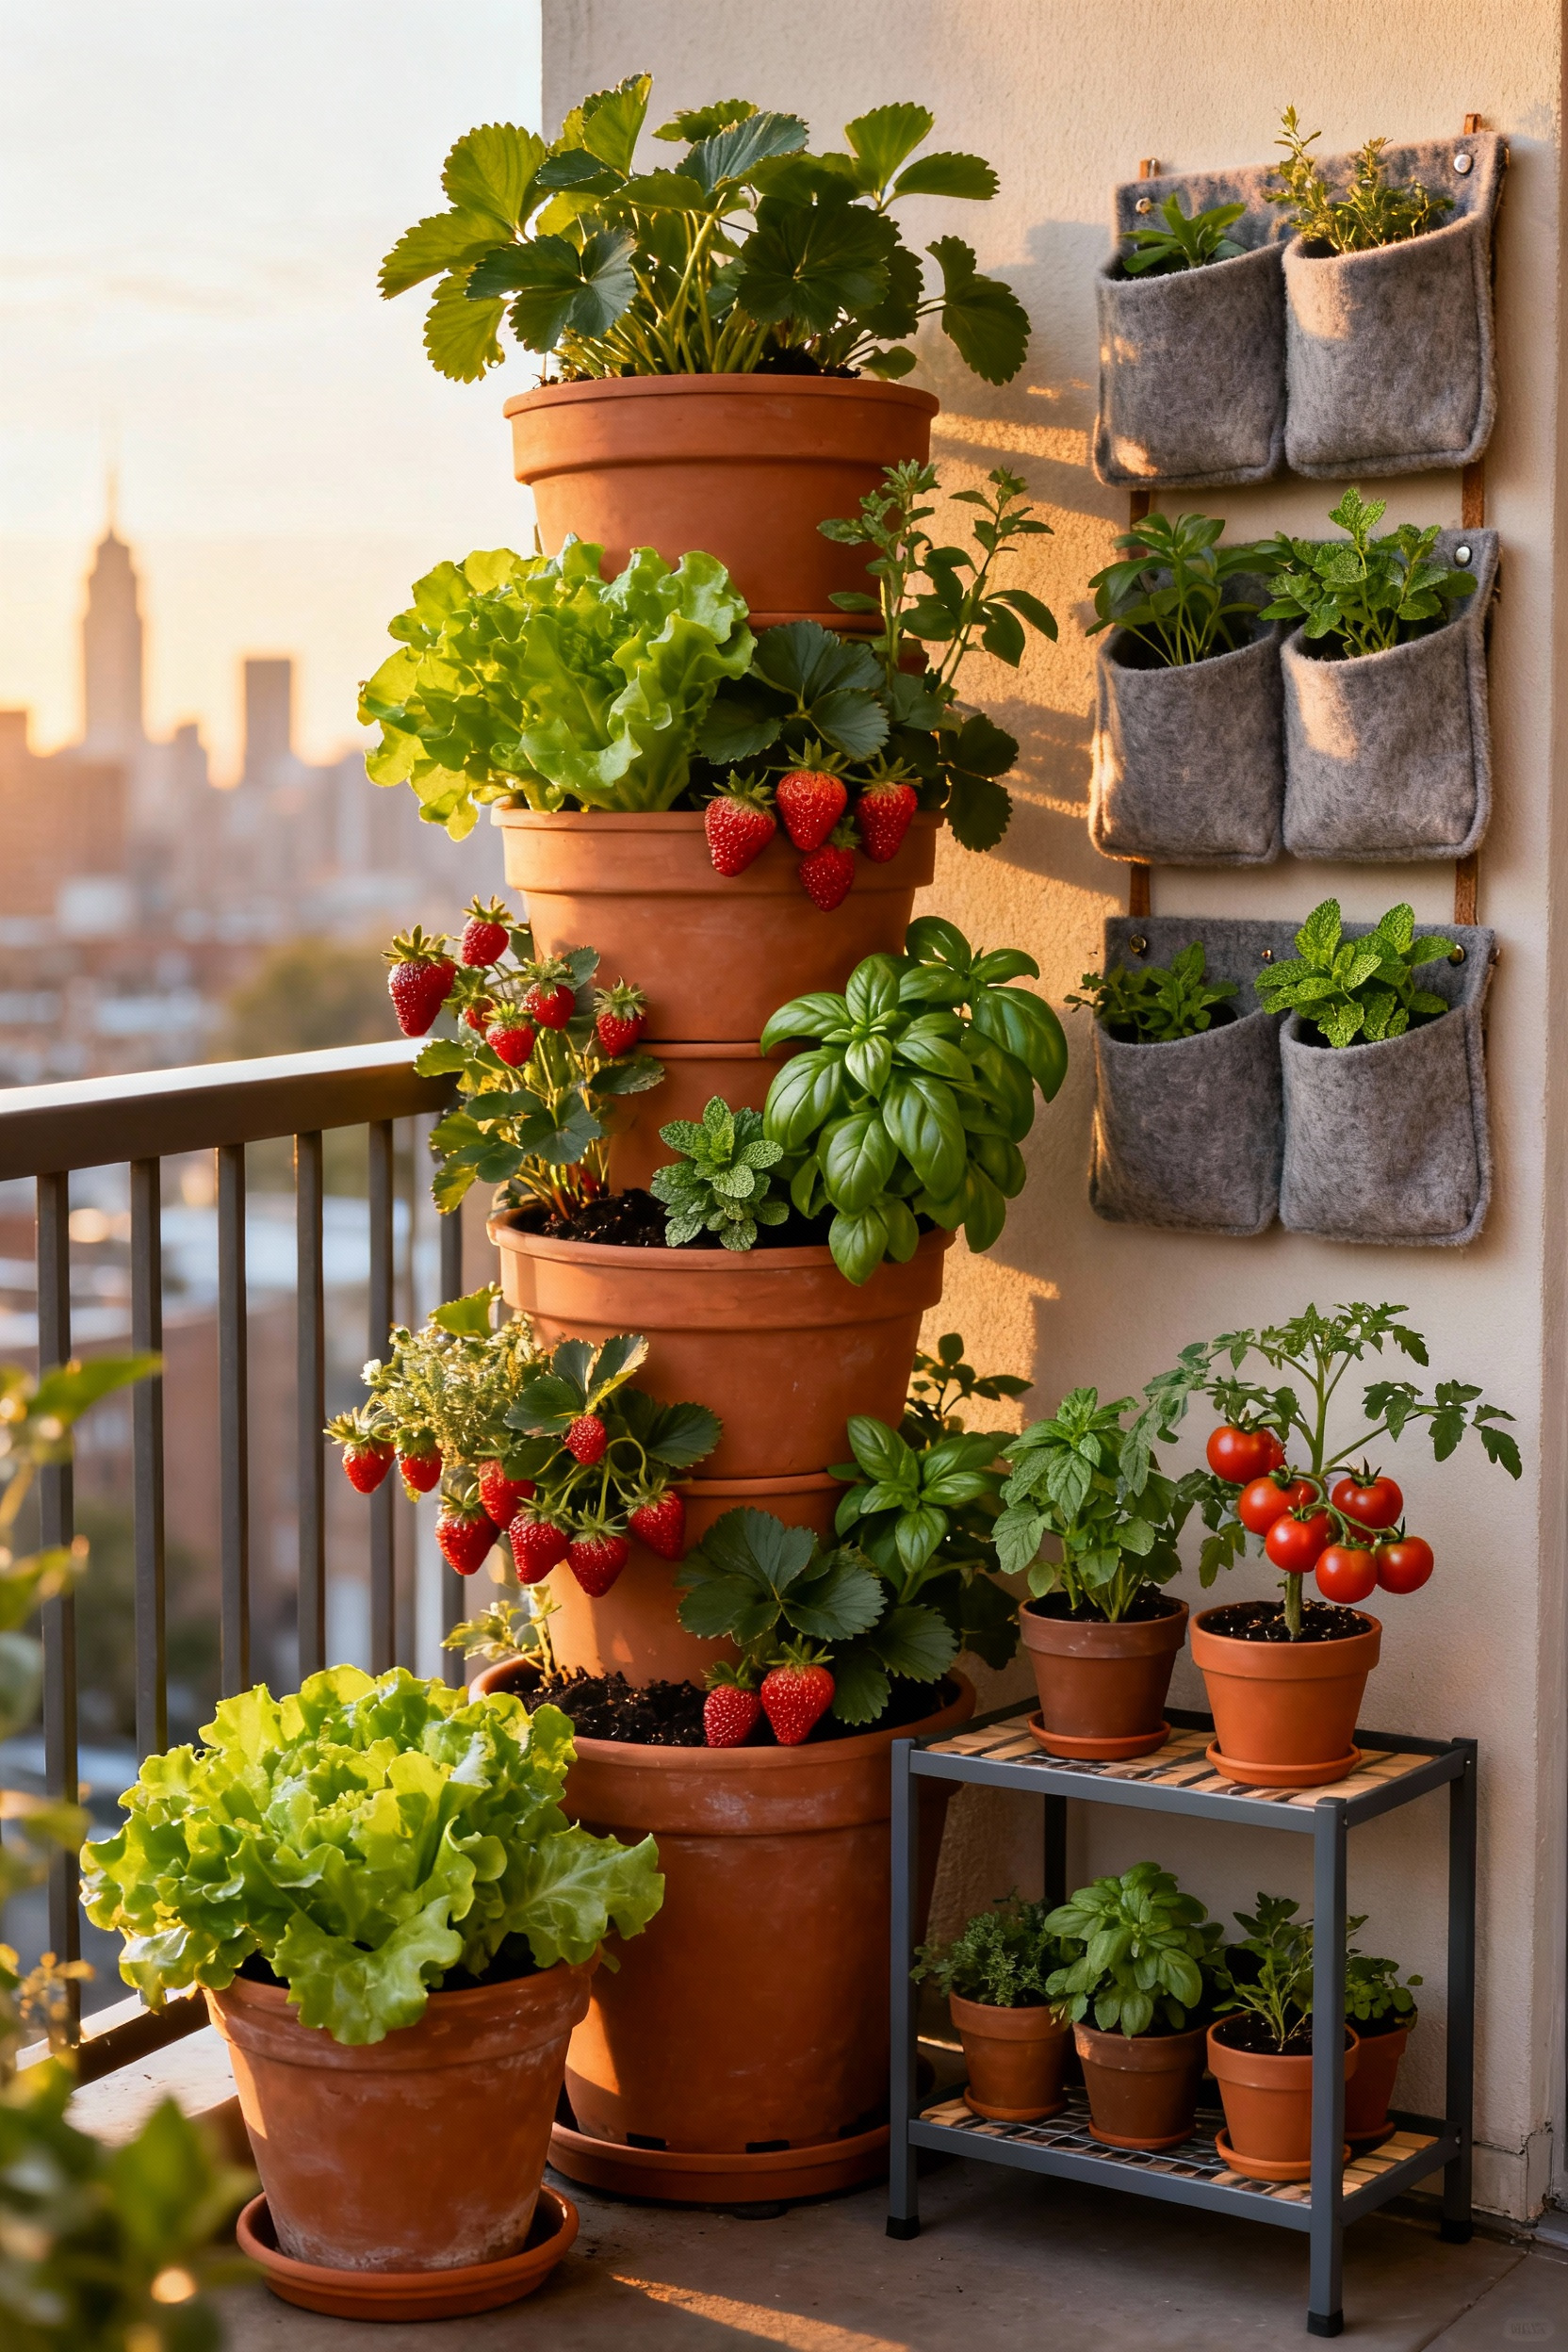
As you get more comfortable, you can explore other options like wall pockets, repurposed wooden pallets, or even DIY systems made from rain gutters. In my DIY projects, the main thing I’ve learned about vertical gardens is to be mindful of watering. The plants at the top tend to dry out the fastest, so they’ll need a bit more attention. But the payoff is huge. Turning a blank, boring wall into a living tapestry of green is one of the most rewarding ways to transform a small space.
8. Sustaining Healthy Growth: Effective Liquid Fertilization Schedules
Think of fertilizer as a vitamin supplement for your plants. Because they’re in a contained space, the nutrients in the soil get used up or washed away with watering over time. To keep your plants growing strong, blooming beautifully, and producing tasty veggies, they’ll need a little boost. A general-purpose liquid fertilizer is a perfect place to start. You just mix a small amount with water according to the package directions.
Here’s my favorite pro-tip: “feed weakly, weekly.” Instead of giving them a full-strength dose every few weeks, I dilute the fertilizer to half or quarter strength and give them a little bit with their water about once a week during the growing season. In my professional experience, this gentle, consistent feeding is much better for the plants than a sudden jolt of nutrients. It prevents fertilizer “burn” and keeps them happy and healthy all season long. It’s a small change in routine that makes a huge difference.
9. Preventing Pests Naturally: Strategic Companion Planting in Containers
Before you ever reach for a chemical spray, let nature help you out! Companion planting is like making friendships in your garden. Certain plants have natural abilities to repel pests, while others can attract “good bugs” (like ladybugs!) that eat the bad ones. It’s a wonderfully simple and organic way to keep your container garden healthy. A classic and easy example is planting marigolds near your tomatoes; their strong scent helps deter a number of common pests.
Herbs are also fantastic companions. Planting basil near your tomatoes can improve their flavor and repel some insects. Planting mint, chives, or rosemary can help deter aphids and other little critters from your leafy greens. Nasturtiums are another favorite of mine; they act as a “trap crop” for aphids, drawing them away from your more prized plants. What I’ve seen in my own garden is that creating this diverse little community of plants makes the entire system stronger and more resilient. It’s smart, it’s beautiful, and it’s a much kinder way to garden.
Elevating Your Container Gardening Approach: Beyond the Basics (Part 2)
Okay, friend, you’re doing amazing! You’ve got happy plants and beautiful combinations. Now let’s talk about some clever tricks that make your gardening life a little easier and a lot more productive. These are the kinds of smart solutions that really elevate your container garden from a hobby to a smoothly running system.
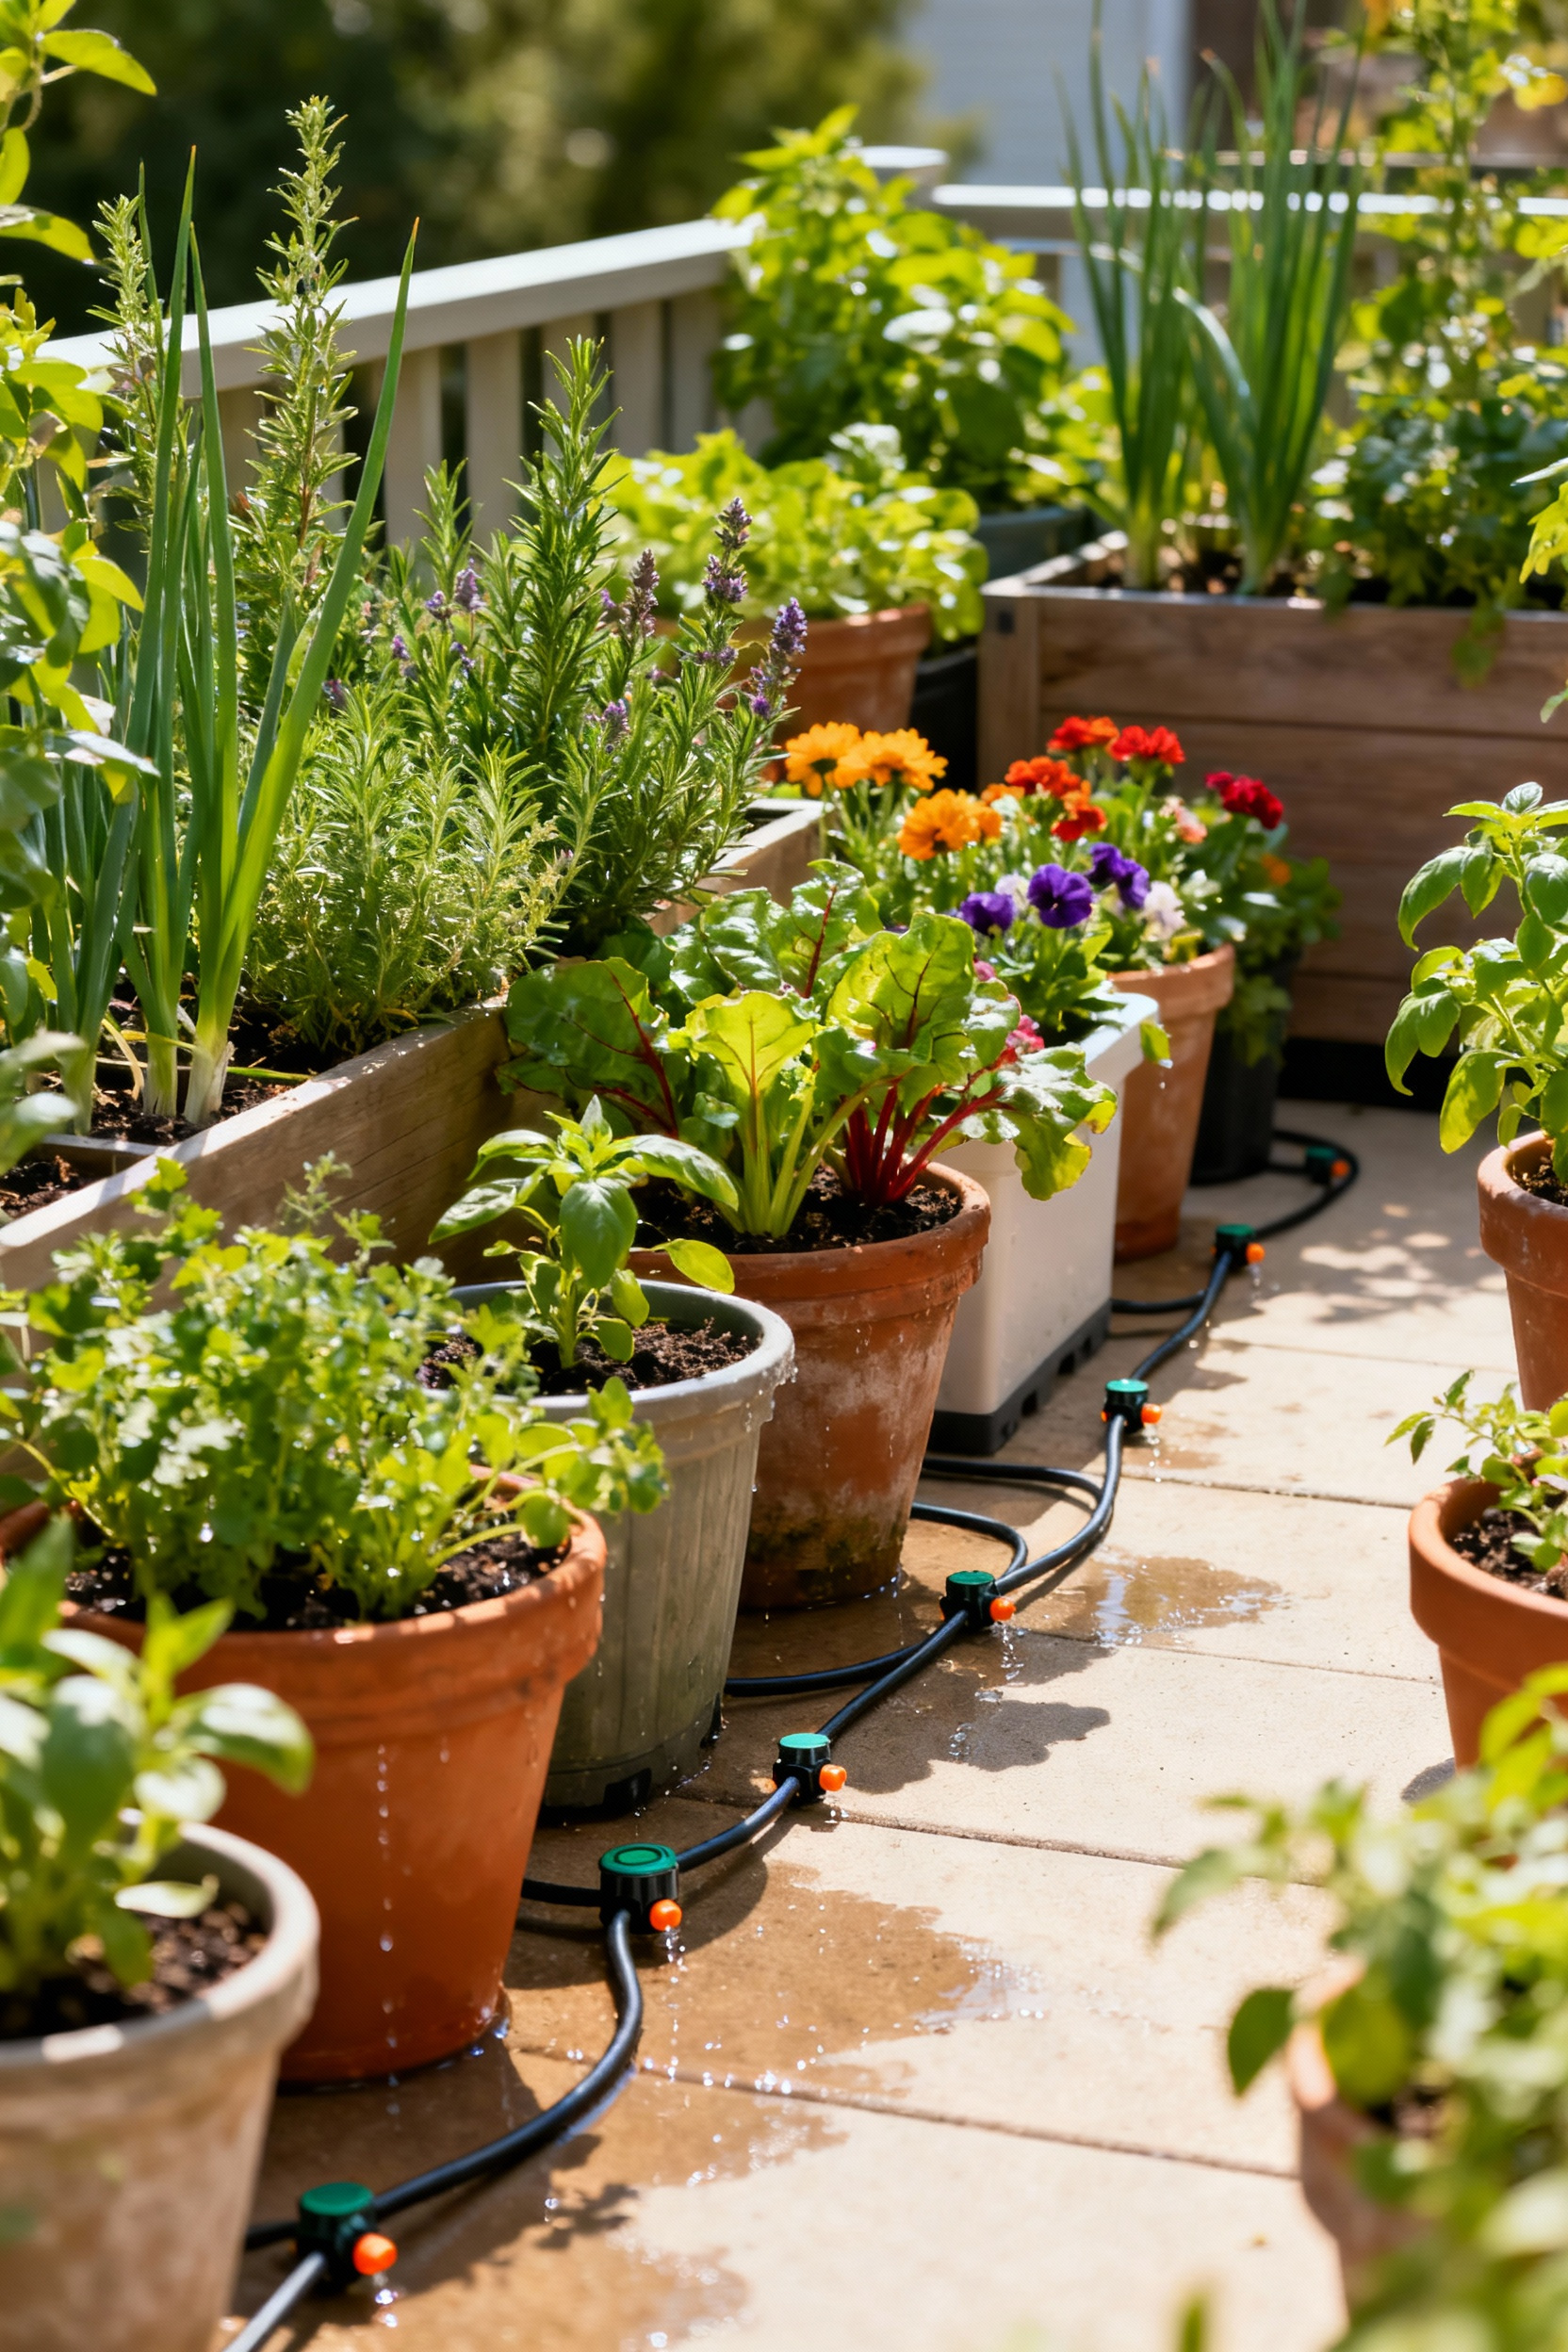
10. Smart Container Irrigation: Simple Drip Systems for Consistent Watering
If you have more than a few pots, daily watering can start to feel like a real chore, especially during a heatwave. And what about when you want to go on vacation? This is where a simple drip irrigation system can feel like pure magic. It might sound technical, but I promise, the kits they sell now for patios and containers are incredibly user-friendly. They’re like LEGOs for your garden! You just connect a main tube to your outdoor faucet, then run smaller little “spaghetti” tubes with emitters right to the base of each plant.
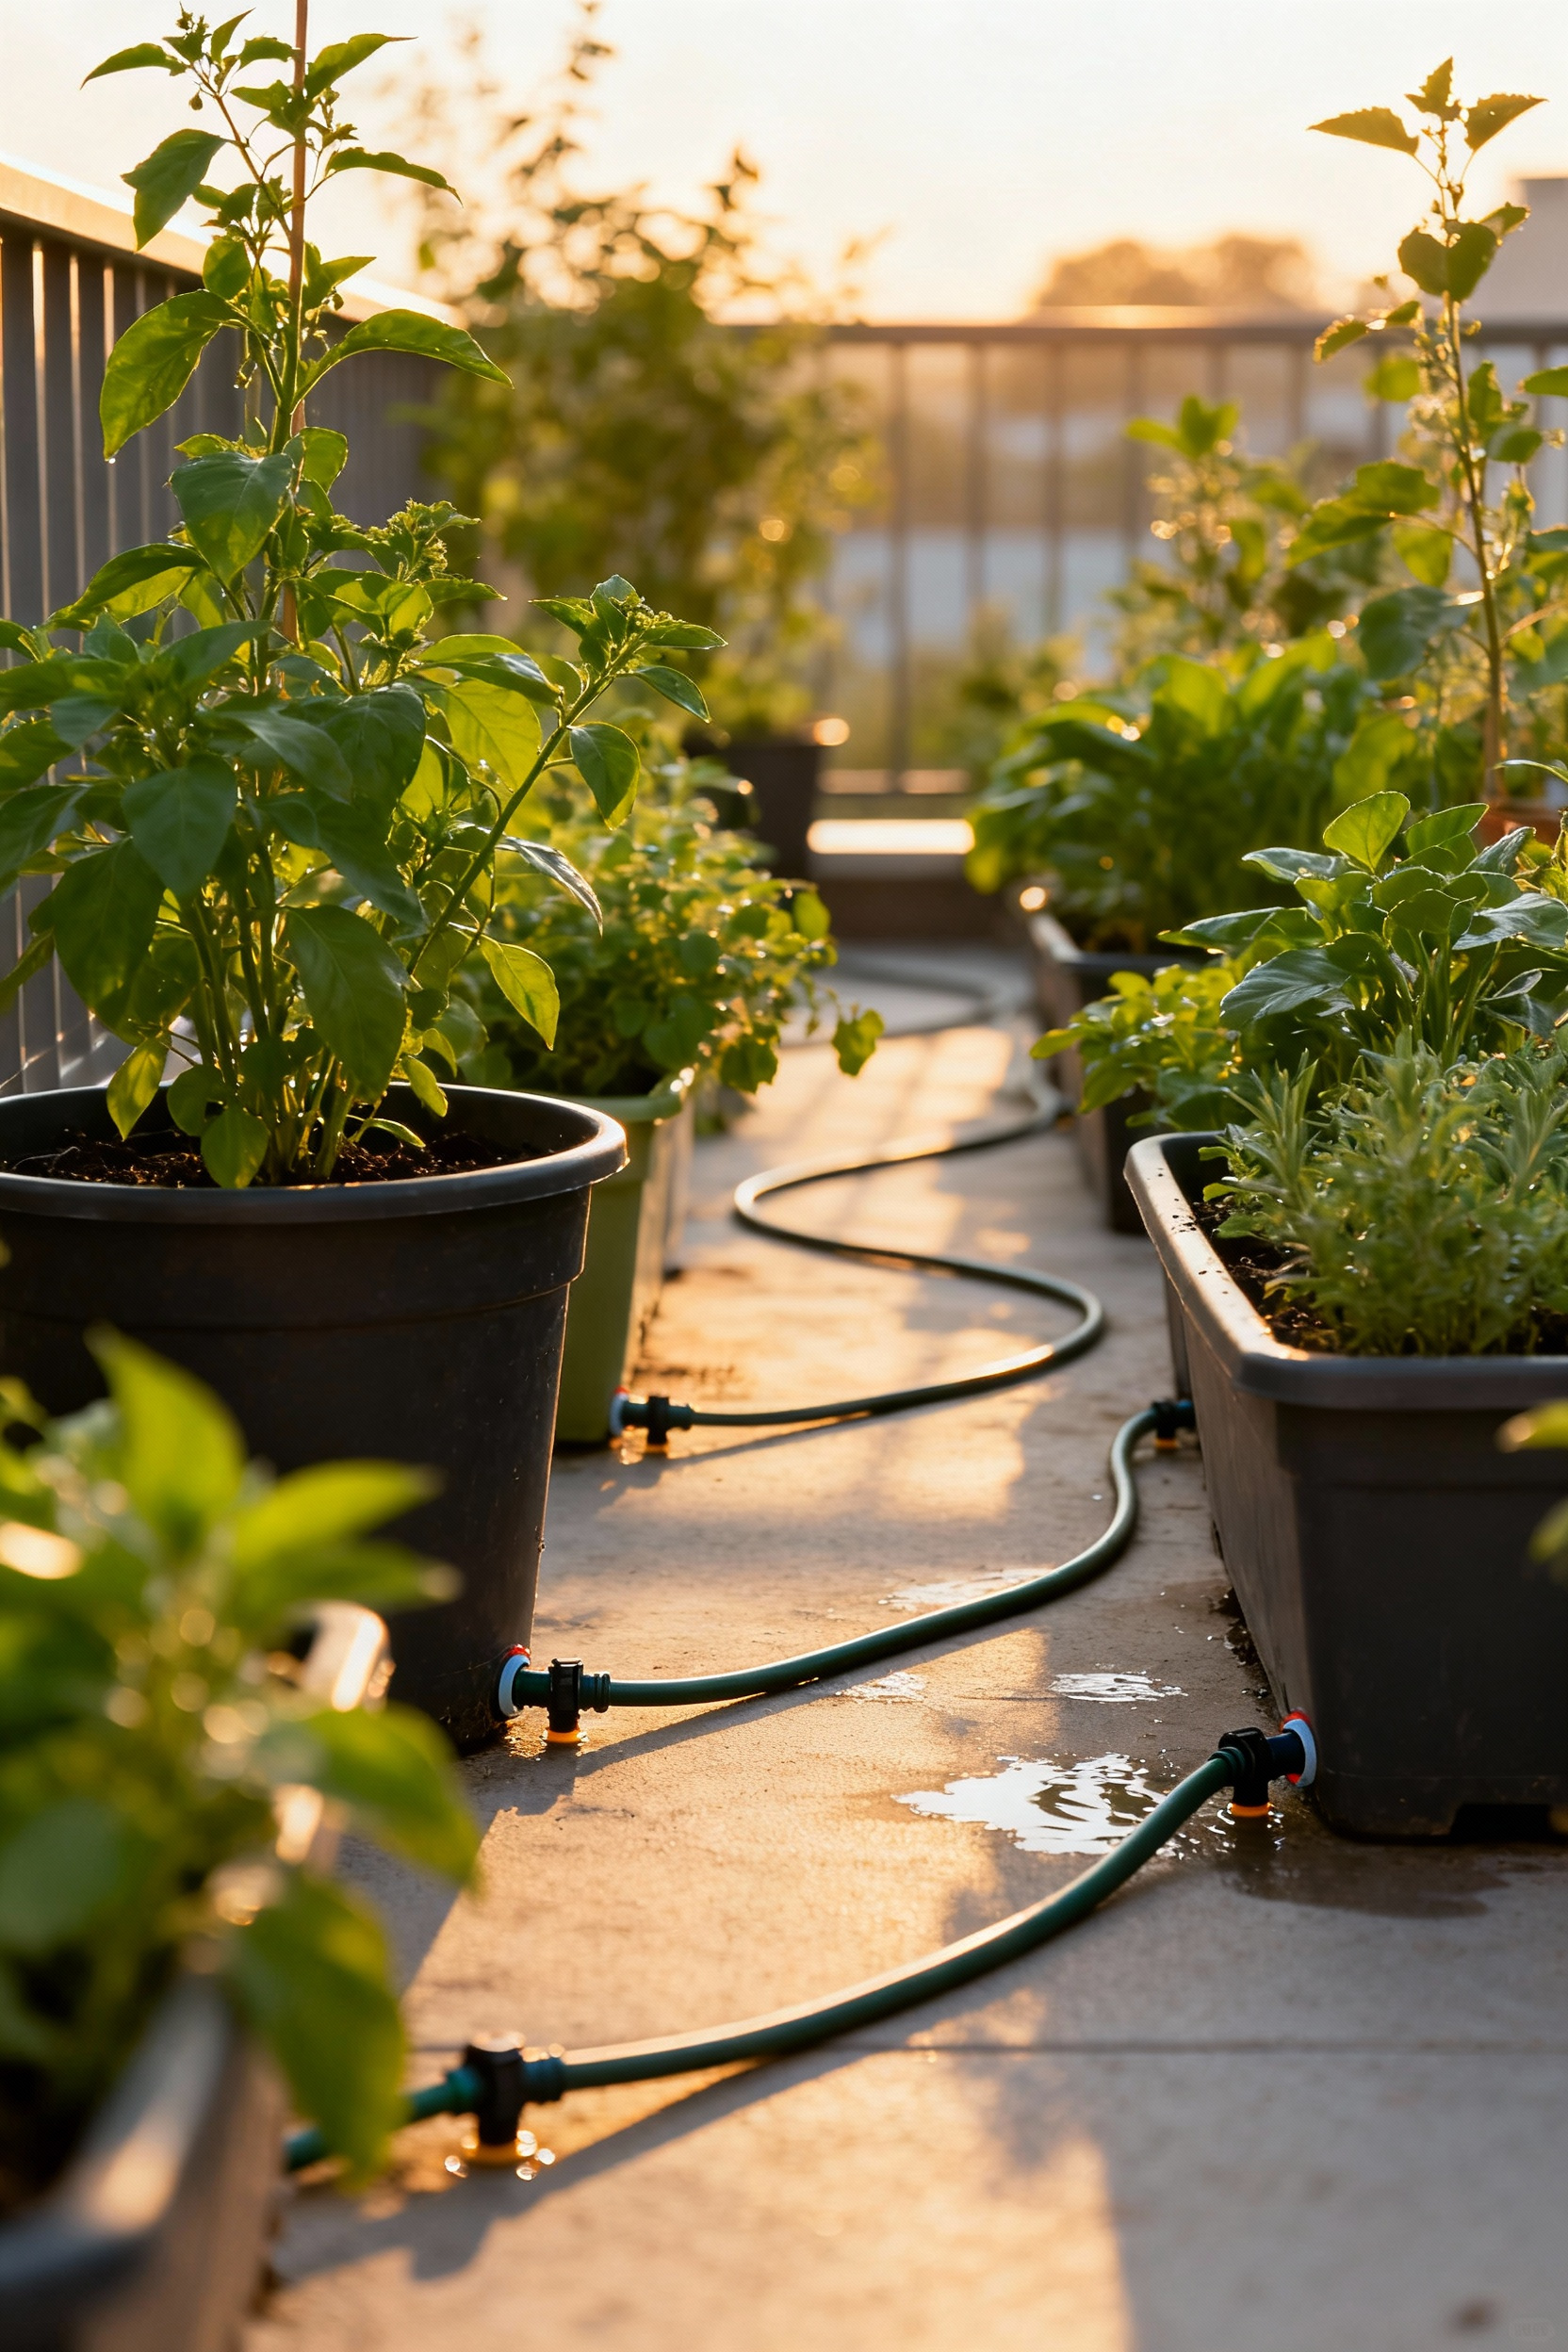
This is a game-changer for a few reasons. First, it delivers water slowly and directly to the roots, which is way more efficient and saves water. Second, you can put it on a timer and completely automate your watering. As someone who loves DIY projects, I was amazed at how simple these systems were to set up. It gives you incredible peace of mind and ensures your plants get the consistent moisture they crave to really thrive, whether you’re home or not.
11. Growing Your Own Herbs: Designing a Flavorful Container Kitchen Garden
There is nothing quite like stepping out your back door to snip fresh herbs for whatever you’re cooking. If you’ve got one pot of basil, you’re already on your way! But designing a full “kitchen garden” in containers is a true delight. The idea is to group herbs together in a way that’s both beautiful and convenient. You could create a “pizza pot” with basil, oregano, and thyme all growing happily together. Or how about a “cocktail garden” with different varieties of mint, lemon balm, and lavender?
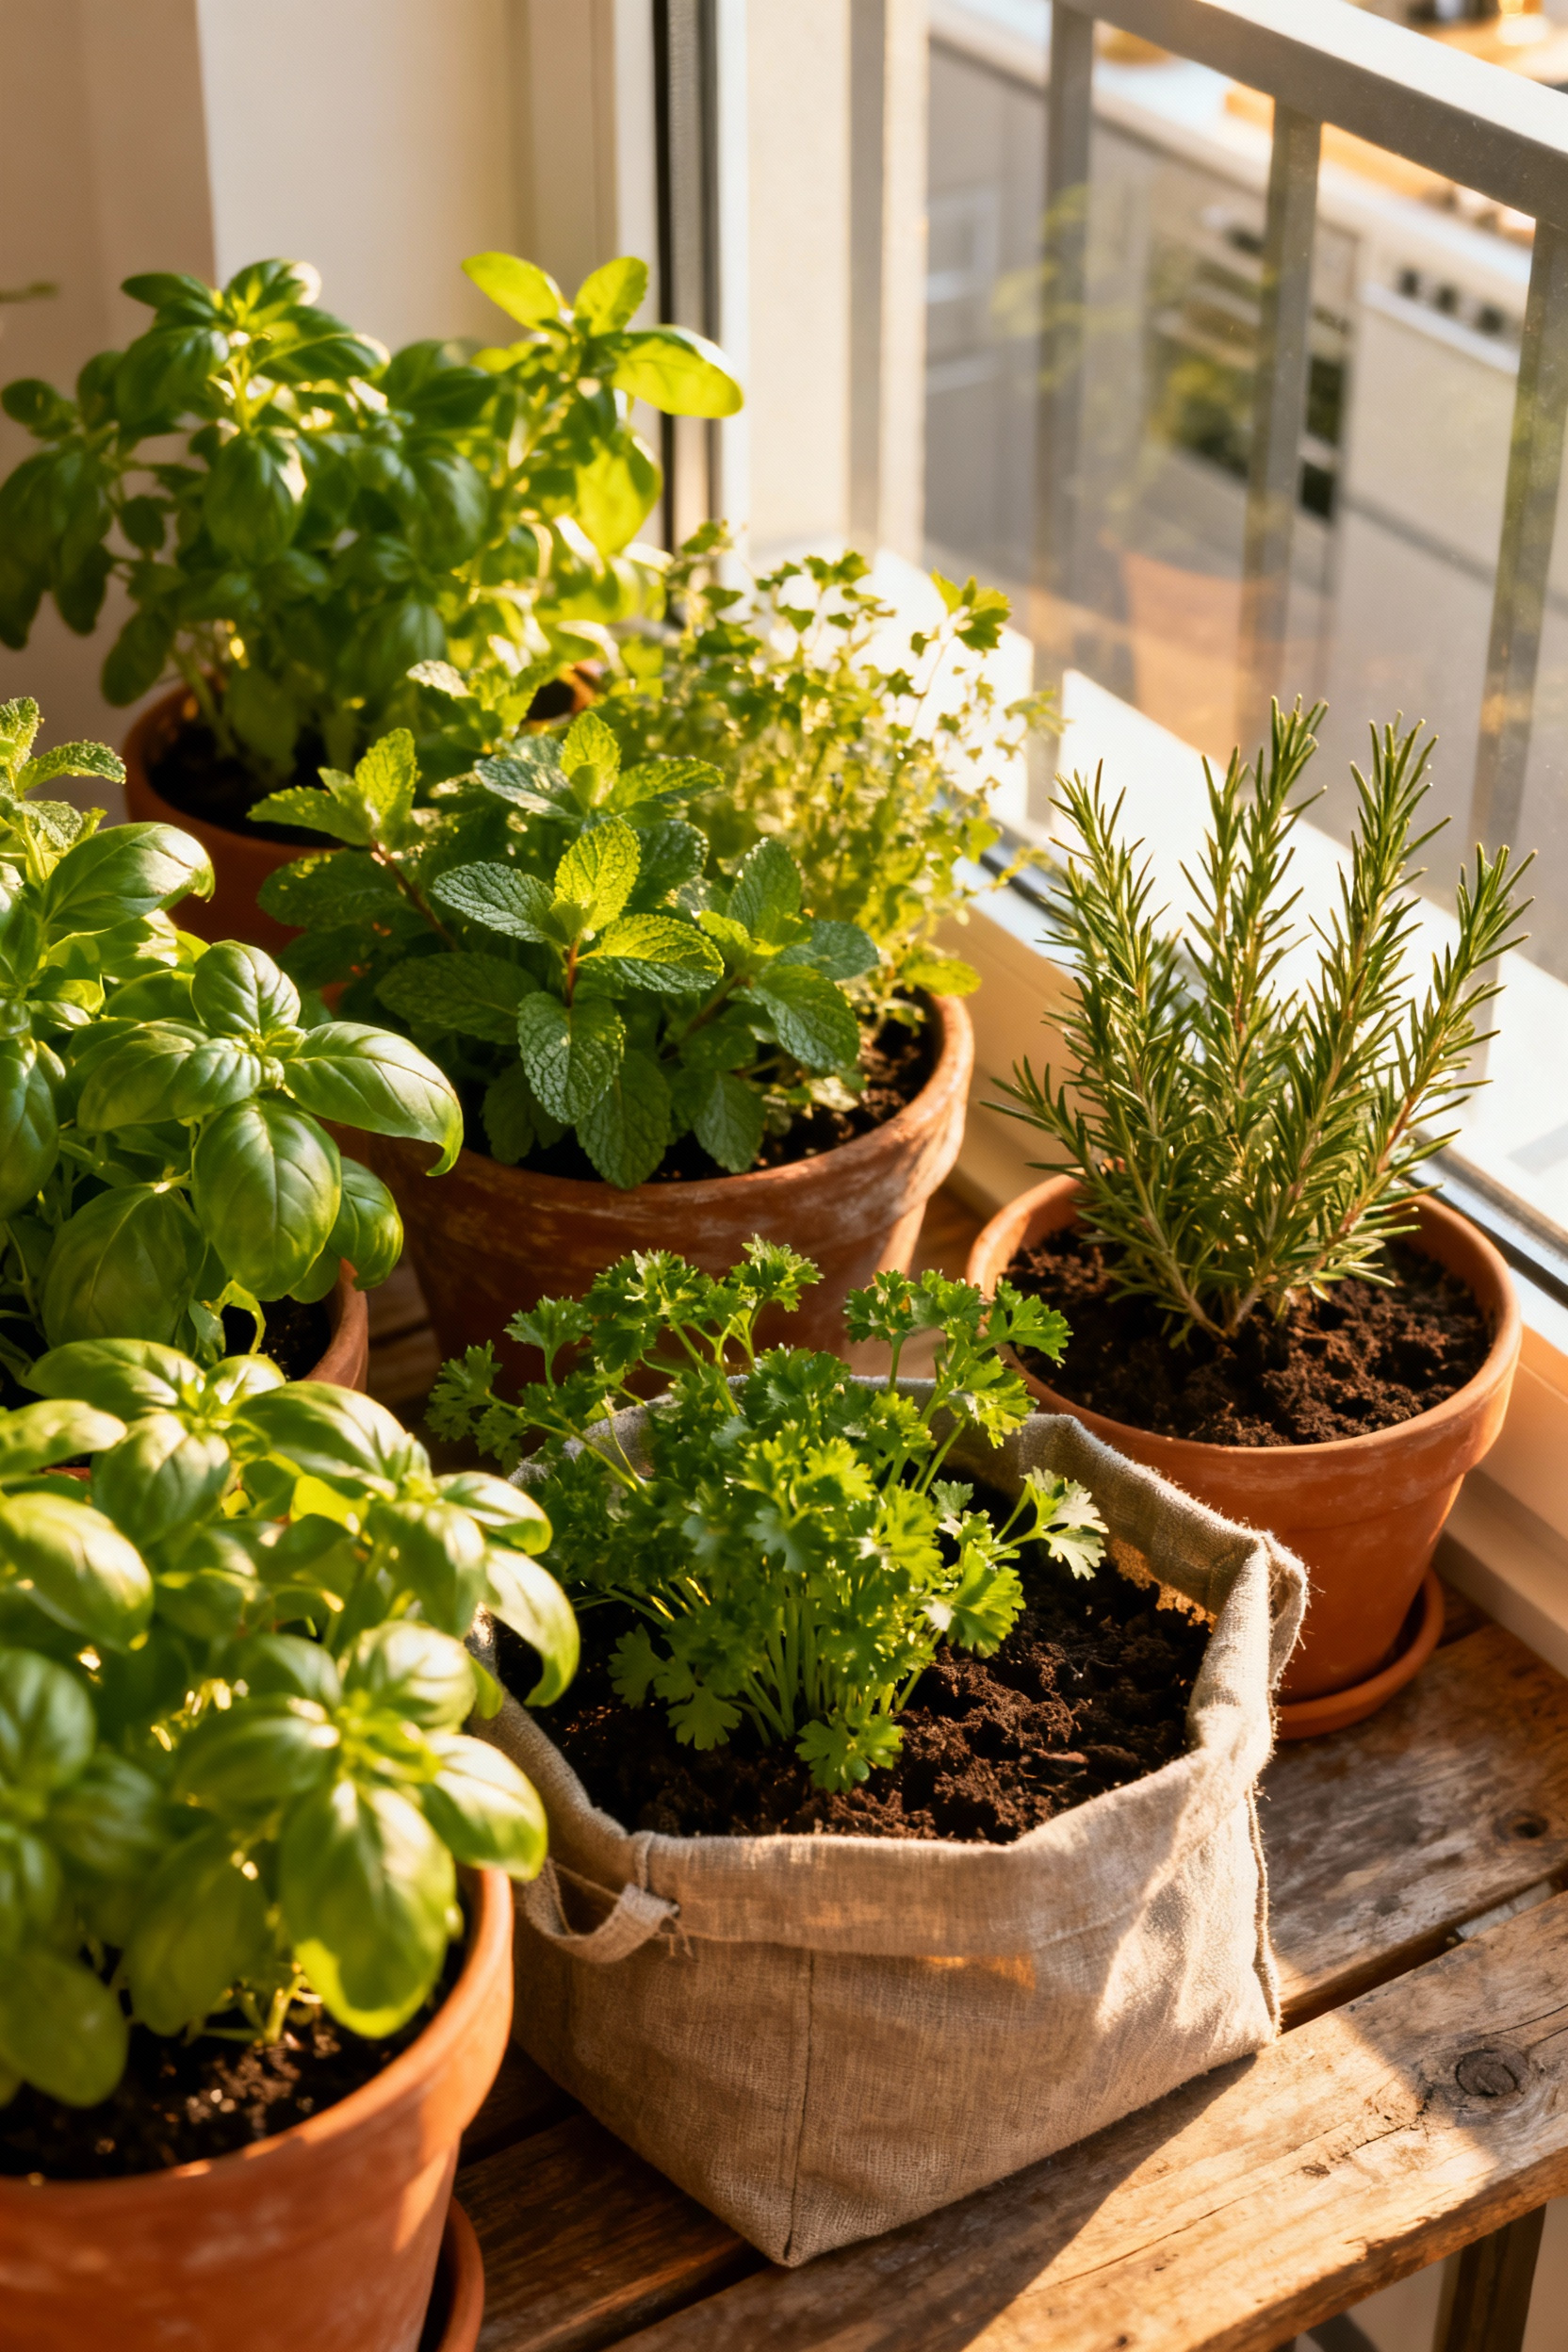
Think about how you cook and what you use most often. Keep those pots closest to your kitchen door for easy access. Remember to group herbs with similar needs—sun-loving Mediterranean herbs like rosemary, thyme, and sage do great together, while moisture-loving herbs like mint and parsley are also good pot-mates. I’ve found that creating these themed containers not only makes them easier to care for but also inspires me to get more creative in the kitchen. It turns your patio into a fragrant, living pantry.
12. Extending the Season: Portable Protection for Cooler Weather and Frost
Just because the calendar says fall is coming doesn’t mean your garden has to be over! With a few simple tricks, you can protect your plants from the first few frosts and extend your harvest season by weeks, or even months. The easiest thing to do is simply throw an old bedsheet or a special “frost blanket” over your containers on nights when the temperature is predicted to dip near freezing. This simple layer can trap enough ground heat to keep your plants safe.
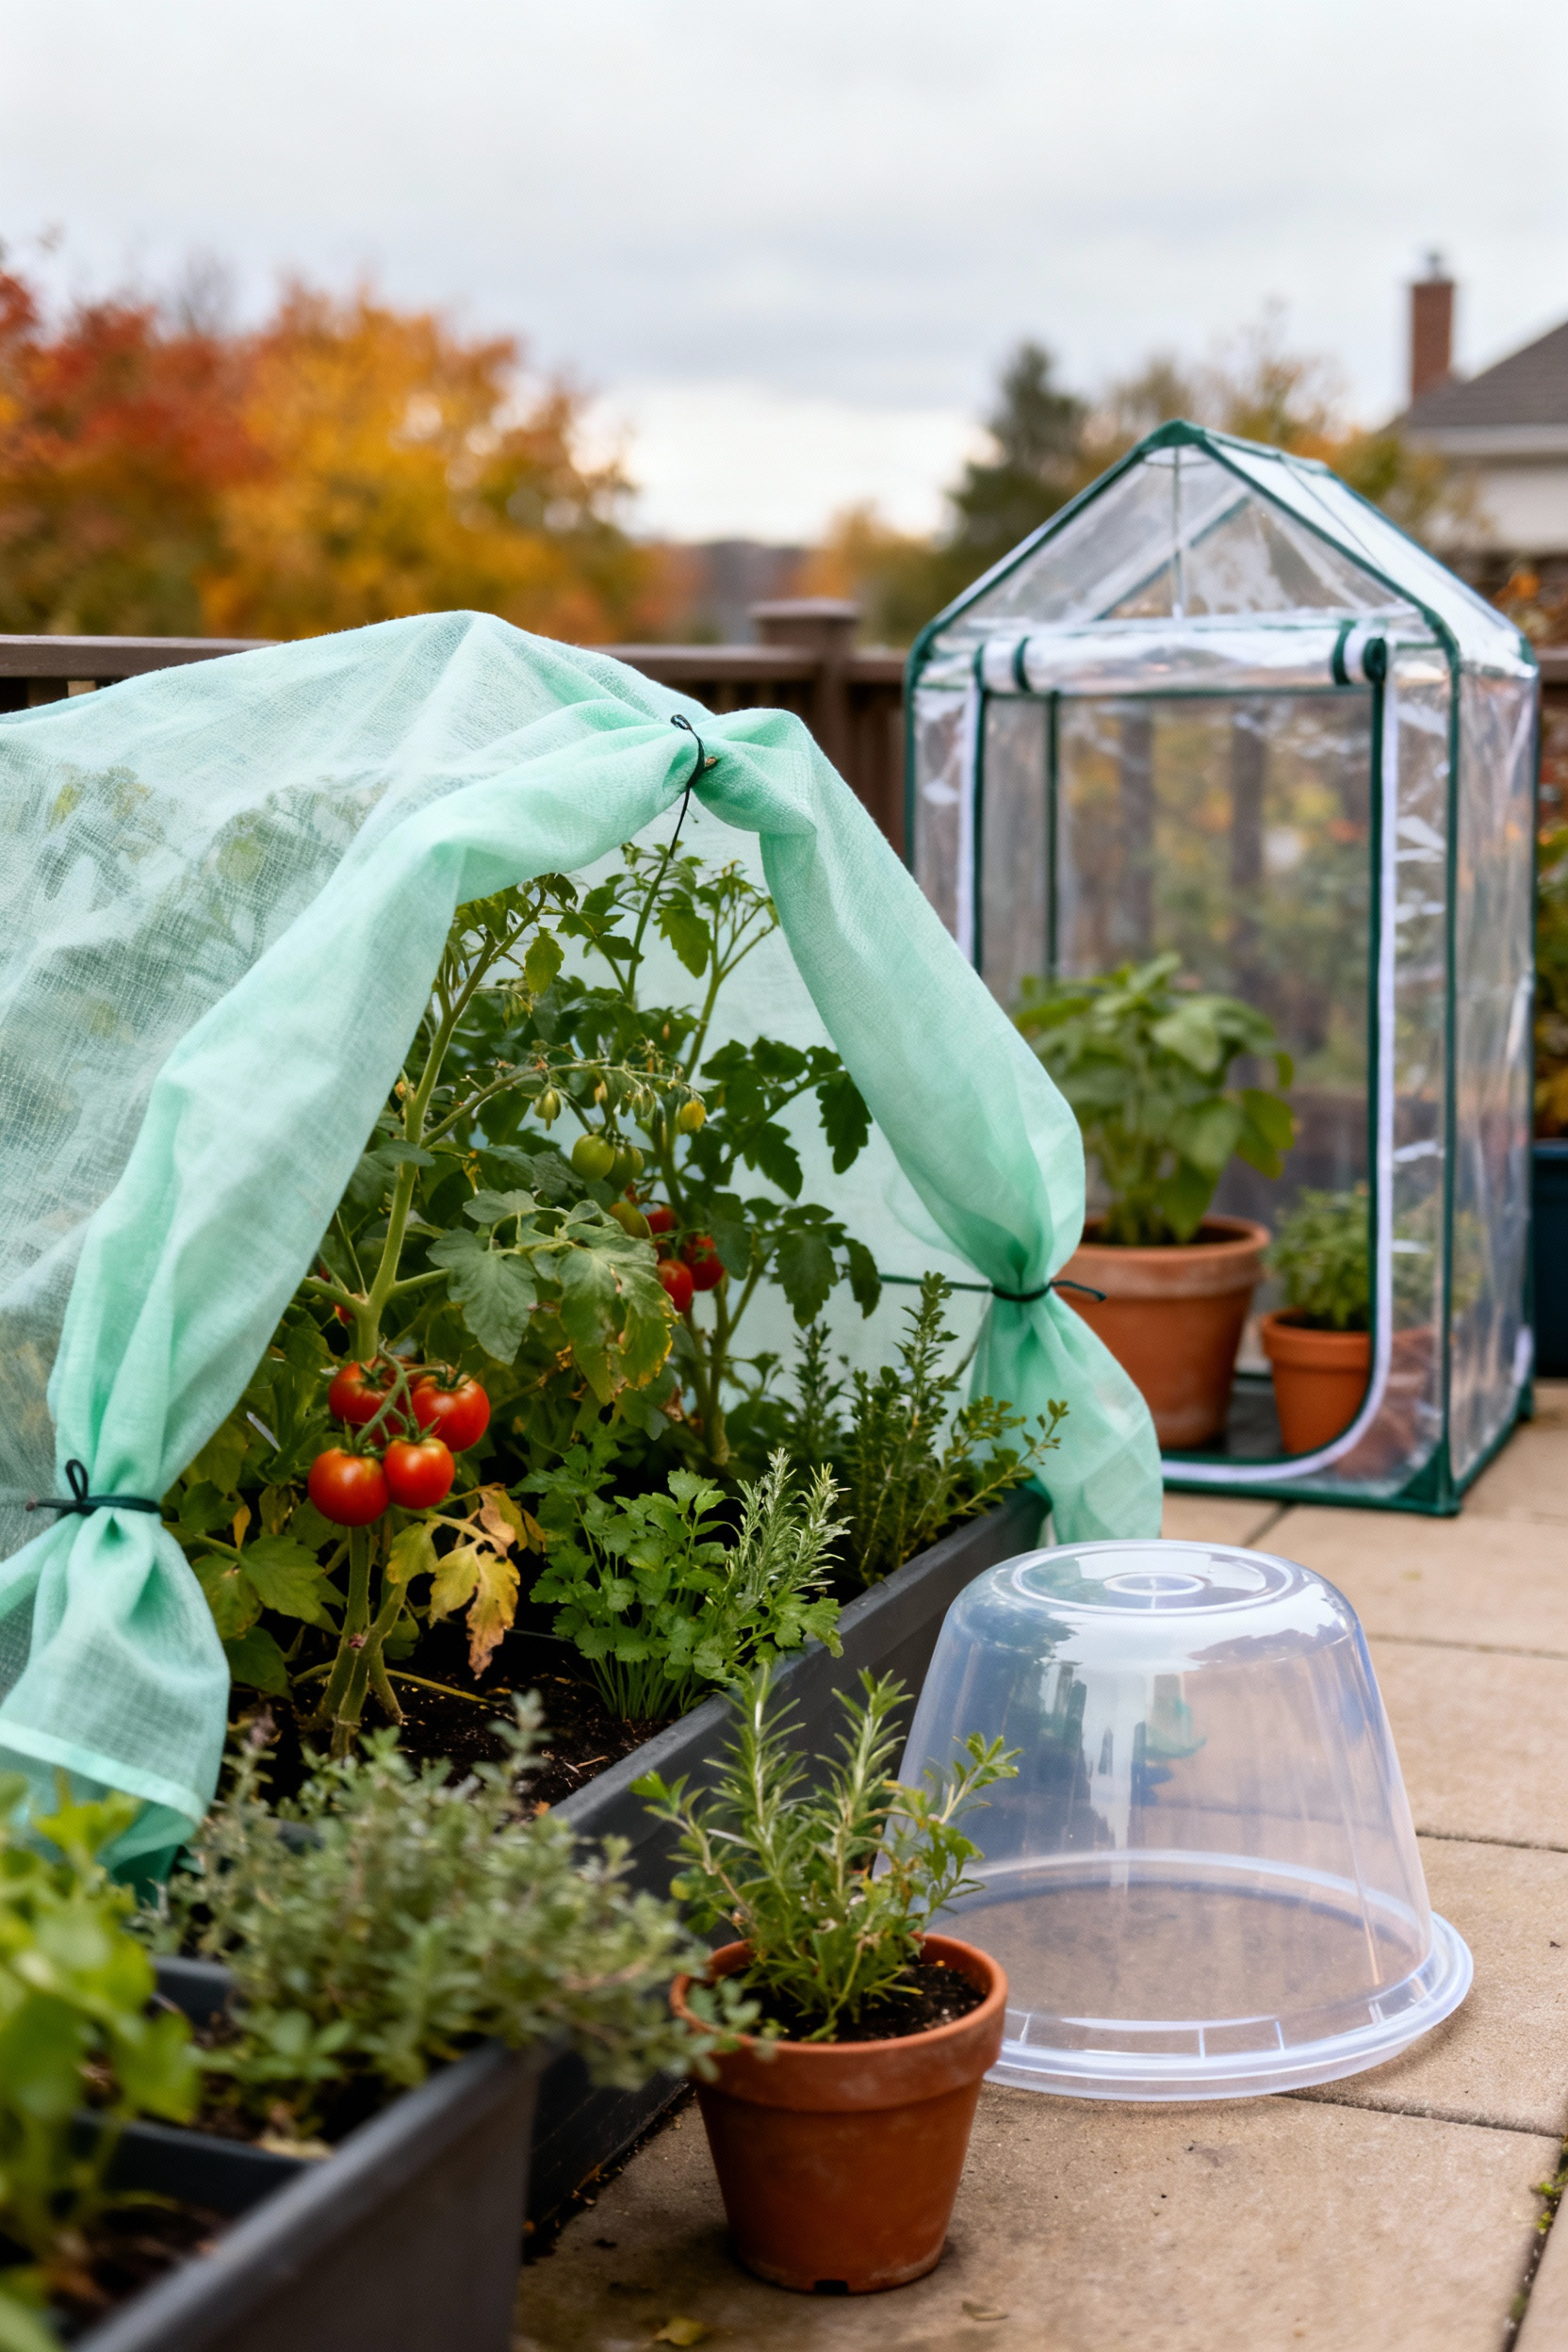
For a more robust solution, you can get a portable mini greenhouse or a “cold frame.” These are like little tents for your plants that create a warmer microclimate inside. From my work in budget-friendly design, I’ve seen so many clever DIY versions made from old windows, shower curtains, or clear plastic sheeting stretched over a simple frame. This allows you to keep growing cool-weather crops like lettuce, spinach, and kale well into the late fall, and gives you a head start on planting in the spring. It’s a wonderful way to get the most out of your container garden all year long.
Advanced Container Gardening Strategies: Designing for Impact (Part 1)
Ready to think like a seasoned gardener? These next few strategies are about creating a container garden that’s not just beautiful, but smart, sustainable, and incredibly productive. We’re moving from individual pots to thinking about your garden as a whole, dynamic system.
13. Systematic Crop Rotation: Rejuvenating Container Soil Health Season After Season
You might have heard about crop rotation for big farm fields, but it’s an amazing technique for container gardeners, too! The basic idea is to avoid planting the same type of plant in the same pot, year after year. Different plants take different nutrients from the soil. For example, tomatoes and peppers are “heavy feeders” and use up a lot of nutrients. If you plant them in the same spot repeatedly, you’ll deplete the soil. On the other hand, plants like beans and peas are “givers”—they actually add nitrogen back into the soil!
A simple rotation could look like this: one year, you plant tomatoes in a large pot. The next year, you plant bush beans in that same pot to help replenish the nitrogen. The year after that, you could plant carrots or lettuce. What I’ve learned from experience is that this simple shuffle keeps your soil healthier, reduces the buildup of plant-specific diseases, and leads to stronger plants overall. Each time you switch crops, be sure to mix in a few scoops of fresh compost to give the new residents a happy start.
14. Integrating Edibles and Ornamentals: Achieving Aesthetic and Productive Harmony
Who says a vegetable garden can’t be stunningly beautiful? One of my favorite things to do is mix edible plants and ornamental flowers together in the same container. This is where my art teacher background really comes out! Think about the incredible colors and textures you can play with. The deep purple leaves of an eggplant look gorgeous next to the bright orange of a calendula flower. The feathery fronds of a carrot plant can be a beautiful “filler” around a showy zinnia.
This isn’t just about looks, either. As we talked about with companion planting, many flowers can help attract pollinators to your vegetables or deter pests. A cascade of sweet alyssum at the base of a pepper plant will bring in tiny beneficial insects. My professional perspective is that a garden should feed your soul as well as your body. By erasing the line between what’s edible and what’s beautiful, you create containers that are dynamic, productive, and a true work of living art.
15. Overwintering Perennials: Protecting Container Plants for Next Year’s Bloom
It can feel so sad to toss out a beautiful perennial plant at the end of the season. The good news is, you often don’t have to! Overwintering is the process of protecting your container plants through the cold months so they can come back even bigger and better next year. For many plants, this is as simple as moving the pot into an unheated garage, shed, or basement once the first hard frost hits. The goal is to keep the roots from freezing solid while letting the plant go dormant for the winter.
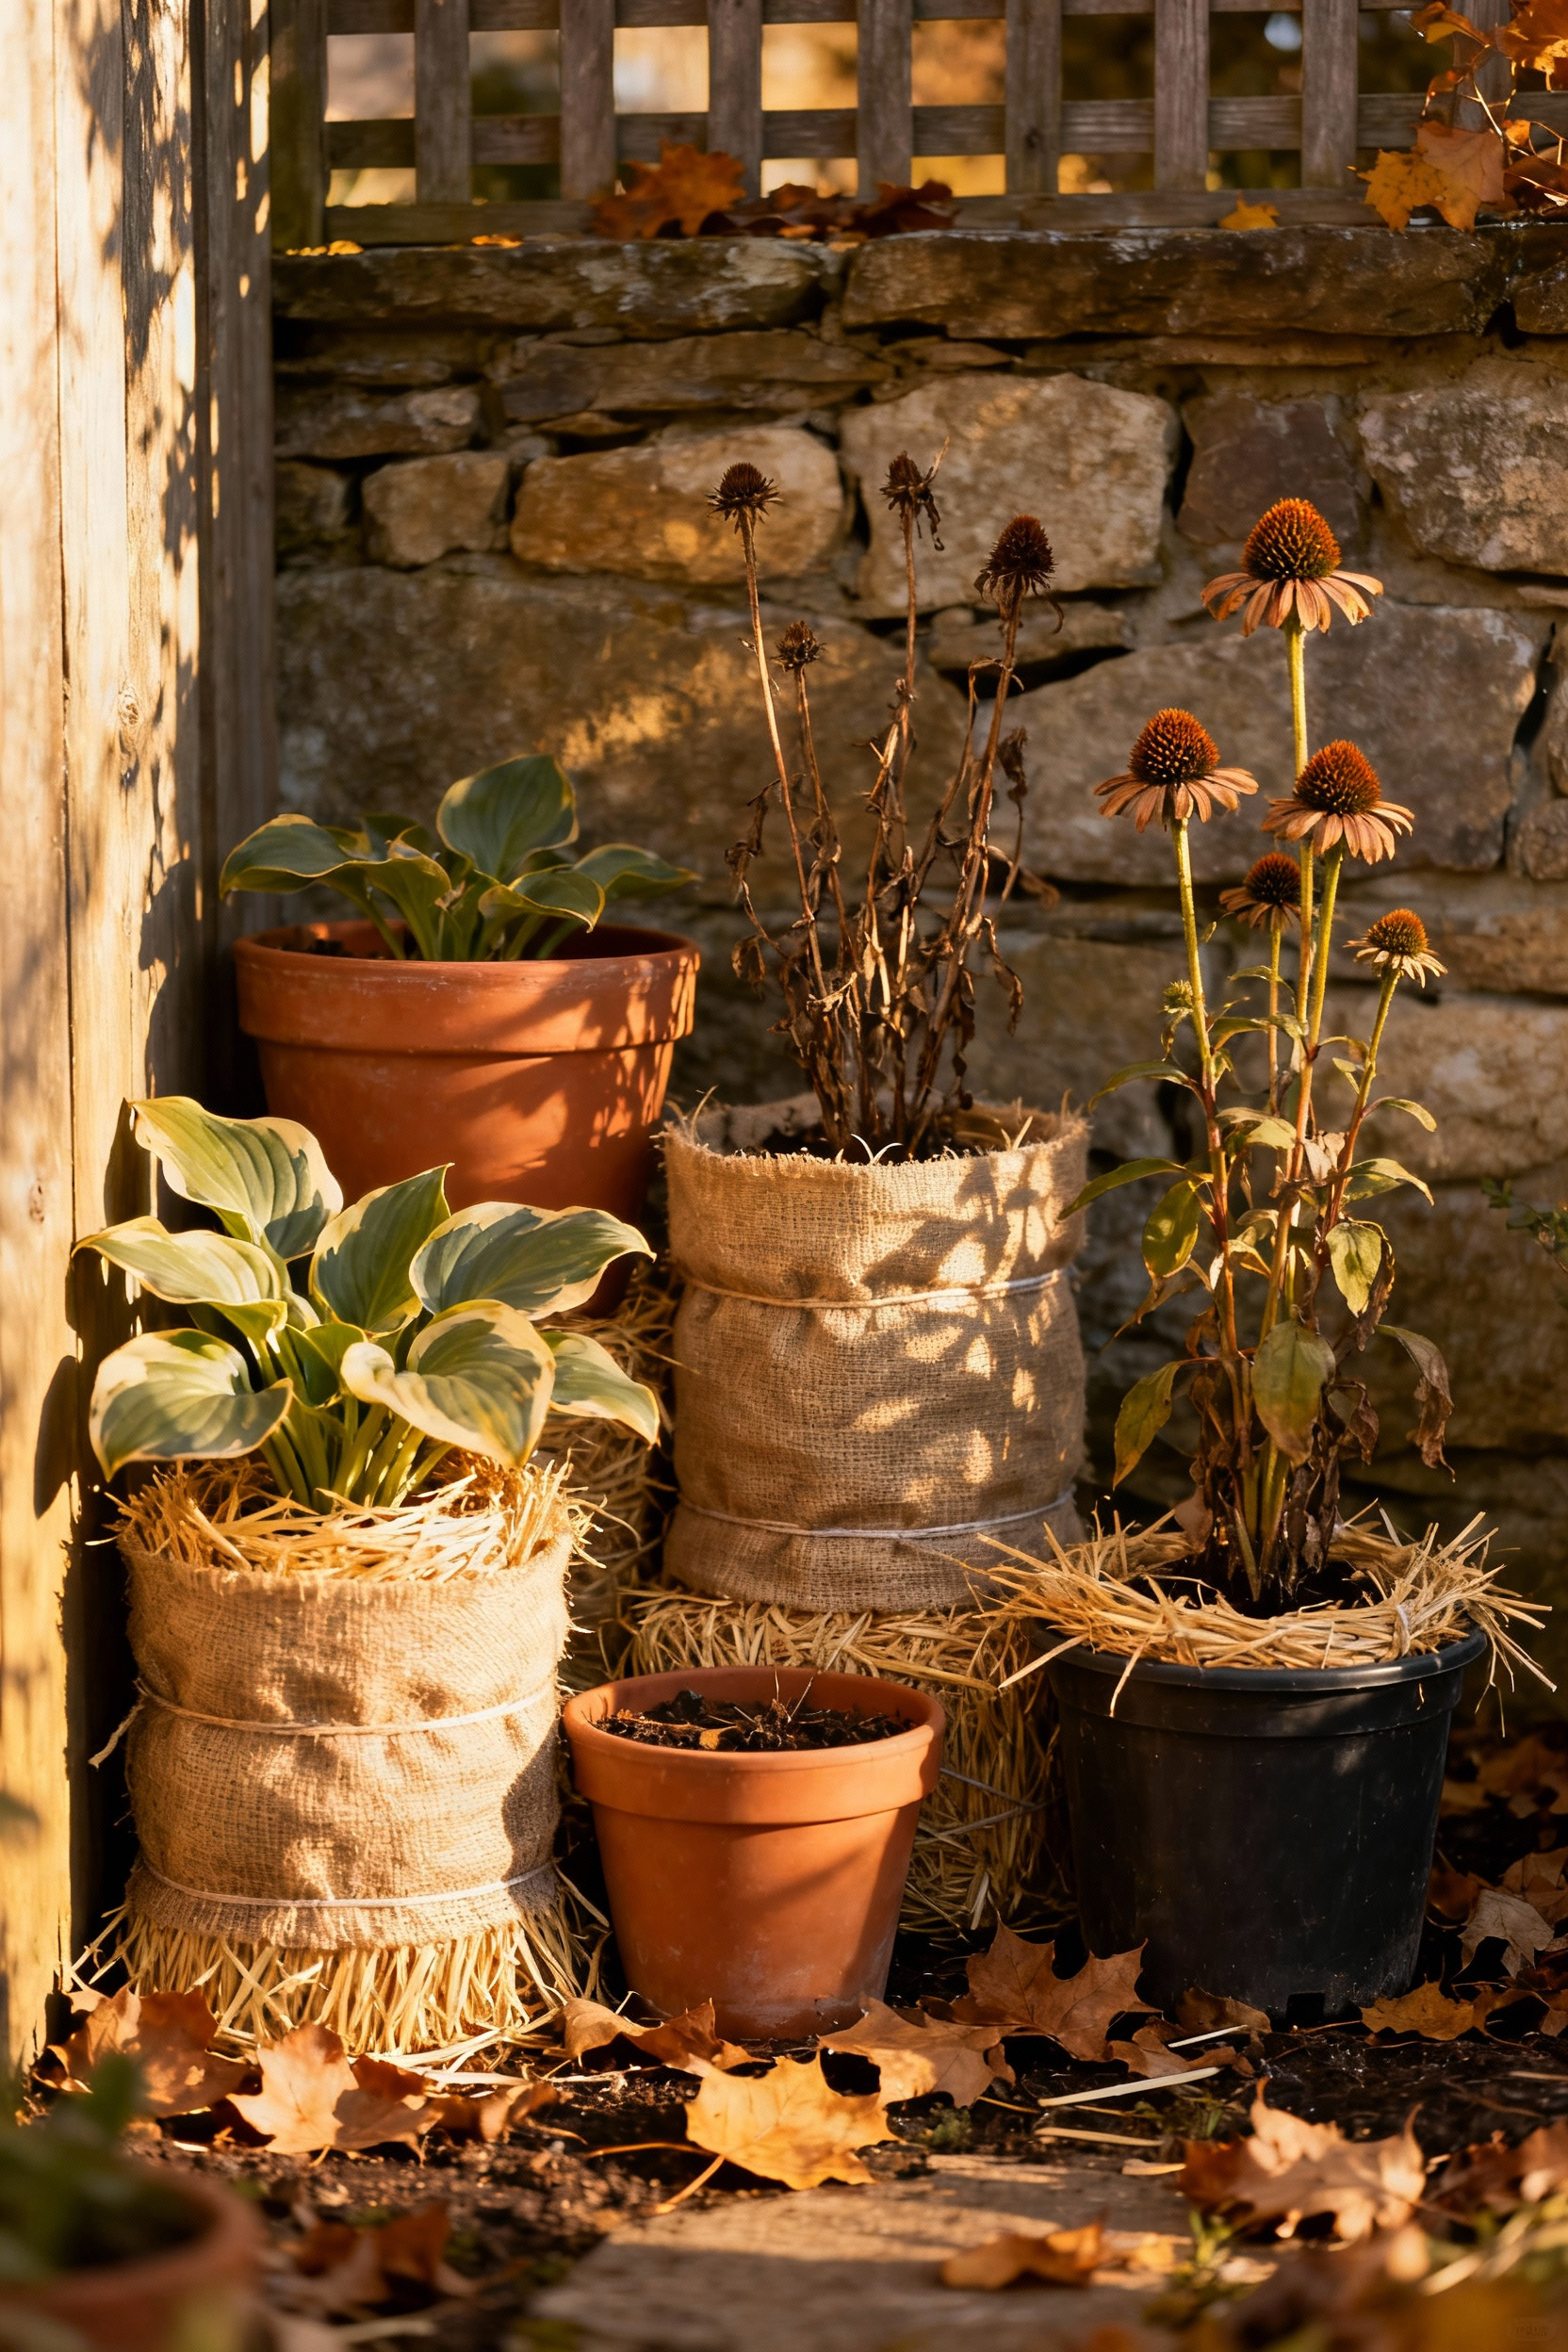
You’ll want to water them very sparingly—maybe once a month—just enough to keep the soil from becoming bone dry. For plants that are a little more cold-hardy, you can group several pots together against a protected wall of your house, wrap the pots in burlap or bubble wrap for insulation, and pile mulch on top of the soil. Years of practice taught me that a little winter protection saves so much money and effort in the spring. It’s incredibly rewarding to see those familiar green shoots emerge when the weather warms up again.
16. Automated Watering Solutions: Smart Systems for Vacation Peace of Mind
We talked about simple drip systems, but if you’re ready for the next level, let’s get smart! Modern automated watering systems for containers have become incredibly sophisticated and surprisingly user-friendly. These often connect to your home’s Wi-Fi and can be controlled with an app on your phone. Some even come with soil moisture sensors that you place directly in your pots. This means the system doesn’t just water on a set schedule; it waters only when the soil actually needs it.
Some smart controllers will even check the local weather forecast and automatically skip a watering cycle if rain is on the way, or increase watering during an unexpected heatwave. While it might sound like a high-tech luxury, for a dedicated container gardener, it provides the ultimate peace of mind. What I love about this is how it empowers you to give your plants exactly what they need, optimizing their health while conserving water. It’s a brilliant way to ensure your garden thrives, no matter how busy life gets.
Advanced Container Gardening Strategies: Designing for Impact (Part 2)
We’re in the home stretch, and you’re well on your way to becoming a container gardening pro. These final tips are all about maximizing your yield, getting creative with light, and really putting your personal stamp on your garden. Let’s dive into these innovative and rewarding techniques.
17. Mastering Succession Planting: Ensuring Continuous Harvests in Your Containers
Succession planting is the secret to getting the most out of every single one of your pots. The idea is simple: as soon as one crop is finished, you have another one ready to take its place. This keeps your garden productive all season long and means you don’t have sad, empty containers sitting around. A great example is planting a quick crop of radishes in the early spring. Once you harvest them, you can pop in a heat-loving basil plant right in the same spot for the summer. After the basil is done, you could follow up with a fall crop of spinach.
The key to this is planning. Think about plants with short growing times. To really master this, you can even start seeds for your “next-in-line” plants in small pots while your current crop is still growing. I’ve found that having these little seedlings ready to go makes the process feel seamless. It transforms your container garden from a static display into a dynamic, constantly evolving source of fresh food. It’s the ultimate space-saving, production-boosting strategy!
18. Optimizing Light with Reflective Surfaces: Boosting Growth Indoors and Out
Light is plant food! And sometimes, our spaces just don’t have enough of it. Here’s a super clever, budget-friendly trick: use reflective surfaces to bounce more light onto your plants. You don’t need anything fancy. If your containers are up against a wall, painting that wall a bright, clean white will reflect a huge amount of light back onto the “shady side” of your plants, helping them grow more evenly.
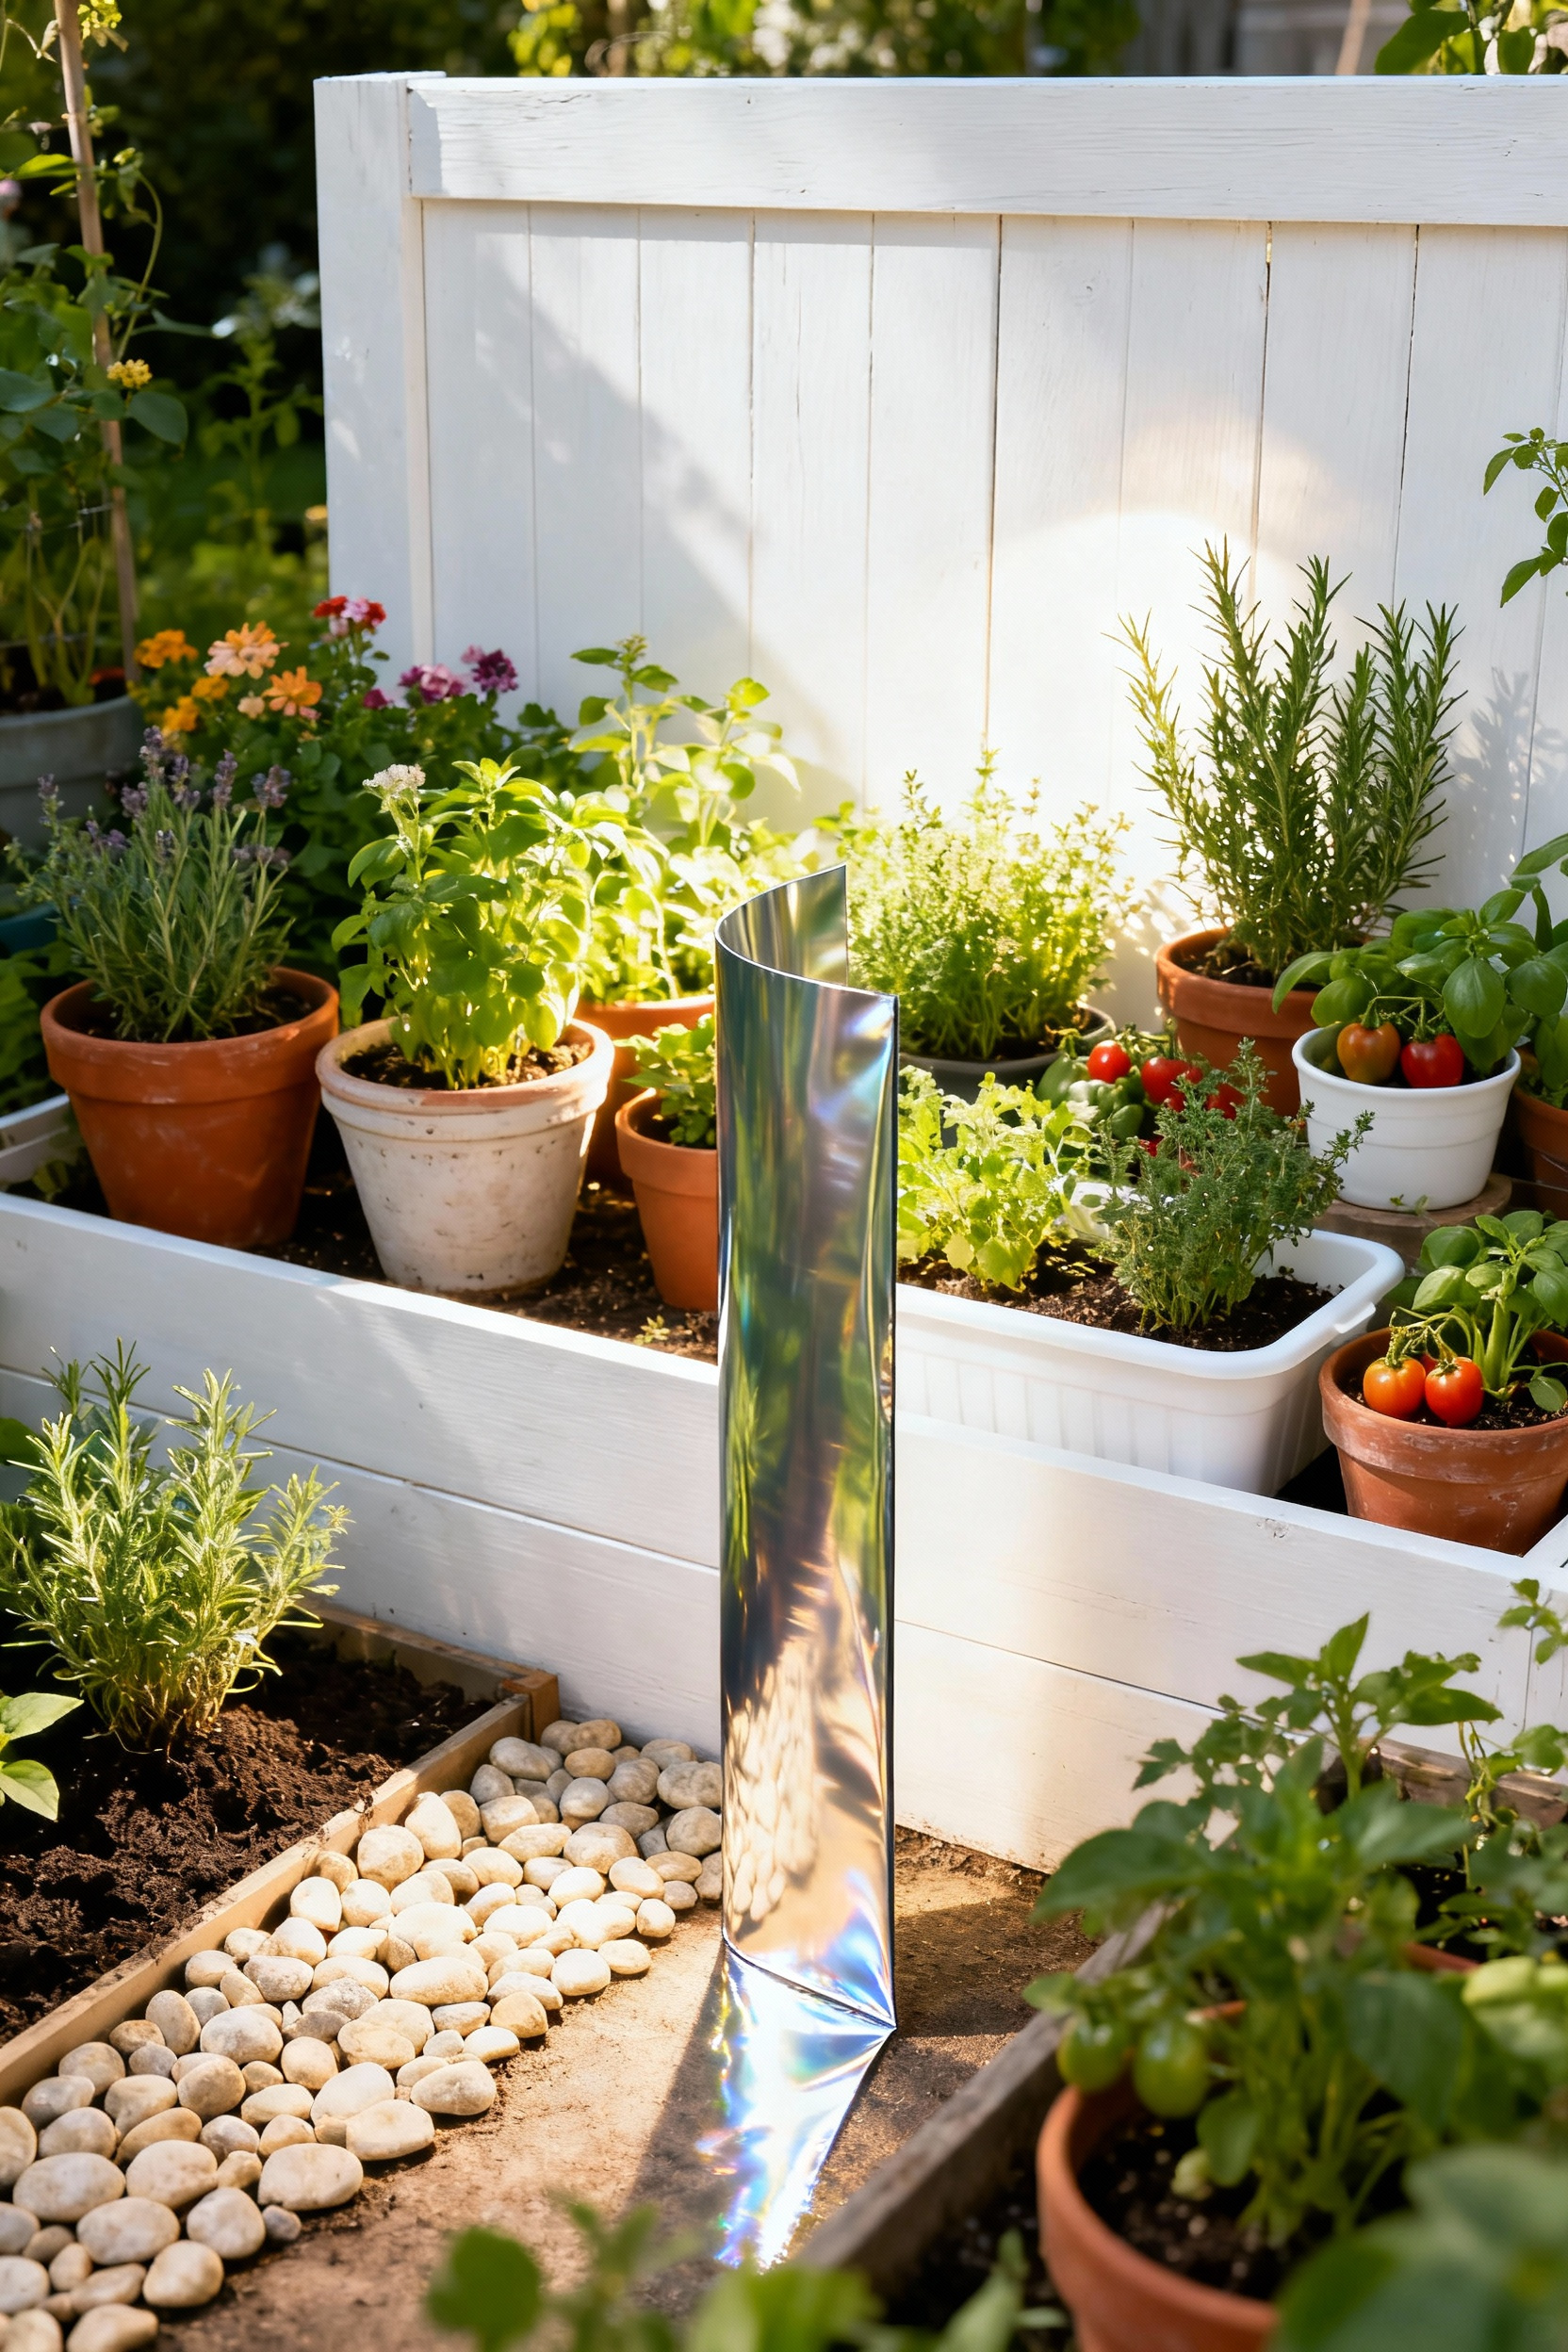
For indoor gardens or particularly shady outdoor corners, you can create simple reflectors. A piece of white poster board or a board wrapped in aluminum foil (crinkly side out is best for diffusing the light) placed strategically can work wonders. What I tell my readers is to think like a photographer setting up a photoshoot—you’re just trying to bounce light into the shadows. This simple, no-cost or low-cost adjustment can make a massive difference in the health and vigor of your plants, especially for sun-lovers like vegetables and herbs.
Mastering Container Gardening: Expert Integration & Innovation
This is where it all comes together. When you start to see your garden not just as a collection of individual plants, but as a small, interconnected world that you get to create. These final ideas are about fostering a healthy ecosystem and expressing your unique personality through your garden.
19. Creating a Micro-Ecosystem: Supporting Beneficial Insects with Diverse Container Plantings
Let’s turn your garden into a bustling, happy neighborhood for “good bugs”! Beyond just attracting bees for pollination, you can actively invite predatory insects that will help you with pest control. Ladybugs, lacewings, and hoverflies are the superstars here, and they love plants with tiny flowers, like sweet alyssum, cilantro, dill, and fennel. Planting a pot with a mix of these “good bug” attractors is like putting out a welcome mat for nature’s pest control team.
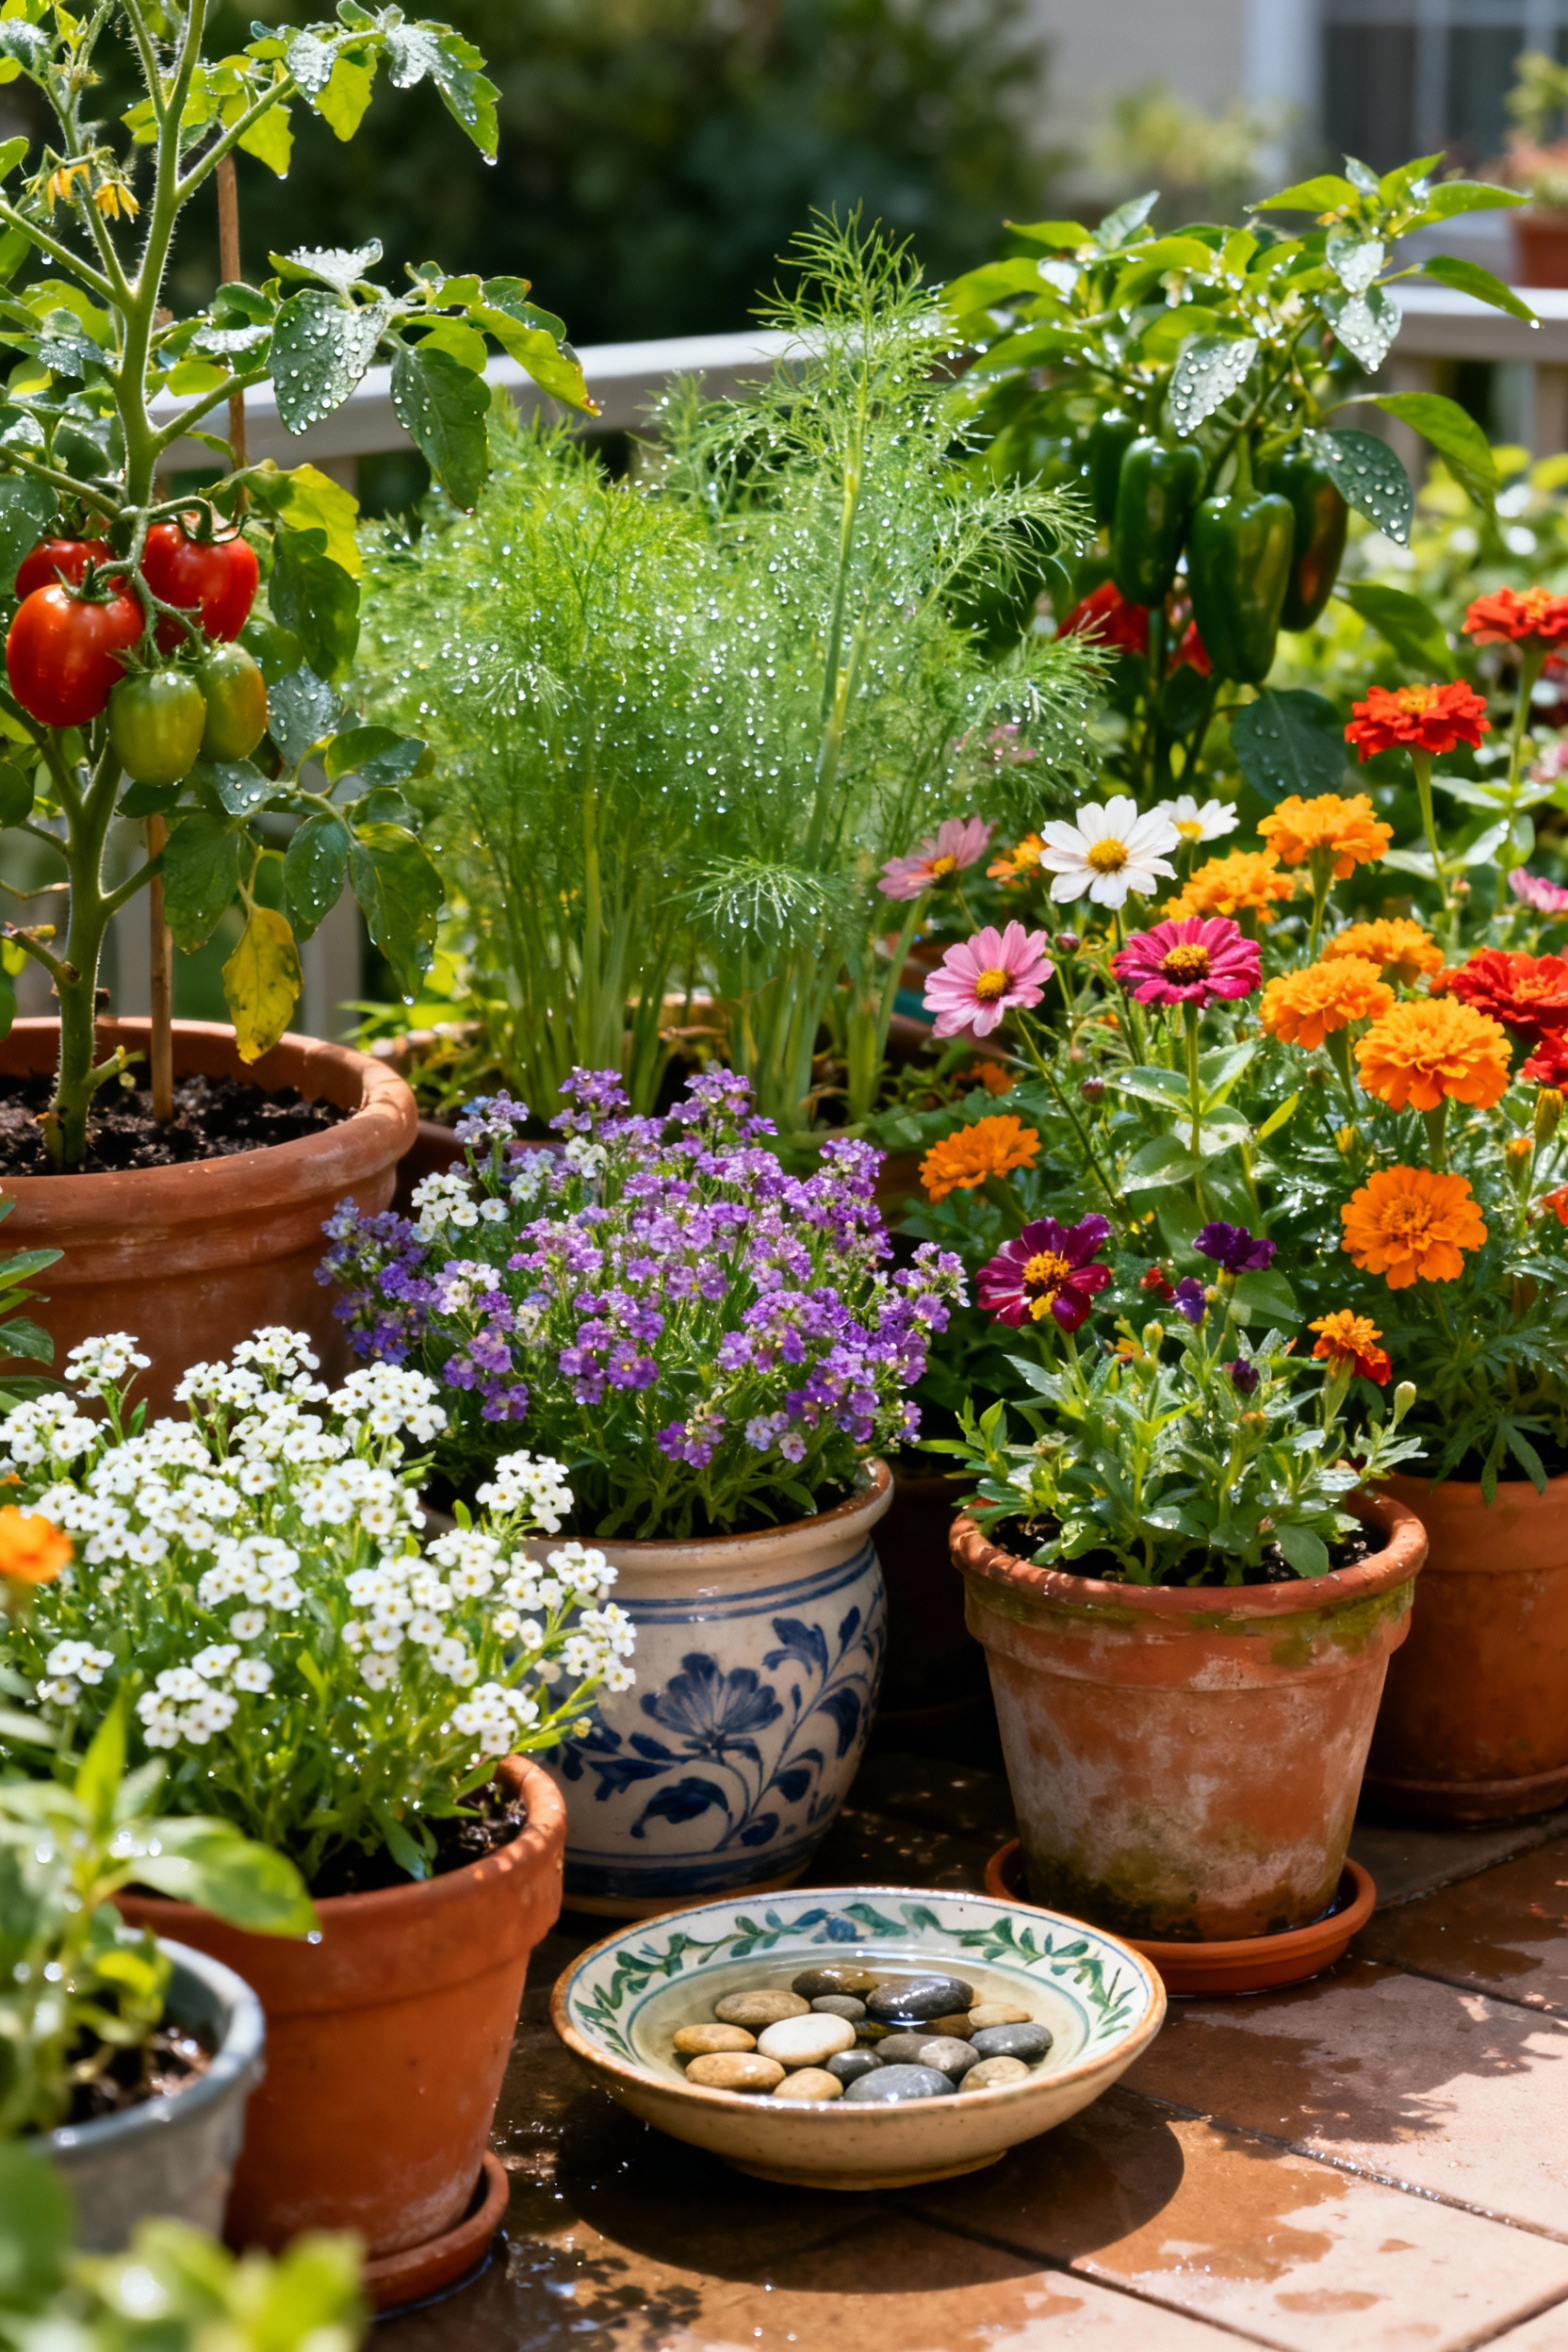
I like to think of this as creating a living ecosystem. By including a wide variety of flowering herbs and flowers among your vegetables and other ornamentals, you provide food and shelter for a whole community of helpful creatures. You’ll be amazed at how this reduces your pest problems naturally. From my professional experience, a diverse garden is a healthy garden. You’re creating a balanced environment where nature does the heavy lifting for you, and it’s a beautiful thing to watch.
20. Upcycling Everyday Objects: Sustainable and Unique Container Planters for Character
This might be the most fun tip of all, especially if you love a good treasure hunt! Your next favorite planter might be hiding in your garage, at a thrift store, or at a yard sale. Almost anything that can hold soil can become a unique and character-filled container. I’ve used old colanders (they come with pre-made drainage holes!), vintage tea tins, rain boots, and even a rusty old wheelbarrow. The possibilities are endless!
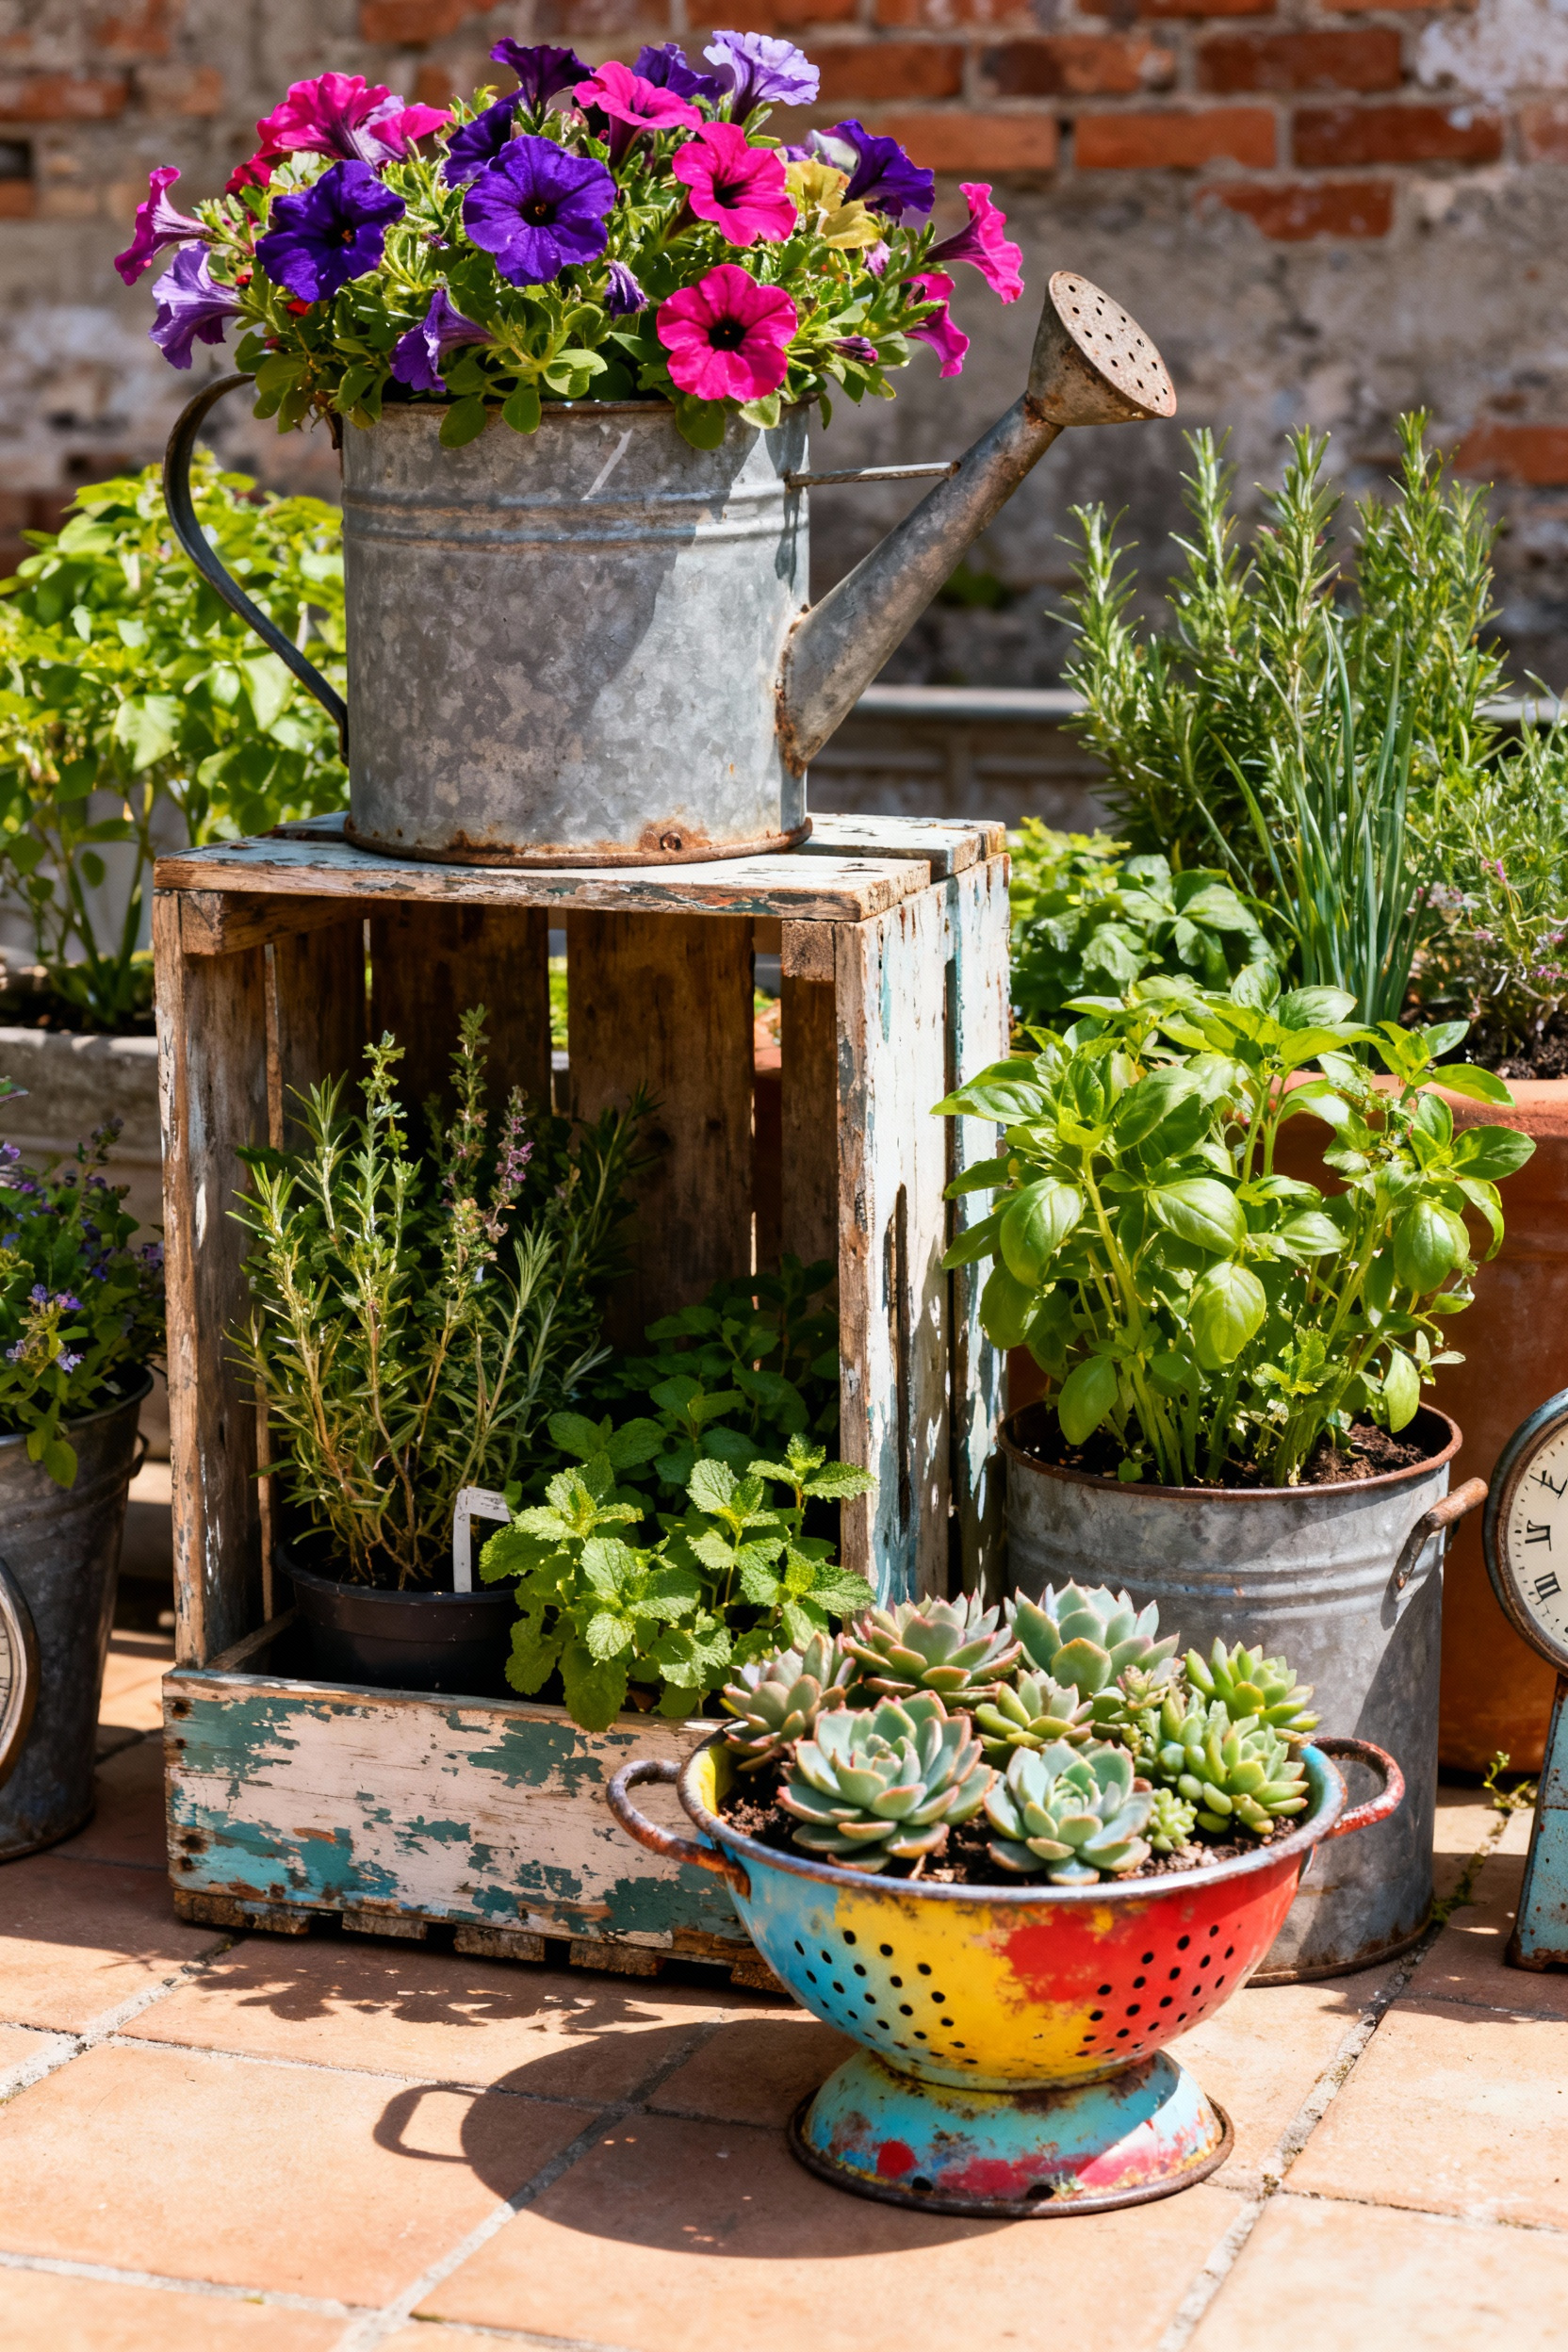
The key is to make sure you add drainage holes if there aren’t any already. A simple drill can turn just about any object into a potential planter. In my own DIY projects, upcycling is my favorite way to add personality and a sustainable touch to my garden. It’s a conversation starter, it keeps things out of the landfill, and it ensures your garden is a true one-of-a-kind reflection of you. Don’t be afraid to get quirky and creative—it’s your masterpiece, after all!
Conclusion
As we wrap up our journey through these 20 ideas, I hope you’re feeling inspired and, more importantly, empowered. We’ve walked through everything from the simple first steps of choosing a pot to creating clever, beautiful designs that bring life to any space. It just goes to show that a container garden isn’t a consolation prize for not having a big yard; it’s a creative, flexible, and incredibly rewarding way to connect with nature, right outside your door.
What I love most is that container gardening gives everyone the chance to grow something. Whether you have a tiny balcony, a sprawling deck, or just a single sunny windowsill, you can create a pocket of green that is all your own. Remember that art teacher I used to be? I see gardening the same way. There are no real mistakes, only happy accidents and opportunities to learn. The goal is to enjoy the process and celebrate the small victories along the way.
So now, it’s your turn. Pick one idea from this list that sparked your imagination and just give it a try. Start small, be curious, and have fun with it. Because the real magic of a container garden isn’t just in the flowers you grow or the herbs you harvest; it’s in the simple, quiet joy of creating something beautiful and watching it thrive. Go ahead—you’ve got this!