Picture this: You’re standing at your back door, coffee in hand, looking out at your yard. What do you see? Is it a cohesive space that draws you out, a genuine extension of your home? Or is it… just a lawn? Maybe a patio that’s a little too small, a few random shrubs, and a vague feeling of missed potential. You’re not alone. The biggest hurdle for most homeowners isn’t a lack of desire; it’s being paralyzed by a thousand different decisions.
You know what people always ask me? “Craig, where do I even start?” They’ve scrolled through a million flawless photos online, and it all feels completely out of reach. For 15 years, first from behind a camera lens and now as a design writer, I’ve seen where projects go right and where they go catastrophically wrong. The difference is almost never about the size of the budget. It’s about the quality of the plan.
Forget the corporate-speak and the glossy magazine fluff. I’m going to break it down for you, step-by-step, the way I would for a friend. We’ll talk about what actually matters and what’s just noise. We’ll cover the foundational stuff, the hardscape that forms the bones of your space, the plants that bring it to life, and the features that make it yours. Let’s get into it.
Strategic Planning & Vision Foundation
Everything—and I mean everything—hinges on this first phase. Skipping these steps is like building a house without a blueprint. You might end up with something that stands up, but it won’t be a place you truly want to live. This is where you save yourself time, money, and a world of frustration.
1. Assess Your Yard’s Existing Conditions for Optimal Placement Decisions
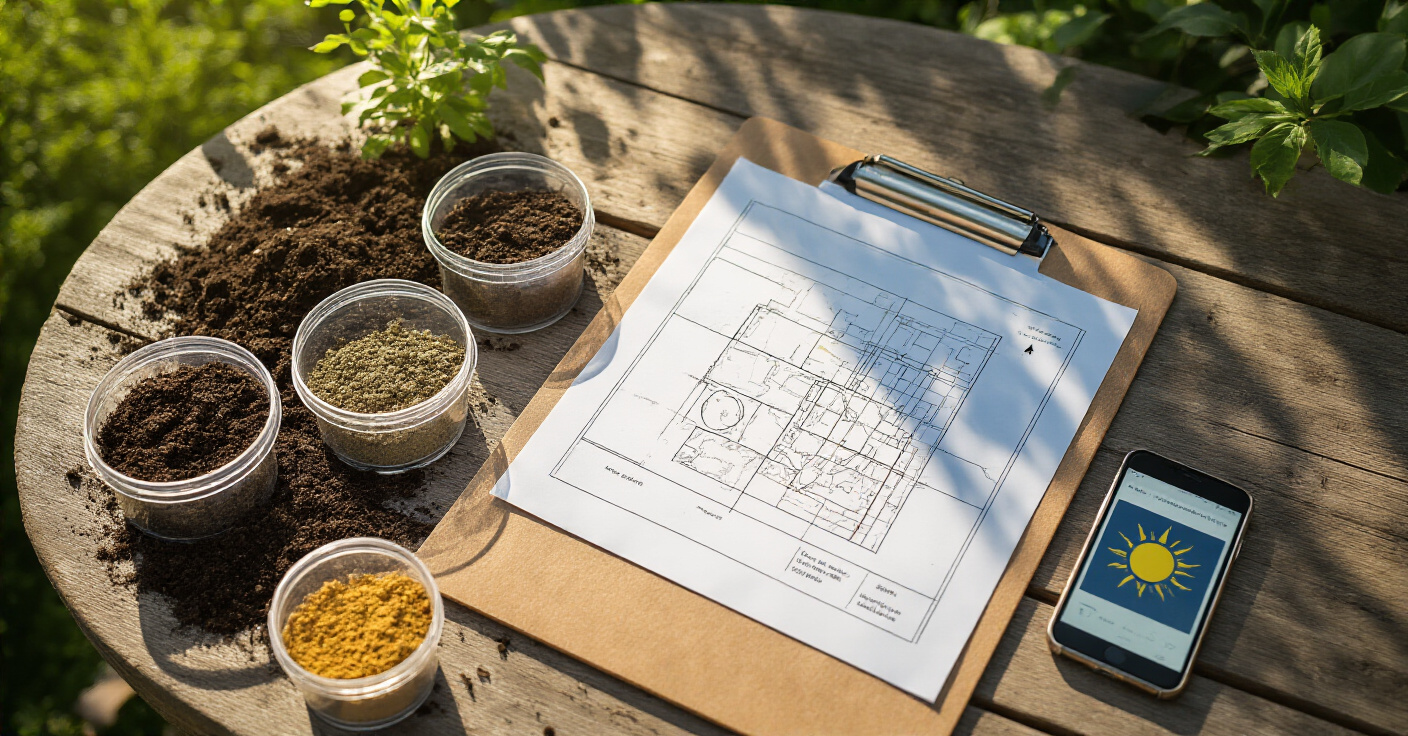
Before you buy a single plant or paving stone, you need to become a detective. As a photographer, the first thing I do on site is study the light. Where are the shadows? Where is the harsh, direct sun? When? Your yard has its own set of rules—sun, shade, wind, water flow, soil type. Your job is to understand them, not fight them. This isn’t just about aesthetics; it’s about making smart, informed decisions that will prevent you from throwing money away on plants that die or patios that bake in the afternoon sun.
The big mistake people make is thinking a quick glance is enough. They’ll look out at 10 a.m. in May and assume that’s the sun pattern for the whole year. It isn’t. I watched a client install a beautiful dark paver patio, only to find it was unusable after 1 p.m. all summer because it sat in punishing, direct sun and became hot enough to fry an egg on. A simple sun-mapping exercise would have saved them thousands. So, get out there at different times of day, in different seasons. See where the water pools after a heavy rain. Dig up a bit of soil. Is it sandy? Clay? This is your site analysis. It’s the most critical piece of data you’ll collect.
And please, before you dig a single hole, call 811. It’s a free service that marks your underground utility lines. Hitting a gas line is a shortcut to a very, very bad day. This simple, free call is the single most important part of your preparation.
2. Define Your Lifestyle Needs to Design a Functional Backyard Layout
Here’s a contradiction I see all the time: homeowners focus so intensely on making the yard look beautiful that they forget to make it work for their life. A stunning backyard that doesn’t actually get used is just an expensive painting you have to maintain. The goal isn’t a picture for a magazine; it’s an outdoor room that serves a purpose. Who is using this space? Is it you and a partner having quiet dinners? Is it your family with three kids and a dog? Do you host big parties?
Get specific. “I want a place to relax” is too vague. What does “relax” mean to you? Reading in a quiet, shaded corner? Or sitting around a fire pit with six friends? Those are two completely different design solutions. I once had a client build a gorgeous, sprawling bluestone patio directly off their living room. Looked amazing. But they were a family with young kids who really needed a soft, durable play area near the back door, not a hard, formal terrace. They spent a fortune on something that didn’t fit their life, and the kids just ended up playing in the side yard.
The shortcut here is to draw “bubble diagrams.” Get a rough sketch of your yard and just draw circles for how you want to use the space. “Dining bubble here.” “Lounge bubble over there.” “Kid play zone.” This isn’t about detailed design; it’s about figuring out the flow before you commit to anything permanent.
3. Create a Thematic Design Mood Board for Cohesive Aesthetics
Can we talk about why everyone gets mood boards wrong? People think a mood board is just a Pinterest board full of pretty gardens. It’s not. A truly useful mood board is a visual contract you make with yourself. It’s the single source of truth for the entire project’s feel. It dictates your choices for materials, colors, textures, and even plant shapes. When I was shooting architecture, I’d create a “shot list” with inspirational images to define the mood and style. This is the exact same thing for your backyard.
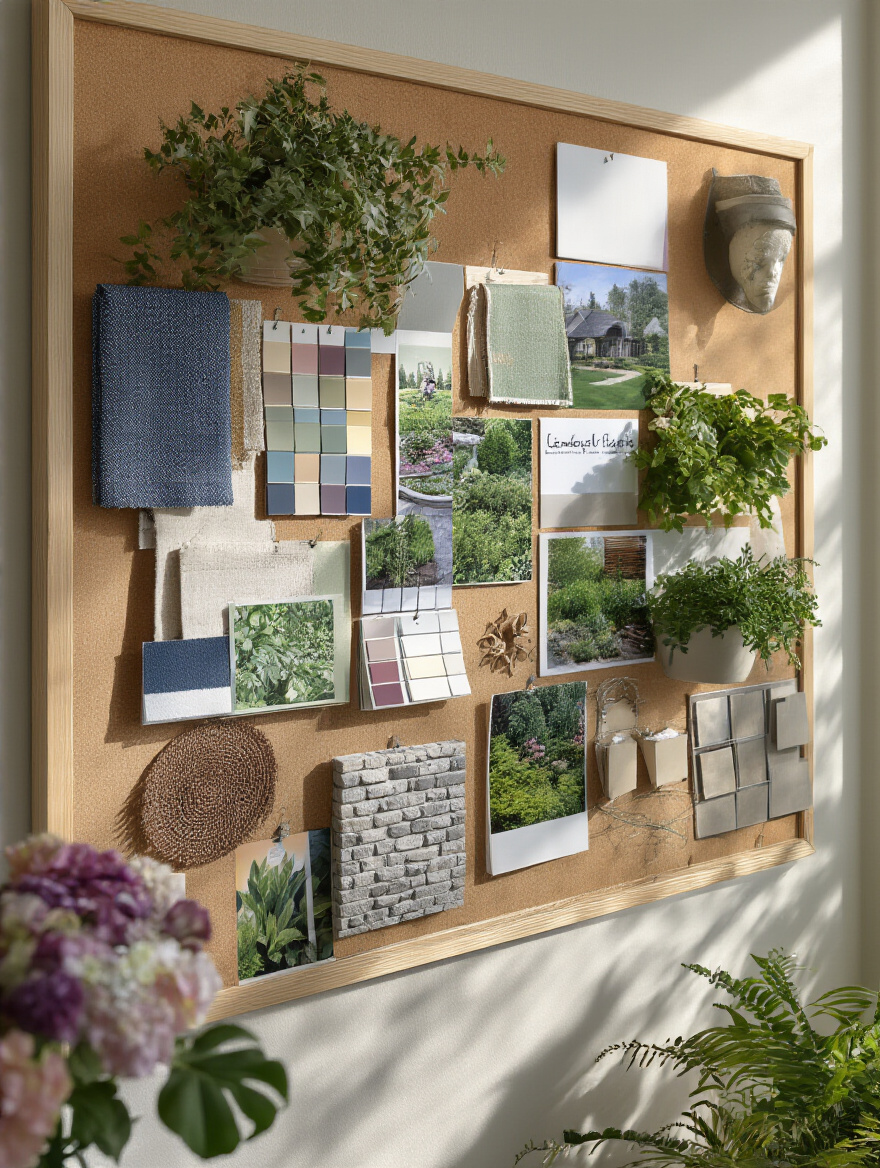
Your mood board is your filter. When you’re at the nursery tempted by a hot pink hibiscus, you look at your “Tranquil Zen Garden” mood board full of greens, grays, and whites and say, “Nope, doesn’t fit.” It’s what keeps your project from looking like a chaotic mishmash of unrelated ideas. I once worked on a project where the client kept changing their mind, adding a bit of rustic here, a splash of modern there. The final result felt disjointed and unsettled, because there was no unifying vision to guide the hundreds of small decisions.
Your shortcut to a better mood board: don’t just pin photos of gardens. Pin textures—a piece of weathered wood, a slab of concrete, a close-up of a pebbled path. Pin colors. Pin lighting fixtures. If you can, get physical samples of your pavers, deck stain, and a few key plant leaves. A tactile board is even more powerful than a digital one. It’s your compass for the entire project.
4. Set a Realistic Budget to Guide Smart Material and Plant Selection
Let’s get this out of the way: a budget is not a buzzkill. A budget is a creative tool. I have a major pet peeve with clients who are afraid to talk numbers. Without a budget, you have infinite choices, which is terrifying. A realistic budget forces you to be clever. It makes you prioritize what’s truly important and find smart, innovative solutions instead of just throwing money at problems. It’s the financial framework that turns a vague dream into an achievable plan.
The common BS I hear is, “We’ll just do it in phases.” Phasing is a great strategy, but only if you have a complete master plan and budget from the start. Phasing without a plan means you end up with a patio that’s in the wrong place for the fire pit you decide you want two years later. Always, always, always include a contingency fund of 10-20%. Last year, I watched a client lose thousands because an unexpected drainage issue popped up mid-project and they hadn’t budgeted for unknowns. Their project stalled for six months while they saved up again.
Here’s the shortcut I wish I’d known earlier: value engineering. This is a fancy term for being smart about your materials. Ask your contractor, “I love the look of this bluestone, but it’s stretching the budget. Is there a concrete paver or porcelain tile that gives a similar feel for less?” A good professional will have a whole library of options you’ve never heard of. You can still get a high-end look by being strategic about where you spend and where you save.
Essential Hardscaping & Infrastructure Elements
Once your plan is solid, it’s time to build the bones. Hardscaping—your patios, paths, walls, and lighting—is the foundation of your landscape. This is the stuff that’s expensive and difficult to change later, so it pays to get it exactly right the first time.
5. Choose Durable Paving Materials for High-Traffic Outdoor Areas
Everyone obsesses over the color and pattern of their patio pavers. And look, as a photographer, I get it. The visual texture matters. But what really matters is what’s underneath. The longevity and stability of your patio has about 20% to do with the paver you choose and 80% to do with the quality of the base you put it on. Skimp on the base, and I guarantee your beautiful patio will be a heaving, sinking mess in a few years.
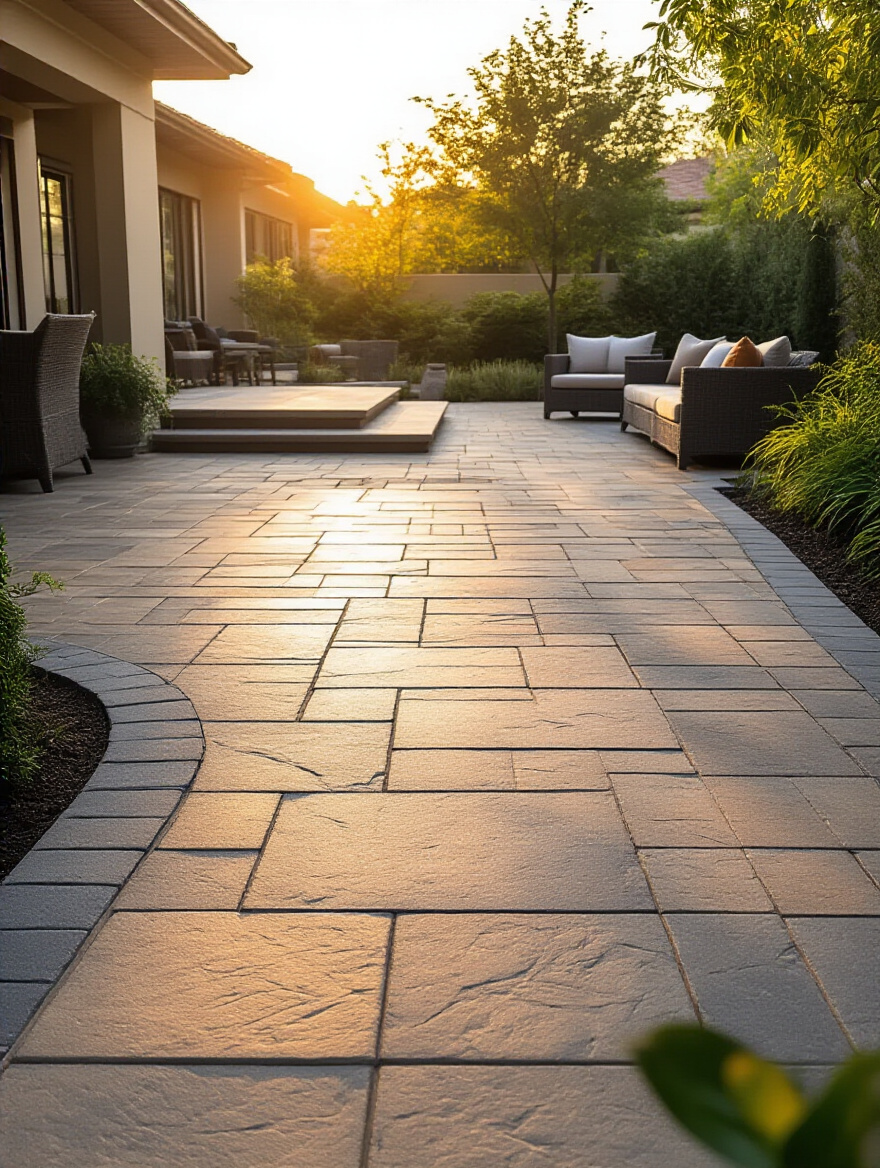
I learned this the hard way on one of my own projects. I found these gorgeous, thin slate tiles and put them on a minimal gravel-and-sand base to save a little money. After one New England winter of freeze-thaw cycles, half of them had cracked or popped loose. An absolute disaster. The BS is when a big-box store employee tells you a couple of inches of gravel is “good enough.” It’s not. A proper paver base requires excavation, layers of compacted aggregate, and precise grading. It’s heavy, tedious work, but it’s the only way to ensure your investment lasts.
My advice: Spend your money on the prep work. If you have to choose between a cheaper paver on a professionally installed base or a premium paver on a DIY-skimped base, choose the former every single time. And consider permeable pavers. They look great and help manage stormwater by letting rain soak into the ground, solving drainage problems before they start.
6. Integrate Efficient Drainage Solutions to Prevent Waterlogging Damage
I’m going to make a bold statement: your backyard isn’t truly designed until you know exactly where every drop of rain is going to go. Drainage is the most boring, least sexy, and most critically important part of any landscape project. Get it wrong, and you can flood your basement, kill your plants, and destroy your hardscaping. Water is relentless. You can’t stop it; you can only tell it where to go.
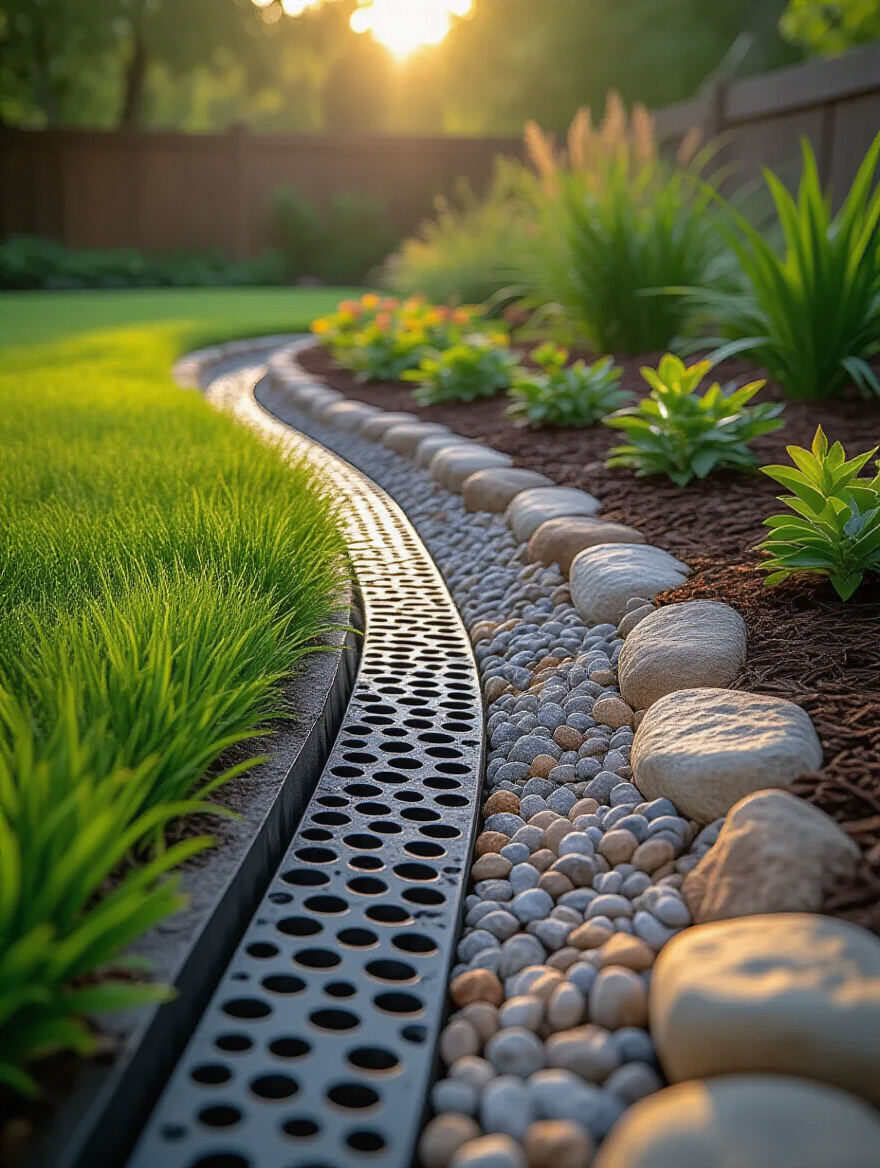
A common misconception is that just sloping a patio away from the house is enough. That’s a start, but what happens to the water then? Does it just create a swamp in your lawn? A client once installed a massive new patio that inadvertently channeled all the runoff from their roof and yard into one low spot right against their foundation. They called me in a panic after the first big storm. We had to dig up part of the new patio to install a French drain. An expensive, frustrating, and totally avoidable problem.
Don’t hide your drainage—make it a feature. A dry creek bed made of river rock can be a beautiful sculptural element that doubles as a channel for stormwater. A rain garden filled with water-loving native plants can be a vibrant, beautiful solution to a low, soggy spot. Thinking about water management from day one protects your home and your investment.
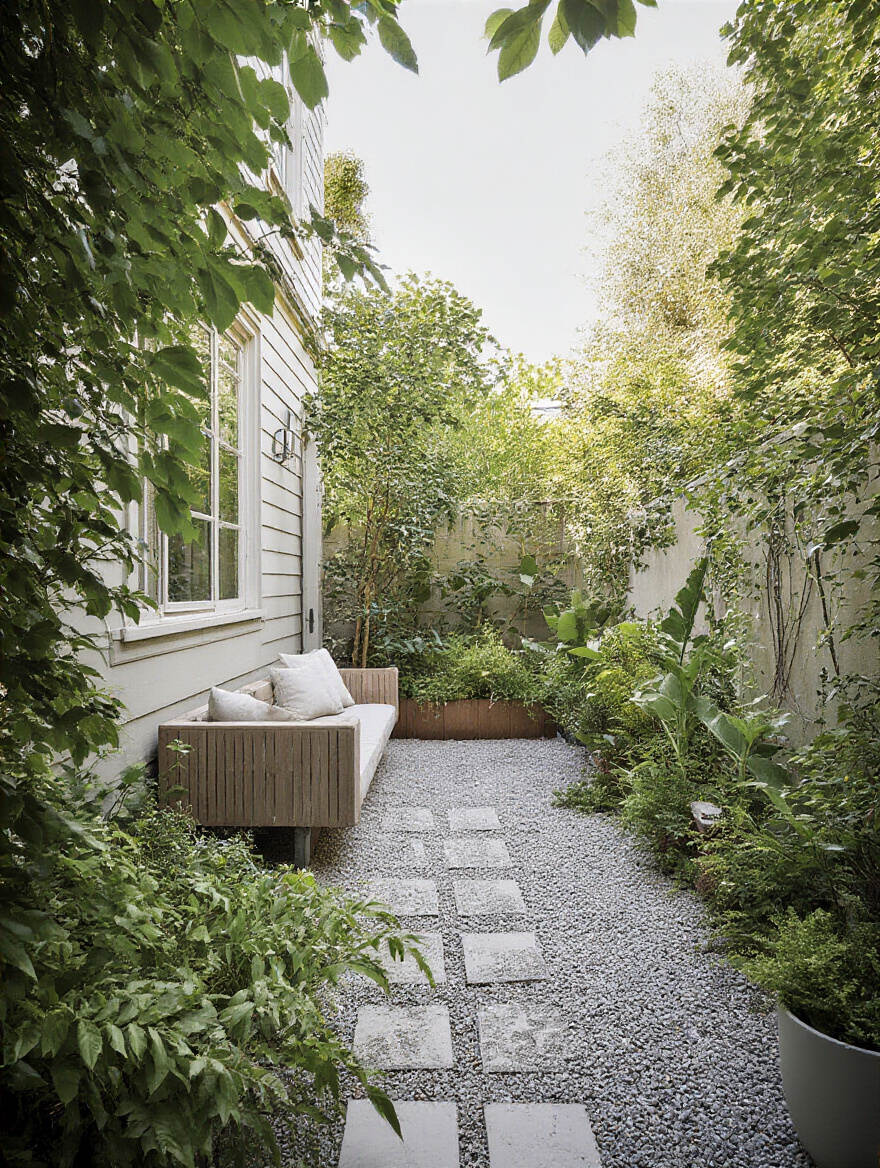
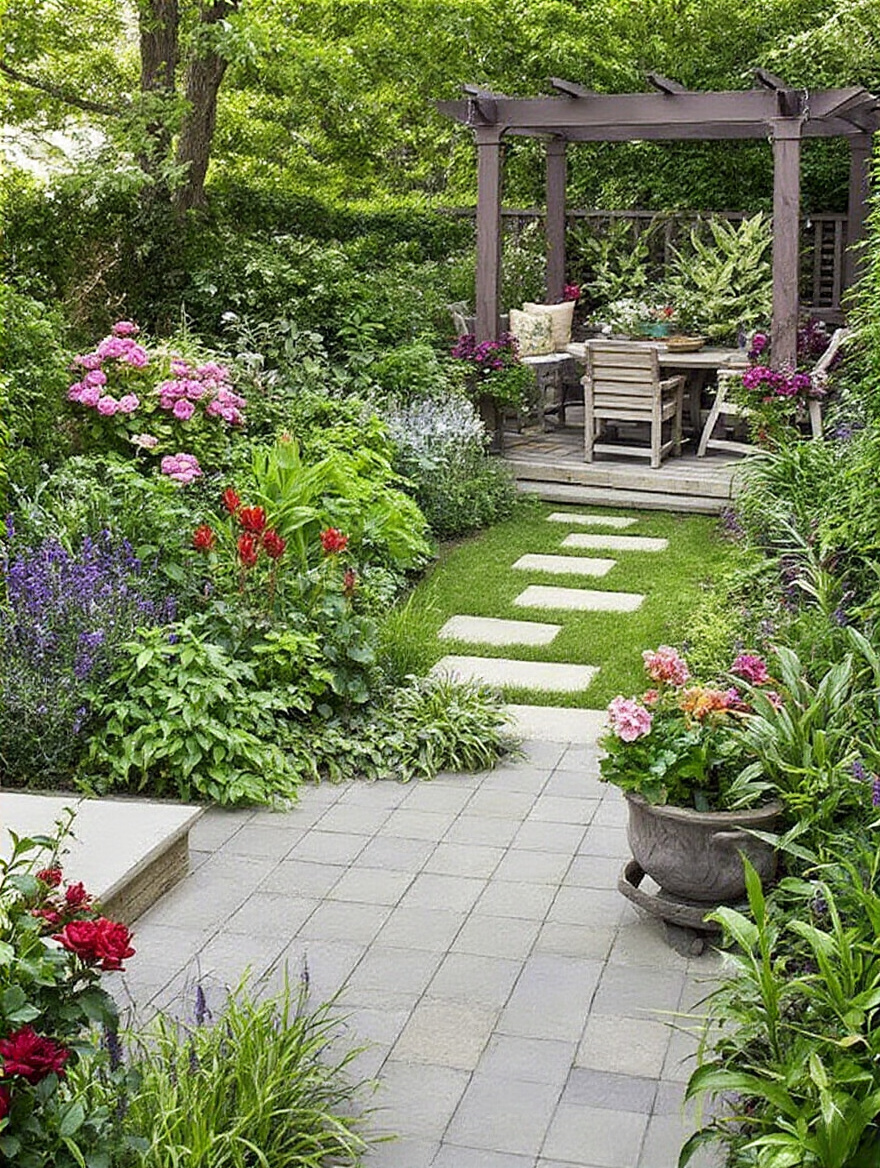
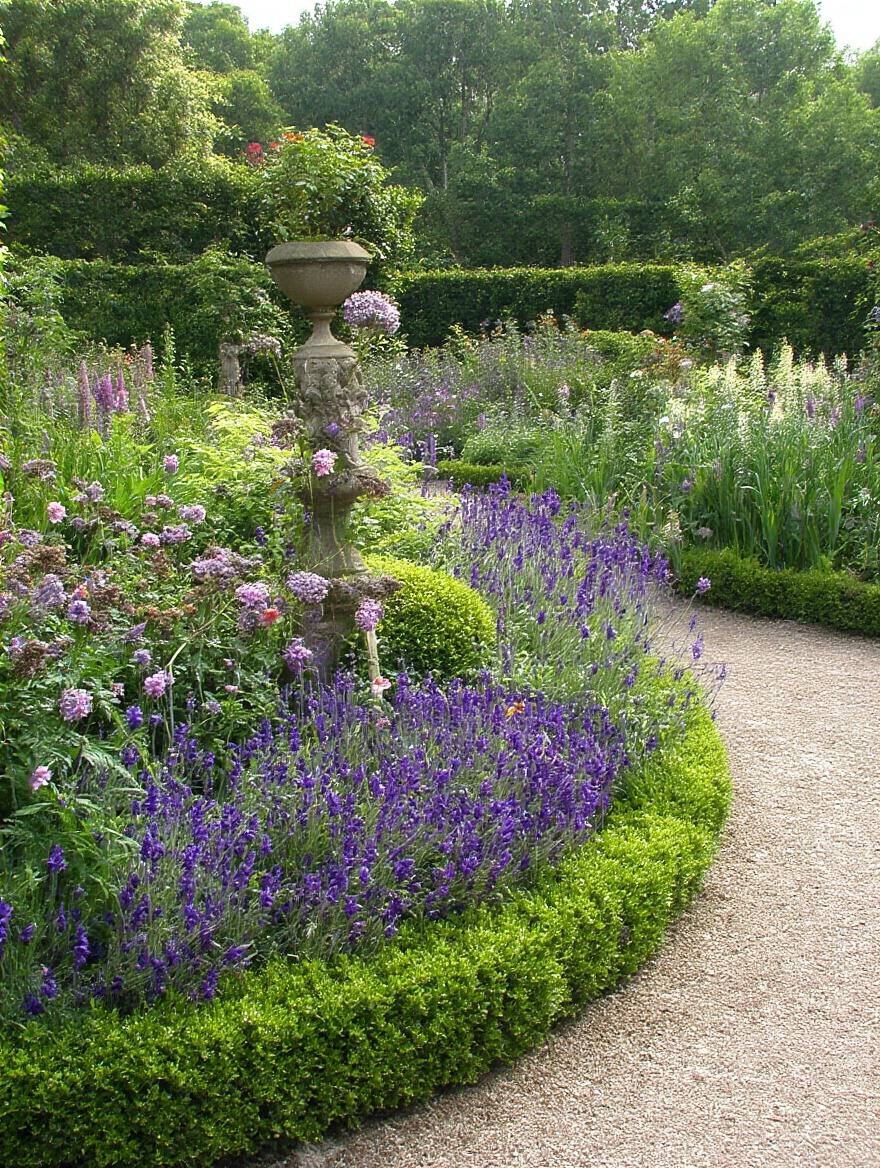
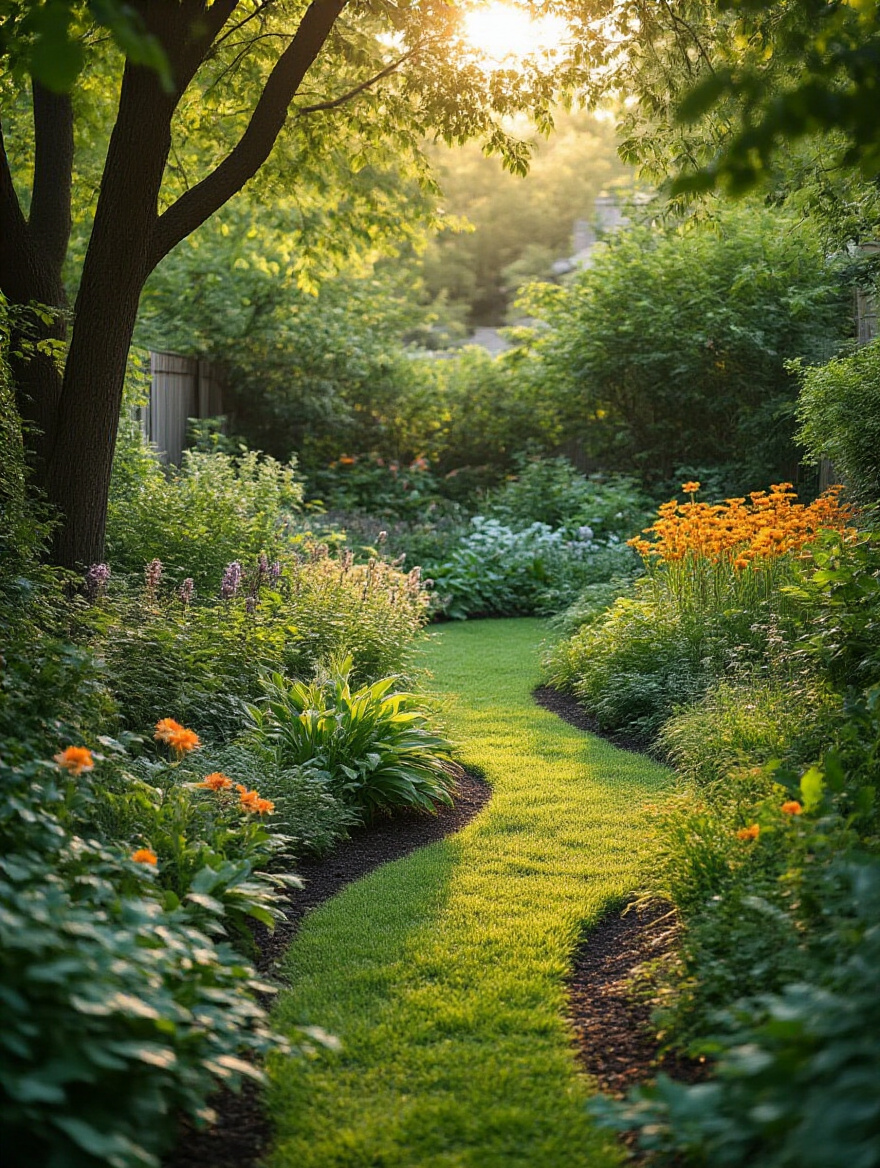
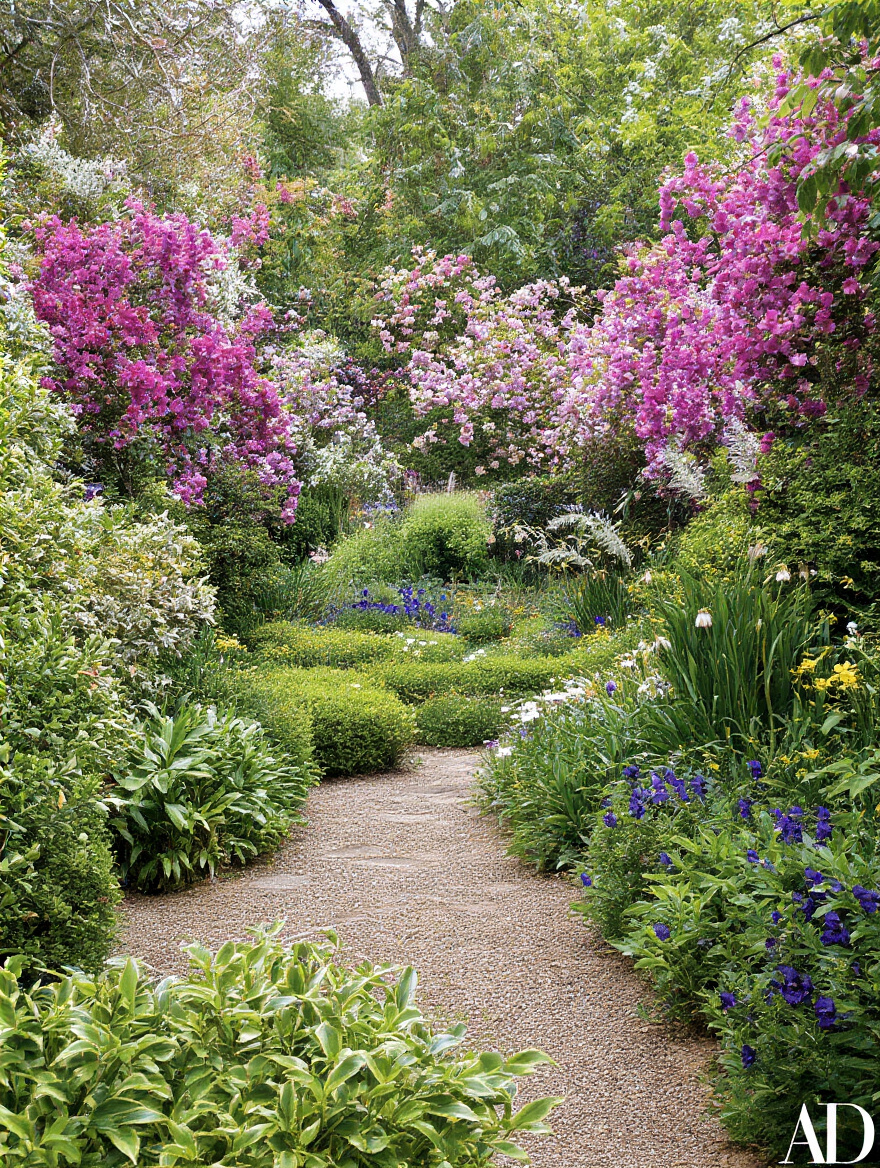
7. Design Functional Pathways for Safe and Easy Yard Navigation
Paths do more than just get you from A to B. From a photographer’s perspective, paths are the lines that direct the eye. They control how you experience a space. A straight, direct path says “efficiency.” A gentle, curving path creates mystery and encourages you to slow down and see what’s around the next bend. They create a sense of order and make a yard feel intentionally designed, not just like a collection of random parts.
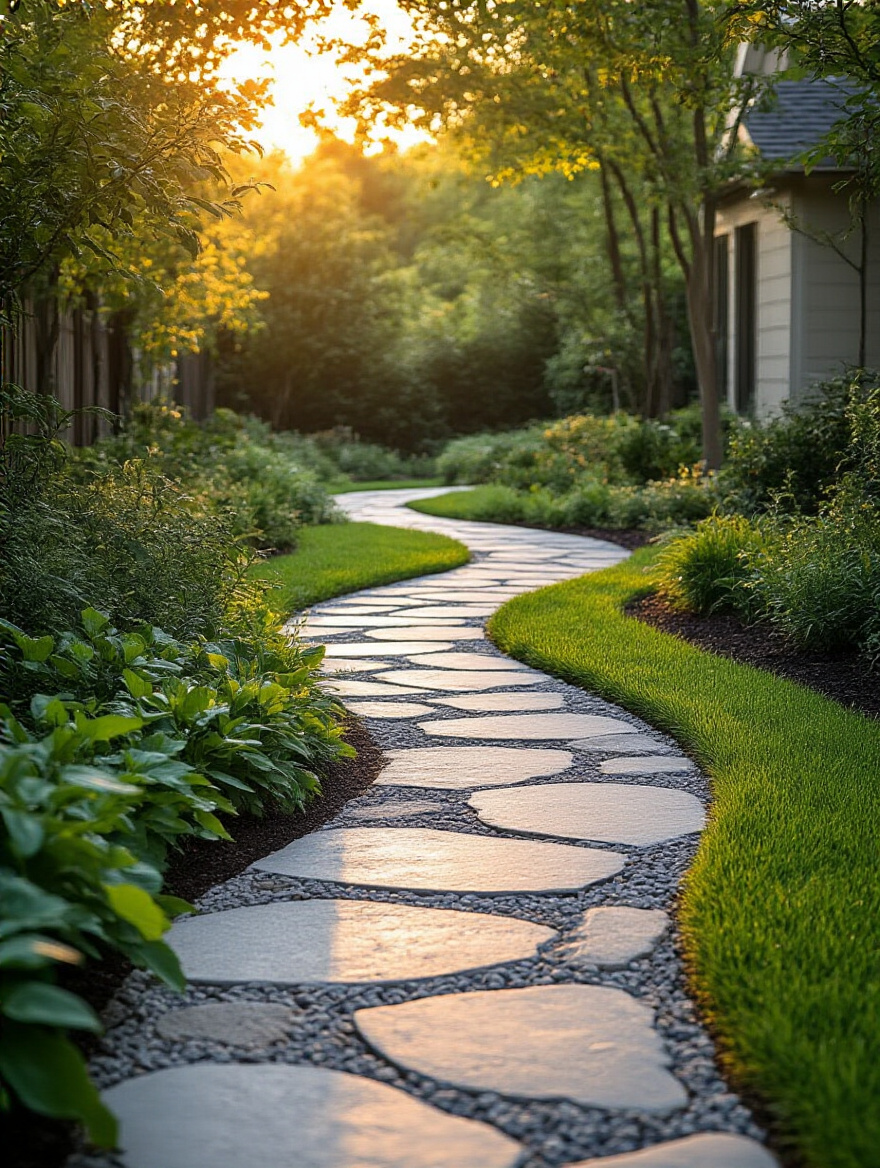
Please, can we stop with the sad, narrow concrete strips that look more like municipal sidewalks than garden paths? A path should be at least 36 inches wide for one person to walk comfortably, and 48-60 inches for two people to walk side-by-side. I worked with a couple who had a small city backyard, and instead of a straight path to the back gate, we created a meandering flagstone path that wound between layered plantings. It made their small yard feel twice as big because you couldn’t see the whole space at once. The journey became part of the experience.
Here’s a great shortcut: use your paths to frame views. As you lay out the curve of a path, stop and look. What do you see? Can you line it up to create a perfect view of a specimen tree, a sculpture, or a distant vista? And light them. A few low-voltage path lights don’t just add safety; they create incredible drama at night by highlighting the texture of the path and the plants alongside it.
8. Select Effective Outdoor Lighting for Enhanced Evening Ambiance

The single biggest mistake I see is what I call “runway lighting”—two parallel lines of bright lights marching down a walkway. It’s harsh, uninviting, and completely misses the point. The goal is to see the effect of the light, not the bulb itself. You should be thinking in layers.
- Ambient Light: A soft, general glow, maybe from downlights hidden in a tree or under the eaves of the house.
- Task Light: Focused light where you need it, like over a grill or at the top of a set of stairs.
- Accent Light: This is the fun part. A narrow spotlight aimed up at the trunk of a beautiful tree, backlighting on a row of ornamental grasses, or a light hidden inside a water feature. This is how you create magic.
A quality, low-voltage (12V) LED system is a fantastic investment. It’s safe for DIY installation, energy-efficient, and will last for years. Buy a good transformer with more capacity than you think you’ll need, because I promise you, once you start, you’ll get addicted to “painting with light.”
9. Install Smart Irrigation Systems for Water-Saving Plant Health
Look, you’re busy. You don’t have time to stand around with a hose every day, and those dumb, clicky-dial timers are only slightly better than nothing. The BS is thinking any automated system is a good system. A timer that runs for 20 minutes every other day, whether it’s 100 degrees and sunny or 65 and raining, is wasting a colossal amount of water and is probably not even watering your plants correctly.
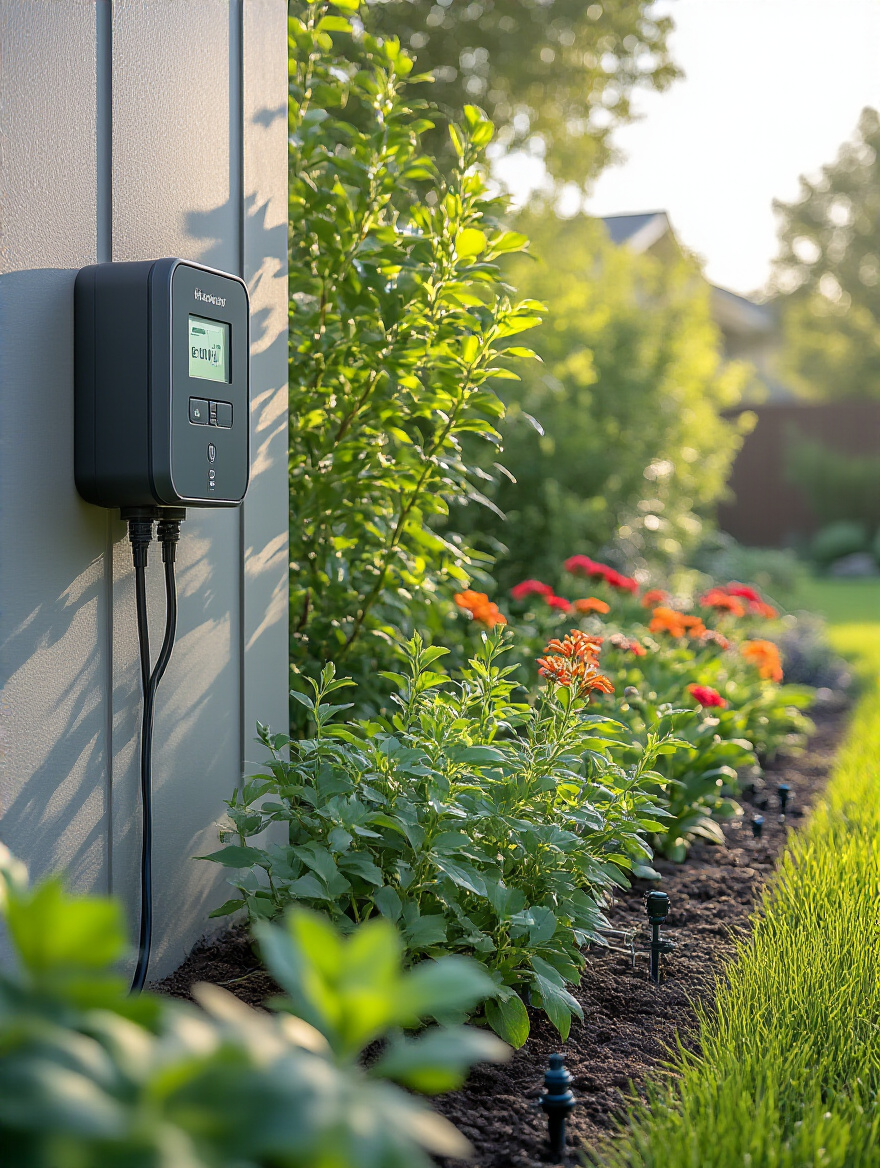
A smart irrigation controller is one of the best tech investments you can make for your home. These systems connect to Wi-Fi and pull local weather data. Is a heatwave coming? It’ll water more. Did it just rain two inches? It’ll automatically skip the next cycle. You can control it from your phone, and it tailors the watering schedule to your specific plant types, soil, and sun exposure. I had a client go on a two-week vacation, and while they were gone, an unseasonable heatwave hit. Their old “dumb” timer would have left them with a brown, dead lawn. Their new smart system adjusted automatically, and they came home to a perfectly healthy landscape.
The pro shortcut is to pair a smart controller with drip irrigation in your garden beds. Drip lines deliver water directly to the root zone of the plants, with almost no evaporation loss. You use less water, have fewer weeds, and your plants are healthier. It’s a win-win-win.
Vibrant Softscaping & Planting Strategies
This is where the soul of your landscape comes from. The plants are the living, breathing, changing elements that bring your hardscape to life. The key is to think like an ecologist, not just a decorator—choosing plants that want to live where you put them.
10. Select Drought-Tolerant Plants for Low-Maintenance Beauty and Resilience
Let’s clear this up right now: “drought-tolerant” does not mean your yard has to look like a gravel lot in Arizona. The myth is that a water-wise garden has to be all cacti and rocks. Absolutely not true. There are thousands of gorgeous, lush, flowering plants—from ornamental grasses to vibrant perennials like Russian Sage and Coneflower—that are incredibly tough and require very little supplemental water once established.
The key is choosing plants adapted to your specific climate. The real BS is when people buy a water-wise plant and then kill it by overwatering it. These plants are built for drier conditions; soggy soil will rot their roots faster than anything. Your local university extension office or native plant society is your absolute best friend here. They’ll have lists of plants that are proven to thrive in your area with minimal fuss.
I worked with a client in California who replaced their thirsty front lawn with a stunning garden of native grasses, sages, and succulents. They cut their outdoor water use by over 50% and spent their weekends enjoying the garden instead of mowing it. That’s the real payoff: less work, less water, more beauty.
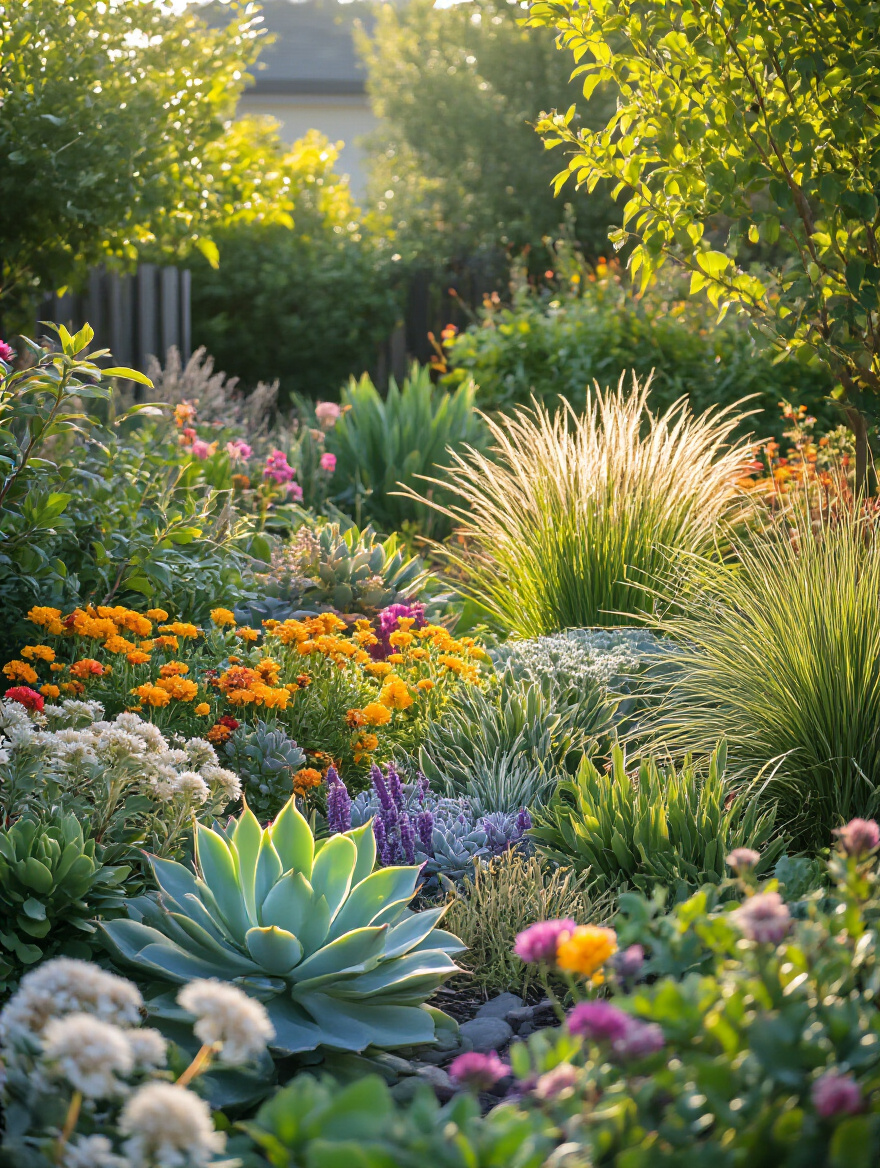
11. Layer Planting Beds for Visual Depth and Year-Round Interest
Remember what I said about composing a photograph? A good photo has a foreground, a midground, and a background. It has depth. Your garden beds should be the same way. The biggest amateur mistake is planting everything in a single, flat row, like soldiers lined up for inspection. It looks static and boring.
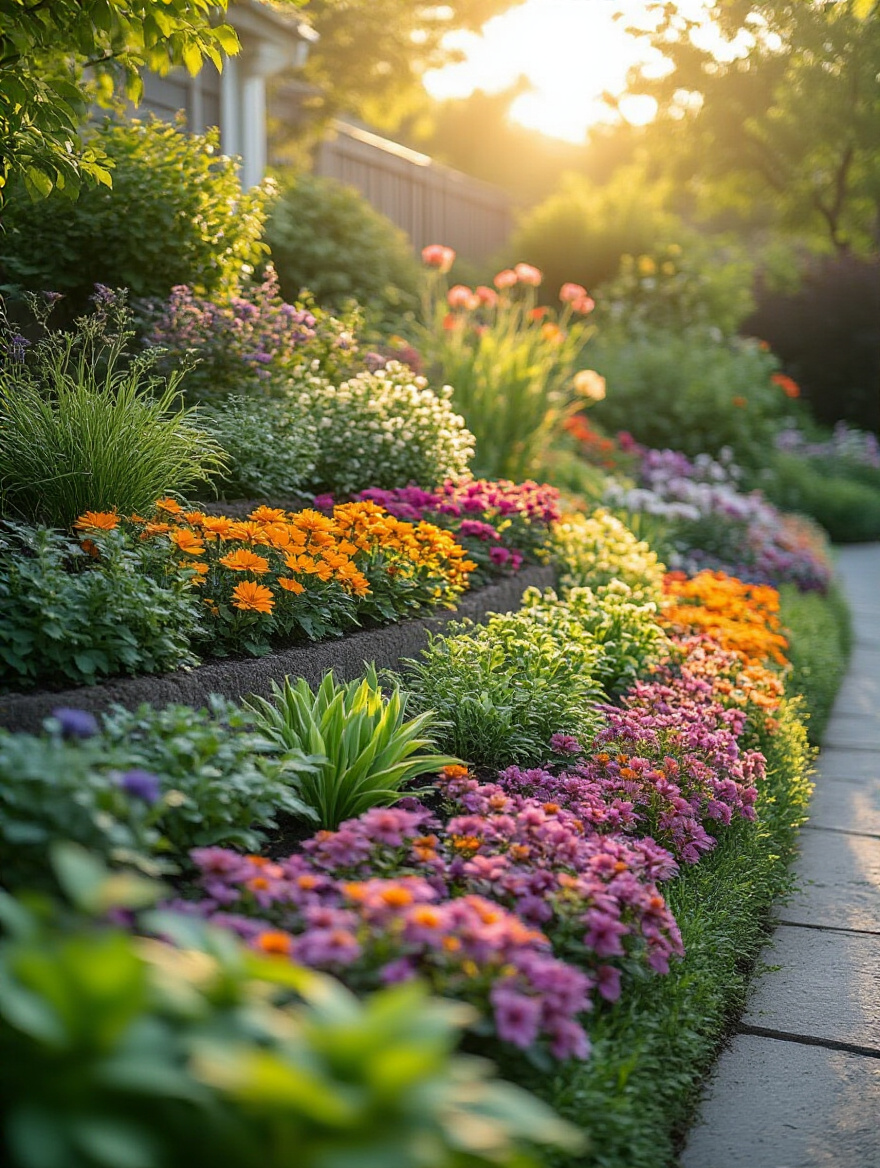
Layering is how you create a rich, immersive feeling. You put the low-growing groundcovers and small perennials in the front. Behind them, you place your medium-sized shrubs and perennials. And in the very back, you put your tallest shrubs or small trees. This simple technique immediately makes a space feel deeper and more lush. But it’s not just about height. You should also be layering textures (fine, bold, spiky, soft) and colors.
Here’s a tip to make it all hang together: repetition. Don’t just plant one of everything. Pick a few key plants or a specific color and repeat it throughout the garden. I once saw a tiny urban backyard that felt huge because the designer used tall, columnar evergreens in the back to draw the eye up, feathery ferns in the middle for texture, and a groundcover of black mondo grass that snaked through the whole space, tying it all together. It was a masterpiece of composition.
12. Introduce Native Species to Support Local Ecosystems and Wildlife
This isn’t about being a zealous environmentalist; it’s about being a smart, lazy gardener. Why would you try to force a plant that evolved in a completely different climate to survive in your yard, when there are beautiful plants that have spent thousands of years adapting perfectly to your exact soil and rainfall patterns? Using native plants is simply working with nature instead of constantly fighting against it.
There’s this weird myth that native plants are all just messy weeds. It’s just not true. From elegant flowering trees to delicate ferns and showy wildflowers, there are natives for every garden style. And here’s a surprising stat for you: Dr. Doug Tallamy, an entomologist, found that a native oak tree can support over 500 species of caterpillars, which are the primary food for baby birds. A non-native Ginkgo tree, by contrast, supports maybe five. By planting natives, you are literally turning your yard into a functioning part of the local ecosystem.
The shortcut to finding the right ones? The National Audubon Society and the Lady Bird Johnson Wildflower Center both have fantastic online databases where you can plug in your zip code and get a list of plants that will thrive in your yard and support local wildlife. It’s that easy.
13. Cultivate a Thriving Edible Garden for Fresh Homegrown Produce
You don’t have to choose between a beautiful garden and a productive one. You can have both. The idea that your Vegetable Garden has to be a sad, rectangular plot hidden in the back corner is completely outdated. Many edible plants are stunningly beautiful. Think of the deep purple leaves of a ‘Redbor’ kale, the sculptural form of an artichoke plant, or a trellis covered in scarlet runner beans. This is “Edible landscaping,” and it’s one of the smartest ways to use your space.

The BS is that you need a huge amount of land to grow your own food. Not true. I’ve seen incredibly productive gardens on tiny city balconies using containers and vertical growing systems. A friend of mine in Brooklyn grows nearly all of his family’s salad greens and herbs in a few raised beds on his rooftop. It’s all about maximizing your square footage.
My advice for beginners is to start small and integrate perennial edibles. Plant a few blueberry bushes as a hedge. Tuck some rhubarb into a perennial border. Plant an espaliered apple tree against a sunny wall. These are plants that you put in once, and they give back year after year with minimal effort. It’s a fantastic return on your investment of time and space.
14. Choose Privacy Trees and Shrubs for Natural Boundary Screening
As a photographer, I think a lot about what’s in the frame and what’s left out. Creating privacy in your yard is the same process. It’s not about building a solid green wall; it’s about strategically obscuring unwanted views while leaving others open. The goal is to create a sense of seclusion, not a feeling of being walled in.
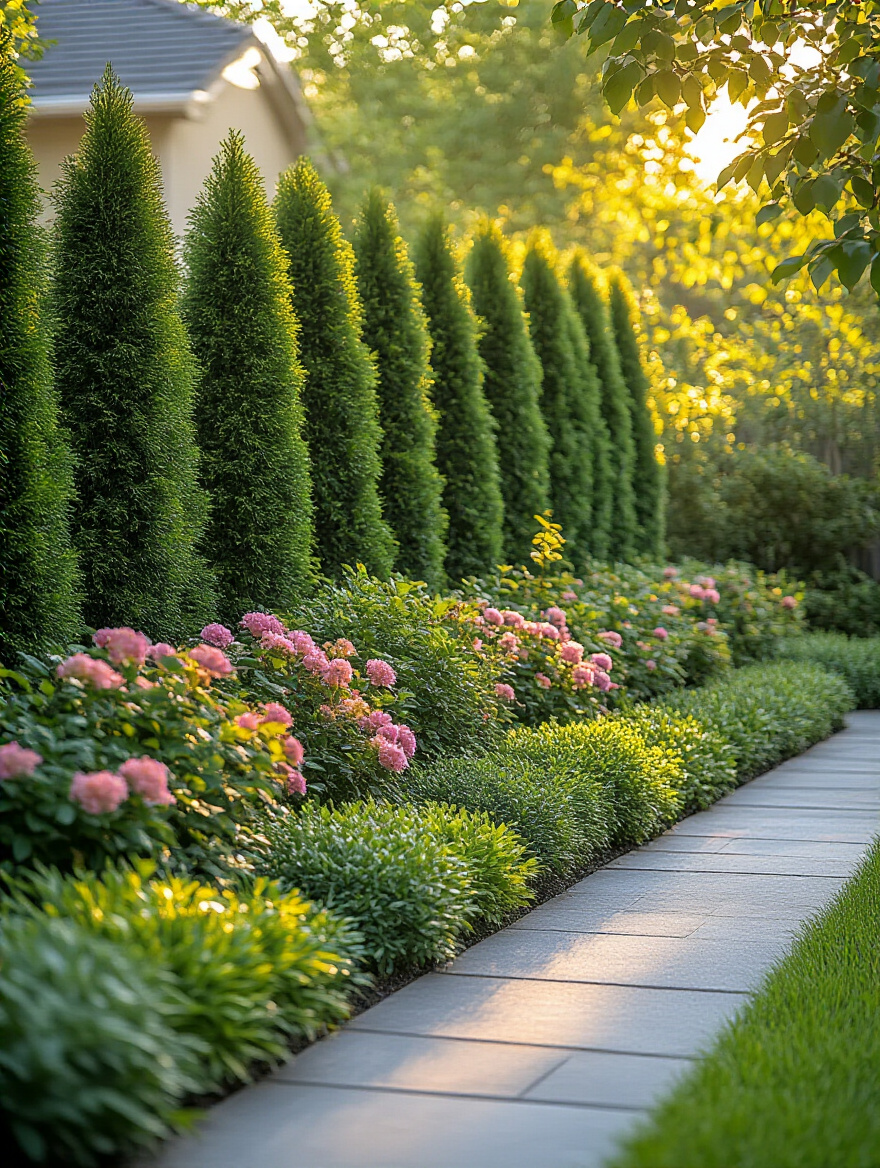
Can we all agree to stop planting single, ruler-straight rows of Arborvitae? They look like a stiff, green fence, and if one of them dies, you have a giant, ugly gap. A much better approach is to create a layered, mixed border. Use taller, narrow evergreens as the backbone, then layer in some medium-sized deciduous shrubs in front of them for seasonal interest, and maybe even some ornamental grasses at the very front. This staggered, multi-layered approach feels more natural, provides better sound absorption, and is more resilient.
A client of mine had a new house built next door, and suddenly their perfectly private patio had a direct view of the neighbor’s second-story bathroom window. Mortifying. Instead of a single wall of trees, we planted a small grove of river birches with some dense evergreen shrubs layered underneath. It completely blocked the view, looked fantastic year-round, and felt like a natural part of the landscape.
Adding Comfort & Personalization Features
The plan is made, the bones are built, and the plants are in. Now comes the best part: adding the features that make your backyard a place you truly want to be. This is where you inject your personality and create experiences.
15. Incorporate a Cozy Fire Pit to Extend Evening Gatherings
A fire pit is more than just a source of heat. It’s a destination. It’s a focal point that instantly creates an outdoor room and gives people a reason to gather and stay outside longer. It’s primal. People are just drawn to fire. A fire pit can extend your outdoor season by months, turning cool spring and autumn evenings into prime entertaining time.
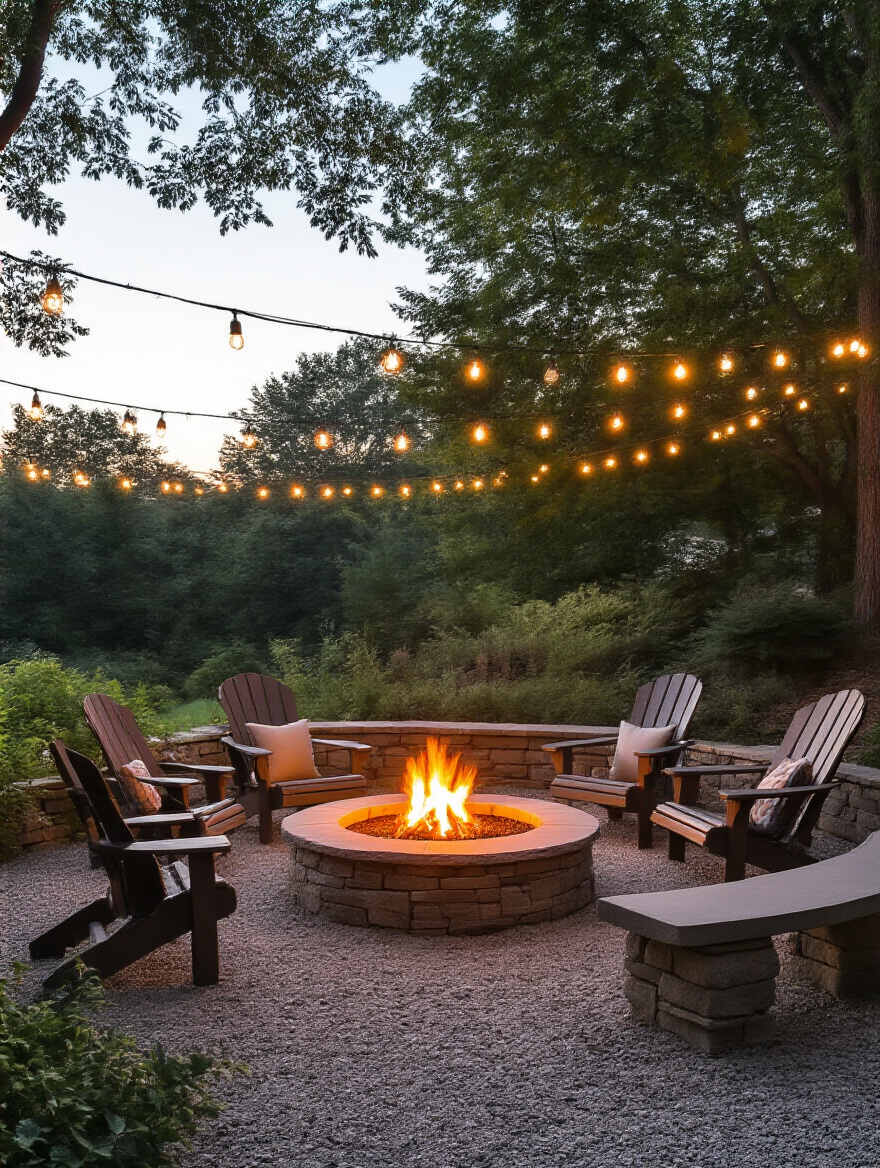
The biggest mistake I see is when people just plop a portable fire pit in the middle of their lawn and call it a day. A fire feature needs a dedicated zone around it—a proper, non-combustible surface like gravel or pavers, and comfortable seating arranged for conversation. And you have to consider the wind! I learned that one the hard way. I helped a friend build a beautiful stone fire pit, but we didn’t pay attention to the prevailing wind direction. On most nights, one side of the circle was completely unusable because it was full of smoke.
My honest advice? If convenience is your top priority and you know you won’t want to deal with firewood and smoke, just go for a gas-powered pit. Natural gas or propane. They provide instant on-and-off ambiance with zero cleanup. You’ll use it ten times more often, I guarantee it.
16. Build a Relaxing Water Feature for Calming Sensory Appeal
Fire provides the visual anchor, but water provides the soundtrack. A water feature introduces a sensory element that can completely transform the feeling of a space. The sound of moving water is incredibly therapeutic. It masks distracting background noise like traffic or neighbors and creates a powerful sense of tranquility and enclosure.
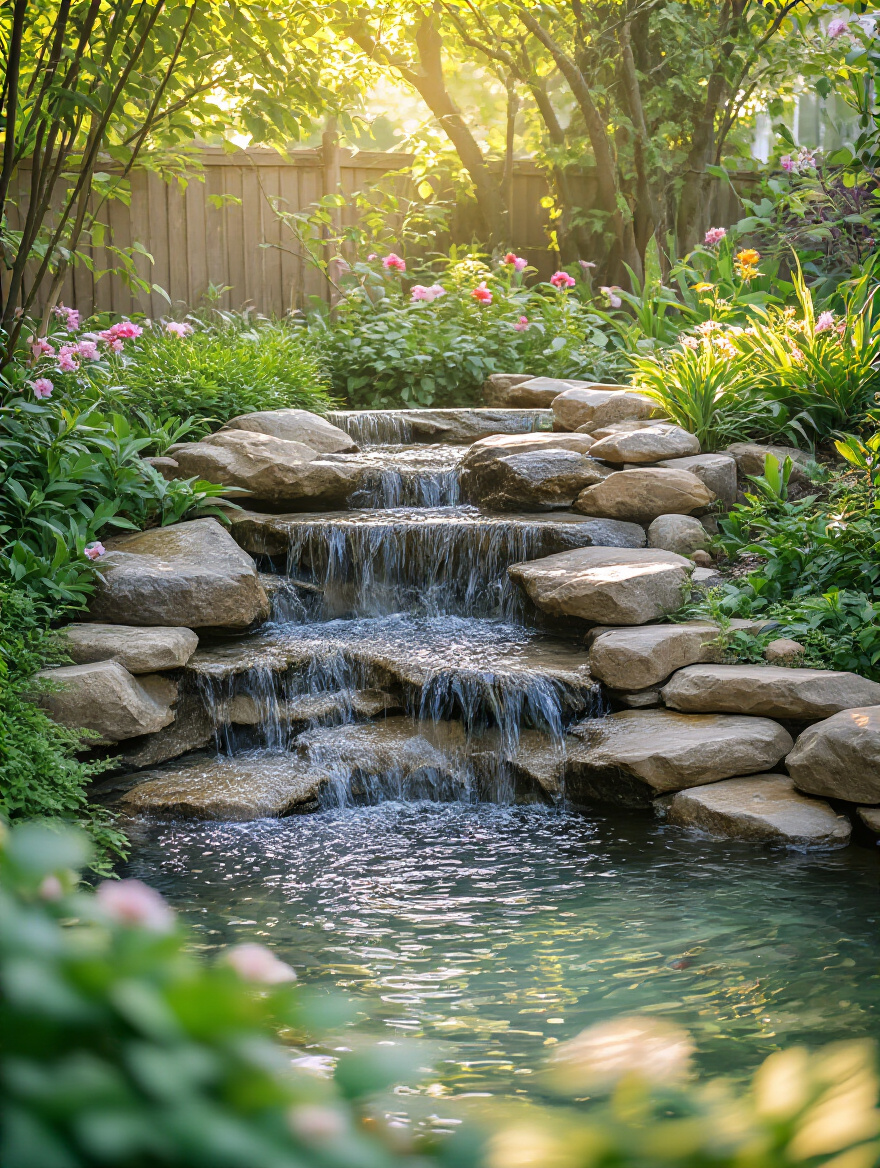
The BS part? Thinking bigger and louder is better. I’ve seen some over-the-top fountains that sound less like a babbling brook and more like a backed-up toilet. The goal is a gentle, calming sound, not a roar. Even a simple, self-contained bubbling rock or urn can provide all the auditory benefits you need without the complexity of a full-blown pond.
Here’s a great pro tip: you can “tune” the sound of your water feature. The sound changes based on how far the water falls and what it hits. A long drop onto a flat rock will be a loud splash. A gentle flow over a bed of small pebbles will be a soft burble. Experiment by moving rocks around and adjusting the flow rate on your pump until you get a sound that you find truly relaxing.
17. Design a Dedicated Outdoor Kitchen for Seamless Entertaining
An outdoor kitchen is the ultimate upgrade for people who love to entertain. It’s not just about having a nice grill; it’s about creating a fully functional culinary hub that stops you from running back and forth to the house a million times. It keeps the host in the center of the party, not isolated in the kitchen.
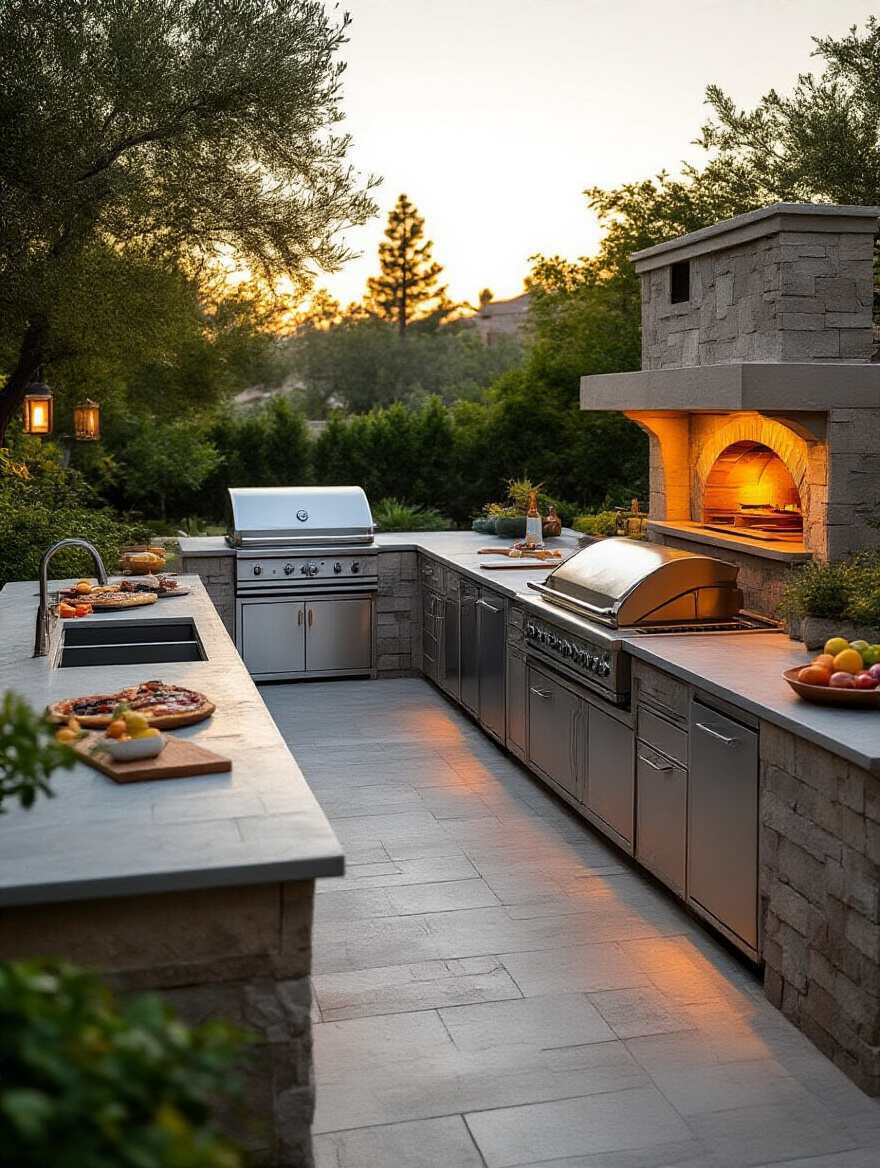
My biggest pet peeve here is when people get so excited about the shiny stainless steel grill that they completely forget about the boring-but-essential infrastructure. An outdoor kitchen is useless without proper utilities. You need dedicated electrical circuits for a refrigerator, outlets, and lighting. You need a gas line. You probably want plumbing for a sink. I once had a client who built a massive, gorgeous stone island for their grill, but didn’t run enough power. The minute they plugged in the fridge and turned on the overhead lights, it tripped the breaker. They had to tear up their brand-new patio to run another line. Plan your utilities first.
The shortcut for great flow is to think in zones, just like an indoor kitchen: a hot zone (grill), a cold zone (fridge), a wet zone (sink), and a prep zone (counter space). And give yourself more counter space than you think you need. Trust me on this. There’s no such thing as too much counter space next to a grill.
18. Select Comfortable Outdoor Furniture for All-Season Relaxation
This is where your backyard finally becomes a true living room. But here’s a confession: on my very first patio, I cheaped out on the furniture. I bought a stylish-looking set from a big-box store, and it was a disaster. The “all-weather” wicker started to fray and fade in one summer, and the cushions were flat, mildew-stained messes by year two. A complete waste of money.
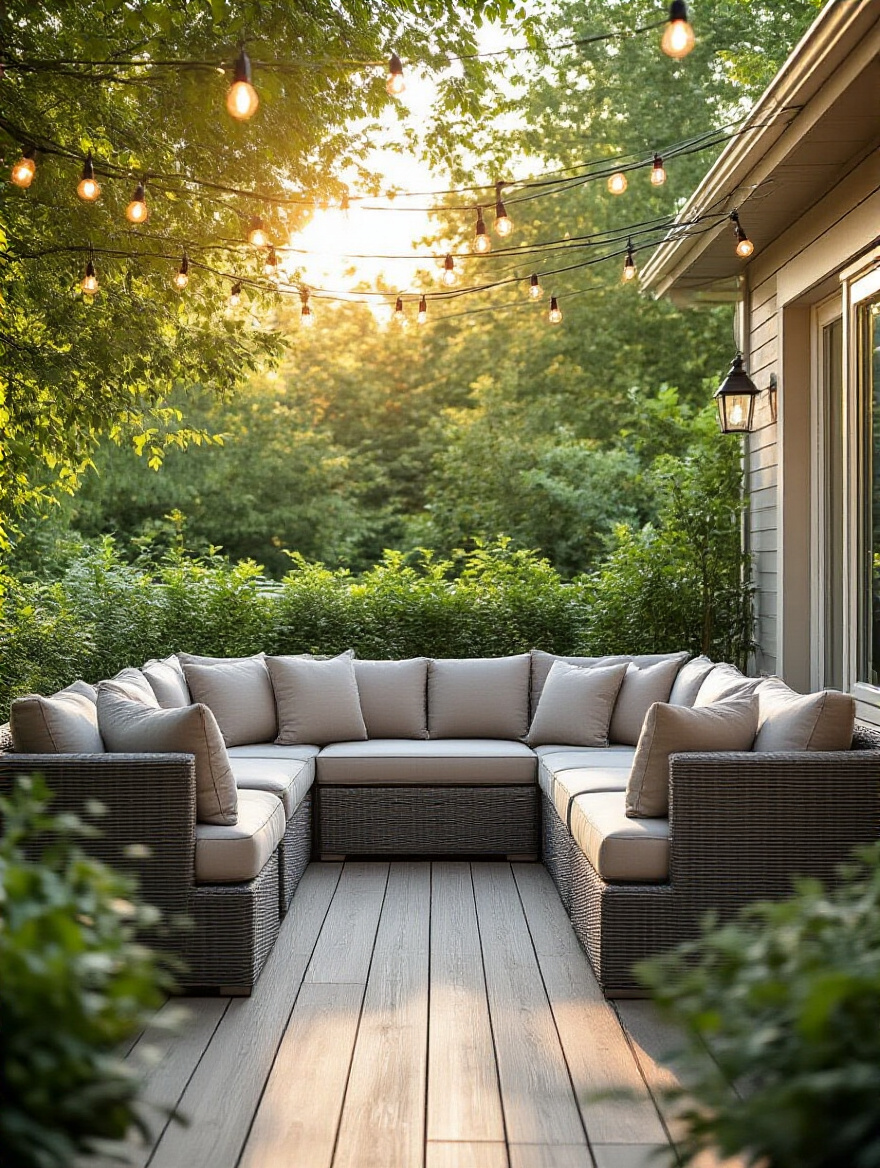
Good outdoor furniture is an investment, but it’s one that pays off in comfort and longevity. Forget the brand names and focus on the materials. You want rust-proof frames like powder-coated aluminum or genuine teak. And for cushions, the fabric is everything. There’s a reason you hear pros talk about Sunbrella all the time. It’s fade-resistant, water-resistant, and easy to clean. Yes, it costs more upfront, but you won’t be replacing your cushions every other year.
And think about actual comfort! So much outdoor furniture is designed to look good in a photo, but it’s brutally uncomfortable to sit in for more than ten minutes. Sit in it before you buy it. Is it deep enough? Is the back at a good angle? You’re creating a space for relaxation, so the furniture had better be relaxing. A few high-quality, truly comfortable pieces are infinitely better than a yard full of cheap stuff you never want to use.
Sustainable Maintenance & Long-Term Care
You did it. You built your oasis. Now, how do you keep it looking great without turning it into a high-maintenance nightmare? The secret is to work smarter, not harder, by embracing a few simple, sustainable practices.
19. Implement Mulching Strategies to Conserve Water and Suppress Weeds
Mulch is the unsung hero of the low-maintenance garden. It’s the single best thing you can do for the health of your soil and the sanity of your back. A good 2-4 inch layer of organic mulch (like shredded bark or wood chips) does three critical things: it dramatically reduces water evaporation from the soil, it smothers most weed seeds before they can sprout, and as it breaks down, it feeds your soil. It means less watering and way, way less weeding.
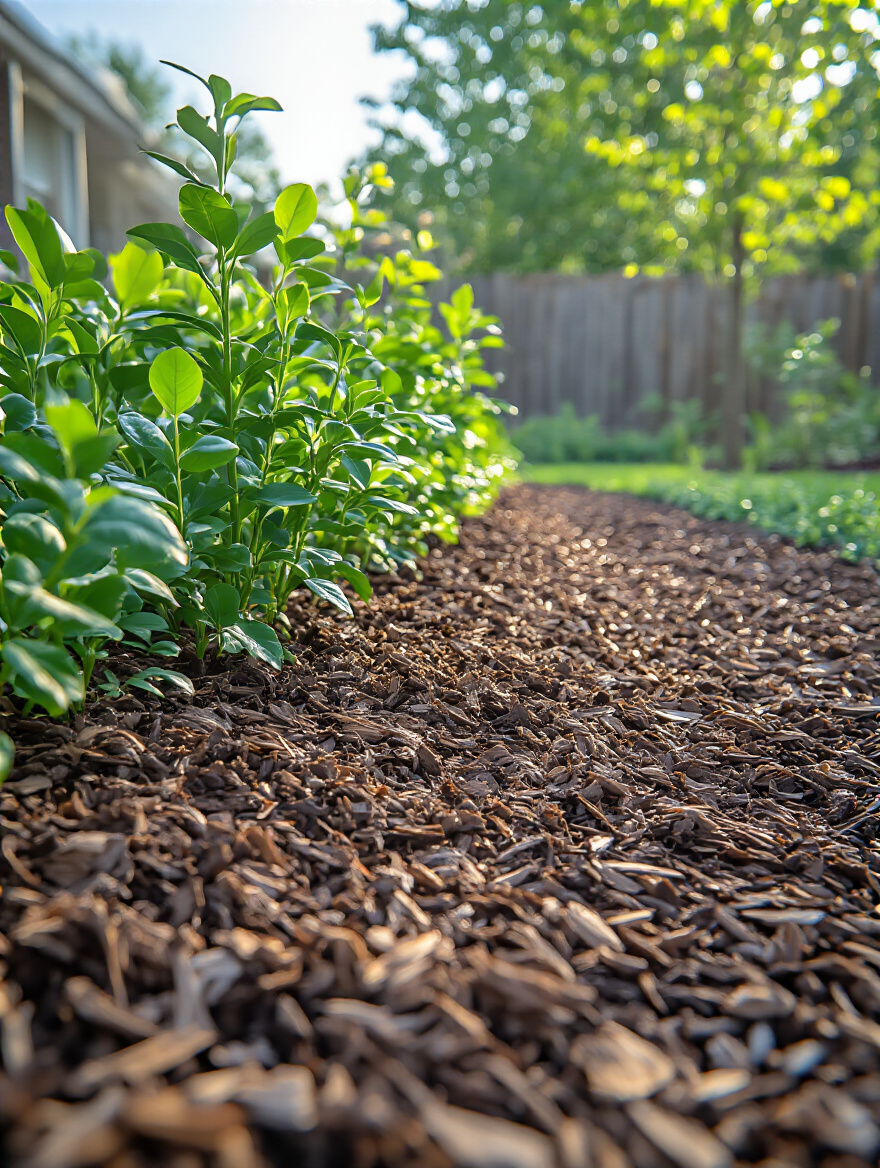
But there is a dark side. Please, I’m begging you, do not “volcano mulch.” That’s when you see a huge mountain of mulch piled up against the trunk of a tree. It’s a plant killer. It traps moisture against the bark, causing it to rot, and provides a perfect home for pests and diseases. Always pull mulch a few inches away from the base of your plants and trees, creating a little “donut hole.”
Here’s my favorite lazy-gardener trick: when starting a new bed over a weedy or grassy area, lay down a layer of plain, tape-free cardboard first. Overlap the edges, wet it down thoroughly, then cover it with 4-6 inches of mulch. The cardboard smothers everything underneath and will slowly decompose, adding organic matter to the soil. It’s an almost foolproof way to create a new, weed-free garden bed.
20. Establish a Composting System for Eco-Friendly Soil Enrichment
Composting sounds complicated and maybe a little… earthy… to some people, but it’s actually incredibly simple. It’s the logical conclusion to your gardening cycle. You’re taking yard waste and kitchen scraps that you would otherwise throw away and turning them into free, nutrient-rich “black gold” that makes your plants healthier and more resilient.
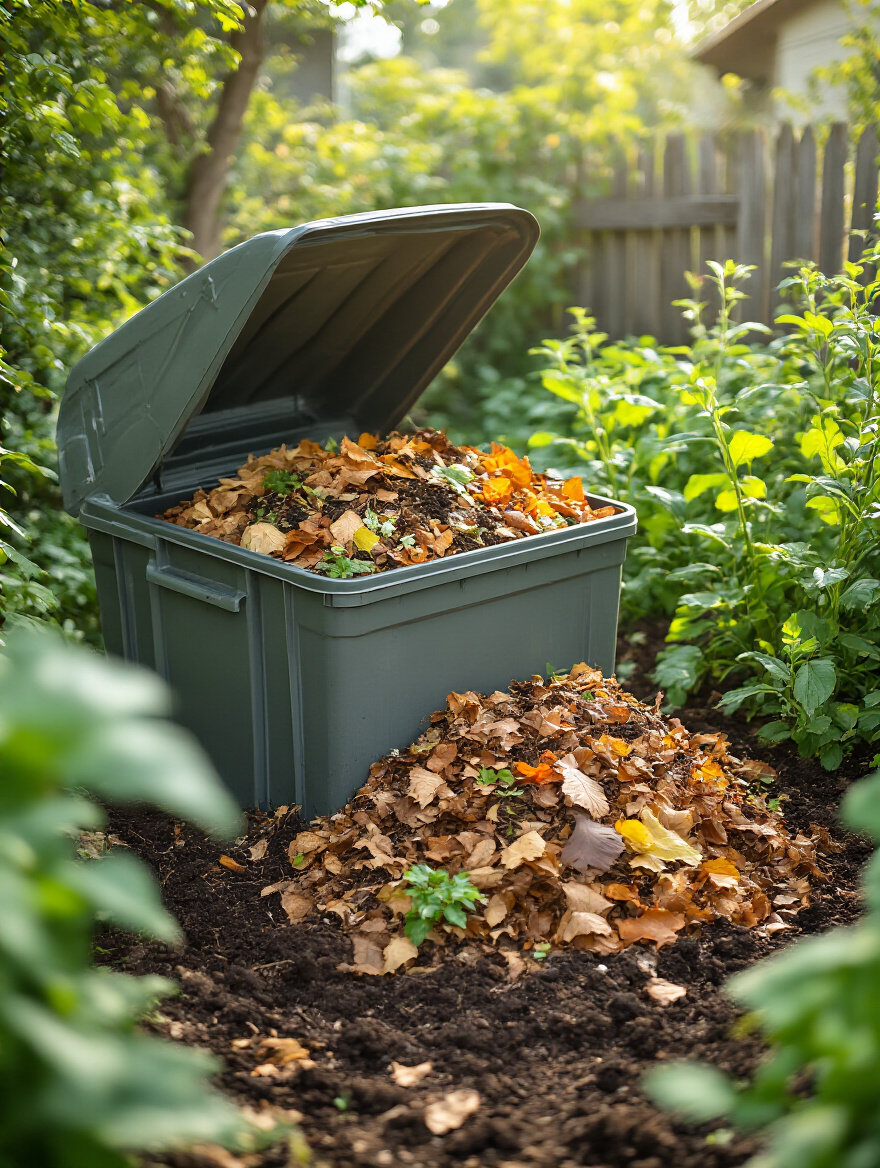
The common misconception is that it has to be a giant, stinky pile in your backyard. Not at all. For most households, a tidy, enclosed bin or a tumbler works perfectly and keeps critters out. The basic recipe is simple: you need a balance of “browns” (carbon-rich stuff like dried leaves, twigs, shredded cardboard) and “greens” (nitrogen-rich stuff like grass clippings and vegetable scraps). Get the ratio right (roughly two parts brown to one part green), keep it about as damp as a wrung-out sponge, and you’ll have beautiful compost.
The easiest shortcut to avoiding a slimy, smelly mess is to keep a small bag or can of “browns” (like shredded paper or wood shavings) right next to your compost bin. Every time you dump in your “green” kitchen scraps, throw in a handful of browns on top. This simple habit keeps the carbon-to-nitrogen ratio in balance and your compost happy.
21. Schedule Seasonal Plant Care to Ensure Healthy Growth and Bloom
The best way to avoid panicked, last-minute gardening chores is to have a simple, proactive plan. Just like your house needs its gutters cleaned in the fall and its AC checked in the spring, your garden has a predictable, seasonal rhythm of needs. Following a basic calendar keeps you ahead of problems and ensures your plants get what they need when they need it.
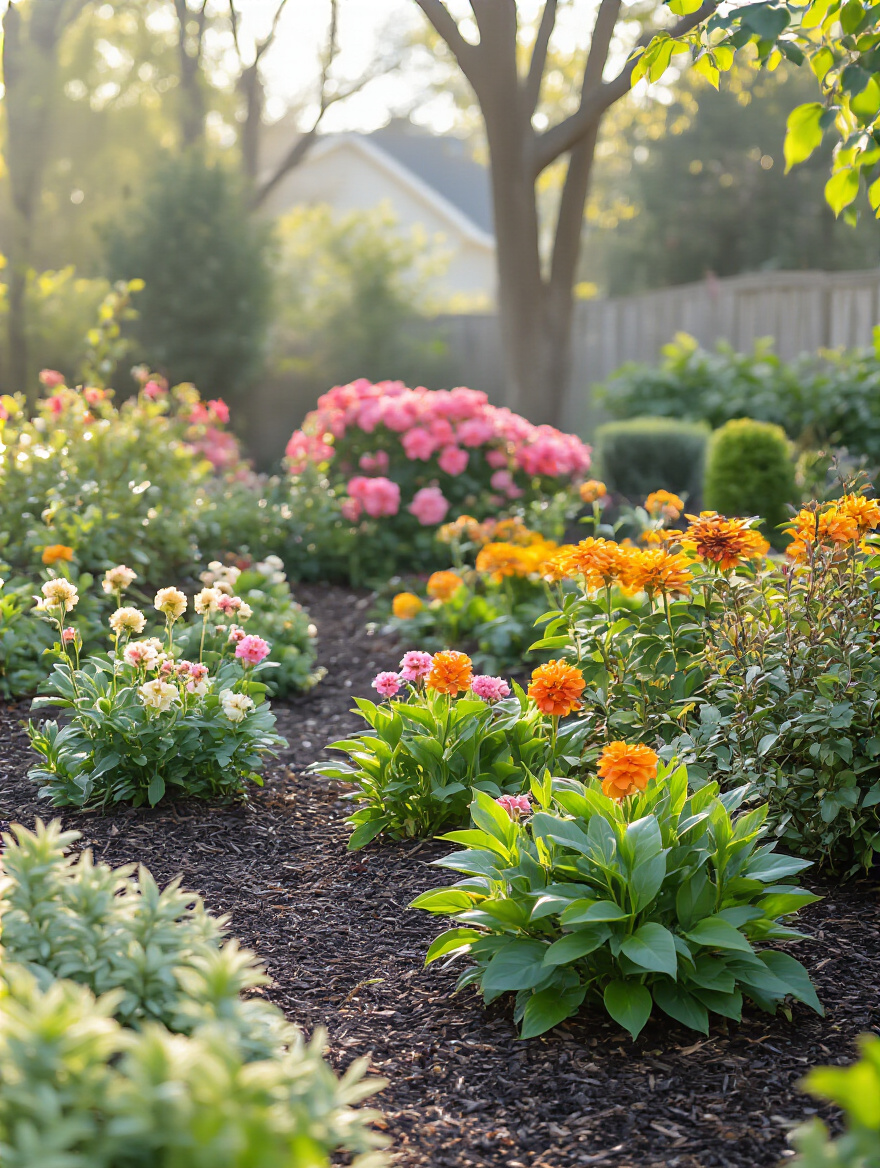
In spring, you’re focused on cleanup and feeding. In summer, it’s about watering and deadheading. In fall, you’re getting things ready for winter and planting bulbs for next spring. In winter, you rest and plan. It doesn’t have to be complicated. My biggest pet peeve is the frantic, “When do I prune my hydrangea?!” question in July after someone has already missed the window. A simple schedule prevents that kind of stress.
But here’s the most important tip: while a calendar is great, you also have to learn to “read” your plants. They’ll tell you what they need. Are the leaves yellowing? Wilting in the morning? A schedule gives you the framework, but observation gives you the details. Pay attention. Your garden will tell you its secrets.
22. Prioritize Integrated Pest Management for Chemical-Free Protection
Your goal is not to kill every single bug in your yard. That’s a losing battle, and it’s the wrong approach anyway. Most of the bugs in your garden are either neutral or beneficial. Integrated Pest Management (IPM) is a smarter, healthier way. It’s about being a detective, not an executioner. It’s about creating a balanced ecosystem where pests don’t get out of control in the first place.
It starts with having healthy, unstressed plants, because pests are drawn to weakness. It means using physical barriers like row covers, or even just hand-picking bigger pests like hornworms off your tomatoes. It means encouraging beneficial insects—like ladybugs that eat aphids—by planting things they love. Broad-spectrum chemical pesticides should be an absolute last resort, because they kill the good guys along with the bad, leaving your plants even more vulnerable in the long run.
The single best tool you can own for IPM is a simple, cheap hand lens. Get a small magnifying glass and actually look at the bugs on your plants. You can’t fight what you can’t identify. You might discover that the “pest” you were about to spray is actually a ladybug larva, one of your best allies in the garden. This is about working with nature, not declaring war on it.
Your Oasis Awaits
Look, I know this is a lot of information. But don’t let it overwhelm you. Remember that feeling of standing at your back door, looking out at a yard full of potential? The journey from that view to an outdoor oasis you love doesn’t happen overnight. It happens one smart decision at a time.
You don’t have to do all 22 of these things tomorrow. Just start with one. Start with #1: go outside and really look at your space. Watch the light. Understand the canvas you’re working with. Or start with #15: create one small, intentional gathering spot with a fire pit and a couple of comfortable chairs. The real magic of a masterful backyard isn’t in a single, grand gesture. It’s in the thoughtful combination of a hundred small, correct choices that create a space that feels personal, functional, and deeply restorative. This isn’t just about increasing your property value. It’s about improving your quality of life.