Picture this: You’re standing in a beautiful kitchen. The countertops are gorgeous, the backsplash is a work of art. Everything feels solid, timeless, and clean. You can literally feel the quality. This space isn’t just stylish; it’s healthy, it’s responsible, and it’s going to last a lifetime. That’s the dream, right?
You’re someone who already cares. You buy organic, you think about your footprint, and you want your home to reflect those values. Yet when it comes to renovation, the world suddenly feels full of marketing buzzwords and “greenwashed” promises. It’s easy to get paralyzed by choice or, worse, accidentally pick something that looks good but is secretly off-gassing chemicals or was ripped out of a mountain halfway across the world unsustainably. The secret isn’t just about finding materials labeled “eco-friendly”; it’s about understanding the entire lifecycle of a product—from its origin to its durability—and making a choice that truly aligns with a healthier planet and a healthier home.
So, let’s cut through the noise. I’m going to walk you through this the way I wish someone had for me years ago. Think of this as your field guide to creating a kitchen that is not only stunning but deeply and authentically sustainable.
Strategic Planning & Foundation Building (Part 1)
Before you even think about looking at samples, we have to lay the groundwork. This is the stage where most people make mistakes that cost them thousands—and undermine their environmental goals—down the road. Getting this part right means your kitchen won’t just look good on day one, but will function beautifully and ethically for decades.
1. Accurately Assess Your Kitchen’s Usage & Durability Demands
Can we talk about why so many “eco” renovations fail? People pick a material because it has a good story—like reclaimed wood or delicate natural stone—but they don’t consider how they actually live. A countertop that gets replaced in five years because it can’t handle your family’s chaos is an environmental disaster, no matter what it’s made of. You’ve just doubled the manufacturing footprint, the transportation emissions, and the landfill waste. The most sustainable choice is always the one that lasts the longest.
So get honest. Are you a “two take-out boxes and a glass of wine” kind of cook, or are you channeling your inner sourdough master with flour and olive oil everywhere? Do you have kids who treat the counter like an art project and a drum set? Write it down. Your beautiful, porous, unsealed marble countertop will weep if it has to endure daily lemon juice and red wine spills. Longevity is sustainability’s best friend. Choose a surface that will gracefully handle the life you actually lead, not the one you see in magazines.
This isn’t about sacrificing beauty; it’s about aligning it with reality. By choosing a material built for your life’s demands, you’re not just getting a better kitchen; you’re making a conscious choice to consume less over the long haul.
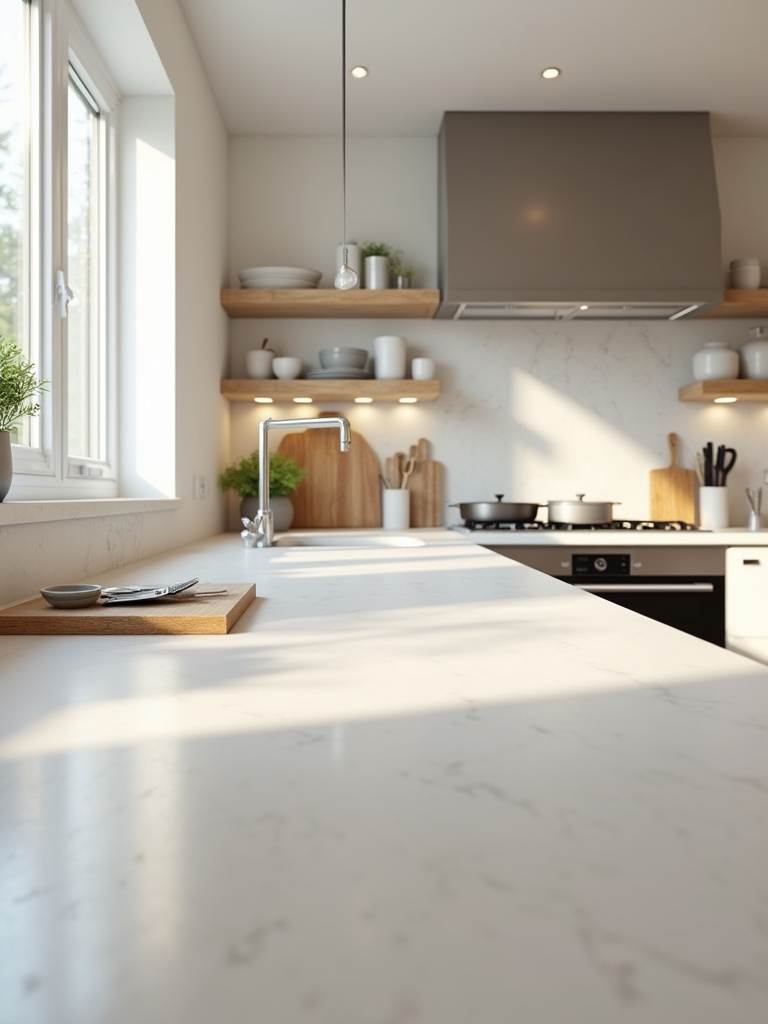
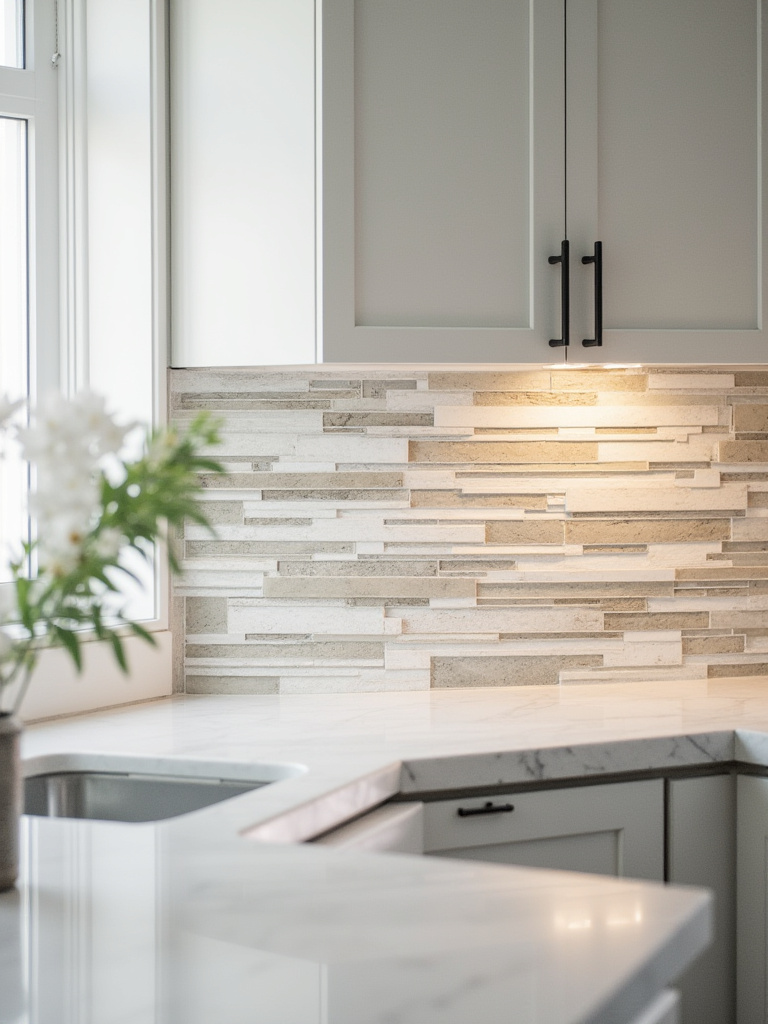
2. Harmonize Your Backsplash and Countertop Aesthetic for Cohesive Design
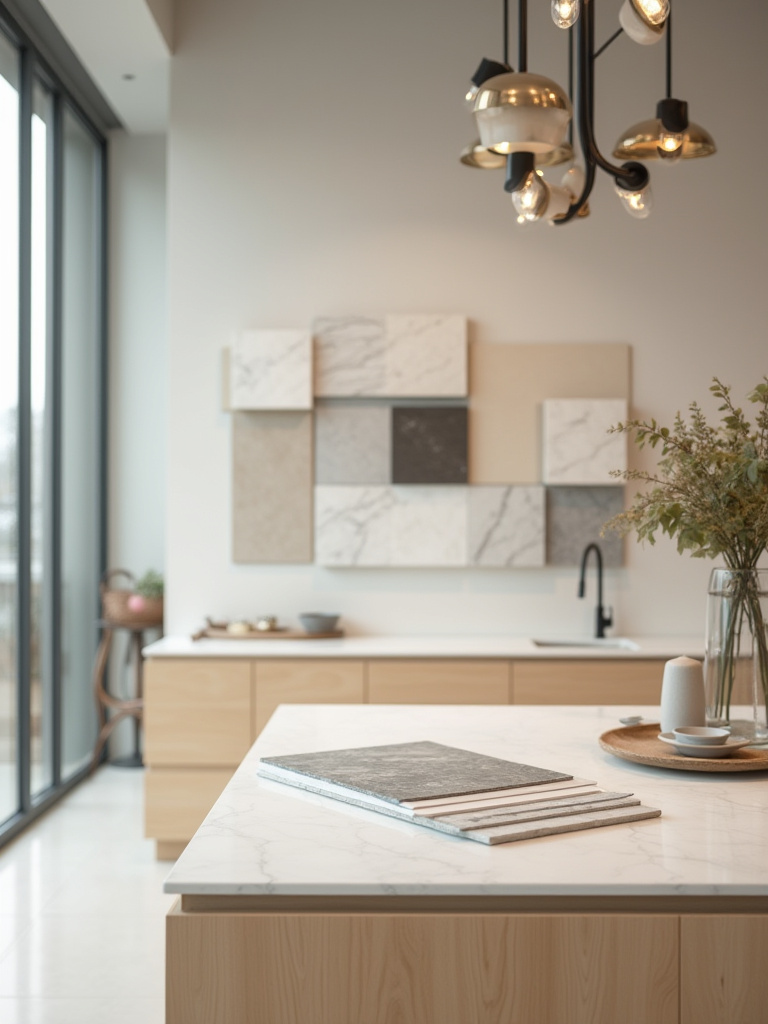
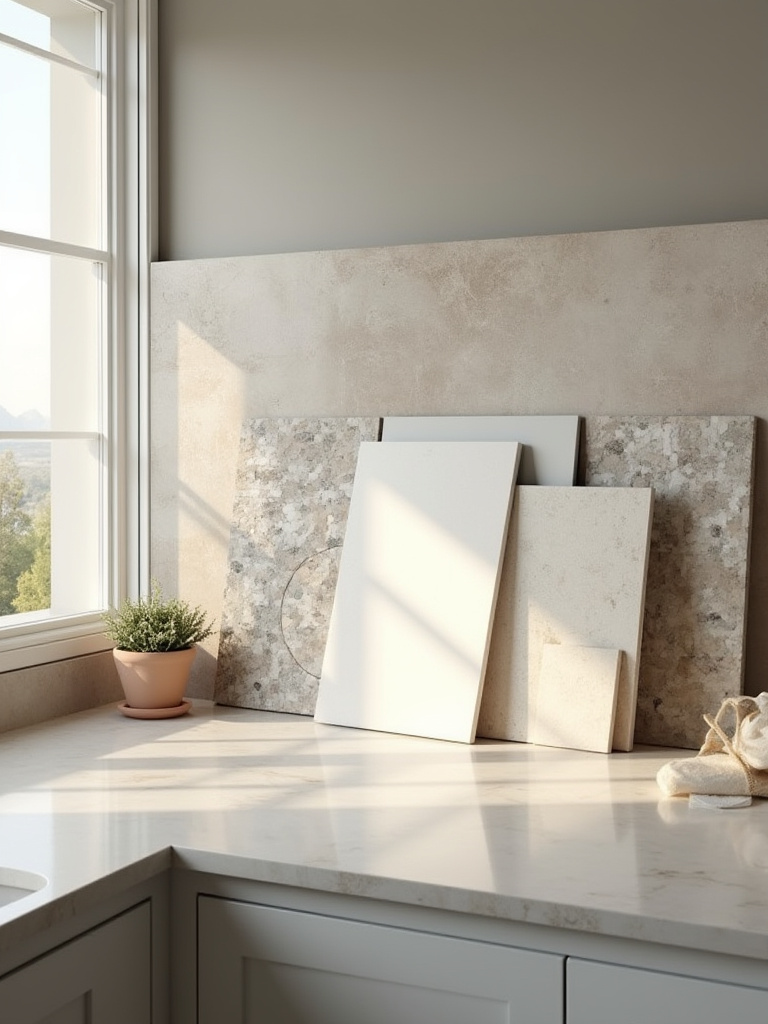
You know that feeling when you walk into a room and it just feels… right? That’s not an accident. It’s harmony. In the kitchen, the relationship between your backsplash and countertop is everything. One of them needs to be the star, and the other is the supporting actor. If you have a countertop with wild, dramatic veining, pair it with a simple, quiet backsplash. If you fall in love with a bold, patterned tile, let it sing by choosing a calm, solid-colored countertop.
I once worked with a client who bought a stunning quartzite slab with deep green and gold rivers running through it, and then, separately, a hand-painted Moroccan Tile backsplash. Both were incredible on their own, but together? It was a visual street fight. They spent thousands on materials that ended up looking chaotic. We had to pivot, using a simple, handcrafted subway tile in a solid color that picked up one of the minor tones from the quartzite. Instantly, the whole room breathed a sigh of relief. The countertop became the art it was meant to be.
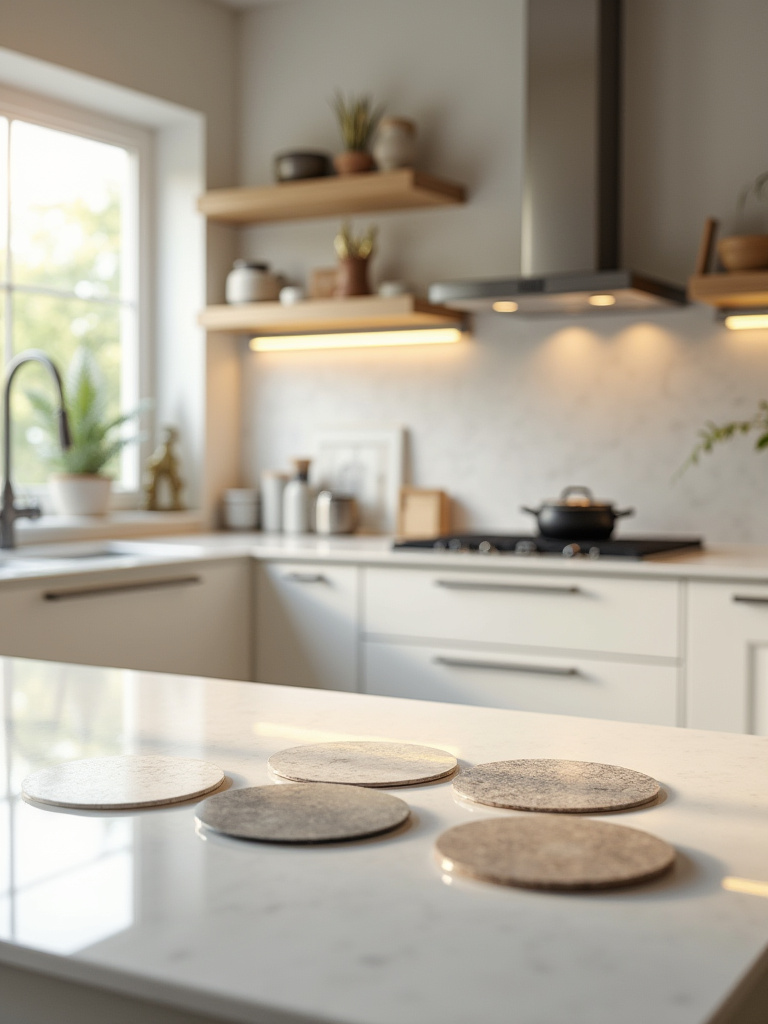
My shortcut here: always bring samples home. And not just tiny 2×2 inch squares. Get the biggest samples you can, place the countertop sample horizontally and the backsplash sample vertically, and look at them throughout the day as the light changes. It’s the only way to see their true relationship.
3. Establish a Realistic Budget by Understanding All Material & Labor Costs
Let’s get real about money. It’s easy to get a quote for a slab of stone and think, “Okay, I can swing that.” But that’s like budgeting for a car and forgetting to include tax, title, and insurance. The real cost is in the details: demolition of your old surfaces, disposal fees (which can be significant for heavy stone), the specific adhesive and grout needed, delivery charges, and, of course, the skilled labor to fabricate and install it.
I learned this the hard way on one of my first personal projects. I budgeted for the countertops and tiles but completely forgot about the cost of preparing the wall behind the stove for a heavy stone slab. The wall wasn’t perfectly flat, which is common in older homes. Suddenly, I had an unexpected $800 bill for prep work. A good rule of thumb is to add a 15-20% contingency fund to your budget. If you don’t use it, great. But if you discover your subfloor needs reinforcing for that beautiful concrete counter, you won’t have to compromise on your vision.
The most eco-conscious budget is an honest one. When you plan for all the real costs upfront, you avoid cutting corners later with cheaper, less-durable, or potentially toxic materials just to finish the project. Get at least three itemized quotes so you can see exactly where the money is going.
4. Optimize Kitchen Workflow & Space Utilization with Countertop Planning
A beautiful kitchen that’s a pain to cook in is a design failure. Your countertop layout is the invisible force that dictates how your kitchen flows. You’ve probably heard of the “work triangle”—the relationship between your sink, stove, and fridge. Your countertop is the highway that connects them. You need clear landing zones on either side of your stove and sink for placing hot pans or washed veggies.
Here’s what everyone gets wrong: they focus on maximizing sheer square footage of countertop space, but they don’t think about where it is. I’ve seen massive kitchens where you have to walk ten feet from the fridge to the nearest available counter space to put your groceries down. It’s maddening. Think in zones: a prep zone with ample space near the sink and trash, a cooking zone with heat-resistant surfaces near the stove, and a clean-up zone.
My shortcut is to use painter’s tape on your floor or existing counters to mock up your new layout. Walk through the motions of making a simple meal, from taking food out of the fridge to chopping it, cooking it, and cleaning up. Where do you run into roadblocks? This simple exercise can reveal major workflow flaws before you spend a single dime.
Strategic Planning & Foundation Building (Part 2)
Okay, you’ve got the big-picture strategy. Now we’re digging into the less glamorous but absolutely essential details that ensure your project is safe, legal, and built to last. Skipping these steps is like building a house on a shaky foundation—it might look fine for a while, but it will eventually cause massive headaches.
5. Prioritize Essential Countertop & Backsplash Performance Features
Beyond color and pattern, materials have resumes. They have skills. A countertop needs to be good at resisting stains, scratches, heat, and impact. A backsplash needs to be easy to clean and able to handle moisture. I always tell my clients to think about their “kitchen Kryptonite.” Is it red wine? Turmeric? A cast iron pan that always gets slammed down a little too hard? Choose a surface that can defend itself.

The corporate-speak will try to sell you on aesthetics, but the real story is in the material science. Non-porous surfaces like quartz or porcelain are heroes for busy families because they won’t harbor bacteria and are incredibly low-maintenance—no sealing required. This isn’t just a convenience; it’s a health benefit. Fewer harsh cleaning chemicals and no need for chemical sealants create better indoor air quality.
“I used to think ‘durable’ was a boring word. Now I see it as the cornerstone of sustainability. A countertop that still looks new in 20 years has an incredibly small environmental footprint compared to one that needed to be replaced twice in that time.”
Ask for the technical specs. What’s the heat tolerance in actual degrees? What’s its scratch resistance rating on the Mohs scale? Don’t let a salesperson just say “it’s durable.” Ask them to prove it.
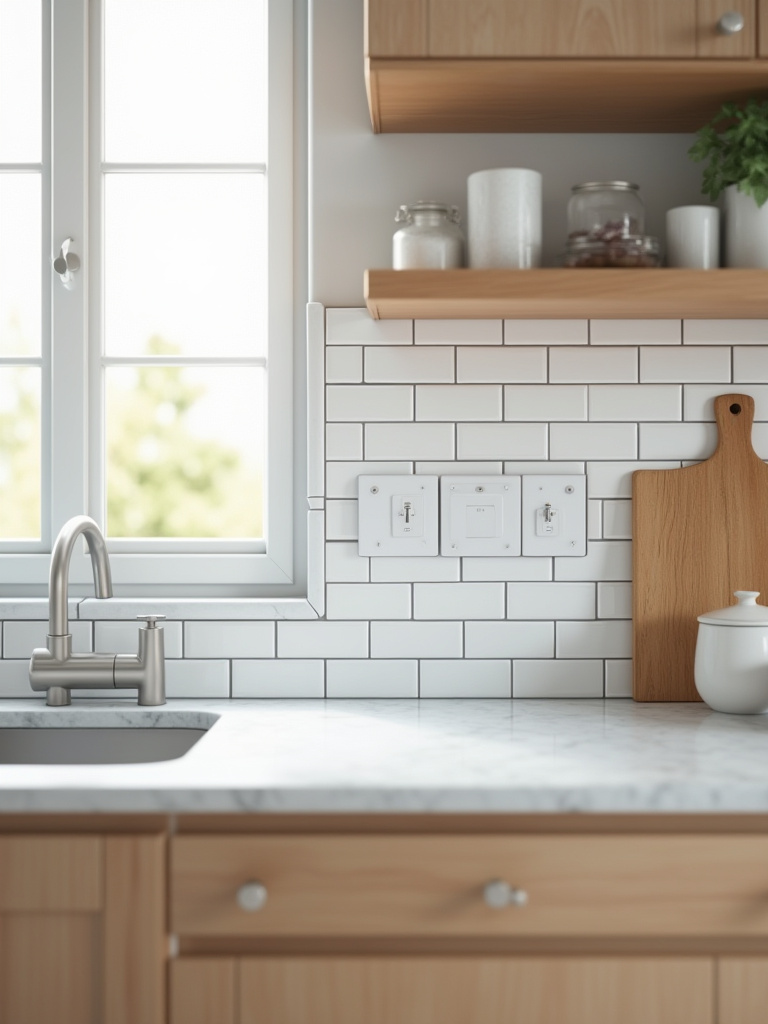
6. Navigate Local Building Codes & Installation Regulations Effectively
This is the part that makes everyone’s eyes glaze over, but listen up. Ignoring building codes isn’t just risky; it can be a financial nightmare. Your project needs to be safe and legal. For countertops and backsplashes, this most often relates to electrical outlets. In most places, code requires GFCI (ground-fault circuit interrupter) outlets within a certain distance of a water source. It also dictates how many outlets you need and where they can be placed.

I once consulted on a flip where the renovator installed a beautiful full-height backsplash but forgot to plan for the outlets. They had two options: cut ugly holes in their brand new, expensive stone slab or fail the electrical inspection. It was a completely avoidable, stressful, and expensive mistake. The code isn’t there to annoy you; it’s there to make sure your house doesn’t catch fire or electrocute you.
Don’t just trust your contractor to know. Pop into your local building department’s website and read the residential kitchen code requirements for yourself. It might take you thirty minutes, but it will empower you to ask the right questions and ensure the job is done correctly, safely, and legally from the start.
Informed Material Selection & Installation Excellence (Part 1)
This is where the vision starts to become a reality. We’re choosing the actual materials and getting into the nitty-gritty of how they come together. The little details here are what separate a decent kitchen from a truly exceptional one.
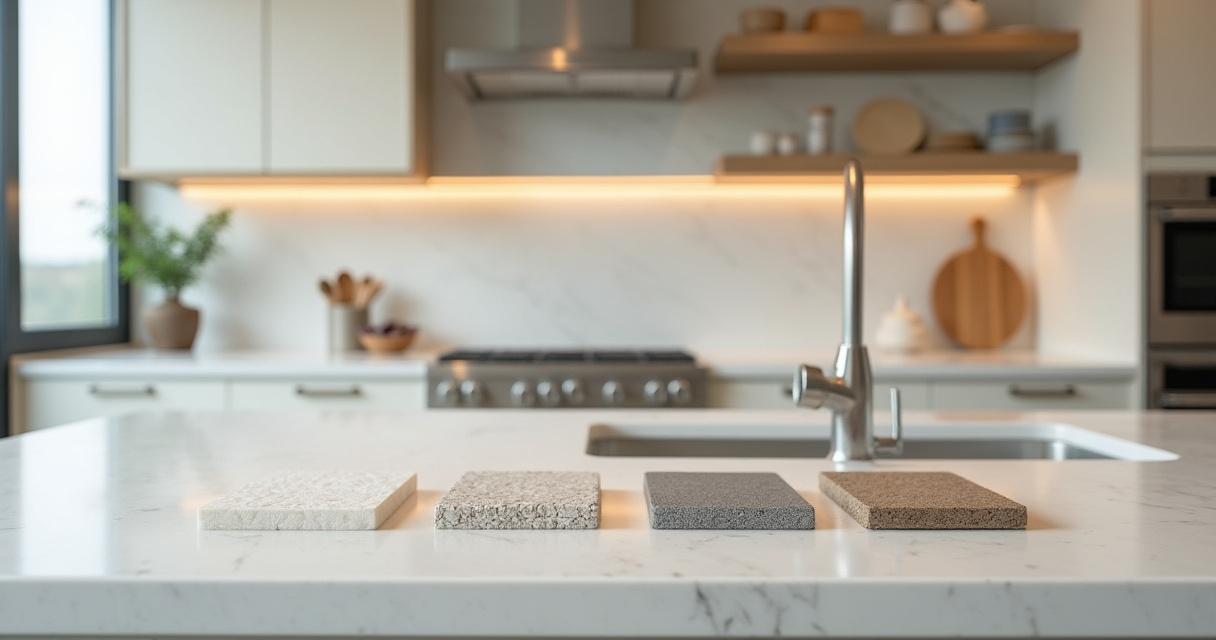
7. Evaluate Top Countertop Materials: Quartz, Granite, Laminate, & More
Alright, let’s talk materials. This is where my environmental science brain and my design heart really come together. Every material has an ecological story.

- Quartz: This is a fantastic performer. It’s engineered, non-porous, and incredibly durable. The BS you hear is that it’s “unnatural.” Well, it’s about 90% crushed quartz (a natural material) held together with a resin binder. The upside is its durability and the fact that it requires zero sealing—no chemicals needed for upkeep. Look for brands that use recycled content and have GREENGUARD certifications, which means they’re tested for low VOC (volatile organic compound) emissions. Better for the planet, better for your indoor air.
- Granite (and other natural stone): Each slab is a unique piece of geological art. The sustainability story here is about proximity. A stone quarried a hundred miles from your home has a much smaller carbon footprint than one shipped from Brazil or Italy. Ask your supplier about the stone’s origin. And please, use a low- or no-VOC sealer to keep it protected without fouling your air.
- Recycled Surfaces: This is where things get exciting! Look at recycled glass countertops (like Vetrazzo), which are stunning and divert massive amounts of waste from landfills. There are also paper composites (like Richlite), which are made from recycled paper and resin. They’re warm, surprisingly durable, and develop a beautiful patina over time. These are the choices that really tell a story of conscious consumption.
- Wood/Butcher Block: Wood is a renewable resource, but the key is to ensure it’s sourced responsibly. Look for the FSC (Forest Stewardship Council) certification. This is the gold standard and ensures the wood comes from a sustainably managed forest. Reclaimed wood from old barns or buildings is an even better option, as it gives beautiful, historic material a second life.
The best material is the one whose performance and environmental story best fits your life and your values. Don’t be afraid to ask suppliers the tough questions about sourcing and chemical content.
8. Explore Diverse Backsplash Tiles: Ceramic, Porcelain, Glass, and Natural Stone
Your backsplash is your kitchen’s exclamation point. It’s a chance to add color, texture, and personality. From a sustainability standpoint, tile is fantastic because it’s incredibly long-lasting.
- Ceramic & Porcelain: These are classic, durable, and come in endless varieties. Look for tiles that are made with recycled content—many manufacturers now incorporate this. A shortcut: choose porcelain for high-moisture or high-grease areas (like behind the stove) because it’s denser and less porous than standard ceramic, making it easier to clean without harsh chemicals.
- Glass Tile: Often made with a high percentage of recycled glass, these tiles are a fantastic eco-choice. They reflect light beautifully, which can make a small kitchen feel brighter and larger, potentially reducing the need for extra electrical lighting. A tip from experience: make sure your installer uses the correct white adhesive, otherwise the color of the adhesive can show through and ruin the look.
- Natural Stone: Just like with countertops, the key here is sourcing. Small stone tiles often use the off-cuts from larger slab projects, which is a great way to reduce waste. Remember that porous stones need sealing to prevent stains, so factor in the use of a good low-VOC sealer.
Whatever you choose, buy about 10-15% extra. This ensures you have matching tiles for any future repairs. It’s far more sustainable to replace one cracked tile than to have to re-do the whole backsplash because you can’t find a match.
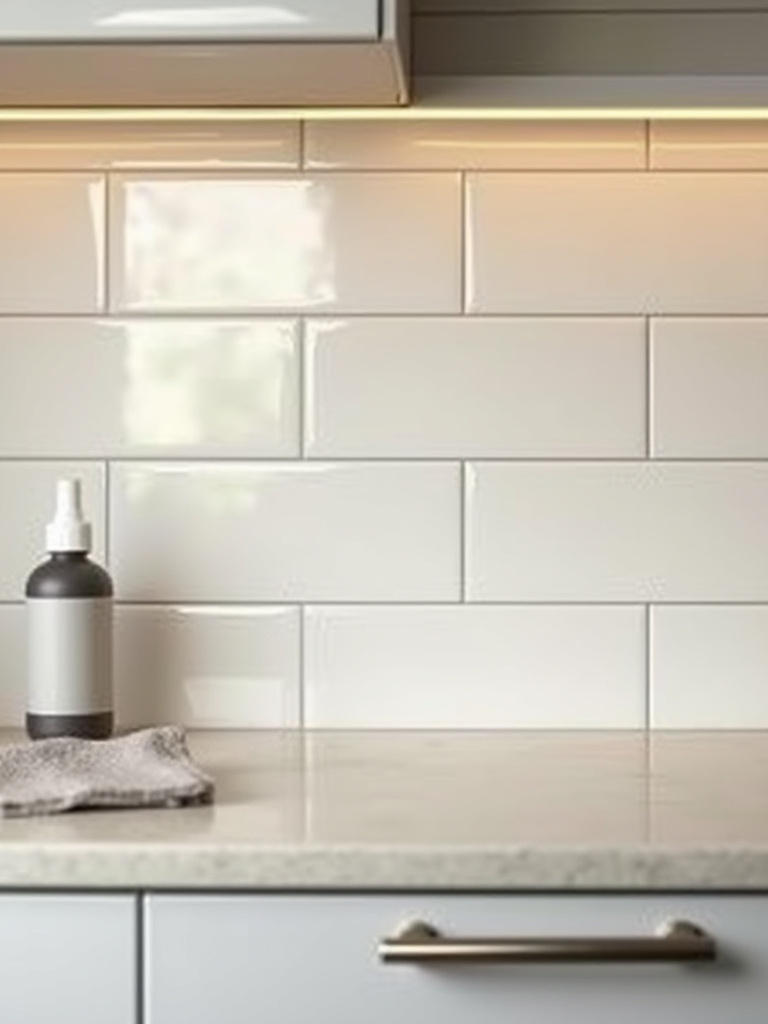
9. Master Grout Color Selection for a Seamless or Striking Backsplash Effect
Grout is the unsung hero of a tile job. Most people see it as an afterthought, but it completely defines the final look. Do you want your tiles to blend into a single, textured surface? Match the grout to the tile color. Do you want to celebrate the shape of each individual tile? Choose a contrasting grout color. A simple white subway tile looks completely different with white grout (classic, seamless) versus dark grey grout (graphic, industrial).
I had a client who was terrified of choosing a dark grout, thinking it would look too busy. We made a small sample board with the exact tiles and both light and dark grout options. Seeing it in person gave them the confidence to go for the contrast, and it ended up being their favorite part of the kitchen. The dark grout made their simple, affordable tiles look incredibly custom and high-end.
Here’s a practical and healthy tip: consider using an epoxy-based or stain-proof grout. Yes, it costs a bit more and is trickier to install, but it’s non-porous. That means no sealing is required, and it resists stains, mold, and mildew. In the long run, it means a cleaner, healthier kitchen with less scrubbing and fewer chemicals.
10. Achieve Near-Invisible Countertop Seams for a Polished Finish
Nothing screams “cheap job” like a thick, obvious, or uneven seam in a countertop. A master installer can make a seam nearly disappear, and it elevates the entire look of the kitchen from good to luxurious. This is especially important for natural stones with lots of movement or patterns.
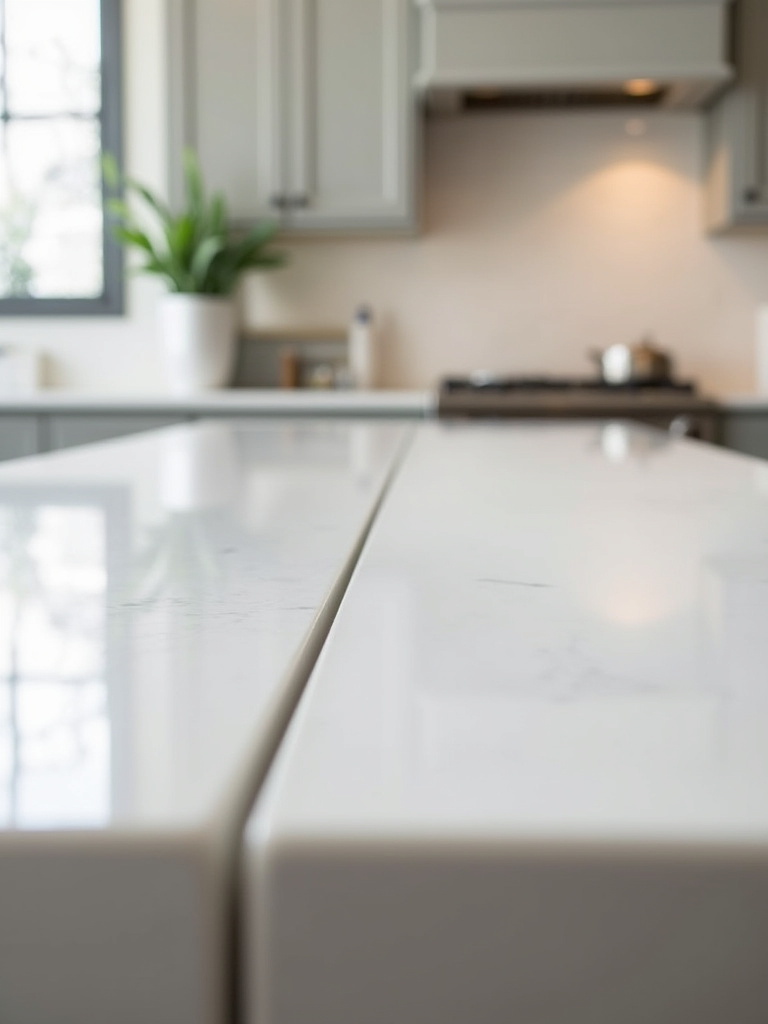
The secret starts way before installation. It starts with the templating. A good fabricator will use digital laser templating to get hyper-precise measurements. They’ll also work with you to plan where the seams will go. You want them in the least conspicuous places possible, like over a cabinet divider or at the center of the sink cutout. I once had a fabricator suggest a layout that would have placed a seam right in the middle of my client’s main prep area. We looked at the slab together and figured out a way to cut it that hid the seam behind the faucet, even though it used slightly more material. It was worth every penny.
When you’re interviewing installers, ask them what kind of tools they use to create seams (the answer you want to hear is “vacuum seam setter”) and ask to see photos of their previous seam work. This isn’t an area to cut corners. A perfect installation will make a mid-range material look high-end, while a bad installation will make an expensive material look cheap.
Informed Material Selection & Installation Excellence (Part 2)
We’re in the home stretch of the technical stuff. This is about making that final, critical decision between doing it yourself and calling in a pro, and understanding why the prep work is just as important as the beautiful material you’ve chosen.
11. Determine When to Hire Professionals vs. Tackling DIY Installation
I love a good DIY project, but I’ve also seen enough DIY disasters to know where to draw the line. Tiling a simple backsplash? If you’re patient, detail-oriented, and willing to learn, you can absolutely do it. The environmental win here is that you develop a new skill and a deeper connection to your home.
But installing a heavy stone or quartz countertop? Please, hire a professional. This is not a job for amateurs. These slabs are incredibly heavy and can easily be cracked or chipped during transport or installation, wasting a huge amount of embodied energy and natural resources. Professionals have the specialized equipment to transport, cut, and seam these materials flawlessly. Messing this up isn’t just a cosmetic issue; it’s a huge waste of money and precious materials.
My rule of thumb: If the material is forgiving and the tools required aren’t highly specialized (like for a ceramic tile backsplash), DIY is a great option. If the material is expensive, heavy, and requires precise fabrication (like a quartz countertop), hiring a vetted professional is the more sustainable and financially sound decision.
12. Prepare Surfaces Meticulously for Optimal Backsplash Adhesion & Durability
You can buy the most beautiful, handcrafted tile in the world, but if you stick it to a dirty, uneven wall, it will fail. Proper surface prep is the most critical and most often skipped step in a backsplash installation. The wall needs to be clean, flat, and primed. Any grease, old wallpaper glue, or dust will compromise the adhesive’s ability to bond.
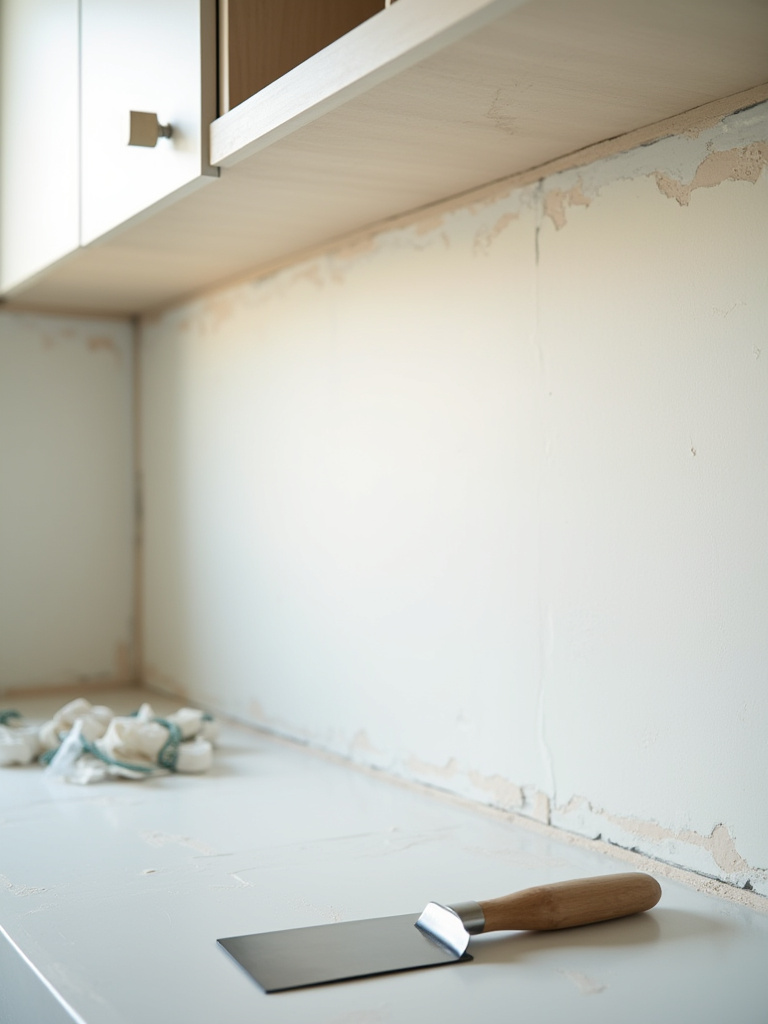
I had a friend who rushed this step. He just tiled right over a painted wall without even cleaning it properly. A year later, half the tiles behind his stove literally just peeled off in a sheet. The heat and steam had caused the paint underneath to let go, and the whole installation came with it. He had to throw out all the tile and start over. It was a complete waste of time, money, and materials.
Take the extra day. Wash the walls with a TSP substitute to get rid of any grime. Patch any holes or uneven spots. And for the love of all that is good, apply a coat of primer. A good primer creates the perfect surface for the tile adhesive to grip onto, ensuring your beautiful backsplash stays on the wall for decades to come.
Elevating Aesthetics & Design Enhancements (Part 1)
Now for the fun part. We’ve built a solid, sustainable foundation, and now we get to add the layers that will make your kitchen truly special. These are the details that elevate a space from functional to fabulous.
13. Integrate Task & Accent lighting to Highlight Your Backsplash Features
Lighting is everything. You could install a backsplash made of solid gold, but if it’s sitting in a dark shadow under your cabinets, no one will ever appreciate it. Good lighting is functional and magical. You need two kinds here: task lighting and accent lighting.
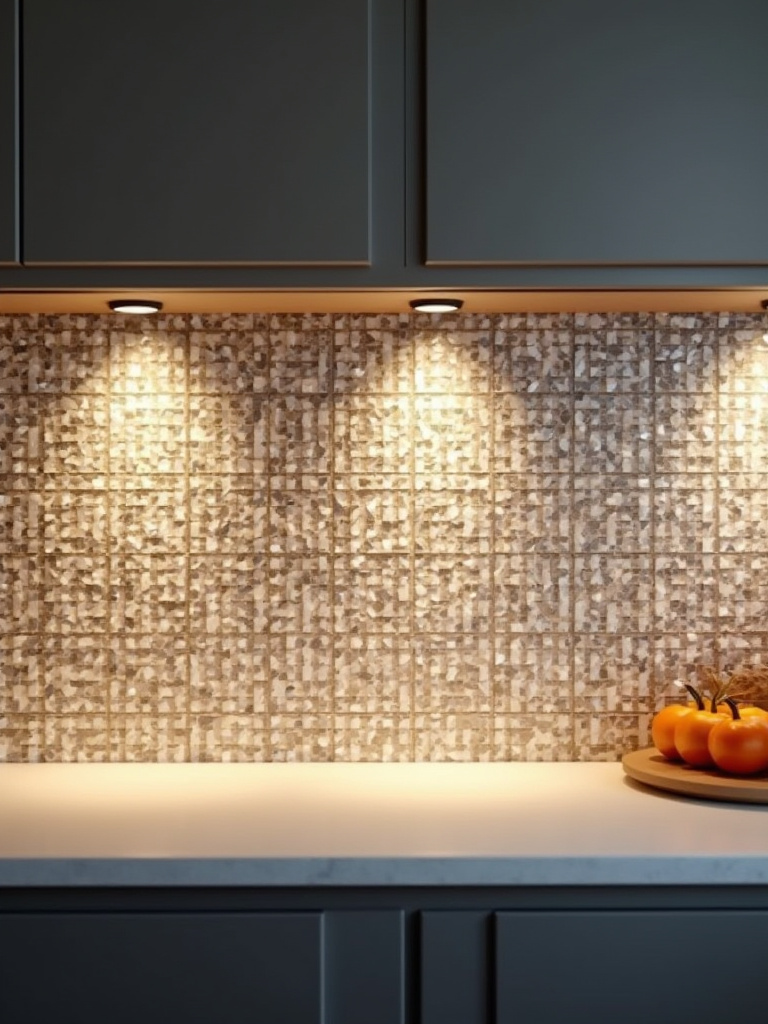
Task lighting, like a sleek LED strip under the cabinets, illuminates your countertop so you can actually see what you’re chopping. From a health and wellness perspective, good task lighting reduces eye strain and makes the kitchen a safer place to work. From a sustainability angle, choose LED lighting. It uses a fraction of the energy of old halogen pucks and lasts for years, meaning less waste in landfills.
Accent lighting is for drama. If you have a special feature, like a mosaic behind the range, a small, focused light can turn it into a true work of art when the main kitchen lights are down. Putting all your lighting on dimmer switches is the ultimate move. It allows you to control the mood and, more importantly, it saves energy. You rarely need your lights at 100% brightness.
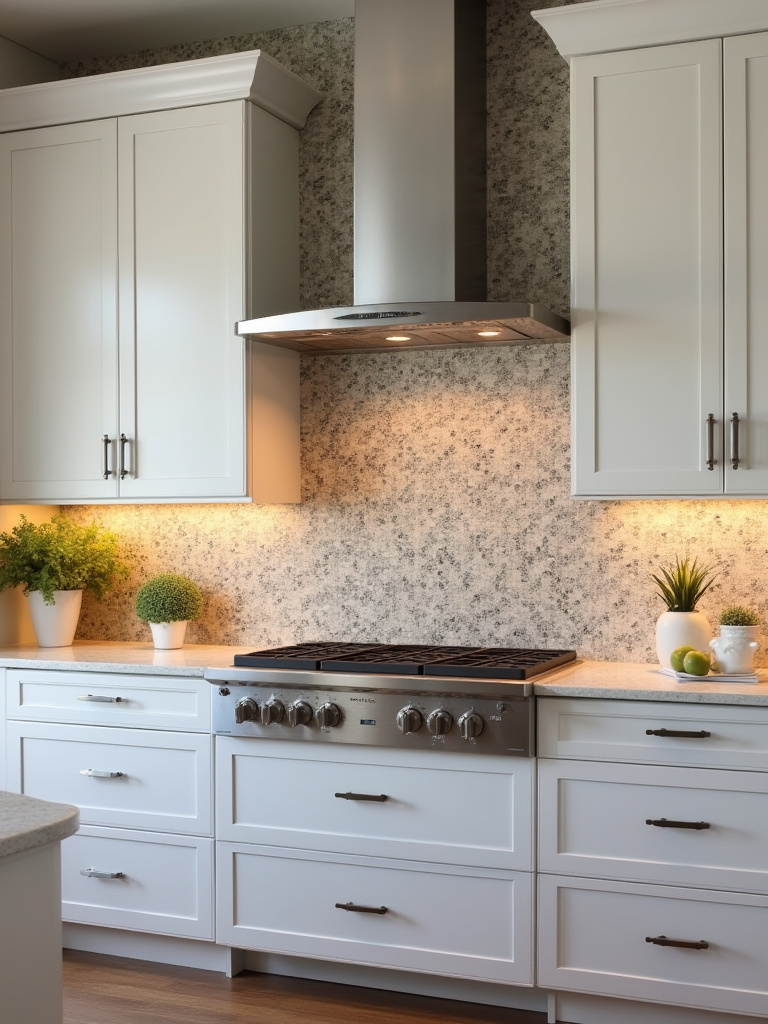
14. Extend Your Backsplash to Create a Dramatic & Unified Kitchen Wall
If you want a high-impact, luxurious look, consider taking your backsplash all the way up to the ceiling. This is one of my favorite design moves. It makes the ceilings feel higher and the entire space feel more custom and intentional. Instead of an awkward painted strip of wall above the tile, you get a seamless, beautiful, and highly durable surface.
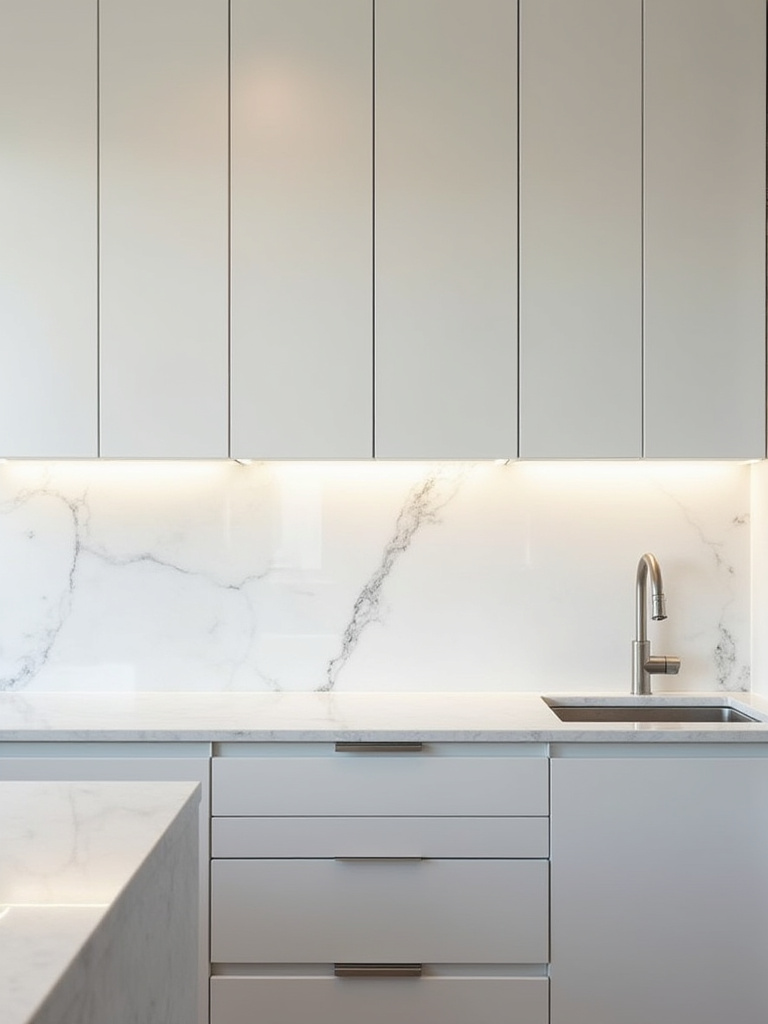
This is a particularly great strategy for smaller kitchens, as it draws the eye upward and creates a sense of spaciousness. From a practical standpoint, it’s also a win. The entire wall becomes a washable surface. No more trying to scrub spaghetti sauce splatters off of painted drywall.
I consulted on a project where the homeowner was hesitant about the cost of tiling the whole wall behind their stove. We calculated the cost of the extra tile versus the long-term benefit of not having to repaint a grease-splattered wall every few years. When they saw it that way—as an investment in long-term durability and lower maintenance—it was an easy decision. The result was absolutely stunning and became the centerpiece of their home.
15. Select Complementary Hardware Finishes to Elevate Countertop Design
Hardware is the jewelry of your kitchen. The finish of your cabinet pulls, knobs, and faucet can either complement your countertop and backsplash or clash with them. This detail is what ties the whole look together. The shortcut here is to pay attention to undertones.
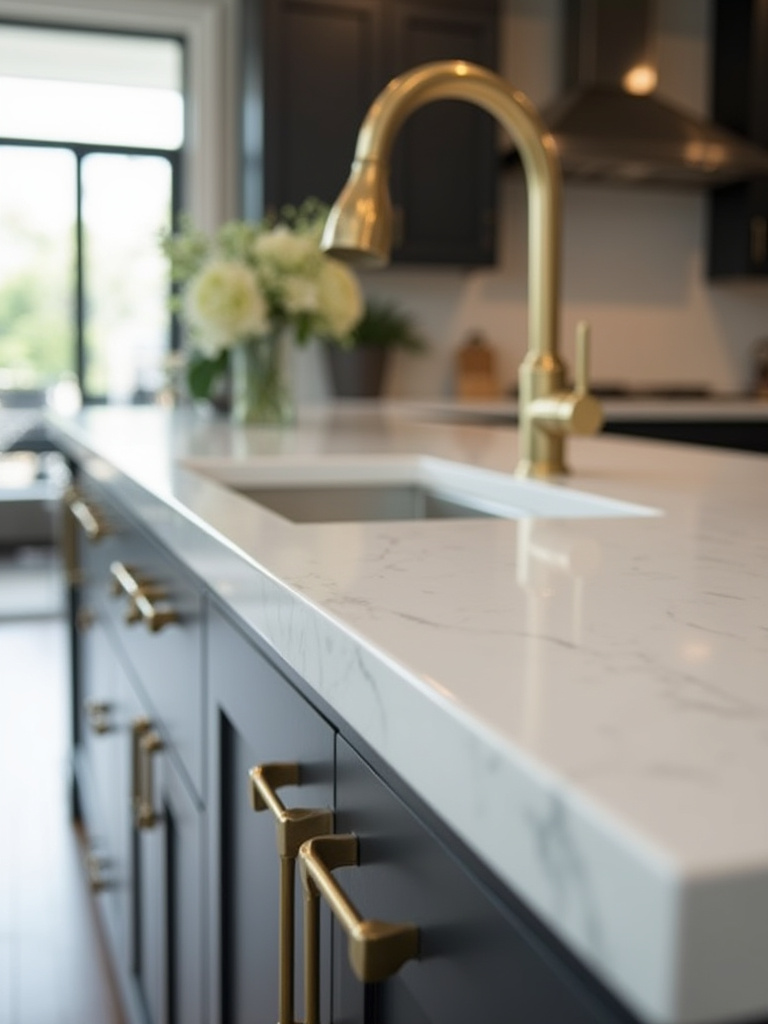
Look closely at your countertop. Does the veining have warm tones (gold, beige, cream) or cool tones (grey, blue, black)? If you have a countertop with warm undertones, hardware in finishes like brushed brass, champagne bronze, or even oil-rubbed bronze will feel harmonious. If you have cool undertones, matte black, polished chrome, or satin nickel will feel cohesive.
And please, choose quality hardware. Cheaply made, plated hardware will start to chip and tarnish in a year or two, and you’ll just end up replacing it. Investing in solid brass or stainless steel hardware means it will last as long as your cabinets and countertops, which is a fundamentally sustainable choice. Less replacement means less waste.
16. Explore Countertop Edge Profiles for Enhanced Style & Functionality
The edge profile—the shape of the edge of your countertop—is a subtle detail that has a big impact on style and durability. A sharp, square edge looks very modern and crisp, but it’s also more prone to chipping, especially in a busy kitchen. A rounded “bullnose” or “half-bullnose” edge is much more forgiving and safer if you have small children who might run into it.

The most common mistake I see is people choosing a very ornate, traditional “Ogee” edge for a sleek, minimalist kitchen. It creates a stylistic disconnect. The edge profile should match the overall design language of your space. An “eased” edge, which is basically a square edge with slightly softened corners, is a timeless, versatile choice that works with almost any style and is quite durable.
Here’s an insider tip: for undermount sinks, ask your fabricator about a “positive reveal” on the edge. This means the countertop edge sits back slightly from the edge of the sink, creating a tiny ledge. It’s much easier to keep clean than a “negative reveal” where the countertop hangs over the sink edge, creating a dark, hard-to-clean crevice where gunk can hide.
Elevating Aesthetics & Design Enhancements (Part 2)
We’re continuing our journey into the design details that make a huge difference. These are the strategies that infuse your kitchen with personality and make it work even harder for you, blending clever function with beautiful form.
17. Design an Eye-Catching Focal Point with Feature Backsplash Tiles
If tiling an entire wall feels like too much, creating a smaller focal point is a fantastic way to add a custom touch without breaking the bank. The area behind the range or the sink is the perfect spot for a “feature panel.” You can use a beautiful mosaic, a uniquely shaped tile laid in a herringbone pattern, or even a single slab of stone that matches your countertop.
This is a great way to use a more expensive, artisanal tile that you love but can’t afford for the whole kitchen. Because you’re only using it in a small area, the splurge is manageable. I had a client who fell in love with these incredibly beautiful, handmade tiles from a local artist. We used simple, affordable subway tile for most of the backsplash and then created a picture-frame inset behind her stove with the art tiles. It cost a fraction of tiling the whole wall, but it gives the entire kitchen a bespoke, curated feel.
This approach is also inherently sustainable because it allows you to support small-scale artisans and makers. It’s a choice that invests in craft and community, not just mass production.
18. Optimize Vertical Space with Clever Integrated Backsplash Storage
The space between your countertop and your upper cabinets is some of the most valuable real estate in your kitchen. Why not make it work harder? Integrated backsplash storage is a game-changer, especially for smaller kitchens. Think of a sleek metal rail system for hanging utensils and spices, a recessed niche for olive oil and salt, or a magnetic knife strip.
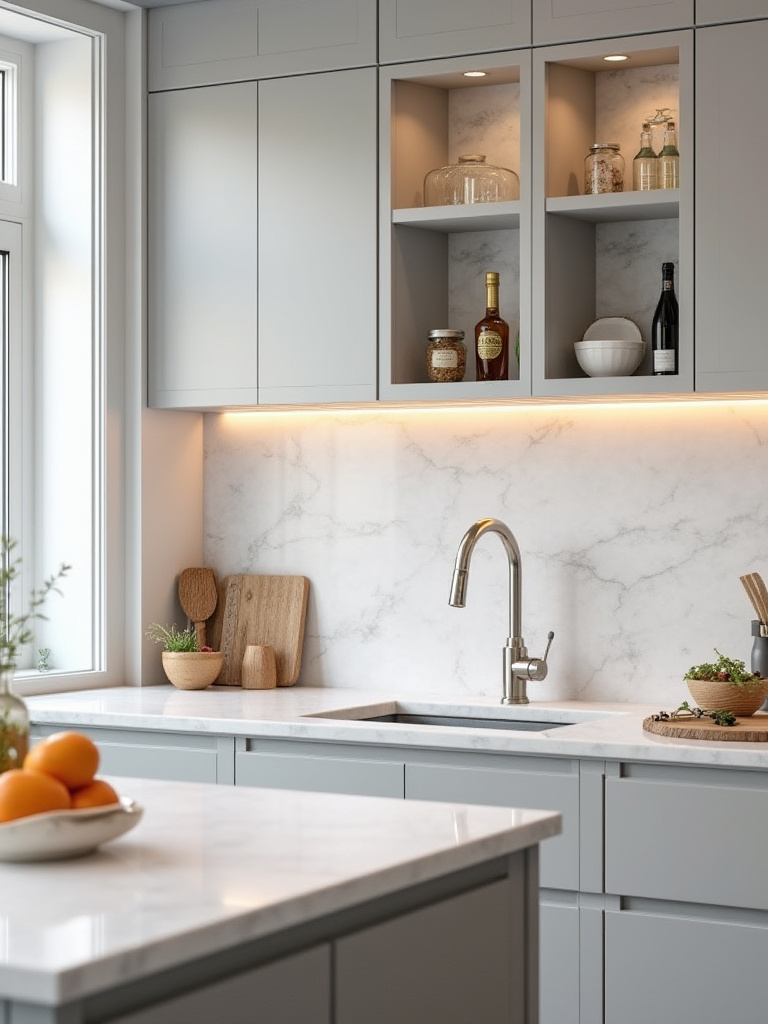
My favorite hack is designing a slightly deeper-than-normal countertop (say, 27 inches instead of the standard 25.5) and building a shallow, 3-inch deep storage ledge along the back. It’s the perfect spot to keep everyday items off your main prep space, keeping your counters beautifully clear and uncluttered. It gives you the function of storage without visually cluttering up your beautiful new backsplash.
Every item you can get off your counter and onto the wall is a win for workflow and sanity. A clear counter is not just aesthetically pleasing; it’s a healthier, easier surface to clean and sanitize.
Long-Term Maintenance & Optimization Strategies
Your beautiful new kitchen is finished! But our work isn’t done. The most sustainable kitchen is one that is cared for and maintained over time. These final steps are all about preserving the beauty and function of your investment for decades to come.
19. Implement Daily Cleaning Routines to Maintain Countertop Luster & Hygiene
The best way to care for your new surfaces is with gentle, consistent cleaning. You don’t need harsh, toxic chemicals. In fact, they can damage your countertops and harm your indoor air quality. For most surfaces, a simple wipe-down with a damp microfiber cloth and a drop of pH-neutral soap is all you need.
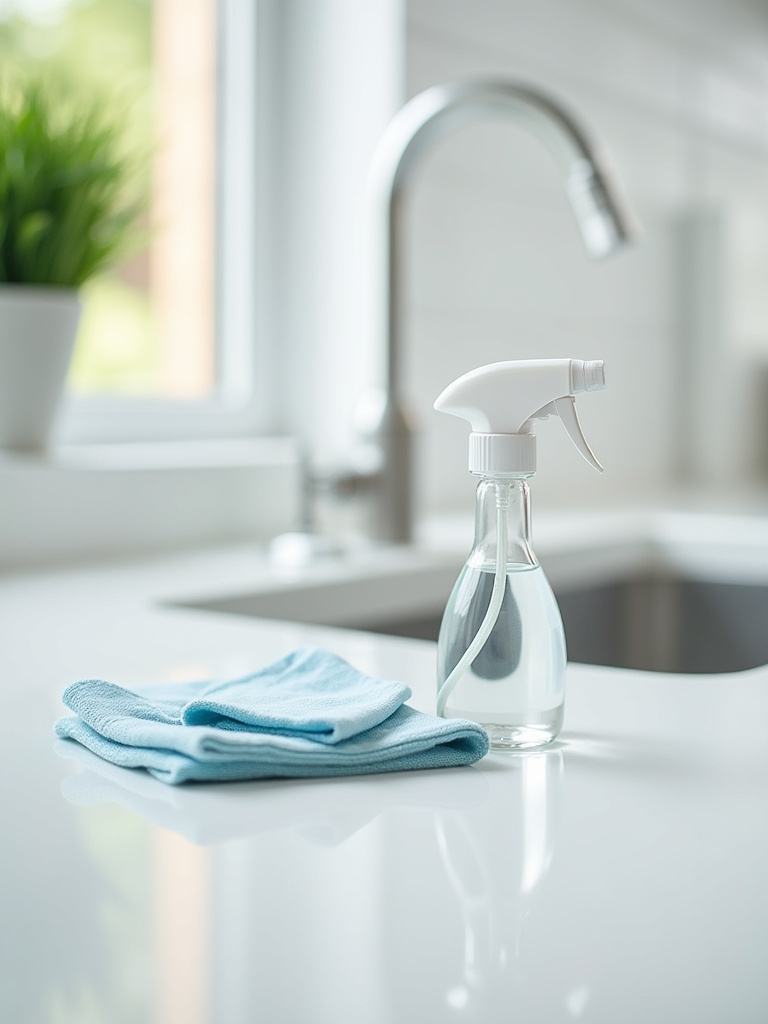
The number one rule is to wipe up spills as soon as they happen, especially anything acidic (lemon juice, vinegar, wine) or staining (turmeric, coffee, beets). On a porous surface like marble, an acid spill can literally eat away at the surface, leaving a dull, etched spot. Being proactive prevents permanent damage.
My confession: I used to be terrible at this. I’d leave a coffee ring on my old laminate counter for hours. But when I invested in a beautiful, light-colored quartz, it trained me to be better. Having a surface you love and have invested in makes you want to take care of it. Think of it as a daily ritual of gratitude for your beautiful, healthy kitchen.
20. Protect Grout Lines Effectively with Sealing to Prevent Stains & Mold
If you chose a traditional cement-based grout, sealing it is non-negotiable. Grout is like a tiny concrete sponge, just waiting to soak up cooking grease, coffee splatters, and moisture, which leads to stains and mildew. A good penetrating sealer creates an invisible shield that repels all that gunk.
Here’s a trick to know when it’s time to reseal: splash a few drops of water onto the grout. If the water beads up like on a freshly waxed car, your sealer is working. If it soaks in and darkens the grout, it’s time to reapply. For a typical kitchen backsplash, you should plan on doing this once a year. It takes about an hour and is one of the highest-return investments of time you can make in your kitchen.
Again, look for a low- or no-VOC sealer. The fumes from traditional sealants can be potent. A high-quality, water-based sealer will do the job beautifully without the toxic off-gassing, keeping your kitchen’s air clean and healthy.
21. Employ Simple Repair Techniques for Minor Backsplash & Countertop Damage
Life happens. A dropped pan might cause a tiny chip in your countertop edge, or a crack might appear in a grout line. The key is to address these small issues immediately before they become big problems. A small chip can be easily filled with a color-matched epoxy repair kit. A cracked grout line can be dug out and re-grouted in minutes.
Ignoring these little things allows moisture and bacteria to get into places they don’t belong. A crack in your grout can let water seep into the wall behind your backsplash, leading to much bigger mold and structural issues. Staying on top of minor repairs is part of the stewardship of your home.
There are fantastic, user-friendly repair kits available for almost every type of surface. Keeping one on hand is like having a first-aid kit for your kitchen. A quick, simple repair not only keeps your surfaces looking pristine but also extends their life, which, as we’ve learned, is the ultimate goal of a sustainable home.
Your Beautiful, Sustainable Kitchen Awaits
And there you have it. You’re no longer just looking at pretty pictures; you’re equipped with the knowledge to make choices that are beautiful, functional, and deeply aligned with your values. You understand that true sustainability isn’t about chasing a label—it’s about choosing quality, prioritizing longevity, and caring for your home in a way that also cares for the planet.
This is your blueprint. Start asking the right questions, gather those big samples, and begin to envision a space that doesn’t just serve your family, but also reflects your commitment to a healthier, more thoughtful way of living. Your dream kitchen isn’t just a place to cook—it’s a statement. It’s a testament to the fact that you don’t have to choose between style and substance, between a beautiful home and a better world.