Can we talk for a moment about why so many “farmhouse” kitchen islands look… well, wrong? It’s a pet peeve of mine. People see a picture online, throw some shiplap on a cabinet box, top it with a thick slab of wood, and call it a day. But that’s not design; that’s caricature. It lacks soul, and frankly, it often lacks basic function. What you end up with is a trendy monolith in the middle of your kitchen that you’ll be tired of in three years.
For centuries, the worktable was the functional, beating heart of a home. It was where bread was kneaded, vegetables were chopped, and conversations happened. A true farmhouse island honors that heritage. What I’m about to share with you isn’t a list of trends from a catalog; these are the enduring principles I’ve used with my most discerning clients to create spaces that feel both authentically timeless and perfectly suited to a modern life. Forget the noise. This is the real story of how you create an island that becomes a beloved, and valuable, piece of your home’s architecture.
Foundational Planning and Design Assessment (Part 1)
Before you even think about countertop materials or leg styles, we have to lay the groundwork. This is the unglamorous part that separates a masterpiece from a costly mistake. Getting this right means your island will feel like it has always belonged in your kitchen; getting it wrong means you’ll be bumping into it for the next decade.
1. Assessing Your Kitchen Layout for Optimal Island Placement and Flow
Let’s be brutally honest about your space. I once walked into a multimillion-dollar home where the kitchen island was a magnificent obstacle. The owners had to perform a little pirouette every time they went from the sink to the refrigerator. It doesn’t matter how beautiful an island is if it kills the flow of the room. You need to map out your primary work triangle—sink, stove, refrigerator—and ensure the island facilitates, not obstructs, that path.
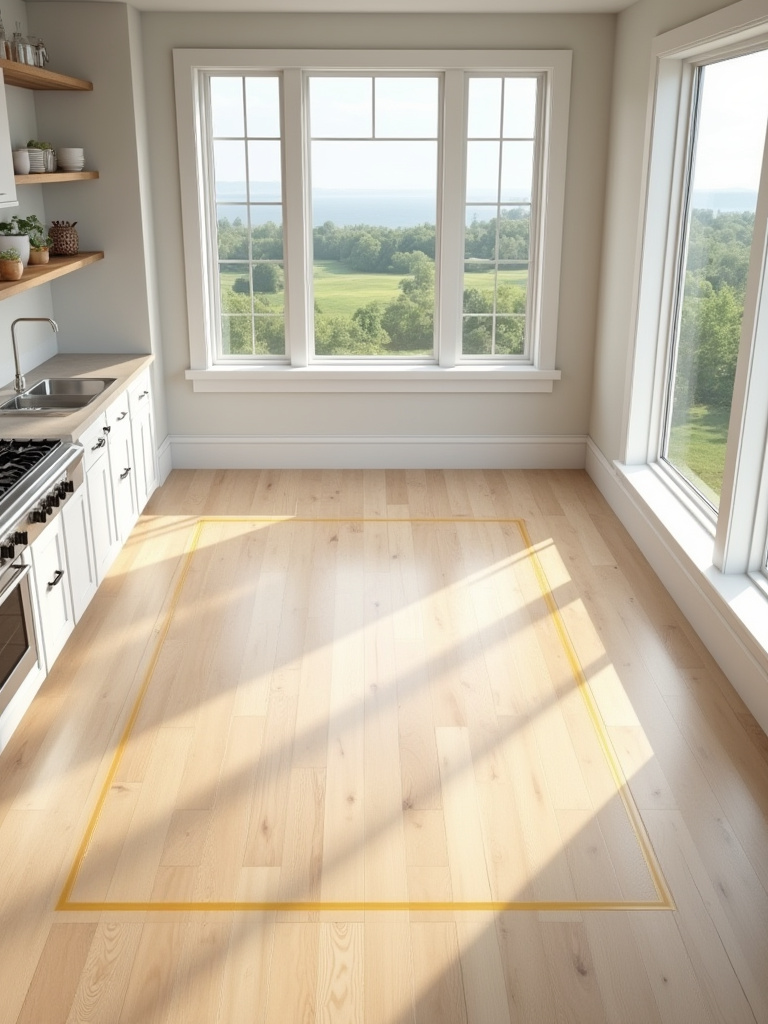
The noise you hear is all about maximizing size. The truth is, it’s about optimizing clearance. The non-negotiable shortcut here is to use painter’s tape. Mark the exact footprint of your proposed island on the floor. Live with it for a few days. Open your oven and dishwasher doors. Walk around it with a laundry basket. The National Kitchen and Bath Association (NKBA) says you need at least 42 inches of clearance. I say for a truly luxurious and functional space, 48 inches is where the magic happens.
With your placement mapped, the next critical question becomes one of proportion.
2. Determining the Ideal Island Dimensions and Scale for Your Space
Everyone says “go big or go home,” but I’ve seen far too many clients go too big and create a kitchen that feels cramped and unbalanced. An island that’s too large suffocates a room; one that’s too small looks like a sad, floating punctuation mark. The scale has to feel intentional and in harmony with the rest of your kitchen’s architecture.
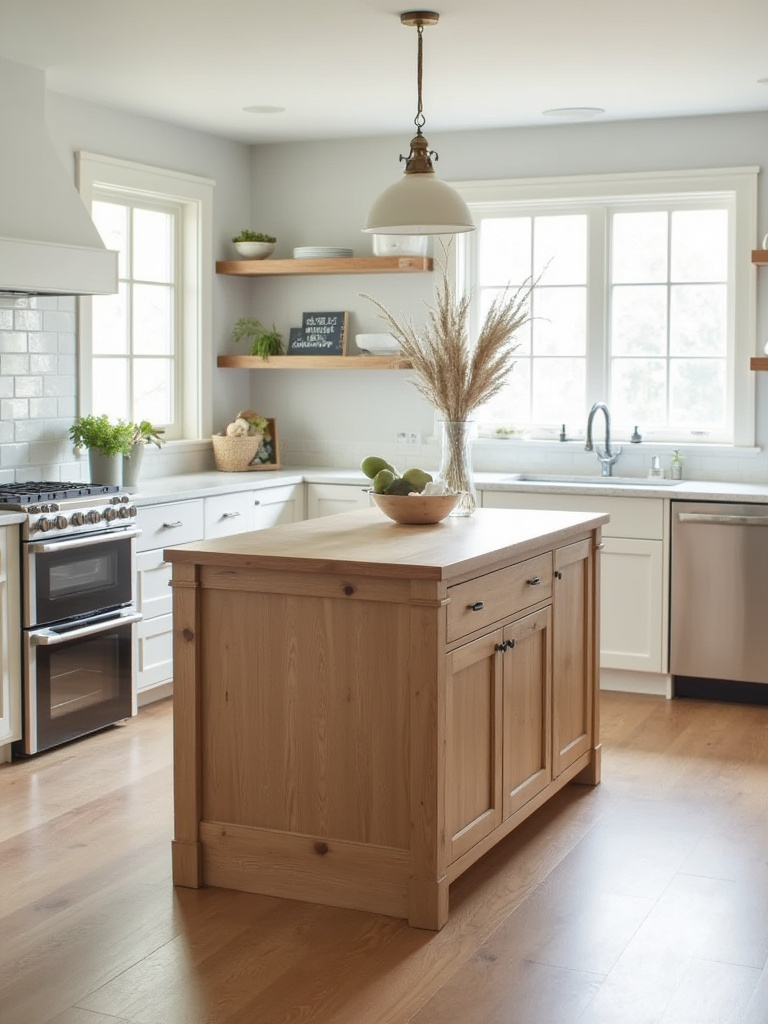
Here’s the shortcut you need: the island should never occupy more than 10% of the kitchen’s total square footage. This isn’t a rigid rule, but it’s a brilliant starting point that prevents the most common sizing mistakes. The real BS is choosing an island from a showroom floor without considering your own ceiling height, cabinet depth, and sightlines. What looks perfect in a 3,000-square-foot showroom can look monstrous in a real home.
Now that we’ve settled on the perfect footprint, we must define its purpose.
3. Defining Primary Island Functions: Prioritizing Seating, Storage, or Prep Areas
You know what people always ask me? “Can my island do everything?” My answer is always, “It can, but it shouldn’t.” Trying to cram seating, a sink, a cooktop, and massive storage into one piece is a recipe for a cluttered, inefficient mess. A truly luxurious design comes from clarity of purpose. You must prioritize. Is this primarily a workspace, a family breakfast spot, or a storage workhorse?
I had a client who was adamant about seating for four, a prep sink, and deep drawers for all her pots. The island would have been the size of a small boat. I learned the hard way that you have to force a choice. I asked her, “What is the one activity that, if this island did it perfectly, would make your life better?” She realized it was having her kids do homework while she prepped dinner. So, we prioritized a large, clean surface with comfortable seating and excellent lighting, keeping storage minimal. That clarity made the final design a triumph.
Once you know what it’s for, you have to figure out how to pay for it.
4. Budgeting Smartly for Your Farmhouse Island: Materials, Installation, and Accessories
Can we discuss why everyone gets budgeting wrong? They fixate on the big-ticket items—the countertop, the cabinetry—and completely forget the rest. The real costs are hidden in the details: the electrical work for that outlet, the plumbing for that prep sink, the delivery fees, the hardware, the cost of a good installer. And don’t forget the contingency. Every single project has an unexpected “oops.”
My shortcut for this is the 40-30-20-10 rule. Allocate 40% of your island budget to cabinetry and the base structure. Dedicate 30% to the countertop. Spend 20% on functional additions like plumbing, electrical, hardware, and seating. And crucially, hold 10% back for that contingency fund. This simple formula forces you to think holistically and prevents those gut-wrenching moments when you realize you can’t afford the bar stools you fell in love with.
This planning directly impacts the technical requirements we must address next.
Foundational Planning and Design Assessment (Part 2)
We’re moving from the abstract floor plan into the tangible, hard-working elements that make an island truly functional. This is where we bring power, water, and authentic character into the design, ensuring the island works as beautifully as it looks.
5. Integrating Essential Electrical Outlets and Plumbing Requirements
Here’s a confession: early in my career, I designed a stunning island for a client. It was perfect. A week after installation, she called me. “Jane, where do I plug in my mixer?” I had completely forgotten to plan for electrical outlets. It was a costly and embarrassing lesson in the absolute necessity of planning for modern life, even in a classic design. An island without power is just a table.

The secret is to think about how you’ll use it and integrate power subtly. You don’t want ugly outlets interrupting a beautiful waterfall edge or custom paneling. Consider pop-up outlets that sit flush with the countertop, or install outlets on the side panels, tucked just under the countertop overhang where they are less visible. If you’re adding a sink, the plumbing isn’t an afterthought—it dictates the entire base cabinet design from day one. Get your plumber and electrician involved before you even sign off on the cabinet drawings.
With the modern necessities planned, we can focus on the soul of the piece.
6. Choosing Authentic Farmhouse Style Elements and Distressing Techniques
Frankly, I’m exhausted by the “distressing” you see in big-box stores. It’s always so uniform, so predictable, as if the wood just had a bad day. True farmhouse character isn’t about random dings and scratches; it’s about evoking a sense of history. It’s about wear that looks earned. The distressing should appear where a hand would naturally rest, where chairs would bump, where a drawer has been pulled open a thousand times.
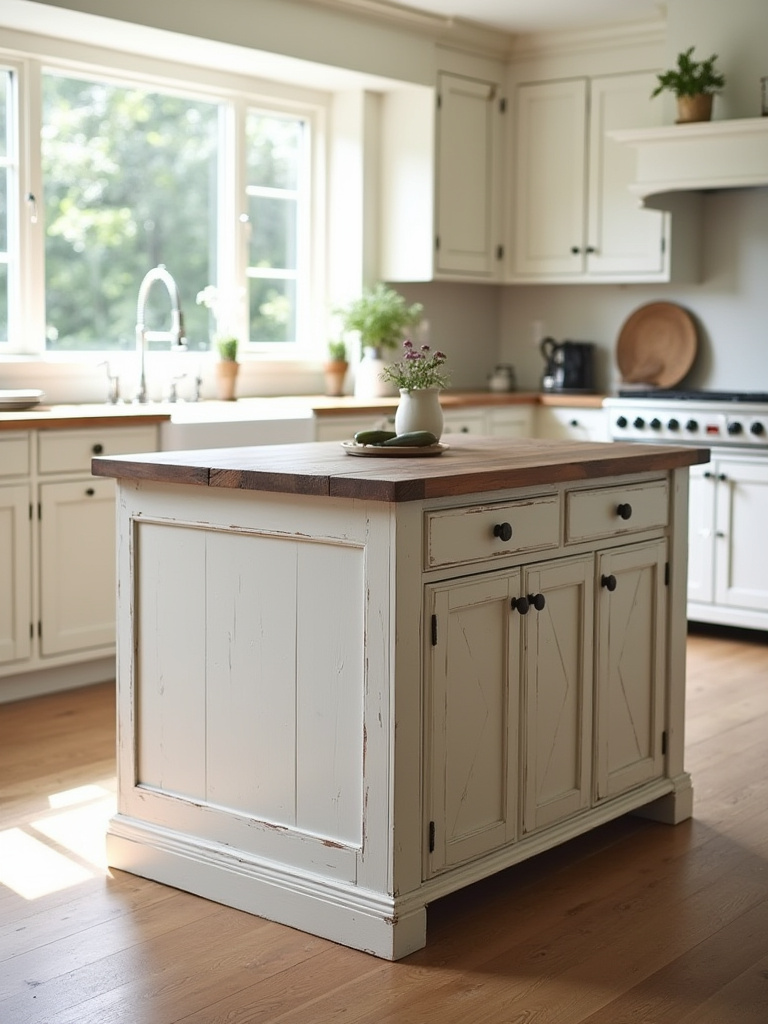
The key is restraint. Instead of beating a new piece of wood with chains (please, don’t do this), start with high-quality wood that already has character. Then, focus on the finish. A multi-layered milk paint finish that is hand-sanded at the edges will look infinitely more authentic than a sprayed-on faux finish. A hand-applied wax will create a soft, lustrous patina that gets better with age. The goal isn’t to make it look damaged; it’s to make it look loved.
This principle of authenticity carries directly into our choice of materials.
Material Selection, Customization, and Core Features (Part 1)
This is where the investment conversation gets real. The materials you choose will define the island’s presence, durability, and how it feels to the touch every single day. These aren’t just aesthetic choices; they are long-term commitments to quality and livability.
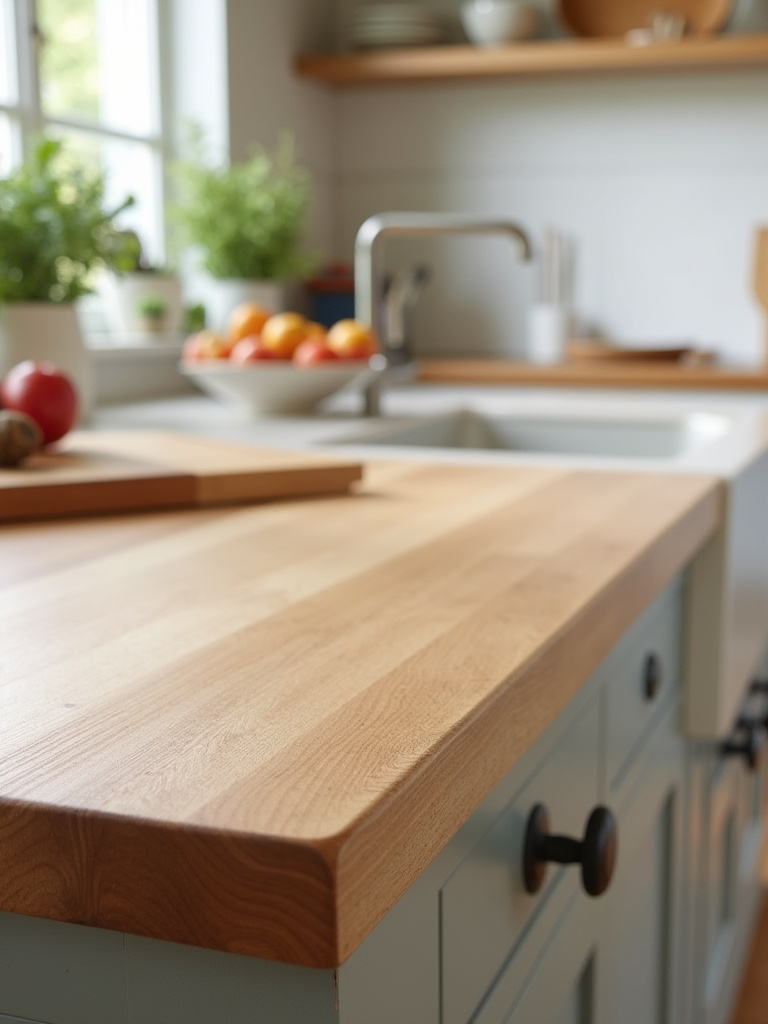
7. Selecting Durable and Aesthetically Pleasing Countertop Materials
You know what people always ask? “Should I get marble?” I tell them the truth: marble is a beautiful, romantic, and high-maintenance partner. It will etch if you look at it with a lemon in your hand. If you are someone who can embrace that patina as part of its story, wonderful. If you are someone who will see every tiny water mark as a flaw, then for the love of all that is holy, do not get marble.

The smart money is often on materials that give you the classic look without the heartache. A high-quality quartz can mimic the veining of Calacatta marble with zero porosity, making it nearly indestructible. Soapstone is another favorite of mine; it’s naturally non-porous and develops a gorgeous dark patina over time. And of course, a thick slab of butcher block adds unparalleled warmth, but you must commit to oiling it like it’s a member of the family. The real luxury is choosing the material that fits your life, not the other way around.
That surface needs to be supported by a structure with just as much character.
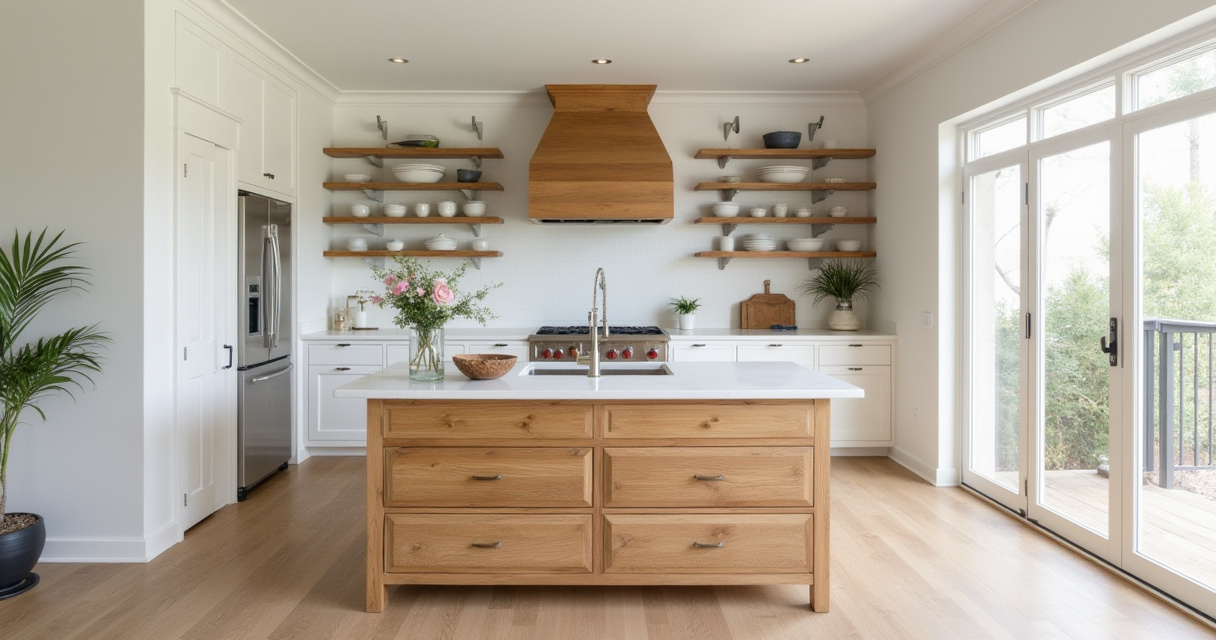
8. Exploring Smart Built-In Storage Solutions: Drawers, Shelves, and Cabinetry
The biggest lie in kitchen design is that you need more space. What you actually need is more intelligent space. An island is the prime opportunity to get clever. The default is often a bank of standard cabinets, but that’s a wasted opportunity. Think beyond the basics. Deep drawers for pots and pans are ergonomically superior to cavernous lower cabinets where everything gets lost in the back.
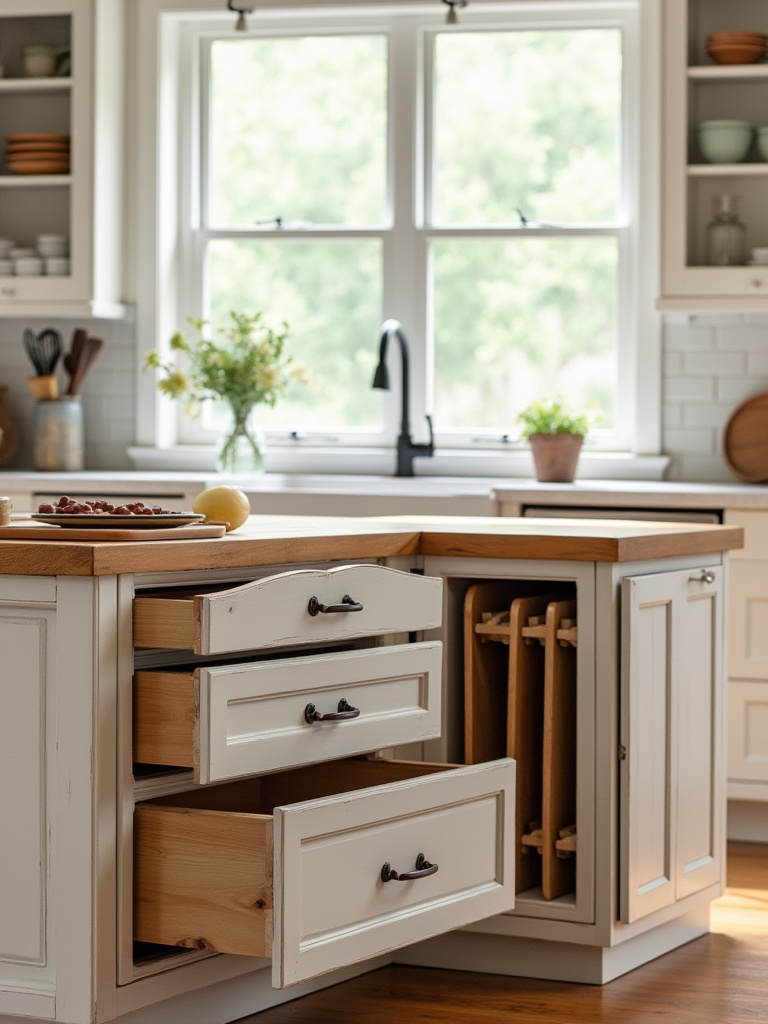
Here’s the shortcut I wish I’d known earlier: customize the interior of one cabinet specifically for your most awkward items. A client of mine was a passionate baker, and her stand mixer was always cluttering the counter. We designed an island cabinet with a heavy-duty appliance lift. It brought the mixer up to counter height effortlessly and then hid it away completely. We also integrated vertical dividers for her baking sheets and trays. It wasn’t about adding more storage; it was about making every square inch work smarter.
Next, we must decide if this smart storage will stay put or have the freedom to move.
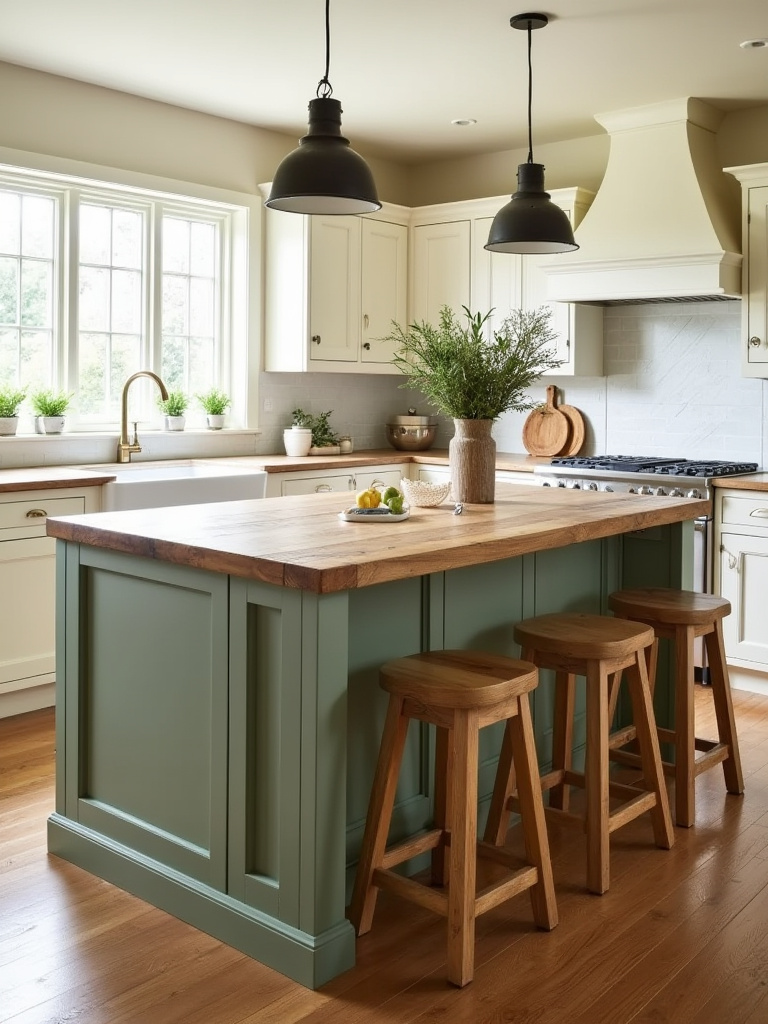
9. Deciding Between a Stationary or Mobile Island Design for Versatility
Everyone says a built-in island is the only way to add real value. That’s just not true. For smaller kitchens or for people who entertain frequently, a mobile island on high-quality locking casters can be a far more intelligent investment. It offers the flexibility to open up the floor for a party or to move your prep station to a different area of the kitchen as needed.
The BS is that mobile means flimsy. I once sourced a vintage 8-foot-long French baker’s table for a client with an open-concept loft. We had it professionally fitted with discreet, industrial-grade locking wheels. It was the centerpiece of her kitchen, providing massive workspace and unparalleled character, but she could also roll it to the side to create a dance floor. A stationary island could never have offered that kind of dual-purpose luxury.
The form of that island, whether mobile or stationary, is defined by its foundation.
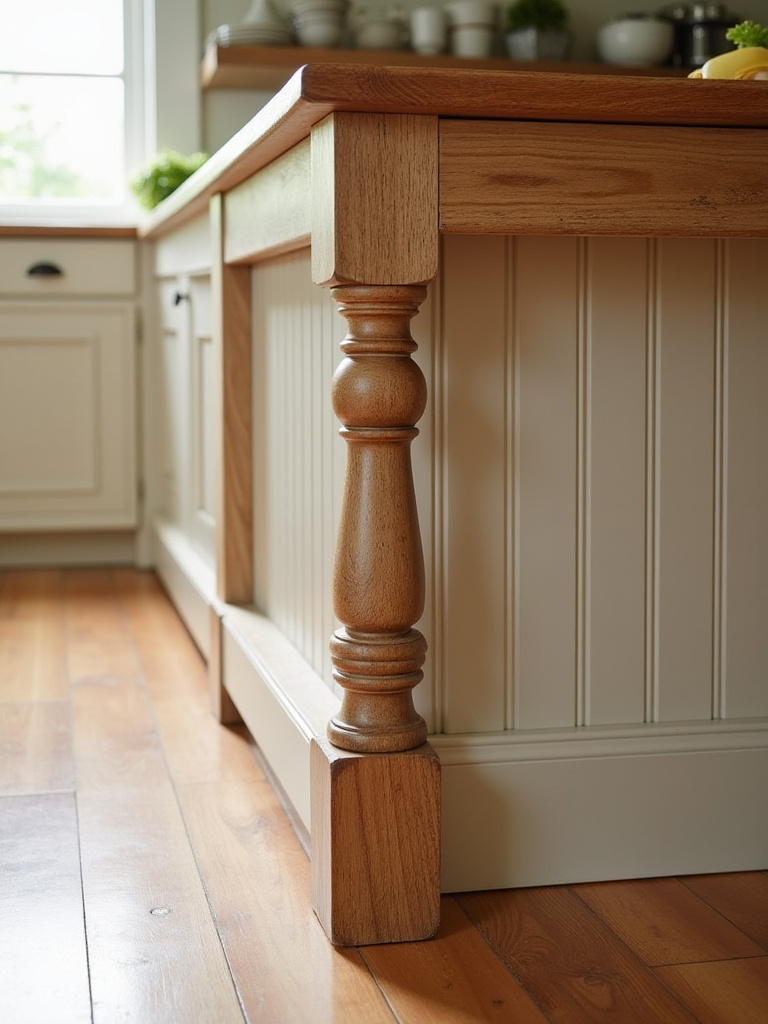
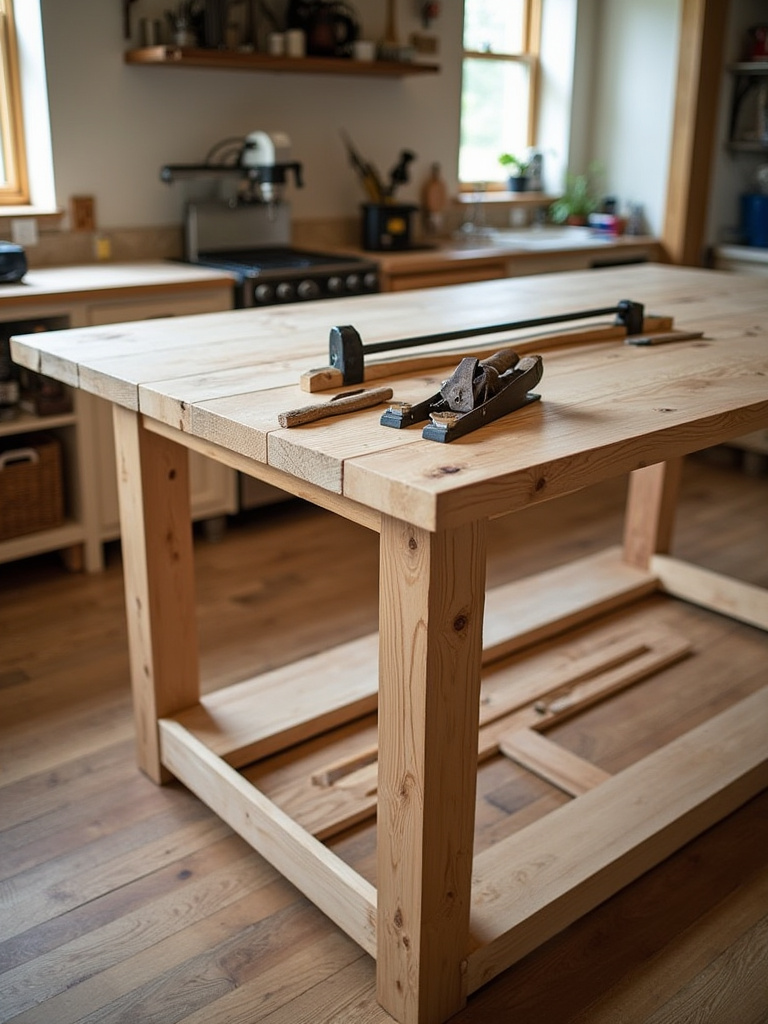
10. Customizing Island Leg Styles and Base Details for Period Authenticity
The legs and base of an island are like the right pair of shoes for a bespoke suit. They set the entire tone. Choosing a stock cabinet base is easy, but it will always look like, well, a stock cabinet base. To achieve a truly authentic farmhouse feel, the island needs to look and feel like a piece of furniture, not a kitchen cabinet.
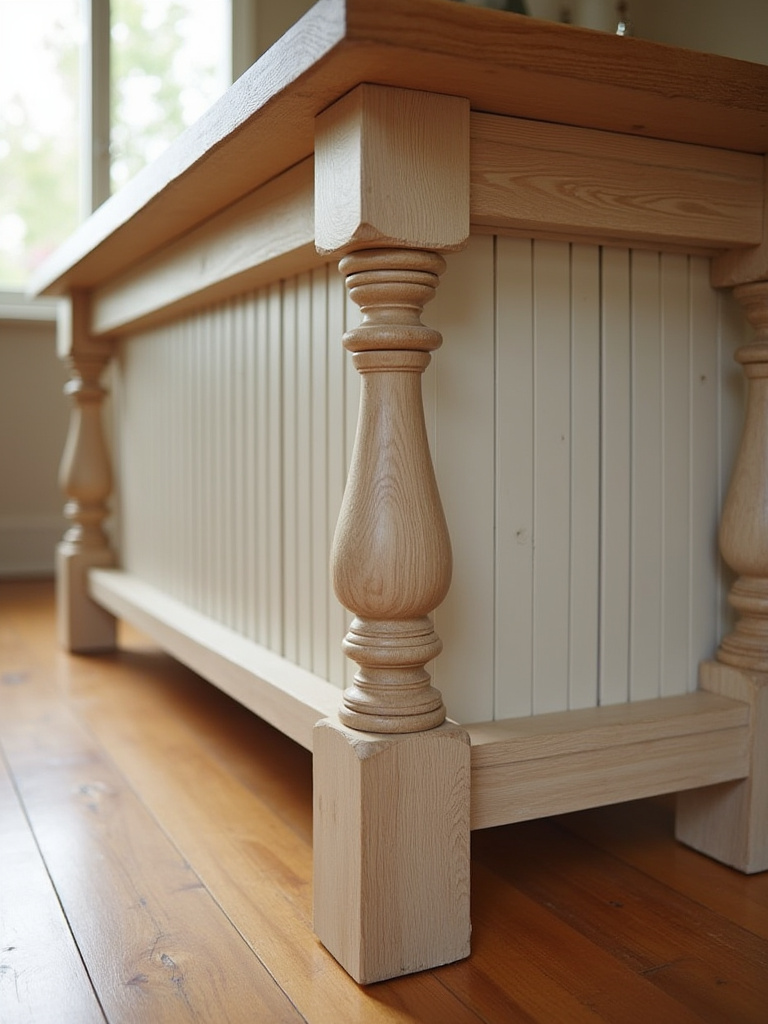
This is where you can infuse real personality. Think about turned legs for a classic, softer look, or substantial, straight-hewn legs for a more rustic, utilitarian feel. The apron—the piece of wood that runs between the legs just below the countertop—is another detail that adds instant authenticity. I tell my clients to look at antique farm tables or workbenches for inspiration. Replicating those simple, honest structural details is what separates a good design from a truly great one.
Let’s continue to build on this foundation with more sophisticated features.
Material Selection, Customization, and Core Features (Part 2)
We are now moving into the elements that refine the design, adding layers of charm and functionality. This is where we go from a well-built structure to a living, breathing part of your home.
11. Incorporating Open Shelving for Charming Display and Easy Access
Everyone seems to be terrified of open shelving. “It will just get cluttered and dusty!” they say. Here’s what’s actually happening: when done thoughtfully, a section of open shelving on an island forces you to be curated. It’s the perfect place to display the beautiful stoneware you actually use every day or a small collection of your favorite cookbooks. It breaks up the visual weight of a solid block of cabinetry and makes the entire piece feel lighter and more inviting.
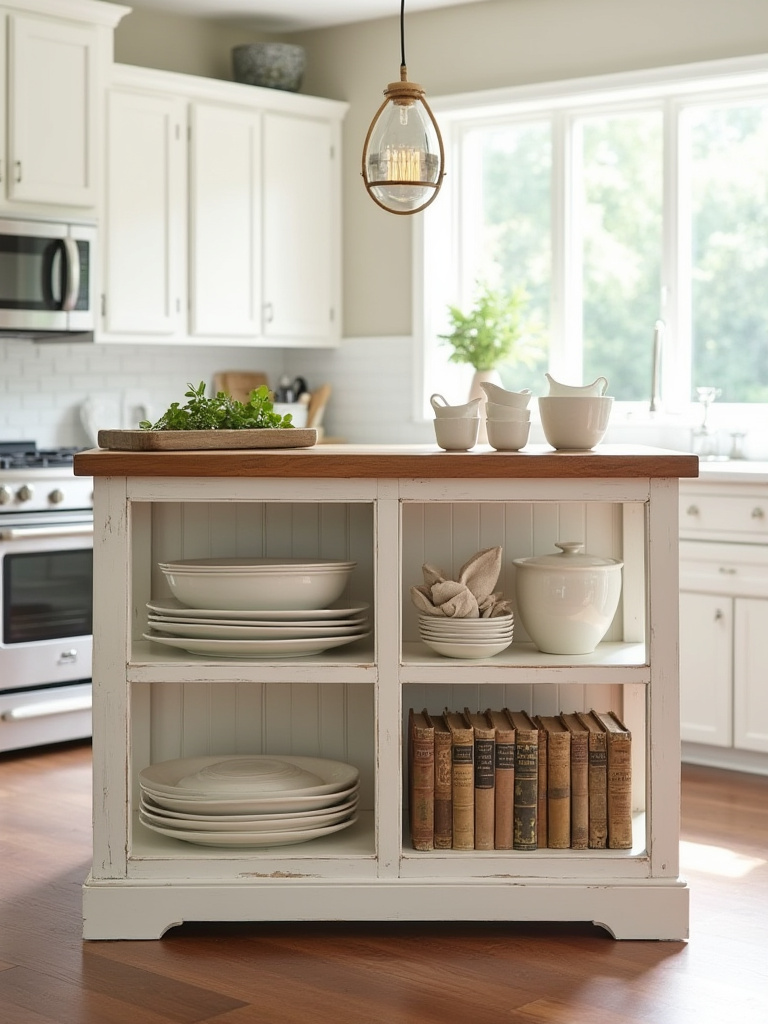
The trick is to dedicate the open shelves to items that are both beautiful and functional. This isn’t the place for dusty knick-knacks. I designed an island with a wide open shelf at the very bottom, intended for large, heavy Dutch ovens and serving bowls. It made them easy to grab and put away, and their beautiful colors provided a stunning visual anchor for the whole kitchen. It was storage as decor, the most efficient combination.
Such beautiful items, of course, deserve to be seen in the best light.
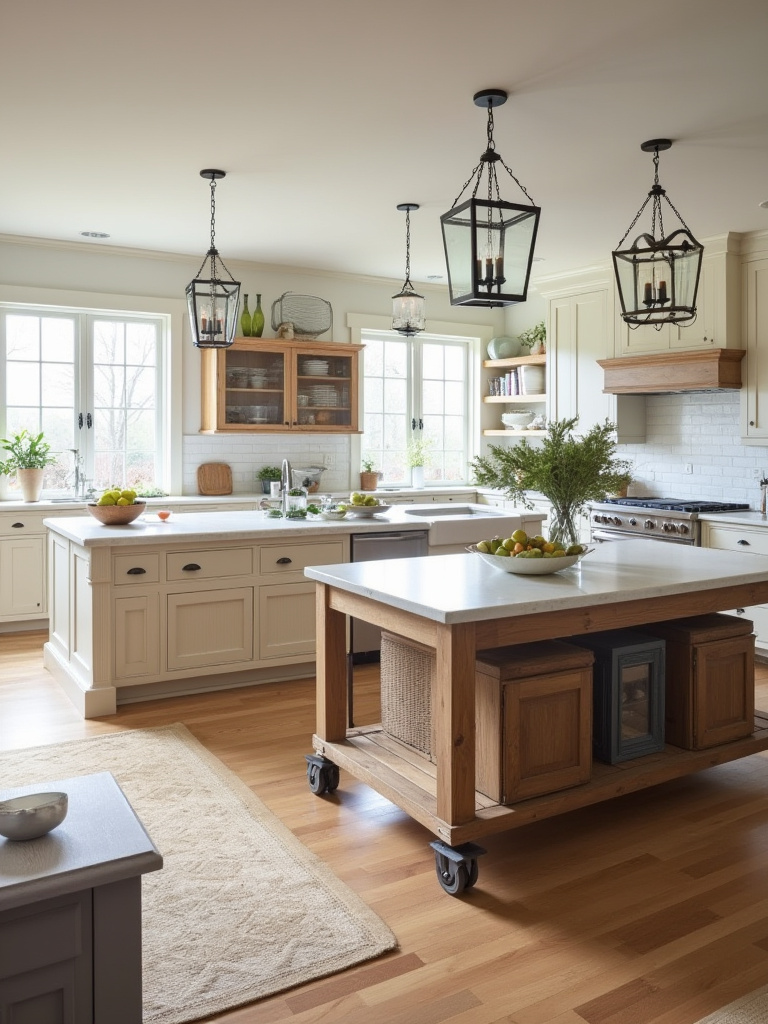
12. Ensuring Proper Lighting Fixtures Enhance Both Function and Farmhouse Aesthetics
Here’s a painful truth: bad lighting can kill a multi-thousand-dollar island design. A single, sad flush-mount light in the center of the kitchen is not going to cut it. Your island is a primary workspace and a social hub; it requires its own layered lighting plan. This is an area where you absolutely cannot afford to cut corners.

You need a combination of task lighting and ambient lighting. A pair or trio of pendants hanging over the island provides focused light for chopping and prep work while also serving as a major design statement. Look for fixtures with classic farmhouse materials—aged brass, oil-rubbed bronze, hammered metal. But the insider secret is this: put everything on a dimmer. Being able to transition from bright, functional task light to a soft, ambient glow for dinner is the ultimate luxury.
Next, we face the big question of who will actually bring this vision to life.
13. Navigating the DIY vs. Professional Installation Decision for Structural Integrity
I used to think DIY was just about saving money. Then I watched a client’s DIY island installation go horribly wrong. They hadn’t properly anchored it to the subfloor, and the massive quartz countertop they’d ordered was creating a dangerous amount of instability. They ended up paying a professional twice as much to fix the mess than it would have cost to hire one in the first place.
Here’s my non-negotiable rule: if the island involves any plumbing, any electrical work, or a countertop made of heavy stone, hire a professional. Period. Their expertise in leveling, anchoring, and scribing to uneven floors is worth every single penny for your safety and peace of mind. A DIY project is fine for a simple, small-scale wooden island, but don’t gamble with structural integrity.
With the island securely in place, the real fun begins.
Styling, Enhancement, and Long-Term Care (Part 1)
Your island is built. Now it’s time to make it yours. This is about adding the layers that reflect your personality and ensuring the piece is as comfortable and welcoming as it is beautiful.
14. Styling Your Island with Rustic Decor and Functional Accessories
The biggest mistake people make here is clutter. They think “farmhouse styling” means piling on a bunch of rustic-looking objects. That’s not styling; that’s just making a mess. The goal is to create a few intentional moments, what I call “functional vignettes.” Every item on your island should either have a job or a story.

A beautiful wooden bowl for fruit, a ceramic crock for your most-used utensils, a small pot of fresh herbs—these are all items that serve a purpose while adding texture and life. My favorite shortcut for keeping things balanced is to use a large, shallow tray. It contains a few key items—a candle, a small vase, a salt cellar—and corrals them into a single, cohesive unit. This leaves plenty of clear workspace while still adding that warm, lived-in touch.
Part of that lived-in feel comes from making it a place where people want to linger.
15. Adding Comfort and Style with Appropriate Bar Stools or Seating
Choosing bar stools is like a final exam for your design project. The right ones complete the vision; the wrong ones can ruin the whole thing. The noise out there is all about looks, but the real deciding factor should be comfort and proportion. Please, I beg of you, sit in a stool before you buy it. If it’s not comfortable for at least thirty minutes, it’s a failure, no matter how good it looks.

And let’s talk about height. A stool that is too tall or too short for the counter is a classic amateur mistake. The golden rule is to have about 10-12 inches of space between the top of the stool seat and the bottom of the countertop. For materials, look for something that complements but doesn’t exactly match the island. If your island base is painted white, consider stools in a warm, natural wood tone to add contrast and warmth.
Of course, a piece this central to your home deserves meticulous care.
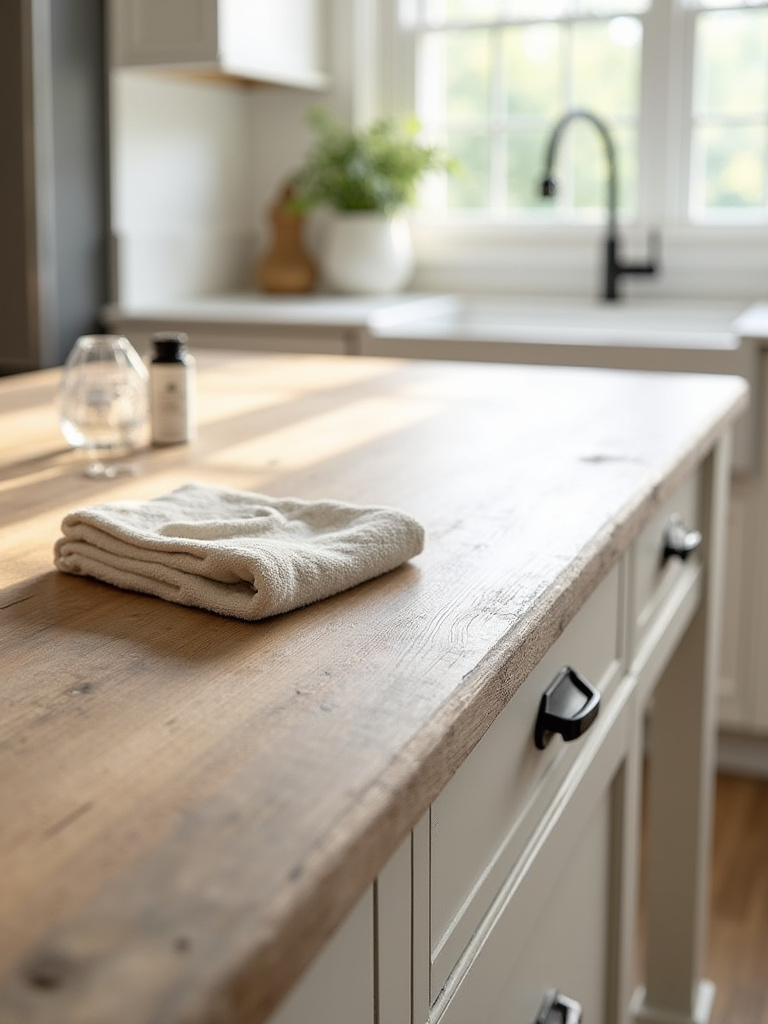
16. Protecting Butcher Block and Other Countertop Surfaces with Regular Care
I confess, I have a romantic attachment to butcher block. It’s warm, forgiving, and develops the most beautiful patina over time—if you take care of it. A butcher block top is a living surface. You have to clean it properly and, most importantly, you have to oil it regularly with a food-safe mineral oil or conditioner. It’s a bit of a ritual, but it’s what keeps the wood from drying out, cracking, and staining.
The same principle applies to natural stone. Sealing your granite, marble, or soapstone isn’t a one-time thing. It needs to be re-done periodically to maintain its resistance to stains. Think of it as a protective shield for your investment. Neglecting this is like buying a beautiful wool coat and never having it dry-cleaned. Eventually, the daily grime will take its toll.
This philosophy of care extends beyond just the countertop.
17. Maintaining Painted and Stained Finishes for Enduring Farmhouse Charm
A beautifully painted or stained finish is what gives a farmhouse island its character, but life is messy. Drips, splatters, and dings are inevitable. The key to keeping the finish looking pristine for years isn’t some magic product; it’s about swift, gentle, and consistent cleaning. Wipe up spills immediately with a soft, damp cloth. Don’t let anything sit.
The best shortcut I can give you is this: when your island is first finished, save a small, sealed jar of the exact paint or stain used. When a small chip or scratch inevitably appears, you can do a pinpoint touch-up with a tiny artist’s brush. It’s a five-minute fix that prevents a small imperfection from becoming a major eyesore, preserving that flawless look for years.
Finally, let’s talk about keeping the inside as beautiful as the outside.
Styling, Enhancement, and Long-Term Care (Part 2)
We’ve focused on the aesthetics and the surface-level care, but the long-term enjoyment of your island comes down to daily use. Keeping it organized and protecting it from ourselves are the final, crucial steps to ensuring it remains an asset, not a burden.
18. Organizing Island Drawers and Cabinets for Maximum Efficiency
There is nothing luxurious about frantically rummaging through a junk drawer while you’re trying to cook. The interior organization of your island is just as important as its external appearance. Chaos on the inside will eventually spill out onto the countertops. You must be ruthless about giving every single item a designated home.
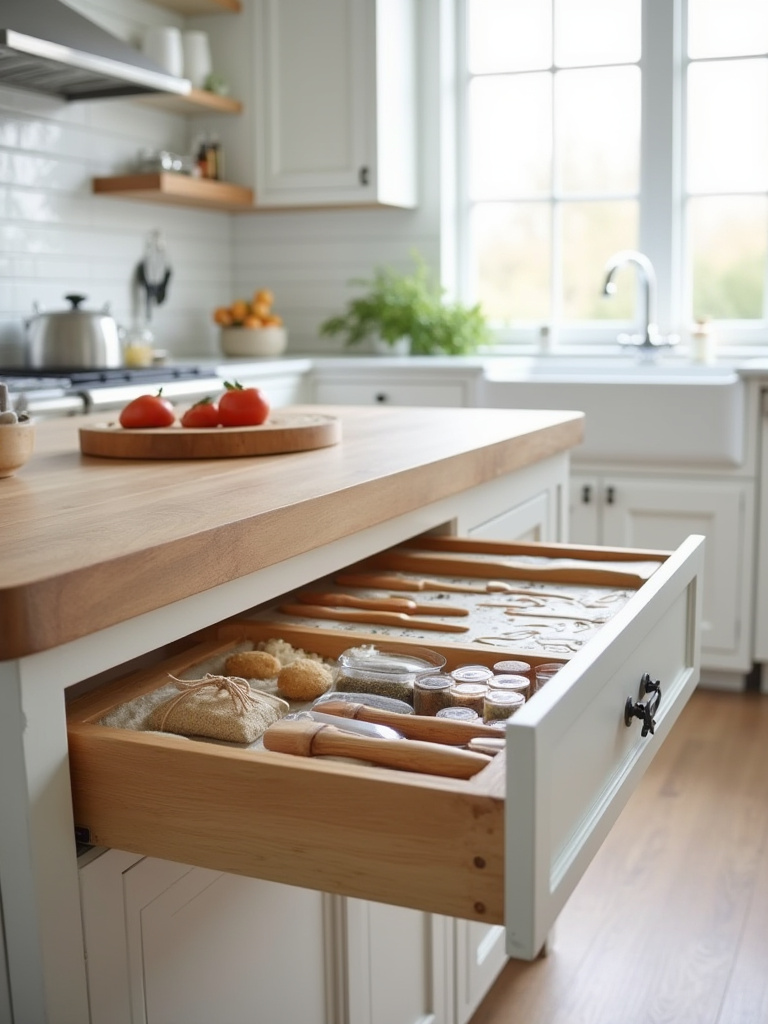
This isn’t about buying a million tiny plastic bins. It’s about smart, integrated solutions. I’m a huge believer in high-quality drawer dividers—not just for cutlery, but deep, adjustable dividers for utensils, foils, and wraps. For deep cabinets, pull-out shelves are a non-negotiable. They bring the contents of the cabinet to you, so nothing ever gets lost in the dark recesses again. This one investment will dramatically improve your day-to-day kitchen experience.
This leads us to the final principle: proactive protection.
19. Preventing Common Wear and Tear: Best Practices for Daily Use
Your kitchen island will be the hardest-working piece of furniture in your home. You have to treat it with respect. This sounds obvious, but you’d be surprised. The number one thing you can do to prevent wear and tear is simple and costs almost nothing: use cutting boards and trivets. Always. Never cut directly on the countertop, and never put a hot pot down on the surface.
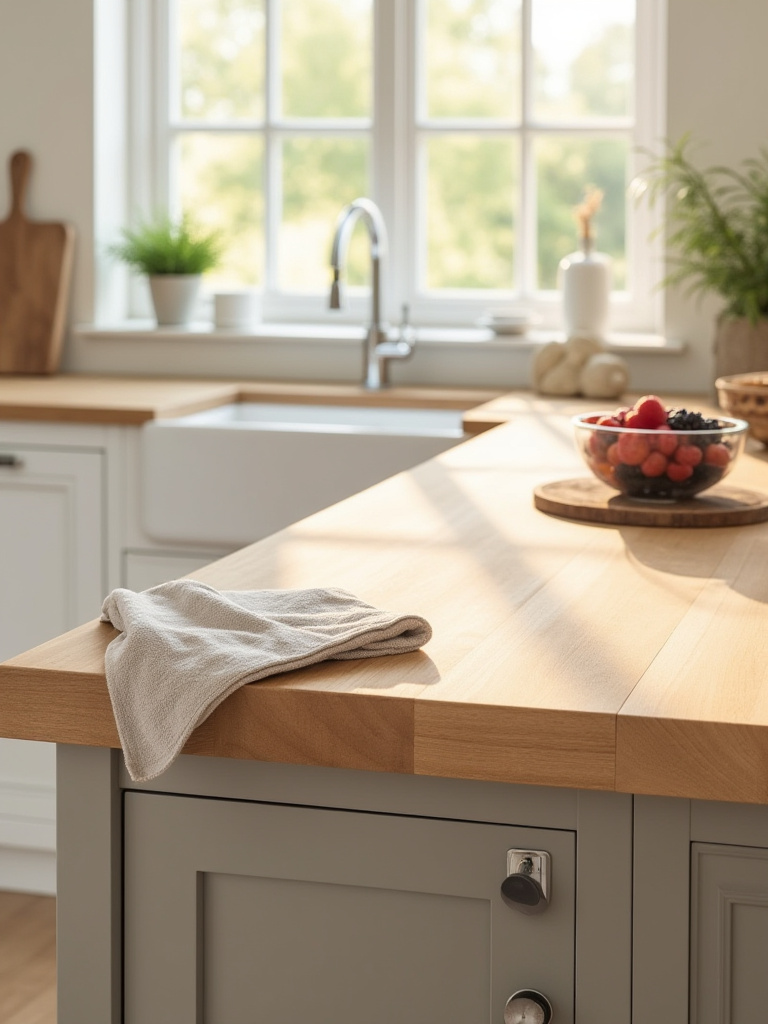
This isn’t about being precious; it’s about being smart. Creating these simple habits is the difference between a countertop that looks aged and worn after two years and one that looks beautifully patinated after twenty. My one pro tip is to find a beautiful, oversized cutting board and just leave it on the island. It becomes a functional and decorative element that naturally encourages everyone in the family to use it as the designated chopping zone.
Conclusion
So there you have it. Creating the perfect farmhouse island has very little to do with passing trends and everything to do with a thoughtful approach to space, purpose, and material. It’s an investment, not just of money, but of consideration. When done right, it will pay you back every single day in pure, unadulterated function and joy. It becomes the magnetic force in your home, the place where everything from frantic weekday breakfasts to long, lingering weekend dinners happens.
You now have the complete blueprint. You understand the critical importance of proportion, the necessity of defining a clear purpose, and the secrets to choosing materials that are not just beautiful but durable. You are armed with the knowledge to make smart, lasting choices. Don’t let this be just another article you read. Take one of these ideas—just one—and start sketching. Plan your layout, research a material you love, or find the perfect inspiration photo for a leg style. Your dream island isn’t in a catalog; it’s waiting for you to bring it to life, and now you know exactly how.